Unfringed Cowl – Crochet Pattern
Hi there, I’m Erin, the maker behind CraftsEverywhere! I’m a knit and crochet pattern designer, stay at home momma and maker of hats, faux fur poms and any other craft I can get my hands on.
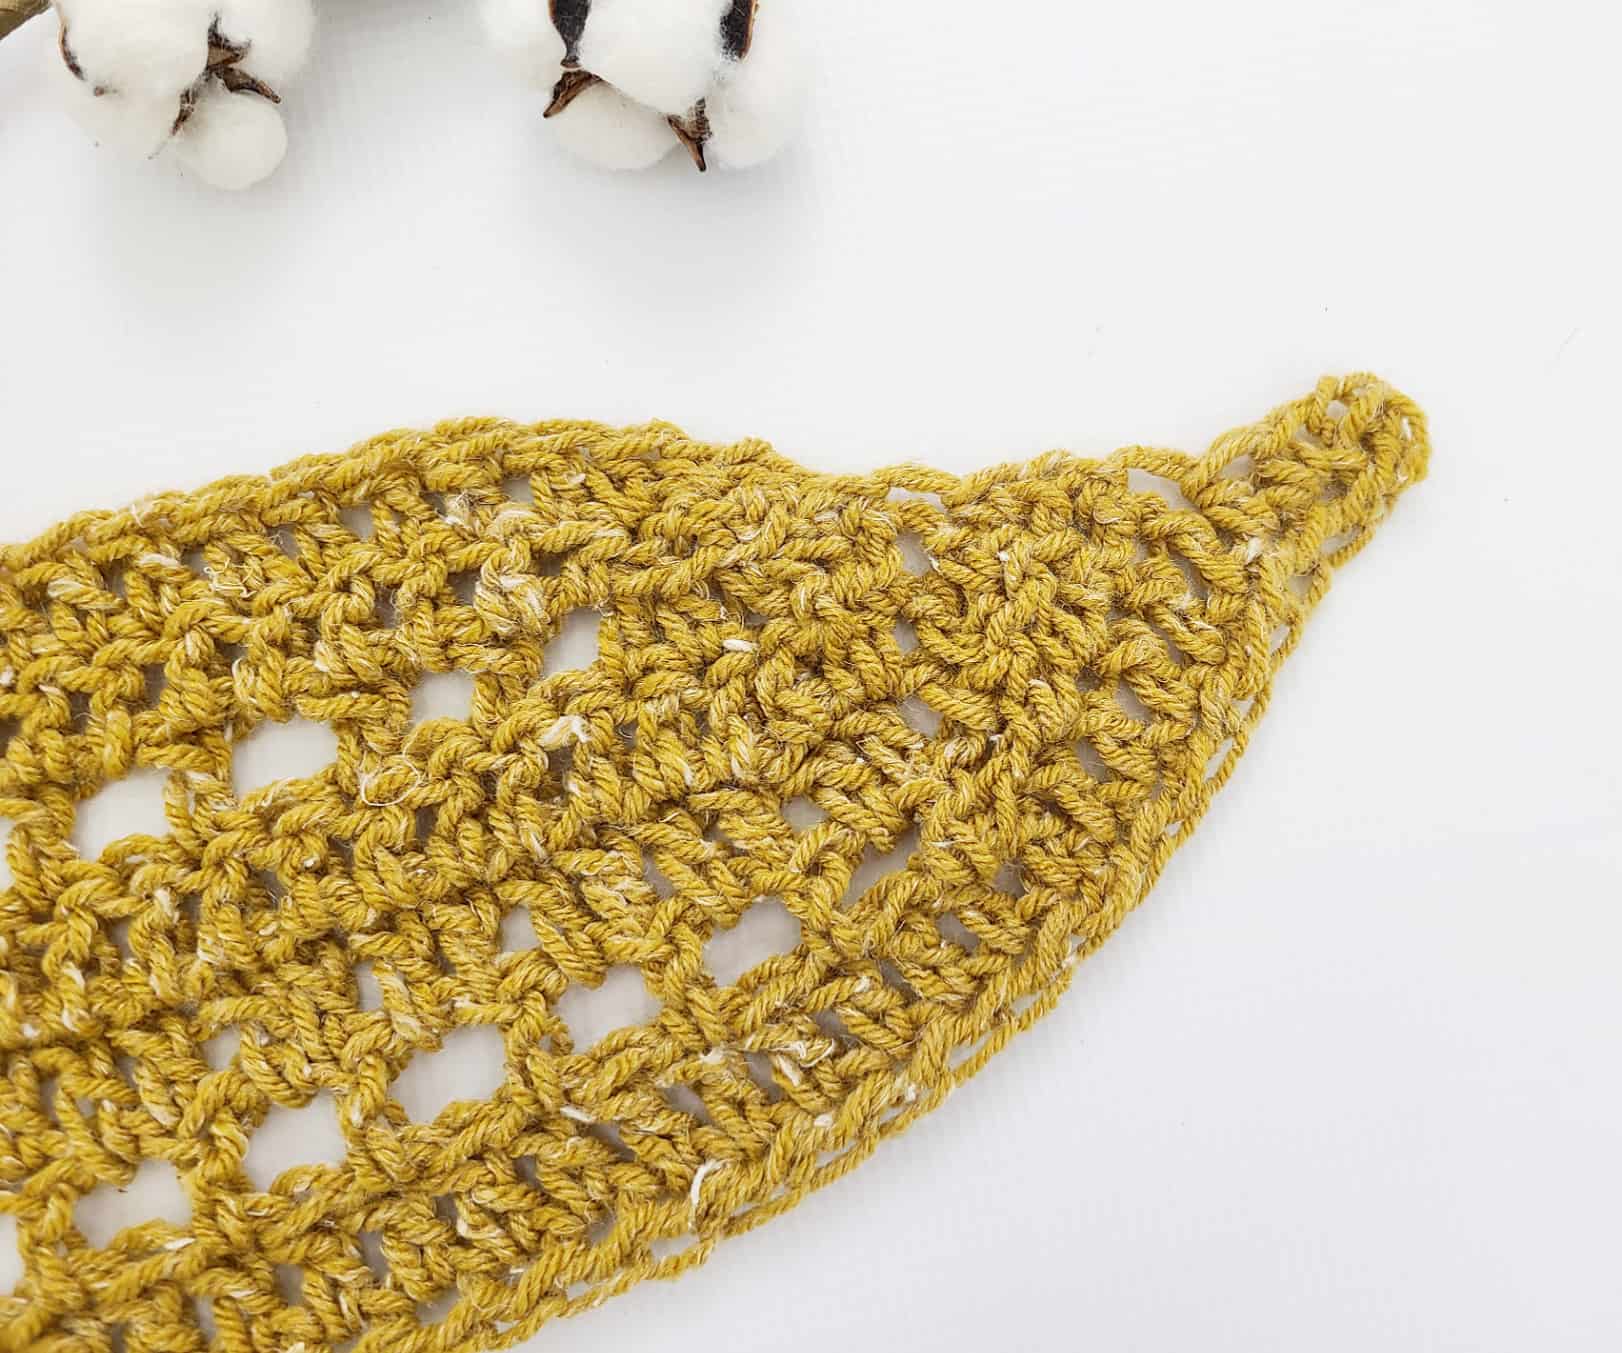
I designed the Unfringed Cowl specifically for our family photos back in the fall. I love the look of triangle scarves with fringe but since I’m only 5’2″, they can get large and be pretty overwhelming on me. I wanted something with great drape that looked good without fringe.
This is an advanced beginner pattern using a large hook and a single strand of worsted weight yarn. It makes for a super light-weight cowl that can be customized for length so you can wear it to work, in the house or make it longer and wear it hooded during the winter.
You’ll need a 9 mm hook and worsted weight yarn. If you’d like an ad-free version with more photos, you can find that on Etsy or Ravelry. Let’s get started!

Skill Level
Advanced Beginner
Materials
- Amour Crochet Hook M/N (9 mm) – Art. No 1056/MN
- Worsted weight yarn
- 225-250 yards (4.5-5 oz, can divide. Need about 0.6 oz to complete a 3 round repeat on neck)
- Darning Needle Set – Art. No 3121
- Locking Stitch Markers – Art. No 353
- Optional: Tag
Gauge
4″ = 8 rows x 6-6.5 sts in dc with one strand of worsted weight yarn and a 9 mm hook
**Gauge can be off by a bit for this project. It’s very forgiving**
Terms
- st(s) – Stitch(es)
- sk – skip
- sc – single crochet
- sc2tog – single crochet 2 stitches together (decrease 1 stitch)
- hdc – half double crochet
- dc – double crochet
- sl st(s) – slip stitch(es)
- yo – yarn over
- ch sp – chain space
- ch – chain
Notes
To work the hdc chainless foundation:
- Ch1, you will see your front and back loops that you usually work through, and then there is a bottom loop and this is what you are working in.
- Yarn over, insert your hook through the bottom loop. (2 loops on hook)
- Yarn over, pull back through the bottom loop. (3 loops on hook)
- Yarn over and draw through all three loops on your hook. One hdc completed.
- Continue repeating steps 2-4 until you have 60 sts.
If you need assistance with the chainless foundation:
Hdc chainless foundation:
https://youtu.be/2sZFgSKgviE
*Asterisks mark a repeated stitch pattern*.
Your stitch count is in parentheses at the end of relevant rounds.
For the neck portion of the cowl when you are working in the round, you will always join to the top of the first st in the round.
The cowl portion can be tricky to keep track of stitch count. I highly recommend using stitch markers to mark your beginning and ending stitches of each round to help keep count.
Finished Dimensions
12″ wide, measured while laying flat after joining the cowl portion together
Pattern
Cowl
**This portion of the cowl worked flat in rows back and forth. Place markers in beginning and ending stitches in each row to help keep track of stitch count!**
Row 1 – Ch2, chainless hdc foundation for 60 sts, turn (60)
Row 2 – Ch1, sk the first st, sc, hdc, dc x 54, hdc, sc, sl st in final st, turn (1 sl st, 2 sc, 2 hdc, 54 dc).
Row 3 – Ch1, sk sl st with the ch and the second st, sl st in third st, sc, hdc, dc, *dc, ch1, sk1*. Repeat from * to * across 22 more times, ending on a sk1. Dc x 2, hdc, sc, sl st. Leave the final sts undone, turn (2 sl st, 2 sc, 2 hdc, 26 dc, 23 ch sp).
Row 4 – Ch1, sk sl st with the ch and the second st, sl st in the third st, sc, hdc, *dc in each ch sp and dc across*. Hdc after final ch sp, sc, sl st in next st, leave the remaining sts undone, turn (2 sl st, 2 sc, 2 hdc, 45 dc).
Row 5 – Ch1, sk sl st with the ch and the second st, sl st in the third st, sc, hdc, dc x 42, hdc, sc, sl st in next st, turn (2 sl st, 2 sc, 2 hdc, 42 dc).
Row 6 – Ch1, sk sl st with the ch, sc2tog x 2, hdc, *dc, ch1, sk1*. Repeat from * to * 16 more times, ending on a sk1. Dc, hdc, sc2tog x 2, sl st in next st, turn (1 sl st, 4 sc, 2 hdc, 18 dc, 17 ch sp).
Row 7 – Ch1, sk sl st with the ch, sc2tog x 2, hdc in next ch sp, *dc in each dc and ch sp* for 31 sts. Hdc in final ch sp, sc2tog x 2, sl st in the ch1 from the previous round, turn (1 sl st, 4 sc, 2 hdc, 31 dc).
Row 8 – Ch1, sk sl st with the ch, sc, hdc, dc x 31, hdc, sc, sl st in next st, leave a 10” tail and tie off (1 sl st, 2 sc, 2 hdc, 31 dc).

Join Row
Join new yarn in the top right corner as pictured. It will seem upside down but that is correct! You will be working the join row into the sl sts and row 8 on the cowl. Ch1, place 54 sc evenly around until you reach the opposite corner.
Sl st to the top of the first sc in the row to join in the round.

Neck
Round 1 – Ch1, sc, hdc, *dc, ch1, sk1* across to final 2 sts, ending on a sk1. Dc, hdc, join, ch2, turn (1 sc, 2 hdc, 26 dc, 25 ch sp).
Round 2 – Dc in each st and ch sp around, join, ch2, turn (54).
Round 3 – Dc in each st around, join, ch2, turn.
Round 4 – *Dc, ch1, sk1* around, join, ch2, turn.
Round 5 – Dc in each st and ch sp around, join, ch2, turn.
Round 6 – Dc in each st around, join, ch2, turn.
Repeat rounds 4-6 until neck reaches desired length.
Final Round
When neck reaches desired length, end with a round 6 repeat, ch1, sc around, join, tie off.
Finishing
Cut yarn leaving a 6″ tail. Weave all ends in. Add tag if desired.

Now that you’ve finished your cowl, make sure to show it off on social media by tagging me using #unfringedcowl and @therearecraftseverywhere on Instagram or Facebook!
If you have any questions regarding the pattern, don’t hesitate to contact me at erin.oetker@gmail.com or through my messages on Etsy or Instagram.
Erin
Find CraftsEverywhere on social media! Instagram | Facebook | Ravelry | Etsy
Stay connected with Clover on Facebook | Twitter | Instagram | Pinterest | YouTube | Ravelry
[mc4wp_form id=”11289″]