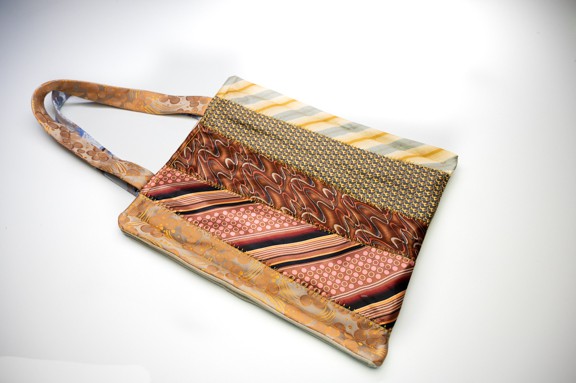
All Tied Up Tote
Back in the day, Shannon and Jason used to be ranking members of the corporate world, a world where we were required to wear ties to work daily.
ACK!! (We feel our ulcers coming back just thinking about it.) Between the two of us, we collected a vast number of ties over the course of 20+ years. Some were beautiful silk ties used only for special occasions. Others, novelty ties we wore only to holiday parties or to annoy certain co-workers (you know who you are). Now that we no longer are required to wear them, we got to thinking about what to do with our collection and the All Tied Up Tote was born.
If you follow along on our adventures, you know we love a tote bag and we have a lot of tote bags. From casual to fancy for groceries and carrying our “stuff ‘n’ things” at events, we have a tote for that. There are always a few by the front door to grab as we head out shopping or for a walk with the Shibakidz, and a tote made from some of our favorite ties would make a great accent to any outfit!
Watch the video tutorial:
Or scroll down for written instructions.
What you’ll need:
Notions and Tools
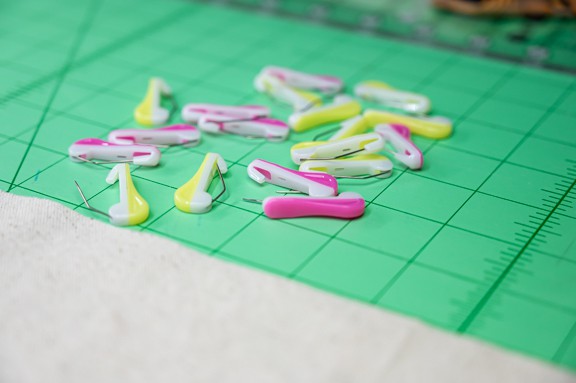
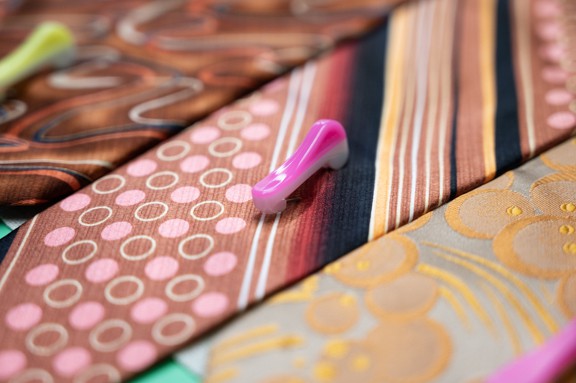
- Wonder Pins – Art. No 3210
- Jumbo Wonder Clips – Art. No 3157
- Rotary Cutter (45mm) – Art. No 7500
- Point 2 Point Turner (optional) – Art. No 7803
- Special appearance by our BERNINA 790 Plus
Fabric
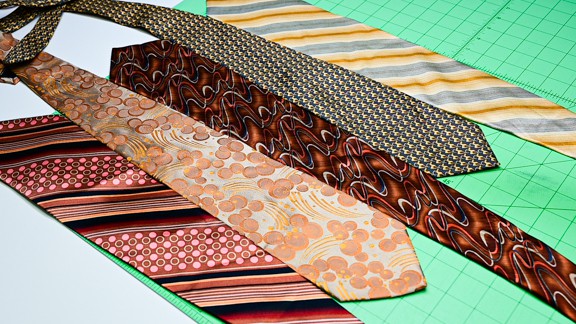
- 10-12 ties
- 1/2 Yard base fabric – we used light cotton canvas
- 1/2 Yard lining fabric – We used aged muslin, choose a lining that compliments your ties.
- This lining fabric is going to be a faux piping feature along the sides and top of the finished tote so pick your fabric and color accordingly.
The Cuts
Base fabric: (2) 16” x 16”
Lining fabric: (1) Lining fabric piece cut to the final dimensions of your tote after squaring up and sewing the bottoms together. The dimensions of the lining fabric will vary based on the selections of your ties and based on the size of your squared up tie fabric.
Instructions
Step 1. Layout
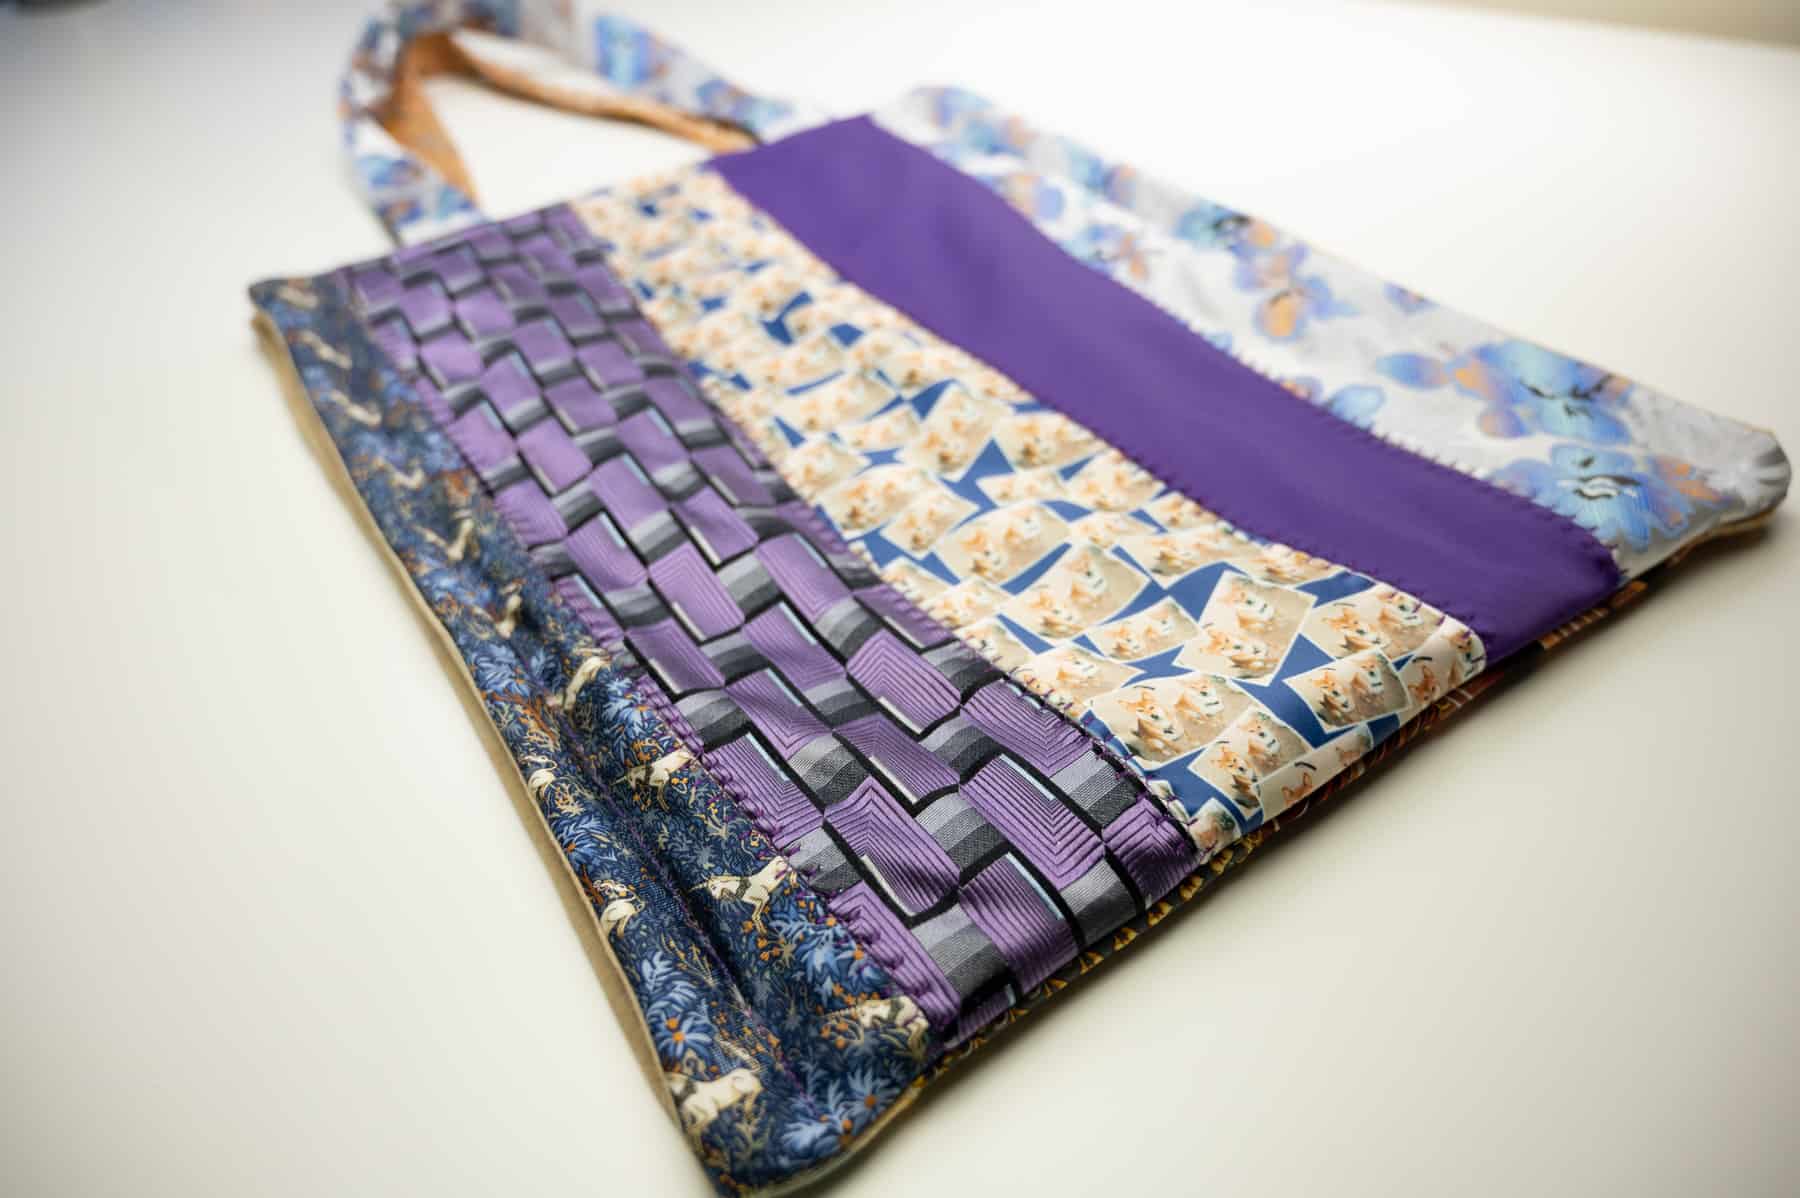
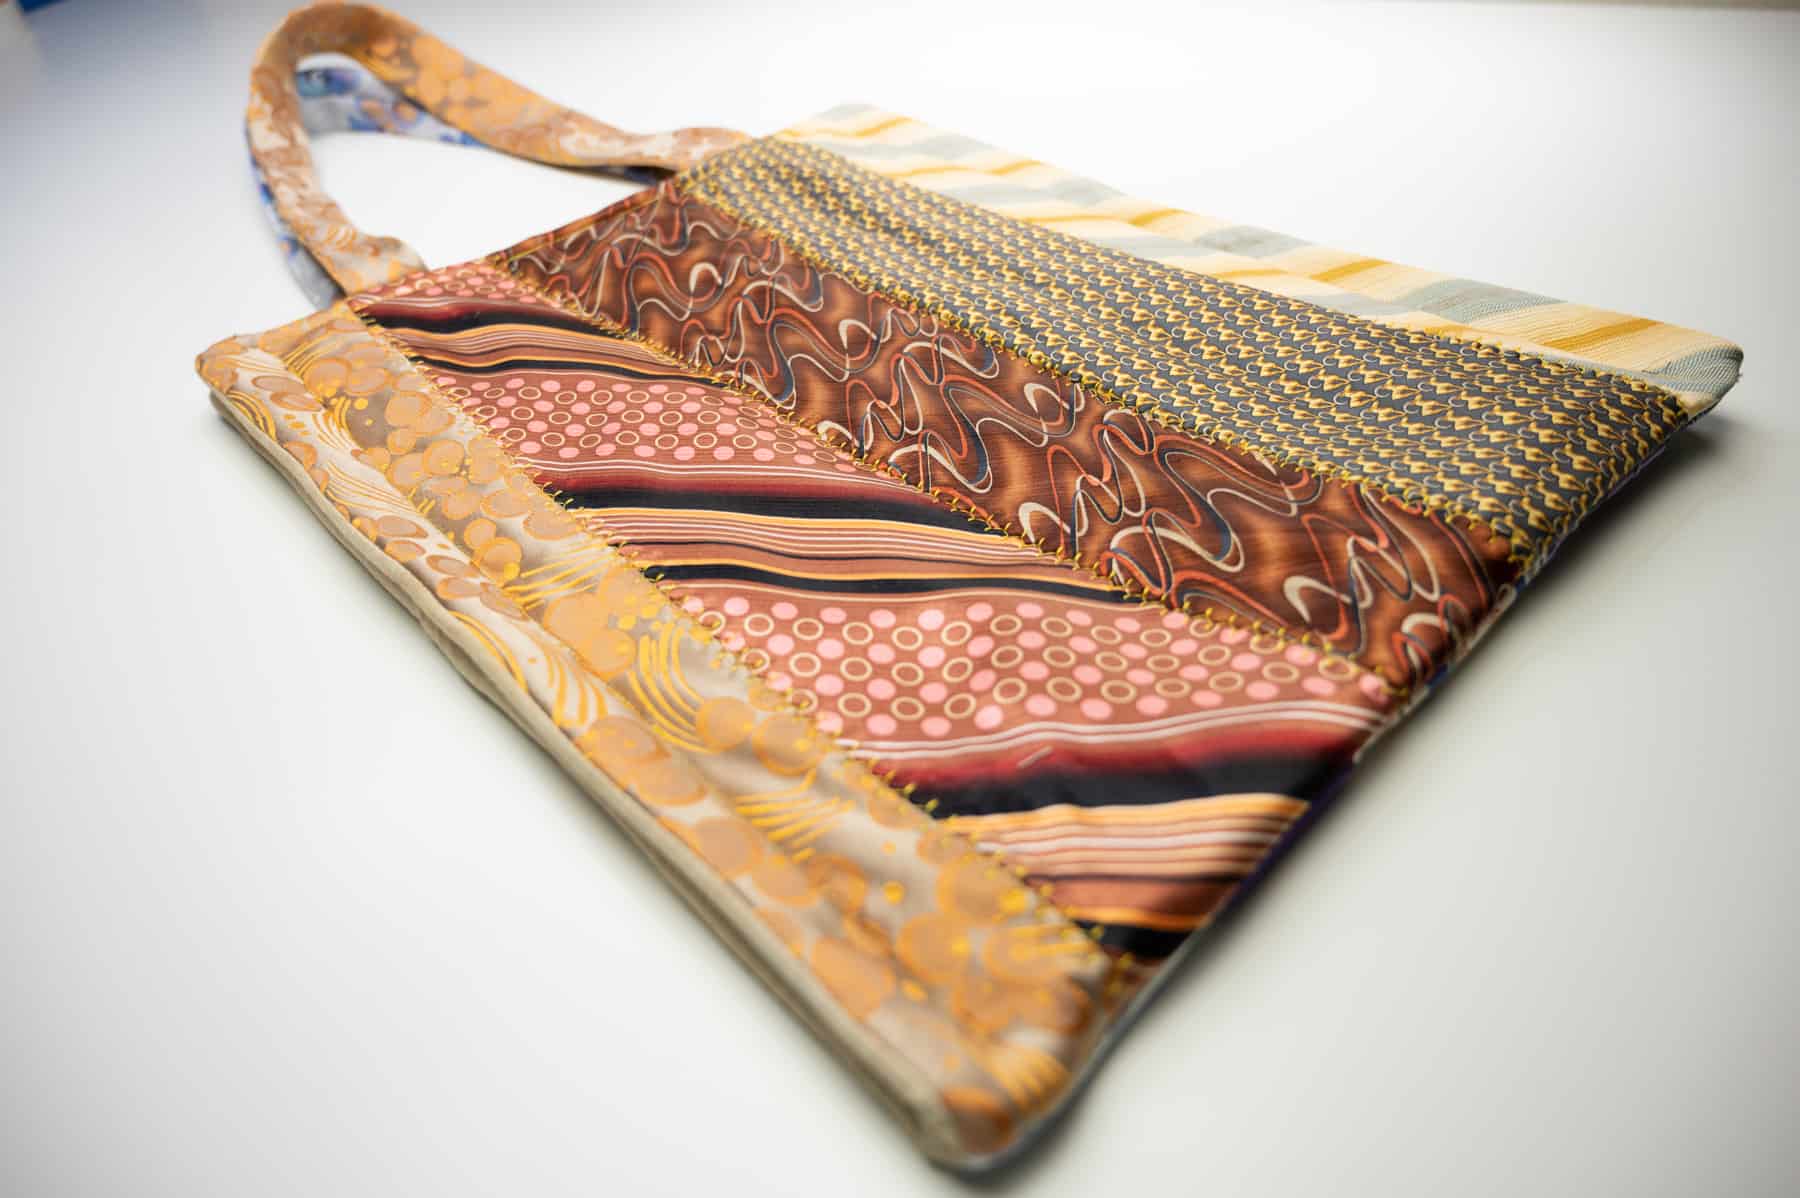
- Lay the ties out next to one another to decide on the final layout for the tote fabric. Consider colors, textures, and materials here. Have fun!
- Use the patterns of the tie fabric to decide which side will be top/bottom of the tote; we decided based on the Shibaboyz and the other animals in the ties.
Note: Take notice of the back of the ties, look for any metal tags that designers like to place on the back tab… remove them before you attempt to sew.
Step 2. First cuts
- Cut the base fabric.
Step 3. Place your ties
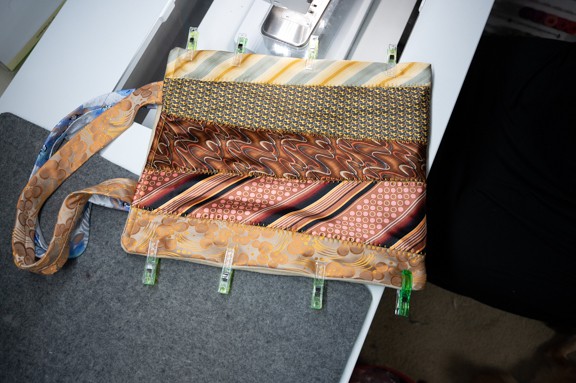
- Lay the ties wide end to skinny end on the base fabric. Allow the tips to overhang the edge of the base fabric; we’ll cut them off later. We used 5 ties side by side per side of our tote.
Note: You can make your tote wider but make sure you add that width to your base fabric.
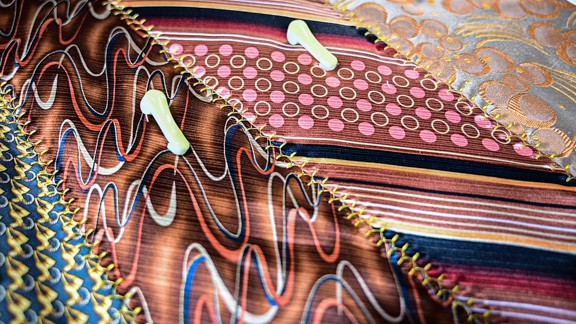
- Pin ties to base fabric using Wonder Pins. The curved, heavy pin makes pinning through multiple layers easy!
- Trim off the tips and long ends of the ties. Don’t throw them away! You’ll be using the narrow ends of the ties for handles and the cuttings make great scrap fabric for other projects.
Step 4: Secure the ties
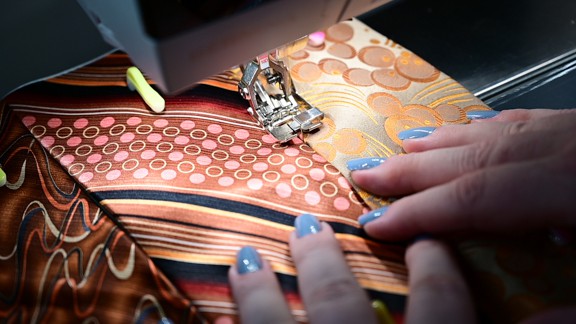
- Sew using decorative zig-zag top stitch to secure the ties to each other and to the base fabric.
- We used stitch #725 on our BERNINA 790 Plus and a 10D Edgestitch Foot.
 Step 5: Trim excess base fabric
- With Right sides together, square up the sides of the tote. You will most likely have to cut both sides, trimming off some of the ties from the edge.
Step 6: Attach the 2 halves
- Sew the bottom of the tote. We used a triple straight stitch because of the thickness of the fabric.
- Fold the tote with Right sides facing and square up top and sides again if needed.
Step 7: Last cuts
- Measure your squared-up tote to determine the dimensions of your lining. Our squared-up tote is 14” x 32 1/2”.
- Cut the lining fabric to the dimensions of squared up tote.
- Cut 24” long handles from the narrow ends of the ties that you cut off (not including the point of the tie).
Step 8: Pin the handles
- Open the tote with Right side facing up.
- Measure 3” from outside edges along the top of the tote and make a mark.
- Center handles Right sides facing on tote at that mark.
- Allow the handles to extend 1/2” off the edge of the tote. When we top stitch the edges of the finished tote this will give the handles added support.
Step 9: Pin the lining
- Lay lining fabric Right side to Right side on top of the tote and handles.
- Use Wonder Pins to pin lining fabric into place.
Step 10: Sew the lining
- Sew the lining into place using a 1/2” seam allowance along all sides, leaving an opening between the handles on one end for turning.
Note: For added strength we recommend using a Triple Straight Stitch if your machine has that option.
Step 11: Finishing
-
- Turn Right side out through opening between handles.
- Fold in the unfinished edge between the handles and press all four sides of the tote.
- Top stitch along the short sides of the tote to secure the turning hole and re-enforce the handles.
- Fold Wrong sides together and top stitch the sides of tote 1/2 to 3/4” from each side.
Tip: When you sew along the sides of the tote, use the thread colors that coordinate with the thread you used to sew the ties together (E.g. use purple as the top thread and gold in the bobbin.)
The lining fabric will show on the sides of the totes giving it a pipped effect. Choose your lining fabric accordingly!
That’s it! Your All TIED Up Tote is ready to use. Use it at the grocery store, farmer’s market, or whenever you feel like showing off a little!
STITCH ON!
Watch the video tutorial:
Find the Shibaguyz on Facebook | Twitter | Instagram | Pinterest
Stay connected with Clover on Facebook | Twitter | Instagram | Pinterest | YouTube | Ravelry
[mc4wp_form id=”11289″]