Knitting 101: Knit Beanie
Hey Friends!
Now that you’ve learned how to use straight needles, along with some knitting basics like how to make the knit and purl stitch, and how to cast off we can move onto your first knitted project! In this post we will work with circular needles to make a knit beanie.
If you missed part 1 of this post “Knitting 101: Knitting for Beginners” catch up here!
We will cast on, do the knit and purl stitch, and learn how to do a knit decrease. I will also show you how I close up my beanies and how to sew in the tails. (I found it to be a lot different then sewing in tails in a crochet piece).
What you need to know when learning to knit a beanie
- cast on *longtail
- how to hold needles to make the first round (make sure not to twist the cast on row)
- knit stitch, purl stitch
- body
- gauge
- knit decrease *closing up the top
- sewing in the tails
Supplies
- Bulky Yarn (I love Lion Brand Wool-Ease-Thick & Quick)
- Takumi Interchangeable Knitting Needles No.11 (Art. No 3642) – purchase on Clover Website or Amazon
- Interchangeable Cord -16in (Art. No 3645) – purchase on Clover Website or Amazon
- Swatch Ruler and Needle Gauge (Art. No 3200) – purchase on Clover Website or Amazon
- Soft Ring Stitch Markers (Art. No 3107) – purchase on Clover Website or Amazon
- Mini Patchwork Scissors (Art. No 493/CW) – purchase on Clover Website or Amazon
- Jumbo Tapestry Needles (Art. No 3113) – purchase on Clover Website or Amazon
- Optional: Natural Fit Leather Thimble – purchase on Clover Website or Amazon (Small | Medium | Large) *helpful so the tip of your finger doesn’t get sore
- Yarn for Pom-Pom (Lion Brand Homespun is my go to for yarn poms)
- Pom-Pom Maker – Large (Art. No 3126) – purchase on Clover Website or Amazon
- Knitting Counter (Art. No 336) – purchase on Clover Website or Amazon *you can also use a paper and pen to keep track

Casting On
Cast on just like we did in section 1, but make the tail about 2 more arm lengths longer, before making the slip knot. Cast on until you have 48 loops on your needles and cord. Lay your project down to check your work. You want to make sure your cast on loops are all laying the same way and nothing is twisted.
Here comes the fun part. You will now be doing a knit stitch and a purl stitch to create the brim of your beanie. Before we move on add your stitch marker to your right needle.
Brim
Knit Stitch
Take the needle from your right hand and go under the first loop on the left hand needle. Pointing the needle up. With the working yarn and the tail yarn together come from the front and go over your needle. Hold the two strings on your right hand needle, pull the loop through the loop on your left hand needle. Push the left hand loop off the needle.
Purl Stitch
Pull your working yarn to the front of the project. Pointing your right hand needle down, towards the left hand needle, go under the stitch. Your right needle should be on top of the left hand needle. Take the working yarn and go over the right hand needle. Twist your right hand so that it pushes the loop you just made towards the back of your project. Now slowly push the left hand loop off you needle.
You just did the first 2 stitches of your beanie. We will continue to do (1) knit stitch and (1) purl stitch till we get back to the stitch marker. But without the tail string. So now you will just have one string in your left hand.
Knit 1, Purl 1
Continue with another knit stitch, then another purl stitch. As you work you will need to slide the loops on your left needle up to the tip so it is easy to get them. And push the right hand loops down to make room for more as you work.
When you get to the end of the first round. Mark in your notebook that round 1 is completed. Now move the stitch maker over. Just take it off the left needle and slide onto the right. Continue to knit and purl another round. Your first two stitches might be a little tighter because they are the 2 loops that have both the tail and working string. Make sure to go under both strings for each stitch.
When you get to the stitch marker, add another round completed in your notebook, move the stitch marker over to the right needle and keep going. Continue to knit, purl, and move the stitch marker over for a total of 8 rounds. *keep track in your notebook.
Body of Beanie
Now that your 8 rounds your brim is finished, and we will start on the body of the beanie. I love this part because it is just knit stitches for the entire body.
Knit stitch every stitch on your needles until you come to the stitch marker again. Mark row 9 in your notebook. Move the stitch marker over and continue knitting with every stitch. Mark off every round in your notebook until you get to row 31. Round 32 you will start to decrease the top of the beanie to close it up.
Are you excited yet? You can see the beanie almost complete. Now we we start to close up the top. This will be done over next 4 rounds. First move the stitch marker over and mark round 31 off in your notebook.
Knit the first two stitches. Next you will be doing a knit decrease. We will be doing a normal knit stitch BUT using the next 2 loop on your left needle instead of just 1 loop.
Knit Decrease
Insert your right hand needle under the next 2 loops, wrap the working yarn around the needle from your right hand. Pull your right hand needle up to the front with the working yarn. Push the 2 loops off your left hand needle to complete the decrease. Knit the next 2 stitch. Now another knit decrease. Again insert your right hand needle under both loops on your left hand needle. Wrap the working yarn around the needle from your right hand. Pull your right hand needle up to the front with the working yarn. *Continue to knit 2 stitches then and a knit decrease* all the way around the round until you come back to the stitch marker. Mark round 32 off in your notebook. Round 33 WILL NOT have any deceasing. So you will just do a knit stitch for each stitch around. *Mark off round 33 in your notebook.
**The last 2 rounds might get a little tighter on your needles. Just keep loose tension and work slow.**
Round 34 WILL BE another decreasing round. And worked as followed: Knit stitch the first loop on left needle. Knit decrease the next loop. Knit stitch the next loop. Knit decrease with the next loop. Continue with *knit stitch, knit decrease* until you complete the round and come back to your stitch marker. Move the stitch marker over from the left hand needle to the right hand needle. Mark off round 34 in your notebook.
Round 35 WILL NOT be a decrease round. Continue to knit stitch in every stitch in the round. After you come back around to the stitch marker, move it over, mark off round 35 in your notebook and get ready to cut the yarn and close up you beanie.
Cut and Sew
Time to cut your yarn. Cut the yarn with about 12 inches of yarn to use to cinch the top and will be used to sewing in the tail. Take the new tail string and thread it onto a tapestry needle. From the right hand side push the loops back. (Not off the needle but towards the left hand needle. With the tapestry needle go under the loop on the left hand needle. Pull that loop off the needle. Continue to the next loop on the left needle. Slide the tapestry needle under the loop and pull the loop off the needle. Continue to do this for all the loops on the left hand needle. As you work you will need to push the loops from the right hand needle over towards the left hand. Once all loops are on the new tail string and off your needles, remove the needles and set aside. Take the tapestry needle and string and pull kind of tight to cinch the top hole. Run the needle under the loops to keep it tight. Now we will sew in the tails and add a Pom Pom to the top. Then you are all done.
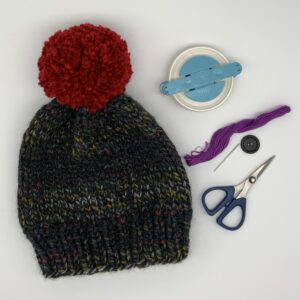
Finishing Touches
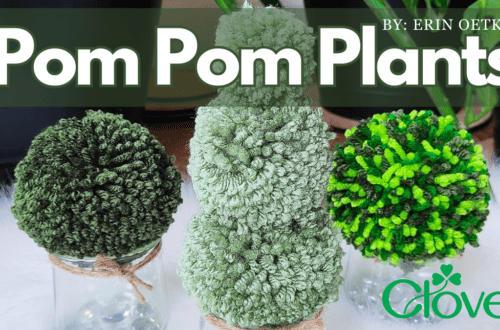
Now that the beanie is all done it’s time to sew in your tails and add your Pom Pom to the top. Who doesn’t love a great fluffy Pom? I like using Lion Brand “Homespun” yarn when I make yarn poms, but you can use any yarn you want.
Gauging Your Beanie
If your beanie is not fitting you right, then you will have to check your gauge. I like to use the swatch ruler which measures a 4 by 4 inch square. We need to count the stitches across the bottom of the ruler (stitches) and count the stitches that go up the side of the ruler (rows). On my beanie my gauge is 10.5 stitches across, and 16 rows are in my 4×4 inch square. I get my measurements from the body of the beanie. You can go up or down in needle size to get the same gauge as mine.
Easy Knit Pattern
Brim:
Cast on 48
Round 1-8: K1,P1
Body:
Round 9-31: Knit Around
Round 32: Knit 2, Knit Decrease
Round 33: Knit Around
Round 34: Knit 1, Knit Decrease
Round 35: Knit Around
Cinching Close:
Cut yarn, get off needles, & cinch close.
Add pom-pom
Catch up on part 1, “Knitting 101: Knitting for Beginners” where Brittani gives knitting beginners some essential tips here.
Find Crocheted by Boo on Instagram | Ravelry | Etsy
Stay connected with Clover on Facebook | Twitter | Instagram | Pinterest | YouTube | Ravelry
[mc4wp_form id=”11289″]