Blooms with Kanzashi Flower Makers
Kanzashi is a traditional Japanese art form of folding and stitching fabric petals for use in hair adornments and other embellishments. Our Kanzashi Flower Makers are a handy plate that makes creating Kanzashi flowers quick and easy. They are available in a variety of shapes and sizes. You can use them to add your own personal touch to create unique accessories, decoration, scrap-booking and more.
Materials Needed
- Assortment of Kanzashi Flower Makers, varied shapes and sizes
- 1.5 yards of fabric
- 14″ foam wreath
- 5 yards of 2″ ribbon
- Fabric glue
- Decorative buttons for Kanzashi centers
Instructions to Construct Wreath
Step 1:
Construct an assortment of 8 small Kanzashi flowers (Kanzashi Flower Maker assortment and instructions below) and glue buttons in the center
Step 2:
Construct a total of 8 large Kanzashi flowers and glue buttons in the center.
Step 3:
Cover your wreath with ribbon and either pin or glue in place.
Step 4:
Once wreath is wrapped arrange your flowers on your wreath and glue to secure in place.

Kanzashi Flower Makers
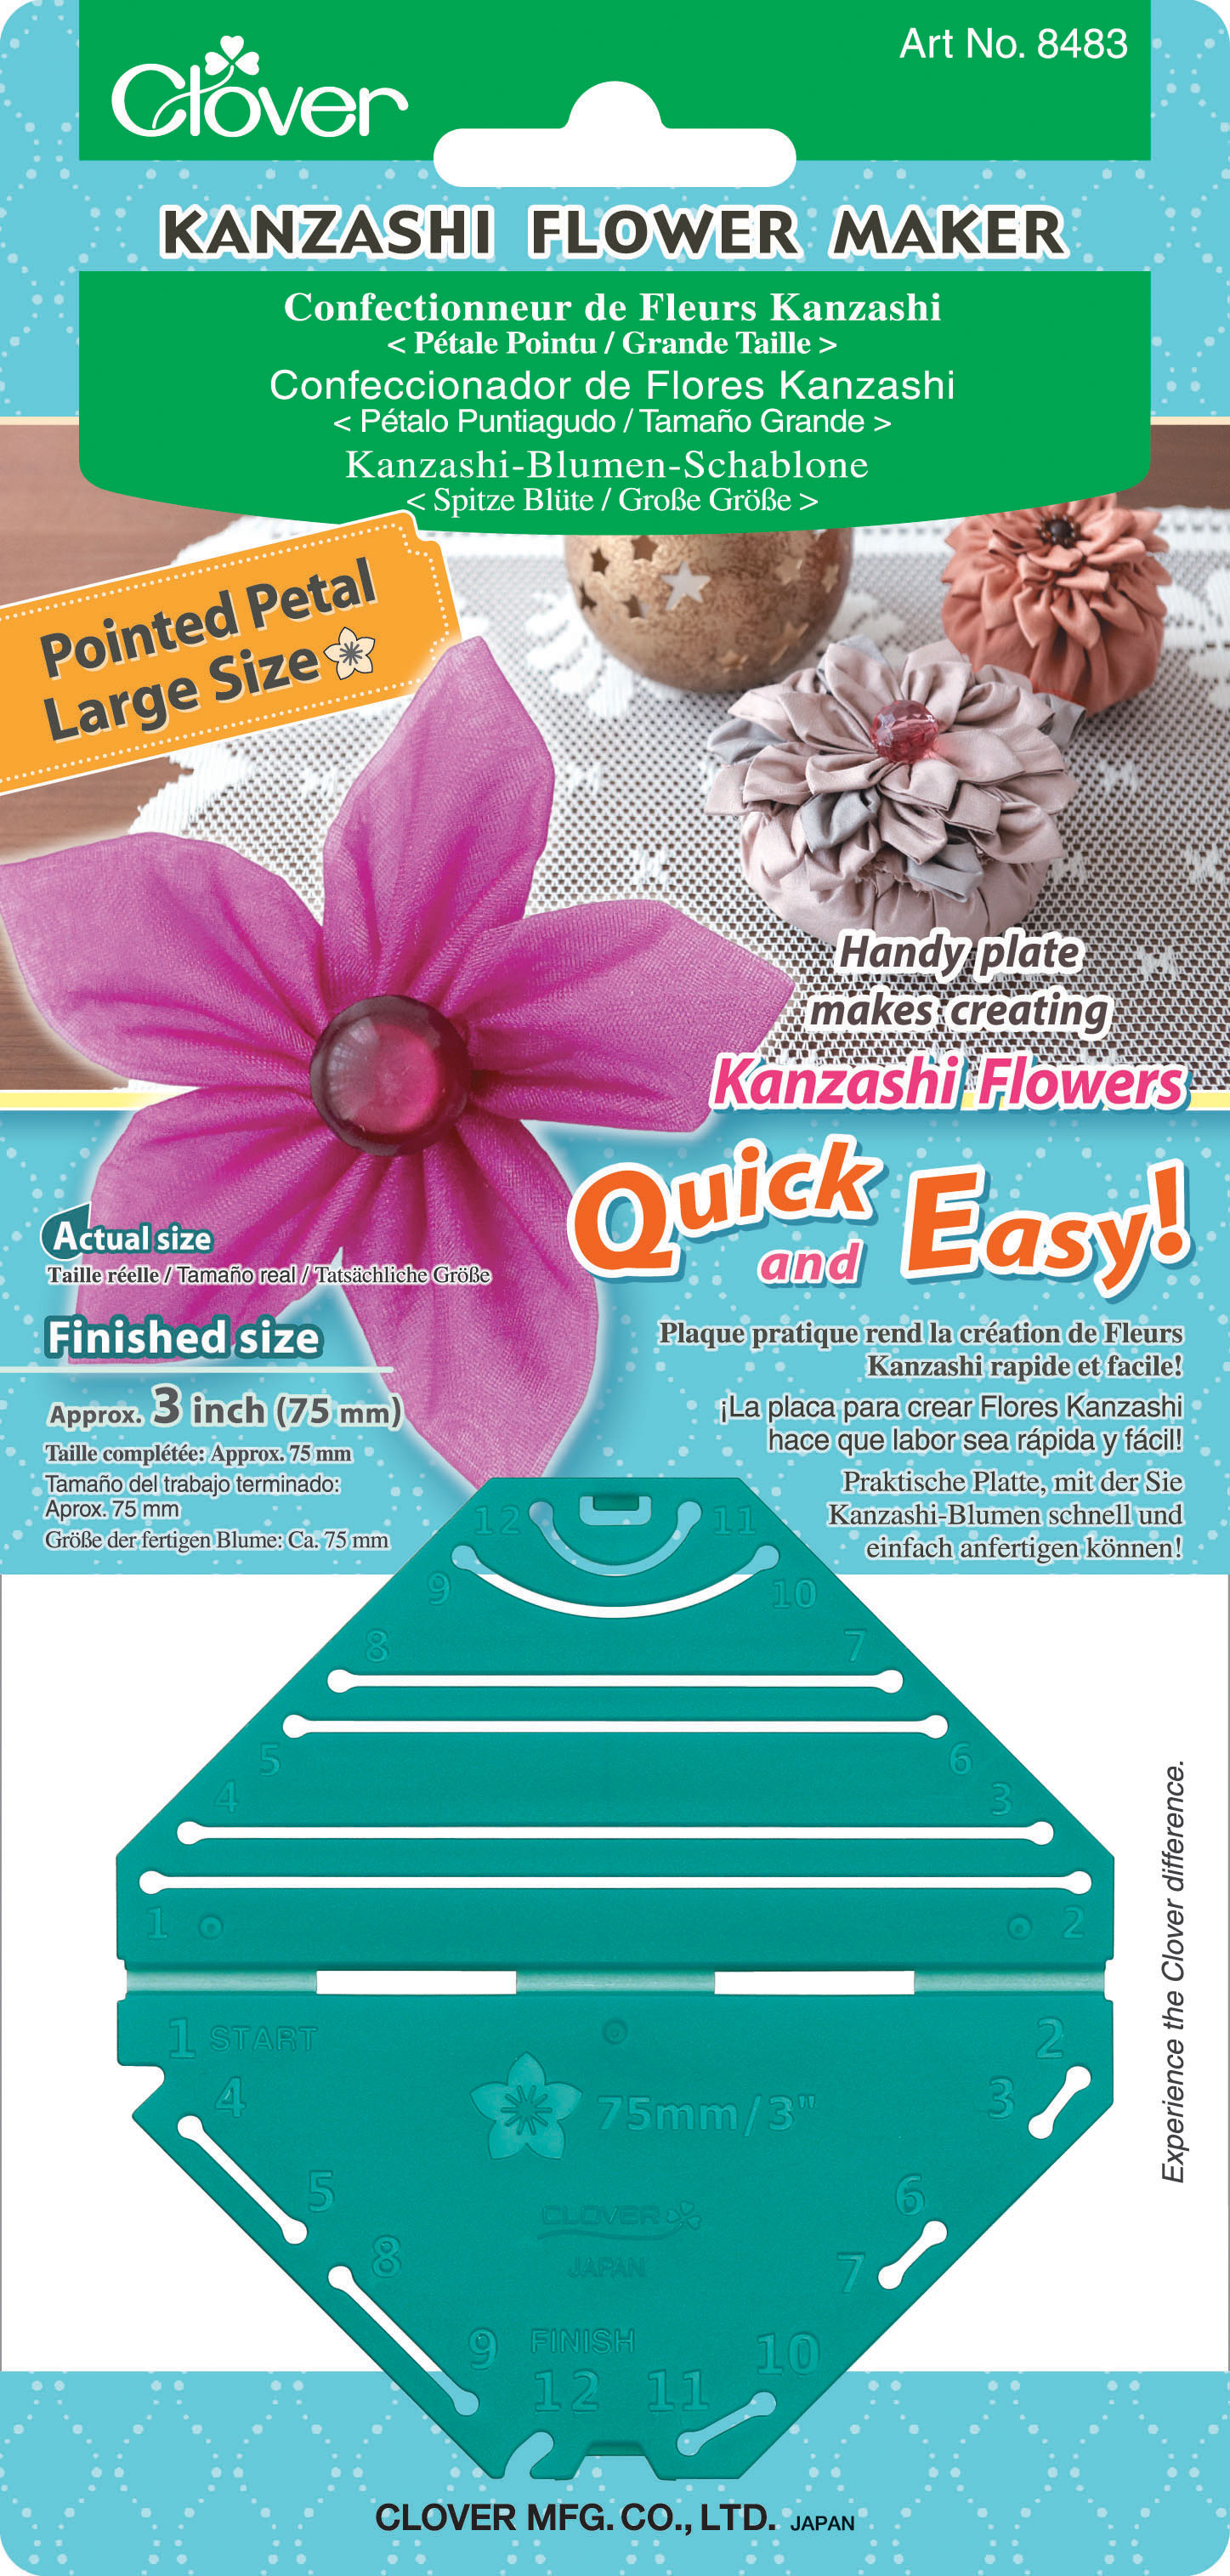
Kanzashi Flower Maker (Pointed/Large)
Art. No 8483
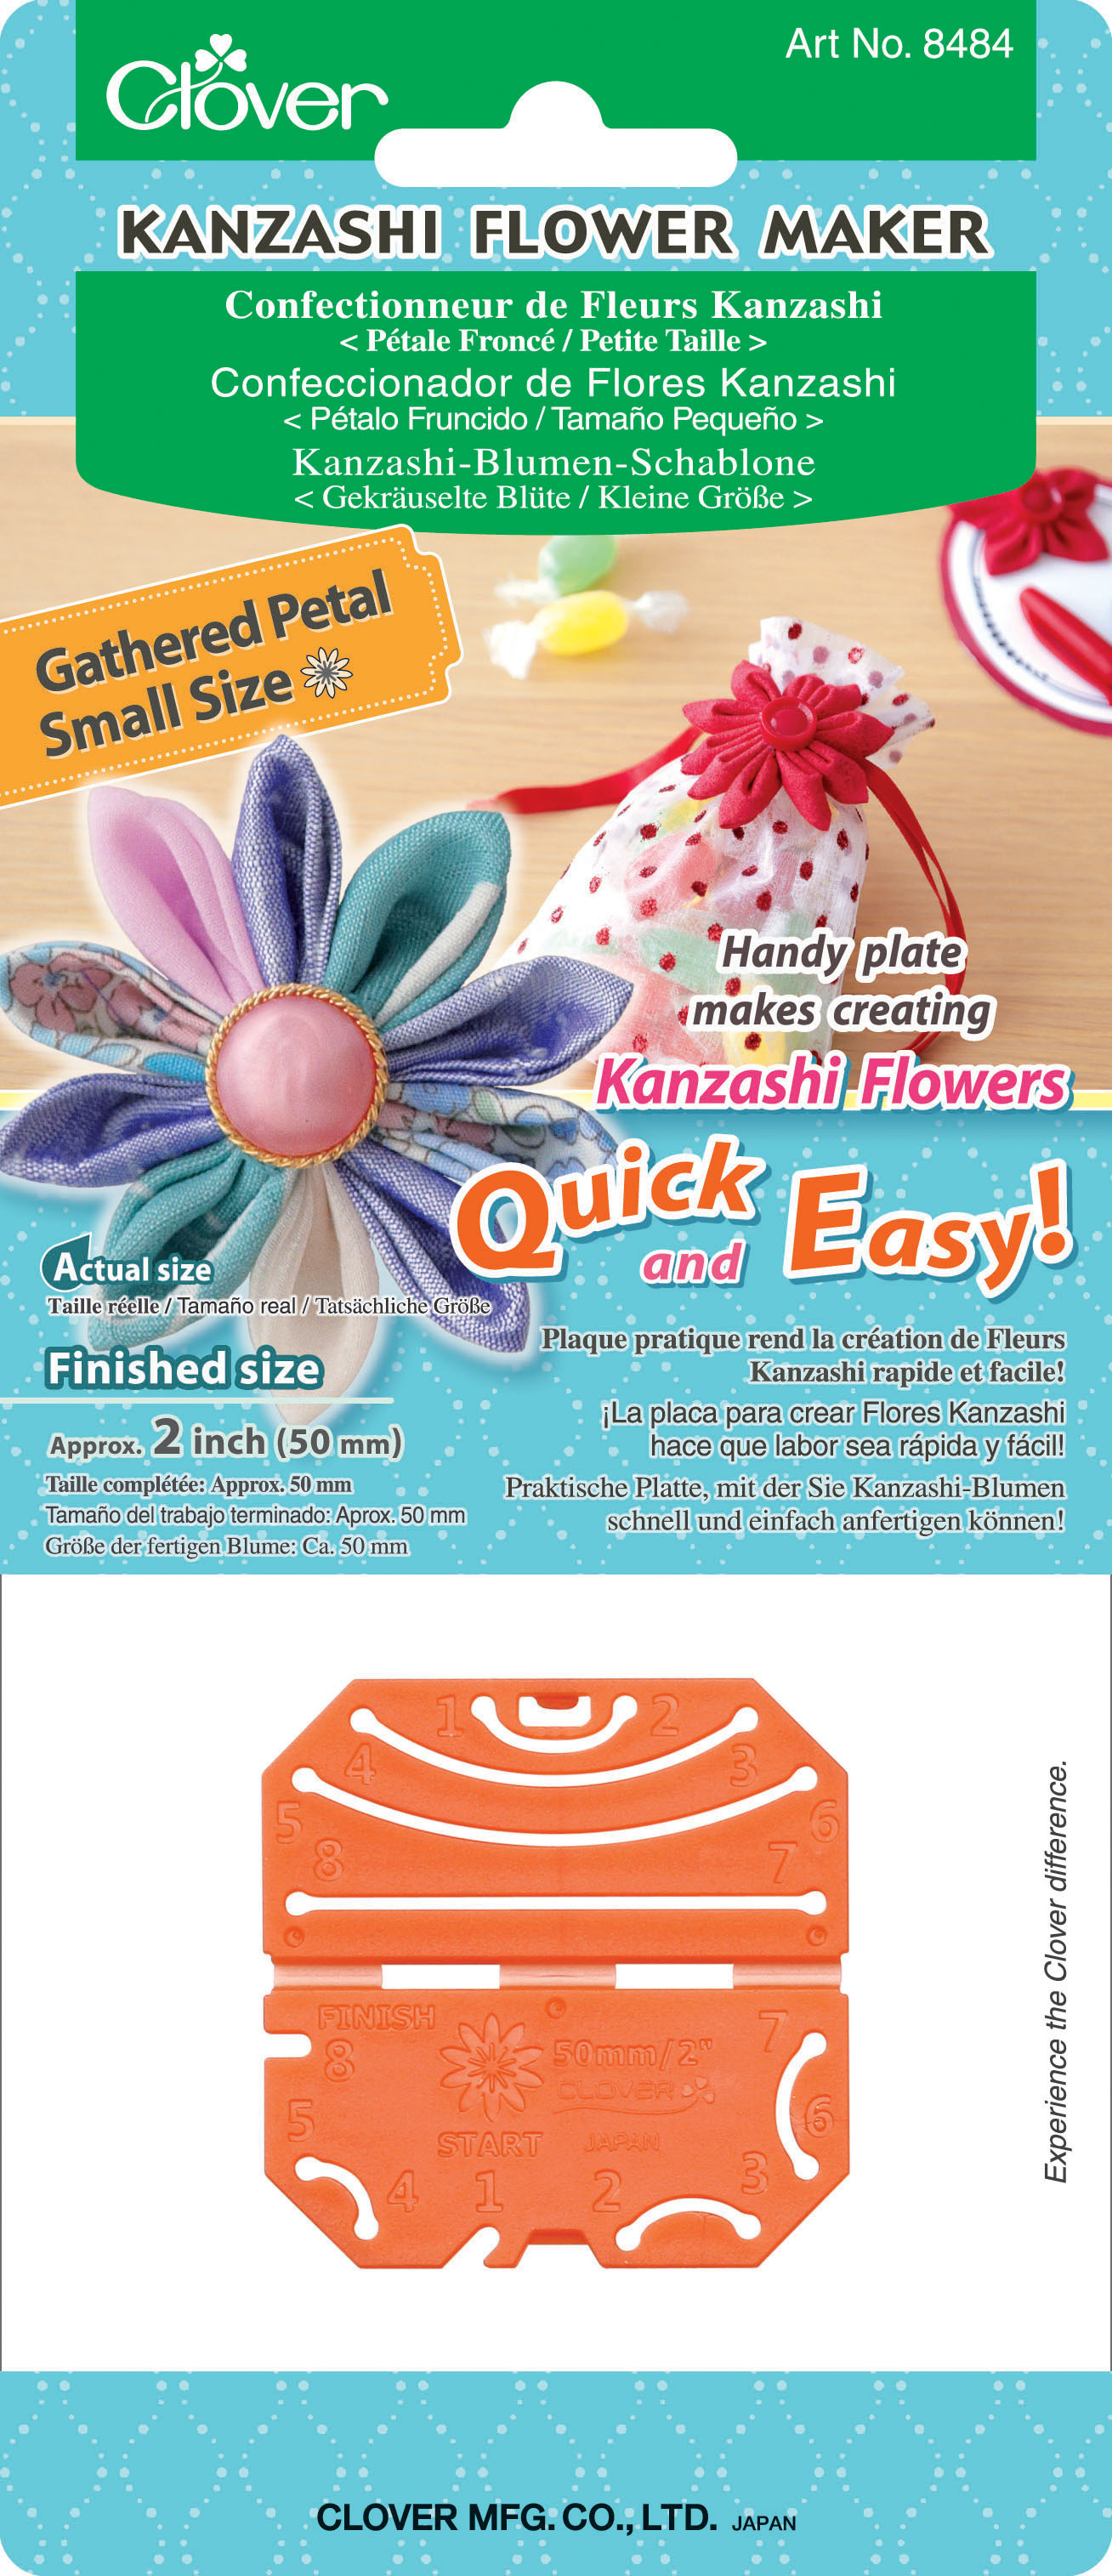
Kanzashi Flower Maker (Gathered/Small)
Art. No 8484
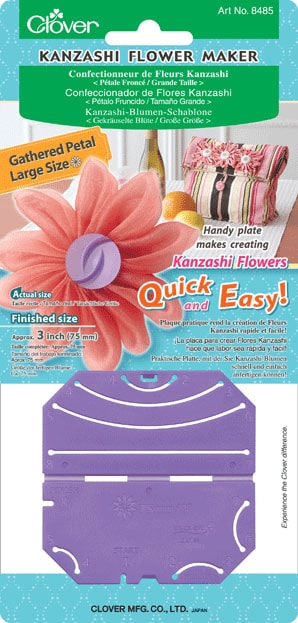
Kanzashi Flower Maker (Gathered/Large)
Art. No 8485
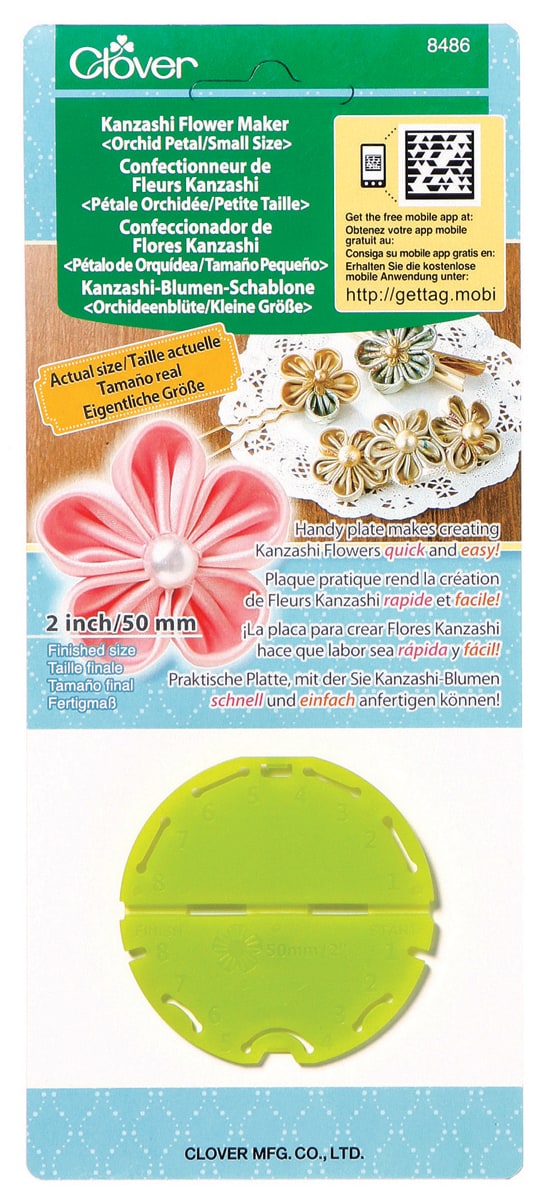
Kanzashi Flower Maker (Orchid/Small)
Art. No 8486
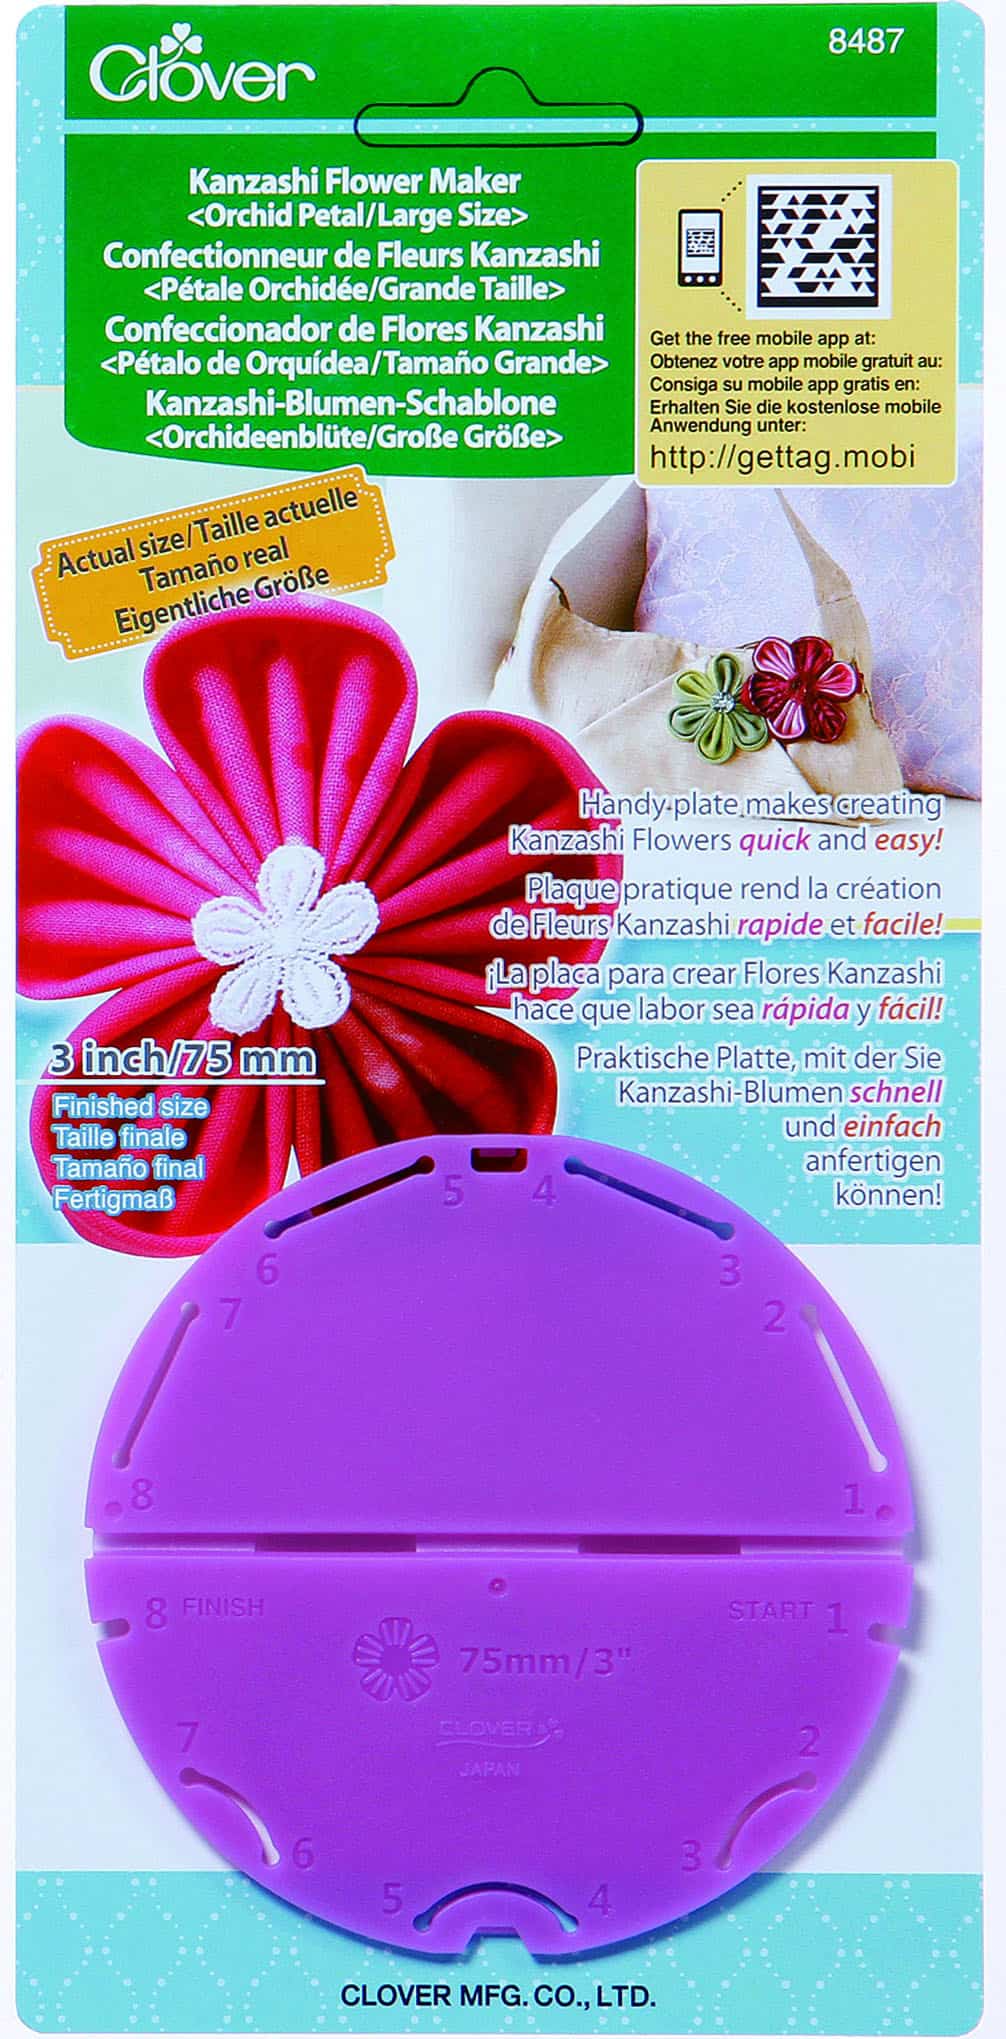
Kanzashi Flower Maker (Orchid/Large)
Art. No 8487
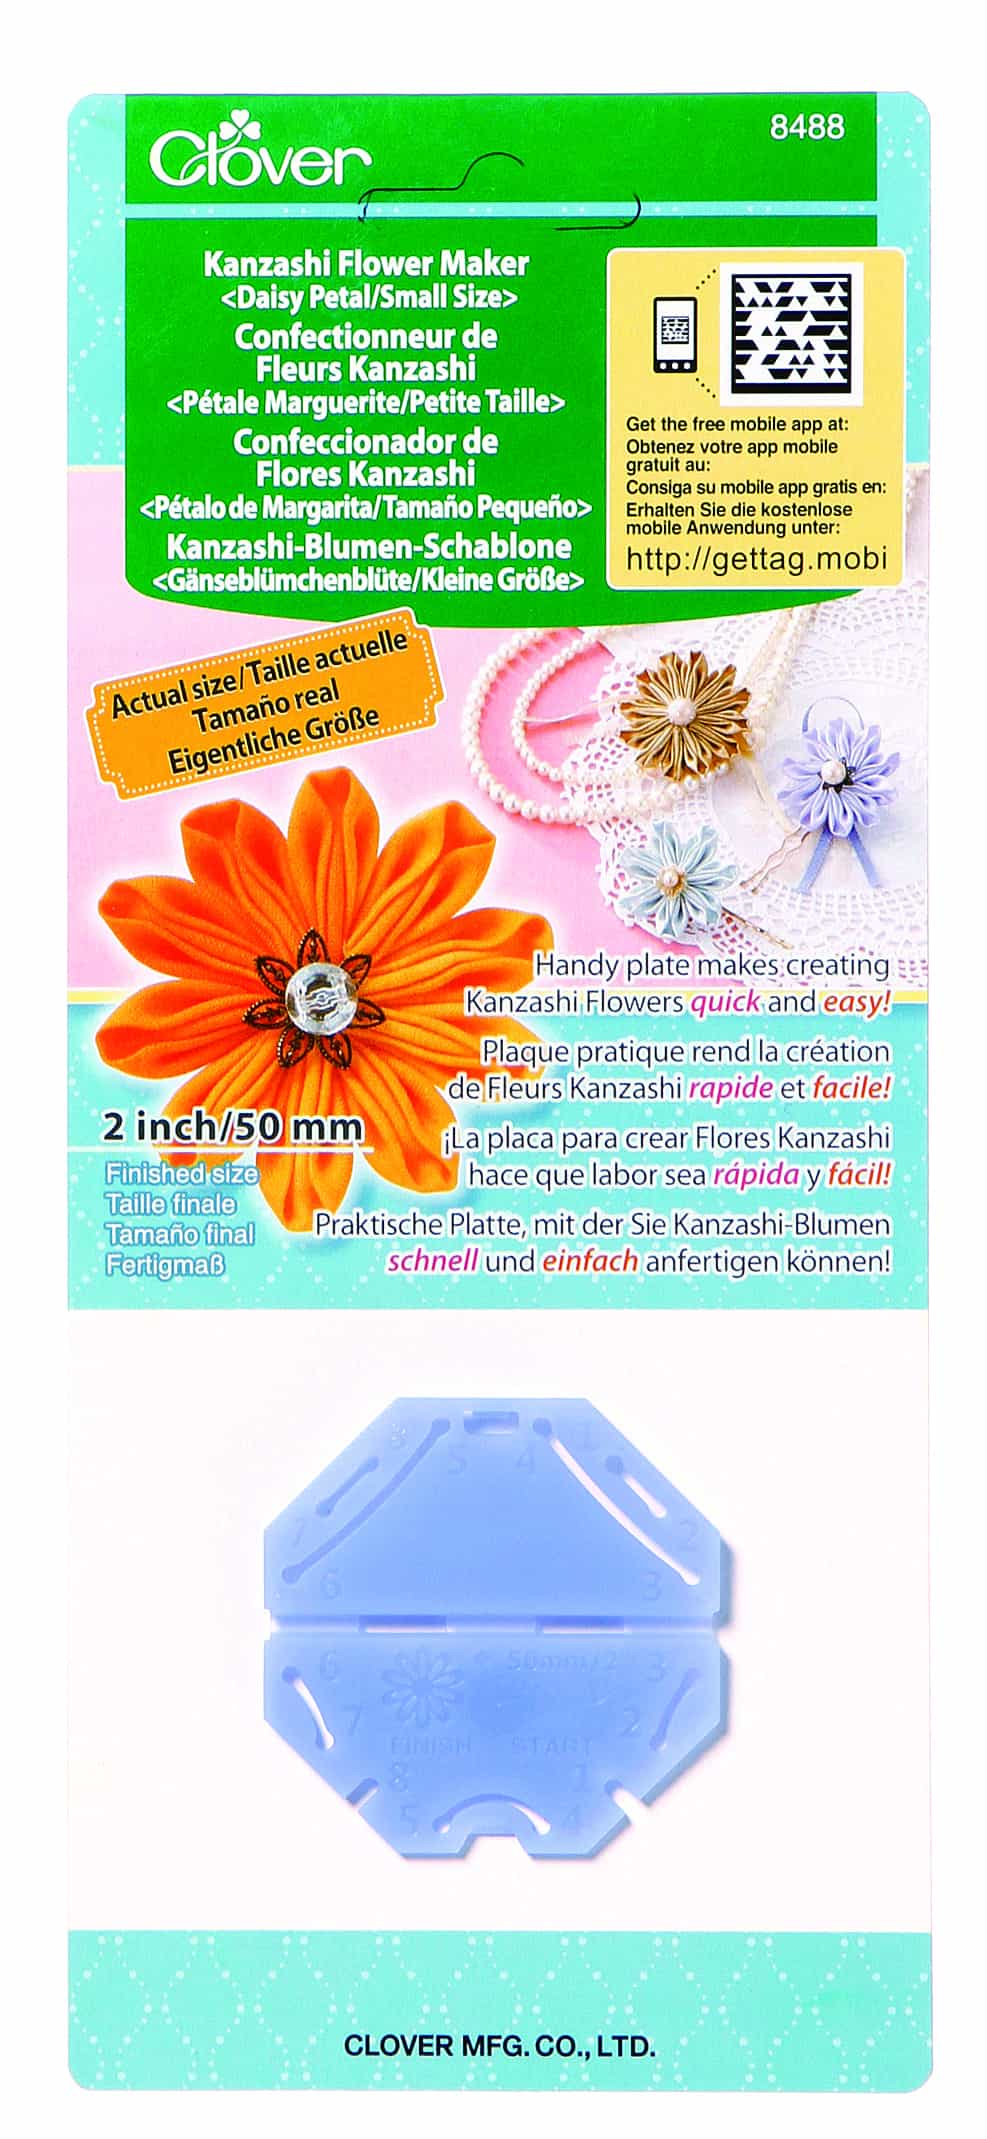
Kanzashi Flower Maker (Daisy/Small)
Art. No 8488
Instructions to construct a Kanzashi Flower
*Note: Although the templates vary in shape and size, general instructions remain the same. The template used for instruction below is Pointed Petal/Large (Art. No 8483).
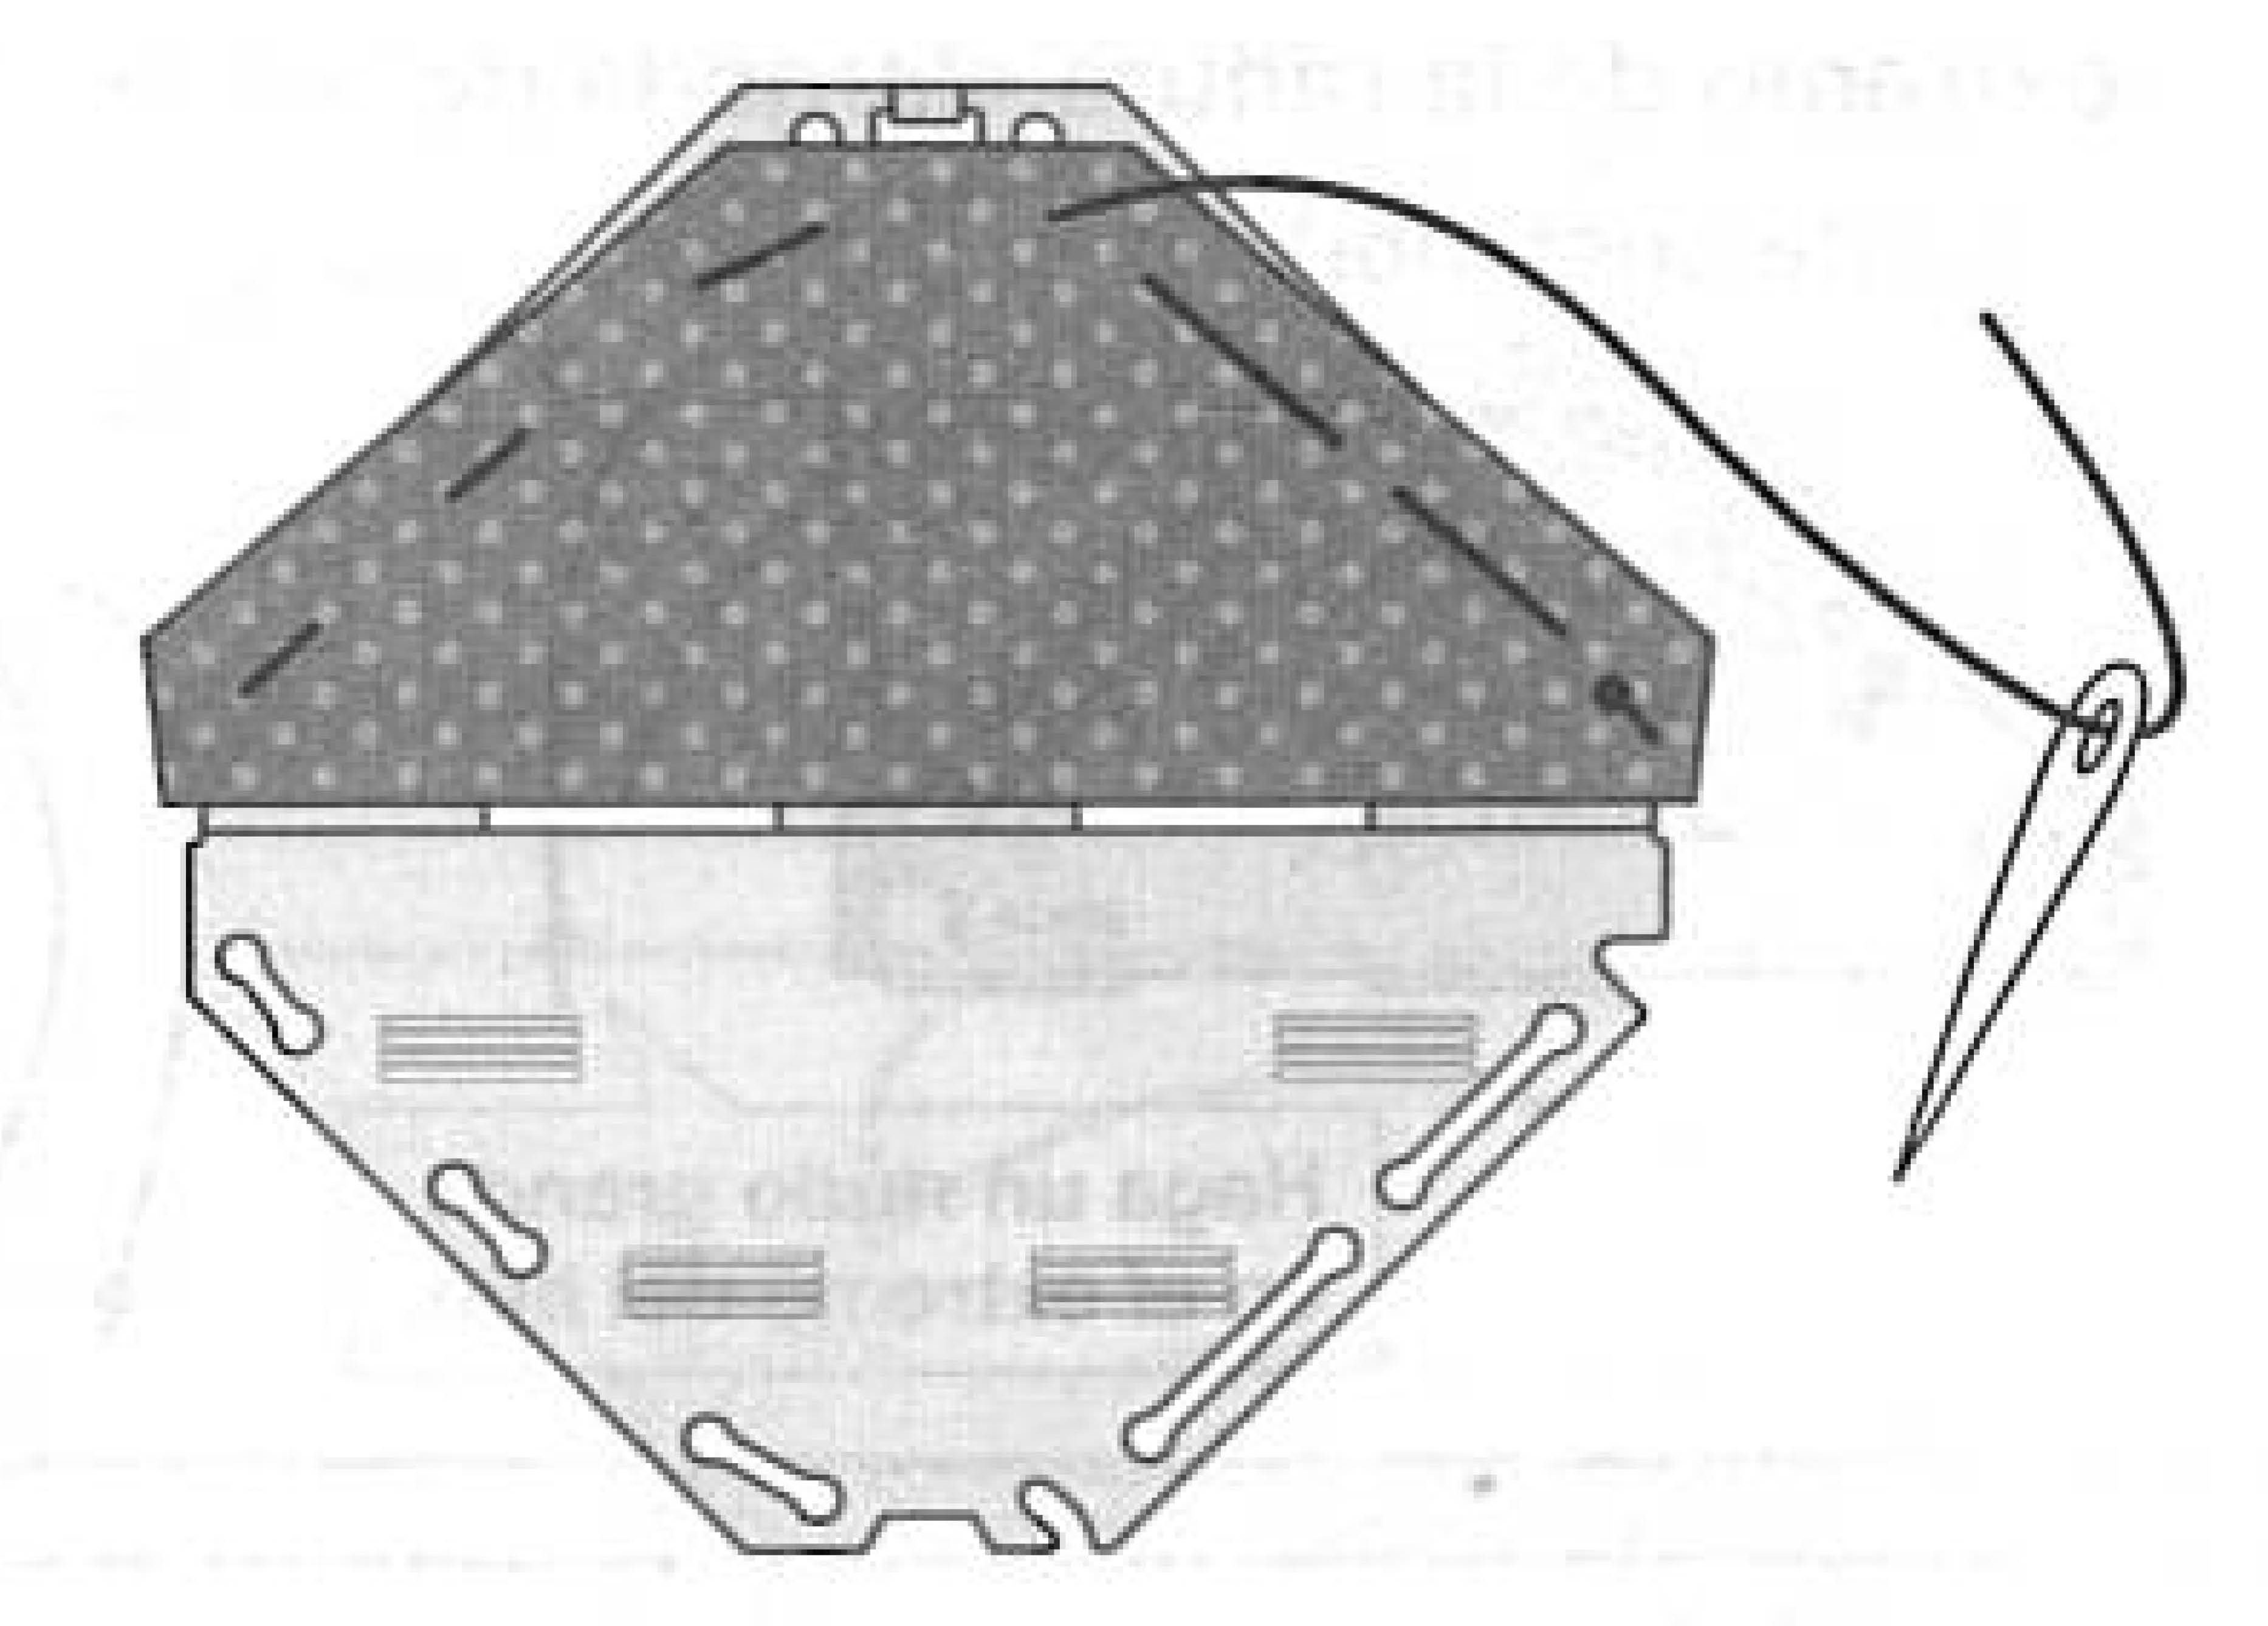
Step 1:
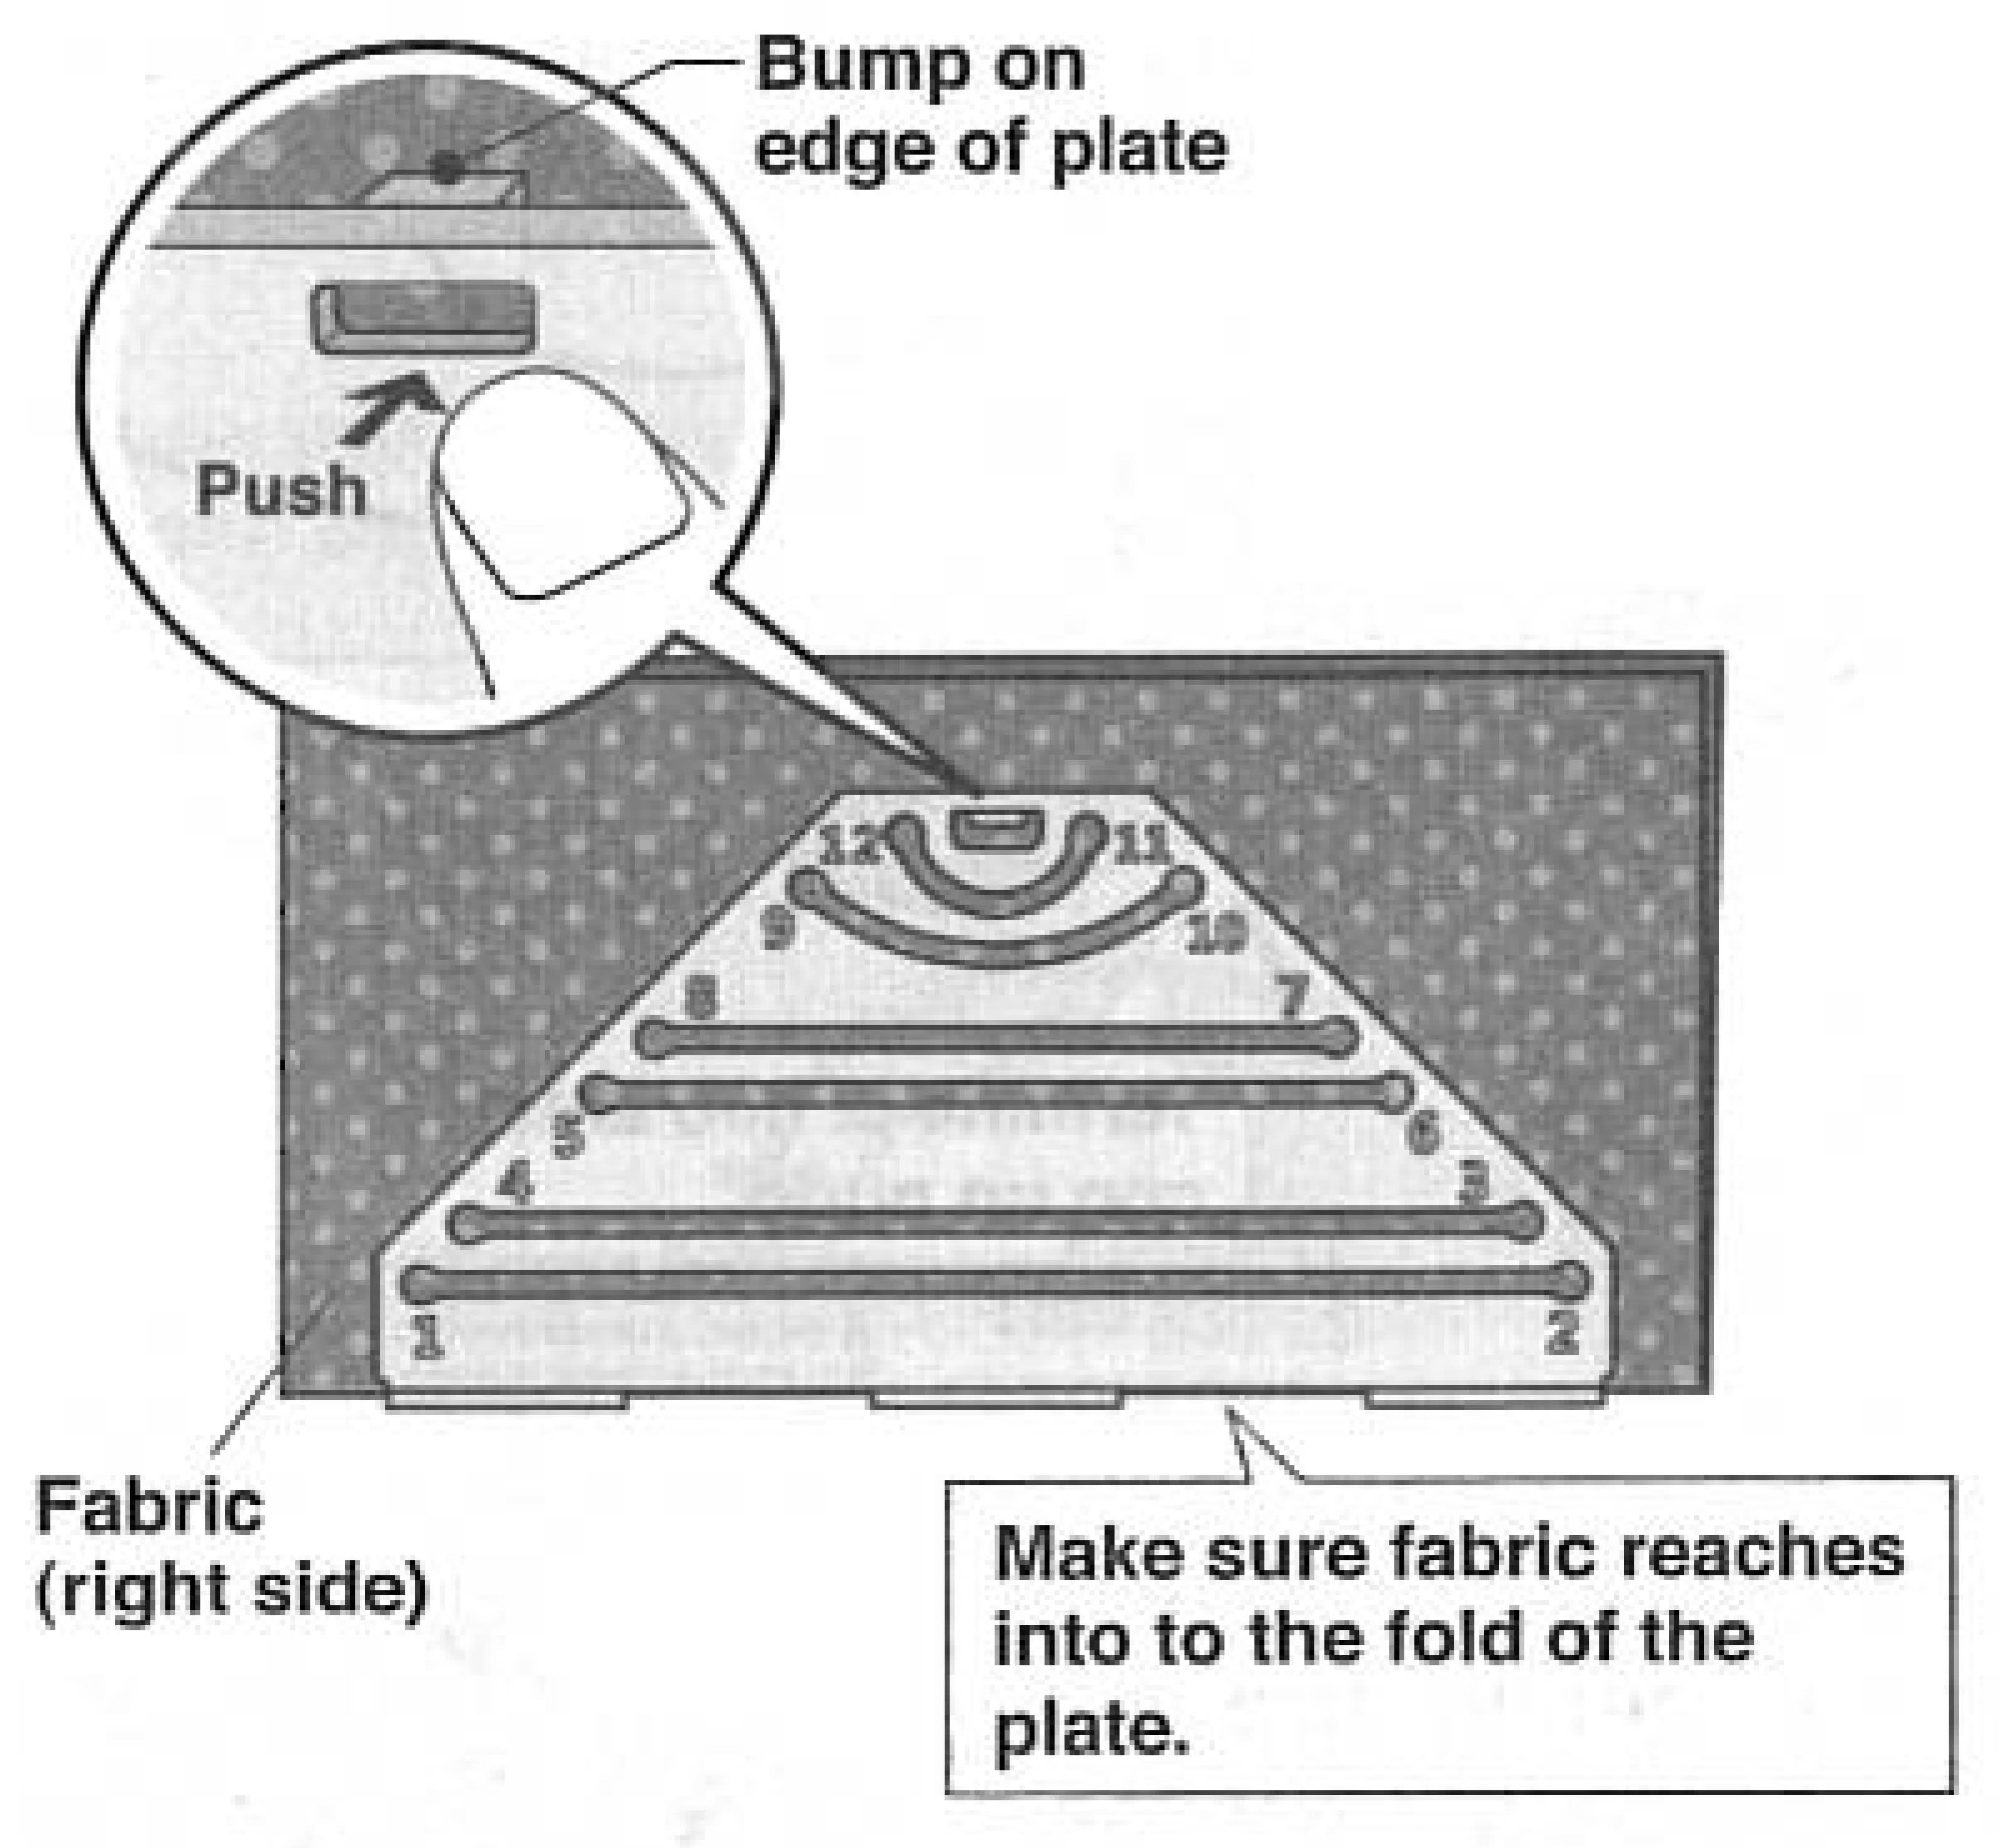
Place plate on the fabric and fold at the center inward to sandwich fabric. *Make sure you don’t create wrinkles in the fabric. 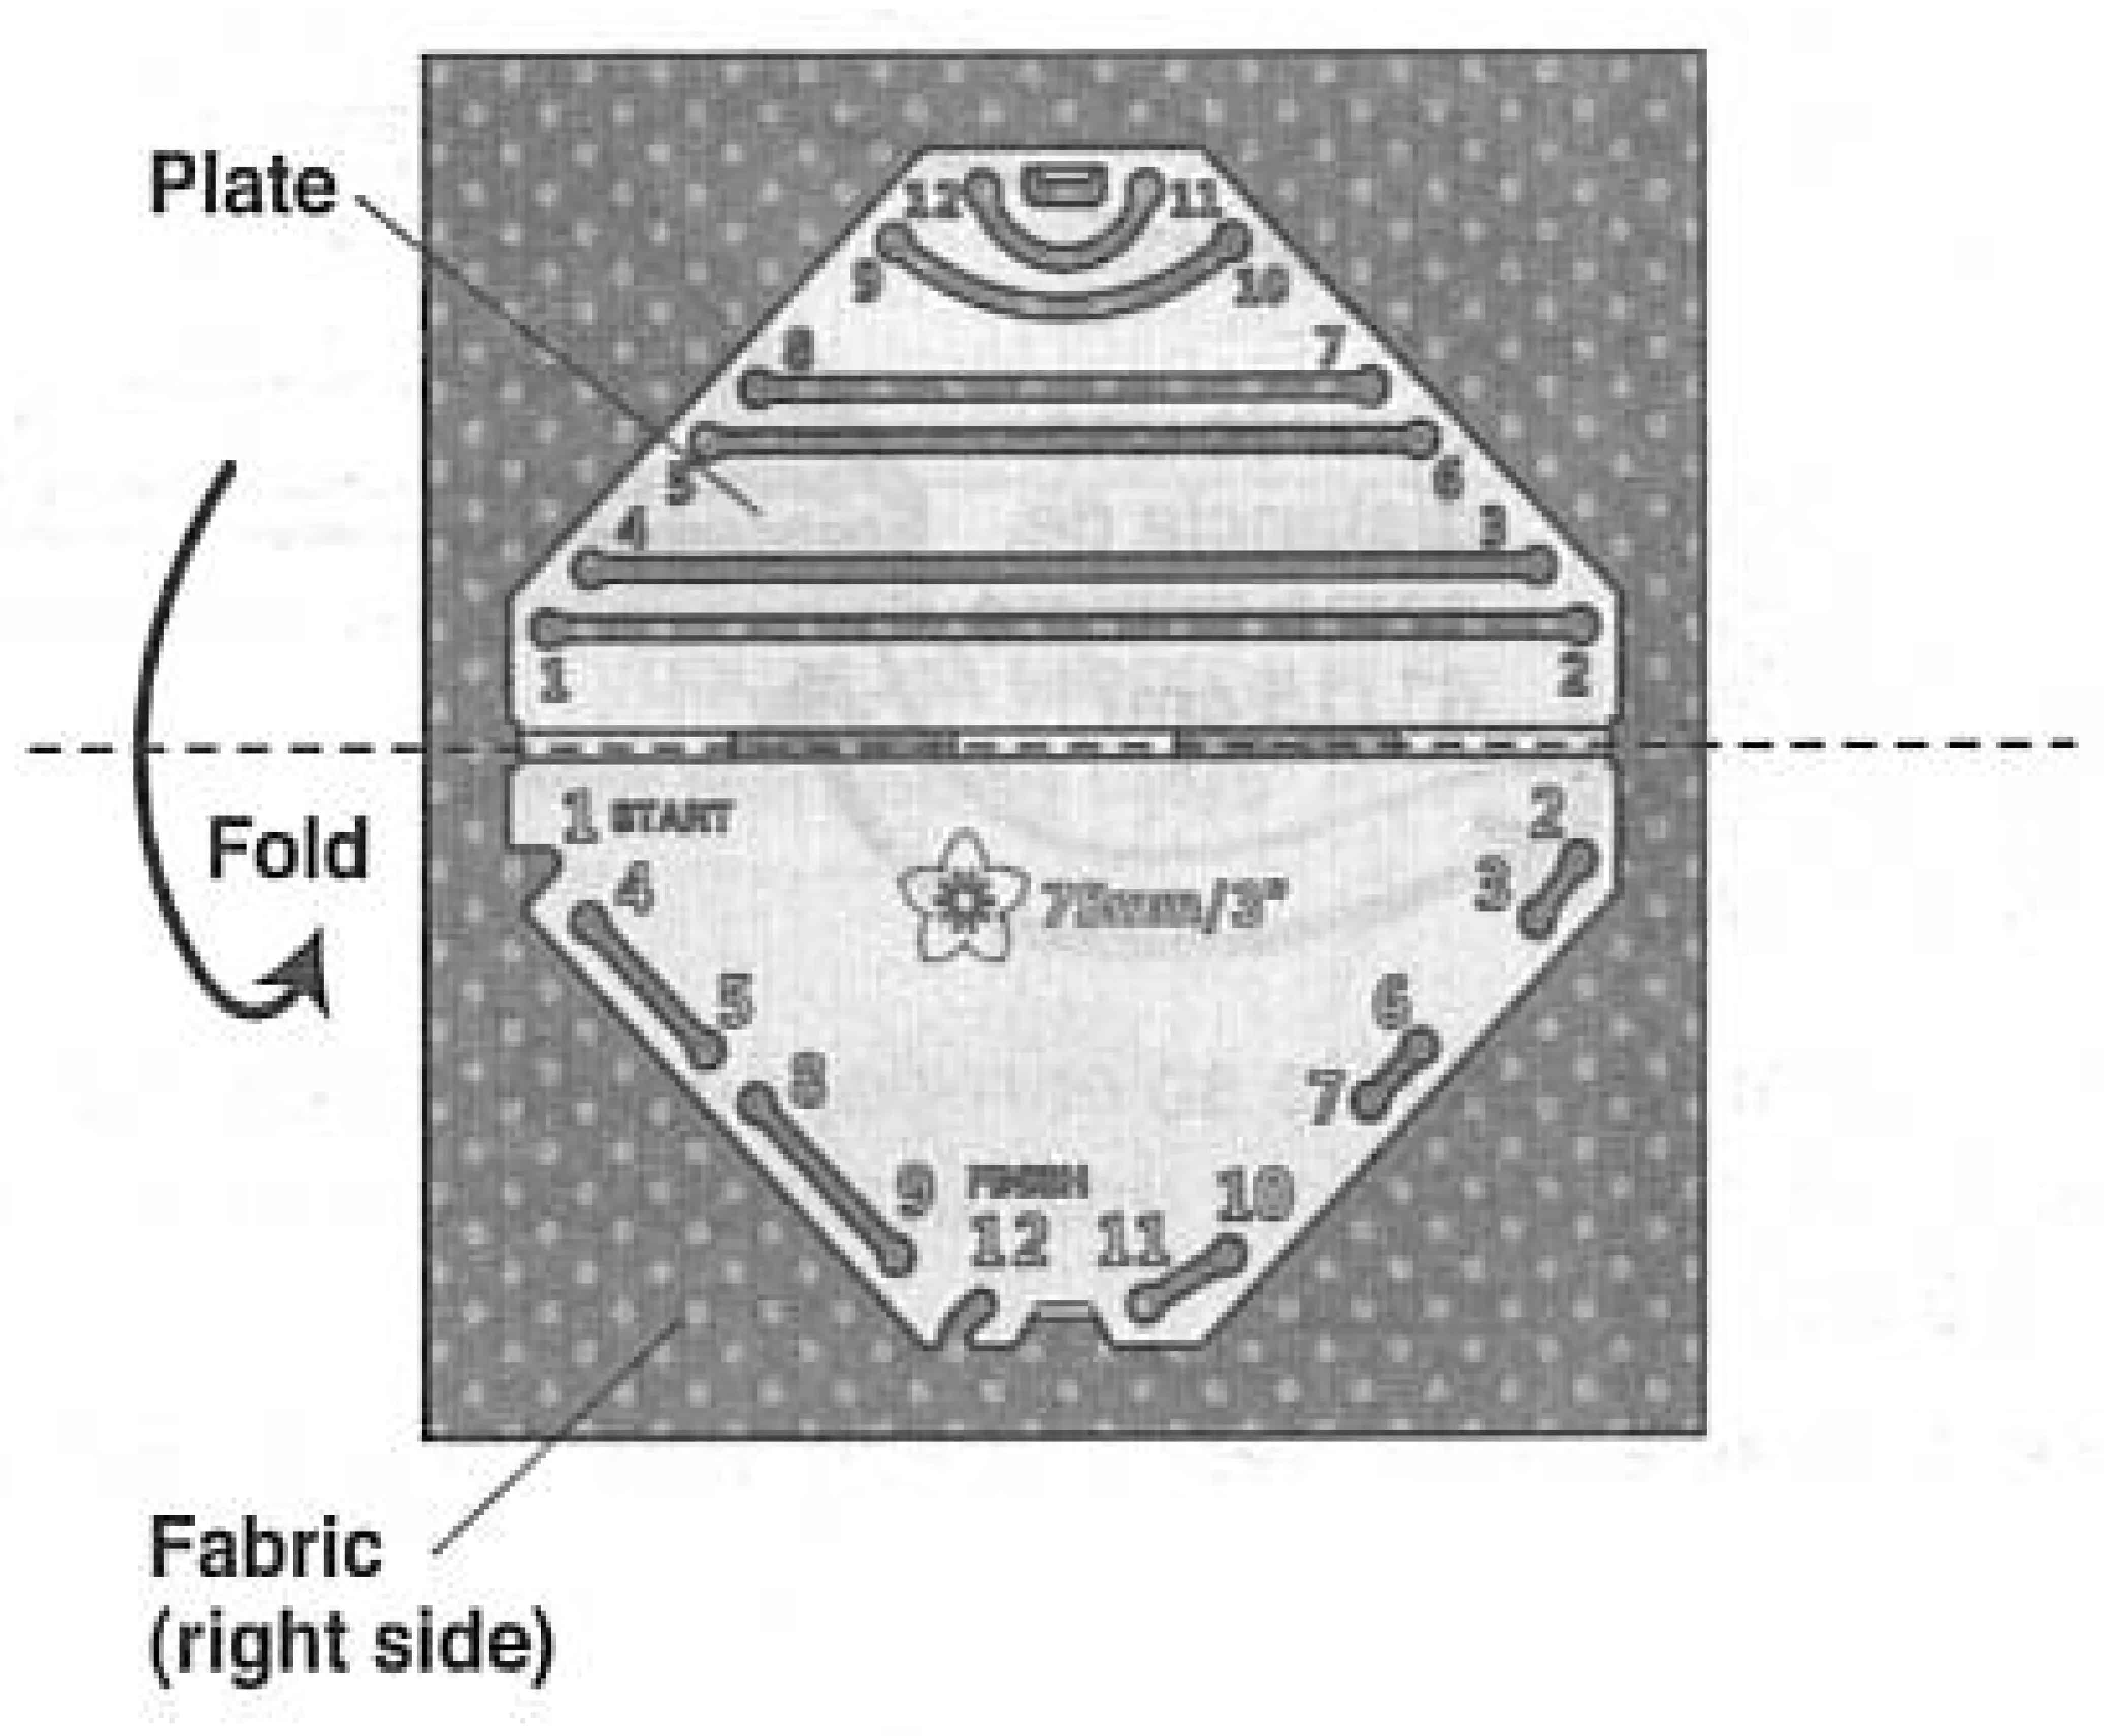
Thicker fabric may be difficult to secure. In this case, be sure to hold plate closed firmly with your fingers.
*Make sure fabric reaches into the fold of the plate
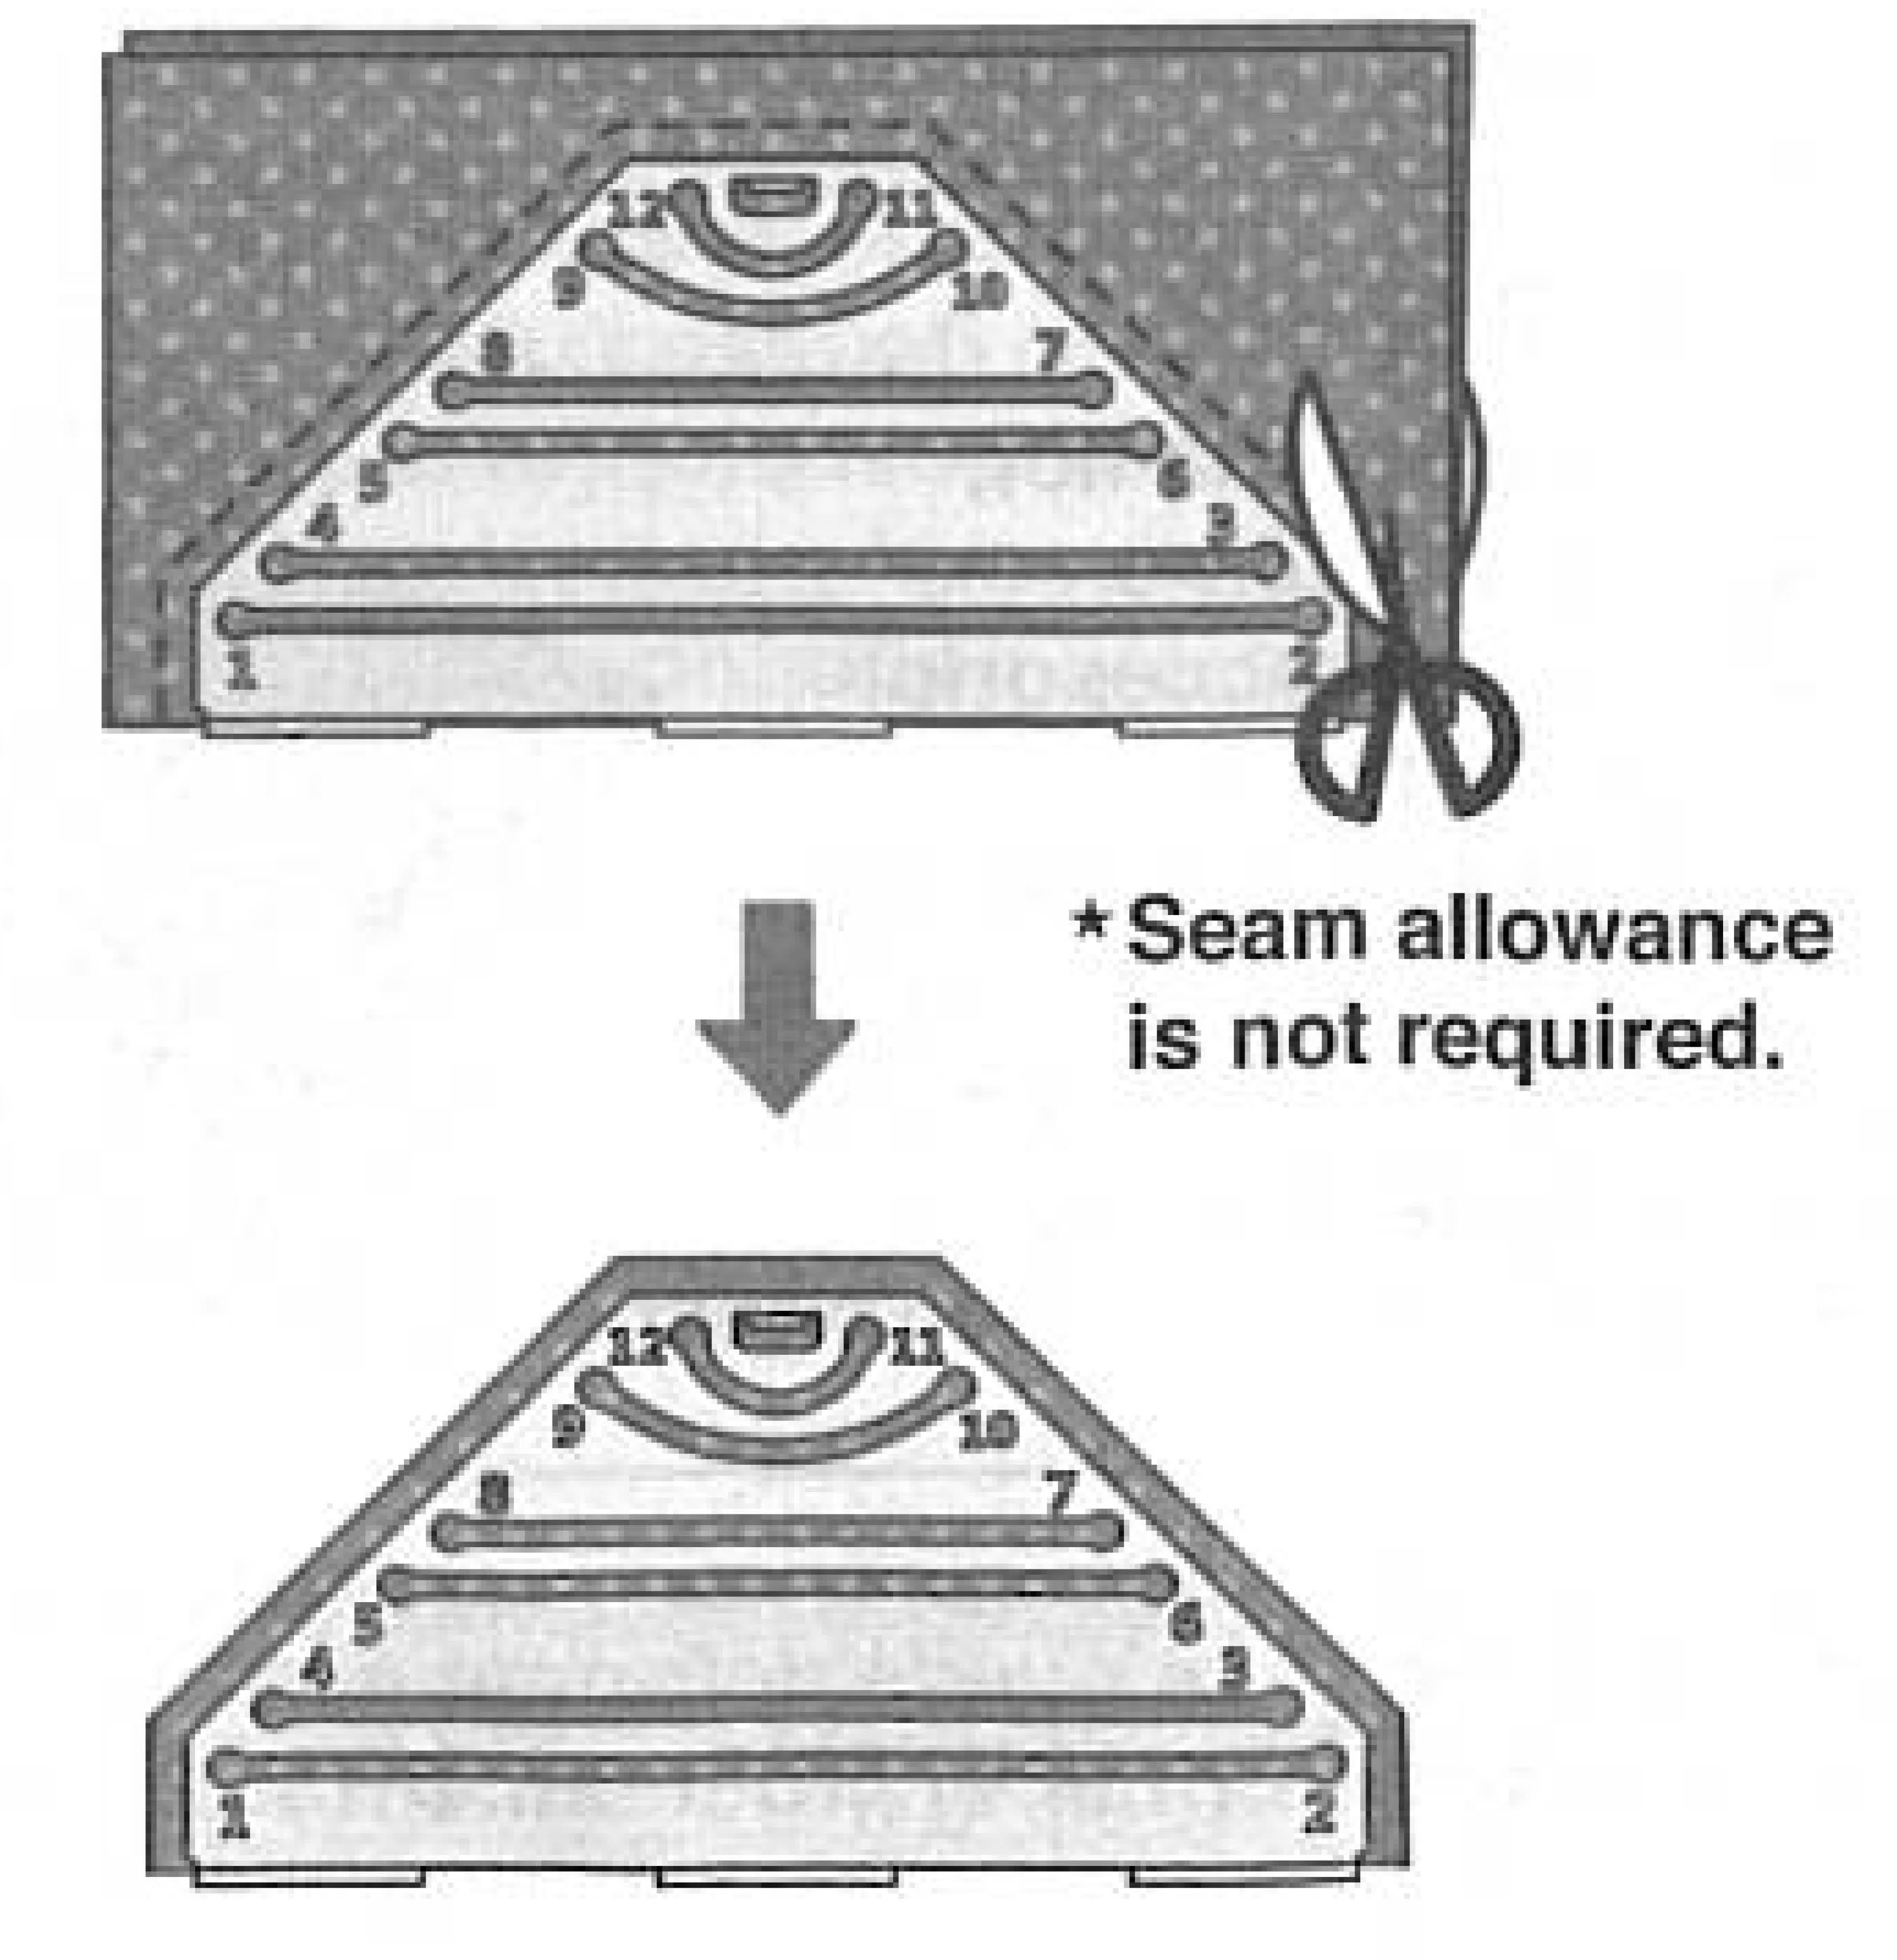
Step 2:
Cut out the fabric following the edge of the plate. No seam allowance is required.
Step 3:
Start sewing by making a large knot and putting your needle in the “Start 1” position on the back side of the plate. Bring needle through to No. 1 at the end of the elongated slit in the front side of the plate and insert in position 2 at the end of the same elongated edge.
*Pull firmly to avoid slack
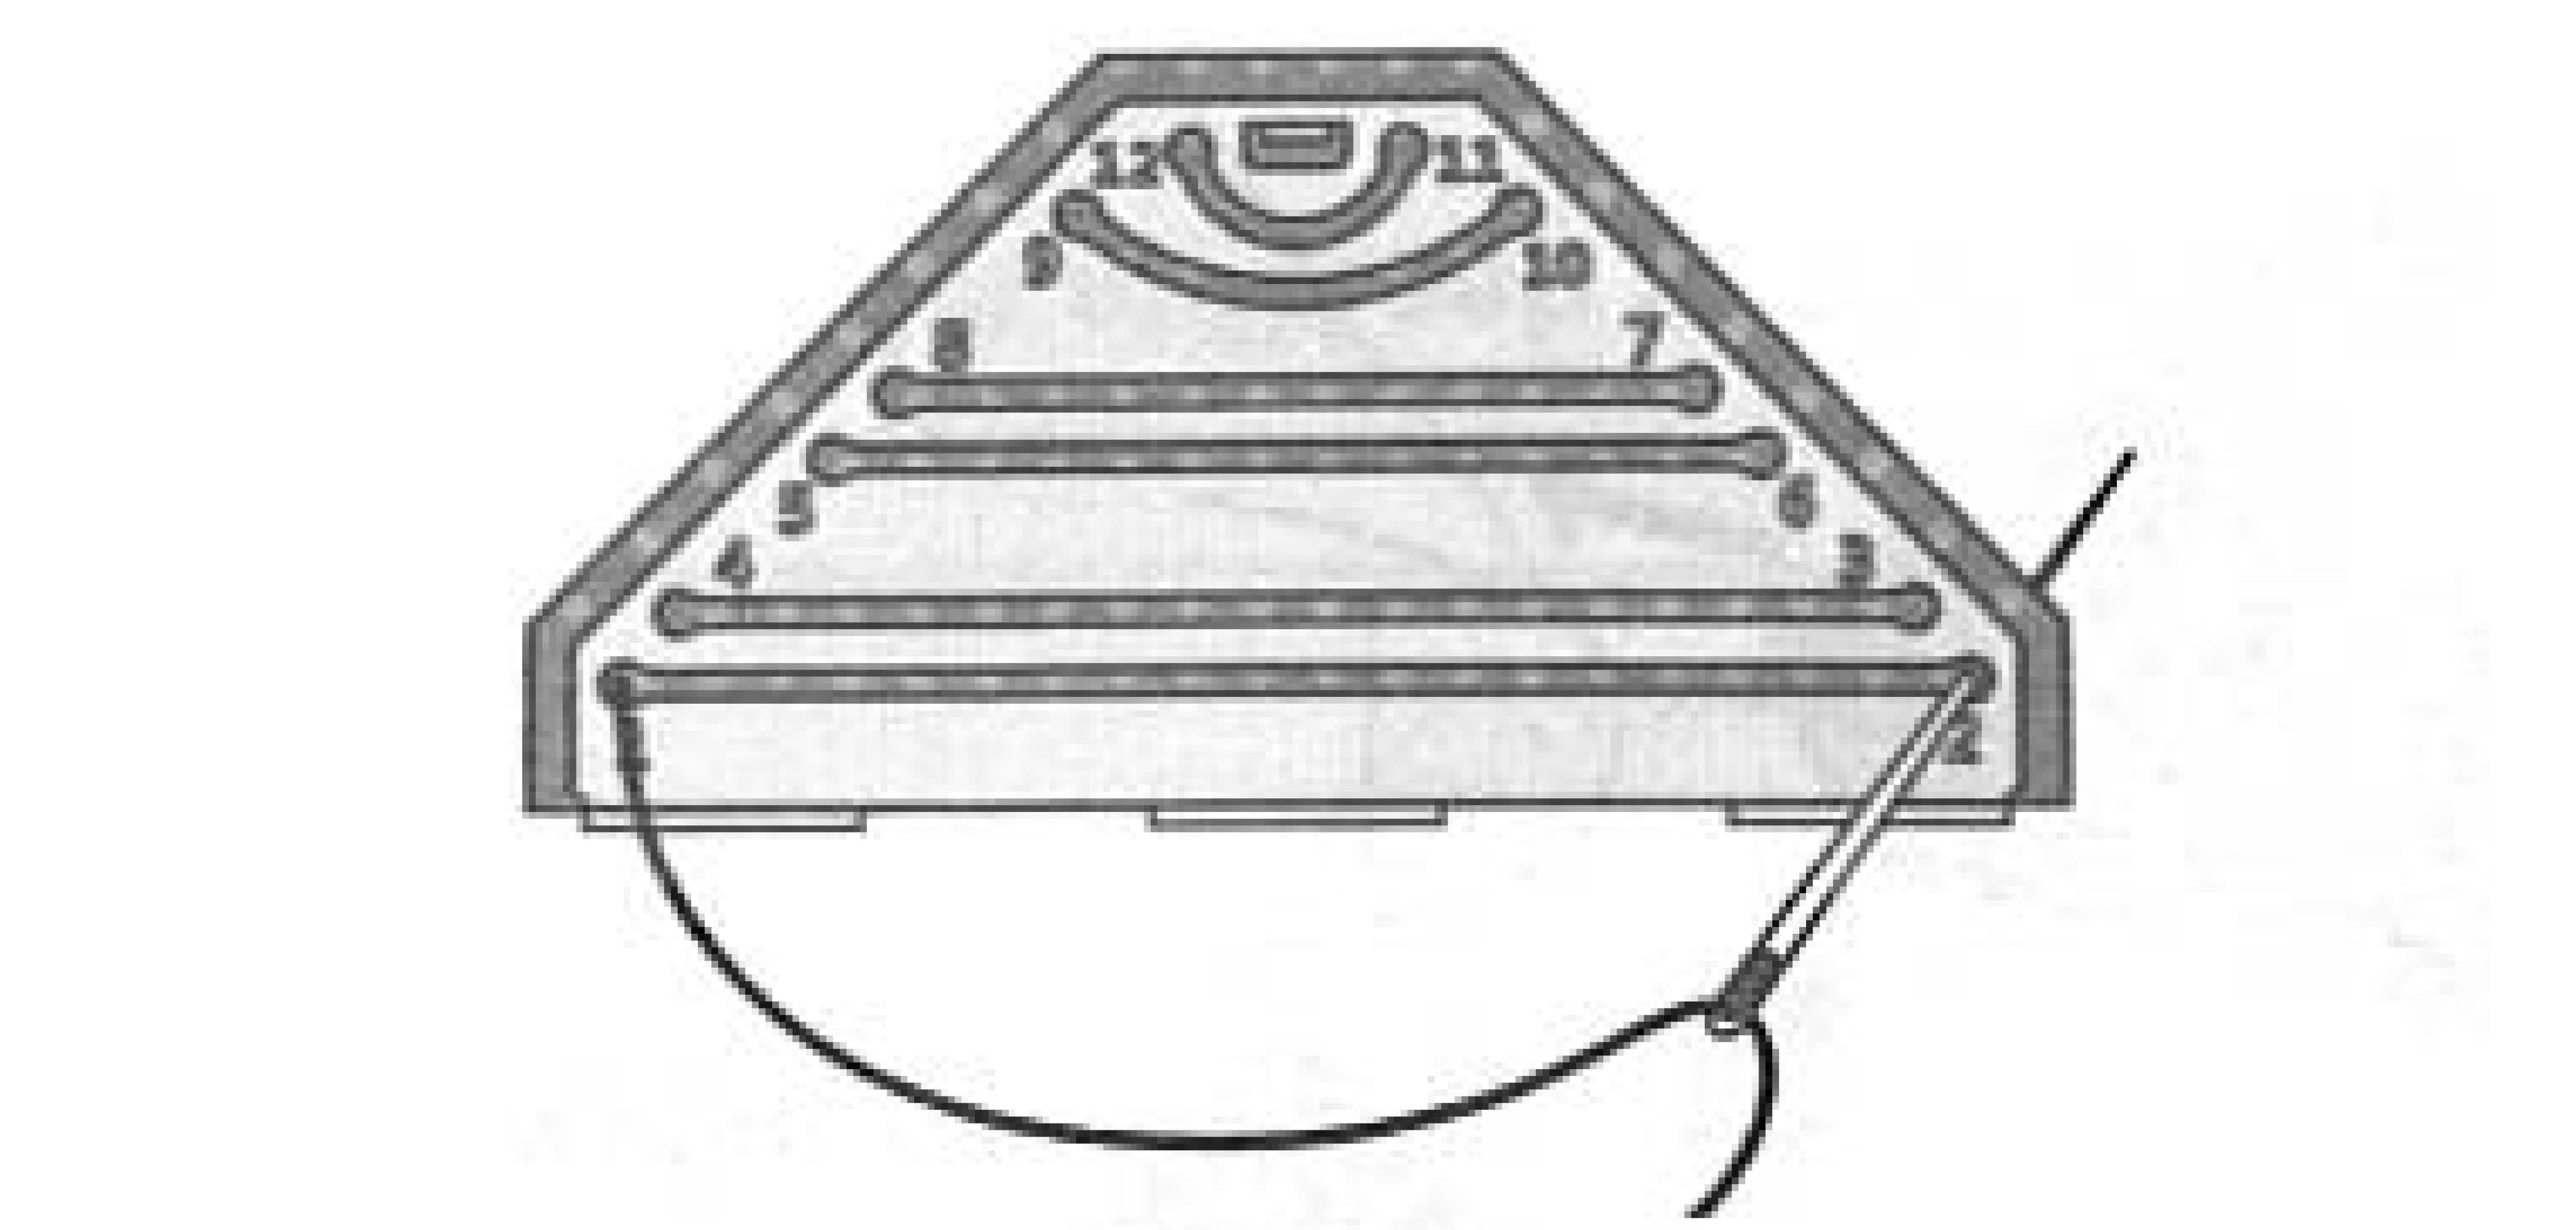
Continue to thread elongated slits according to number using the same needle and thread.
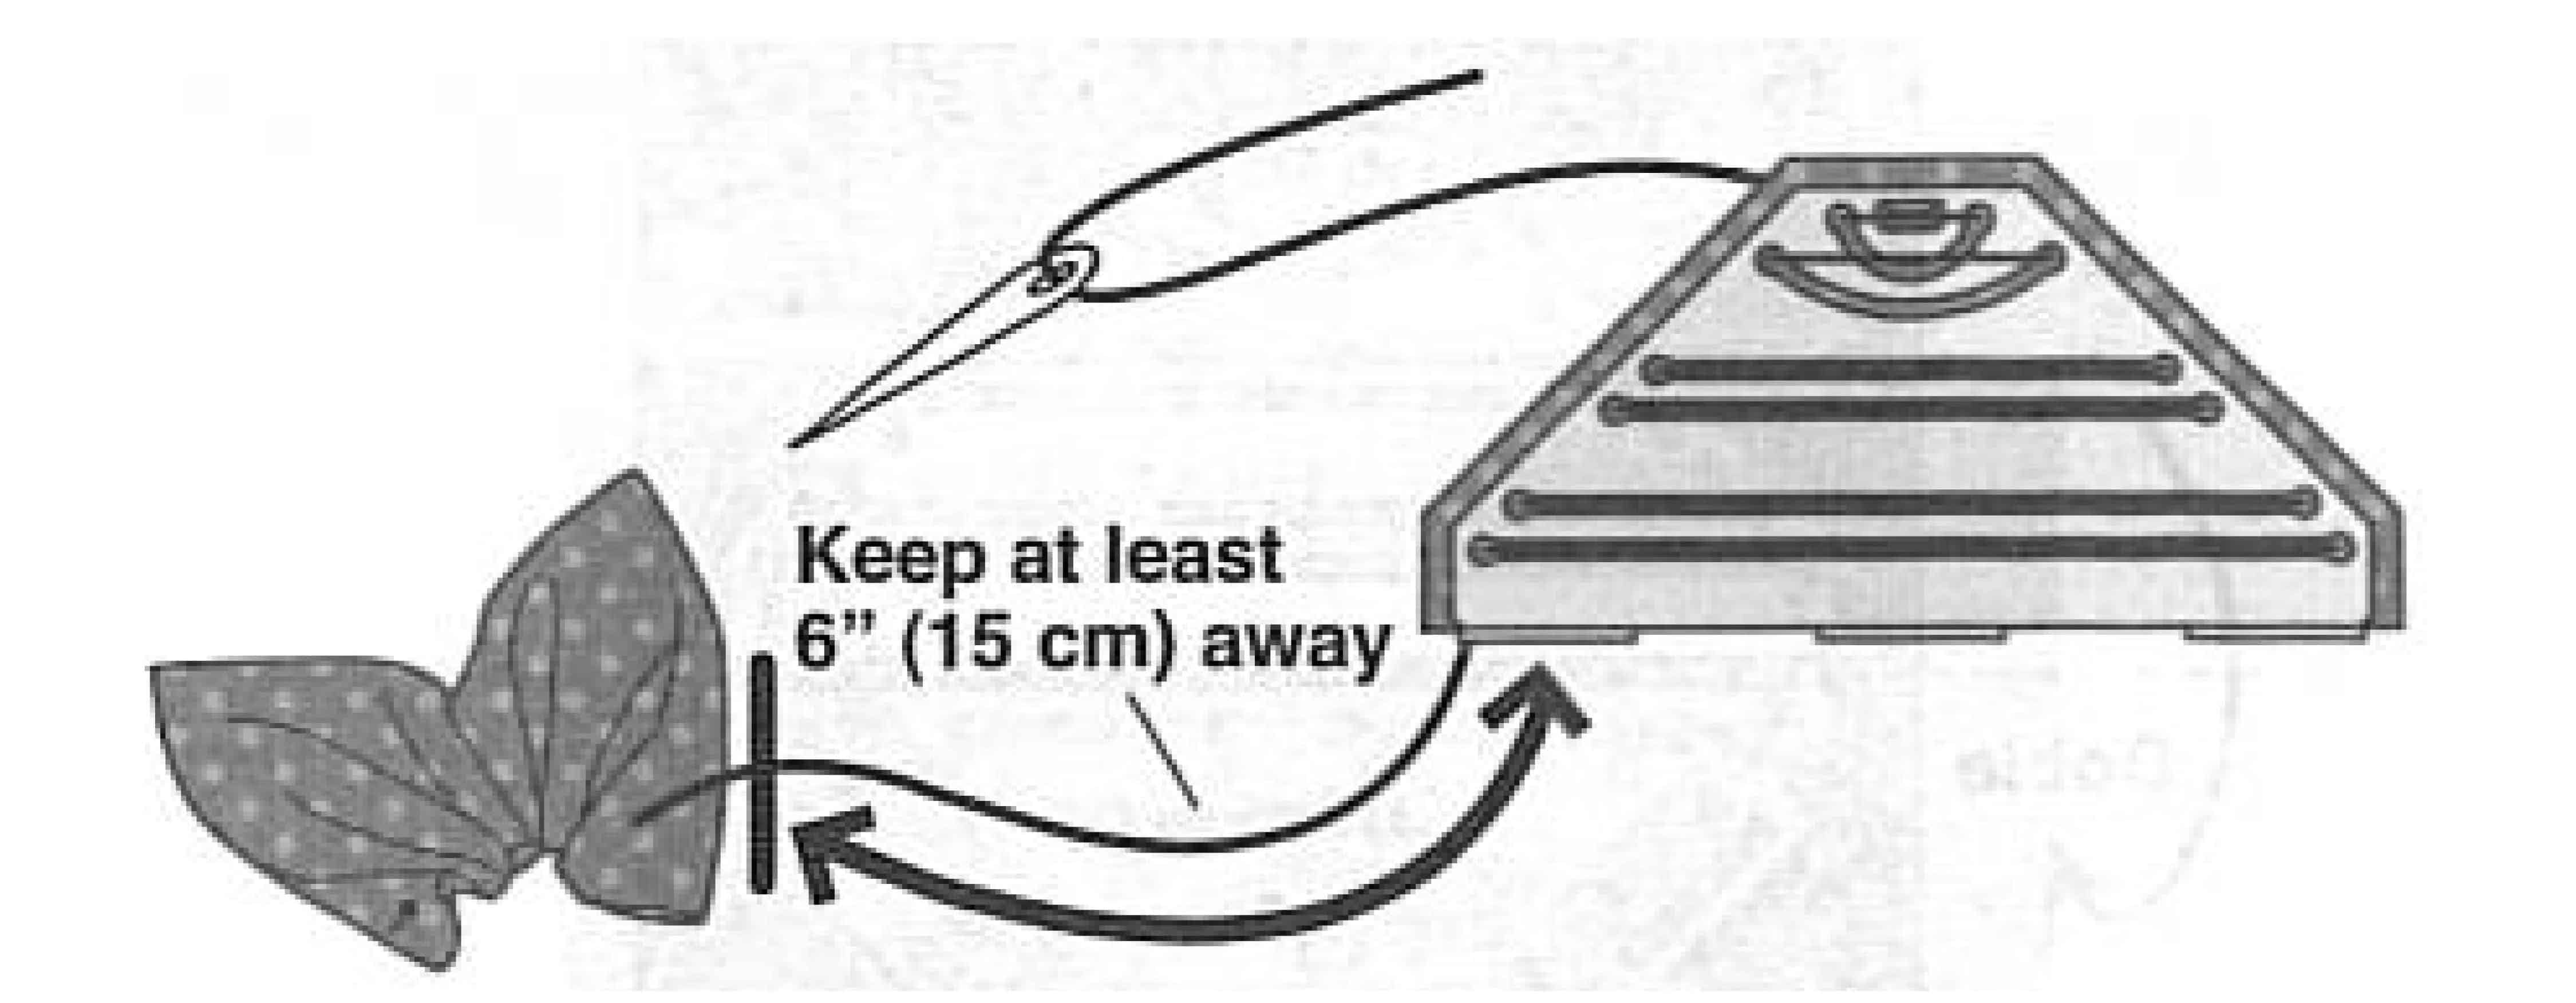
Step 4:
Remove plate, but do not remove the needle or cut the thread.
Step 5:
Pull thread and fold in half. Continue to pull even tighter to create main pleats and shape the petal.
Step 6:
Using the same needle and thread, repeat steps 1 to 5 to make remaining petals.
*To prevent the thread from entangling, keep completed petals at least 6″ (15cm) away from the plate.
*If the thread becomes entangled, remove needle, untangle the thread and start again.
*If you run out of thread, pull the thread to create pleats and knot the thread. Start with a new thread by pulling it through the base of the last petal and continue to create the next petal.
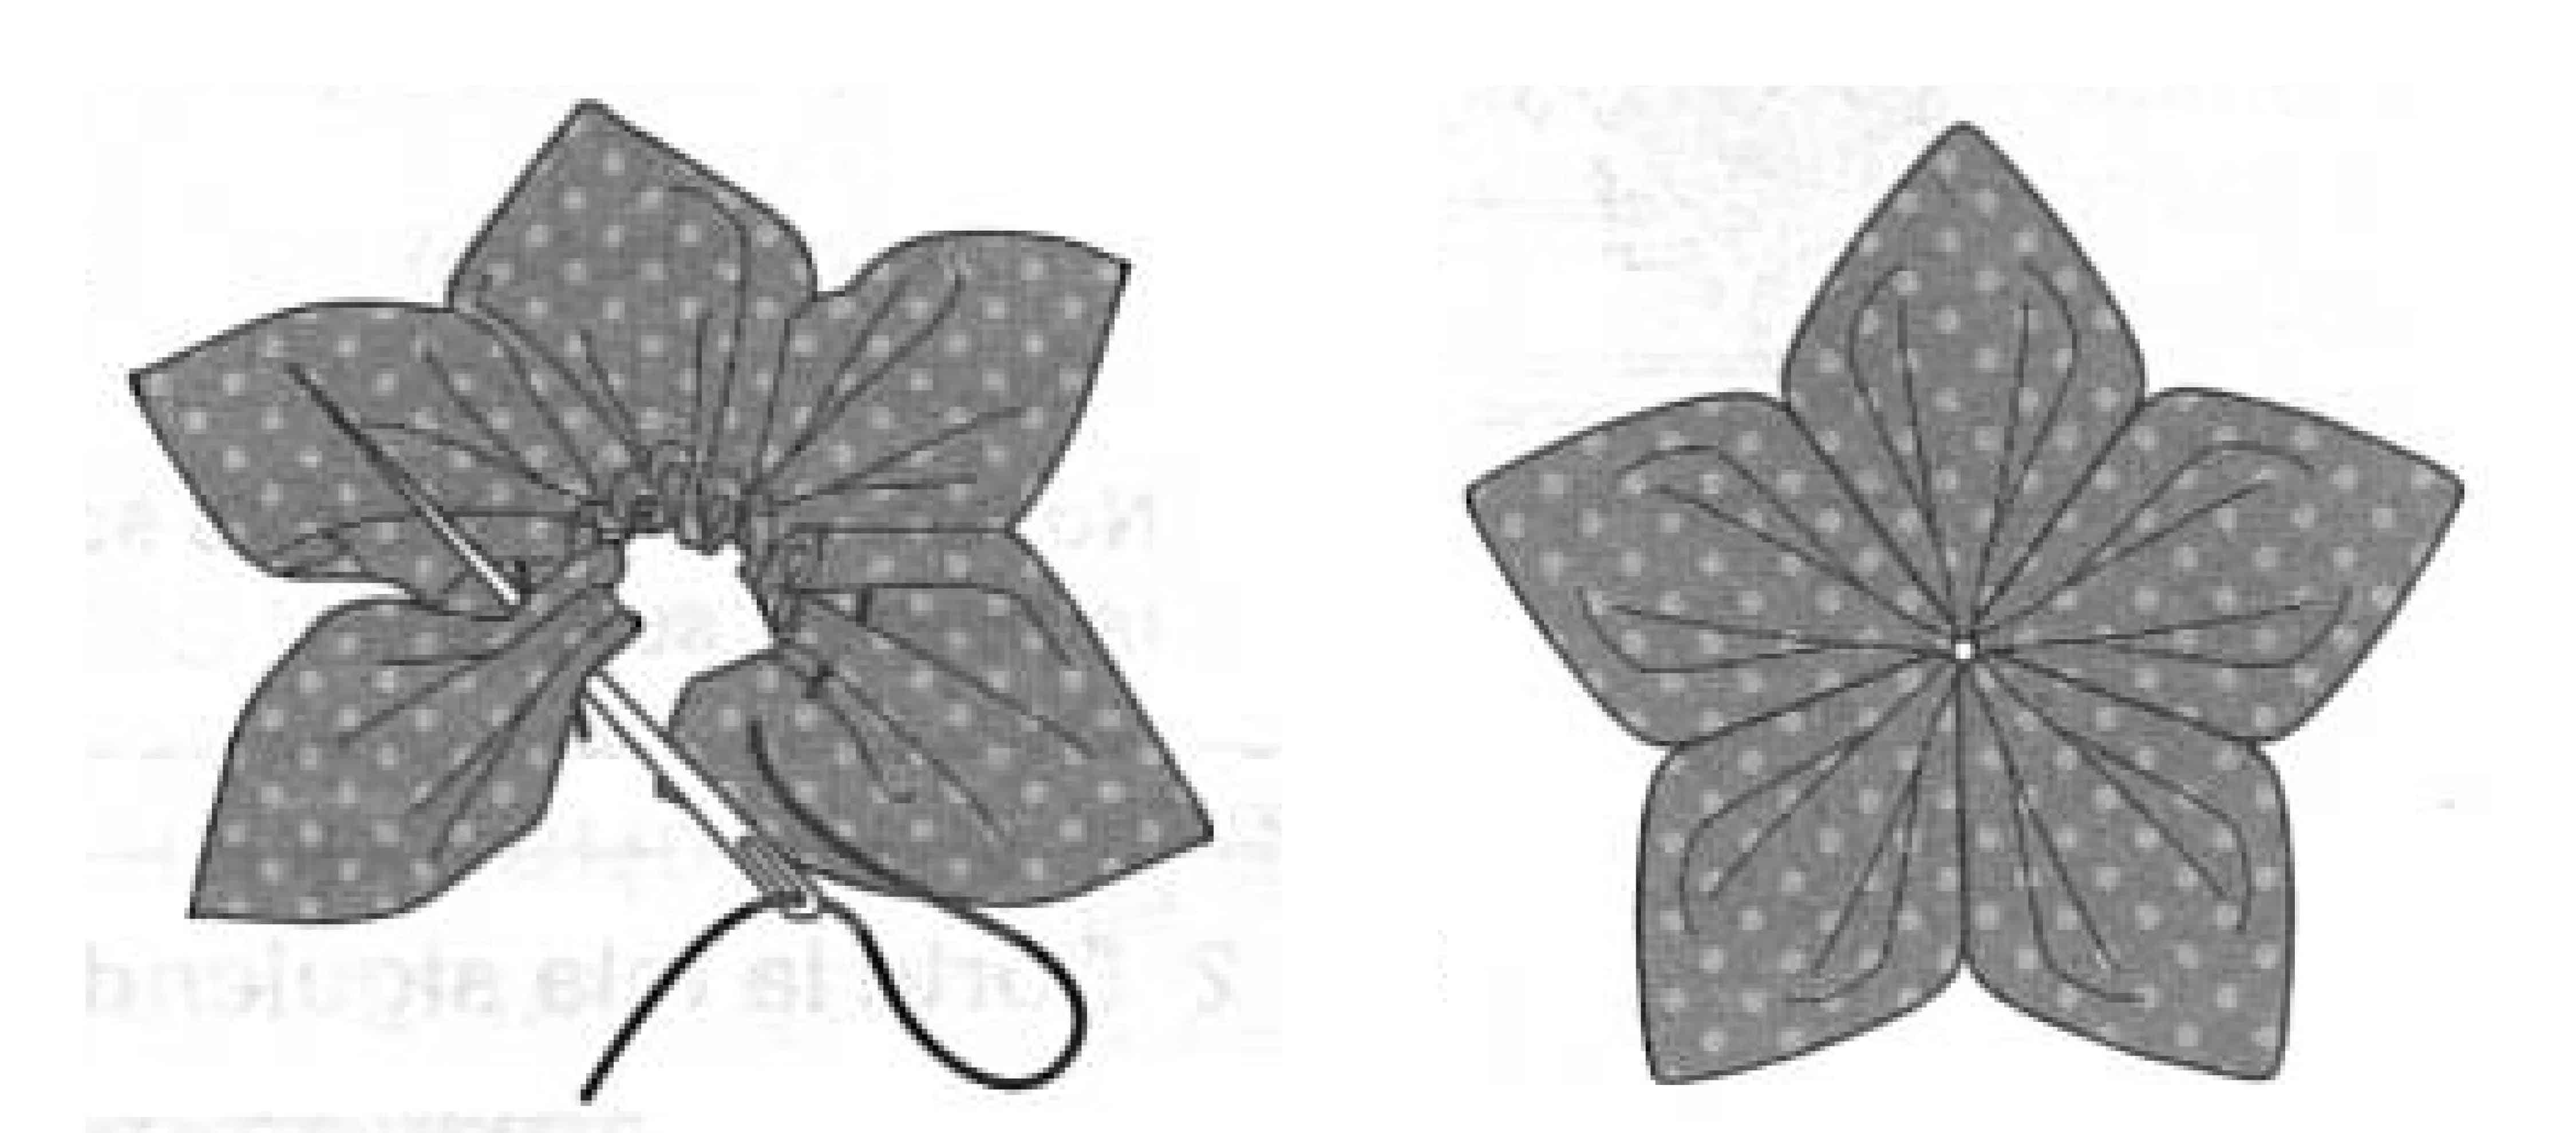
Step 7:
To finish your flower, pull the thread through the first petal, pull tightly to create pleats and seal with a knot.
Add a button or other accessory in the center to complete your flower. Once you are familiar with the technique, experiment with more petals per flower and try a variety of patterns and textures to make unique flower creations.
Watch a video tutorial here:
Stay connected with Clover on Facebook | Twitter | Instagram | Pinterest | YouTube | Ravelry
[mc4wp_form id=”11289″]