Pinwheel Bloom Earrings for Mother’s Day (crochet pattern)
As Mother’s Day approaches, I was inspired by the idea of creating a crochet design that embodies the beauty of a mother. More than just a piece of jewelry, crochet flower earrings are a representation of a mother’s love, perseverance, creativity, and uniqueness. Beyond its aesthetic appeal, this gorgeous ornament has many purposes. In addition to complementing clothing, these earrings convey feelings of kindness and originality and make thoughtful, endearing gifts! Additionally, these items showcase individual style by allowing wearers to choose hues that complement their personality 🙂 Because of their lightweight design (which guarantees comfort throughout the day), they are ideal for both formal events and informal get-togethers.
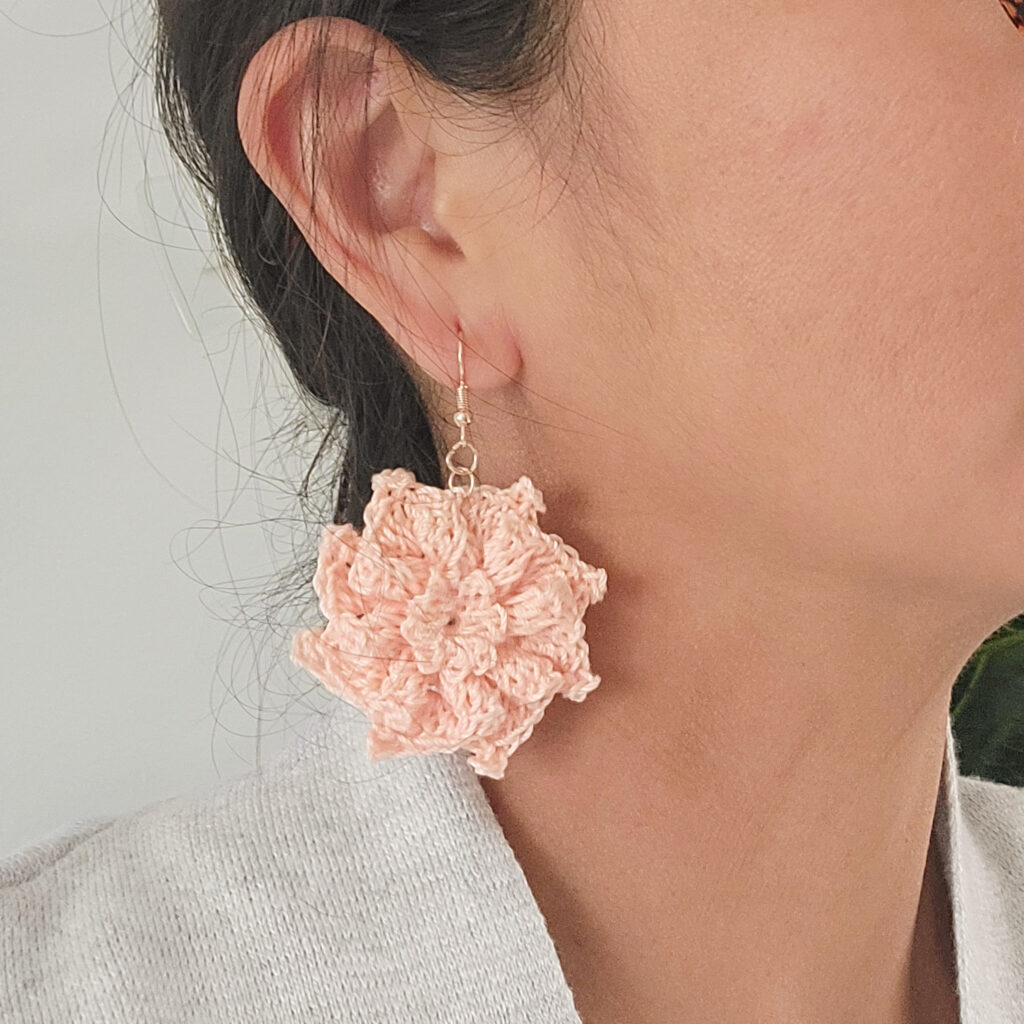
Presenting the Pinwheel Bloom Earrings! As previously said, the approaching Mother’s Day served as the inspiration for this crochet design. The pinwheel is a metaphor for a mother’s “roller-coaster ride-like” existence, and the bloom is a representation of the love she always has. In the midst of a mother’s hardships, sorrow, and happiness, LOVE is what keeps her going and helps her overcome all obstacles in life.
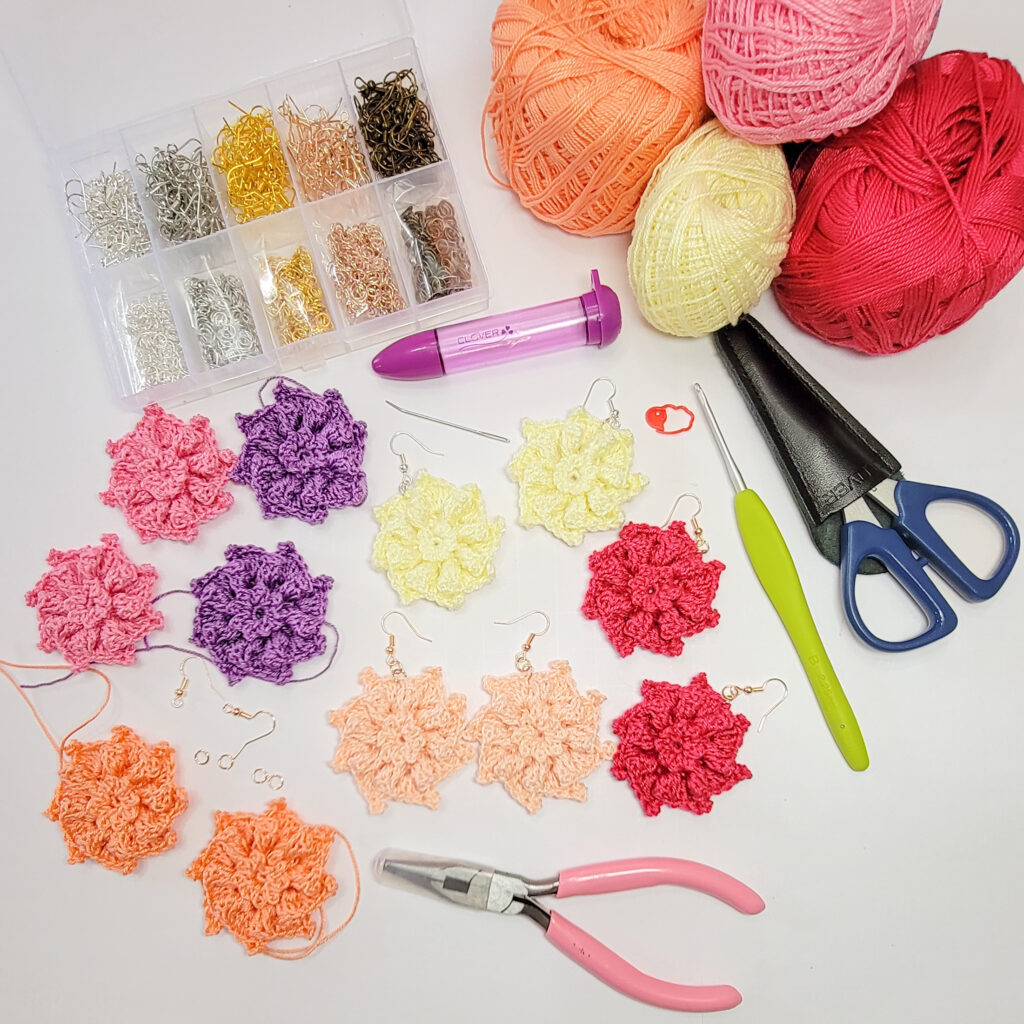
MATERIALS:
- Amour Crochet Hook B (2.25 mm)
- Clover Chibi Lace Darning Needle Set
- Patchwork Mini Scissors
- Clover Quick-Locking Stitch Marker
- Tape Measure
- earring hooks and jump rings
- pliers
- crochet cotton (mercerized) thread
NOTES:
- Read the pattern carefully before starting.
- I recommend using a stitch marker to mark the 1st stitch of each round. Remember to move the stitch marker as you progress.
- ( ) Work instructions within parentheses as many times as directed, or work a group of stitches all in the same stitch or space.
- * * Repeat instructions between asterisks as many times as directed or repeat at specified locations.
- To define the shape of your earrings, block them or use a fabric stiffener.
- Skill level: adventurous beginner to intermediate
- Gauge: too small to gauge. Feel free to use any size of crochet hook as the gauge for this pattern is not very crucial. The size of your earrings is determined by the size of your hook. The same thing applies to your preferred yarn or thread when crocheting your earrings.
- Finished measurement: about 2” (height) x 2” (width)
ABBREVIATIONS:
- blo: back loop only
- ch(s): chain(s)
- dc: double crochet
- flo: front loop only
- hdc: half double crochet
- mr: magic ring
- rep: repeat
- sc: single crochet
- sk: skip
- slst(s): slip stitch(es)
- st(s): stitch(es)
- tc: treble crochet
- p: picot—ch3, then slip stitch in the top of the treble crochet st
- pc: popcorn crochet stitch—work 5 double crochets (dc) into the same stitch, remove the hook, insert it into the first dc of the set, and pull the last loop through the first dc stitch, then ch1 to secure.
- petal – work 2 double crochets (dc), 1 treble crochet (tc), picot (p), 2 double crochets (dc) into the same specified stitch.
PINWHEEL BLOOM EARRING PATTERN:
Make 2.
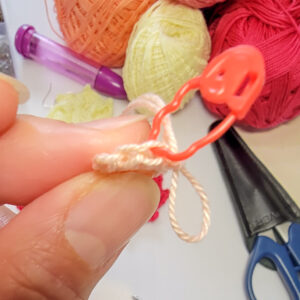
Start with a mr.
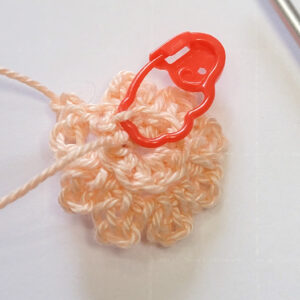
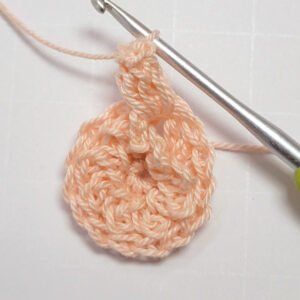
- Round 1: Ch1 (does not count as a st throughout), 8SC into the ring, pm in 1st st, and pull tight the yarn tail to close the ring. Slst in 1st sc st to close the round. 8 sc sts
- Round 2: Stitches are worked in the flo. PM in 1st st through the blo so you won’t miss it for next round. Ch1, (slst, ch3) in each st around. Slst in 1st slst st to close the round. 8 slsts, 8 loops of ch-3
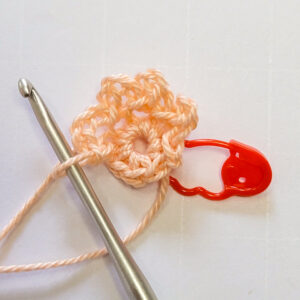
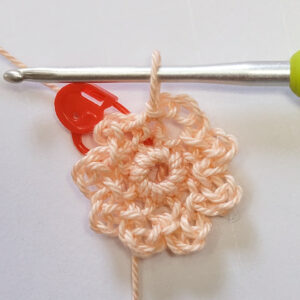
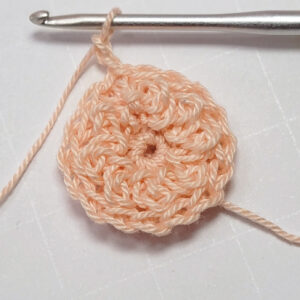
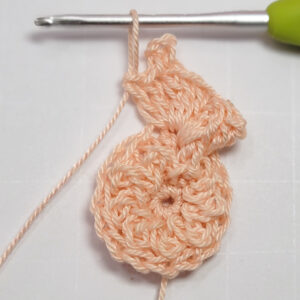
- Round 3: Stitches are worked in the blo of Round 1. Ch2 (does not count as a st throughout), 2dc in each st around. Slst in 1st dc st to close the round. 16 dc sts
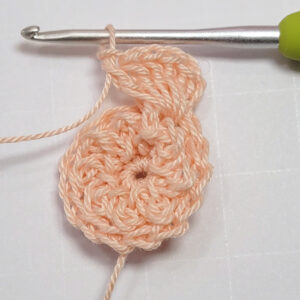
- Round 4: Ch2, 1pc around the fp of the 1st st, 1petal in next st, *1pc around the fp of the next st, 1petal in next st*; rep from * to * around. Slst in the 1st pc st to close the round. 8 pc sts, 8 petals

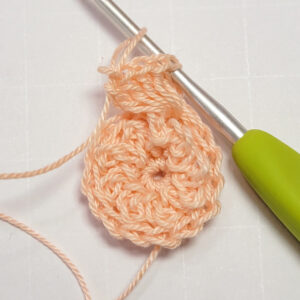
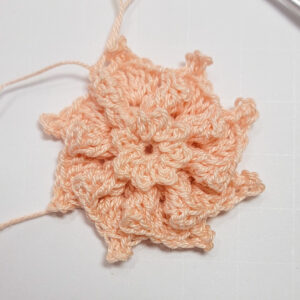
Fasten off and weave in all ends. To define the shape of your earrings, block them or use a fabric stiffener.
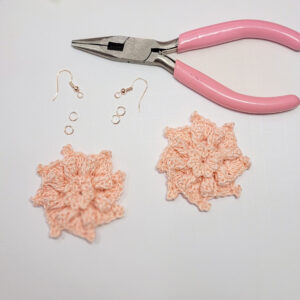
ASSEMBLY:
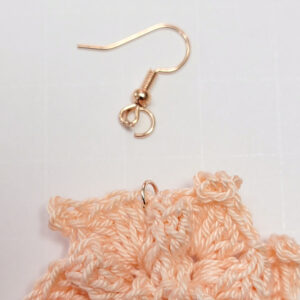
Use pliers to open the loop of the earring hook loop base and the jump ring slightly. Attach the earring jump ring in between the petal sts and then the hook loop. With the use of pliers, close the hook loop base and jump ring securely.
You’re finished! I hope you love your new earrings!
It’s time to show off your gorgeous handcrafted earrings!
Please don’t hesitate to contact me with questions regarding this pattern. You may also reach out to me on Instagram (@stringsandcuddles)!
If you want to keep up with me, Elisa, on social media for other fun projects, follow me on social media: Instagram | Pinterest | Facebook | Blog | Ravelry
If you want to keep up with all things Clover, follow us on: Facebook | Twitter | Instagram | Pinterest | YouTube | Ravelry