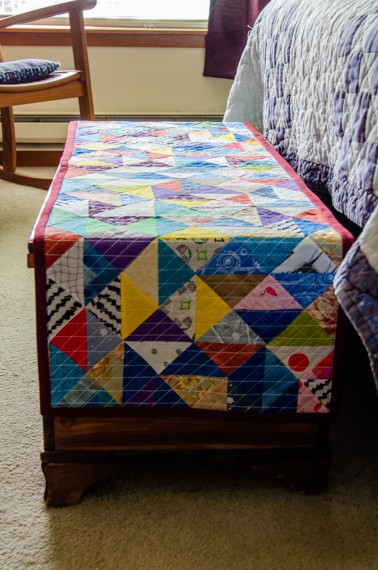
Confetti Quilt Bed Runner
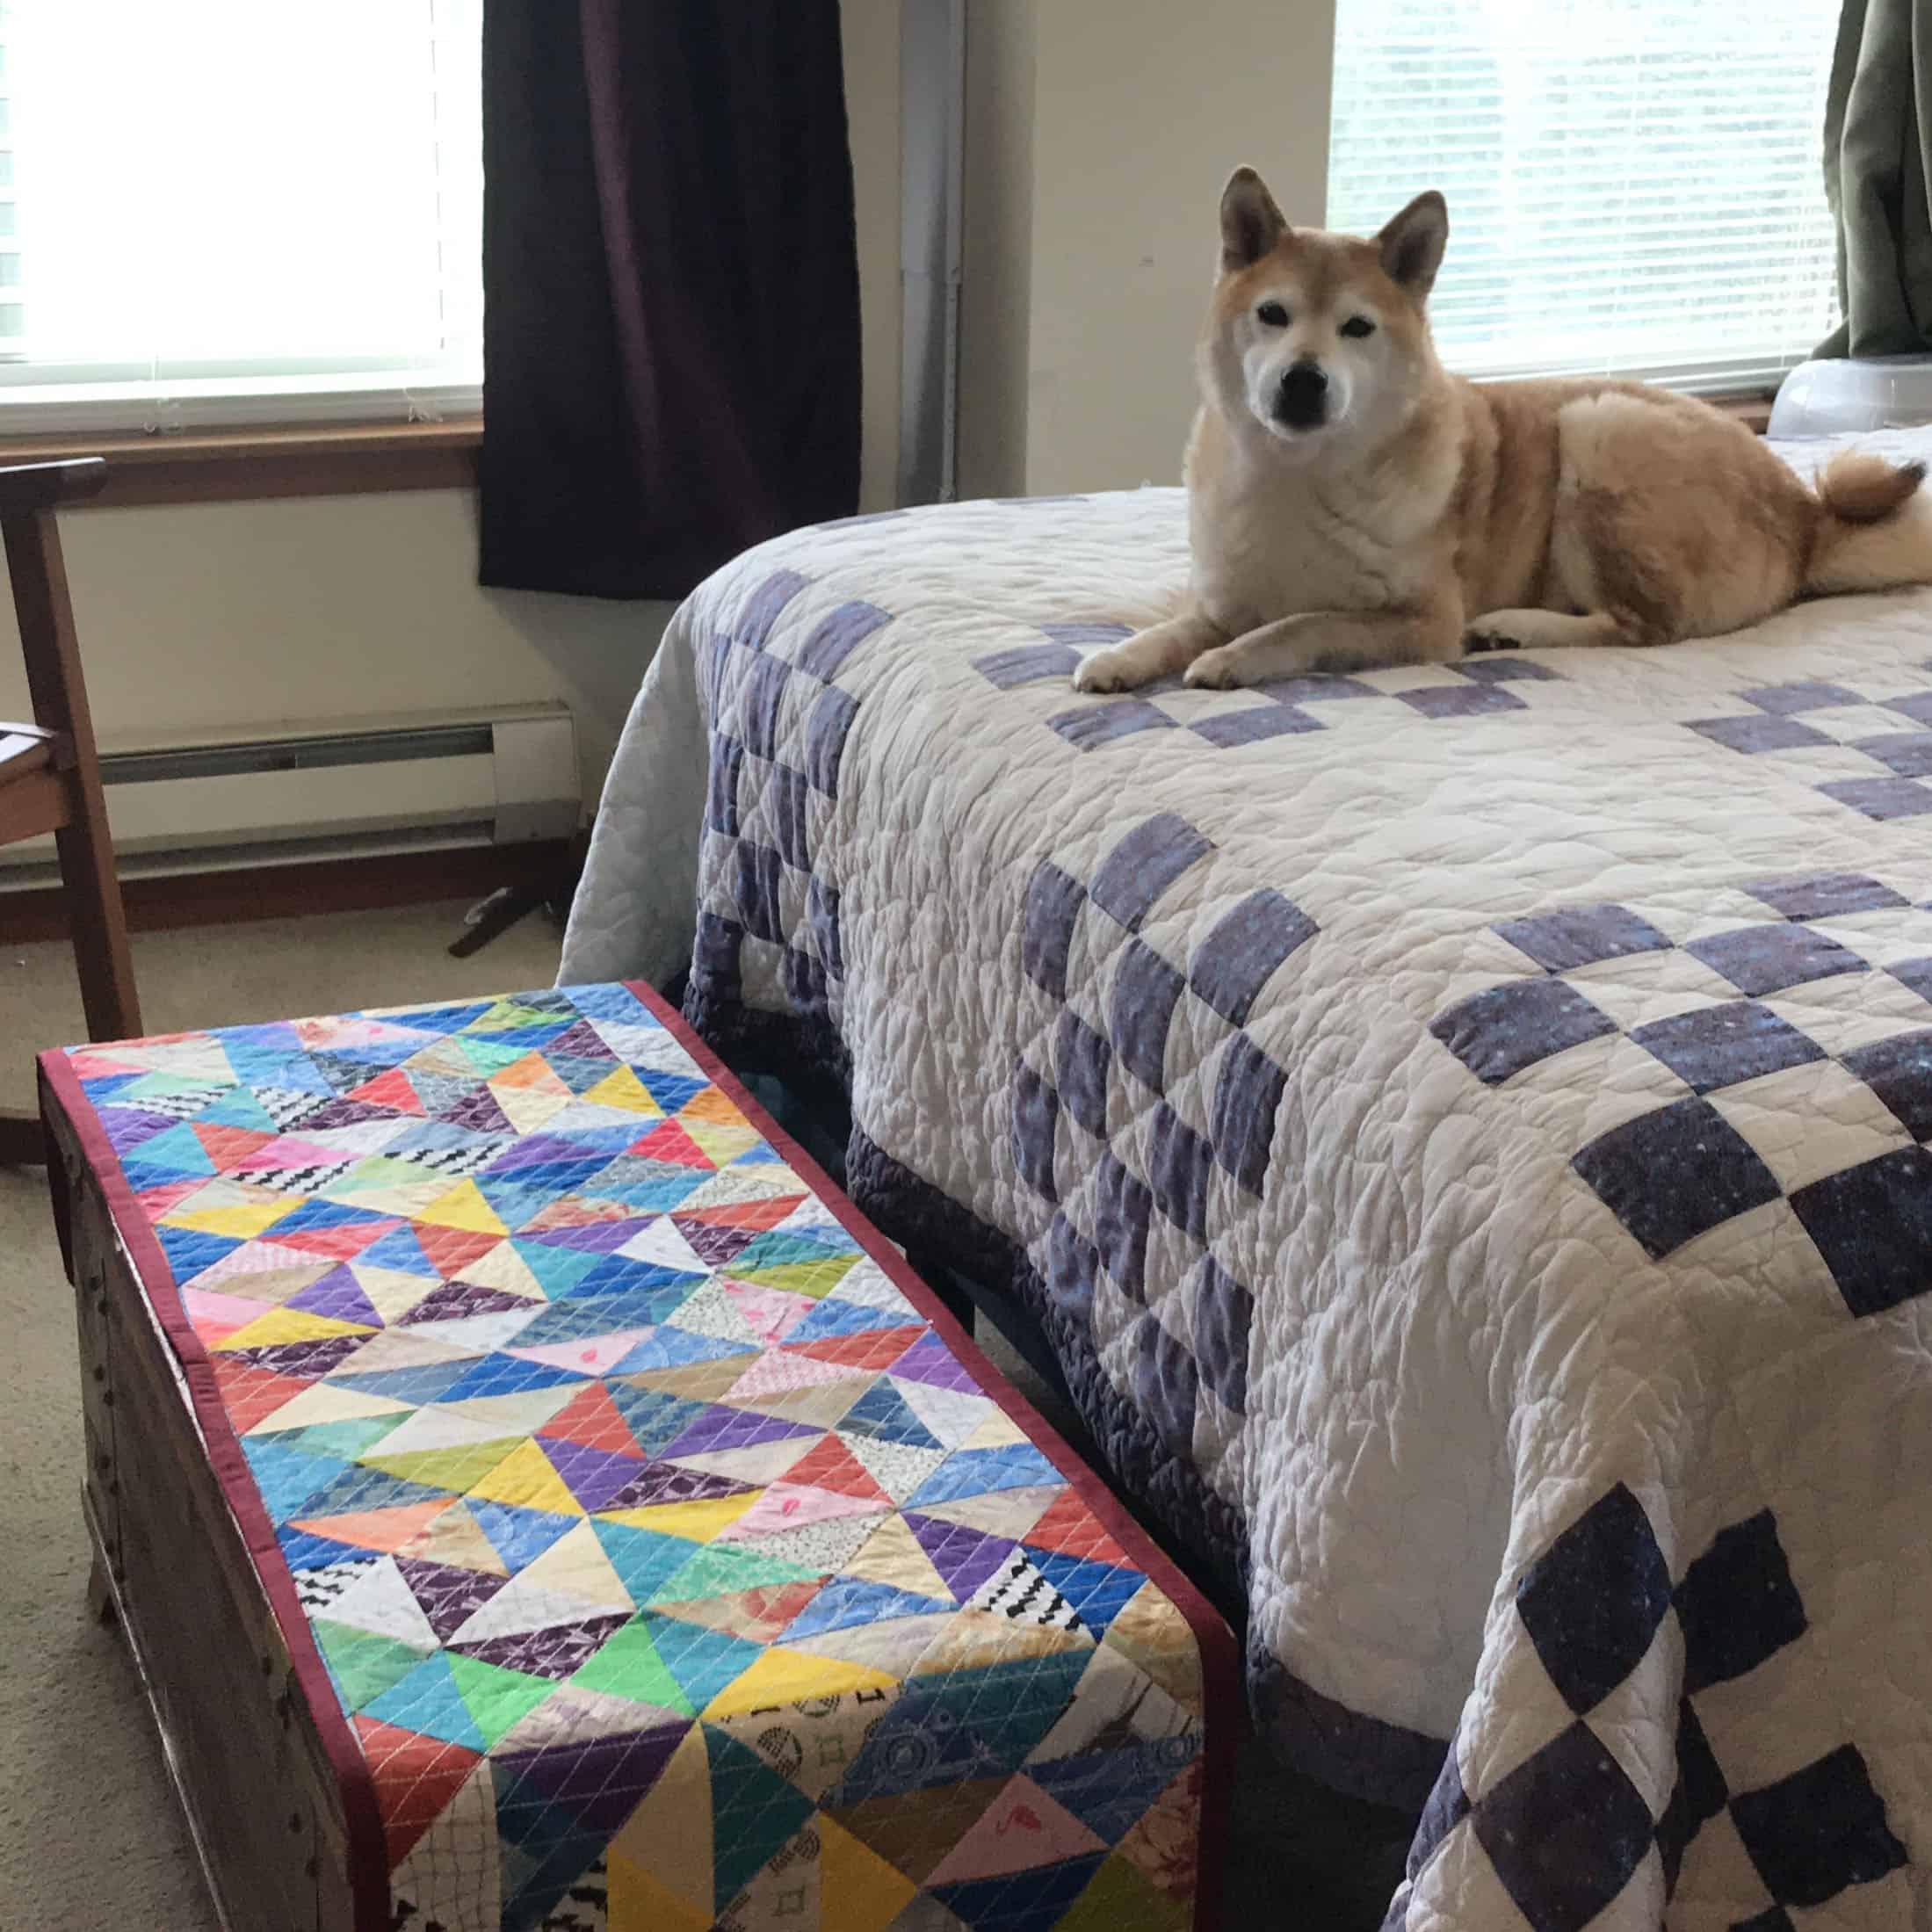
That old cedar chest at the foot of the bed… it’s beautiful and we love it, but there is an issue. We live with three medium size dogs that use it as a step to get up and down safely from our bed.
When there is a towel or a pair of jeans laying on it all is fine, but when it’s free and clear the Shibakidz’s nails slide all over the smooth wood making it more of a hazard than a piece of art.
What to do?
We put our thinking caps on and decided to make a runner that would allow the Shibas to access the bed easier and would look much more thought out than a layer of tossed clothing (c’mon, we all do it…).
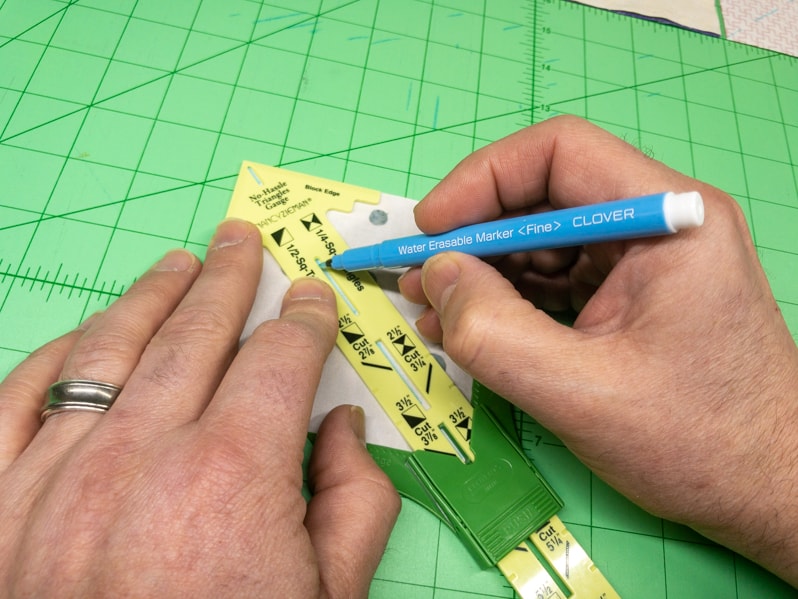
As we started to plan the project out we knew we wanted a lot of color, but no decernable “pattern” and immediately thought of using the No-Hassle Triangle Gauge. We had just finished a small set of project for Clover using this tool and loved how quick it made the process.
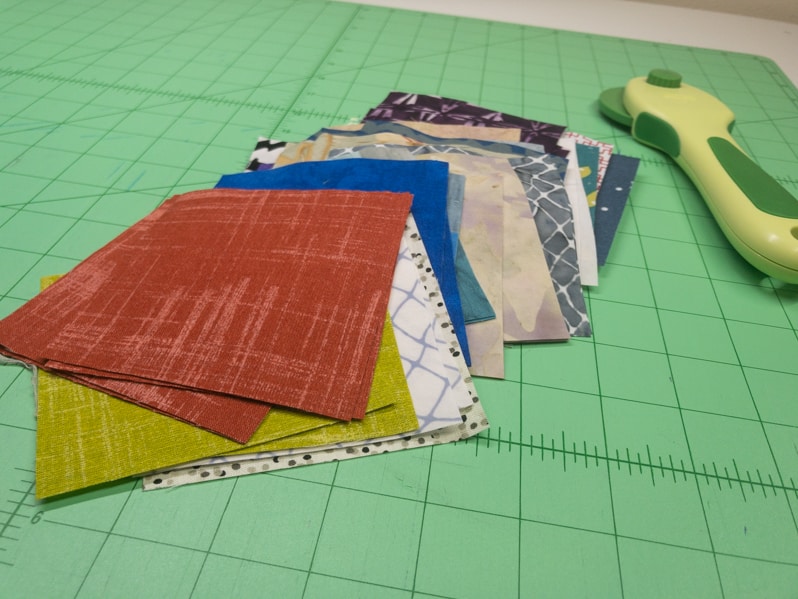
And if you’ve seen some of our other sewing, you know we love scrappy fabrics. Using half triangle blocks made from lots of scrap fabric with a lot of contrast would give us something akin to a parade route covered in confetti. You KNOW the Shibaguyz love a parade! What could be better than having a parade in your bedroom? And the Shibakidz love being able to get in and out of bed without slipping and sliding on that ol’ cedar chest!
What you’ll need:
Notions and Tools
- No-Hassle Triangle Gauge – Art. No 9579
- Wonder Clips – Art. No 3156
- Quilting Pins (Fine) – Art. No 2509
- Sewing machine – ours in the video is the BERNINA 790+
- Iron – we are using a Maven 120IS Home Ironing System from Reliable Corporation
Thread
- Sewing Thread – Aurifil 50wt cotton thread, color #2460 (or color to match your fabric choices)
- Quilting Thread – Aurifil 12wt cotton thread, color #2024 (or color to match your fabric choices)
Finished Dimensions
60″ x 18″
Fabric
Quilt Top
3+ yards worth of any cotton fabric. That said, the purpose of this runner is to use any odds and ends on hand or a variety of fat quarters with high contrast. Don’t feel like you need to dig out exact amounts of any fabric. Scrappy is best for a Confetti Quilt style project like this.
Suggested:
Backing Fabric
One old flannel sheet OR 2 yards of flannel or heavy fabric.
Binding Fabric
3/4 Yard Cotton Fabric
Suggested:
- Michael Miller Fabrics – Cotton Couture (color SC5333-BURG-D)
Safety Lining
We placed a layer of non-slip rug pad on the cedar chest to make sure the runner doesn’t slip around when the Shibakidz jump across it.
Cuts
Squares
130, 3 1/2″ finished half triangle squares of varying colors and patterns. The more colors the better. Follow the directions included with your No-Hassle Triangle Gauge for making the half triangle squares and check out our associated video for a visual walk through.
Backing
Flannel (or other fabric) 62″ x 38″
Binding
Cut strips totaling 175″ x 4″
Instructions
Make the Squares
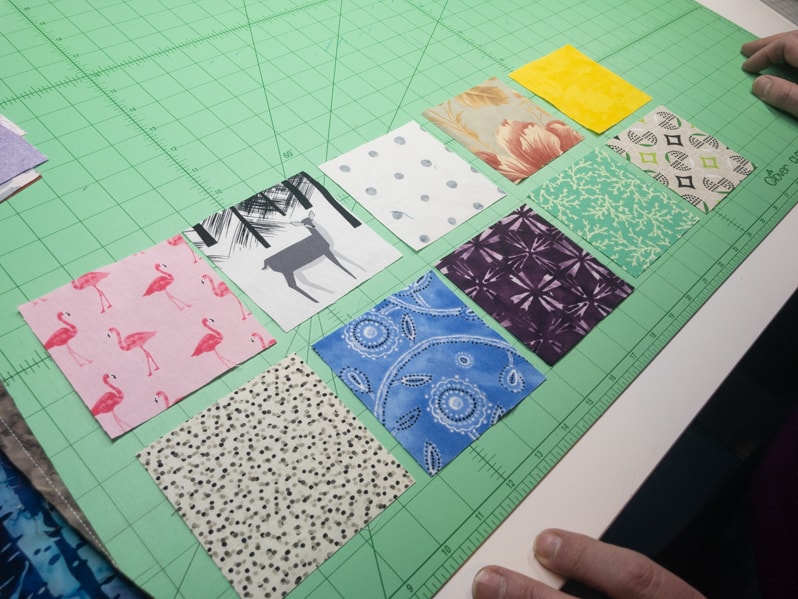
Make 130, 3 1/2″ finished half triangle squares using the Clover No-Hassle Triangle Gauge. Select and combine fabrics that are high contrast (light and dark hue, primary and secondary colors, prints and solids, etc). The more contrast the more confetti-like your finished quilt will appear.
Placement
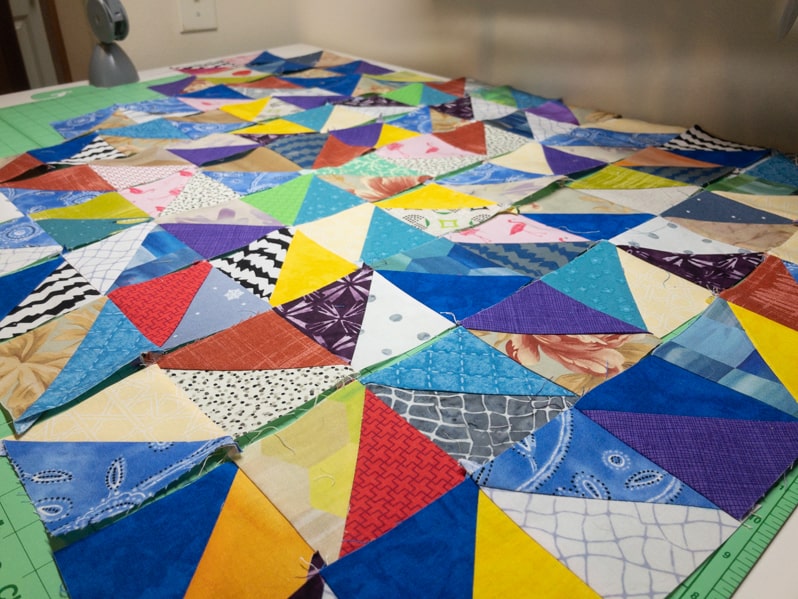
On a long table or bed lay out your finished half triangle blocks as shown in the Layout and Sewing diagram.
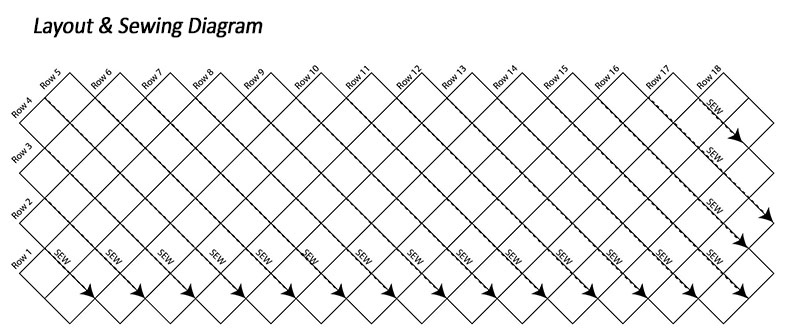
Play with the placement trying to keep the colors and patterns random. There are no rules here other than the square edges be at a 45° angle.
Tip: The more you try to make something look random, the more order you will see in the pattern. We actually tossed all of the half-triangle squares onto our cutting table and started lining them up without really paying any attention to them.
Sew the Top
- Sew the individual squares together into rows as shown in the Layout and Sewing Diagram using a 1/4″ seam allowance.
- Iron seams in alternating directions for each row if you are going to spin your seams or, to reduce bulk, iron flat.
- Trim any overhanging edges (dog ears) and square up the squares and rows as needed.
- Pin 2 rows together and sew using a 1/4″ seam allowance.
Tip: When pinning, to keep your corners meeting perfectly, place one pin on each sides of every seam. This will help the centers meet up exactly.
- Sew the rows as marked on the Layout and Sewing diagram… Row 1 to Row 2, Row 3 to Row 4, etc. Then going back and sewing those strips together.
- Iron all seams flat.

The quilt top is DONE! WOOHOO
Add the Middle Layer and Backing
- Place the quilt top Right Side down on a large flat surface.
- Fold your cut flannel in half lengthwise, Right Side out, and center on the quilt top. This will give you a middle layer and a bottom layer.
- Pin, thread, or glue baste the middle/backing layers to the top.
Tip: A quick spray of washable adhesive will assist in keeping these layers from moving around as you quilt.
Quilt
We have chosen to quilt in straight vertical lines 3/4″ apart across the quilt top; then straight lines at a 45° angle (matching the seams of the rows) also 3/4″ apart using a heavier 12 weight thread. Use whatever quilting pattern you prefer.
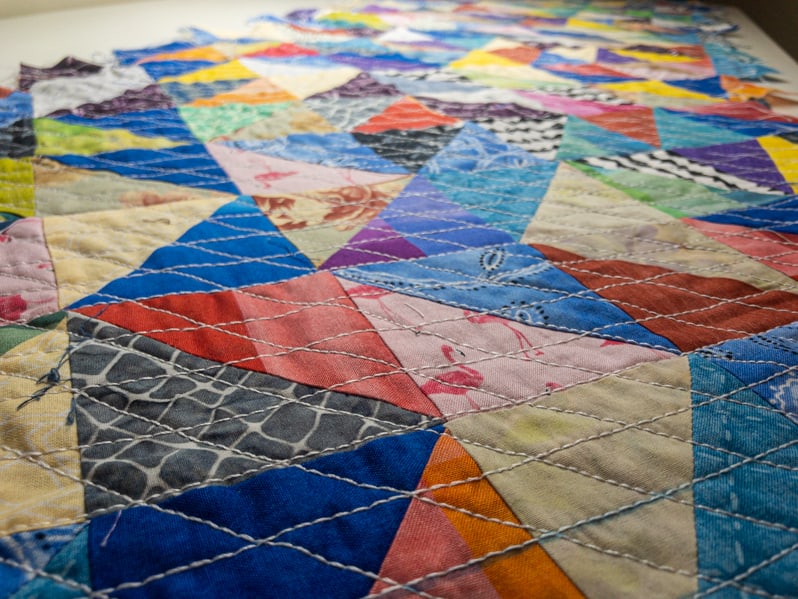
Tip: A heavier needle and a Walking Foot or the BERNINA’s Dual Feed option will assist in keeping the layers from shifting. We used a jeans needle to accommodate the larger thread and the dense fabric.
Trim
Using a quilting ruler or other straight edge trim off the outer points of the quilt 1/4″ below the last sewn block’s seam on each row as shown in the Trimmed Quilt diagram.
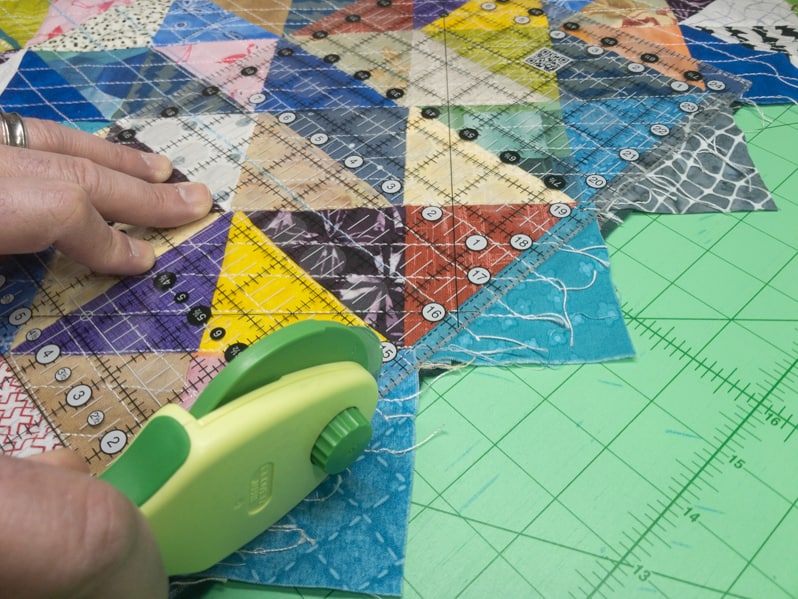
Because the No-Hassle Triangle Gauge adds on a 1/4″ seam allowance on all sides you will see there is a 1/4” overhang making it easy to line up your ruler.
Bind
- Fold your binding in half, Right Side out. Beginning in the middle of one side on the Right Side of the quilt, leaving about 6 inches unsewn, begin sewing a 1/4″ seam.

Mitered Corner
- As shown in the Mitered Corner diagram, when you get to a corner stop sewing 1/4″ from the edge.
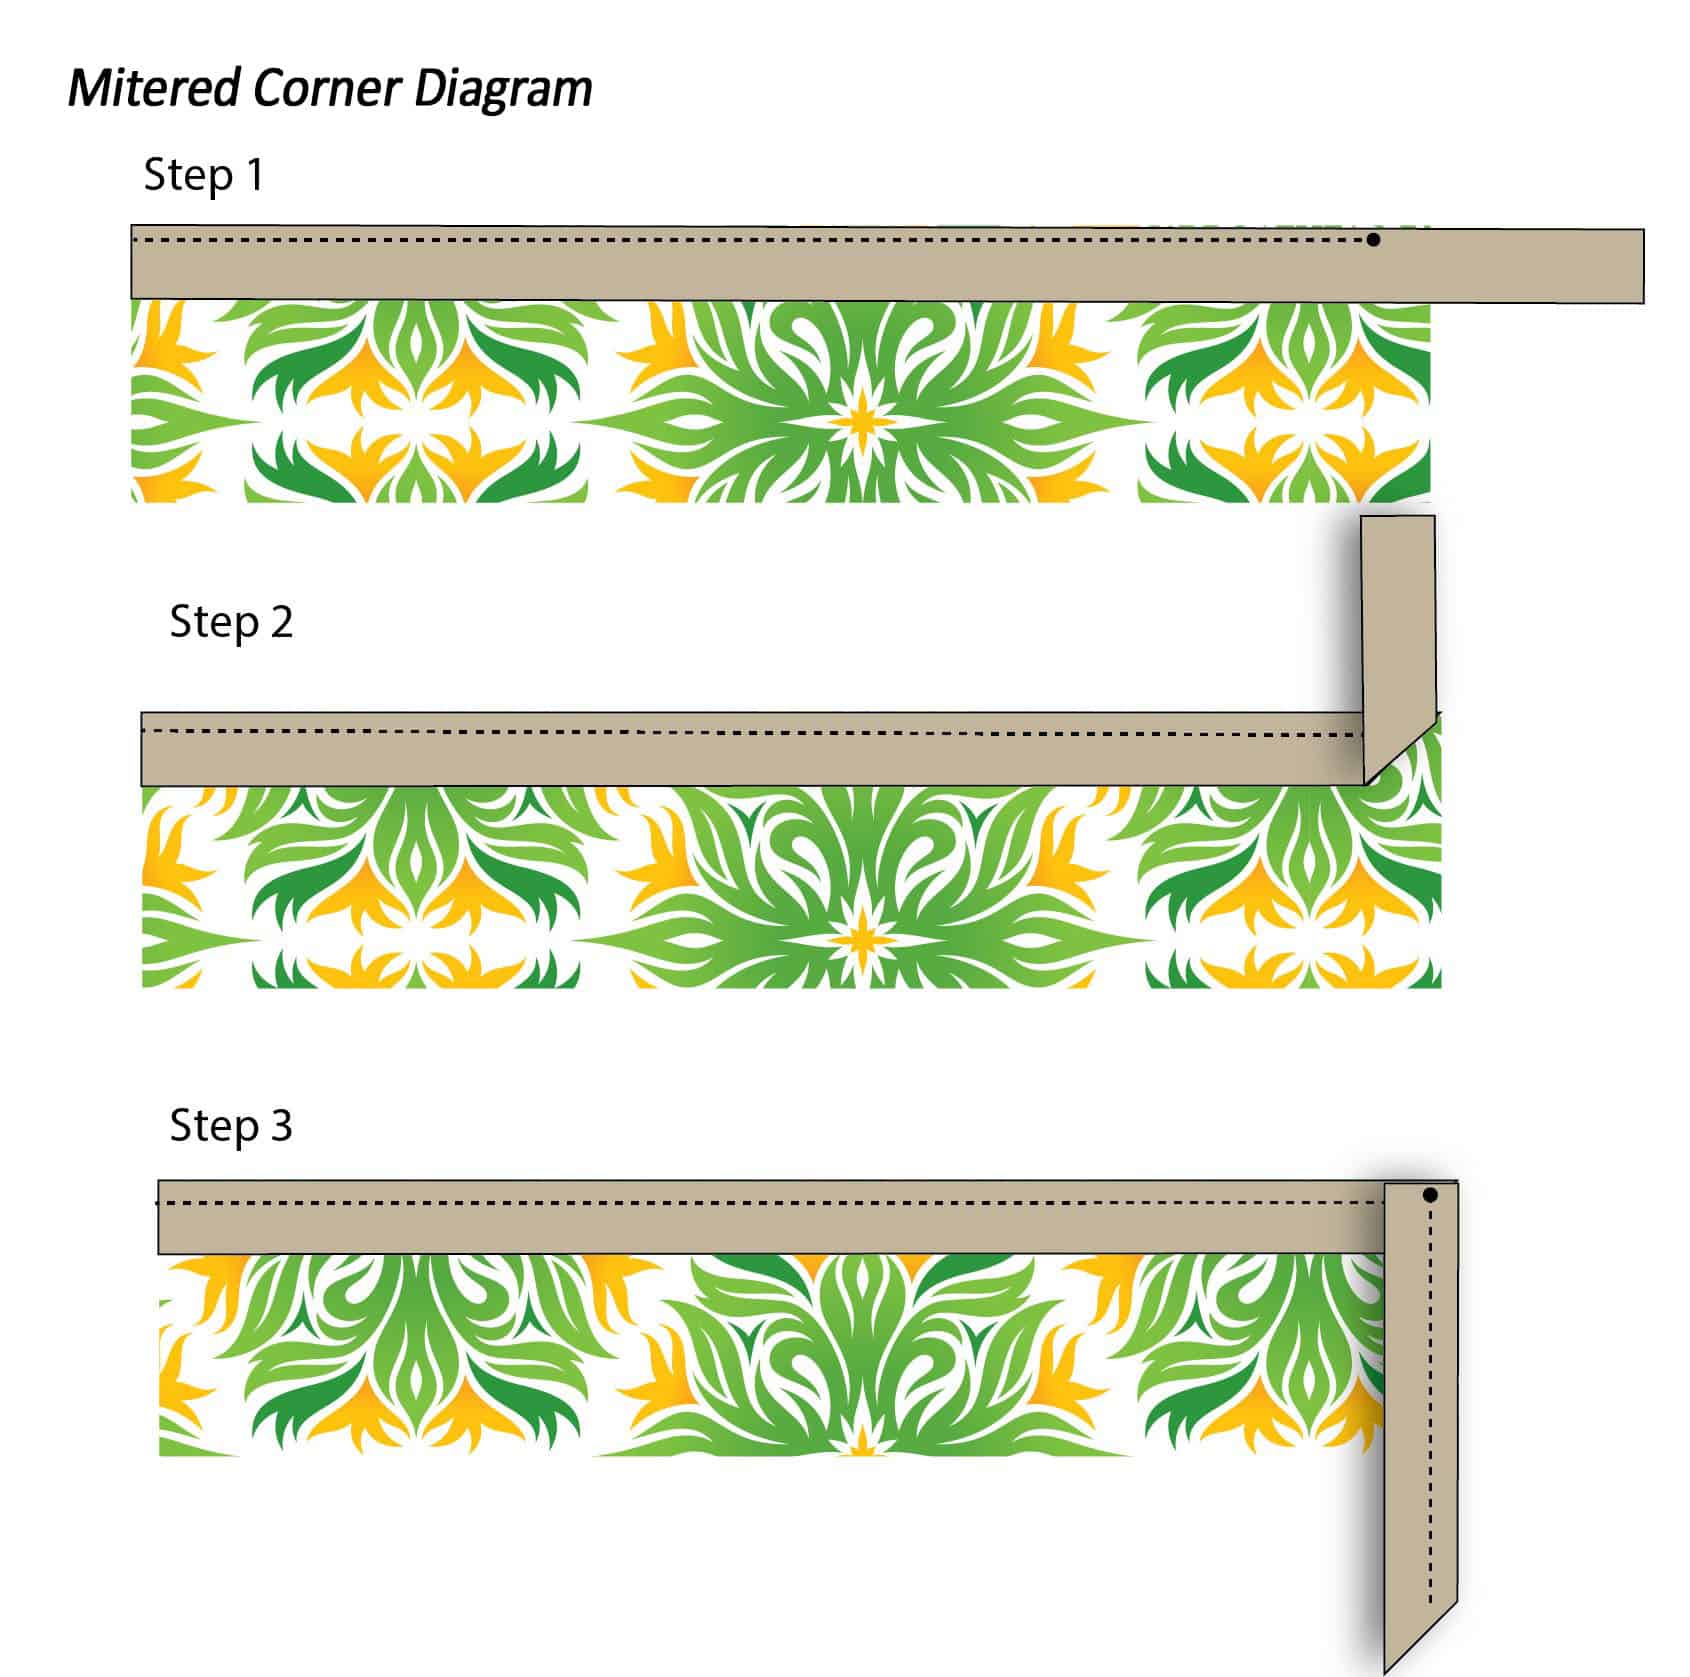
- Fold the binding strip up at a 45° angle.
- Fold back down again matching the folded edge with the next edge of the quilt.
- Continue sewing.
- Sew binding all the way around until you are 6″ from where you started.
- Lay the binding on top of your beginning tail overlapping 4″ and cut.
- Open both sides of the binding and lay Right Sides together at a 90° angle.
- Pin together and mark a line from corner to corner.
- Sew along that line and trim the excess.
- Fold in half again and finish sewing the binding along the Right Side of the quilt.
- Fold the binding to the Wrong Side of the quilt overlapping the sewn line from the binding by 1/8″.
- Secure using pins or Wonder Clips.
- Turn over so the Right Side is facing you and sew a line around the edge of the binding as close to the binding as possible making sure that as you sew you catch the binding on the back side of the quilt.
Tip: An Edging Foot or Blind Hem foot will make this a breeze
Your runner is complete!
Use it as a runner for a cedar chest or a window seat or as a bed runner or, ya know… wherever you need a little confetti in your life!
Watch the video tutorial here:
Find the Shibaguyz on Facebook | Twitter | Instagram | Pinterest
Stay connected with Clover on Facebook | Twitter | Instagram | Pinterest | YouTube | Ravelry
[mc4wp_form id=”11289″]