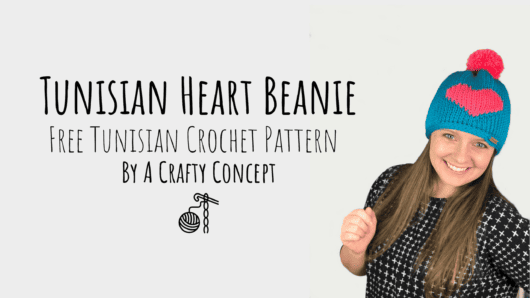
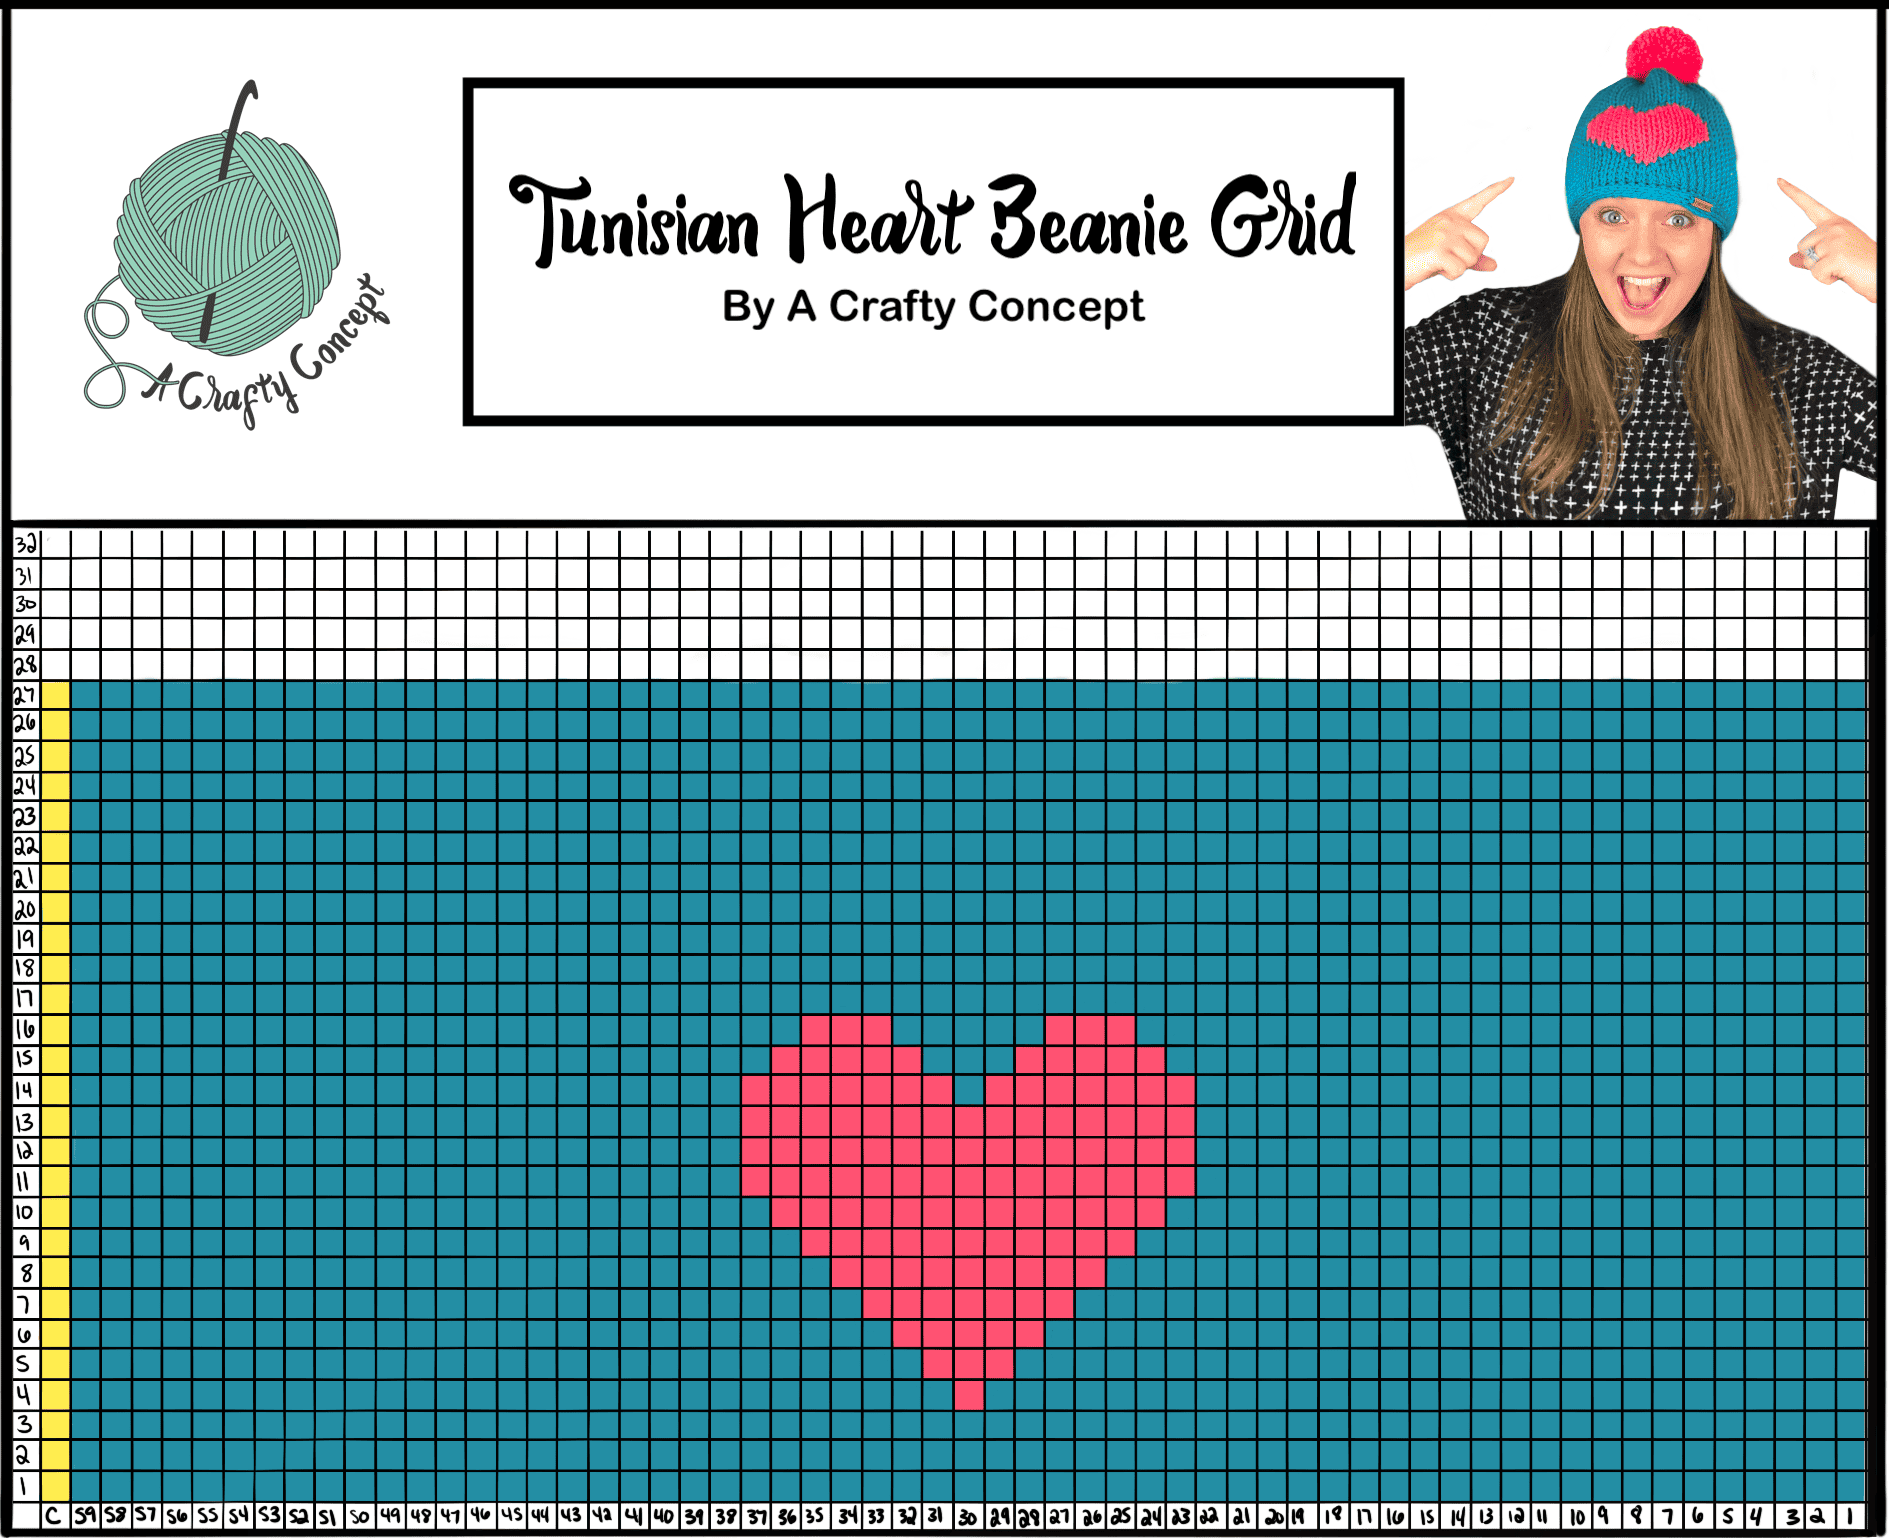
Tunisian Heart Beanie by A Crafty Concept
By Ashley Stallsworth | A Crafty Concept
Hello creative people! My name is Ashley and I am the maker of all things behind A Crafty Concept. I started my small business journey in July of 2016 and have slowly watched it turn from selling original crochet amigurumi toys designing and selling crochet patterns and teaching other makers how to start and run small businesses of their own. I am a full time Maker, Mommy and Wife and I love every second of it!
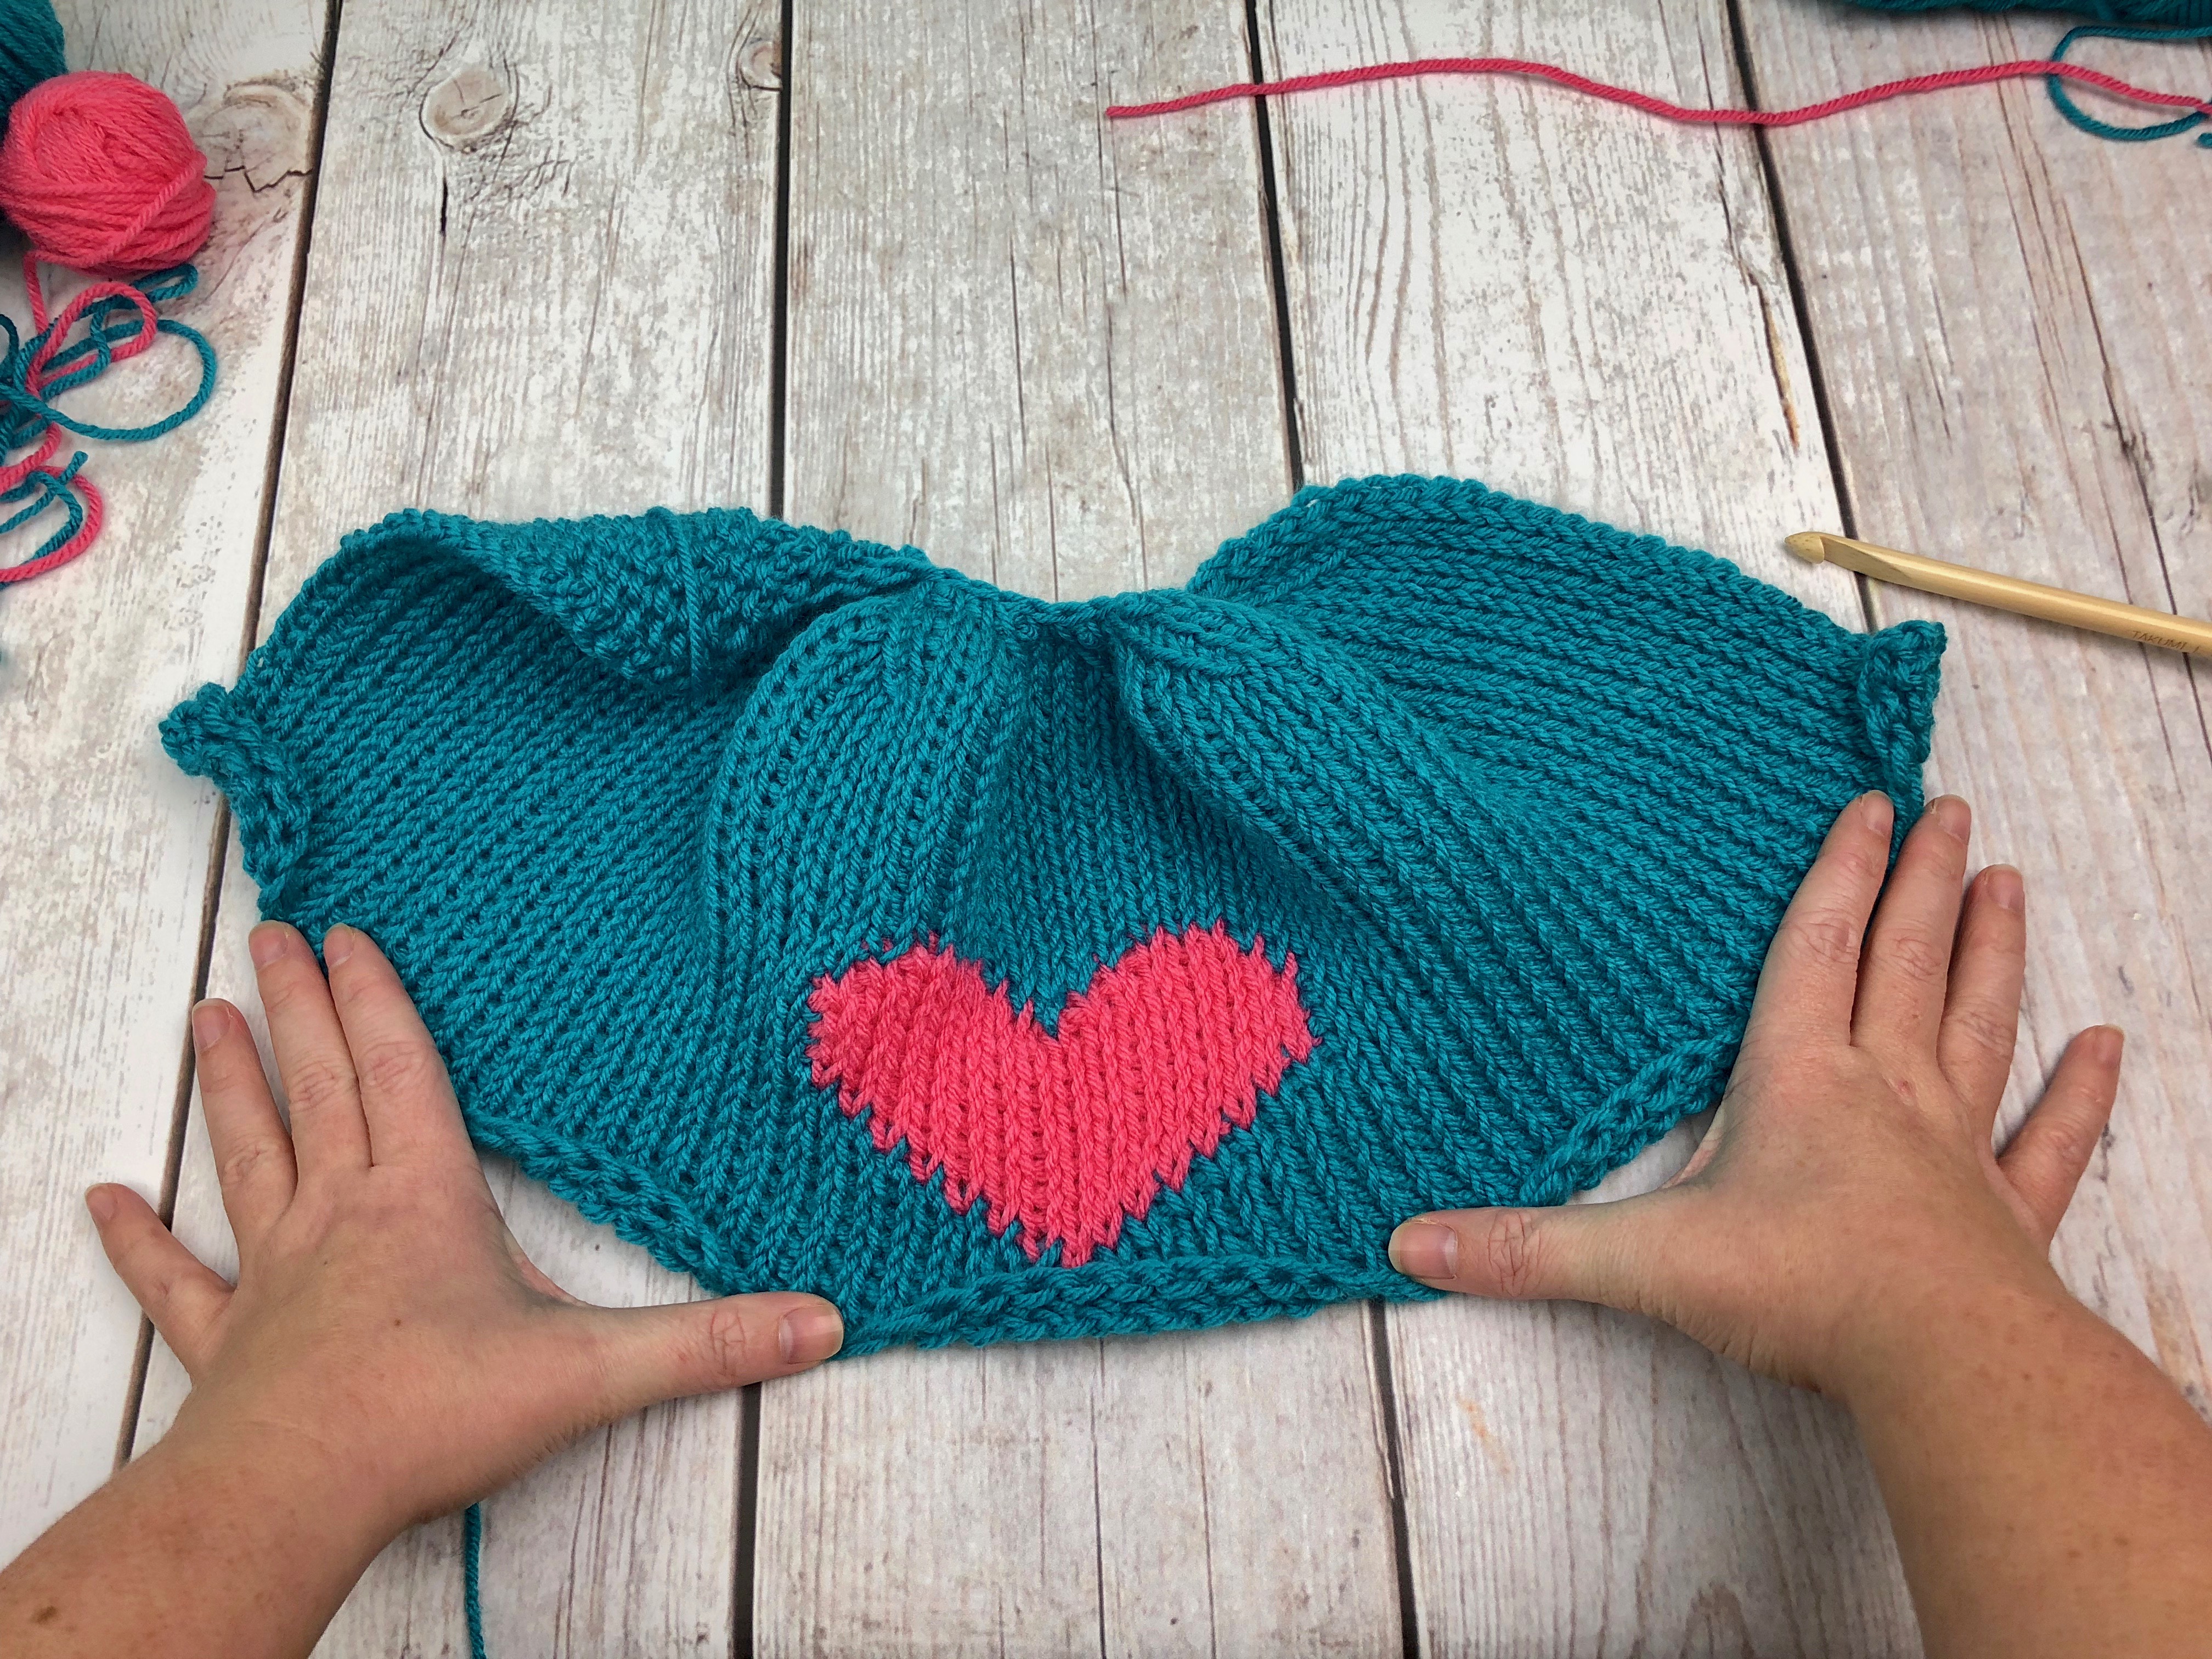
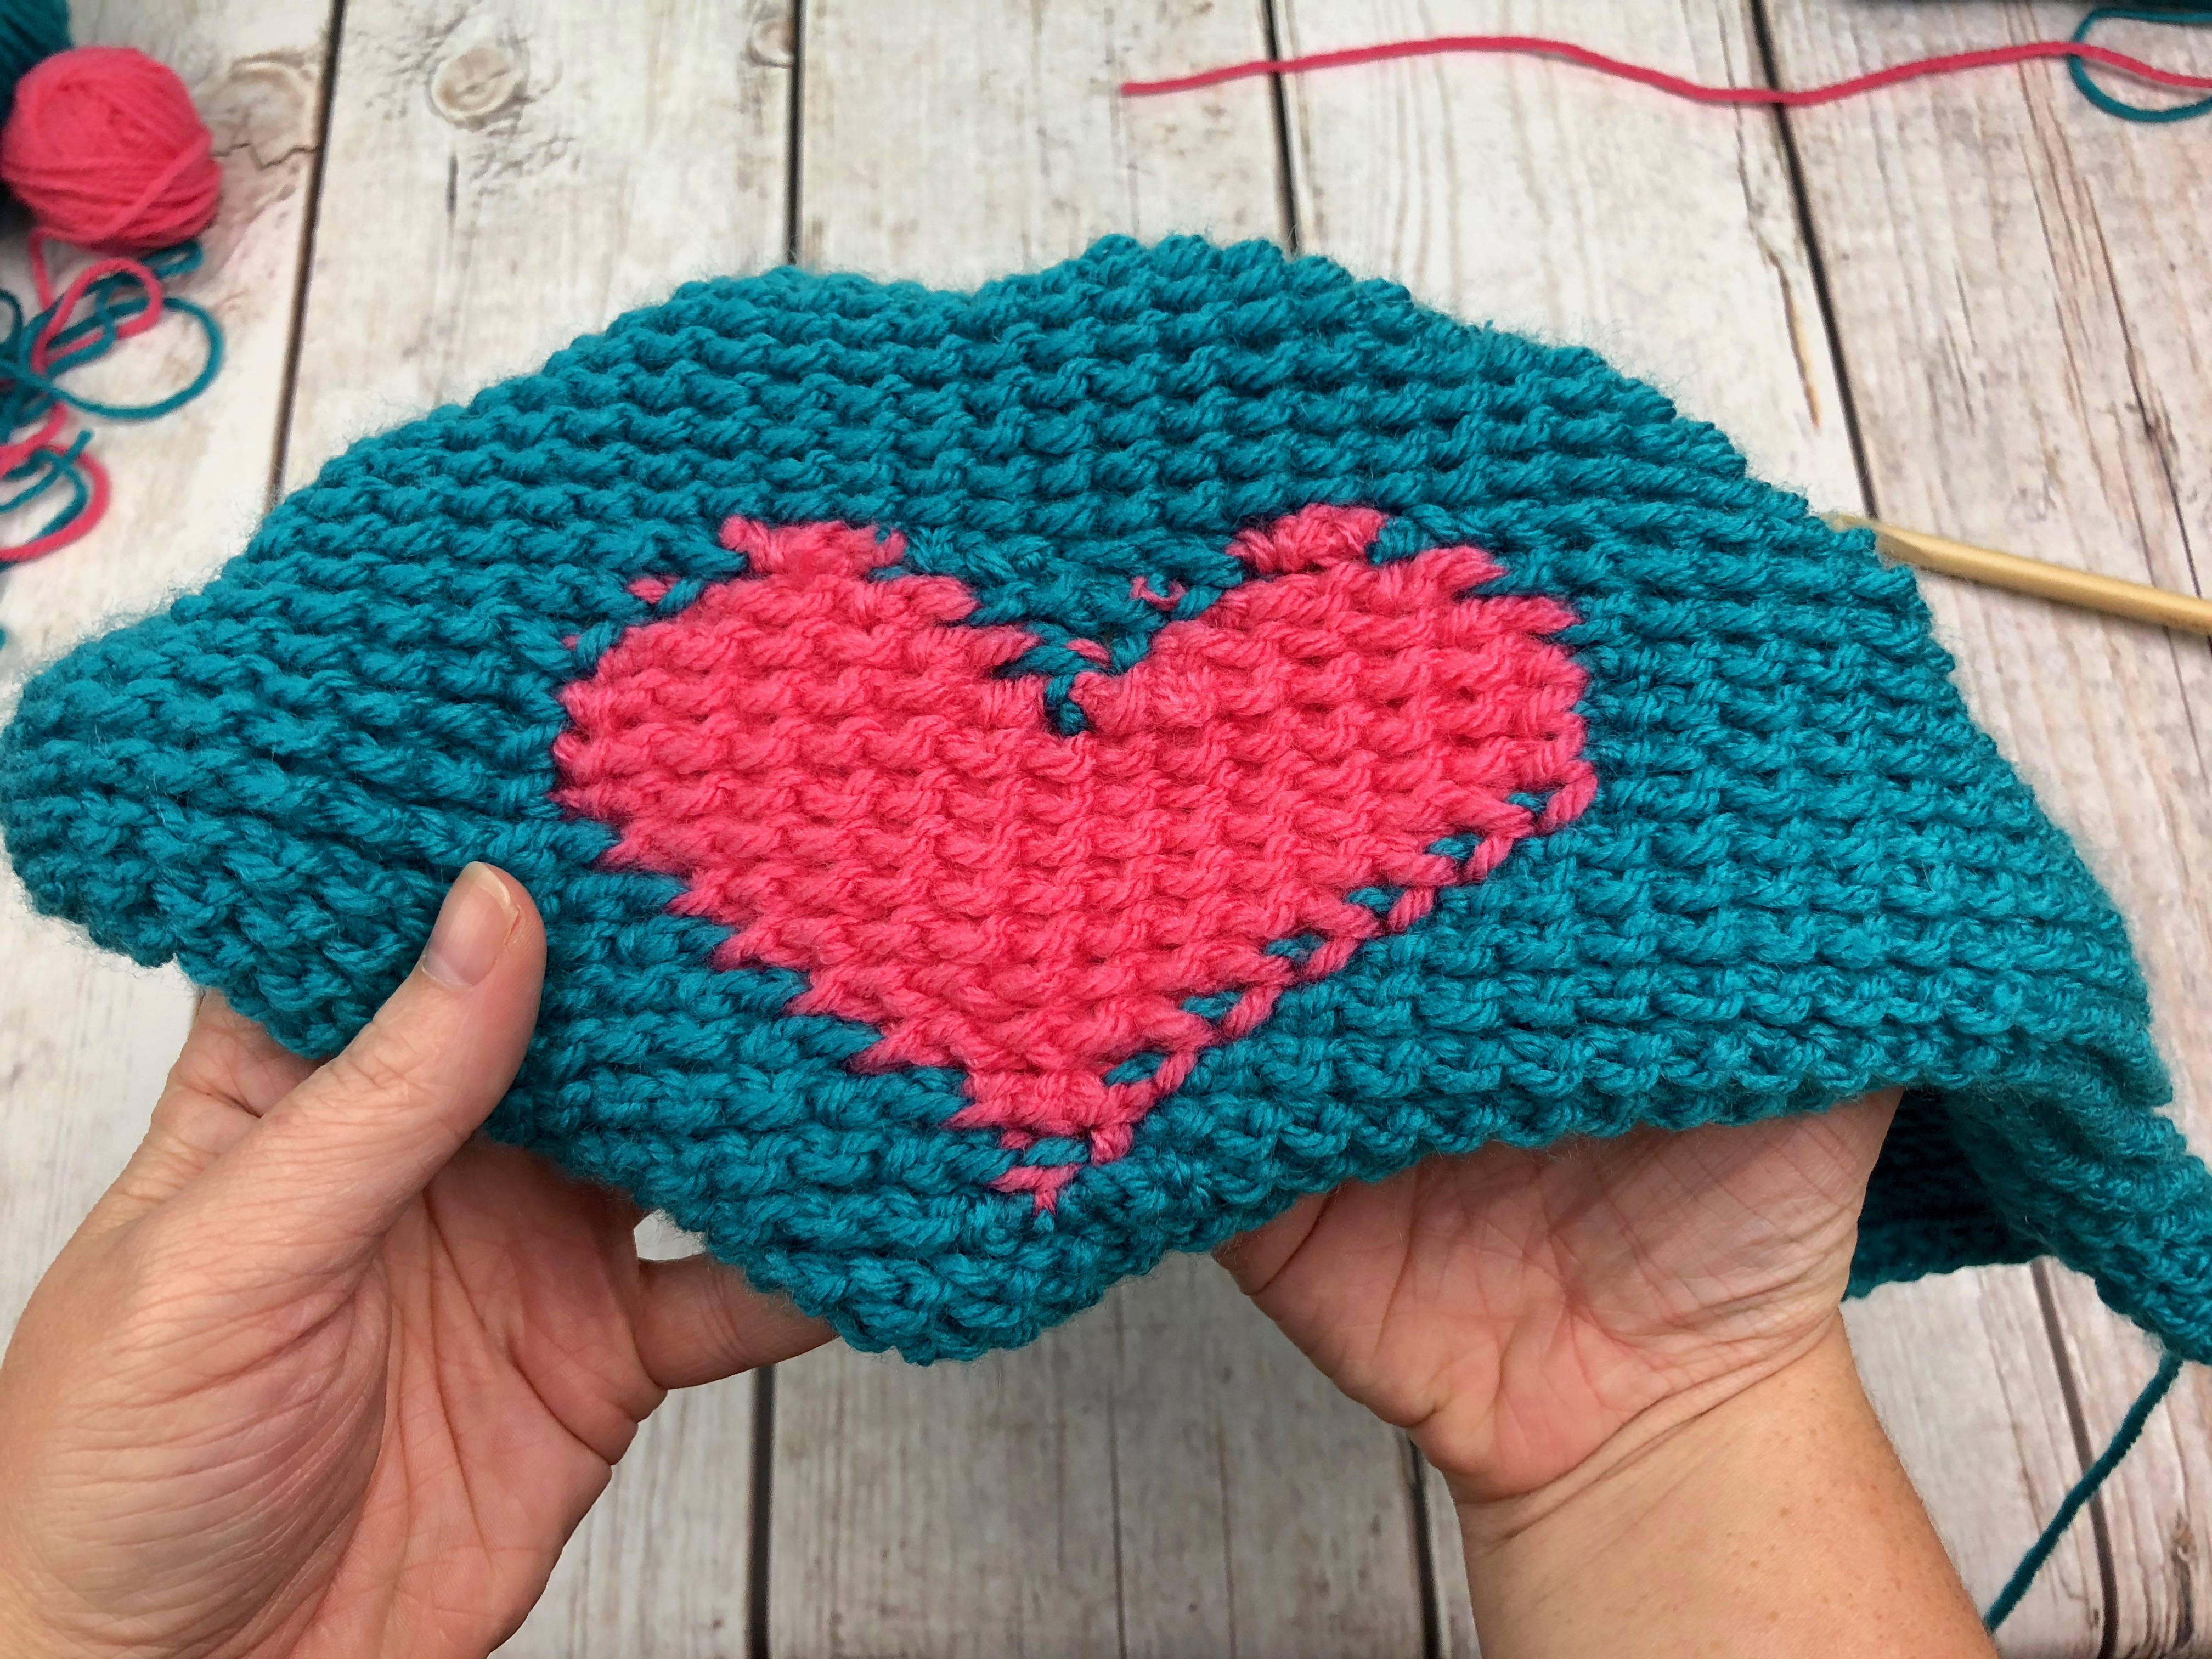
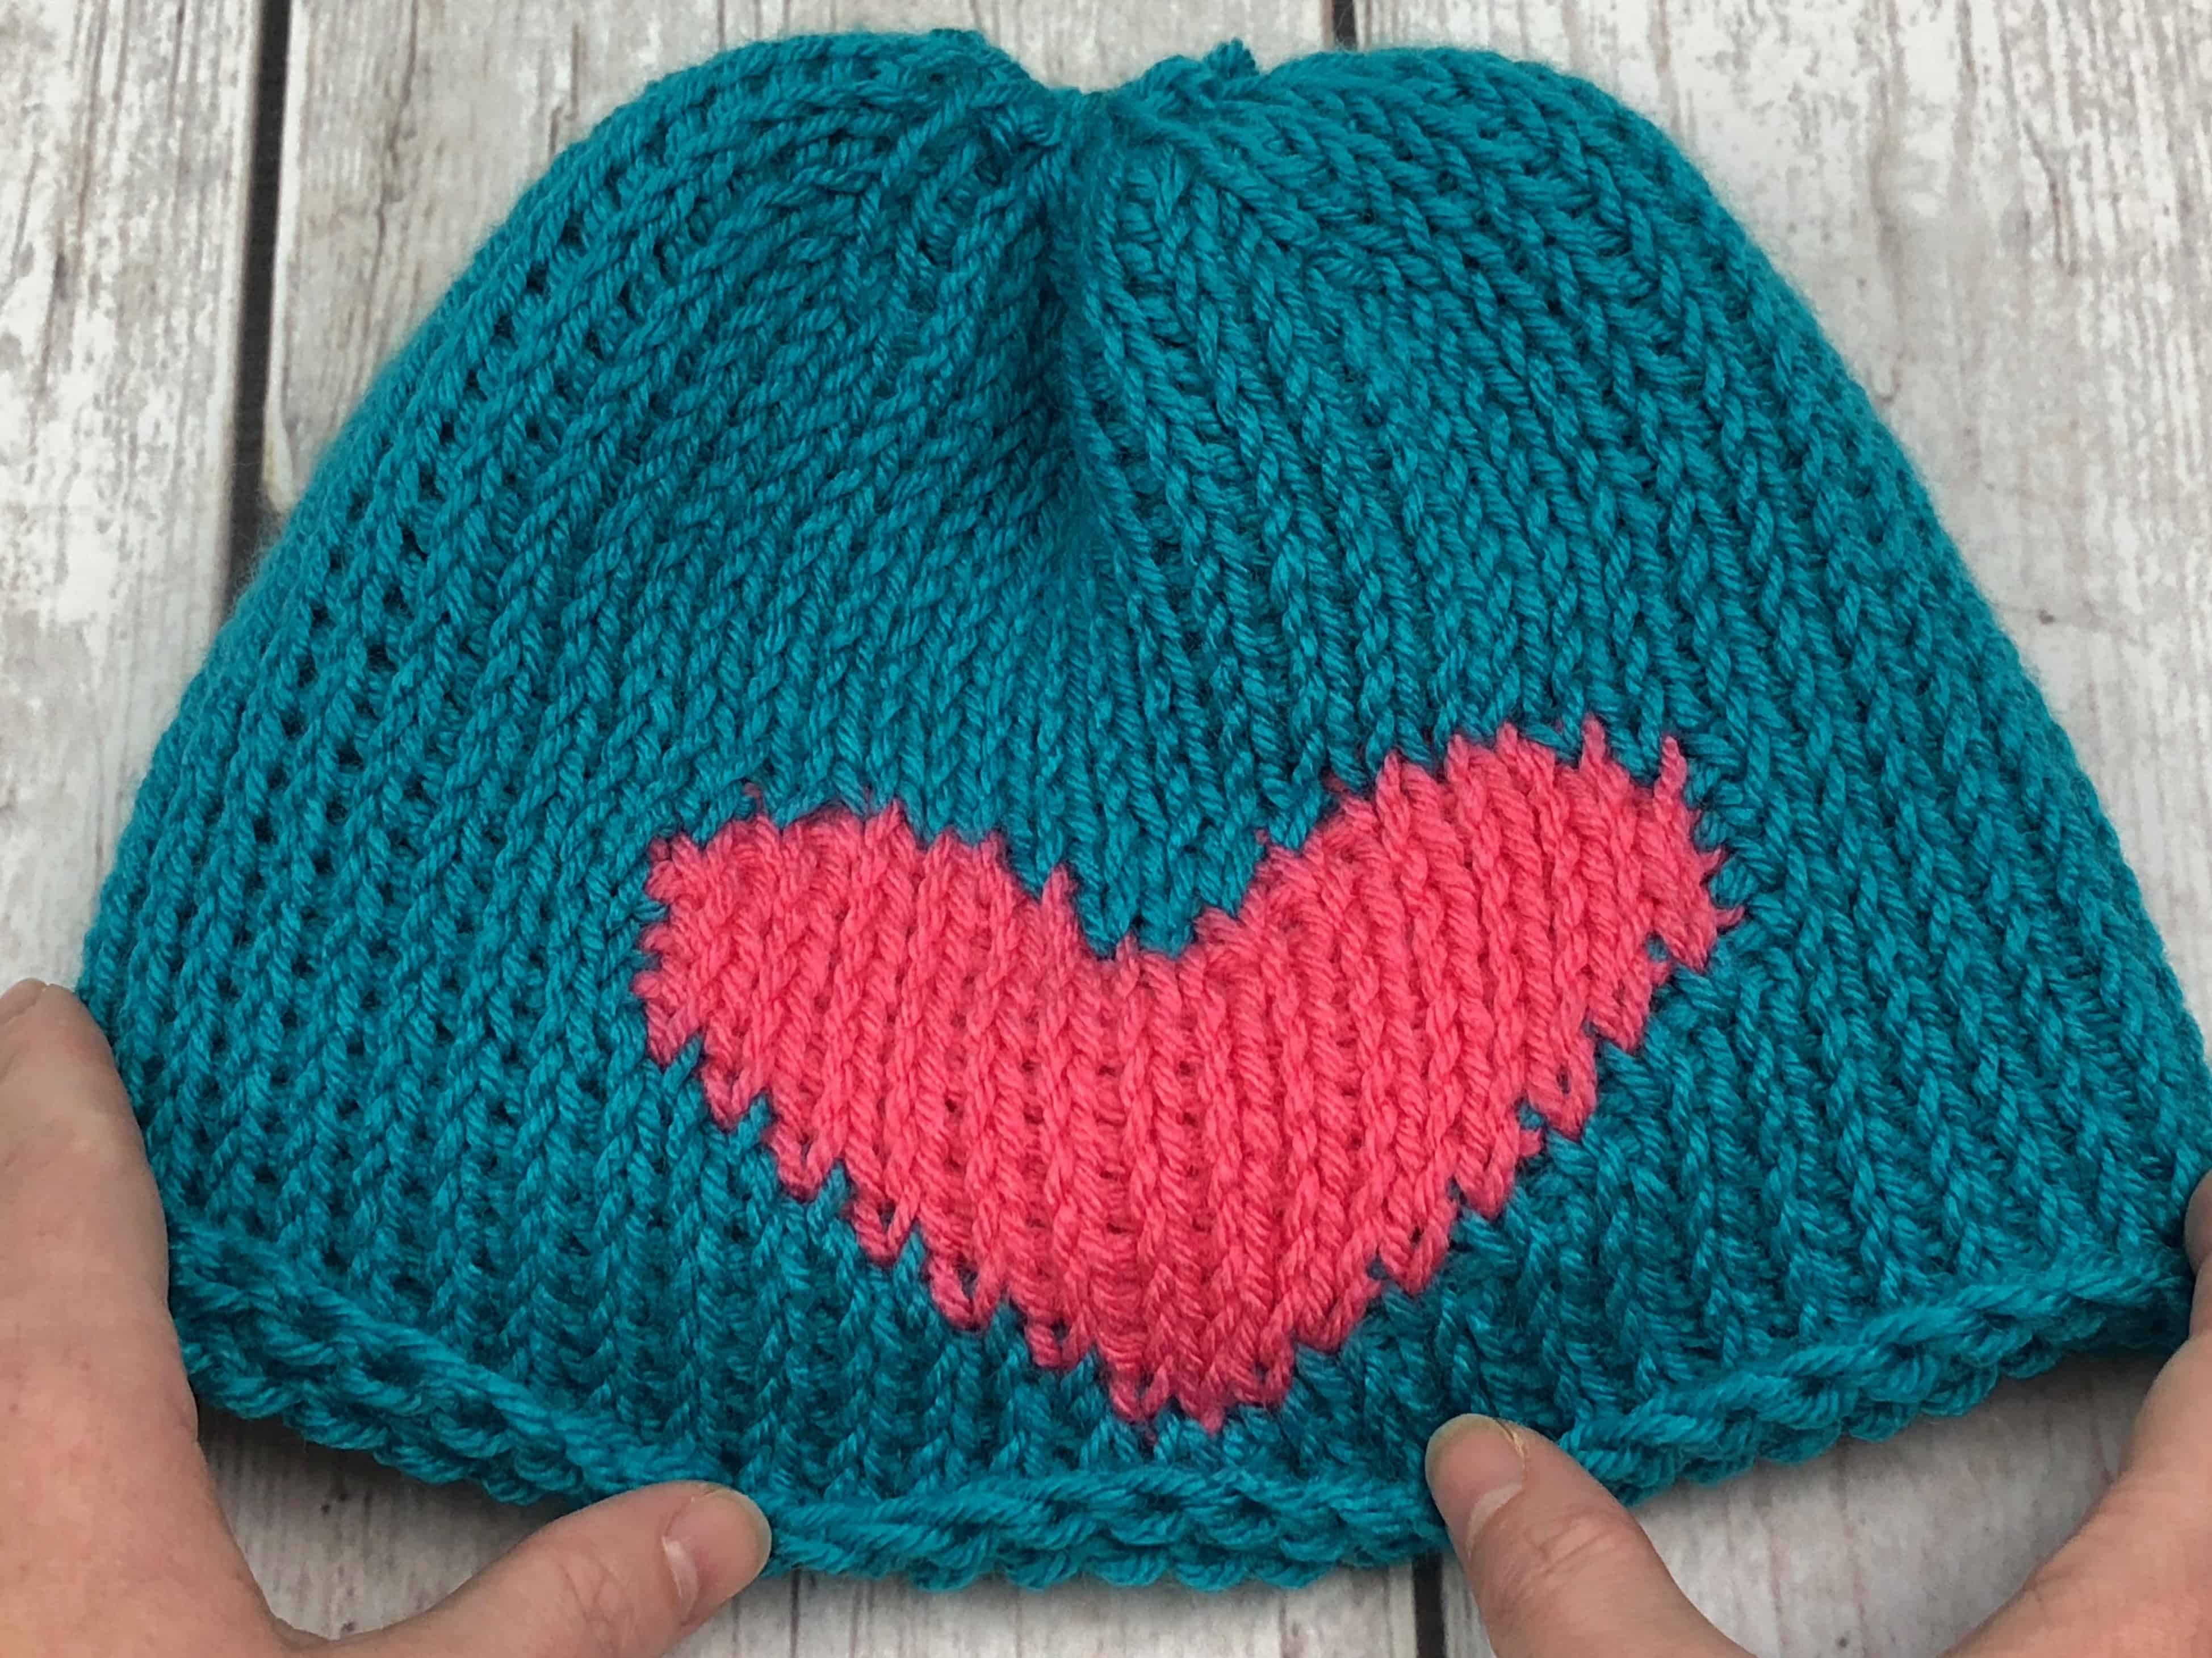
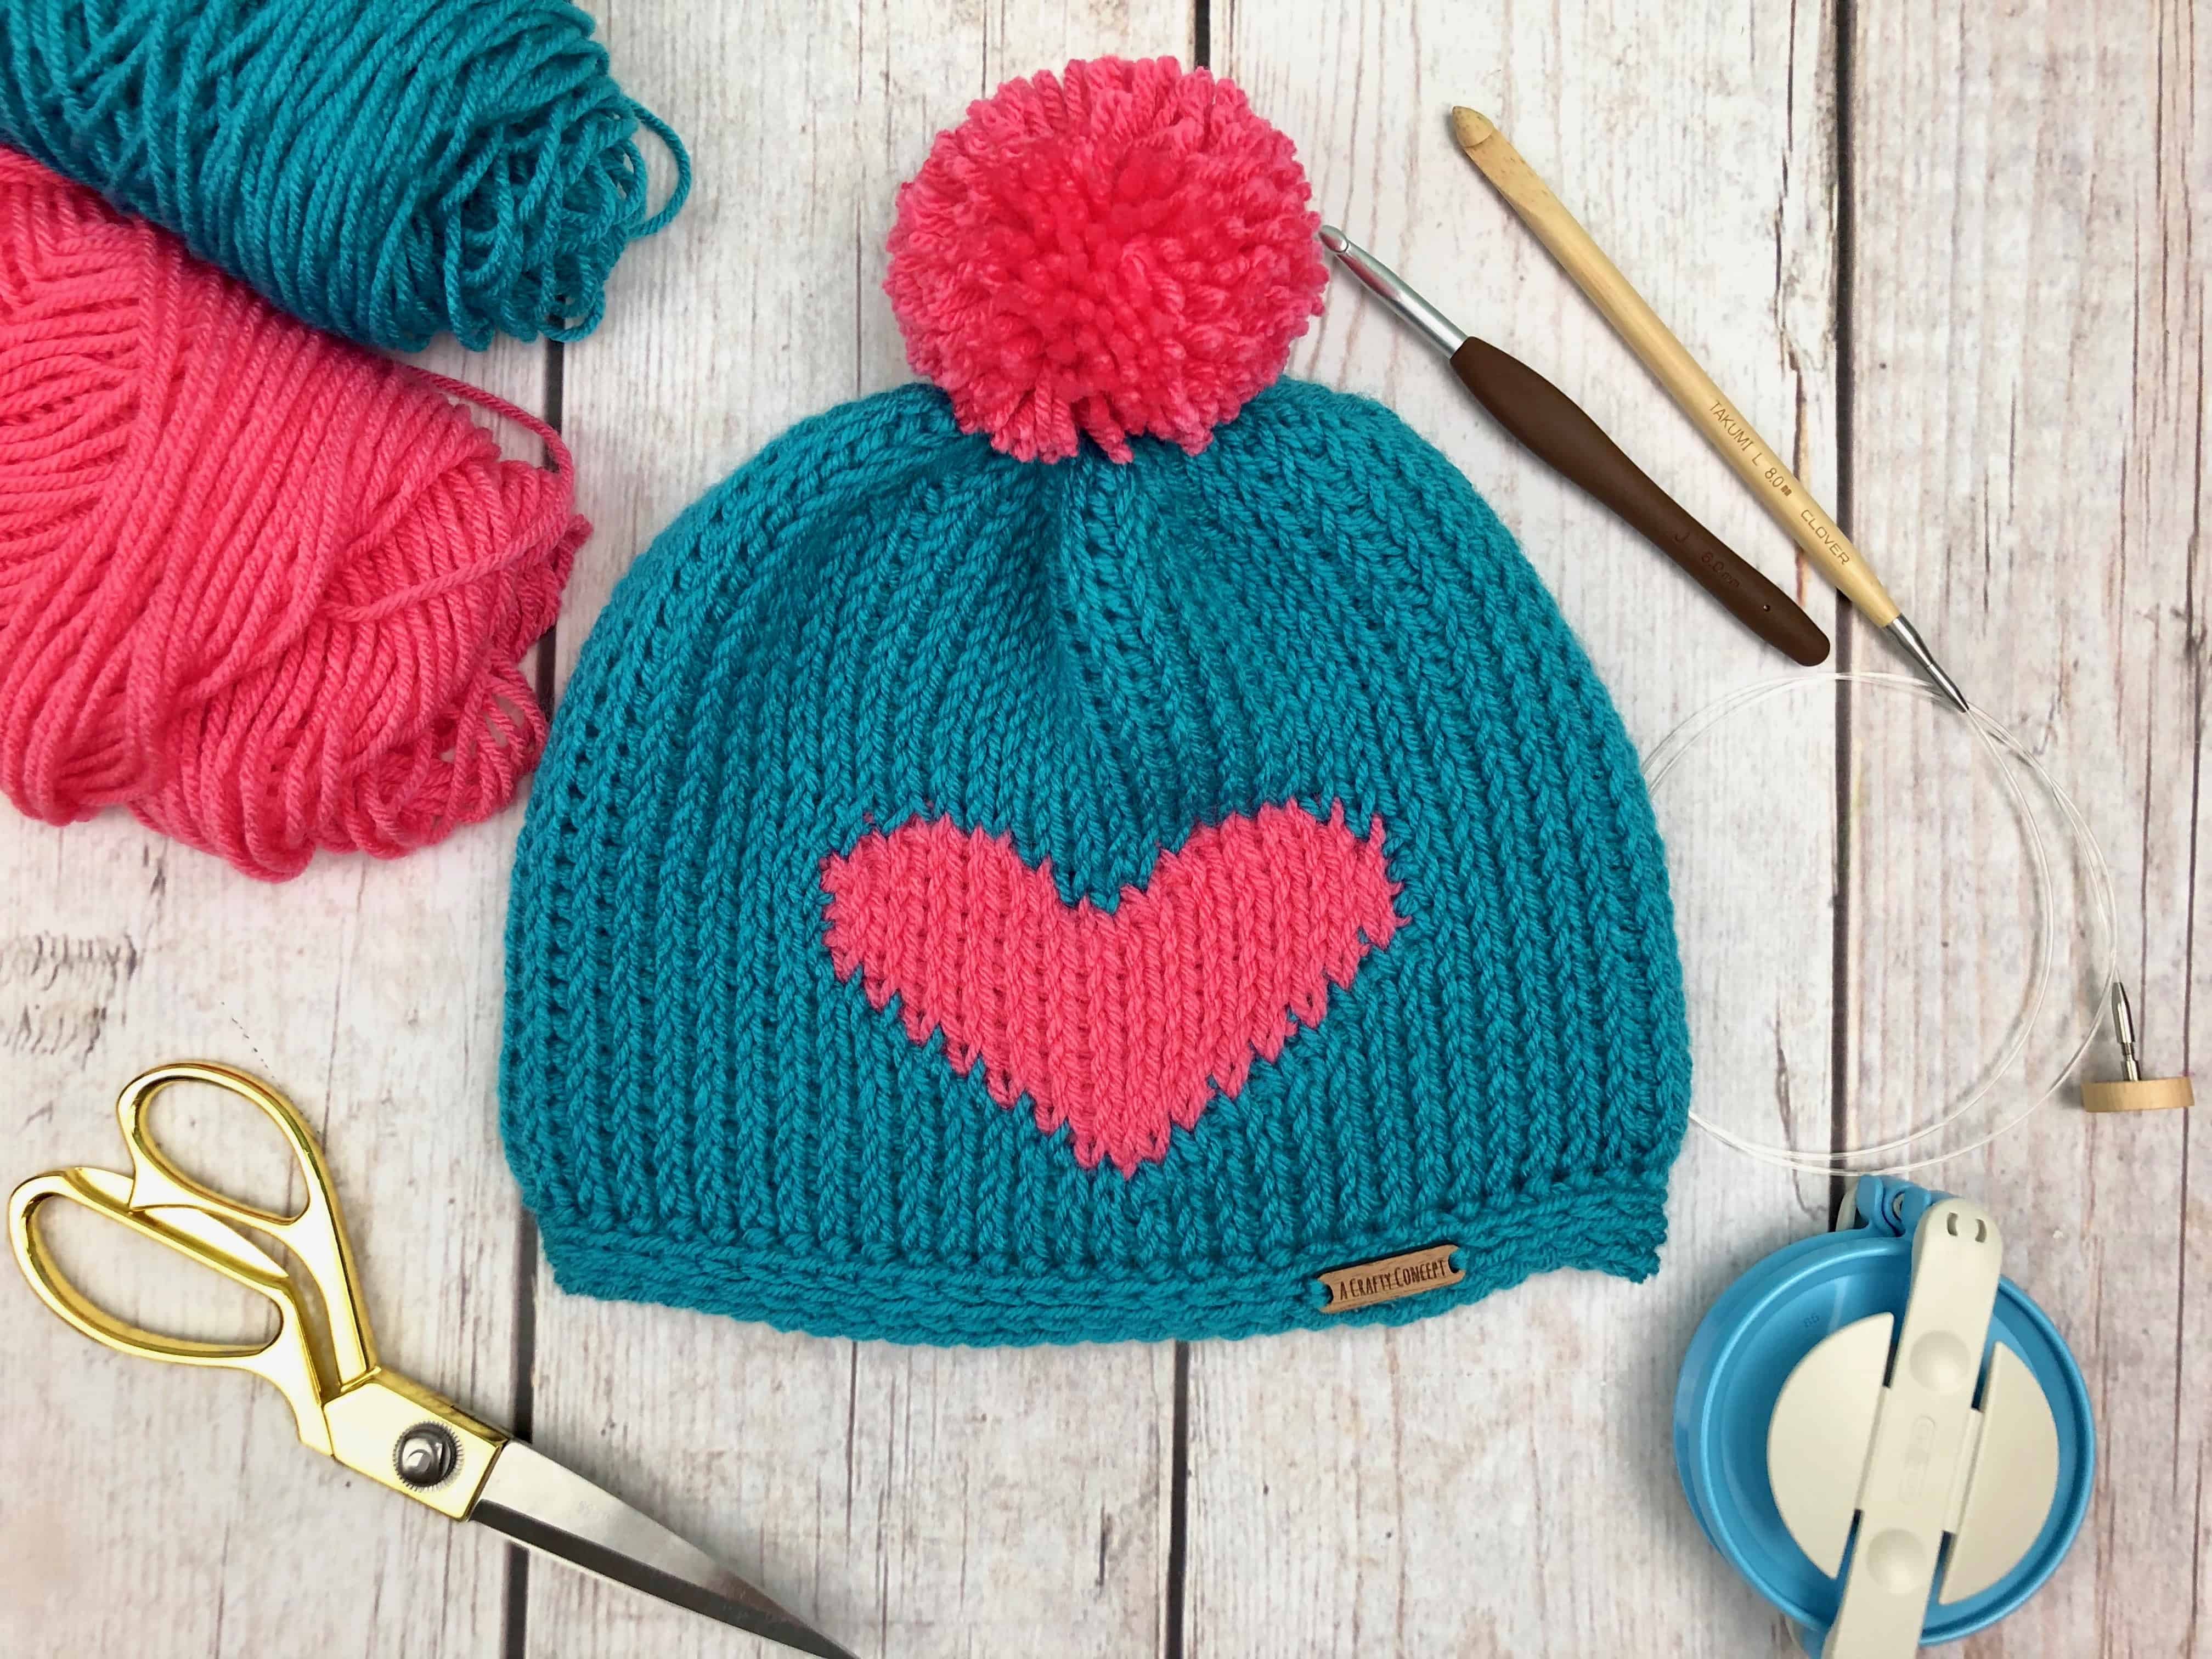
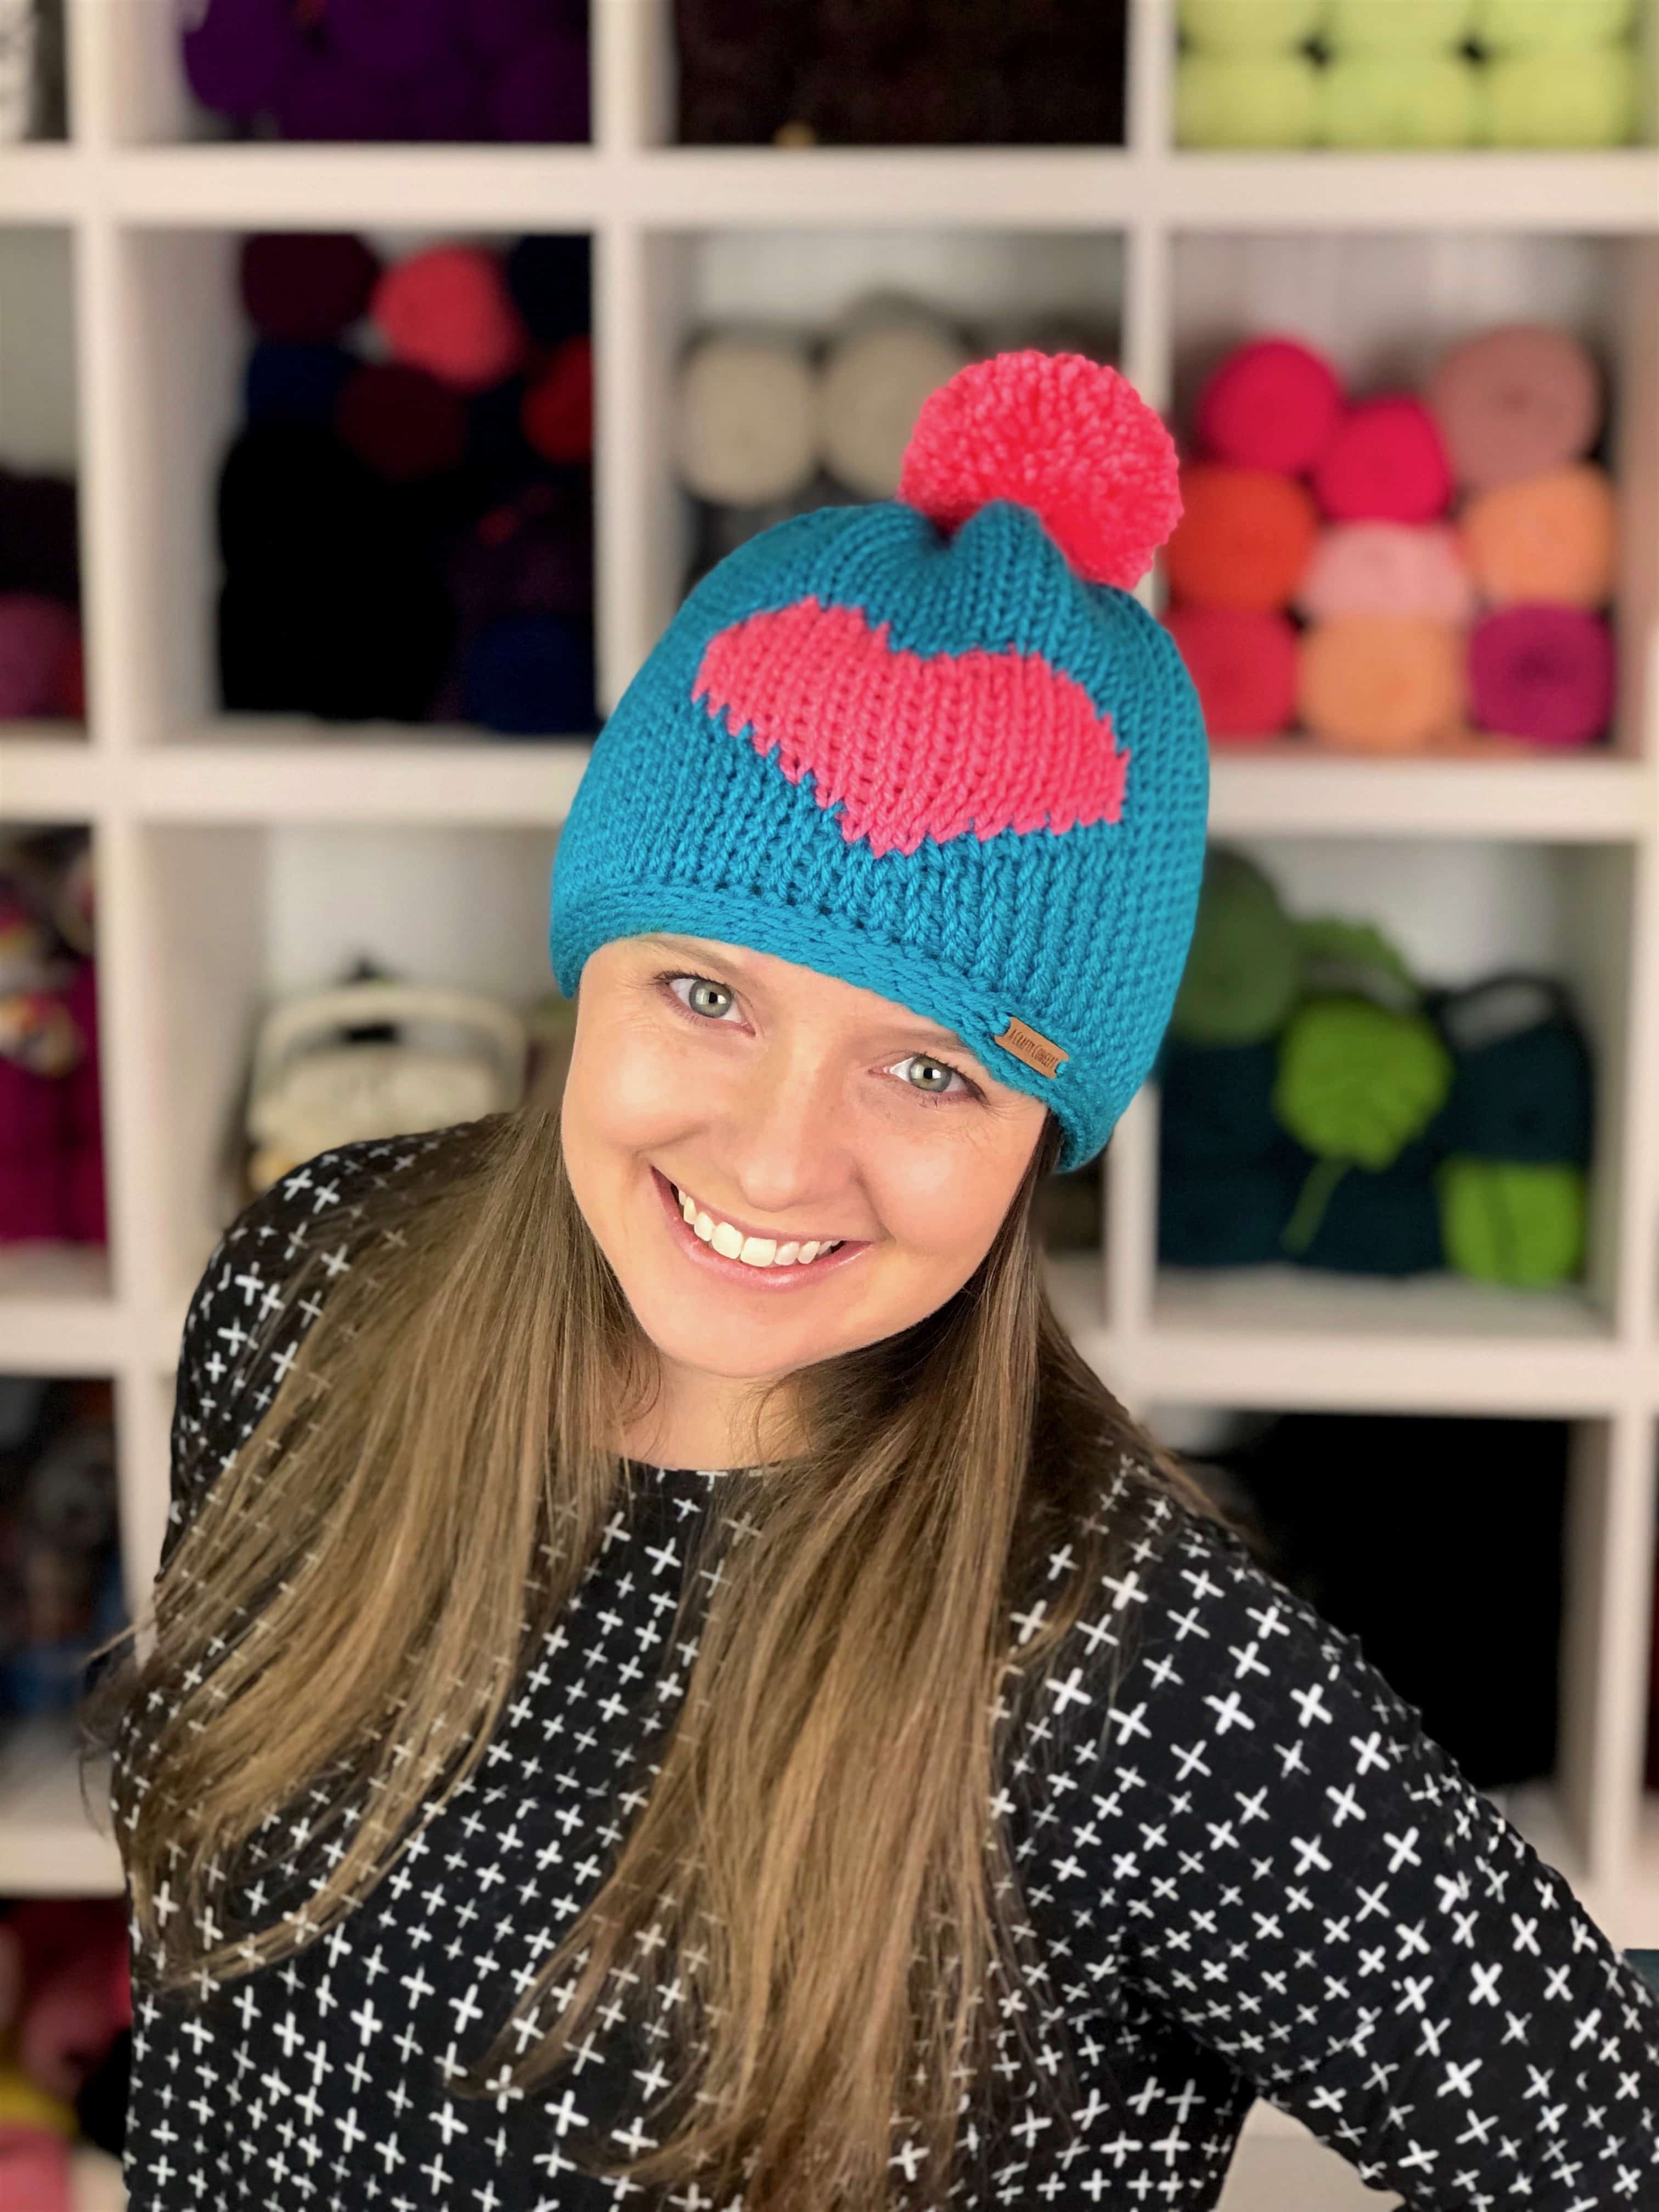
I started playing around with Tunisian crochet at the first of the year and instantly fell in love. With Tunisian crochet, you can achieve the look of a knitted piece, without learning how to knit! This was a serious game-changer for me since knitting and I don’t really get along. I wanted to share my excitement and love for Tunisian crochet so I designed this fun heart beanie pattern using the Tunisian Knit Stitch. Introducing the Tunisian Heart Beanie.
This pattern has been written with beginners in mind, if you have never tried your hand at Tunisian crochet before, you should still be able to follow along with this pattern. I have also included a Youtube video tutorial for any fellow visual learners. If you would like to purchase an ad-free printable PDF version you can find that in my Etsy shop. Ok enough chit chat, let’s jump into the pattern!
Tunisian Heart Beanie

Materials
- Size L (8mm) Interchangeable Tunisian Crochet Hook
- Interchangeable cord and stopper.
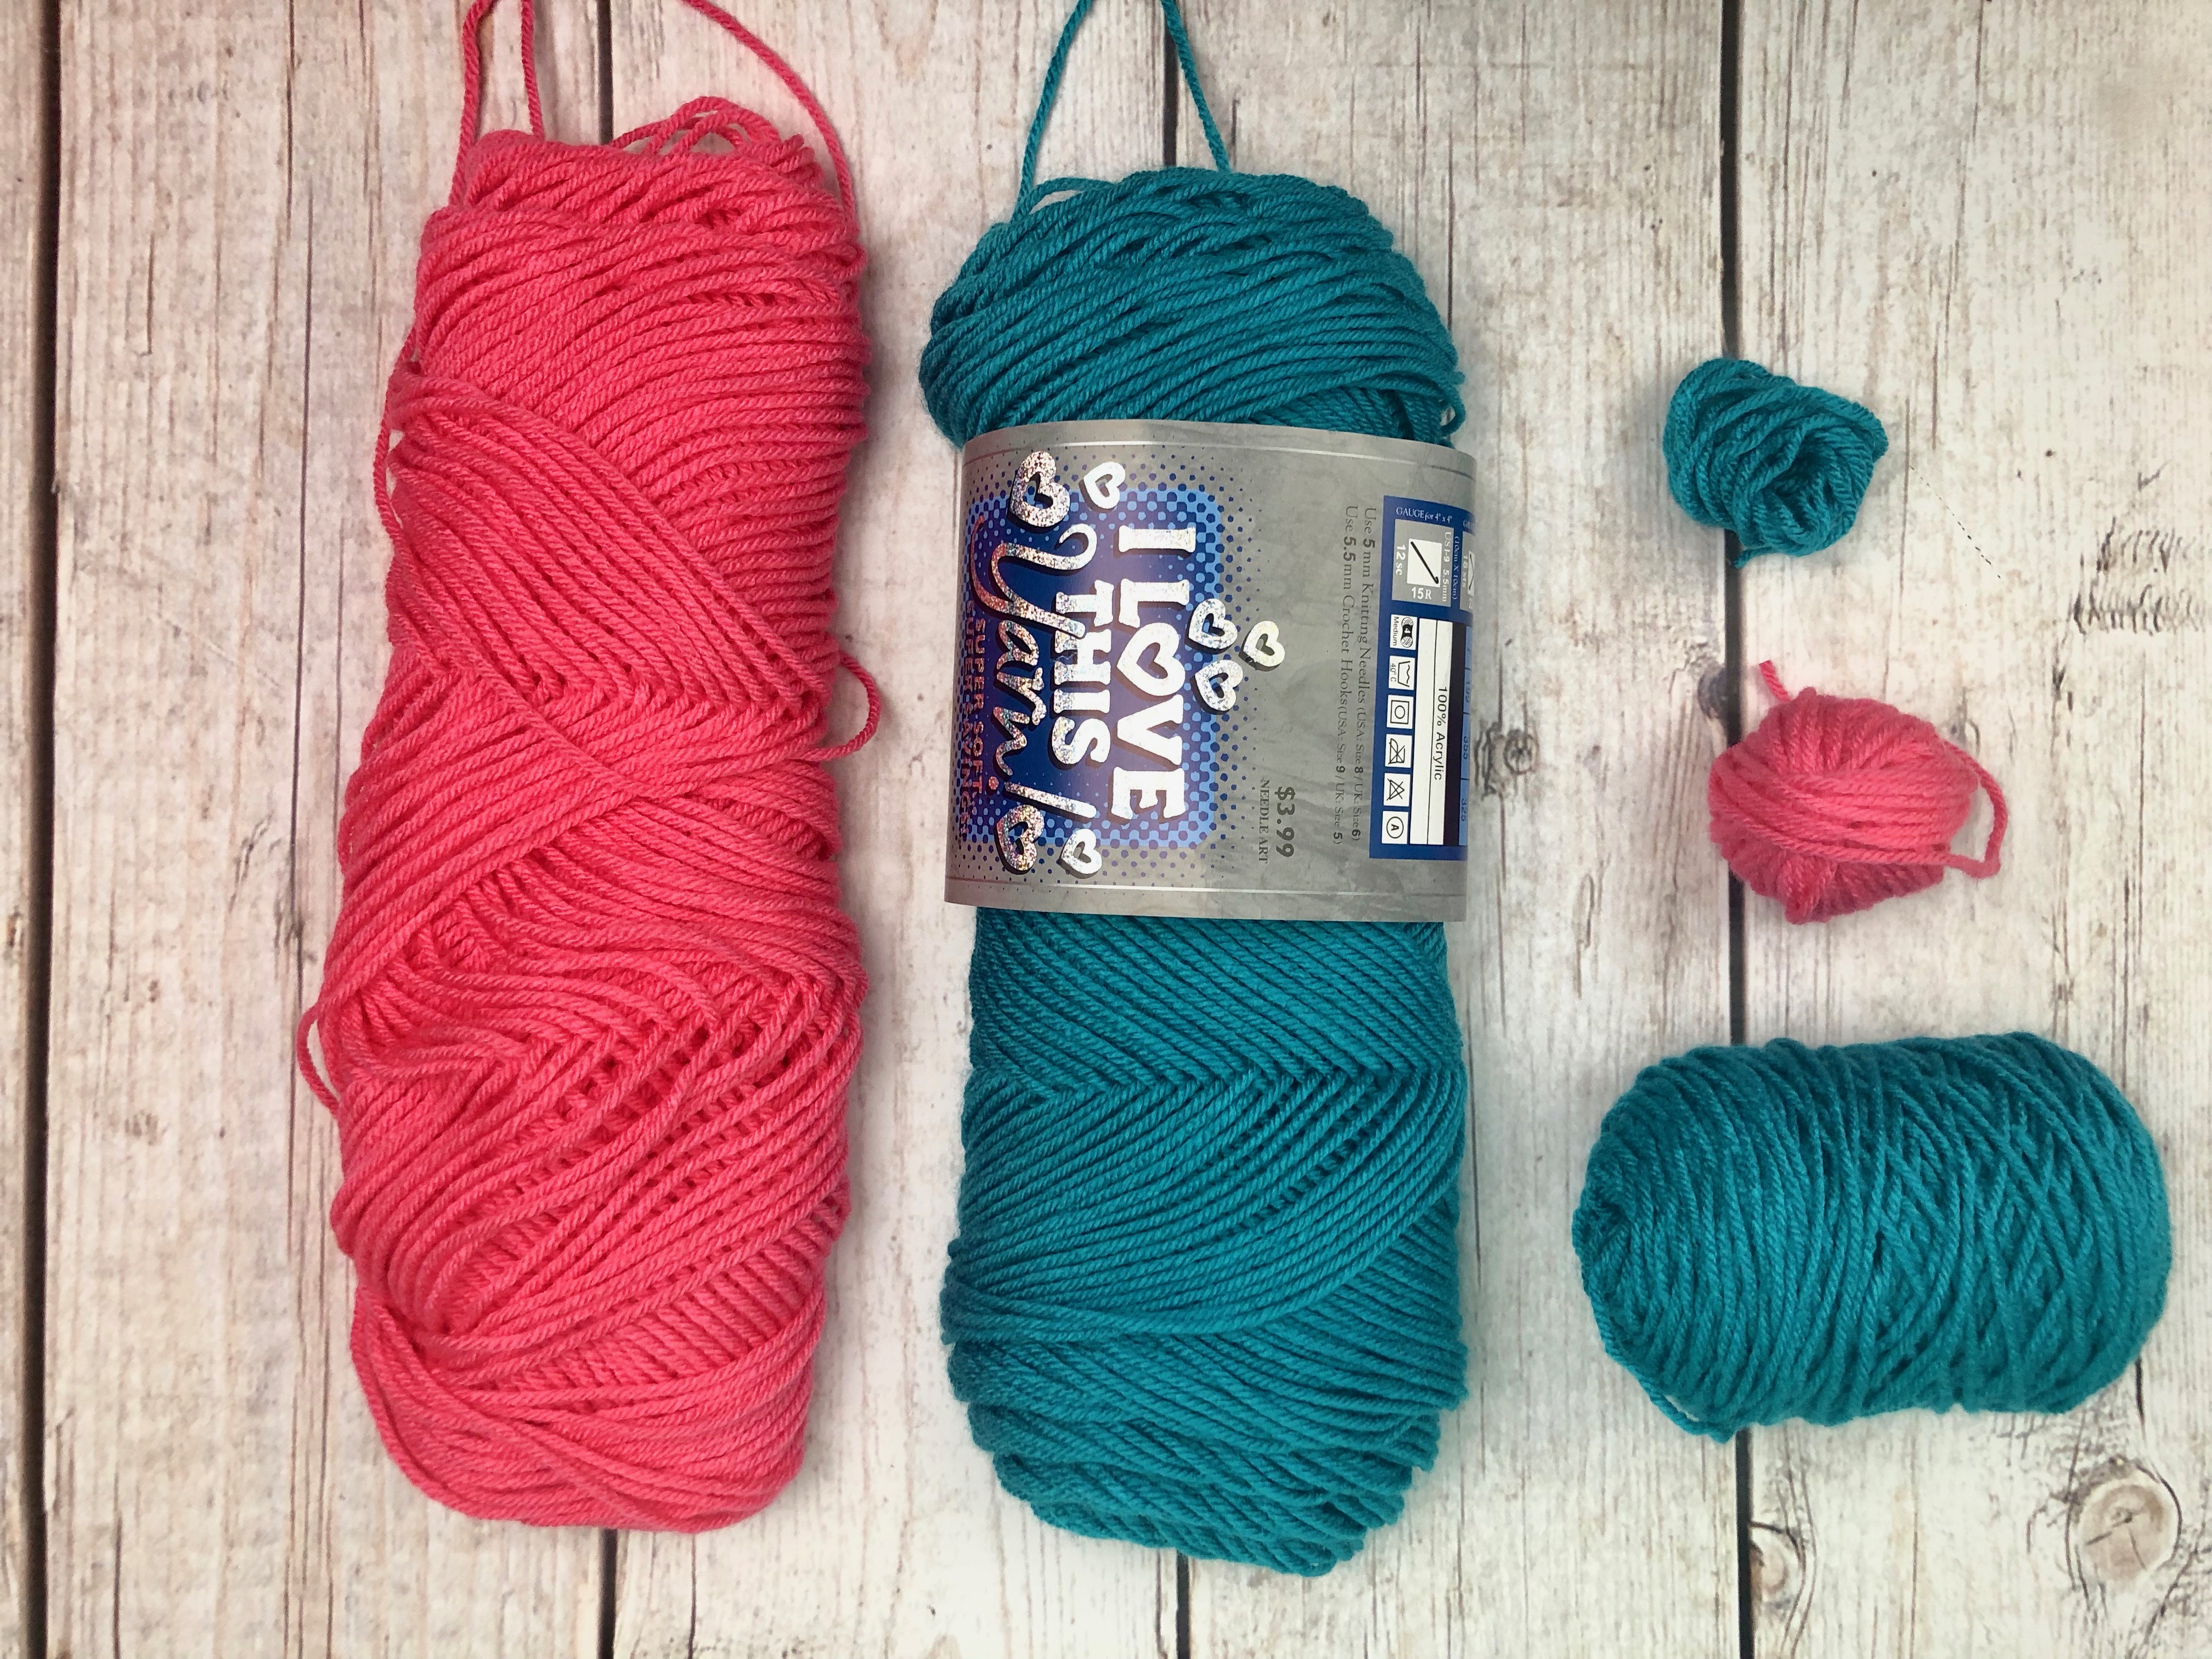
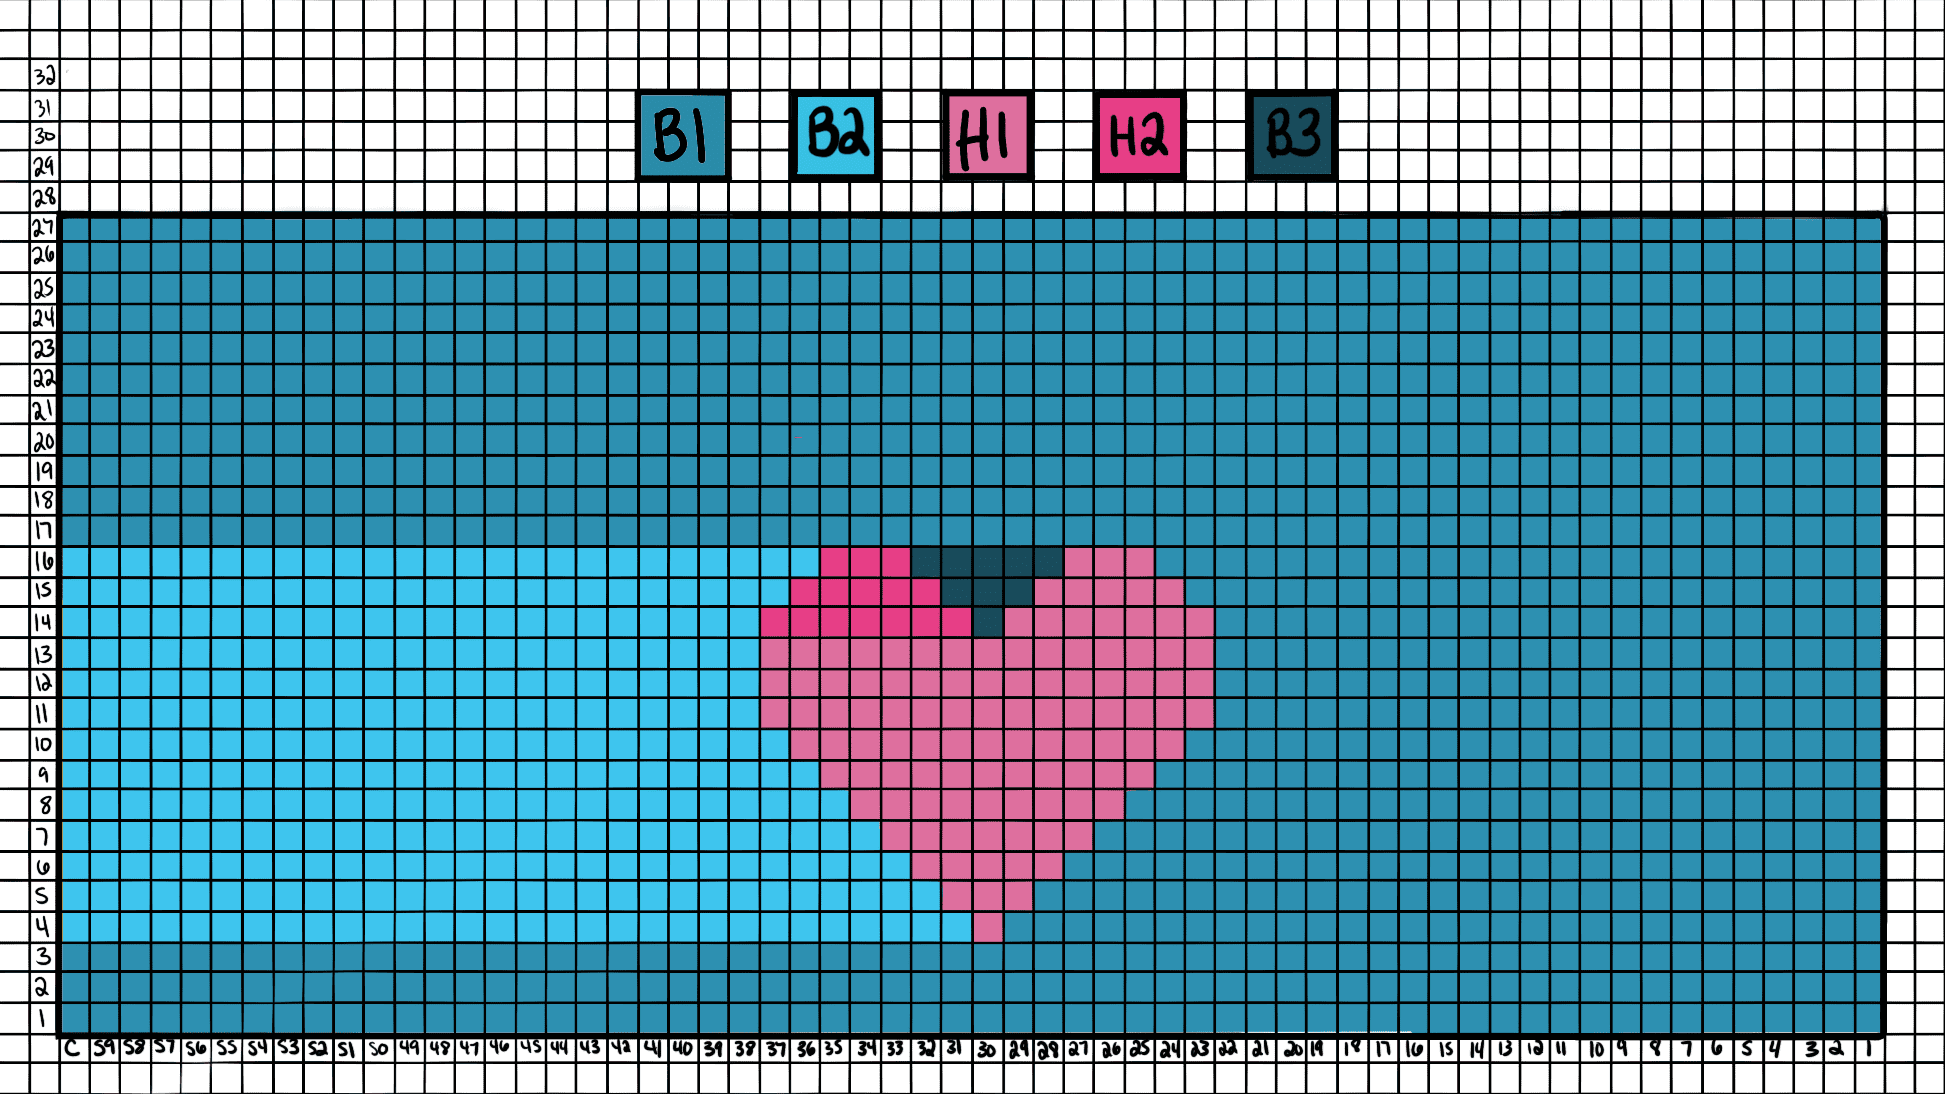
- About 4oz worsted weight yarn, for the body of your beanie. I used I Love This Yarn, in the color Peacock. This yarn will be labeled B1, B2 and B3 yarn in the pattern
- About 1oz worsted weight yarn, for the heart on your beanie. I used I Love This Yarn in the color Tropical Pink. This yarn will be labeled H1 and H2 in the pattern.
- Tapestry needle
Stitch Key (US Terms)
CH- Chain
TKS- Tunisian Knit Stitch
K2TOG- Knit stitch two together
TSLST- Tunisian Slip Stitch
SL2TOG- Slip Stitch two together
Special Stitches
Back Bump: If you look at the top of your starting chain you will see each chain makes a “V” shape. If you flip your chain over so you can see the back side of it there is a loop that connects each “V” together, that is the Back Bump.
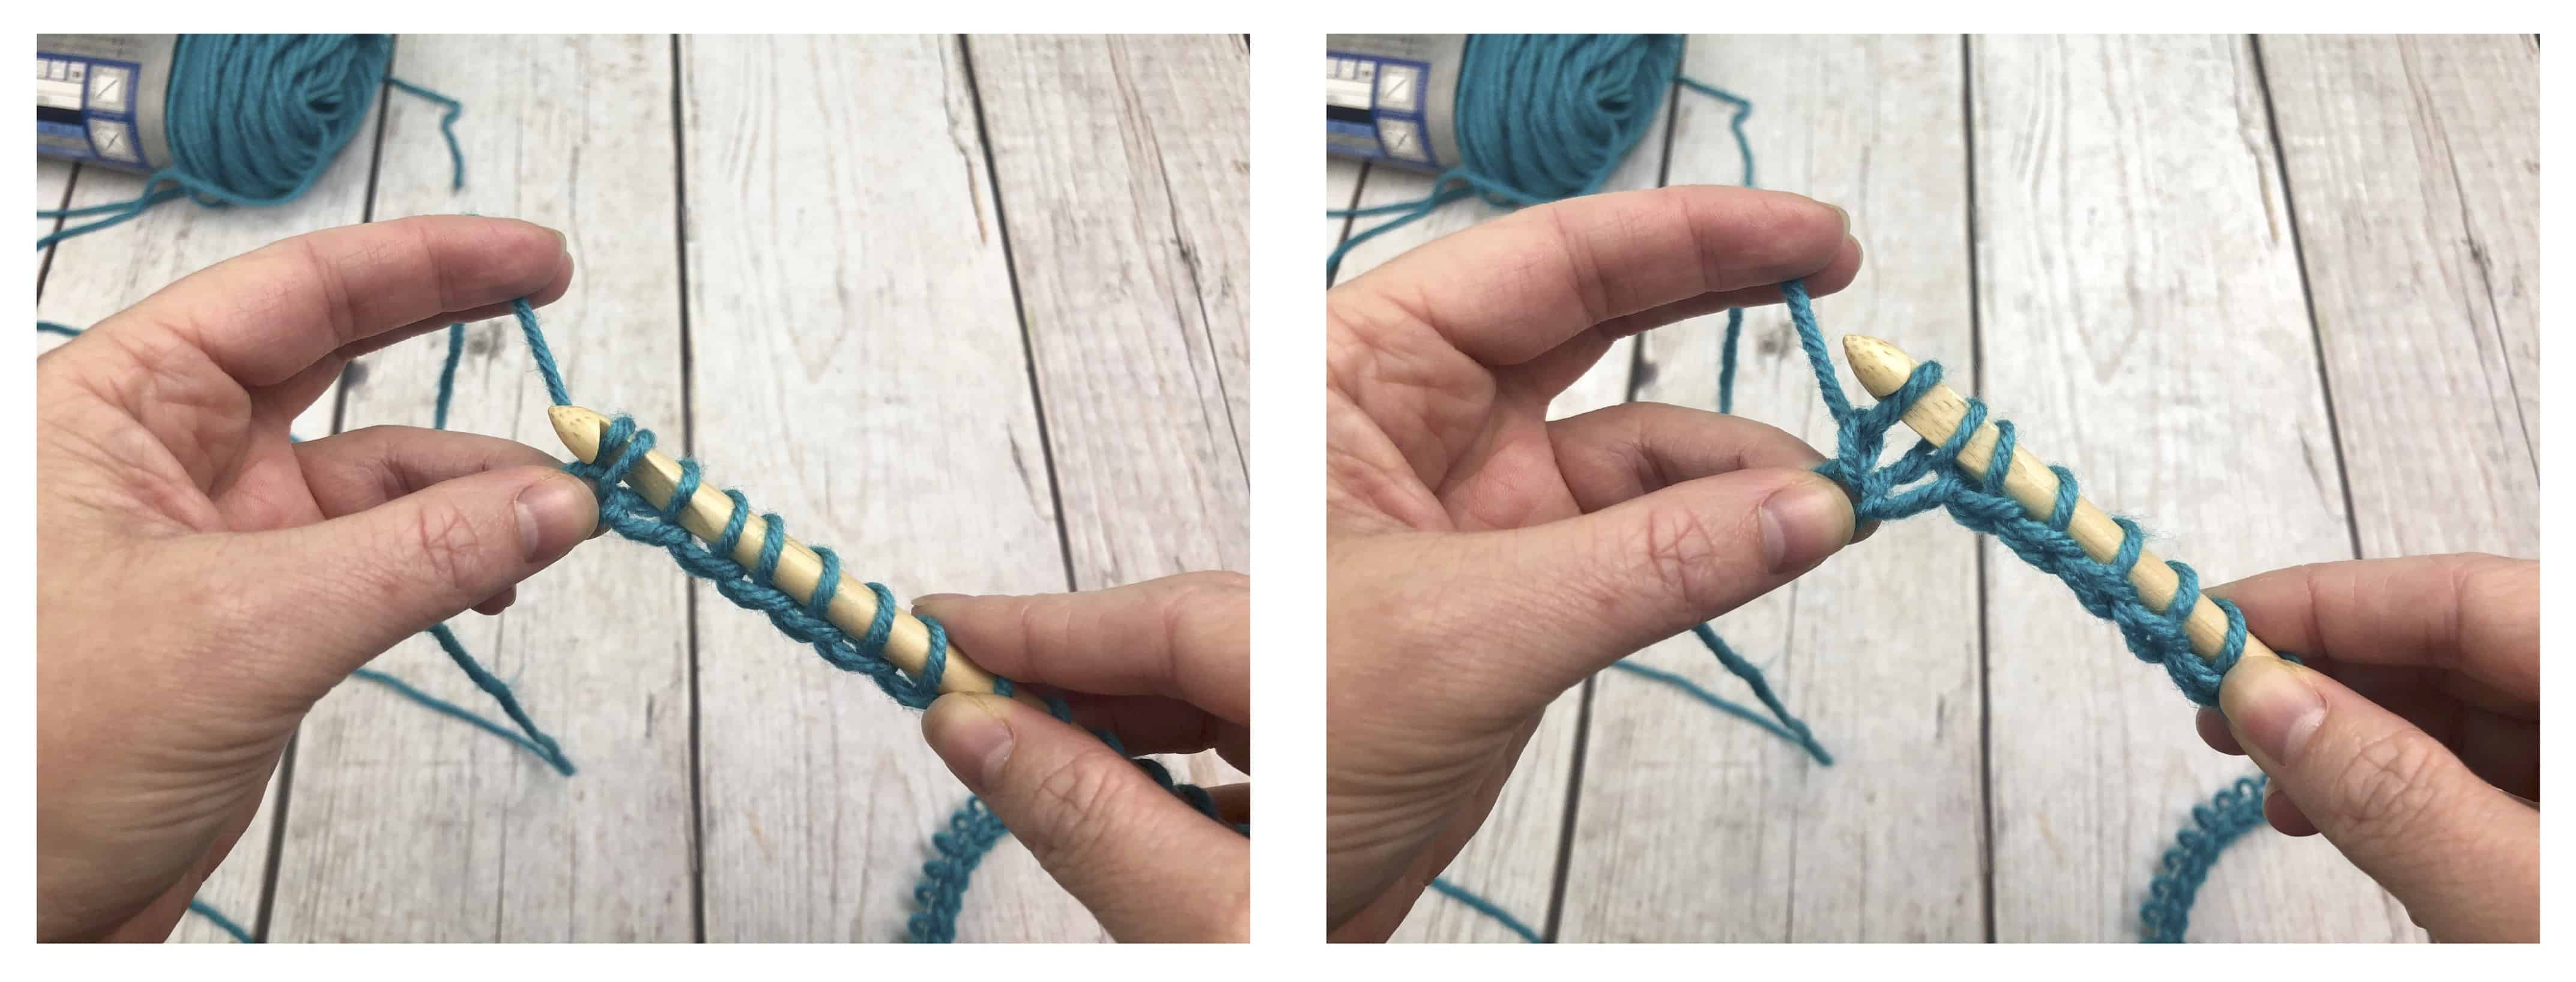
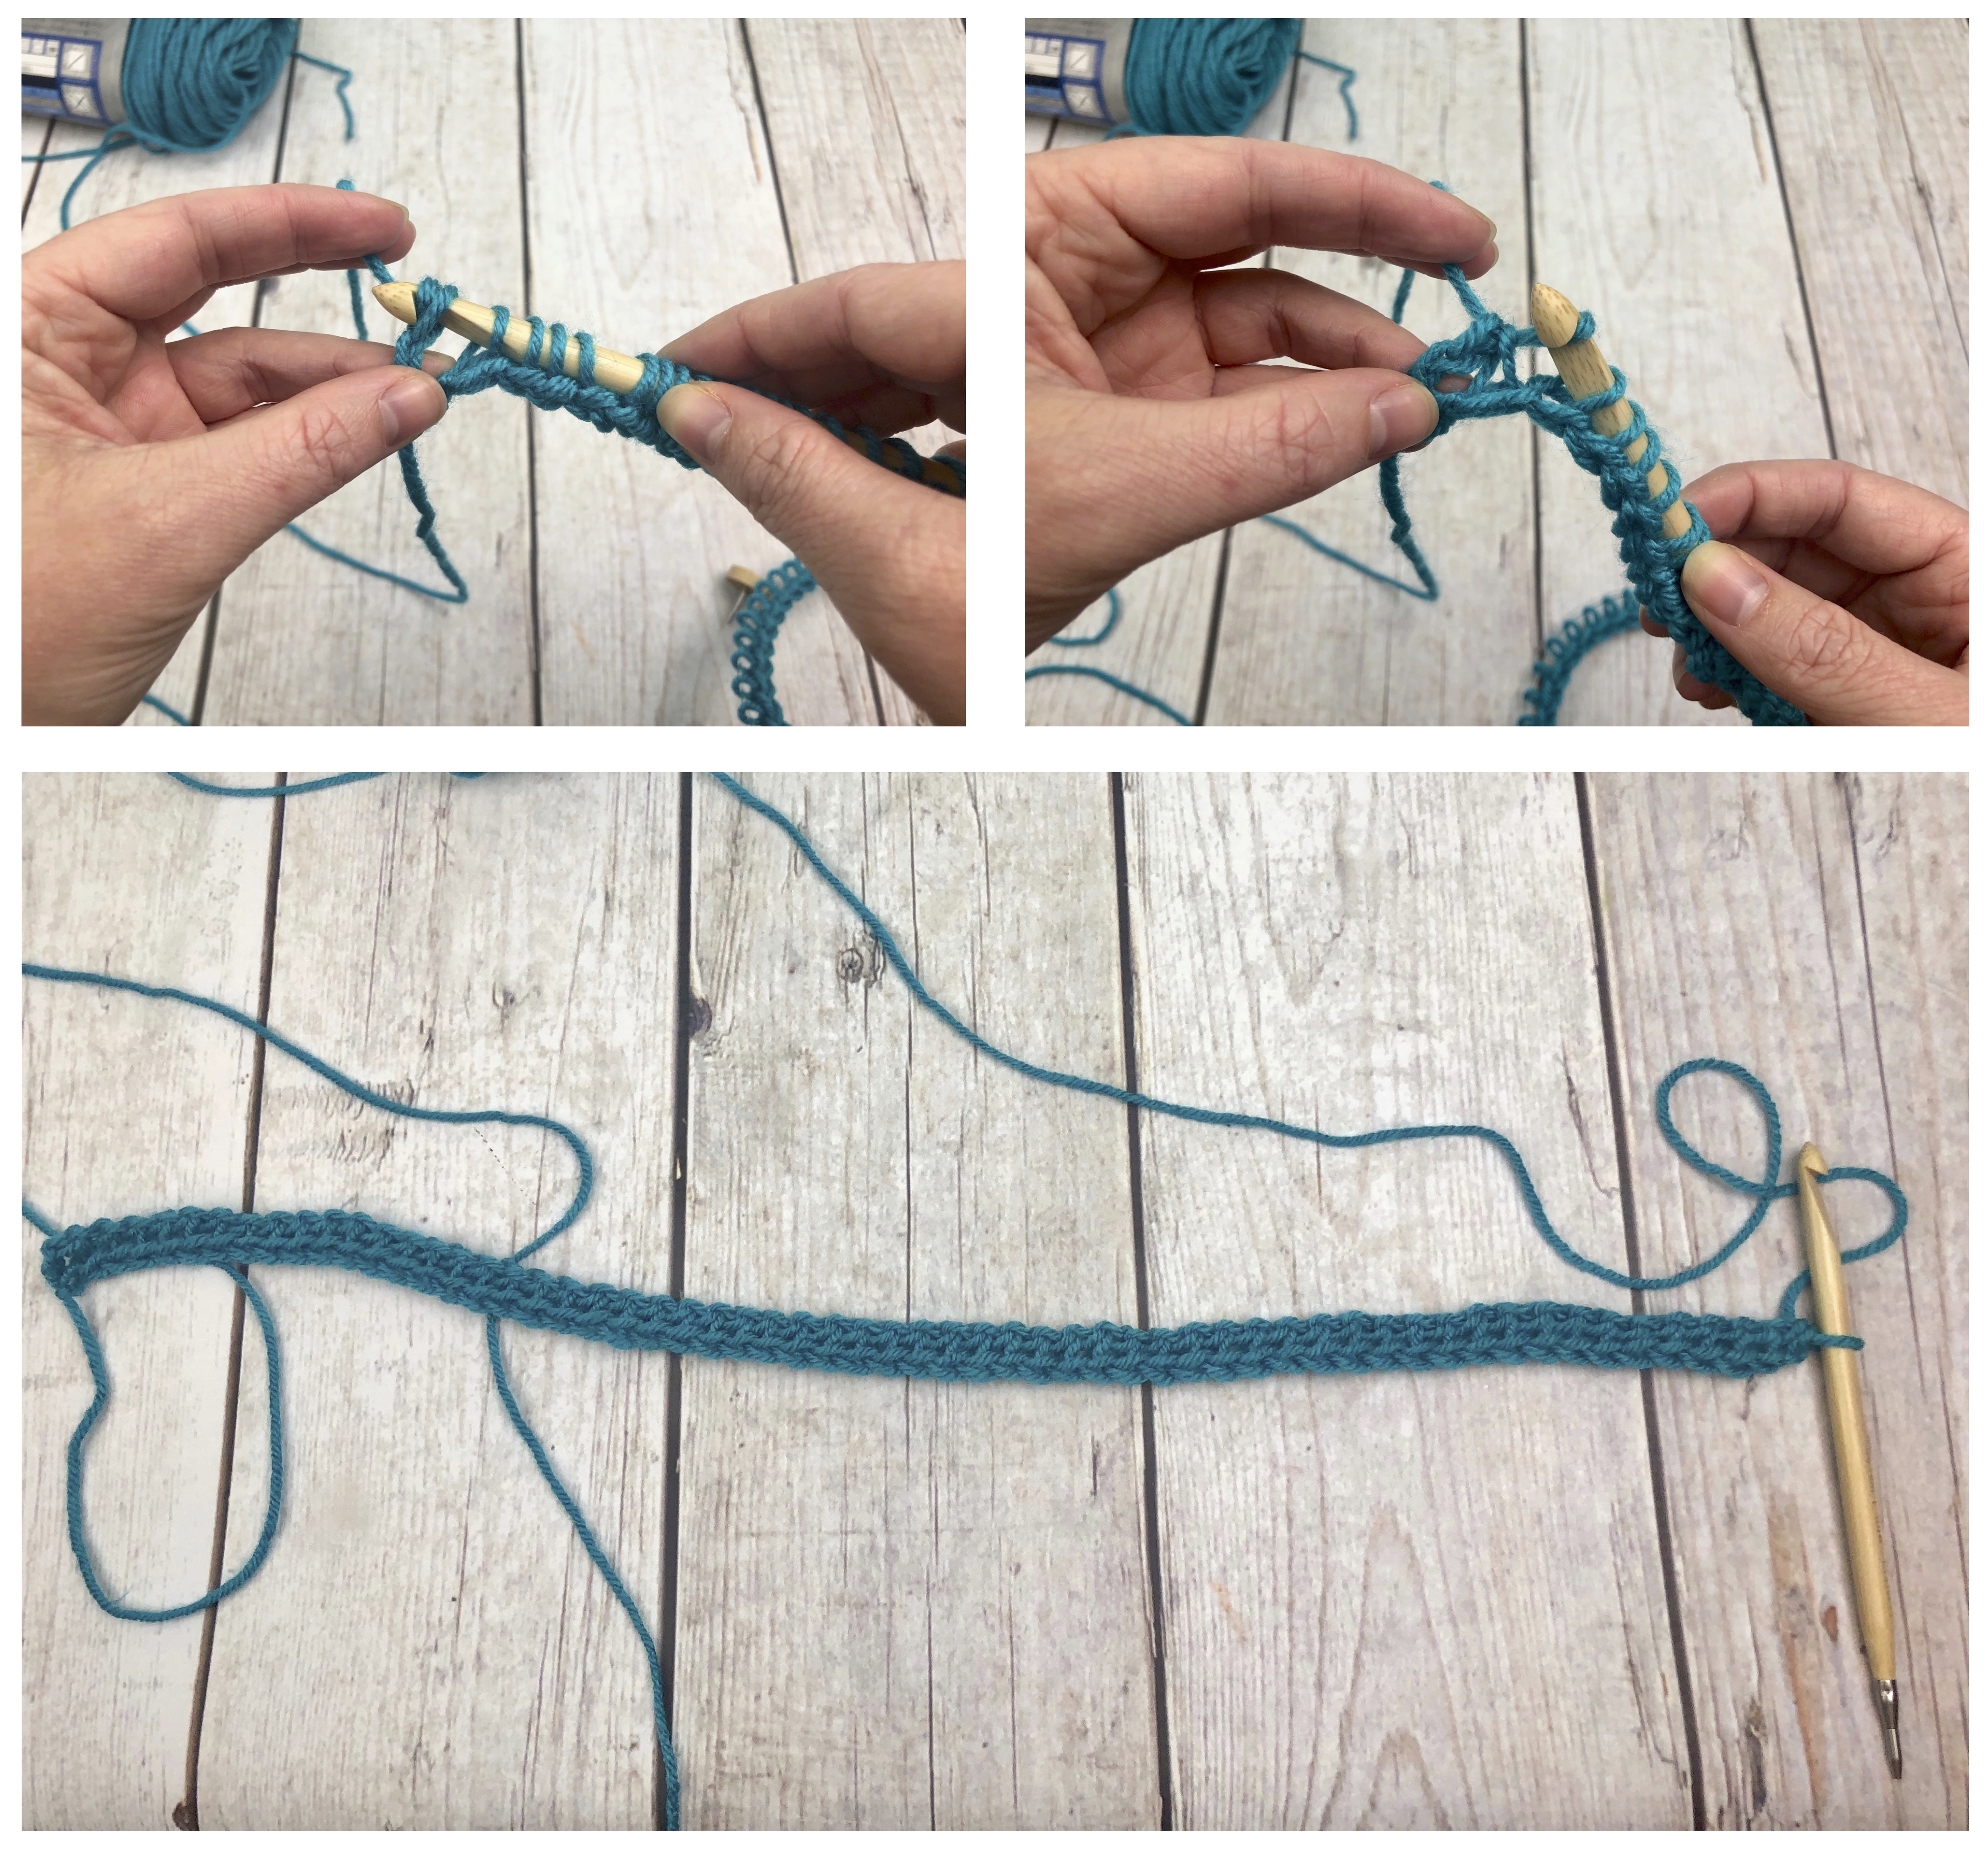
Foundation Row: Insert your hook into the Back Bump of every stitch on your beginning chain and pull up a loop. Once you get to the end, yarn over, pull through one (this counts as your CH up and is not counted as a stitch), yarn over, pull through two (your first stitch). Continue to yarn over and pull through two all the way down your chain.
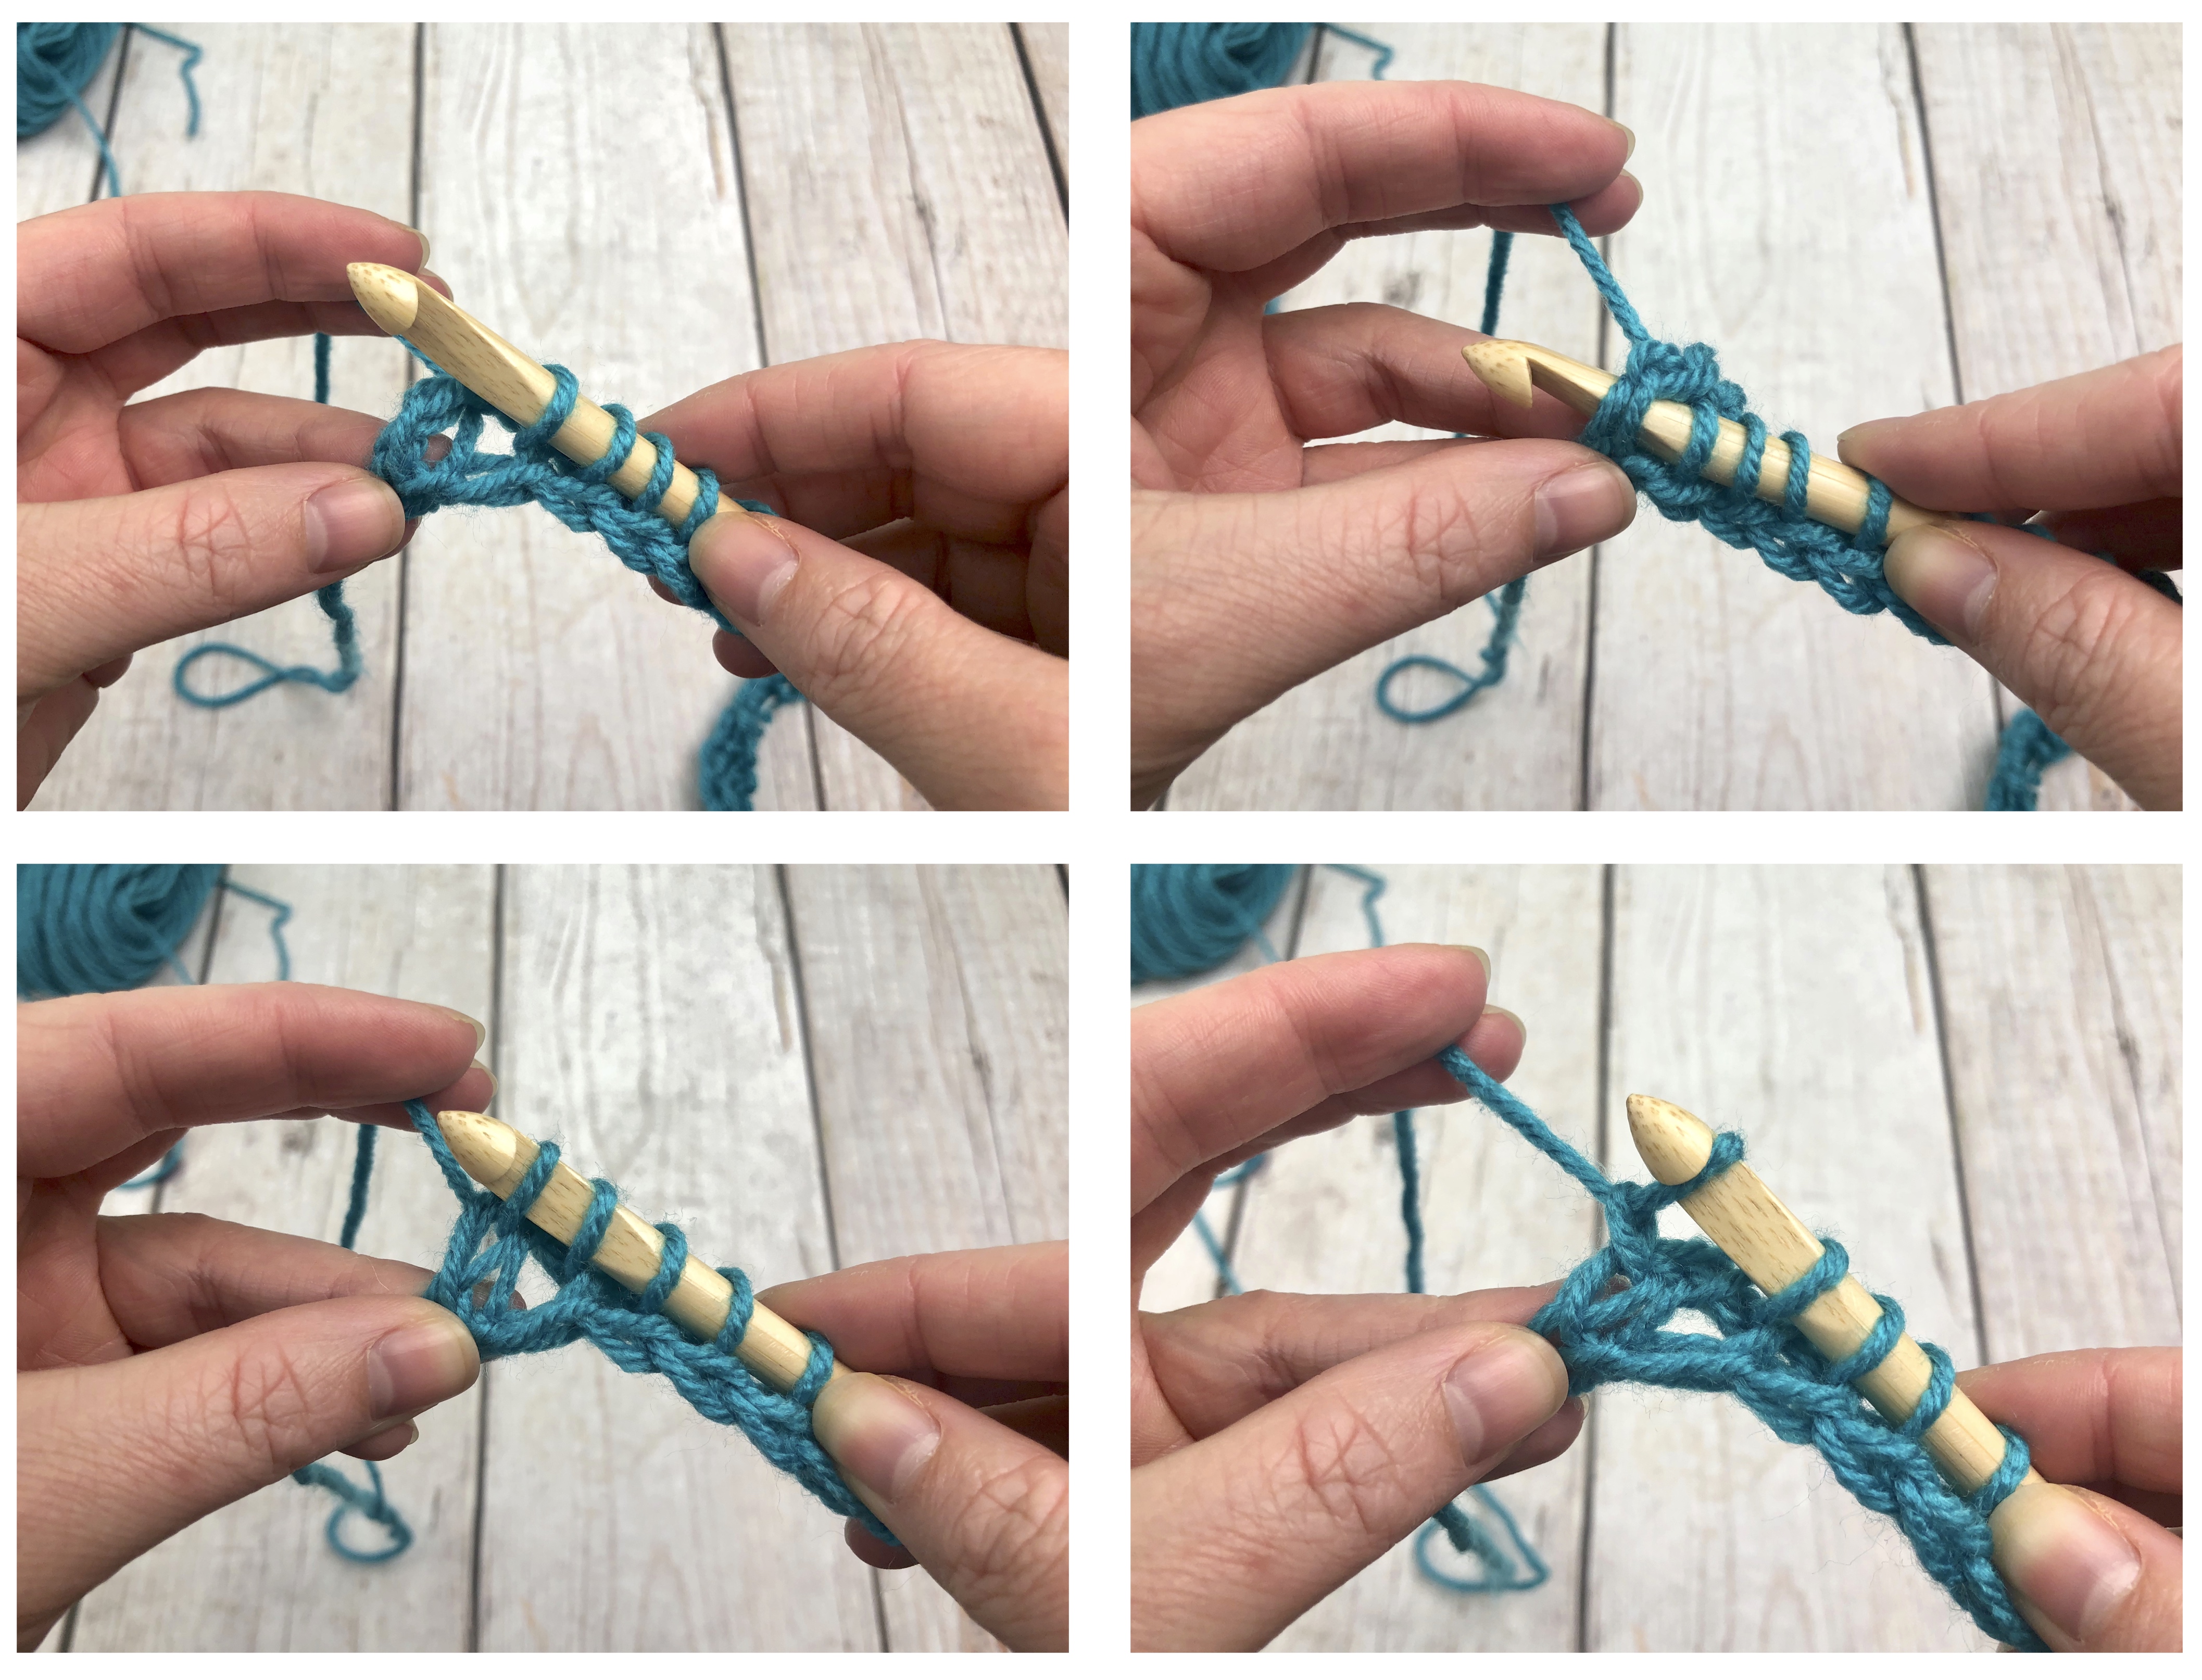
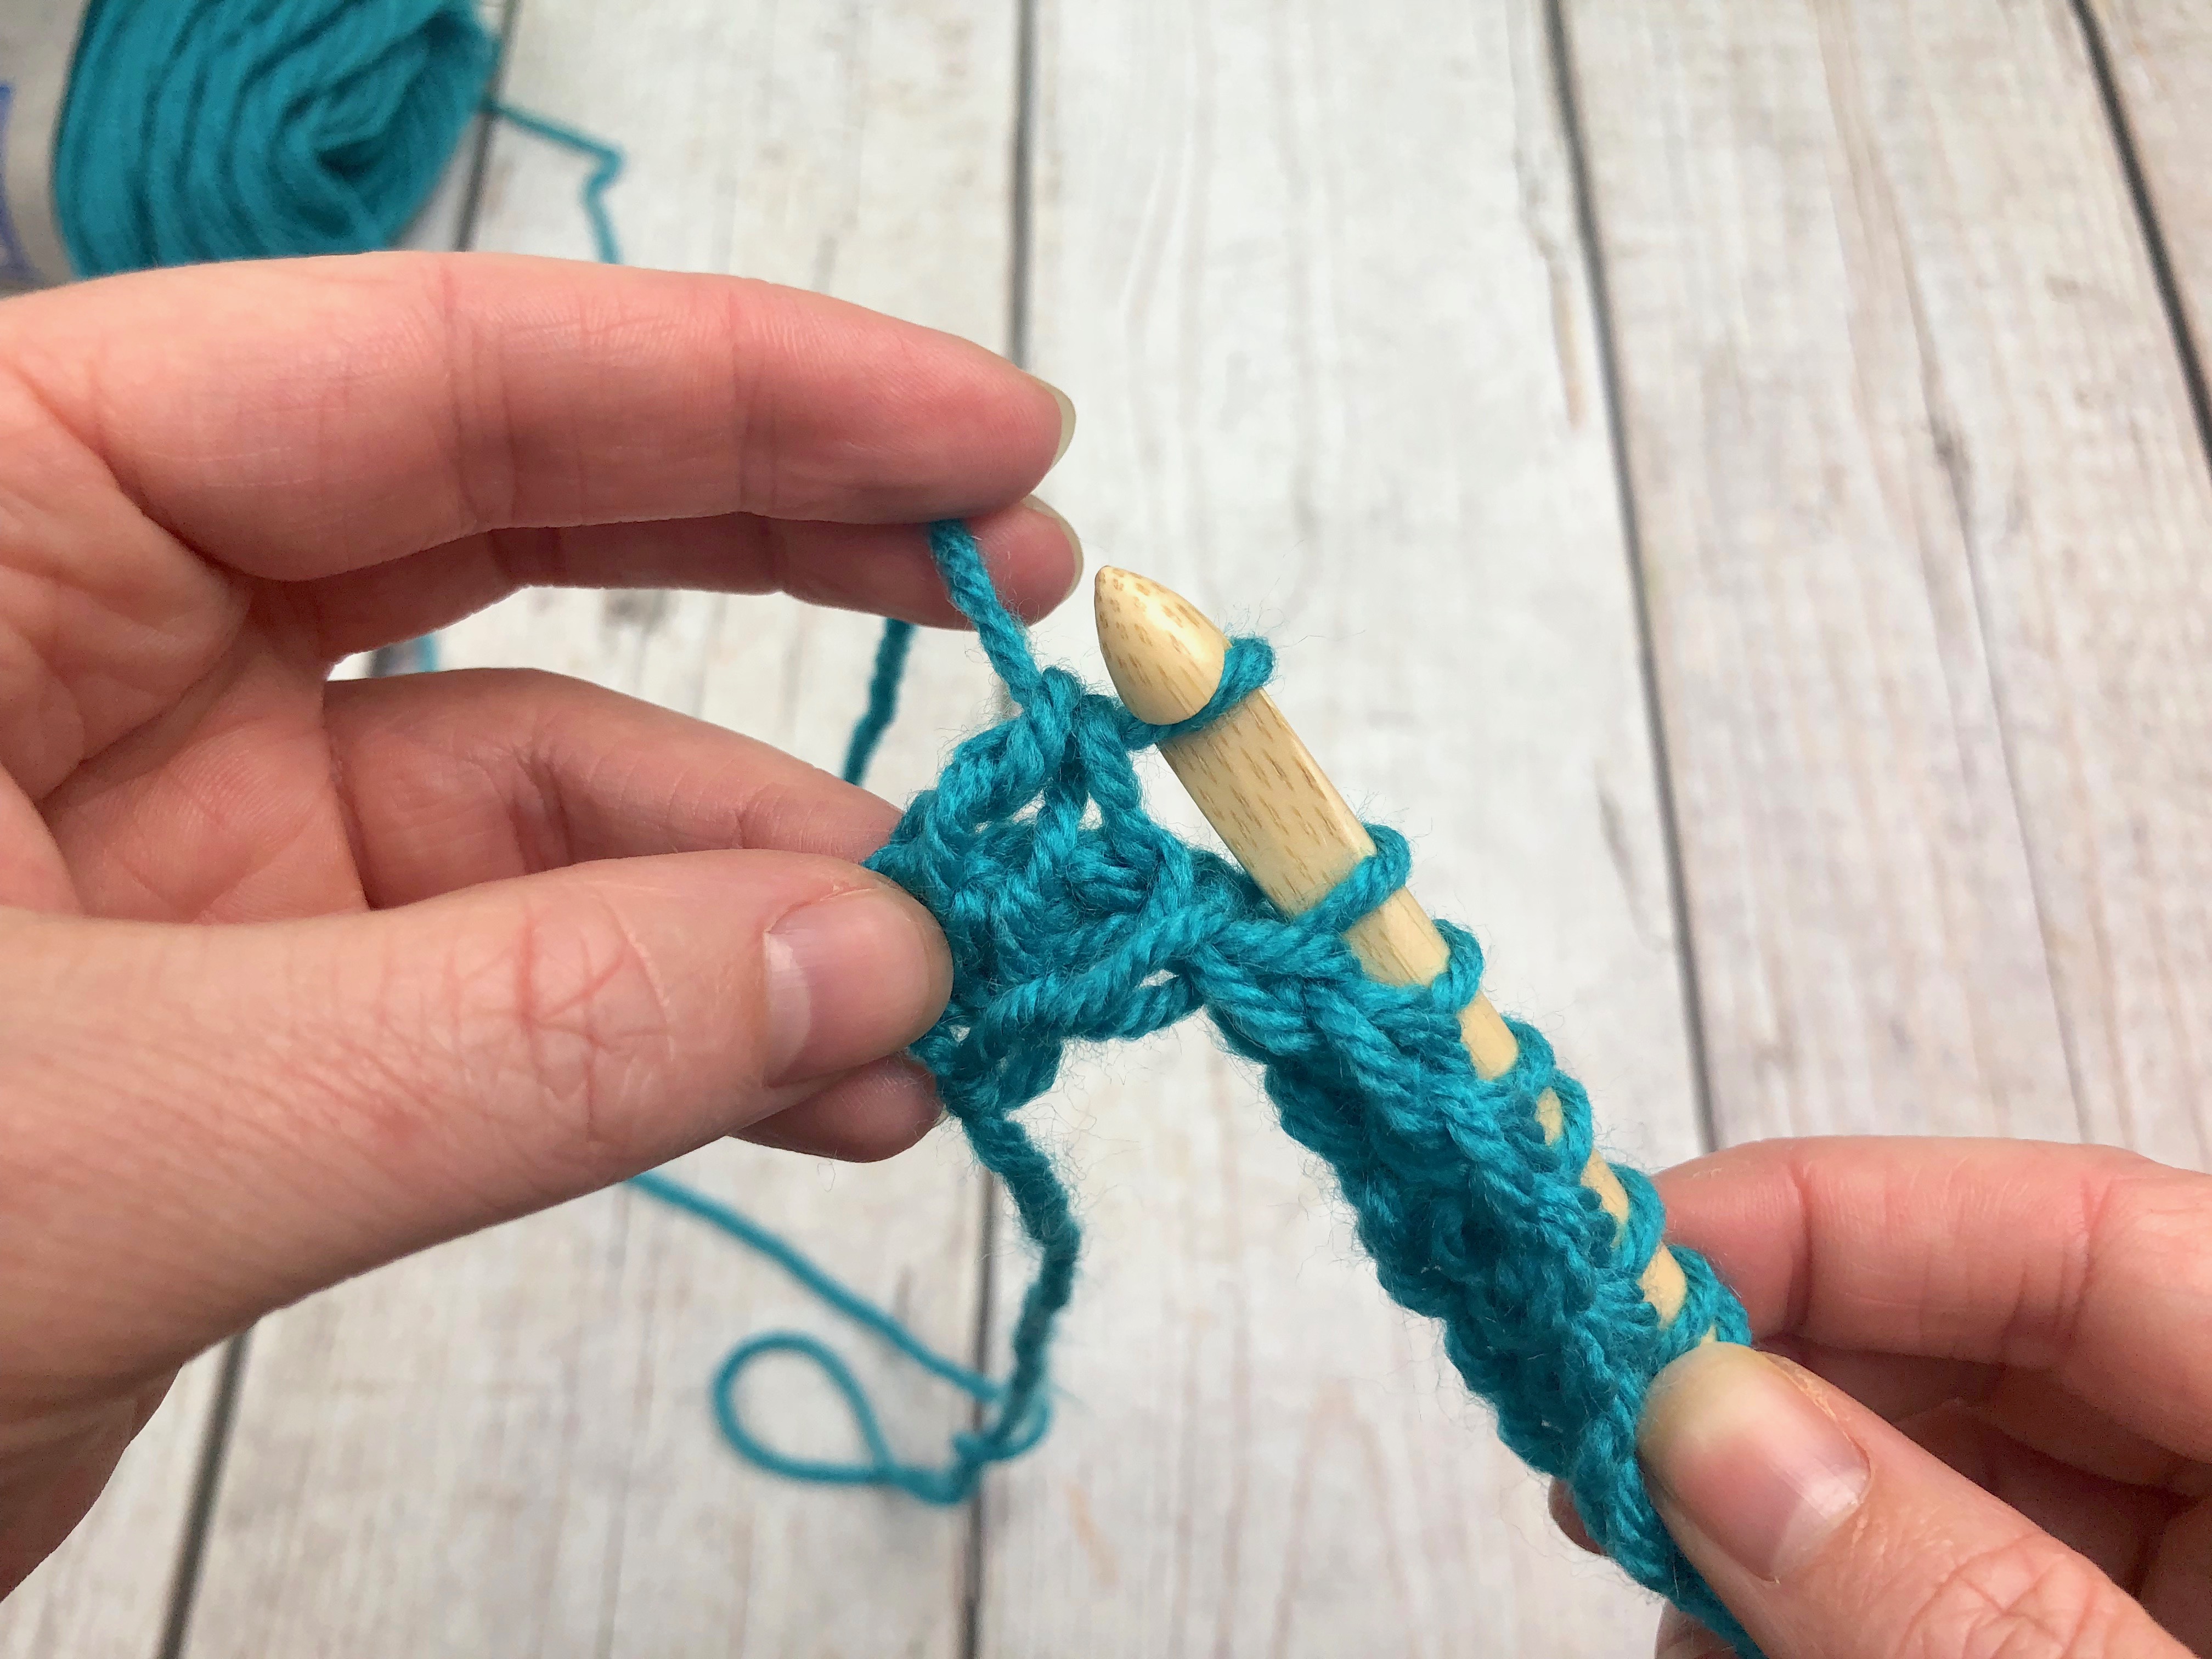
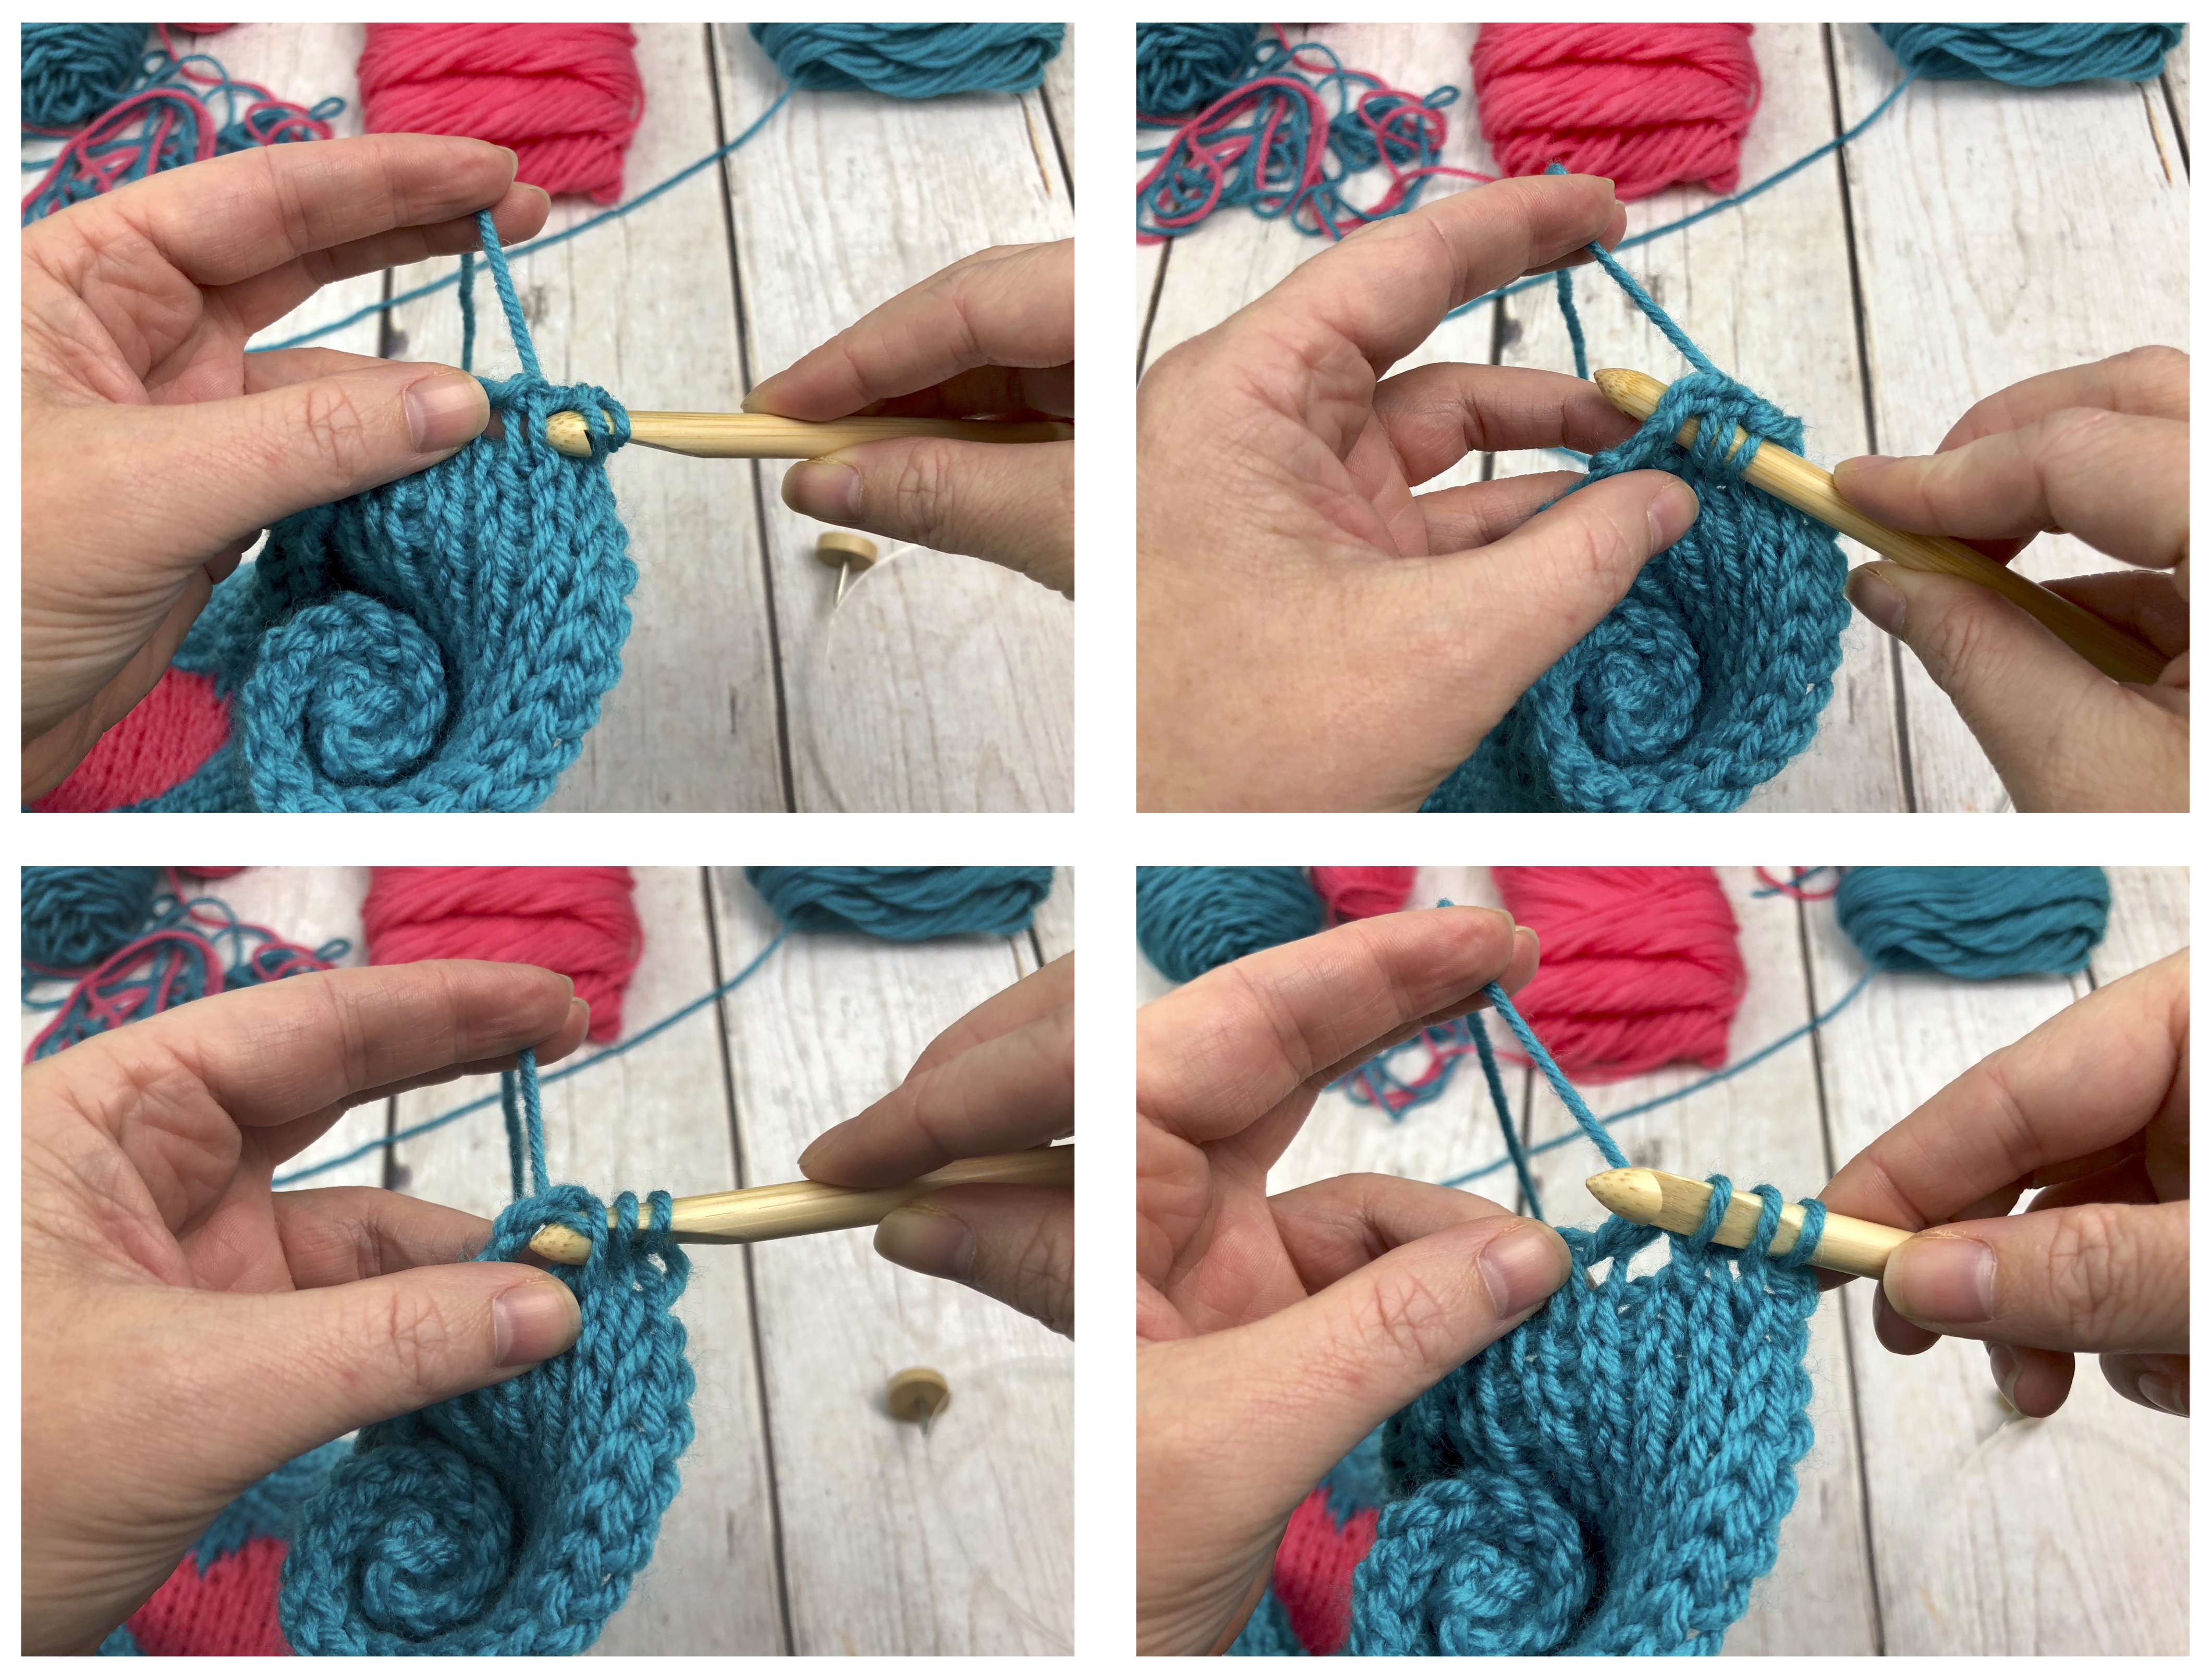
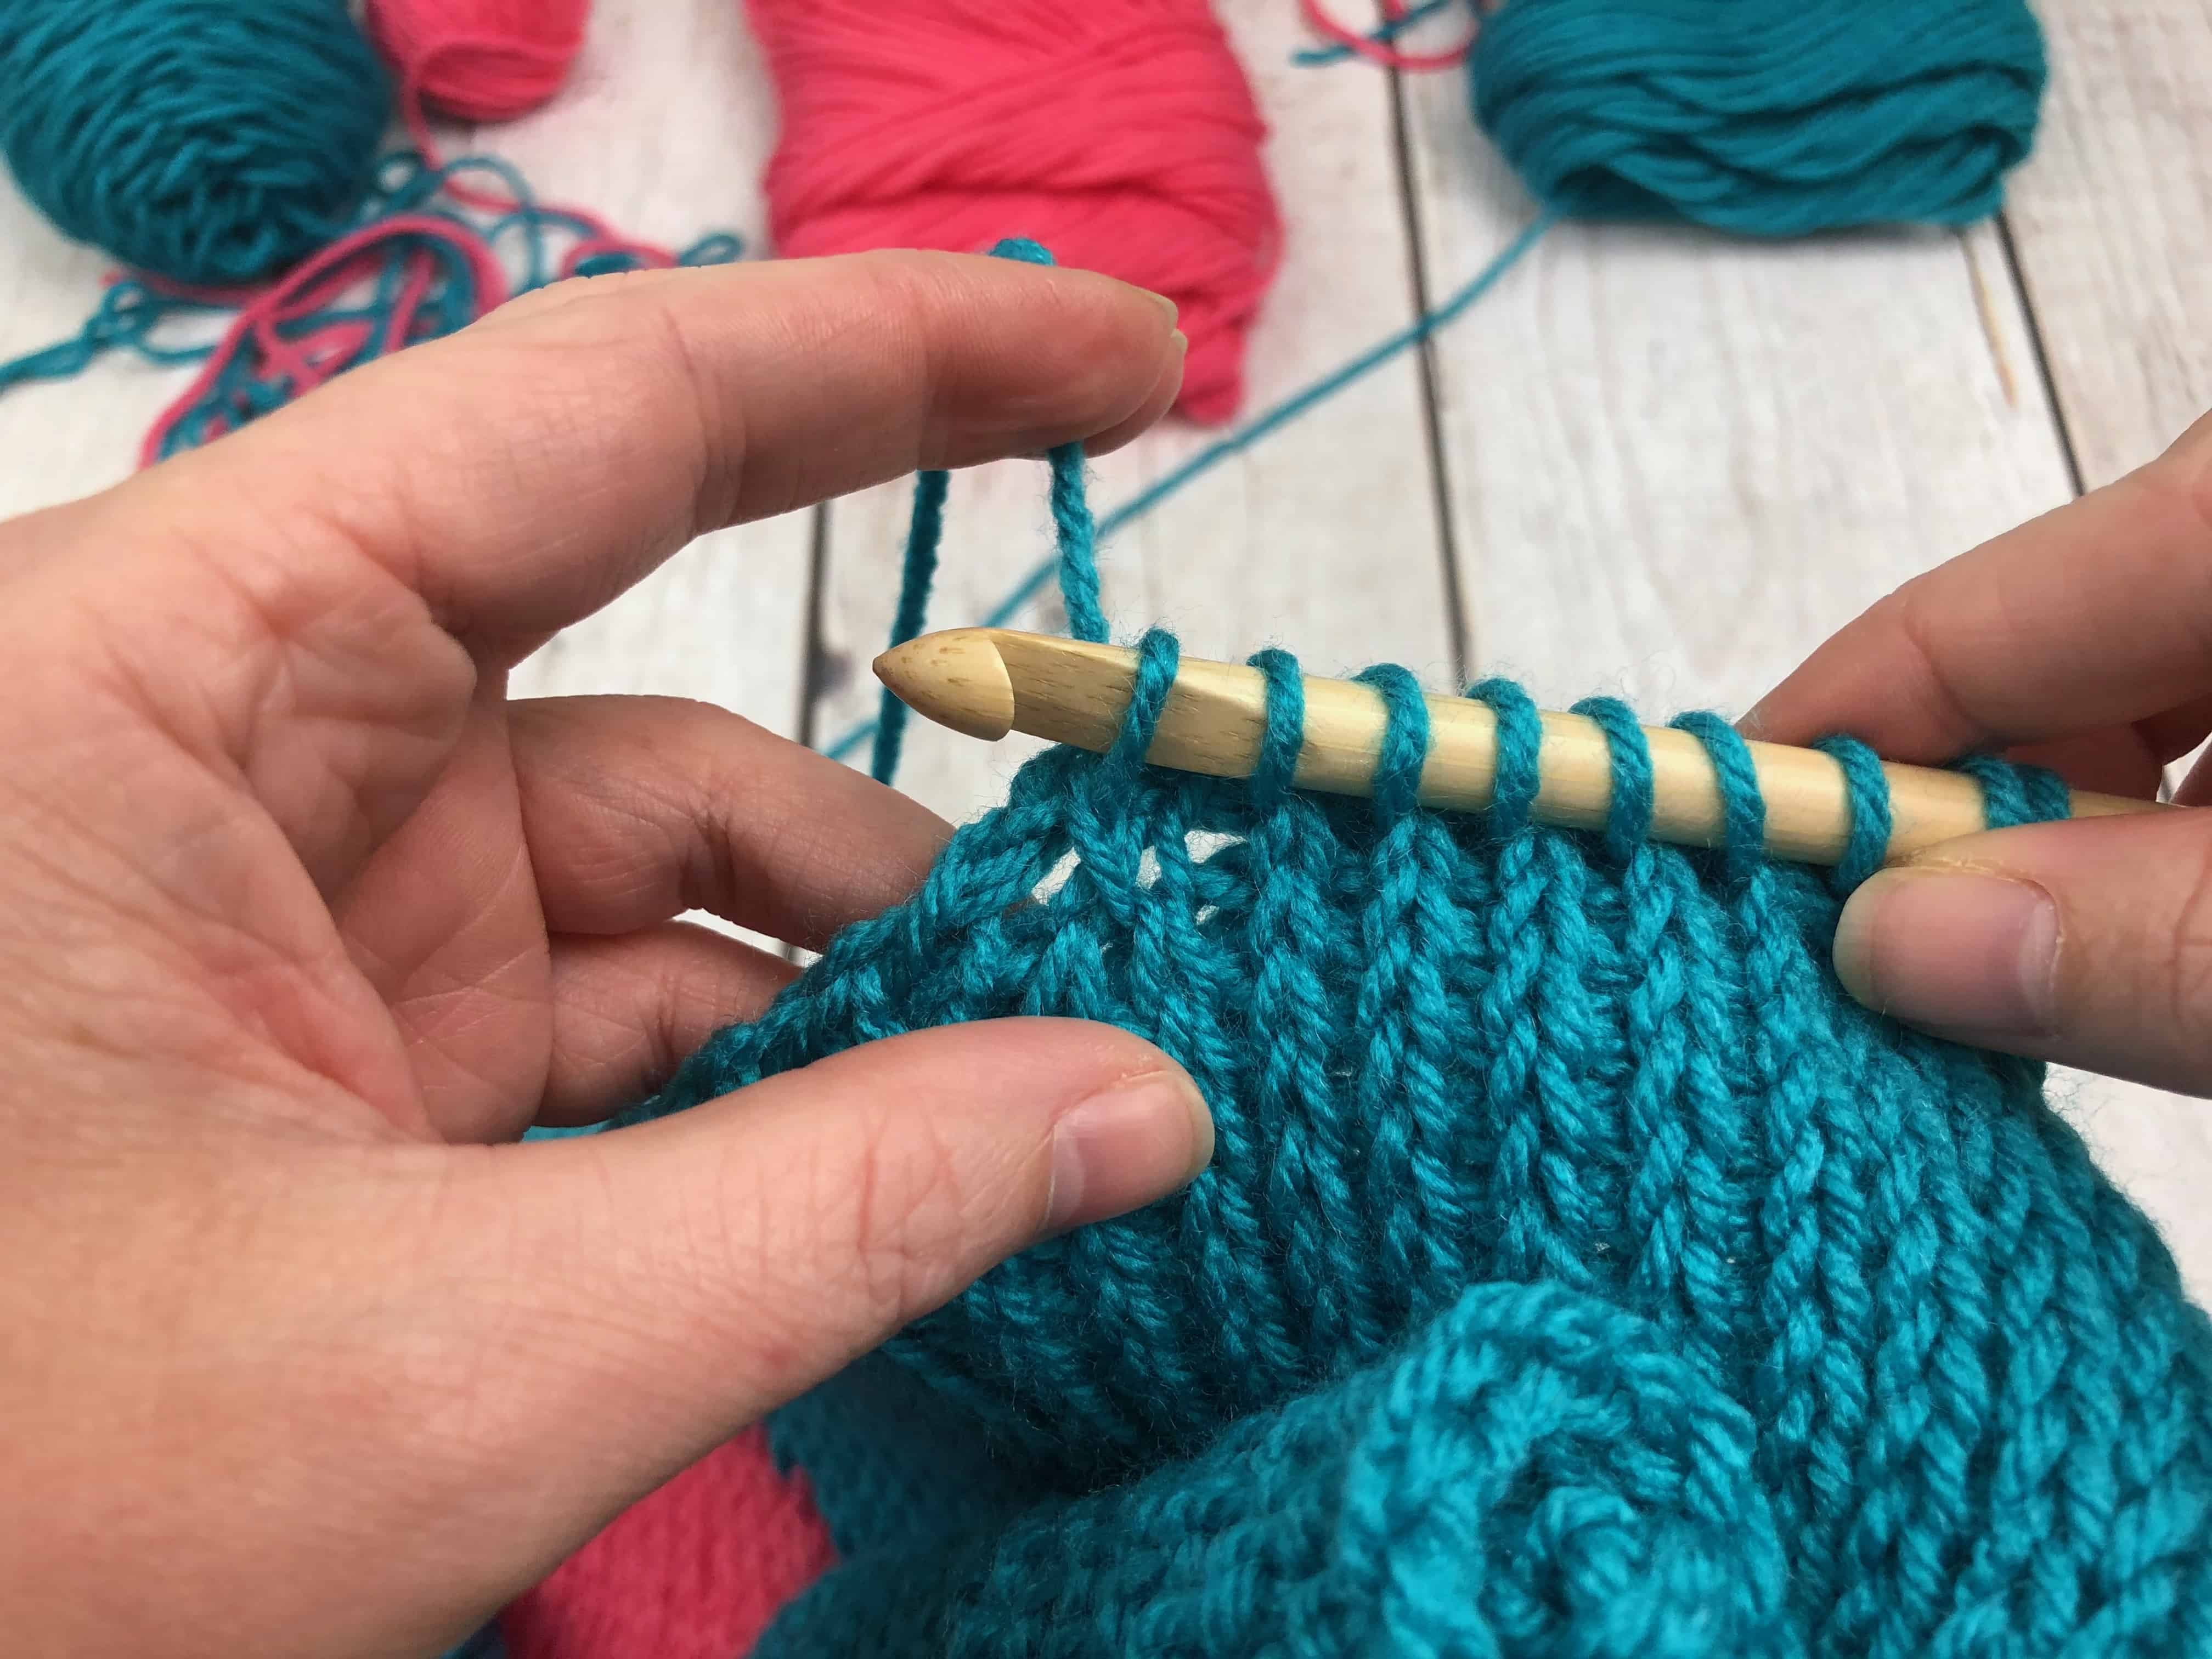
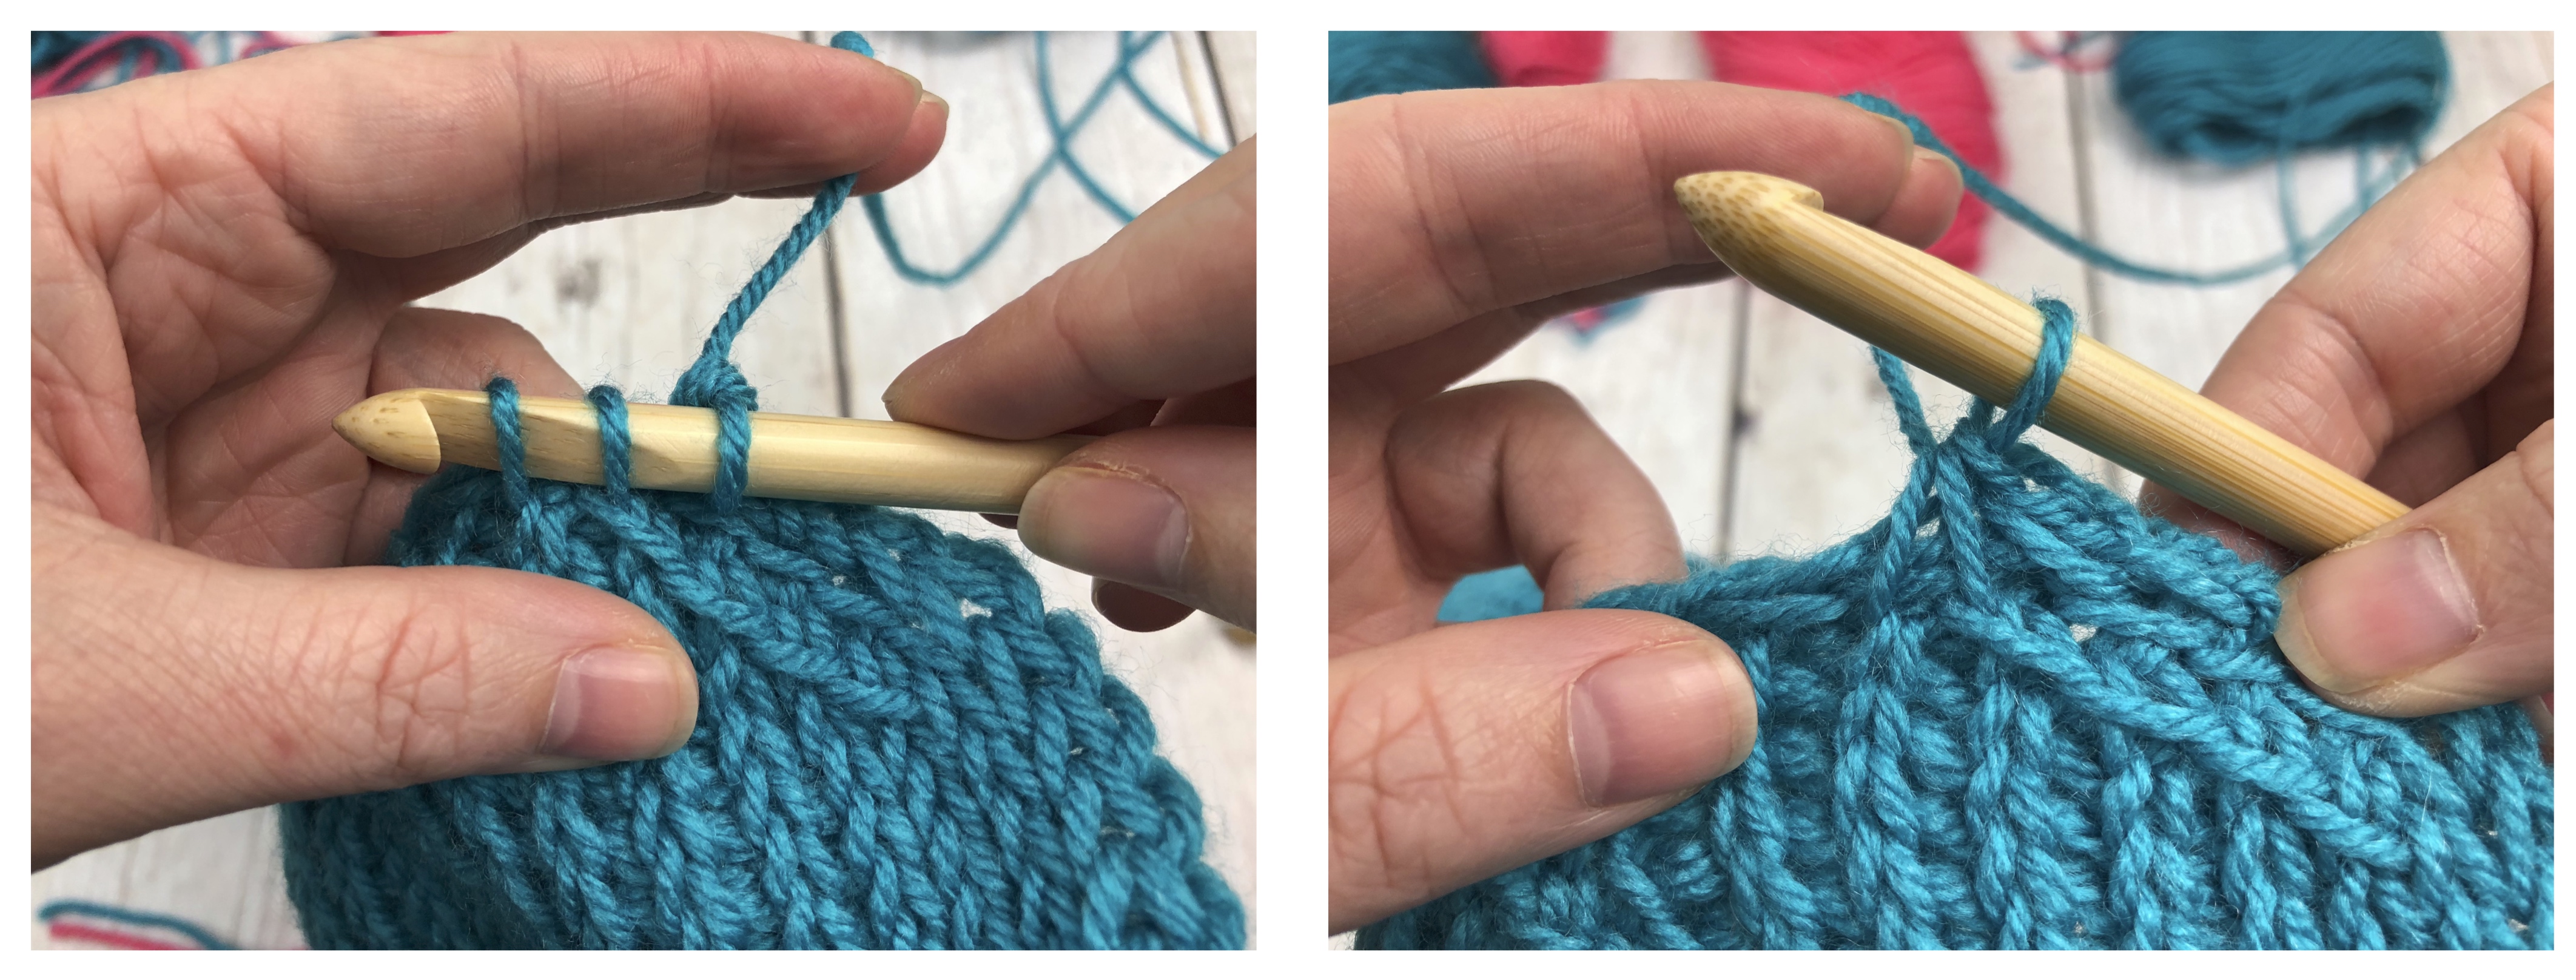
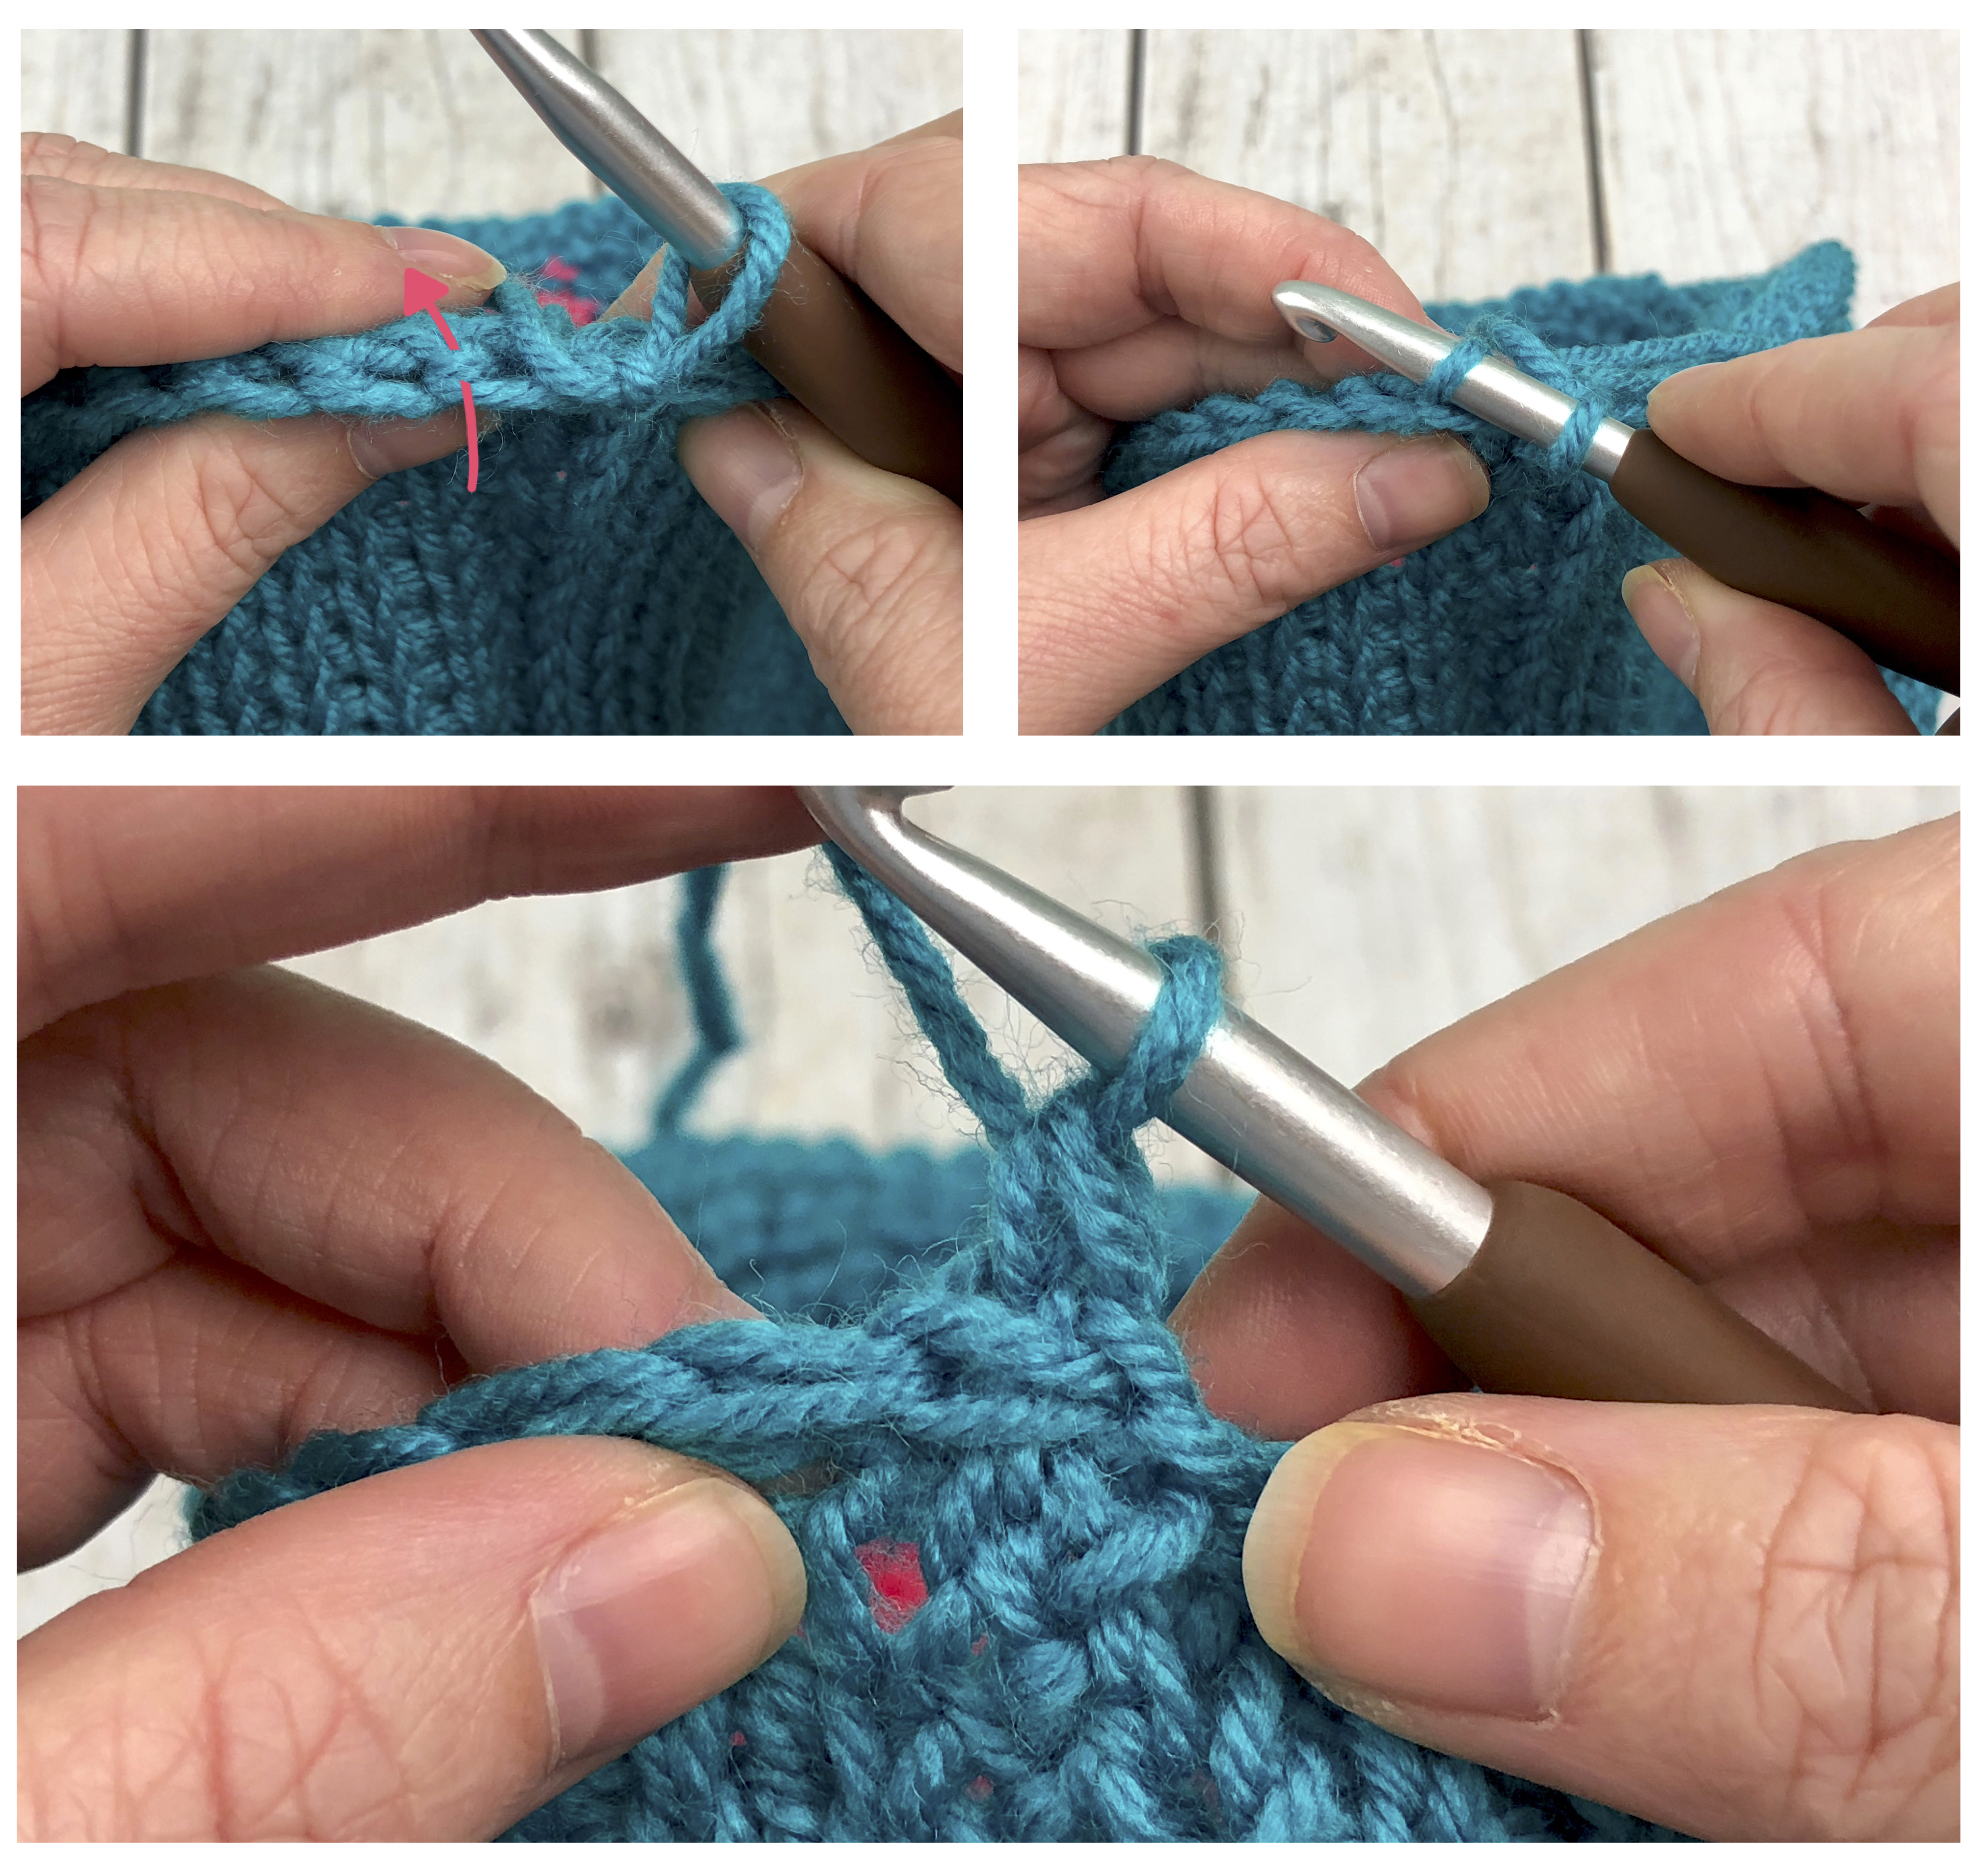
Tunisian Knit Stitch (TKS): Insert your hook between (to the back) the first two vertical bars on your row, yarn over, and pull up a loop. Continue inserting between the two vertical bars and pulling up a loop all the way down the row. When you get to the last stitch (the chain) insert your hook into the chain up you made in the previous row, and pull up a loop. Yarn over and pull through one (this counts as your CH up and is not counted as a stitch), yarn over, pull through two (your first stitch). Continue to yarn over and pull through two all the way down your row.
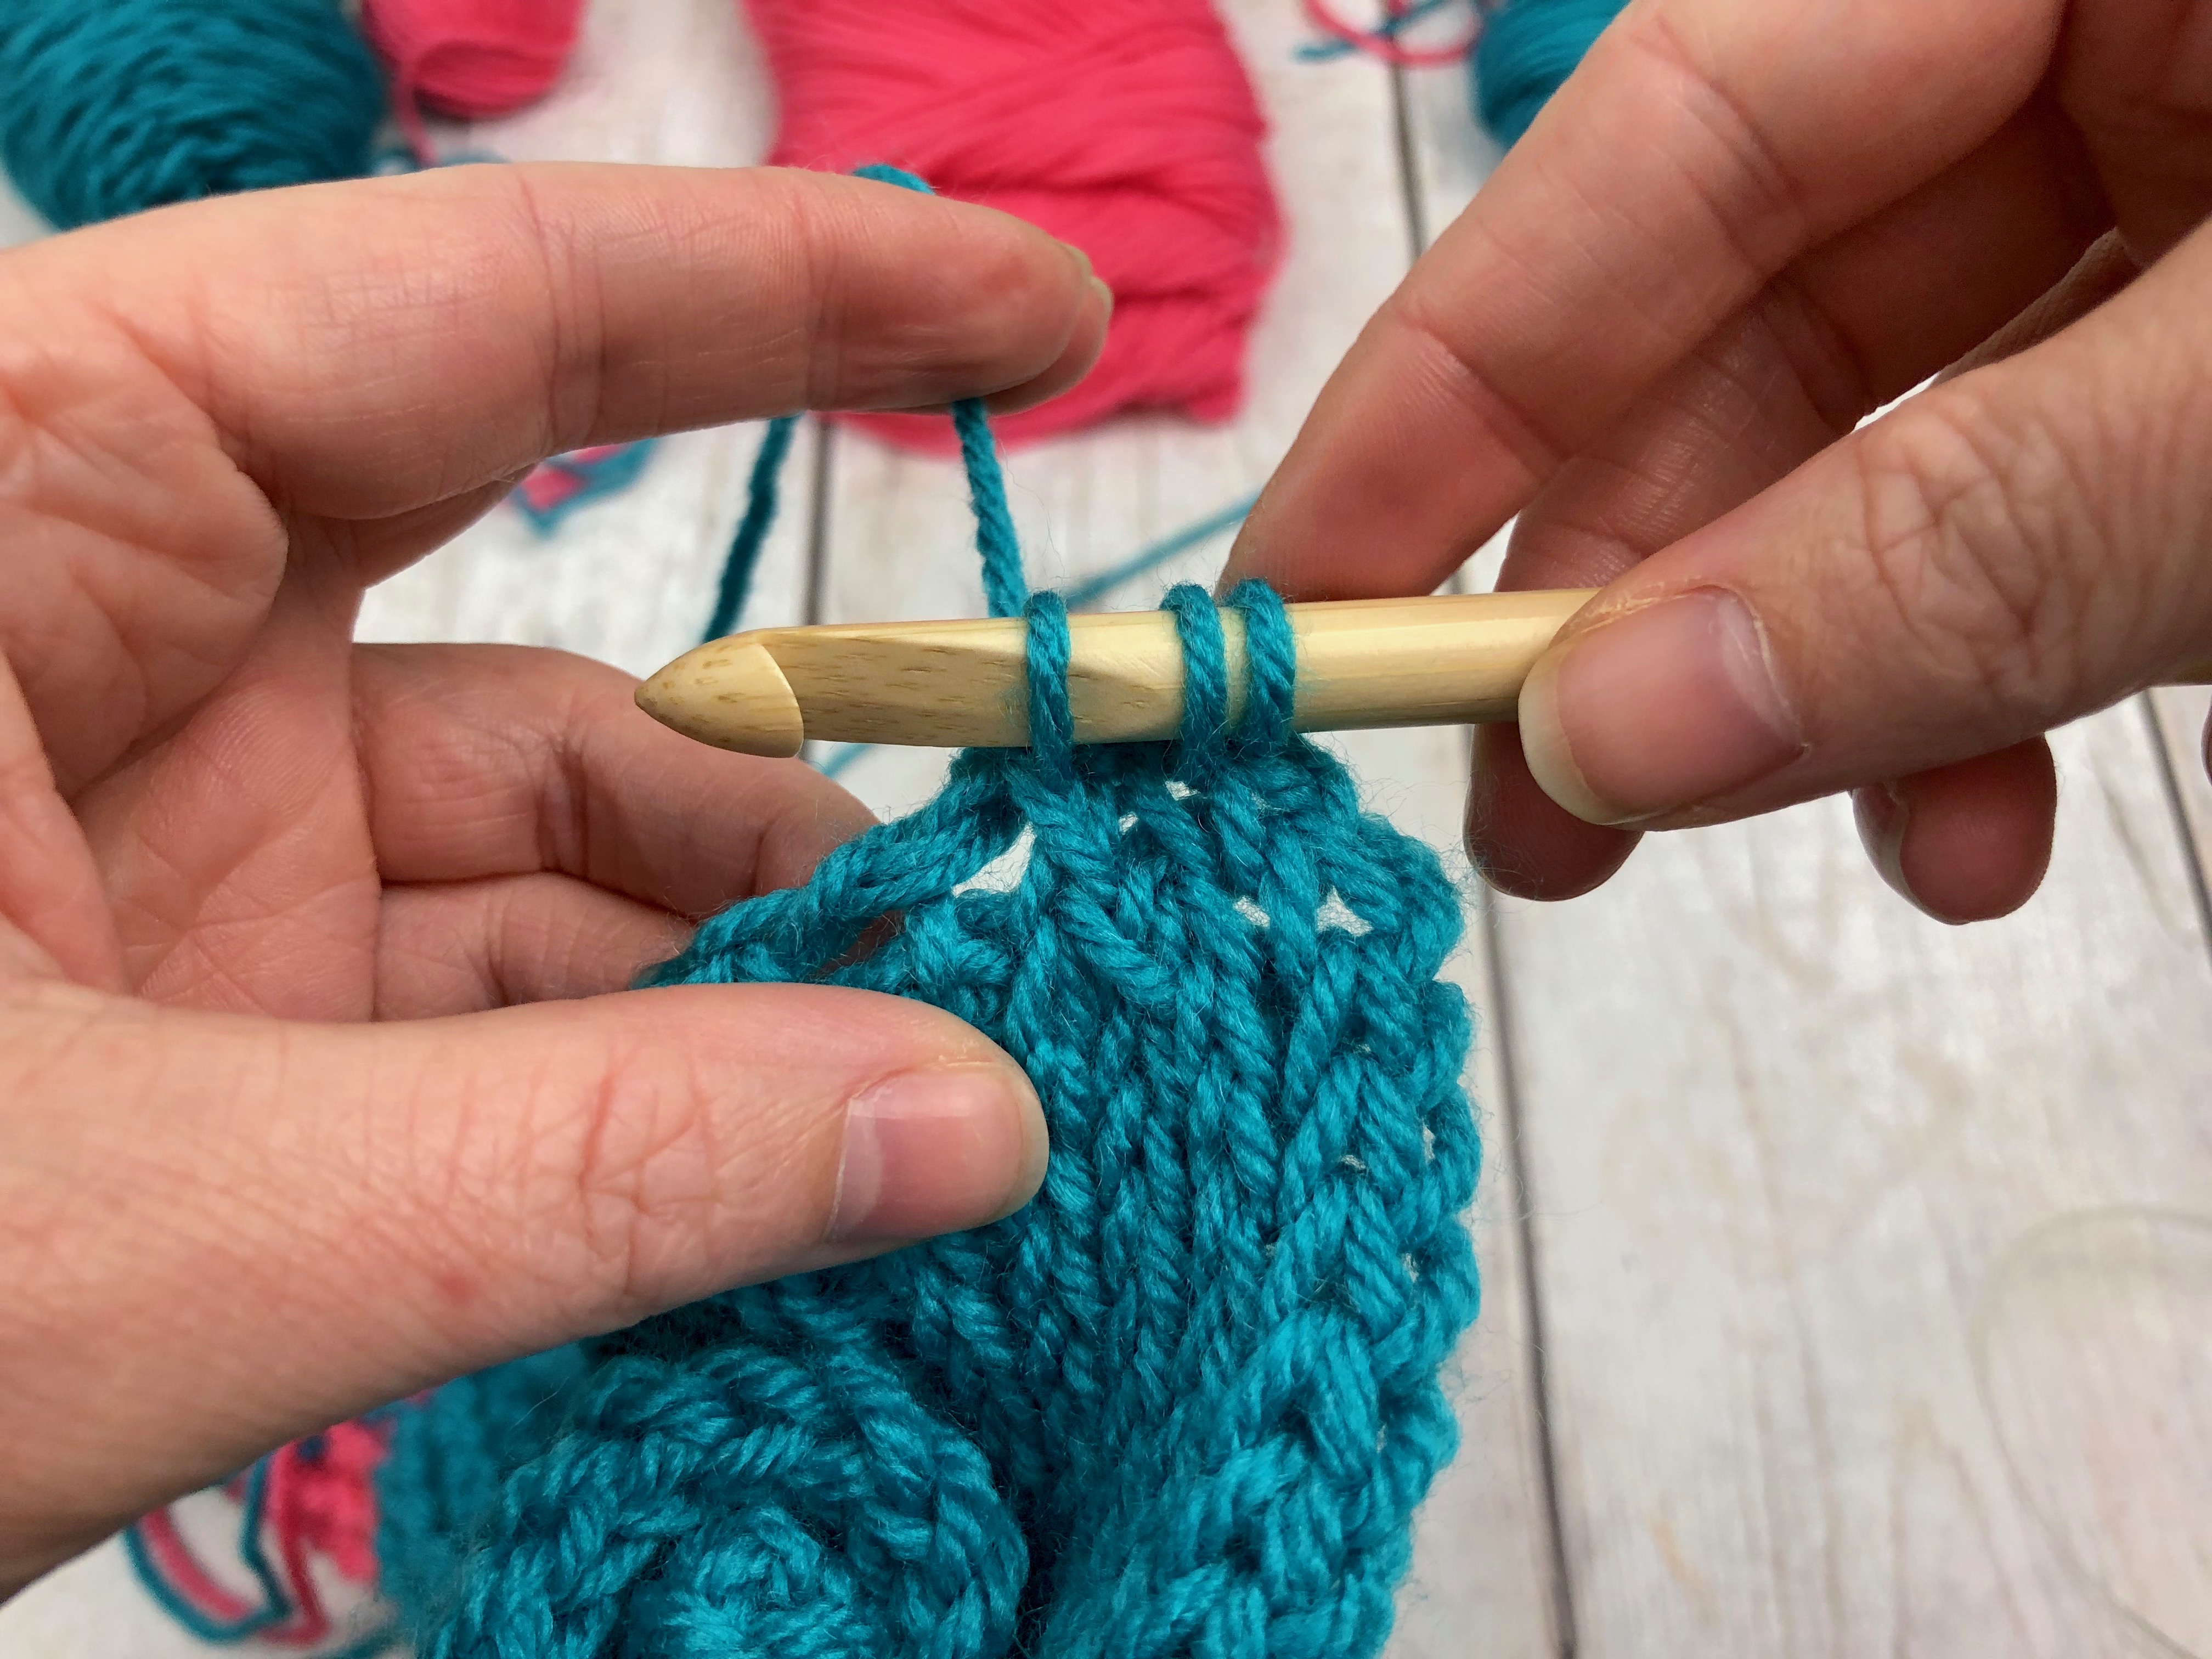
Knit Stitch Two Together (K2TOG): Insert your hook under the first vertical bar of your stitch (not through to the back of your work like in a regular knit stitch, just under the first bar), then insert your hook between the next stitch’s vertical bars (like making a normal knit stitch), yarn over and pull through both bars.
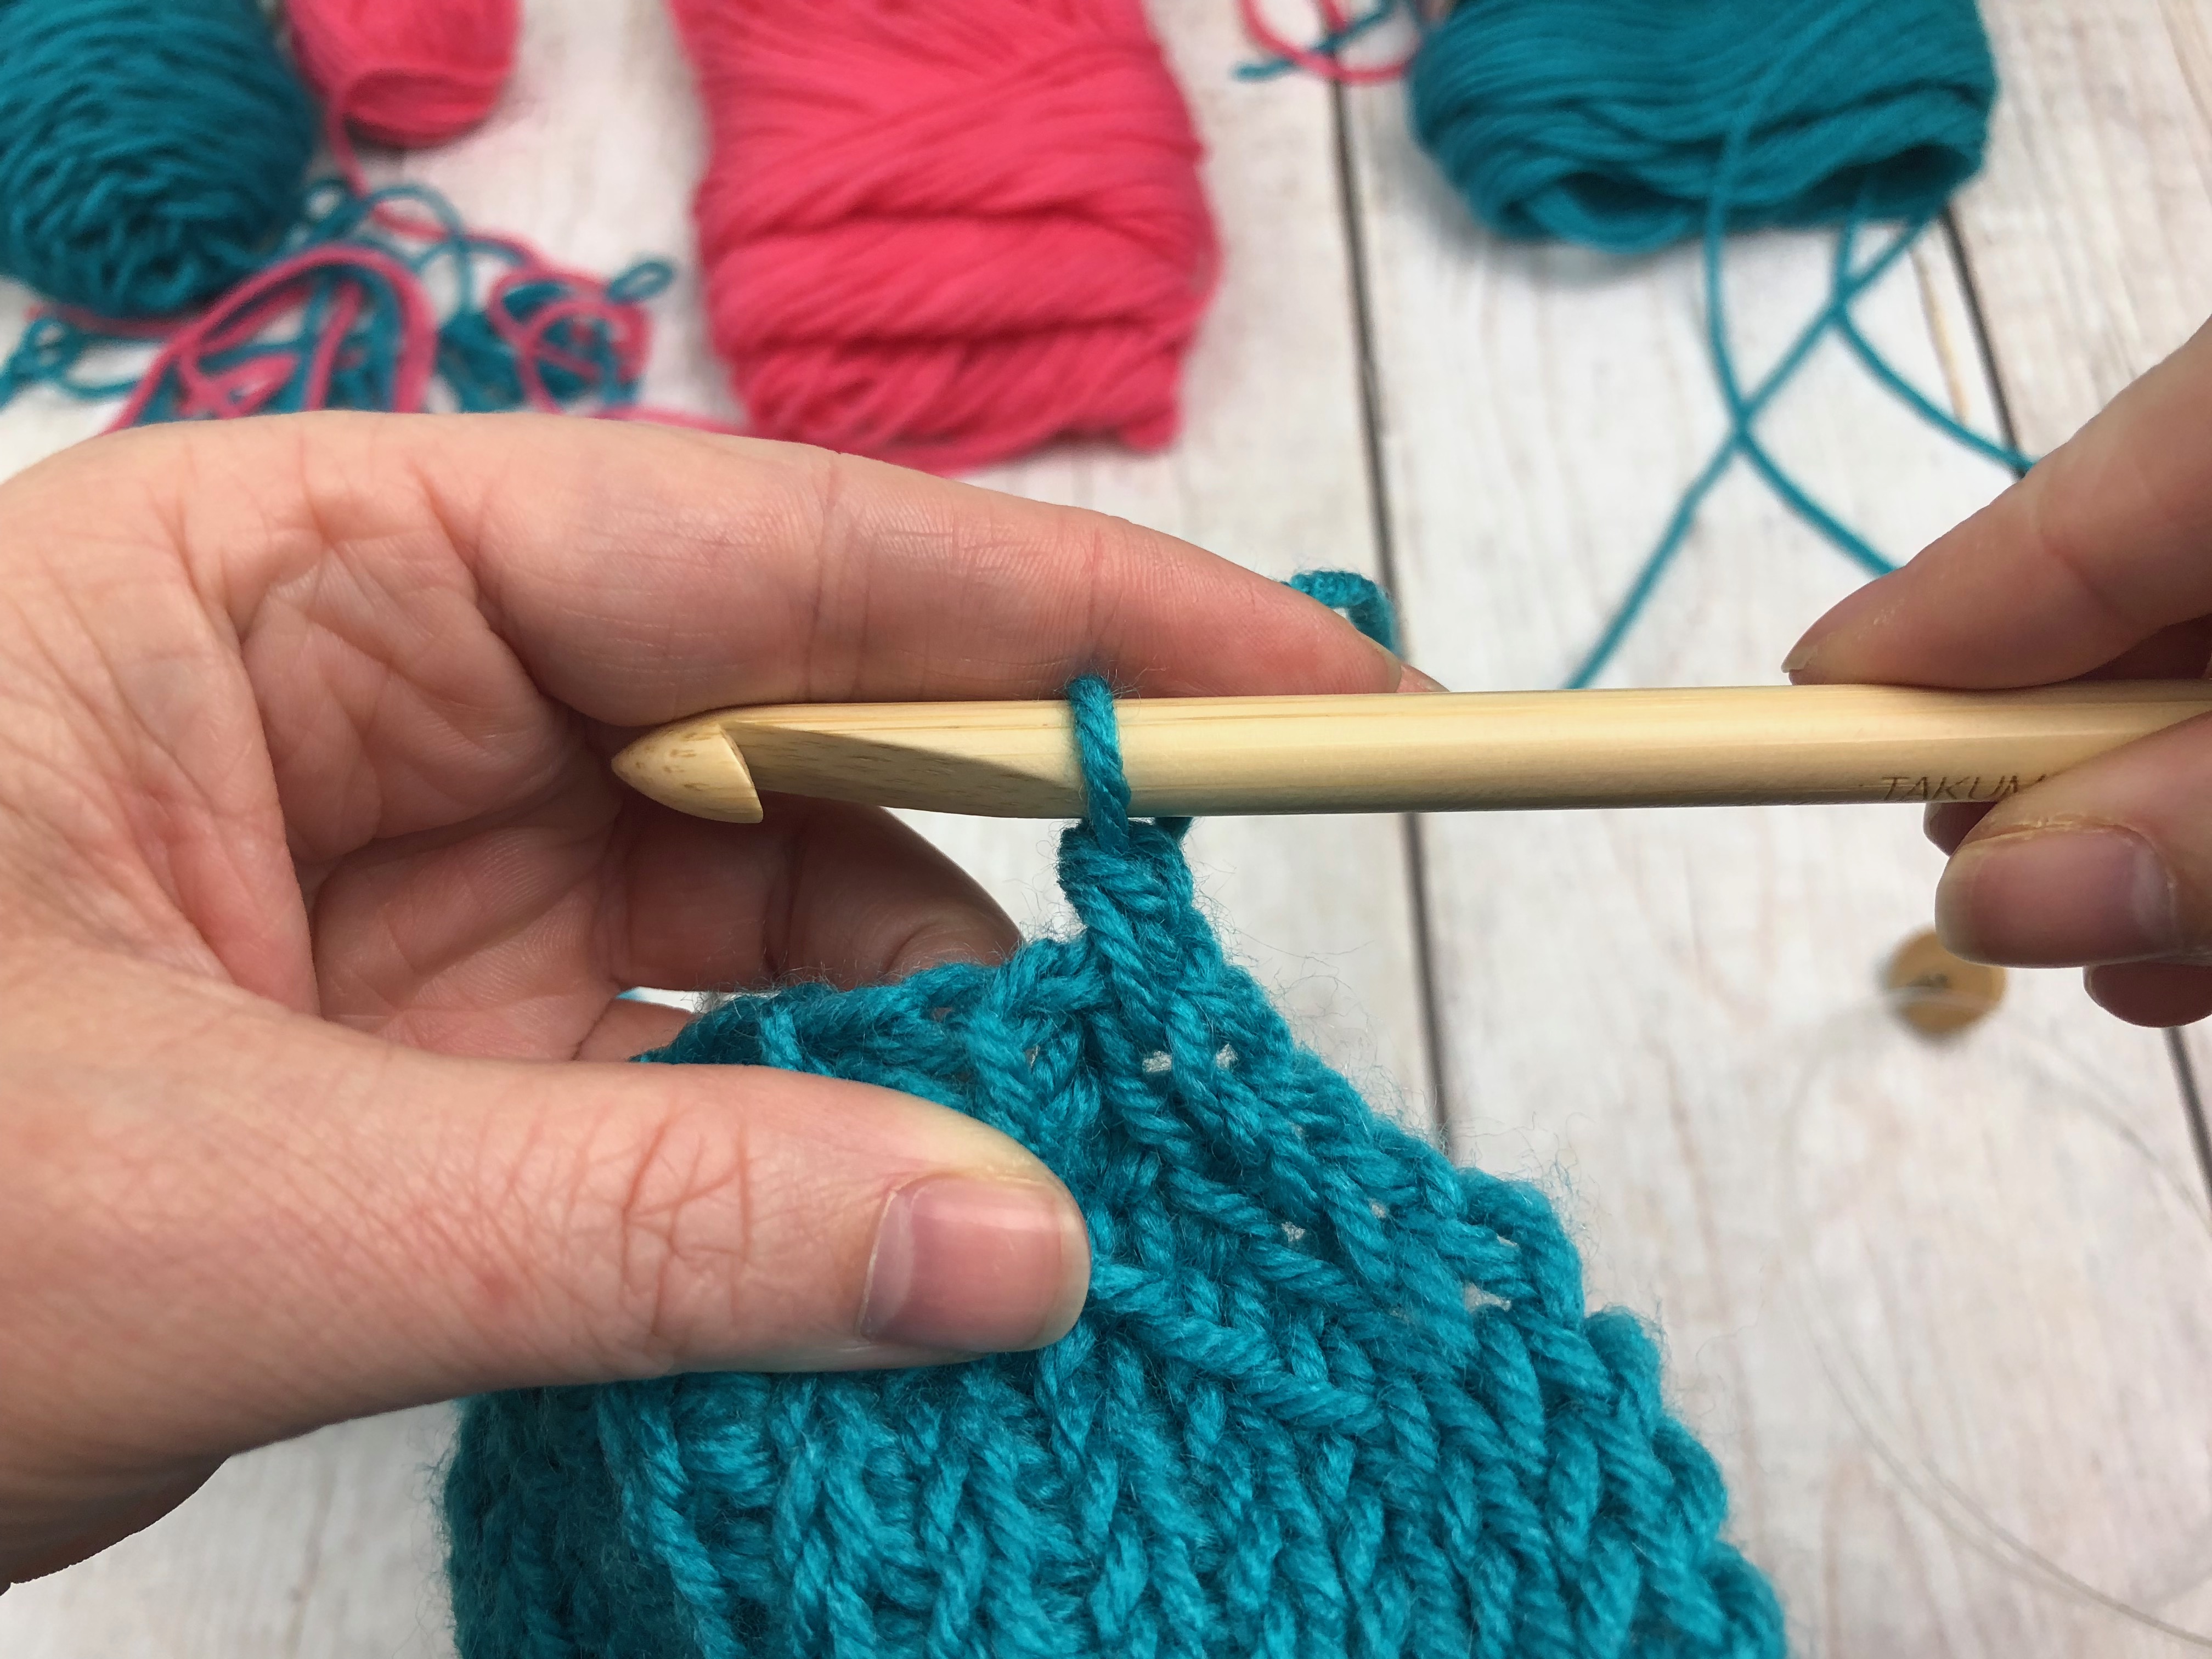
Tunisian Slip Stitch (TSL2TOG): Insert your hook under the first vertical bar of your first stitch, insert your hook directly into the first vertical bar on your next stitch, yarn over and pull through all stitches on your hook.
How to change colors: You can find this explanation in Row 4, but the same principle applies to all the rows that have color changes.
Before you start:
Pull out and roll a ball of your beanie color yarn. It should be about the size of a baseball (remember its better to have too much then to little). This will be referred to as B2 beanie yarn, throughout the pattern. Your main skein will be referred to as B1 beanie yarn. You will also need one really little ball of beanie color yarn and it will be referred to as B3 beanie yarn.
You will need two balls/skeins of heart color yarn. Your bigger ball will be H1 and your smaller ball will be H2.
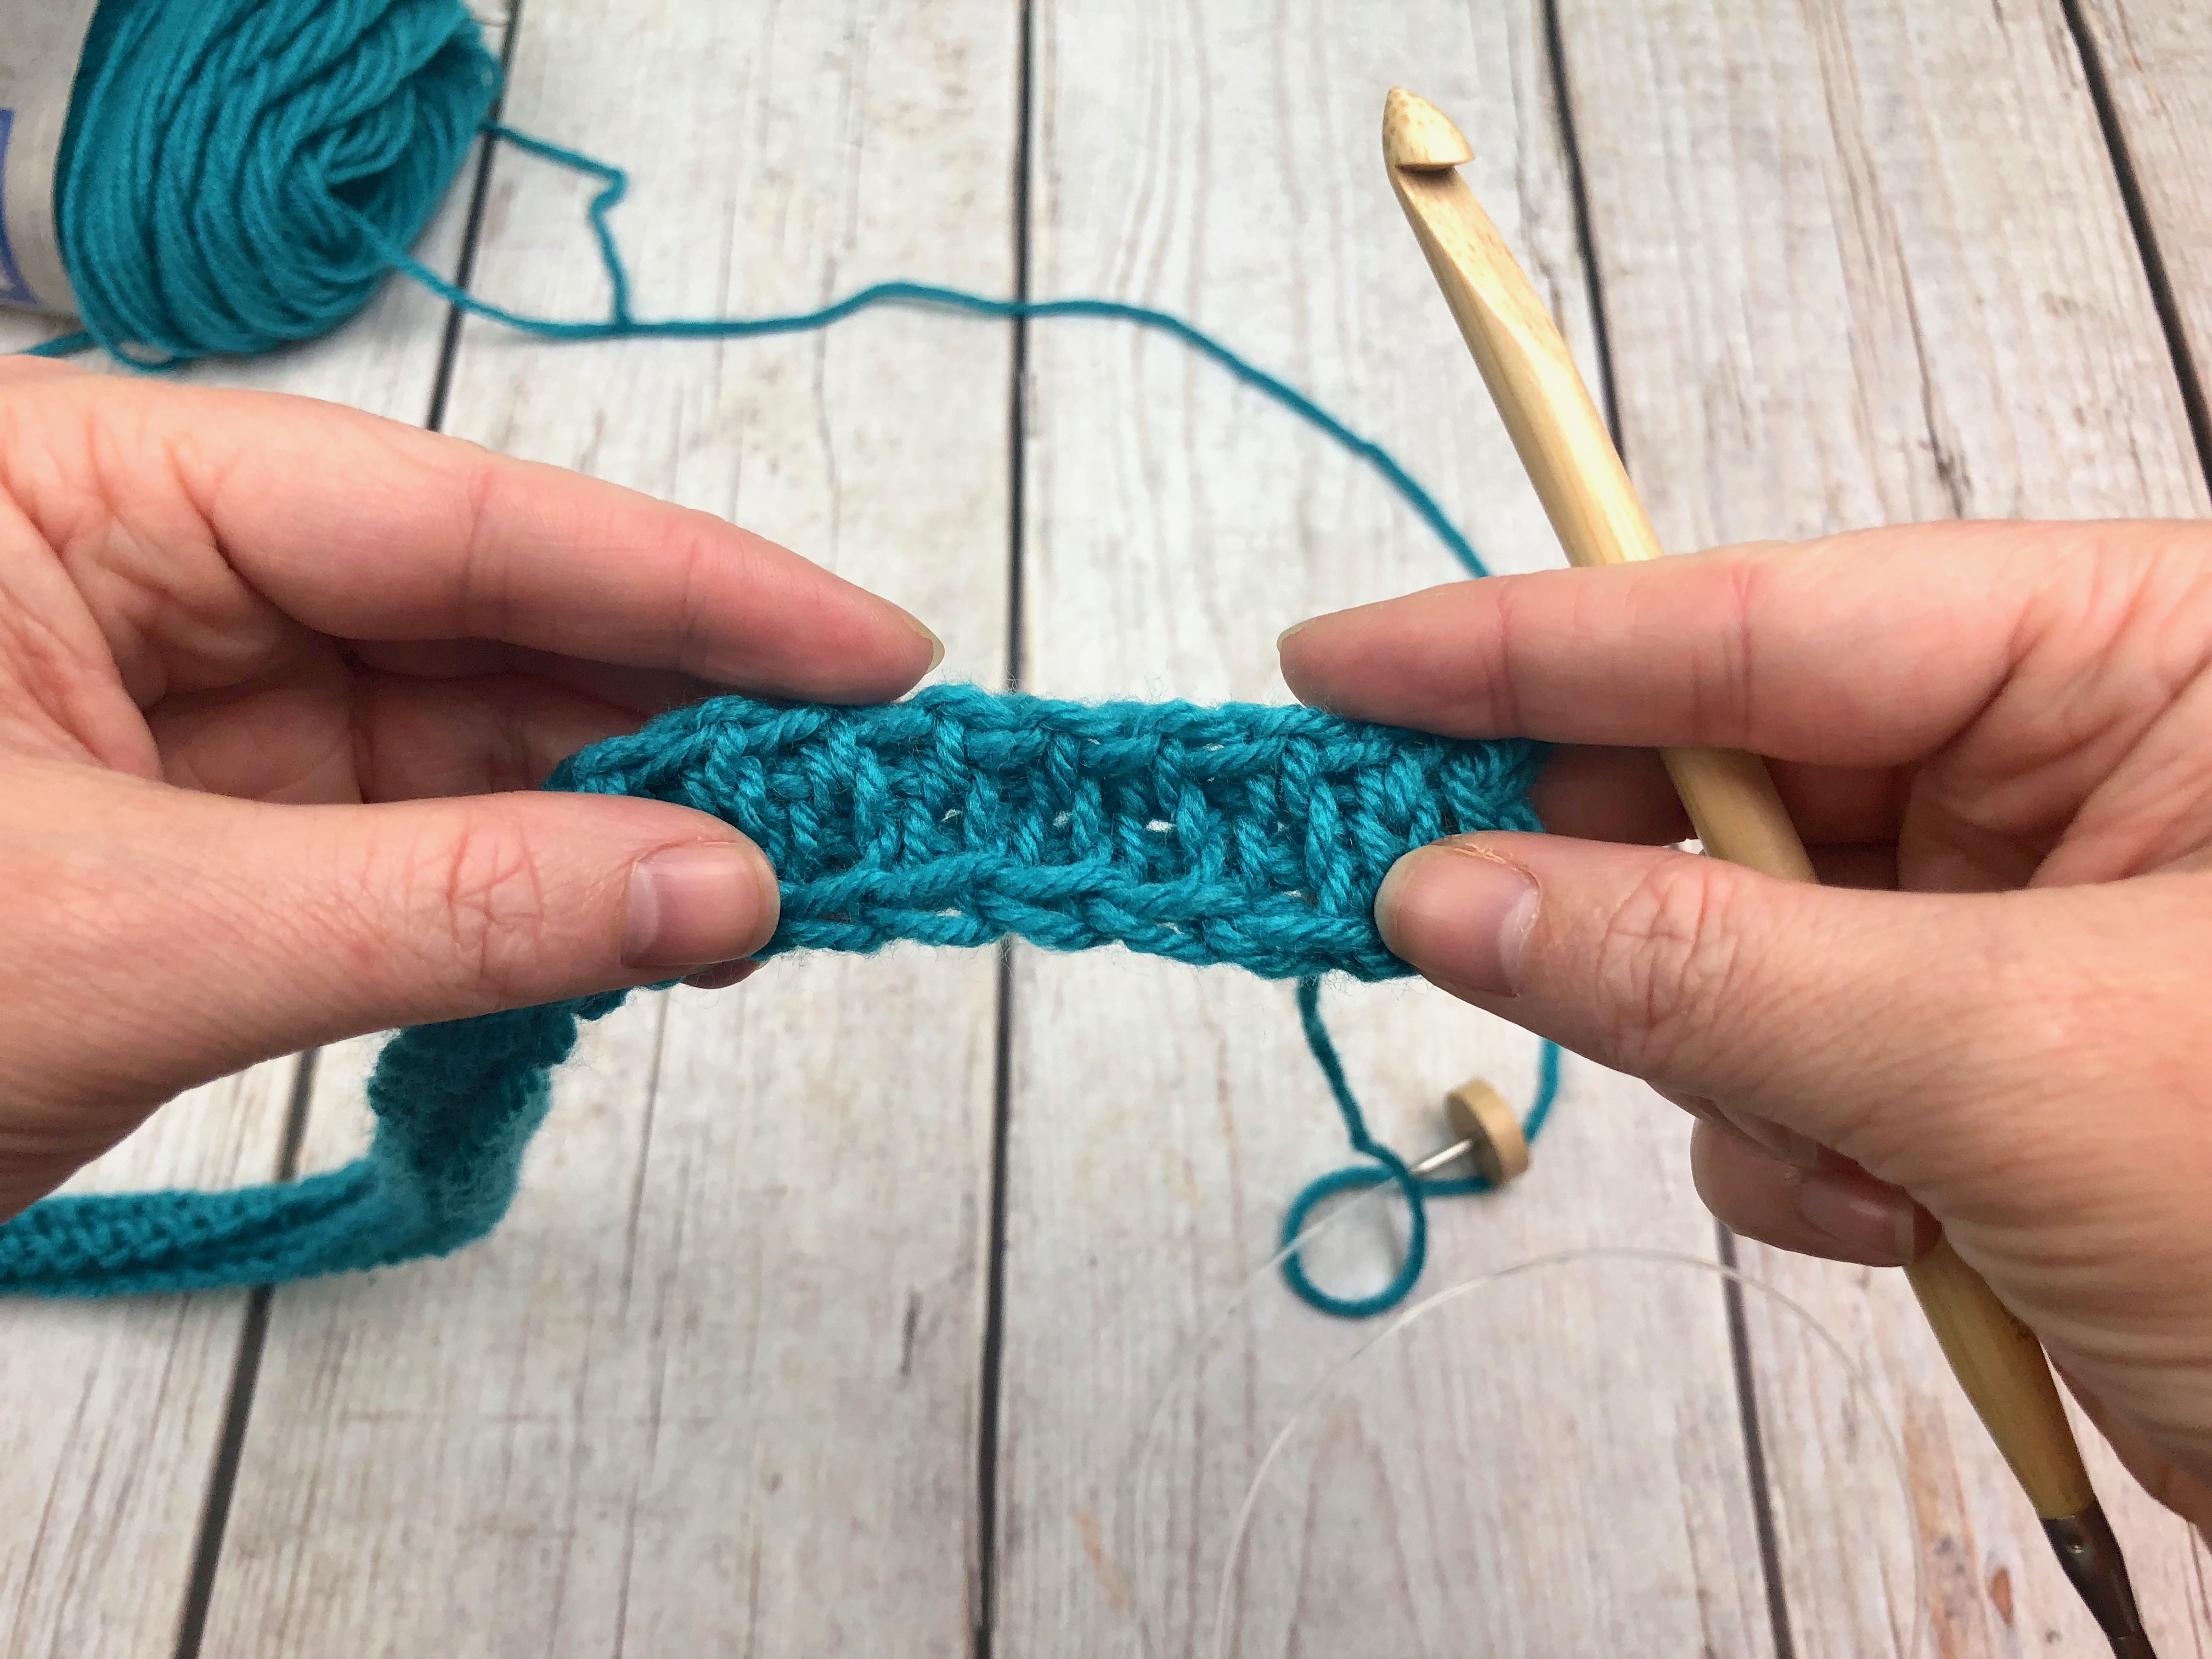
Each row of Tunisian knit stitch is made with two passes, down the row (forward pass) and back up (return pass). That counts as one row.
When I do my forward pass, I grab my yarn by yarning under instead of the traditional yarning over, this gives the stitches a twisted look and makes the tension tighter. If you are not comfortable yarning under you are more than welcome to yarn over as you normally would, your beanie may turn out a little bigger than mine though do to the tension being looser. This is explained in the YouTube video if you are confused.
Here is the chart that goes with the pattern to help you know where the color changes are.
This chart is divided by skein so you can get a better idea of how much yarn will be used from each skein throughout the pattern.
Starting with B1 beanie color, CH 59. Leave about a 3ft tail for sewing up the beanie at the end.
Foundation Row: Insert your hook into the Back Bump of the stitch closest to your hook and pull up a loop. You should now have two loops on your hook. This will count as two stitches.
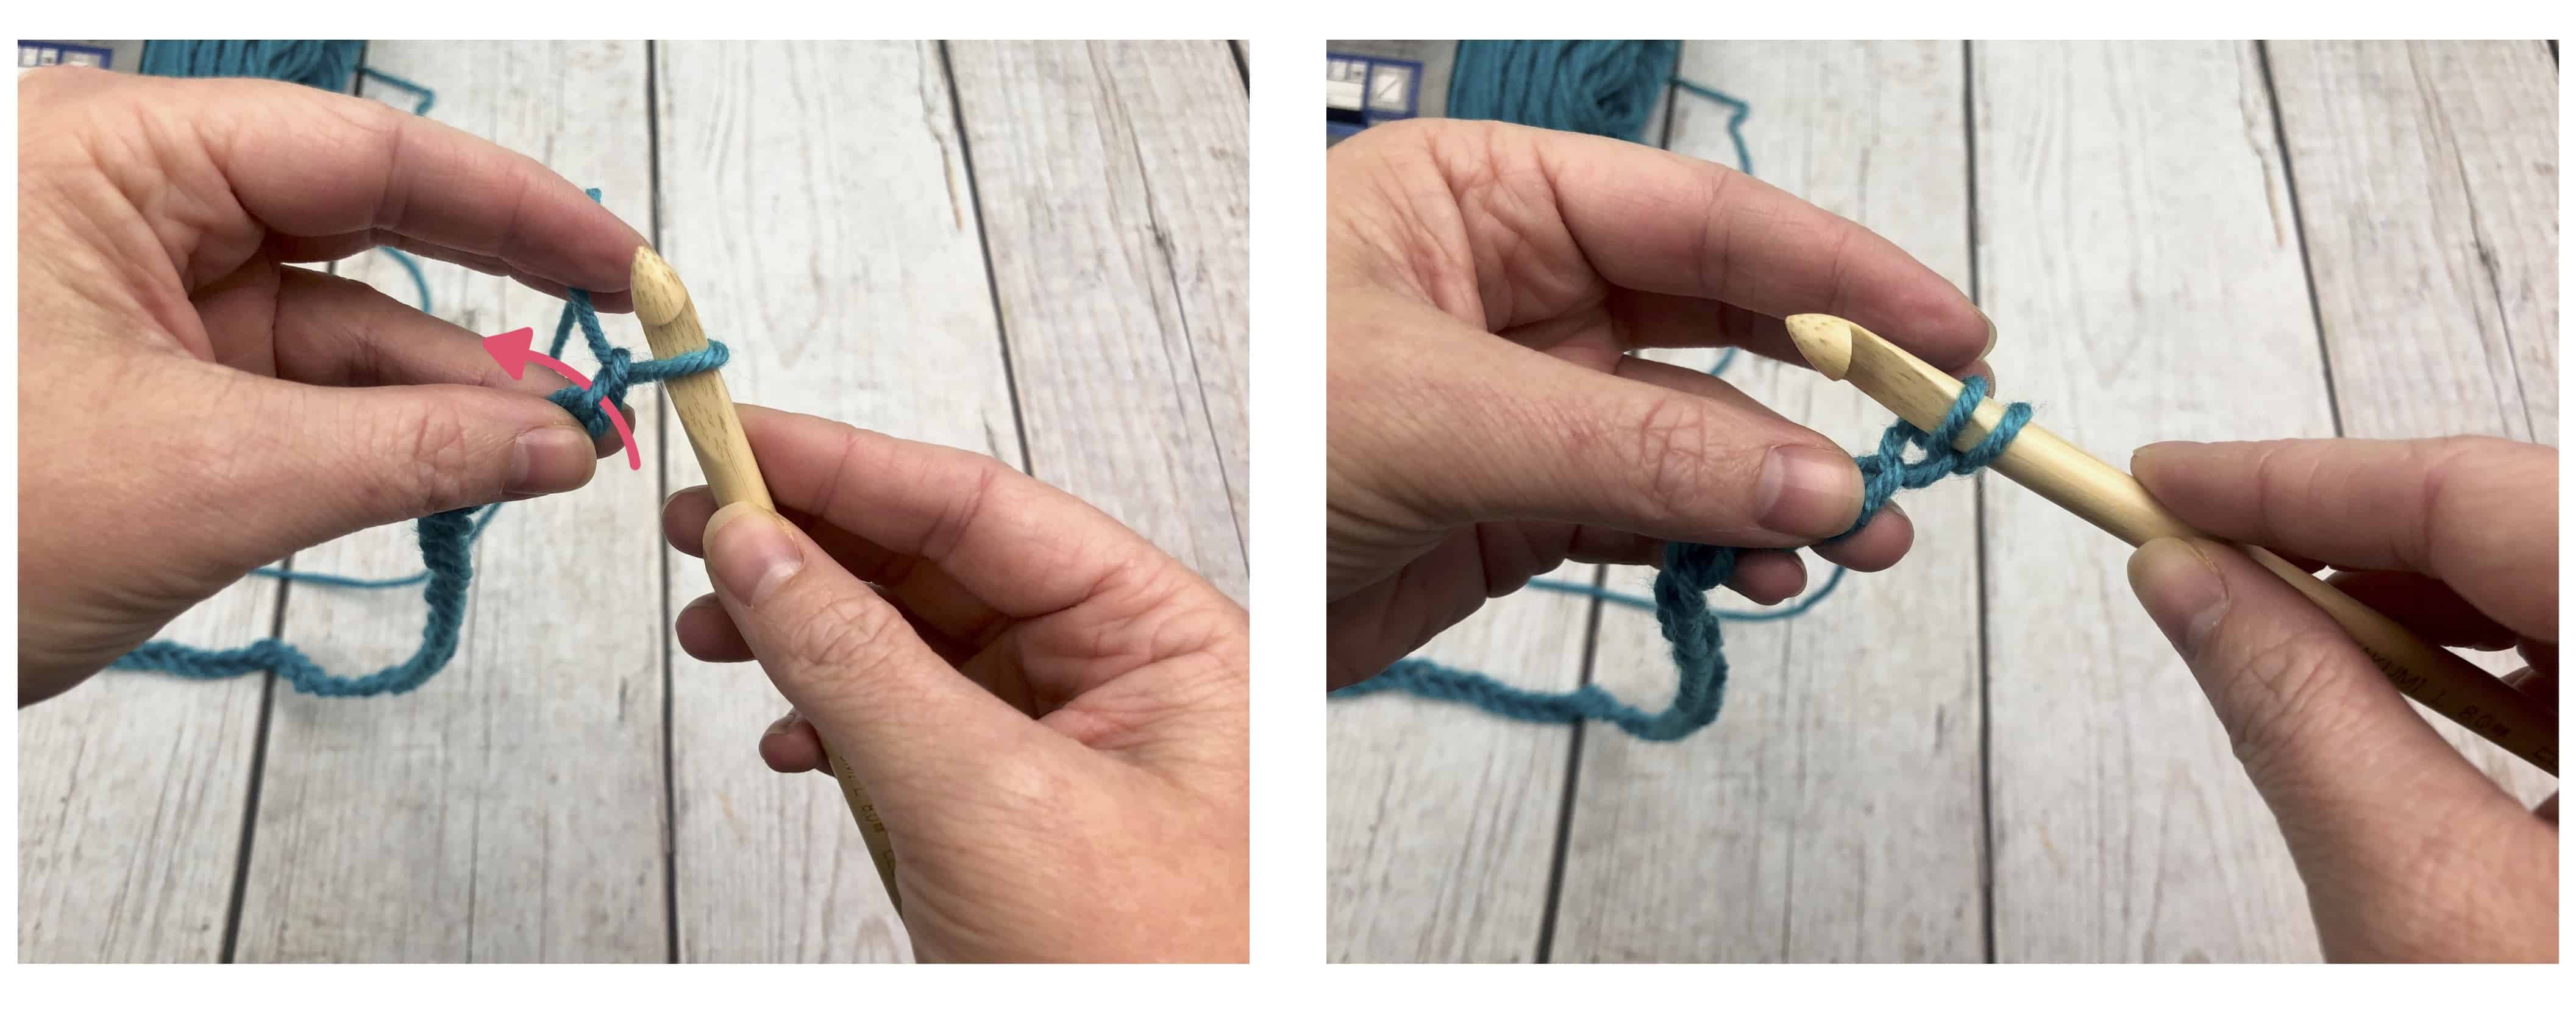
Insert your hook into the Back Bump of the next stitch and pull up a loop (3 loops on your hook now representing 3 stitches). Continue inserting your hook into the Back Bump of each chain and pulling up a loop until you get to the end.
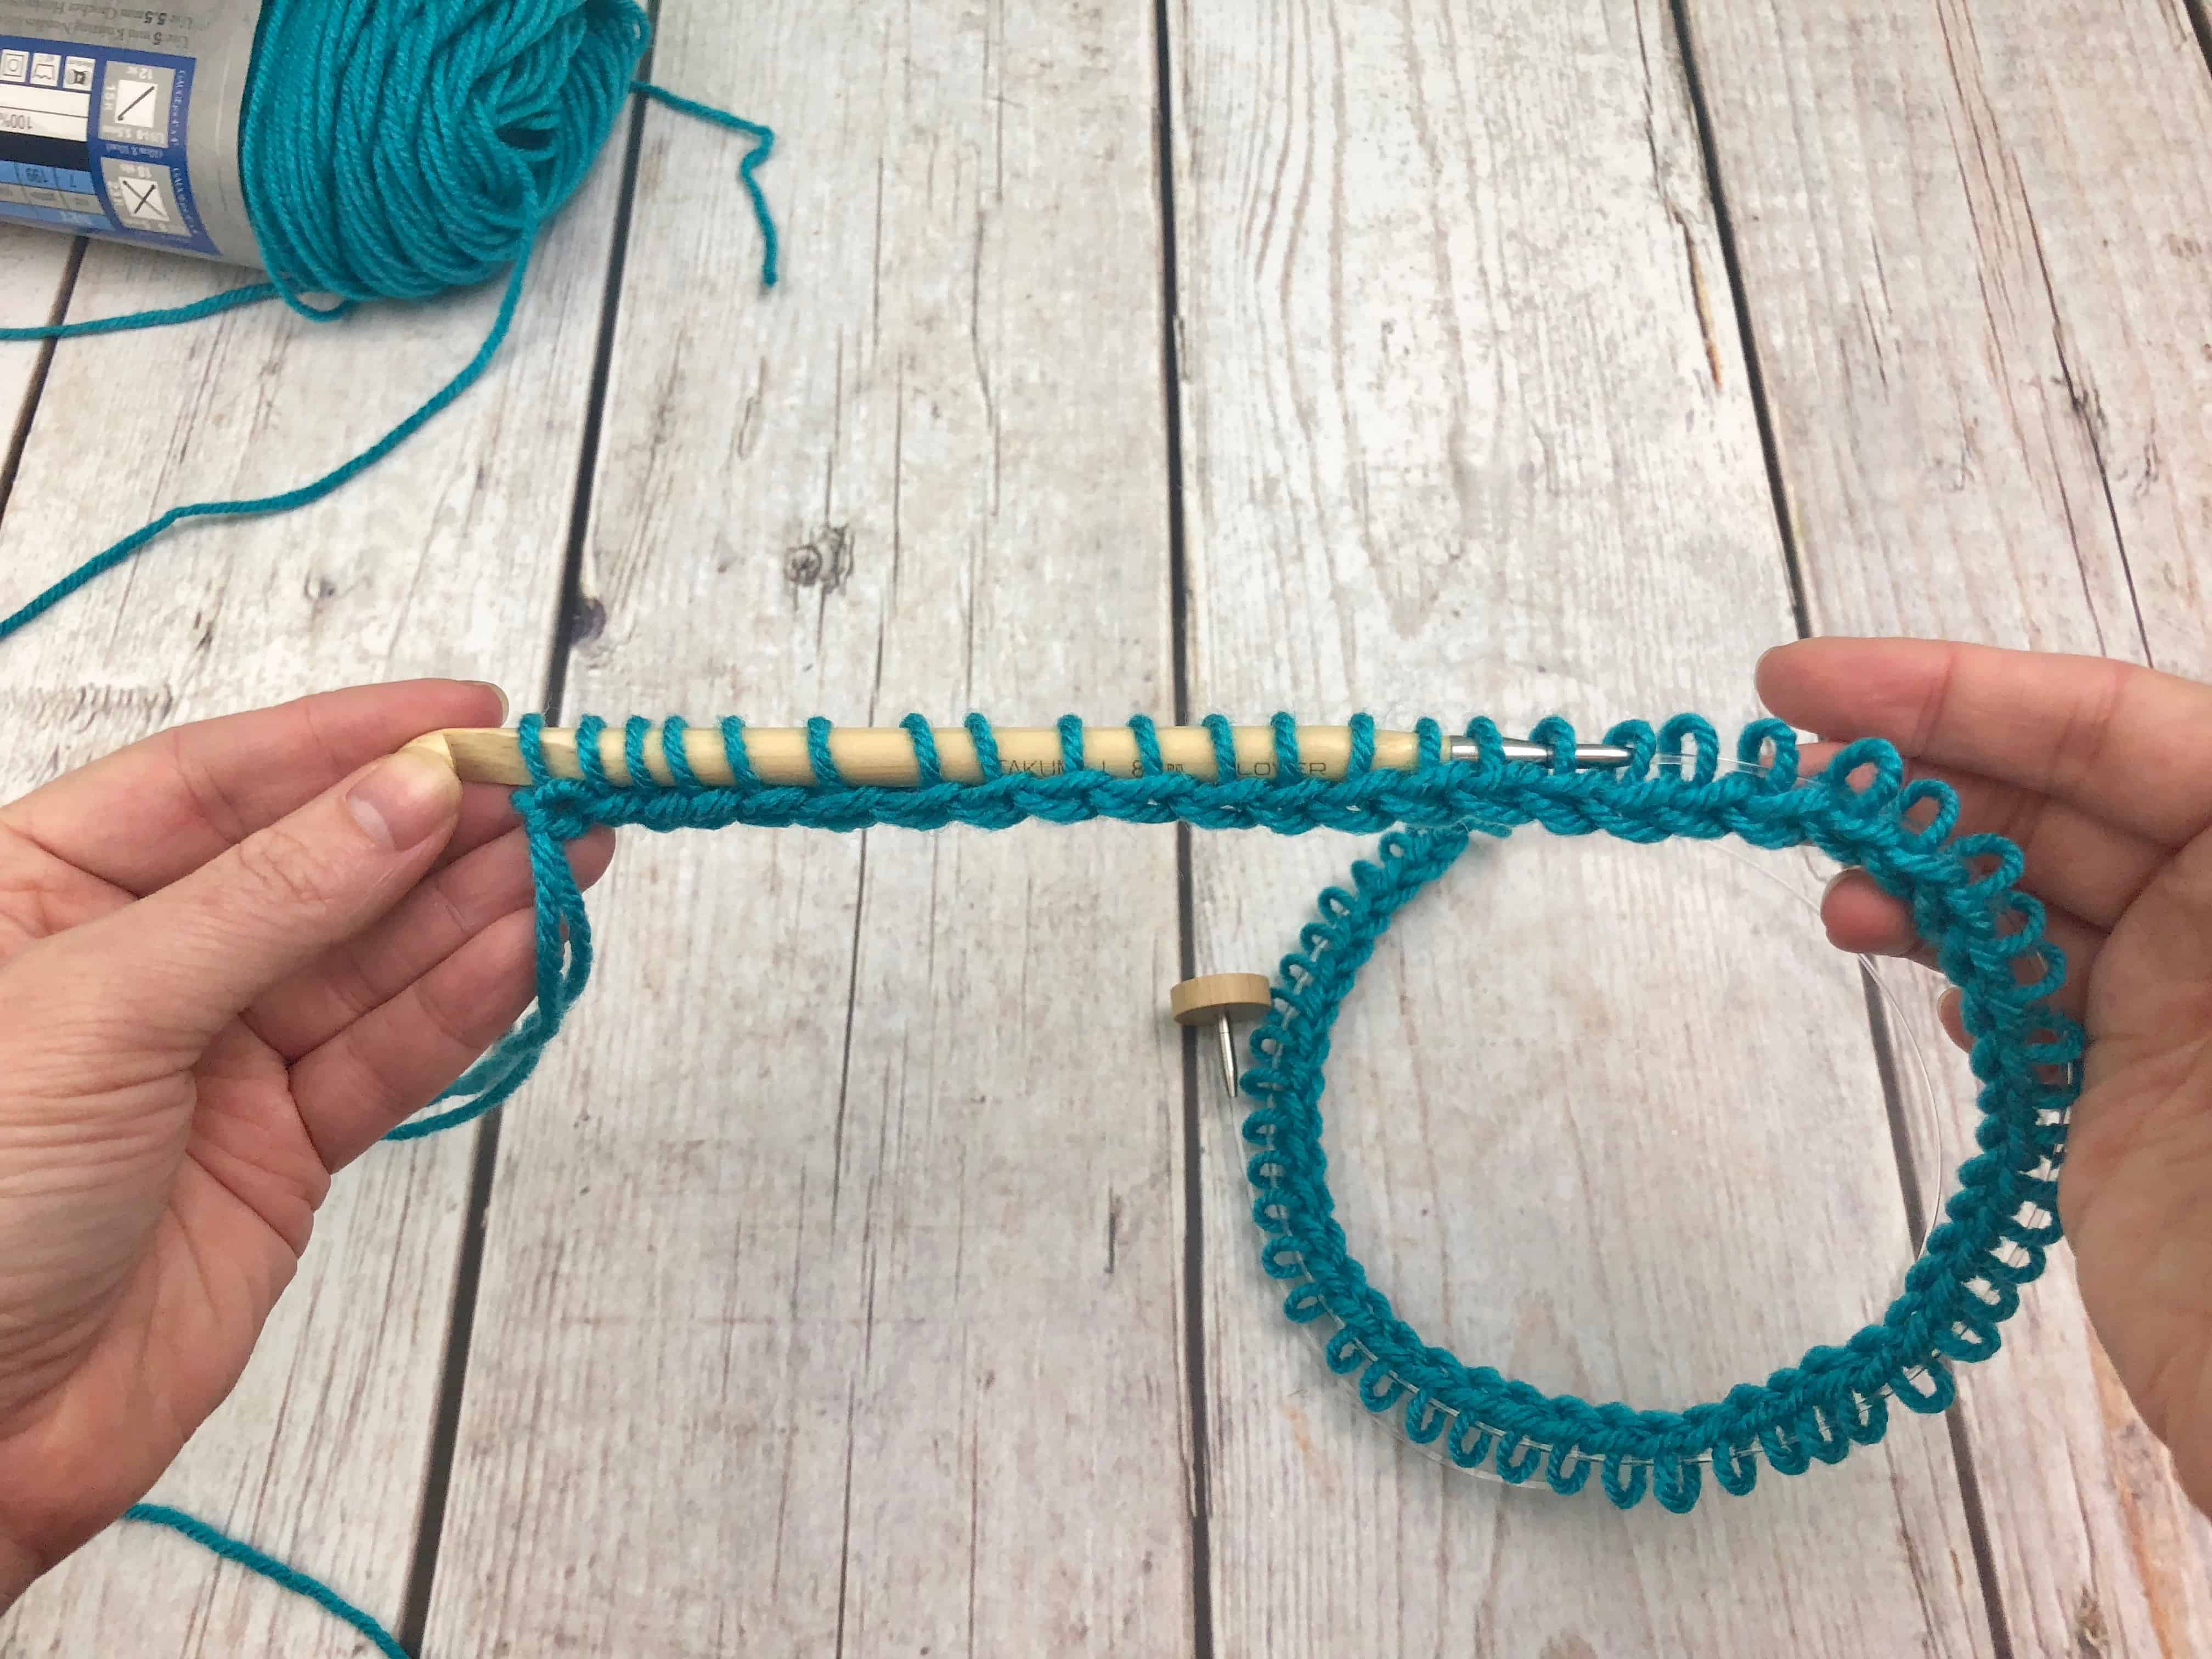
You should have 60 loops on your hook. Yarn over and pull through one loop on your hook. This is your CH up and does not count as a stitch.
Yarn over and pull through two loops on your hook. That is your first stitch. Continue to yarn over and pull through two until you are completely through all loops on your hook (59)
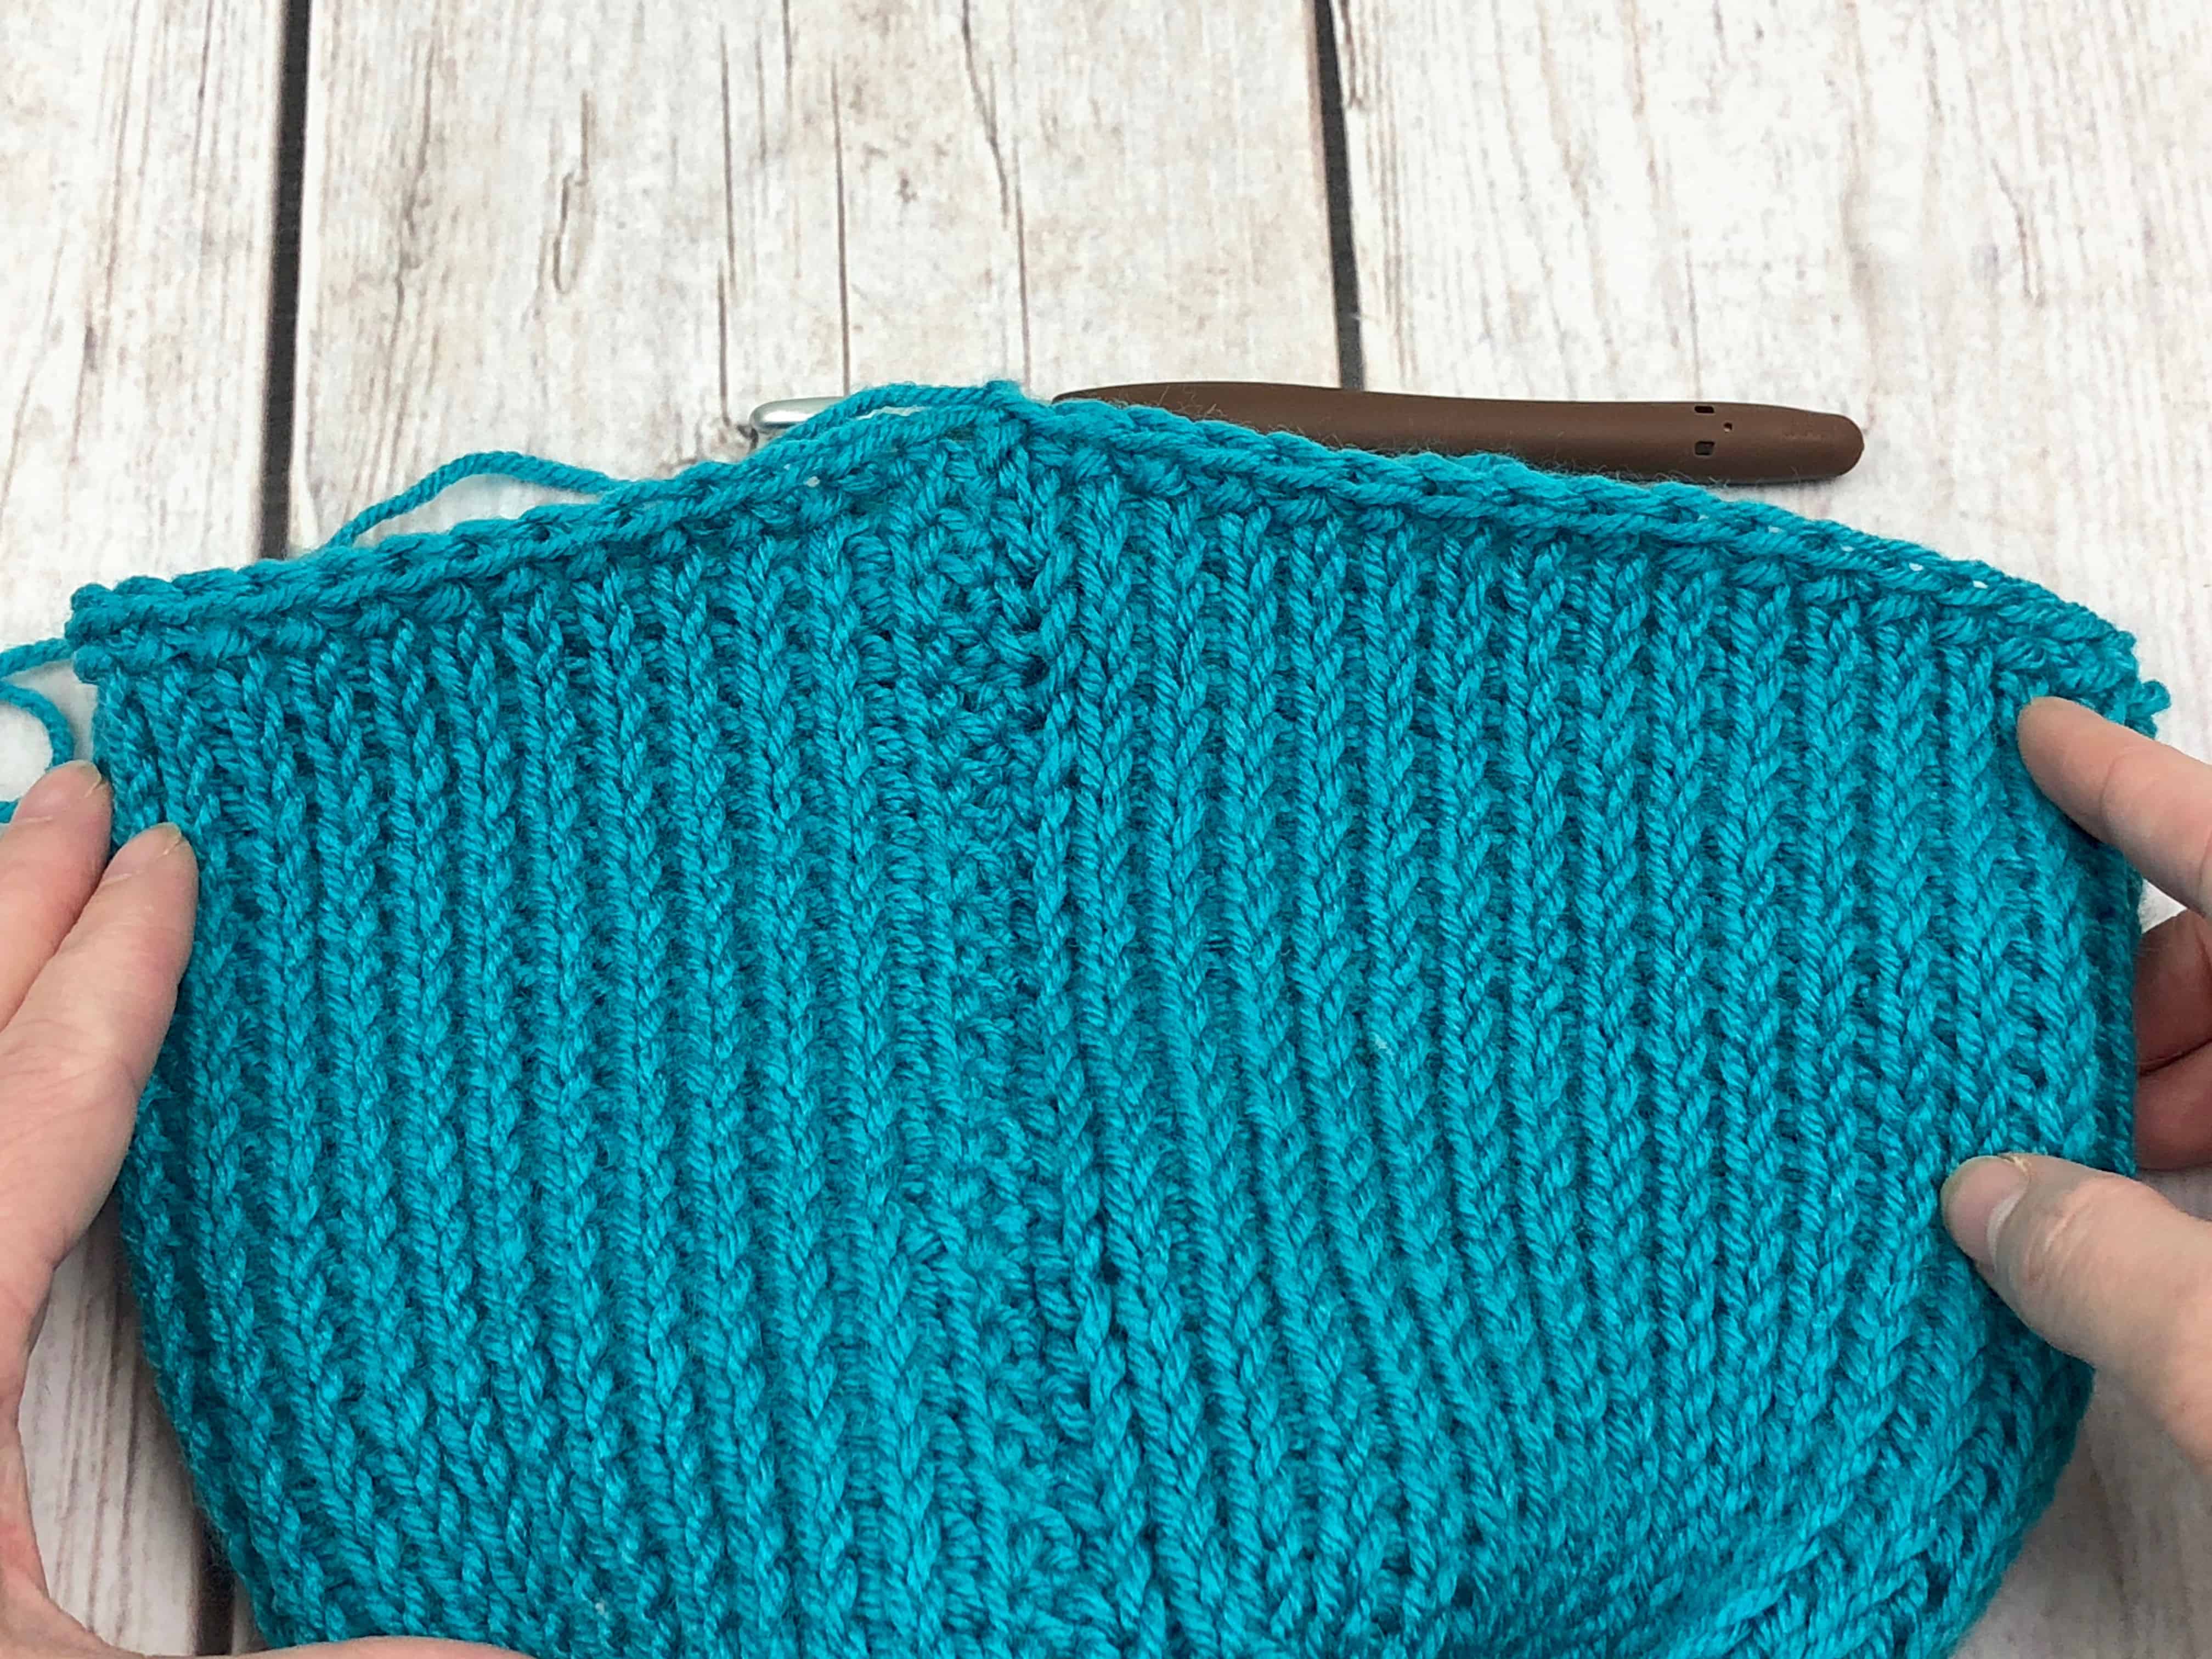
Row 2-3 : (TKS) Insert your hook (from front to back) between the first two vertical bars on your row and pull up a loop. You should now have 2 loops on your hook, remember that first loop counts as a stitch.
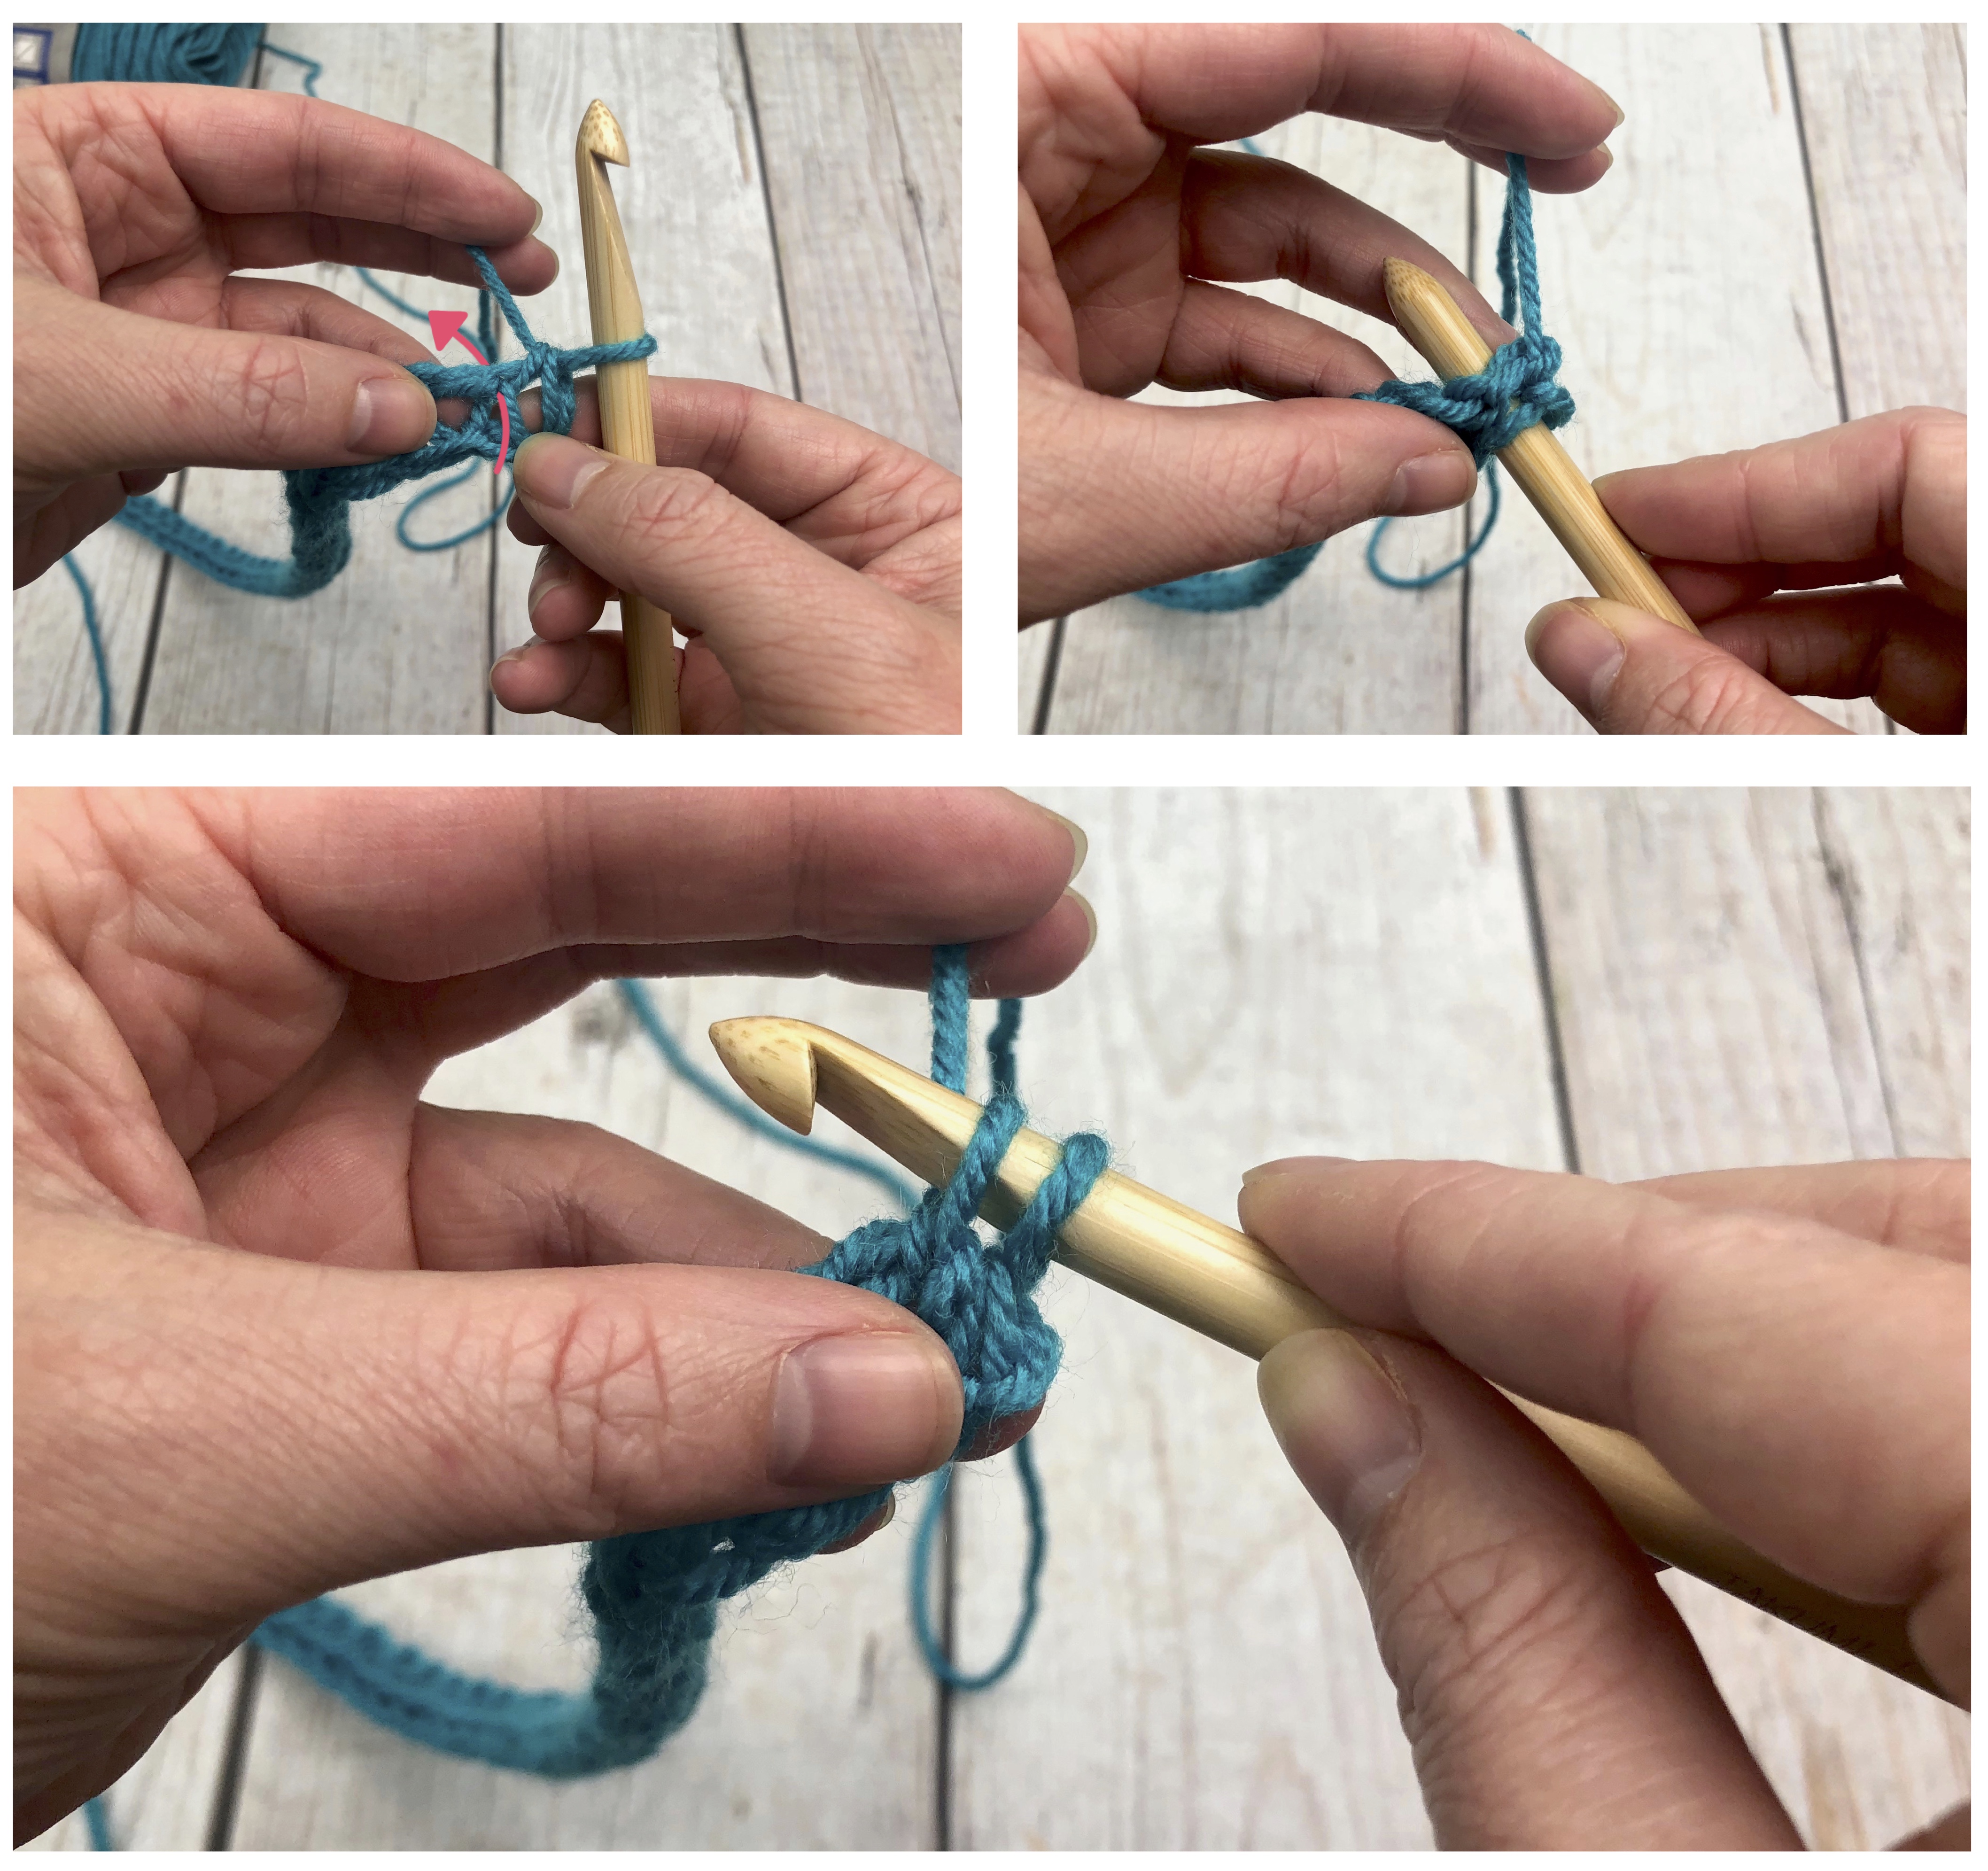
Continue inserting between the two vertical bars and pulling up a loop all the way down the row.

When you get to the last stitch (the chain) insert your hook into the chain up you made in the previous row, and pull up a loop. Yarn over and pull through one (this counts as your CH up and is not counted as a stitch).
Yarn over, pull through two (your first stitch). Continue to yarn over and pull through two all the way down your row. (59)
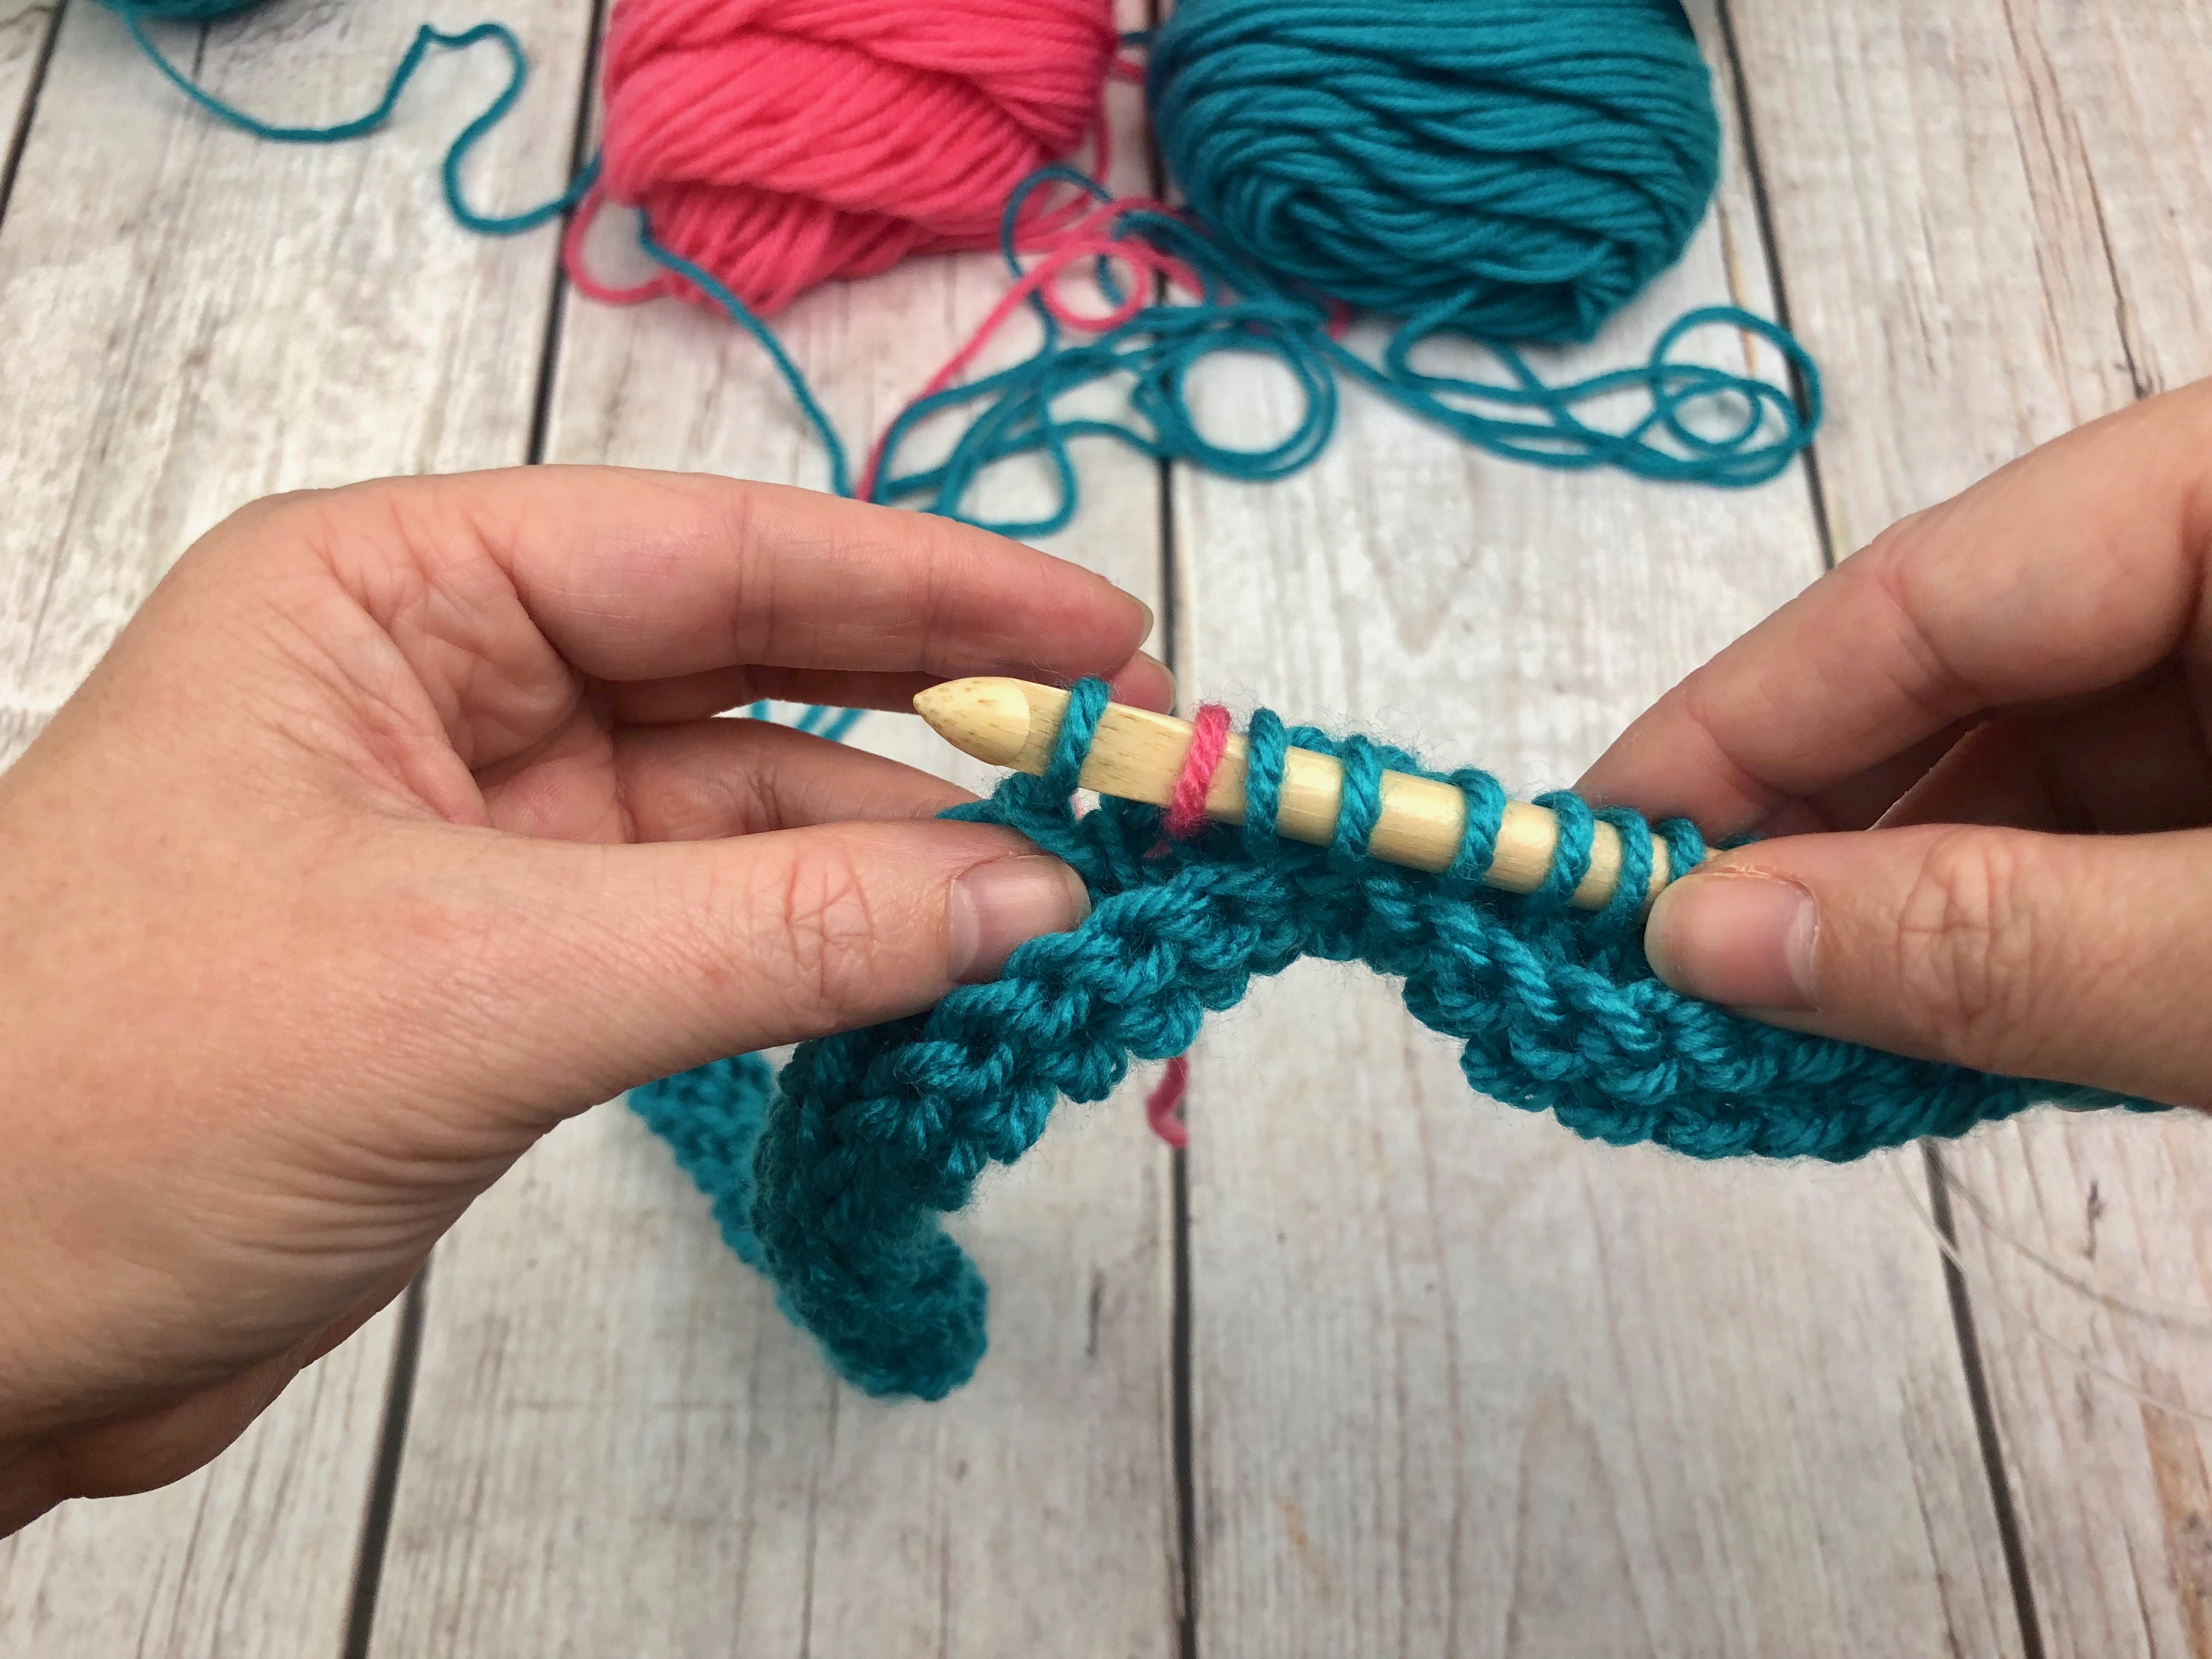
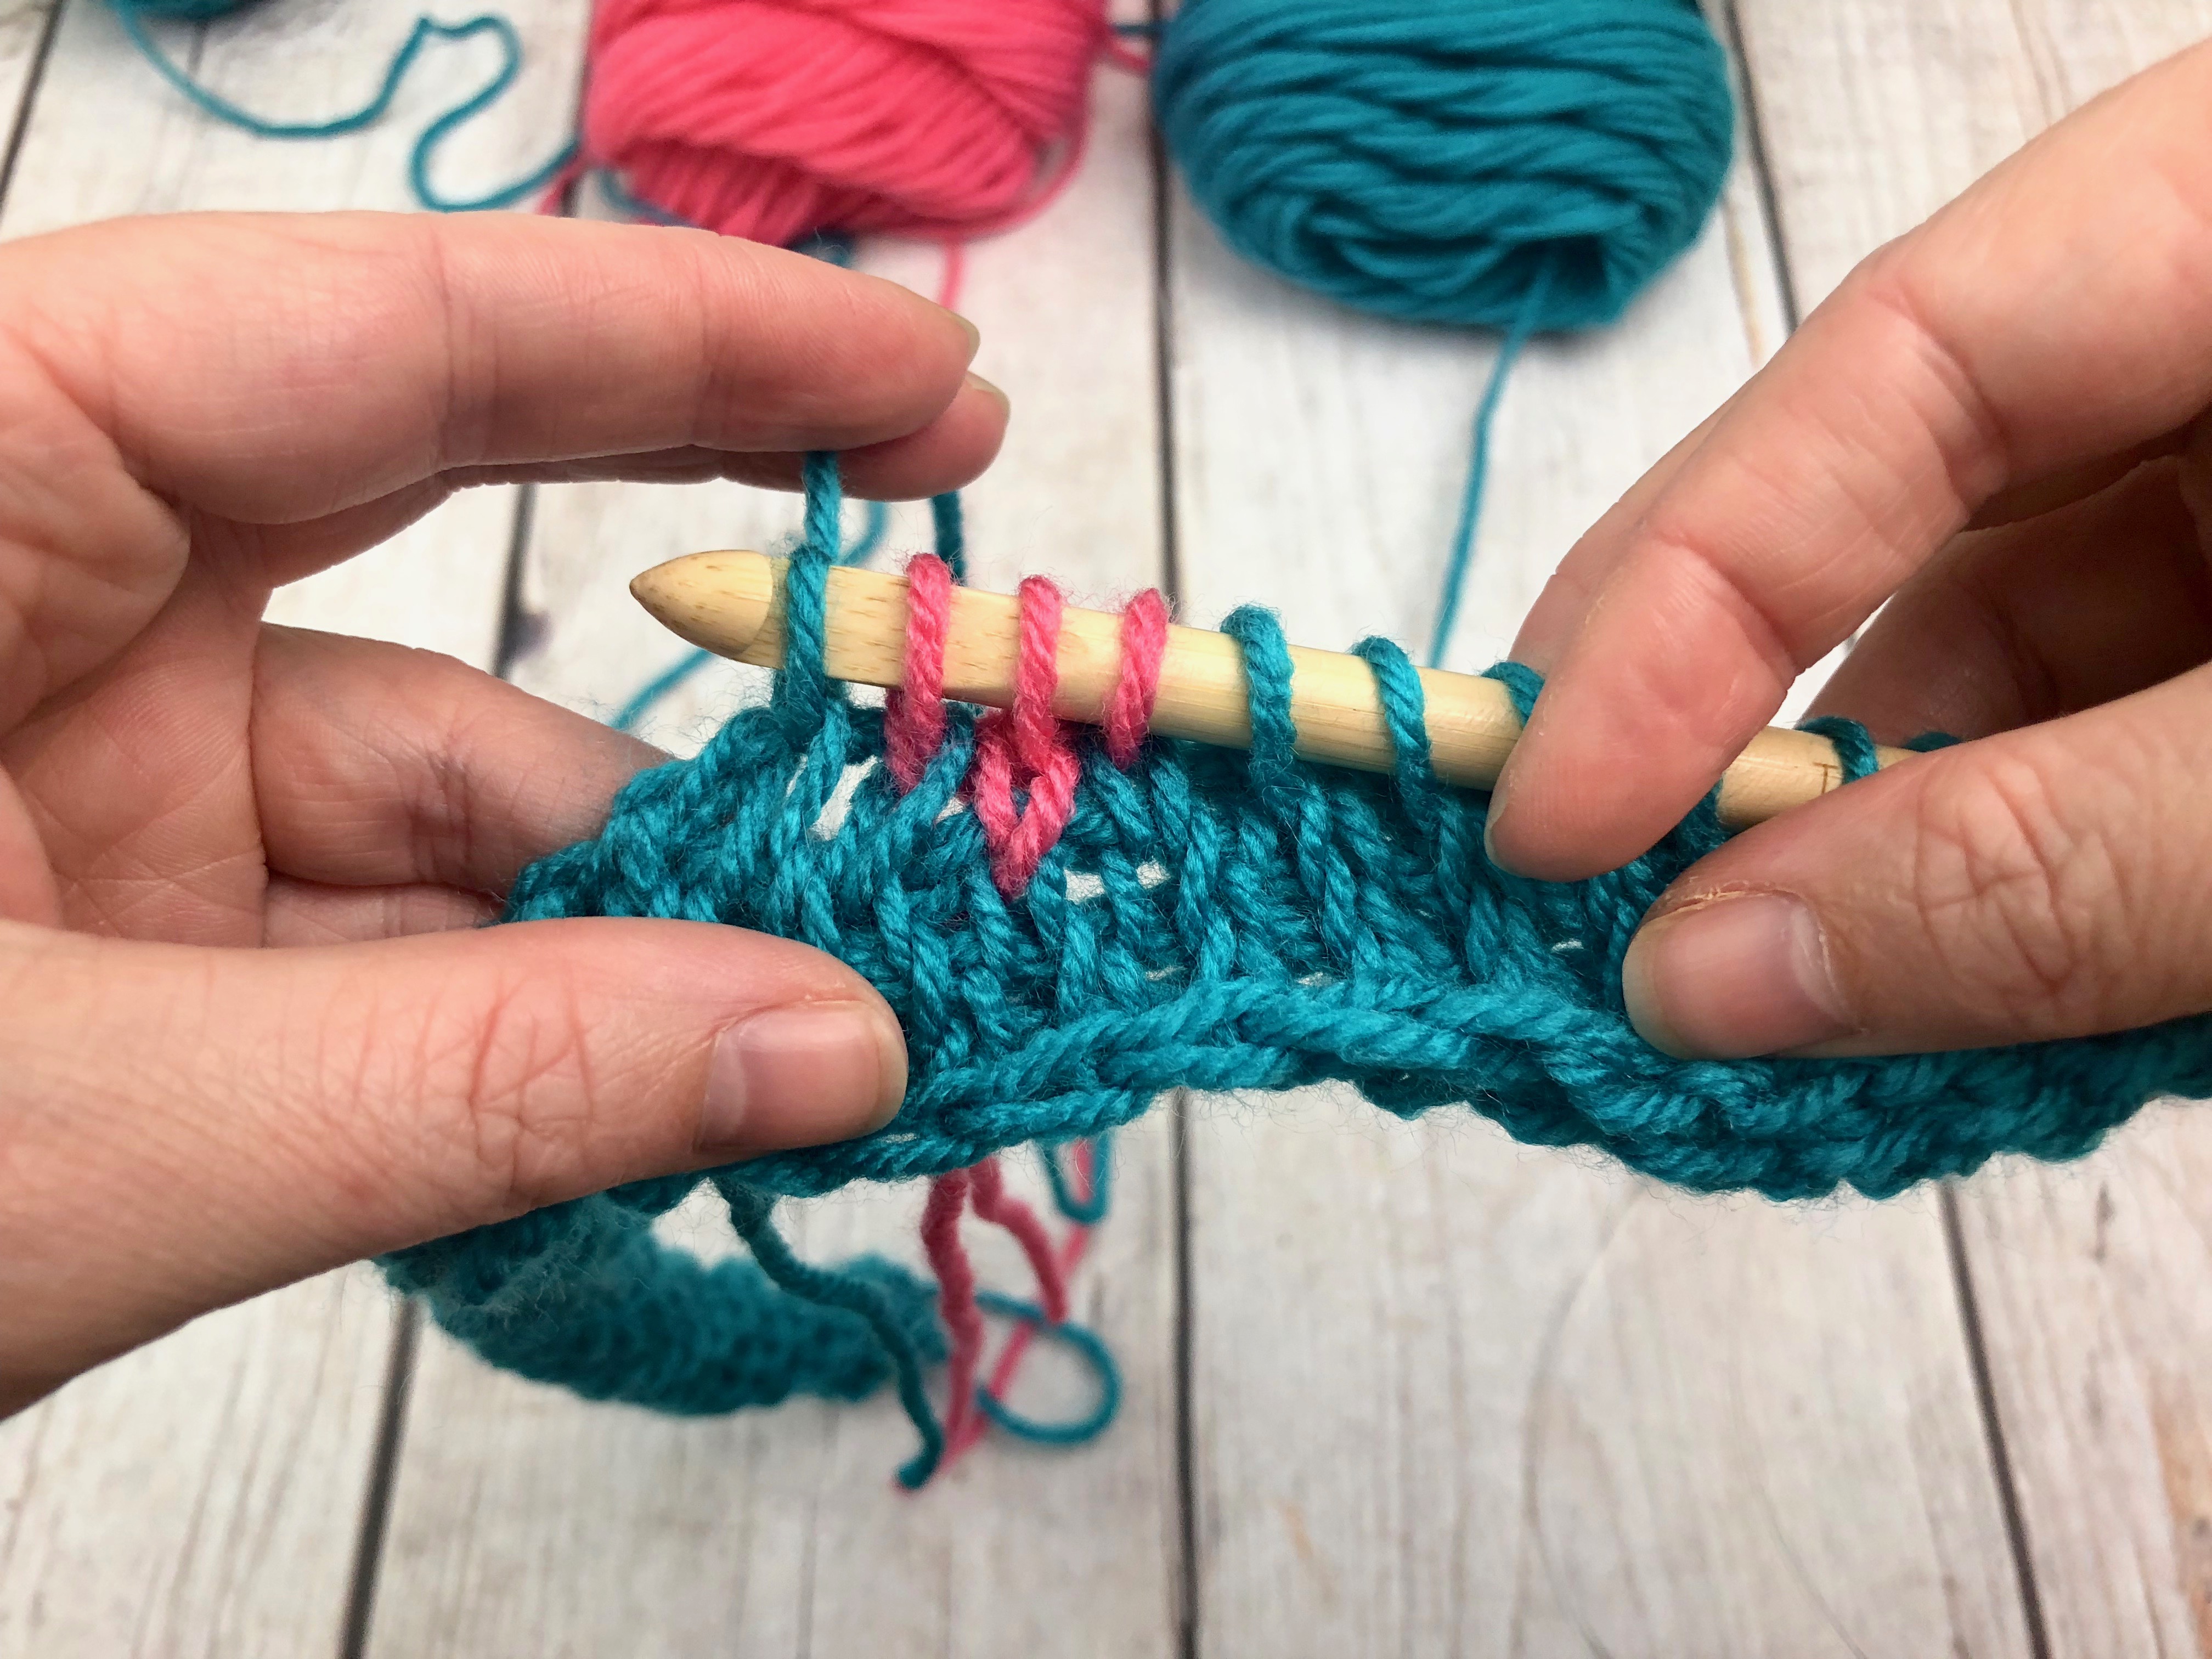
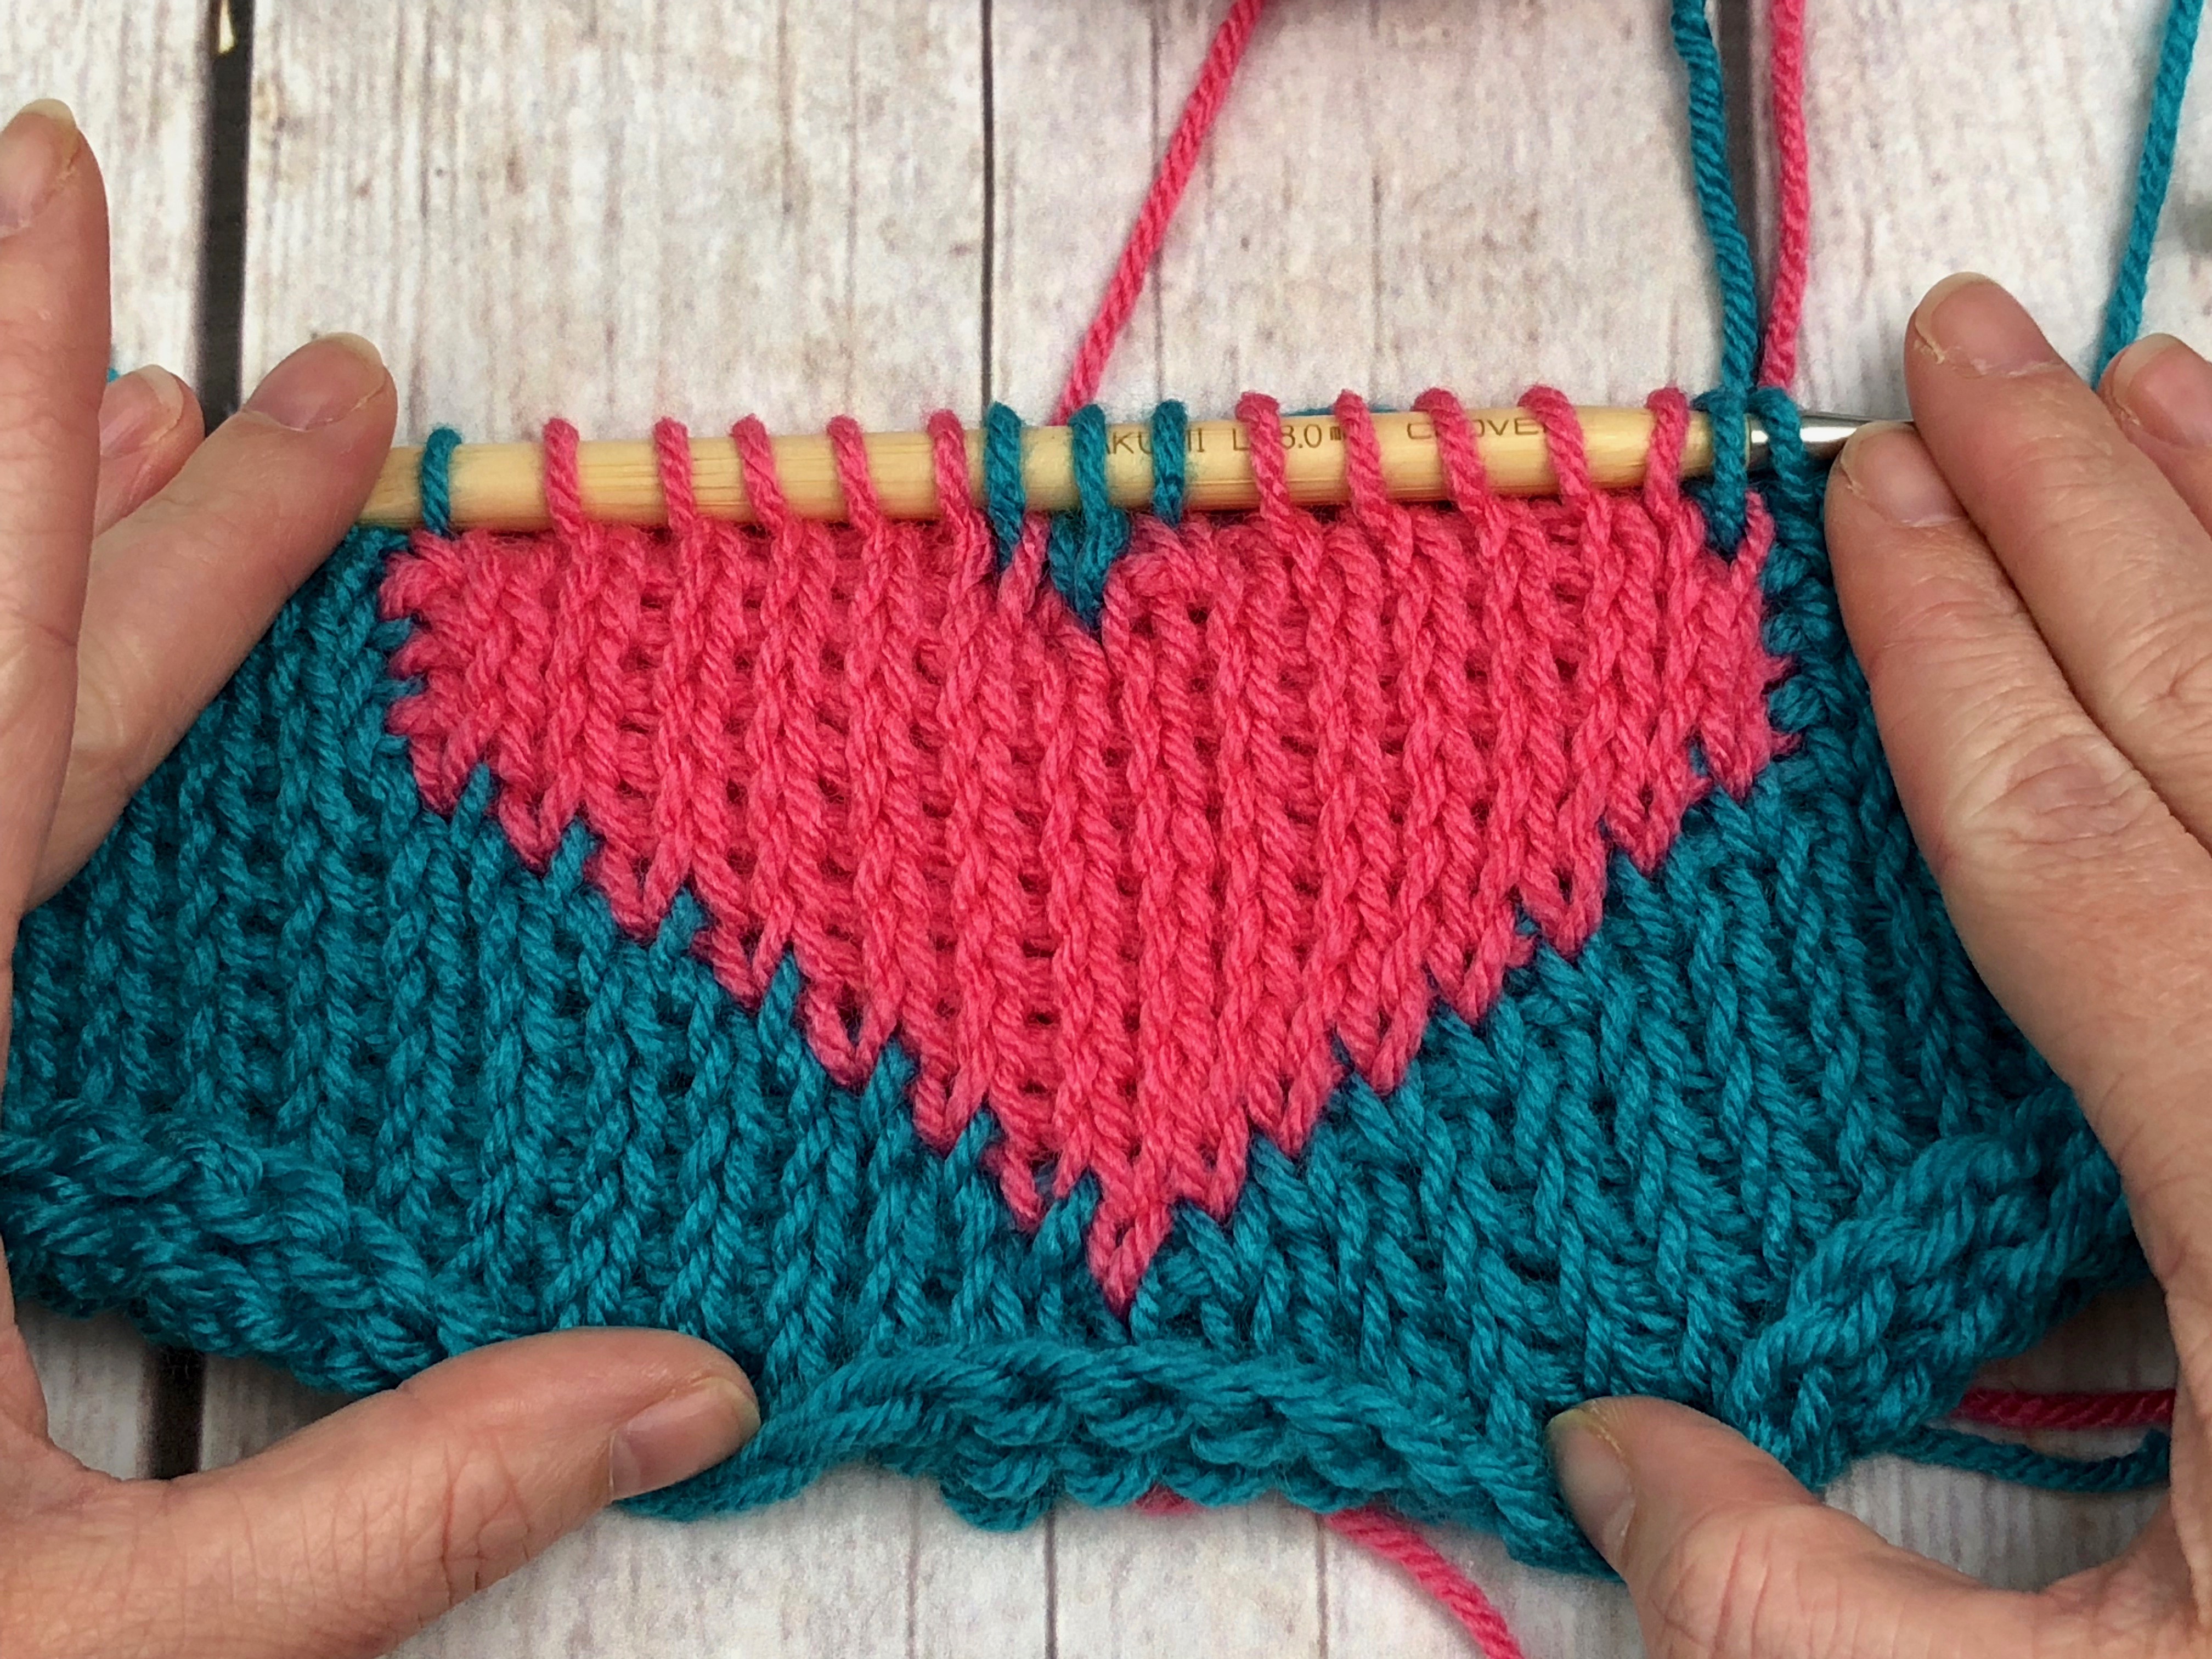
Row 4: TKS 29 stitches (remembering your first loop thats already on your hook counts as a stitch) for the 30th stitch, insert your hook into the next stitch, grab your H1 heart yarn color and pull up a loop (30).
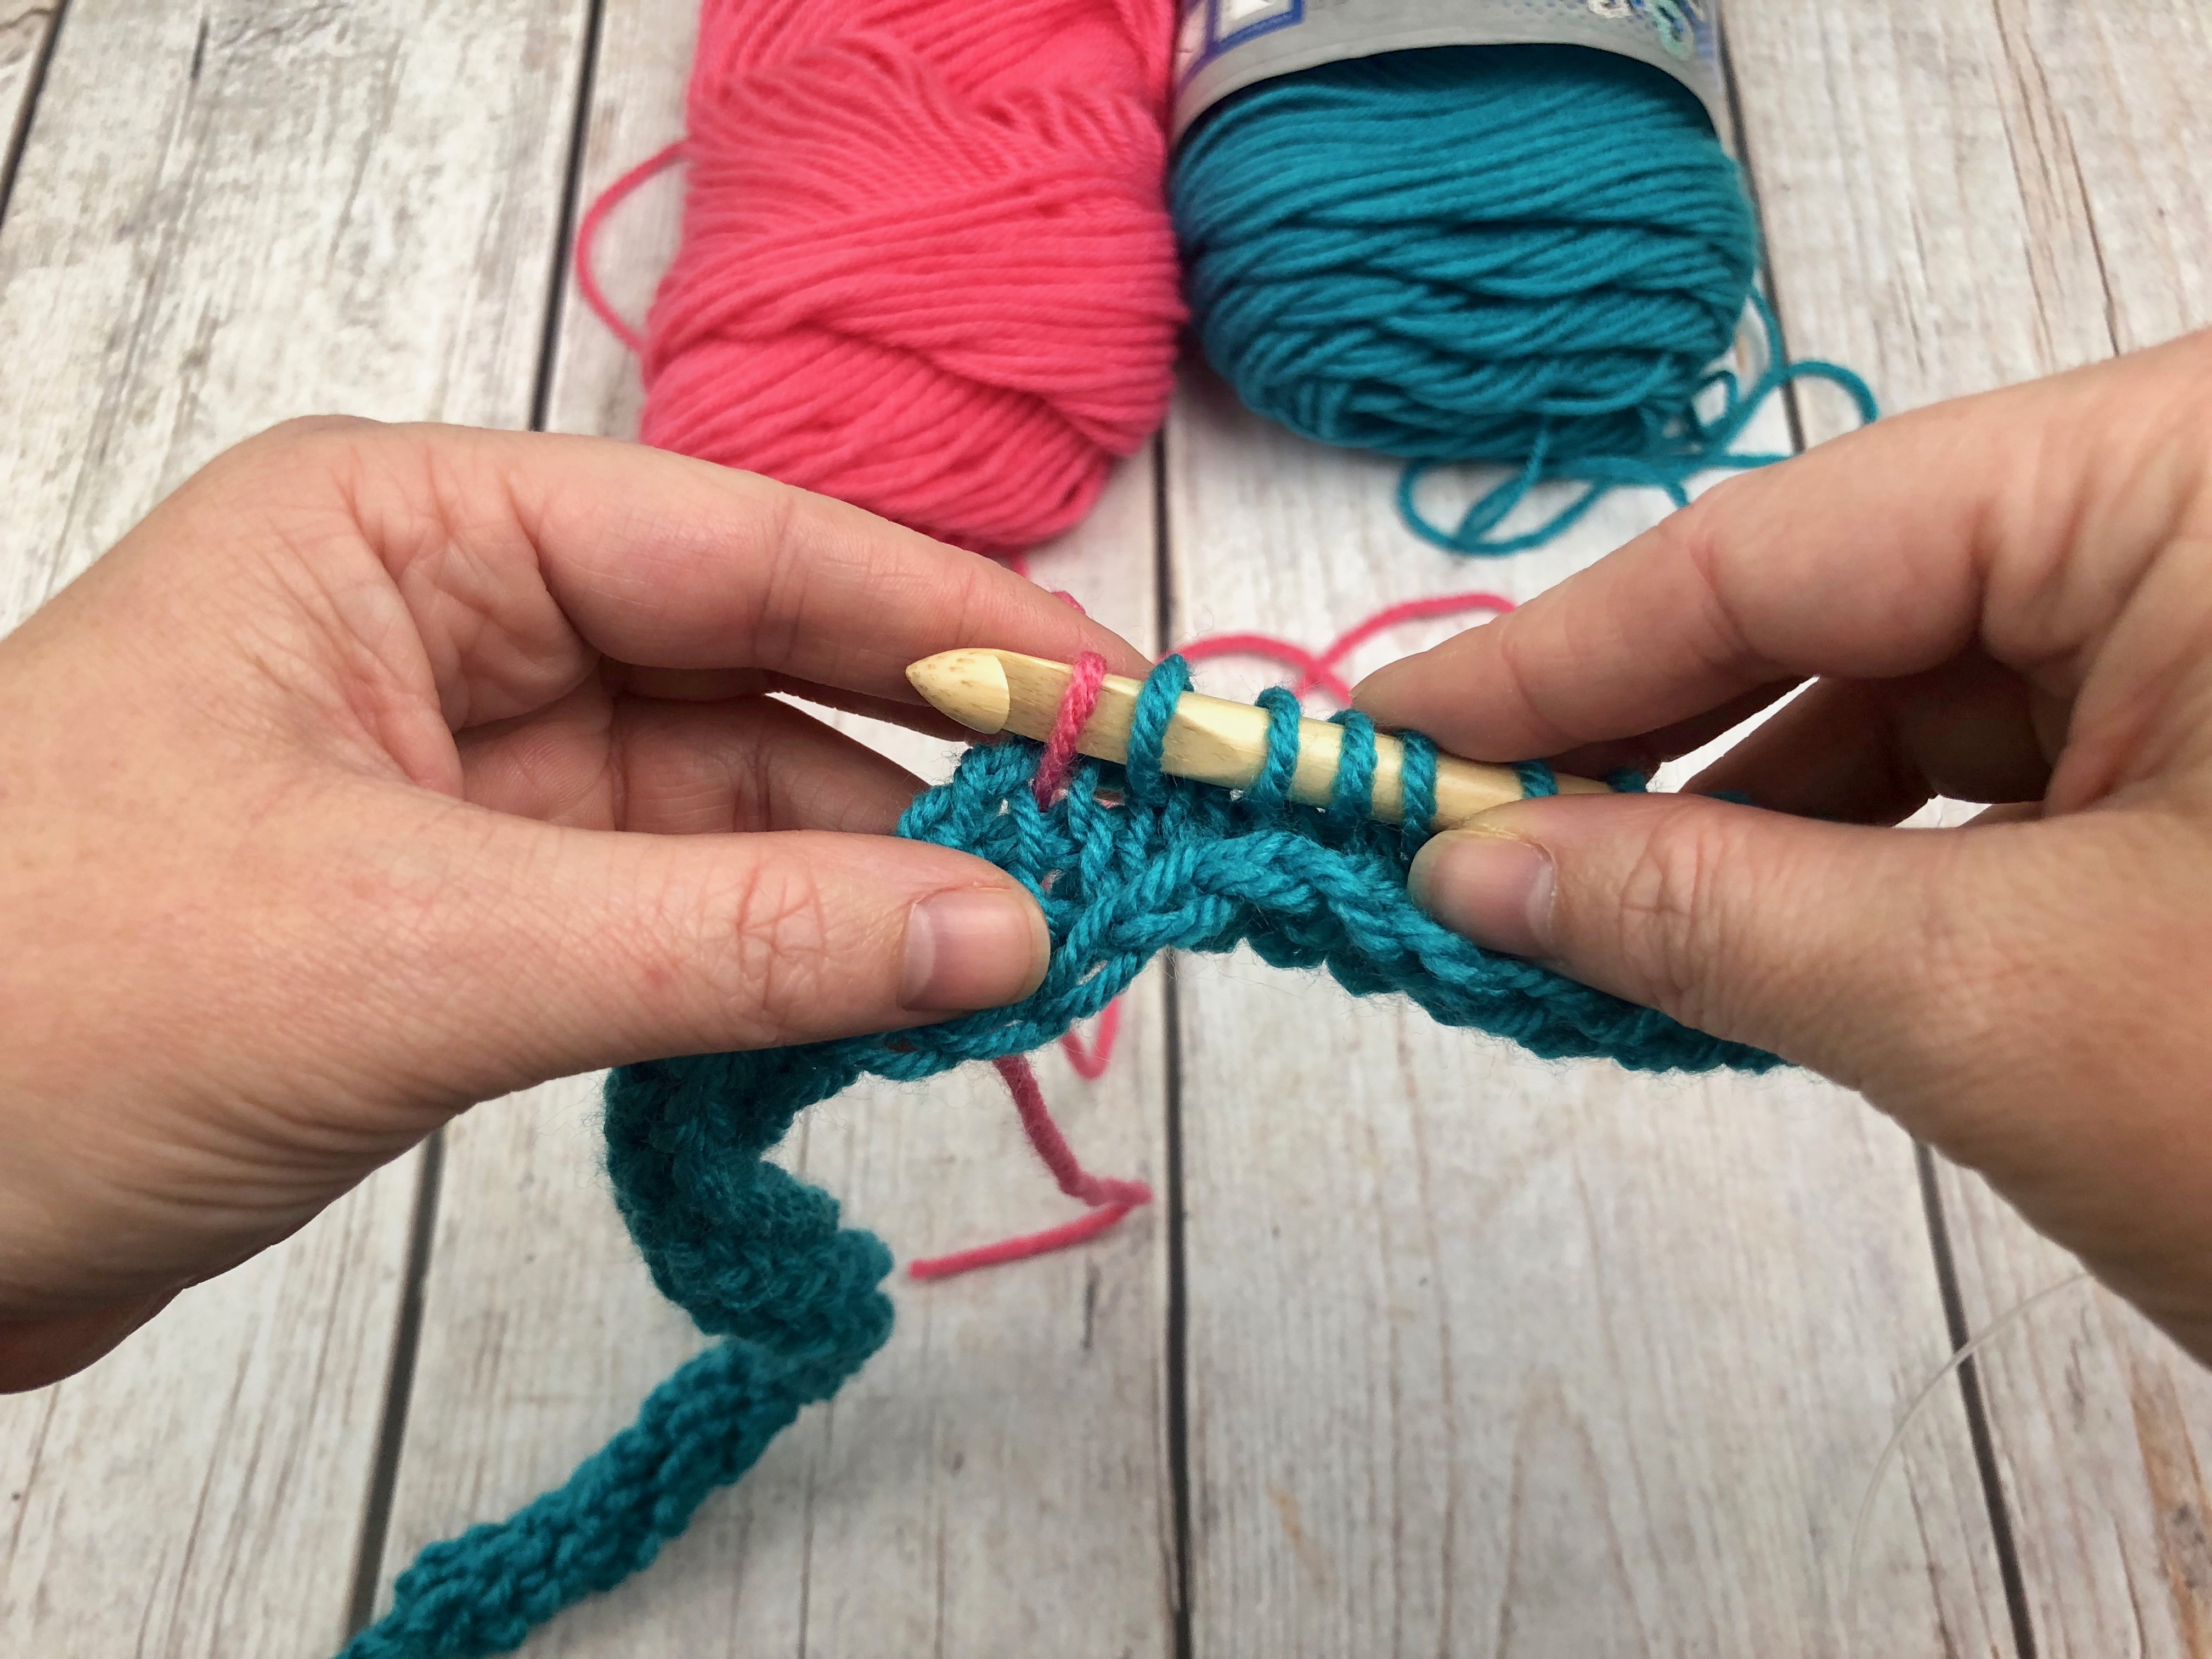
Make sure to leave a tail long enough for sewing in at the end, and be careful not to pull your yarn or it will come right out of the stitch, just let it sit there until it’s secured with the return pass of the row.
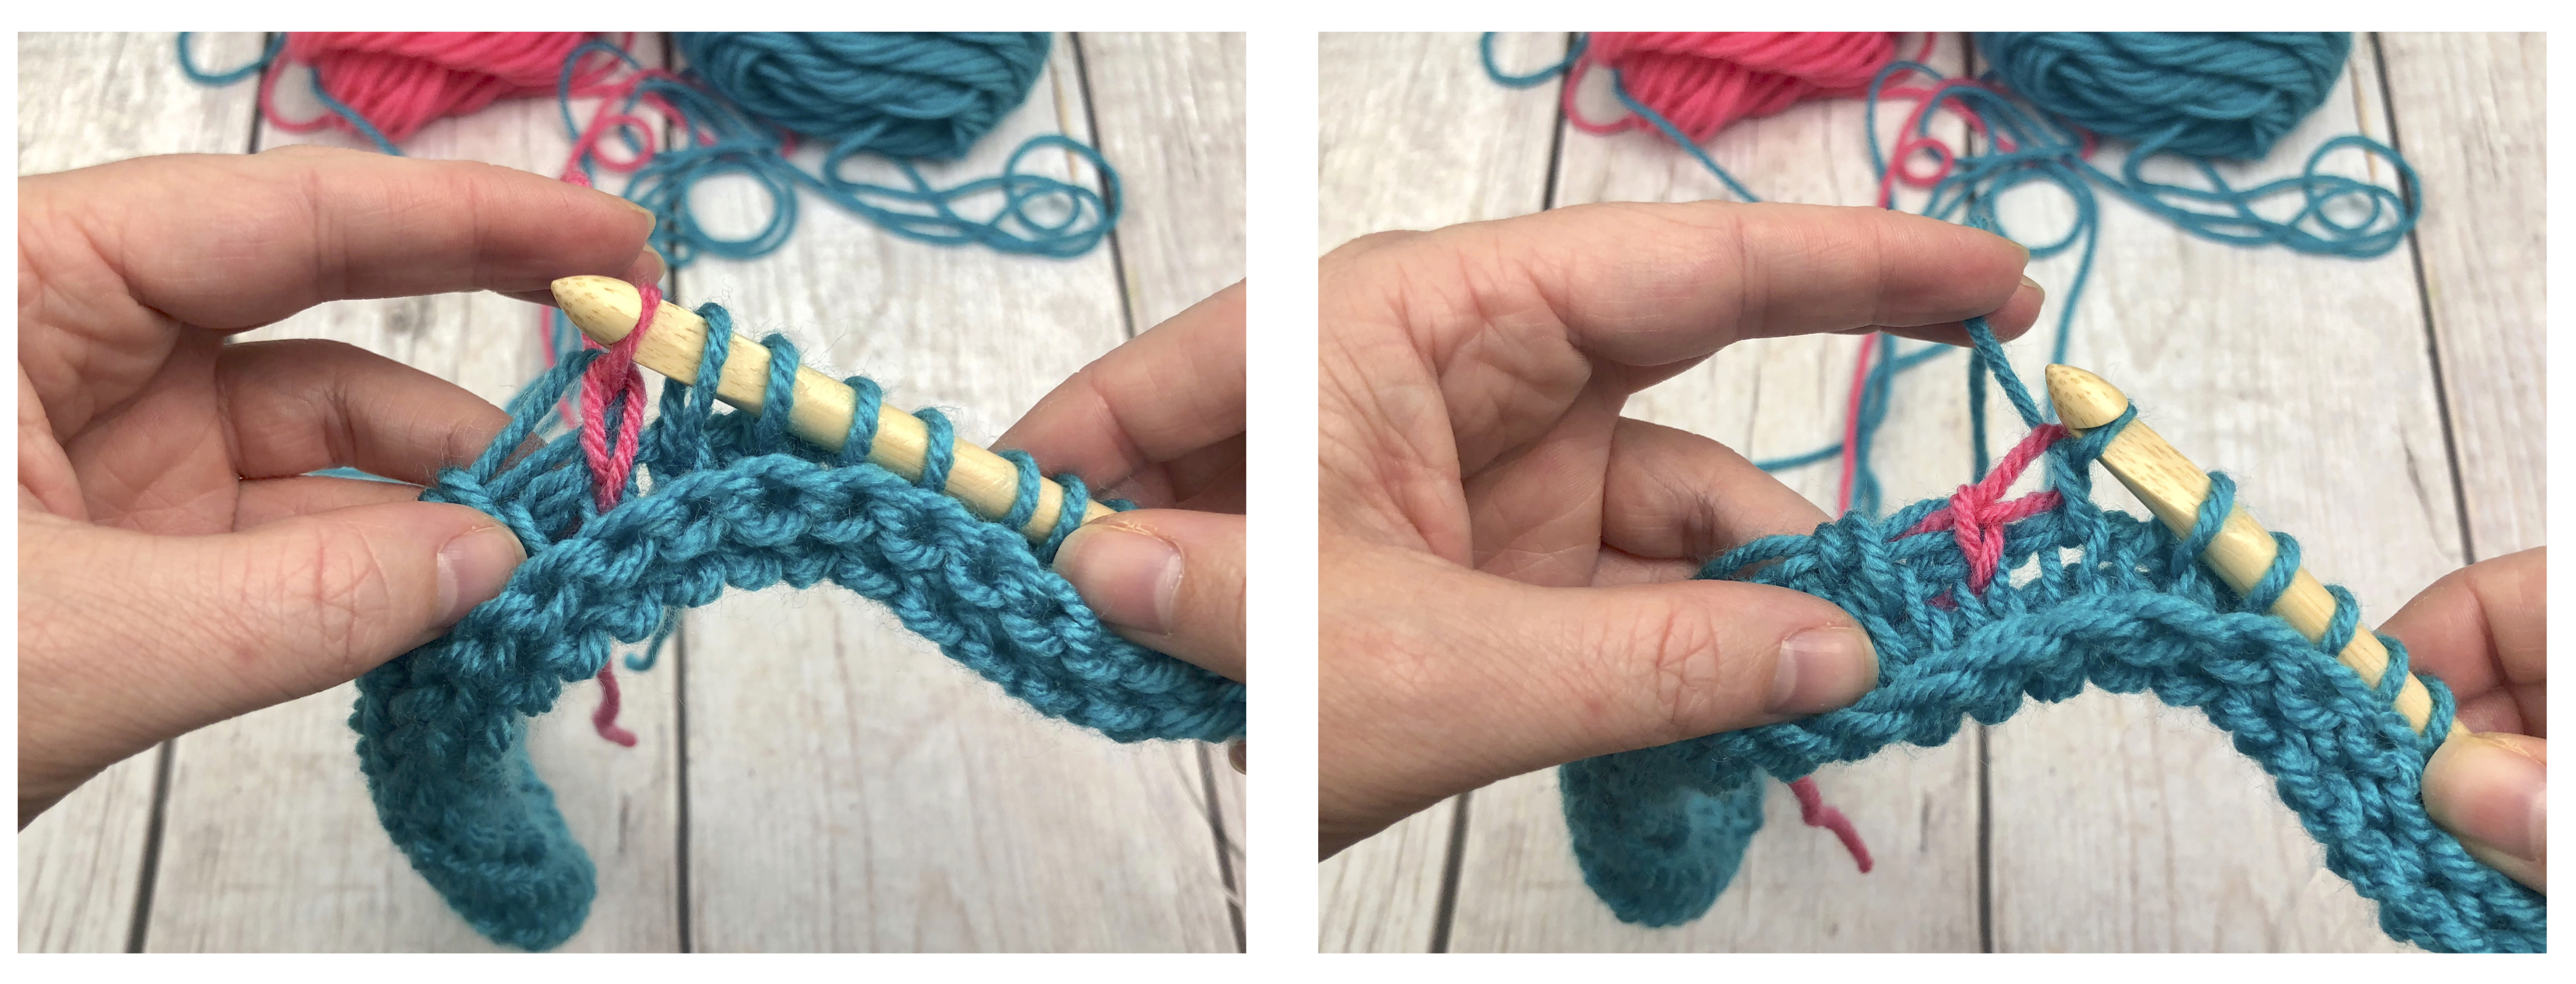
Insert your hook into the next stitch, switch to your B2 skein of beanie color and pull up a loop (31).
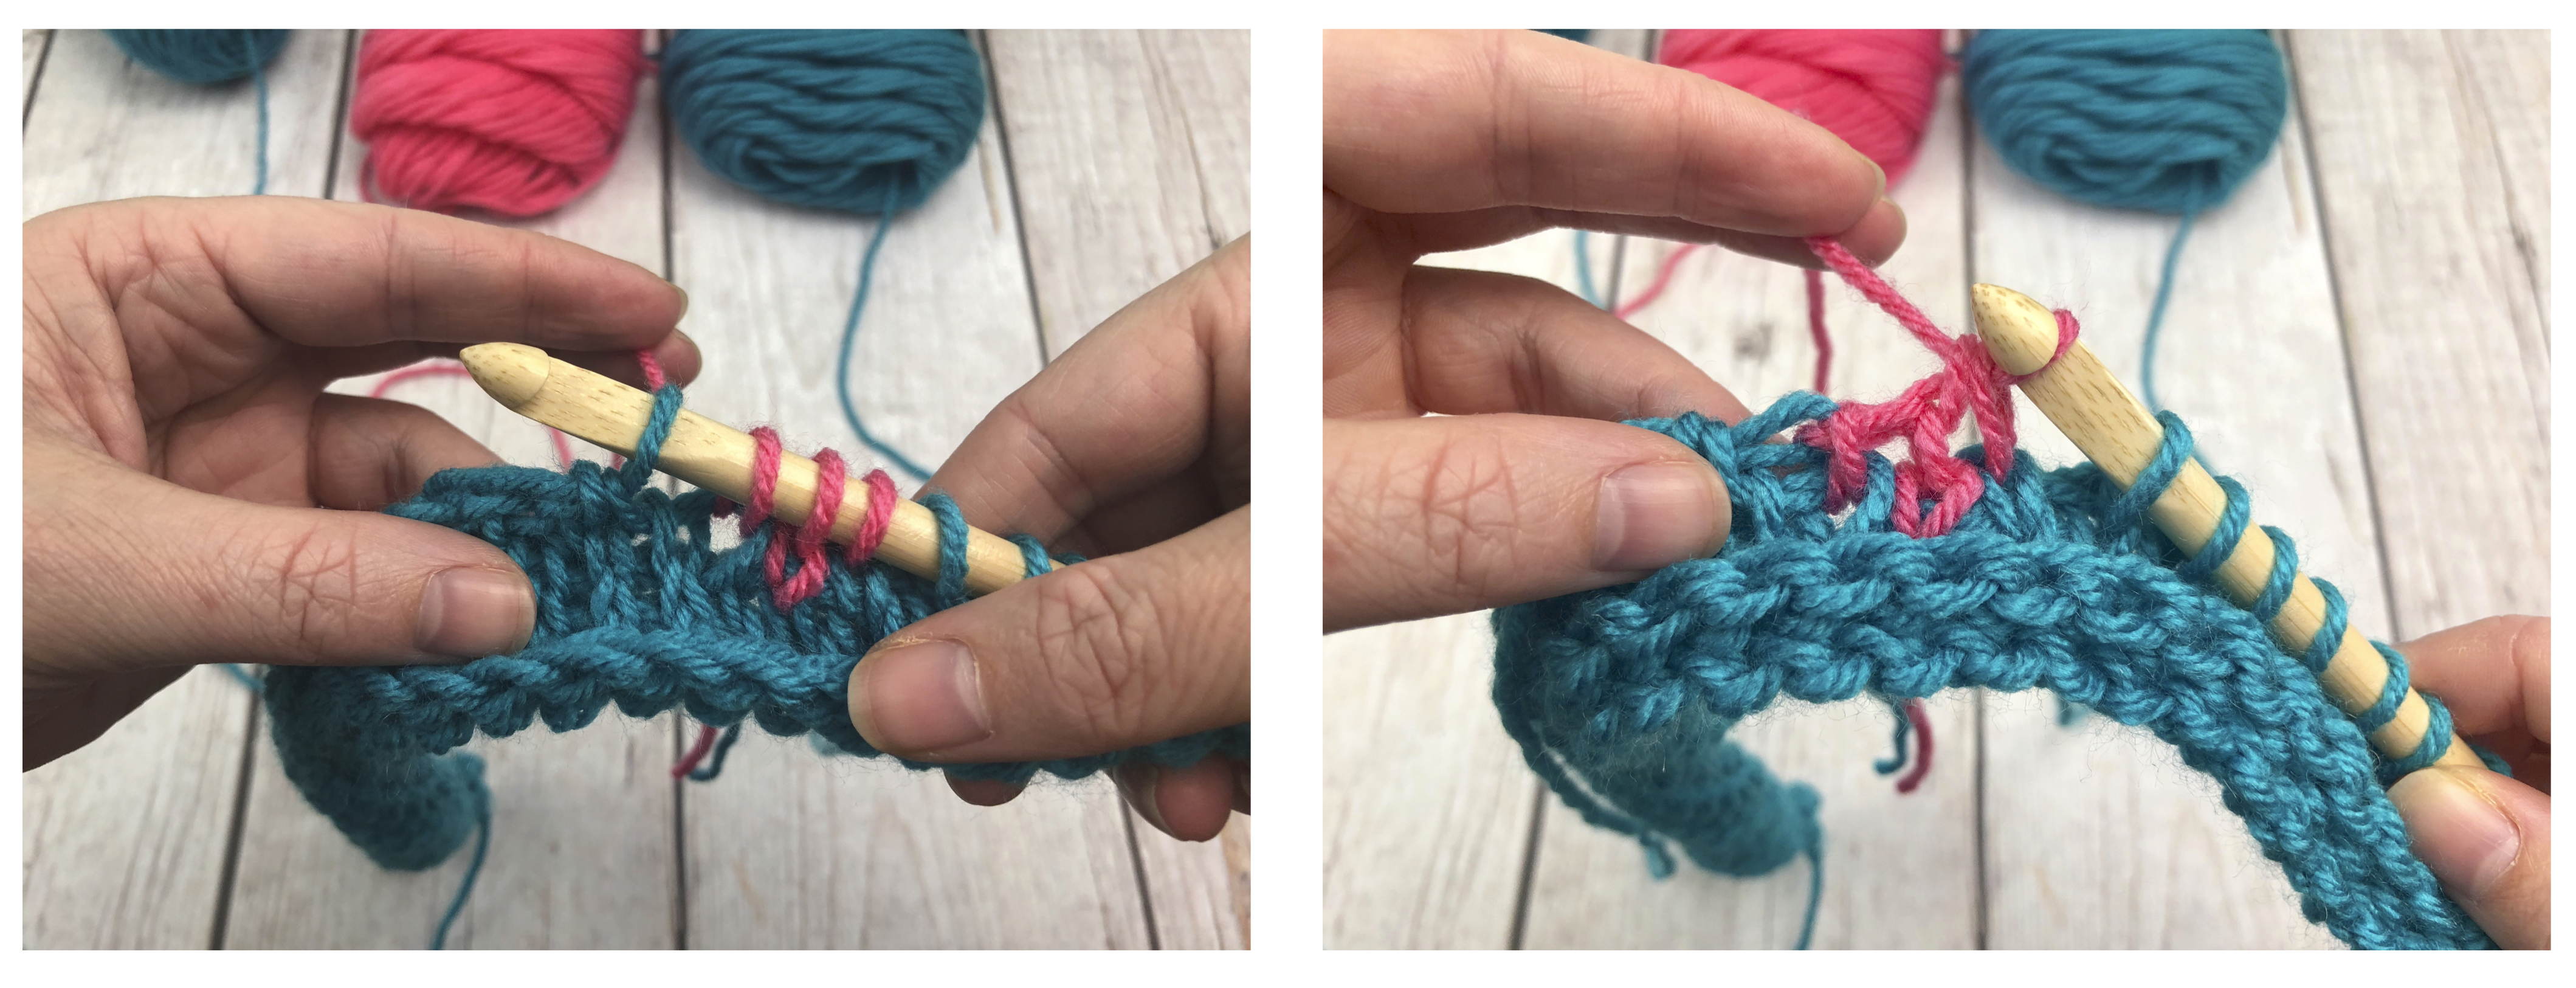
Continue with your B2 beanie color yarn all the way down the row (29 B2 stitches total). Complete your CH stitch then begin to yarn over and pull through two (Still with your B2 beanie color yarn) for 29 stitches (remembering the chain doesn’t count as a stitch).
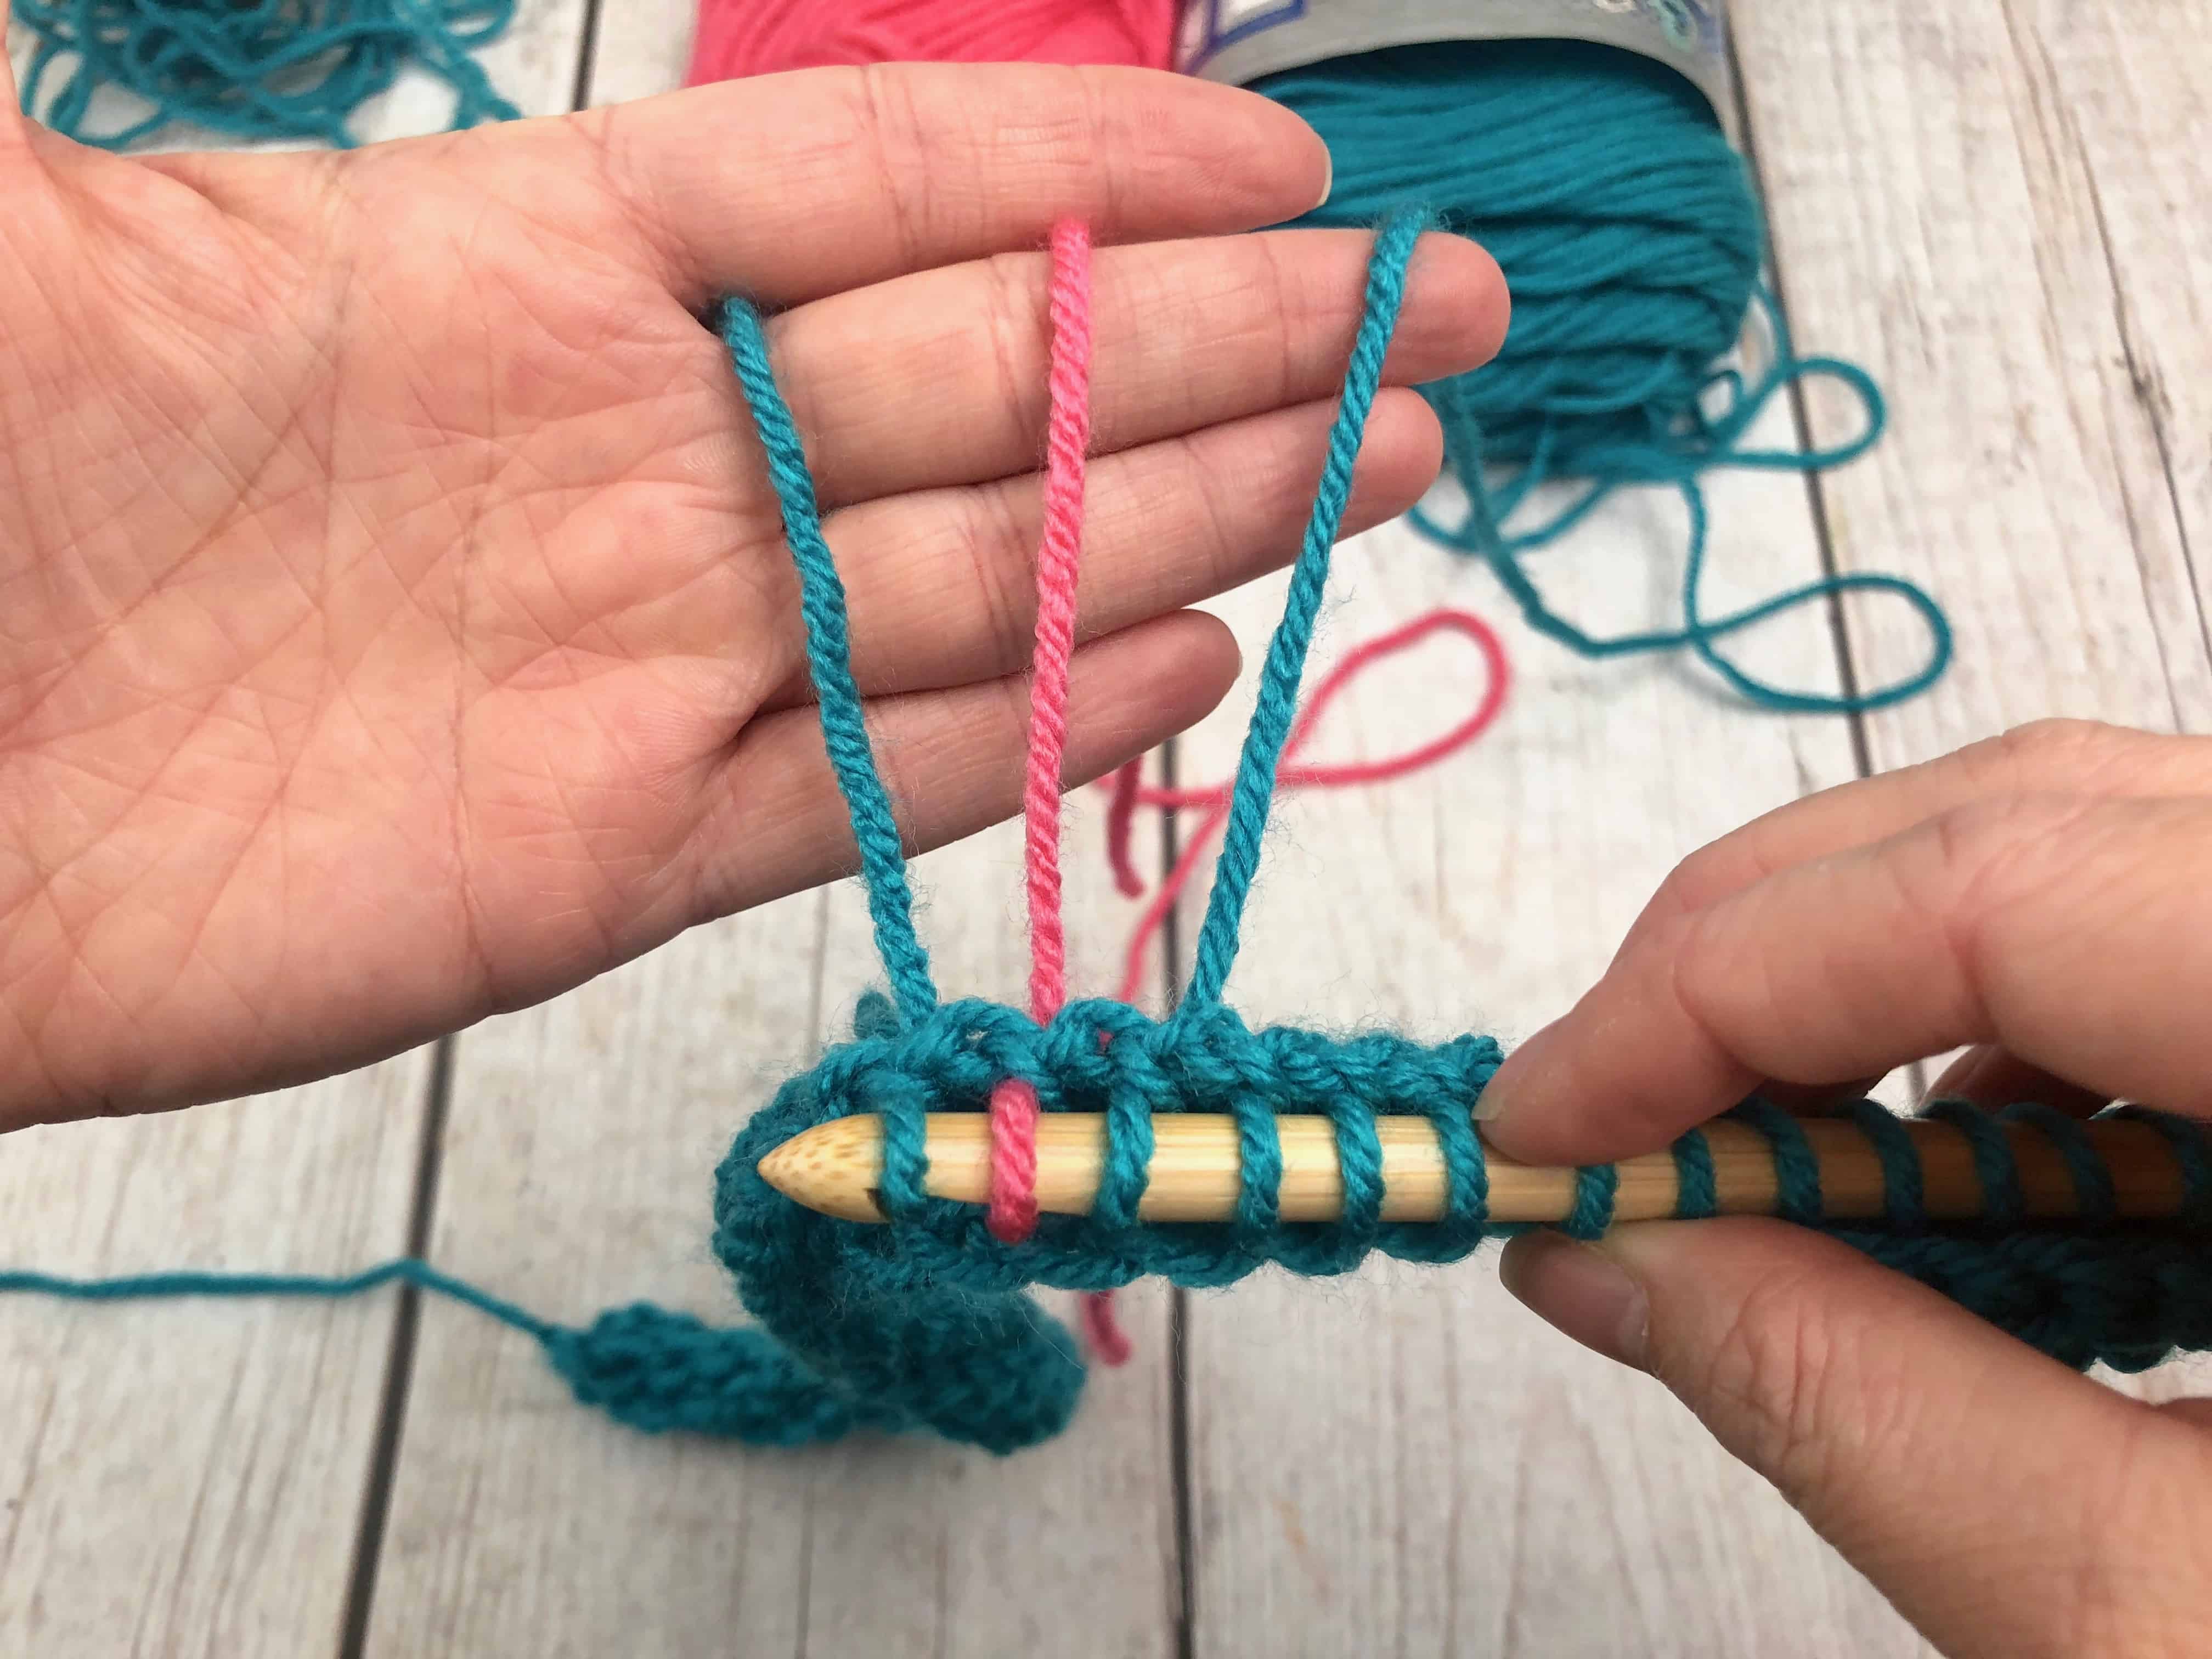
When its time for your 30th stitch you should have one loop of B2 color and one loop of H1 heart color on your hook. Give the tails of each color a tug to make sure tension stays even and you don’t have two super loose stitches.
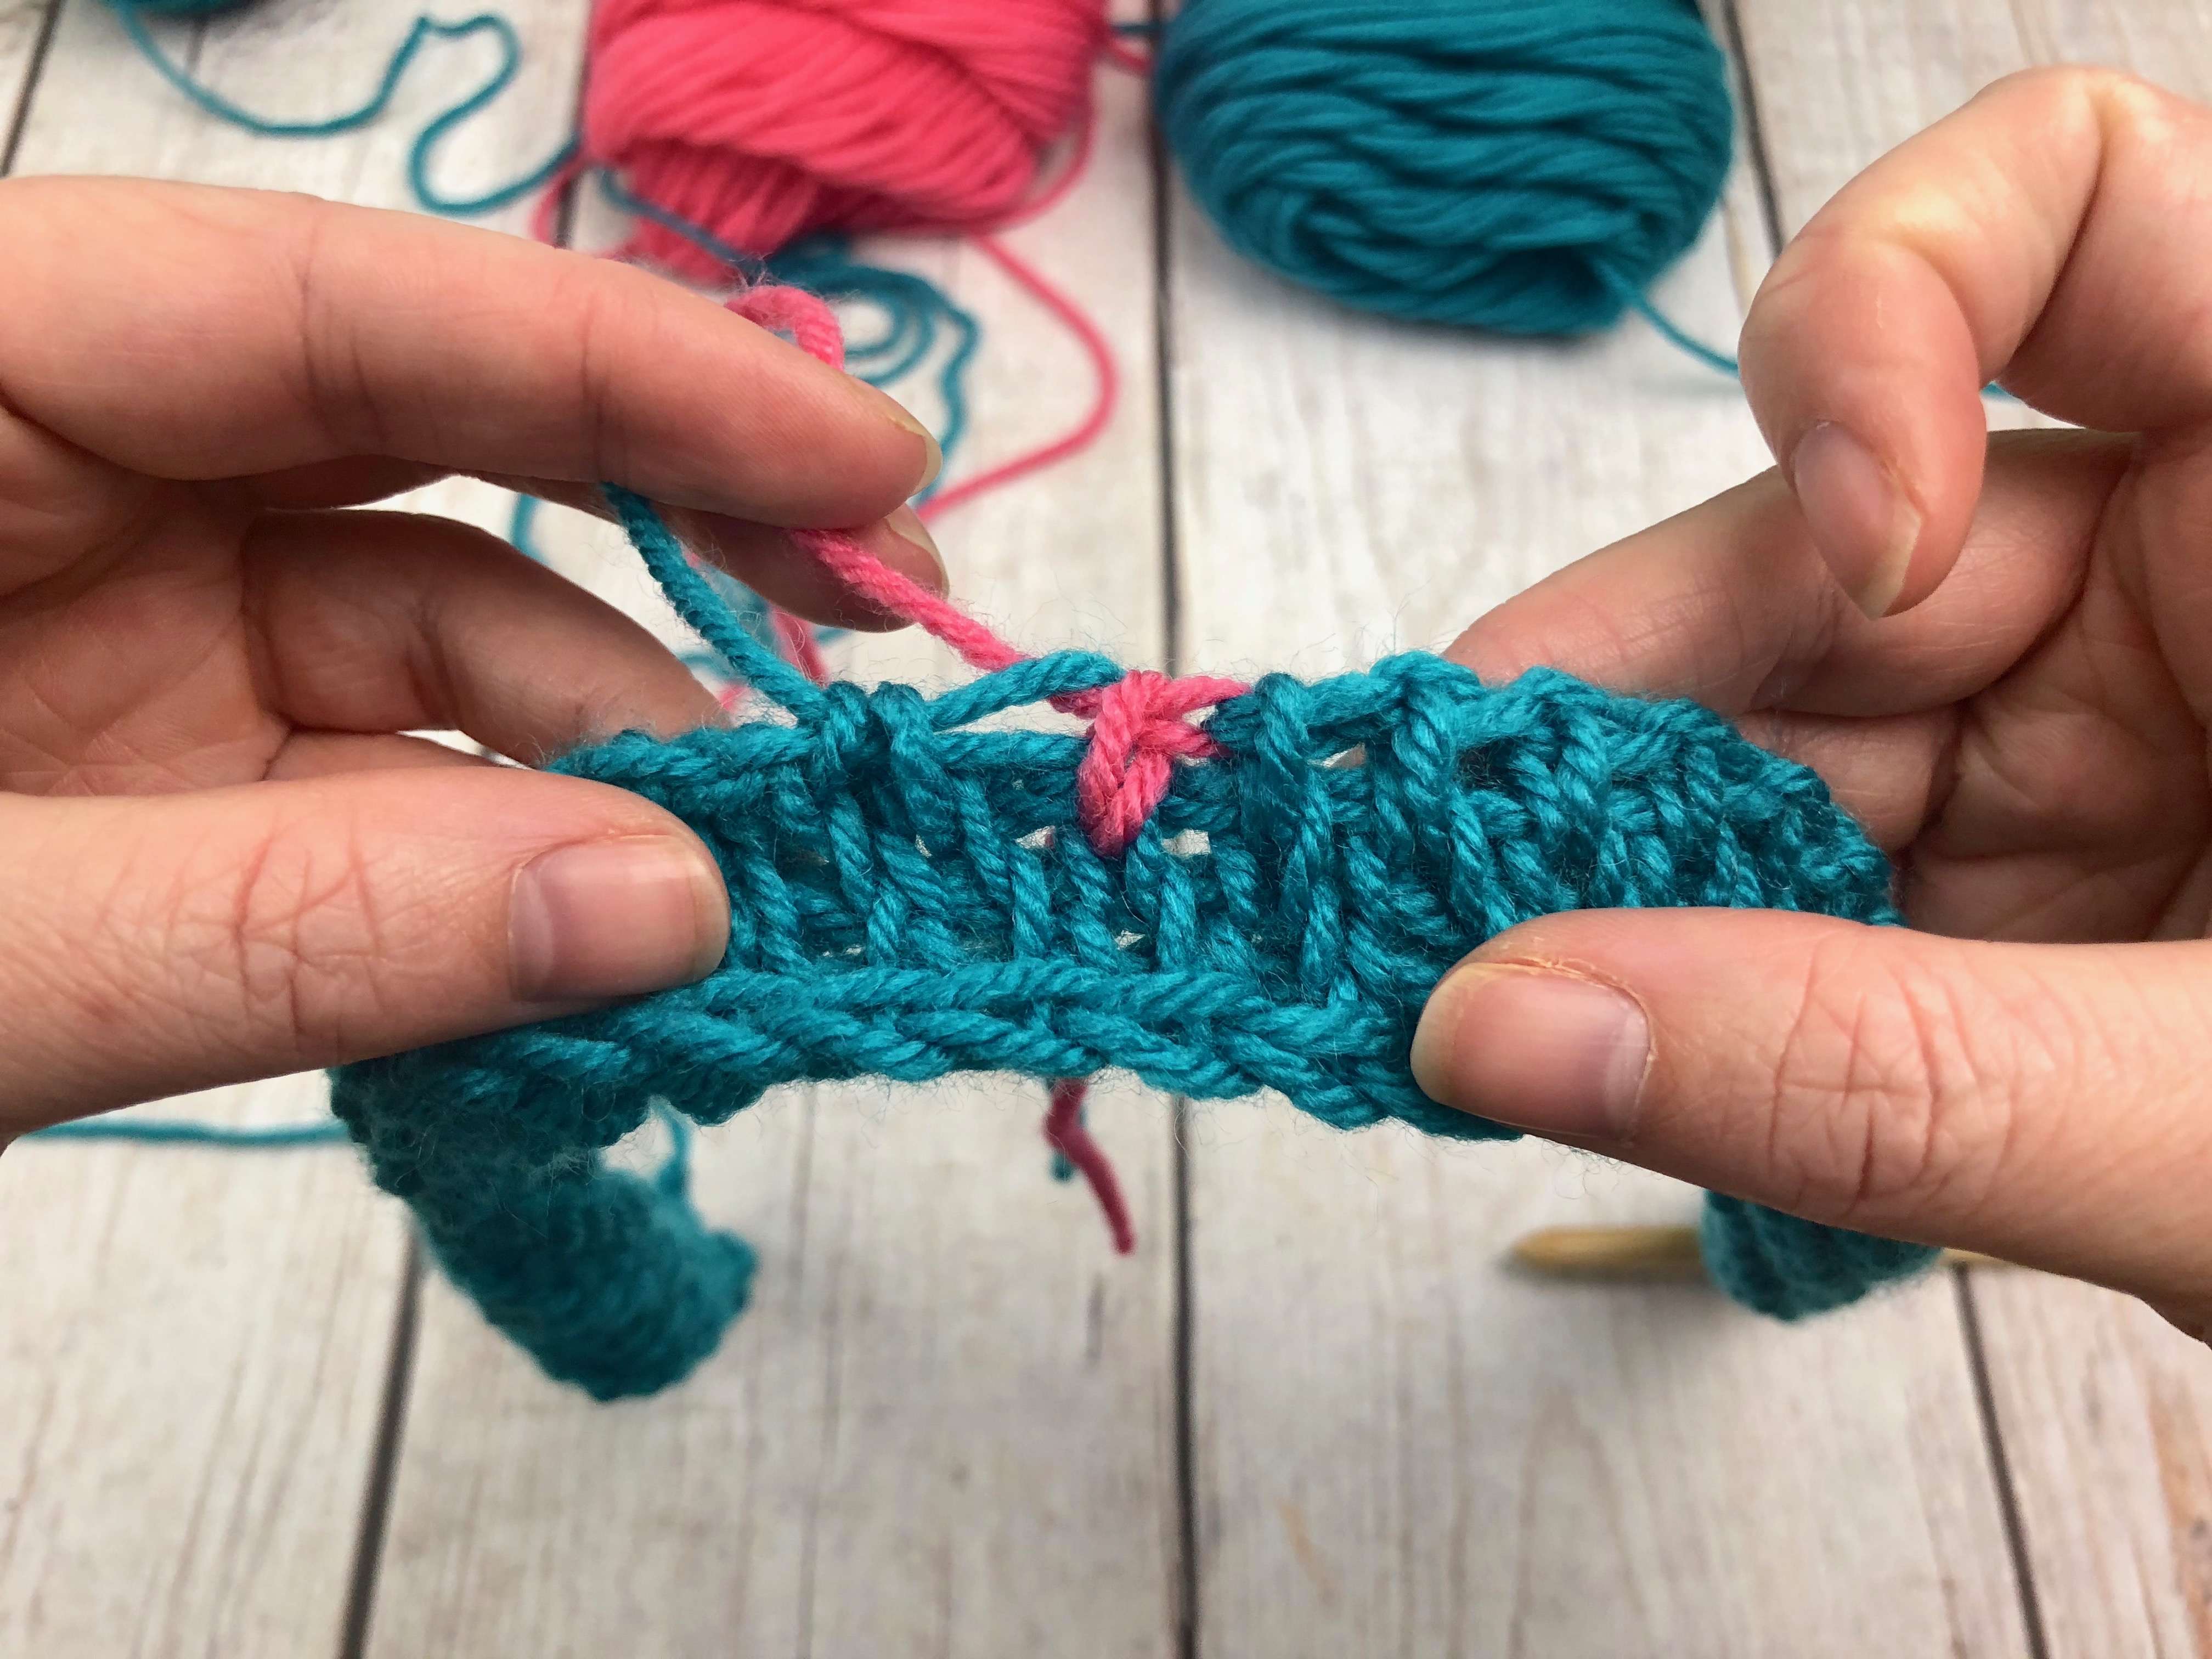
Pick up your H1 heart color yarn and pull through next two loops (30). Pick up your B1 beanie color yarn and pull through next two loops.
Once you pull through two then go to the next stitch to pull through two, you will see your color changes get really loose, don’t worry about it right now, you can tighten them before you pull your first pass loops through them in the following row.
Continue using that yarn for the rest of the row. You should have 29 stitches with B2 beanie yarn, 1 stitch with H1 heart yarn, 29 stitches of B1 beanie yarn.
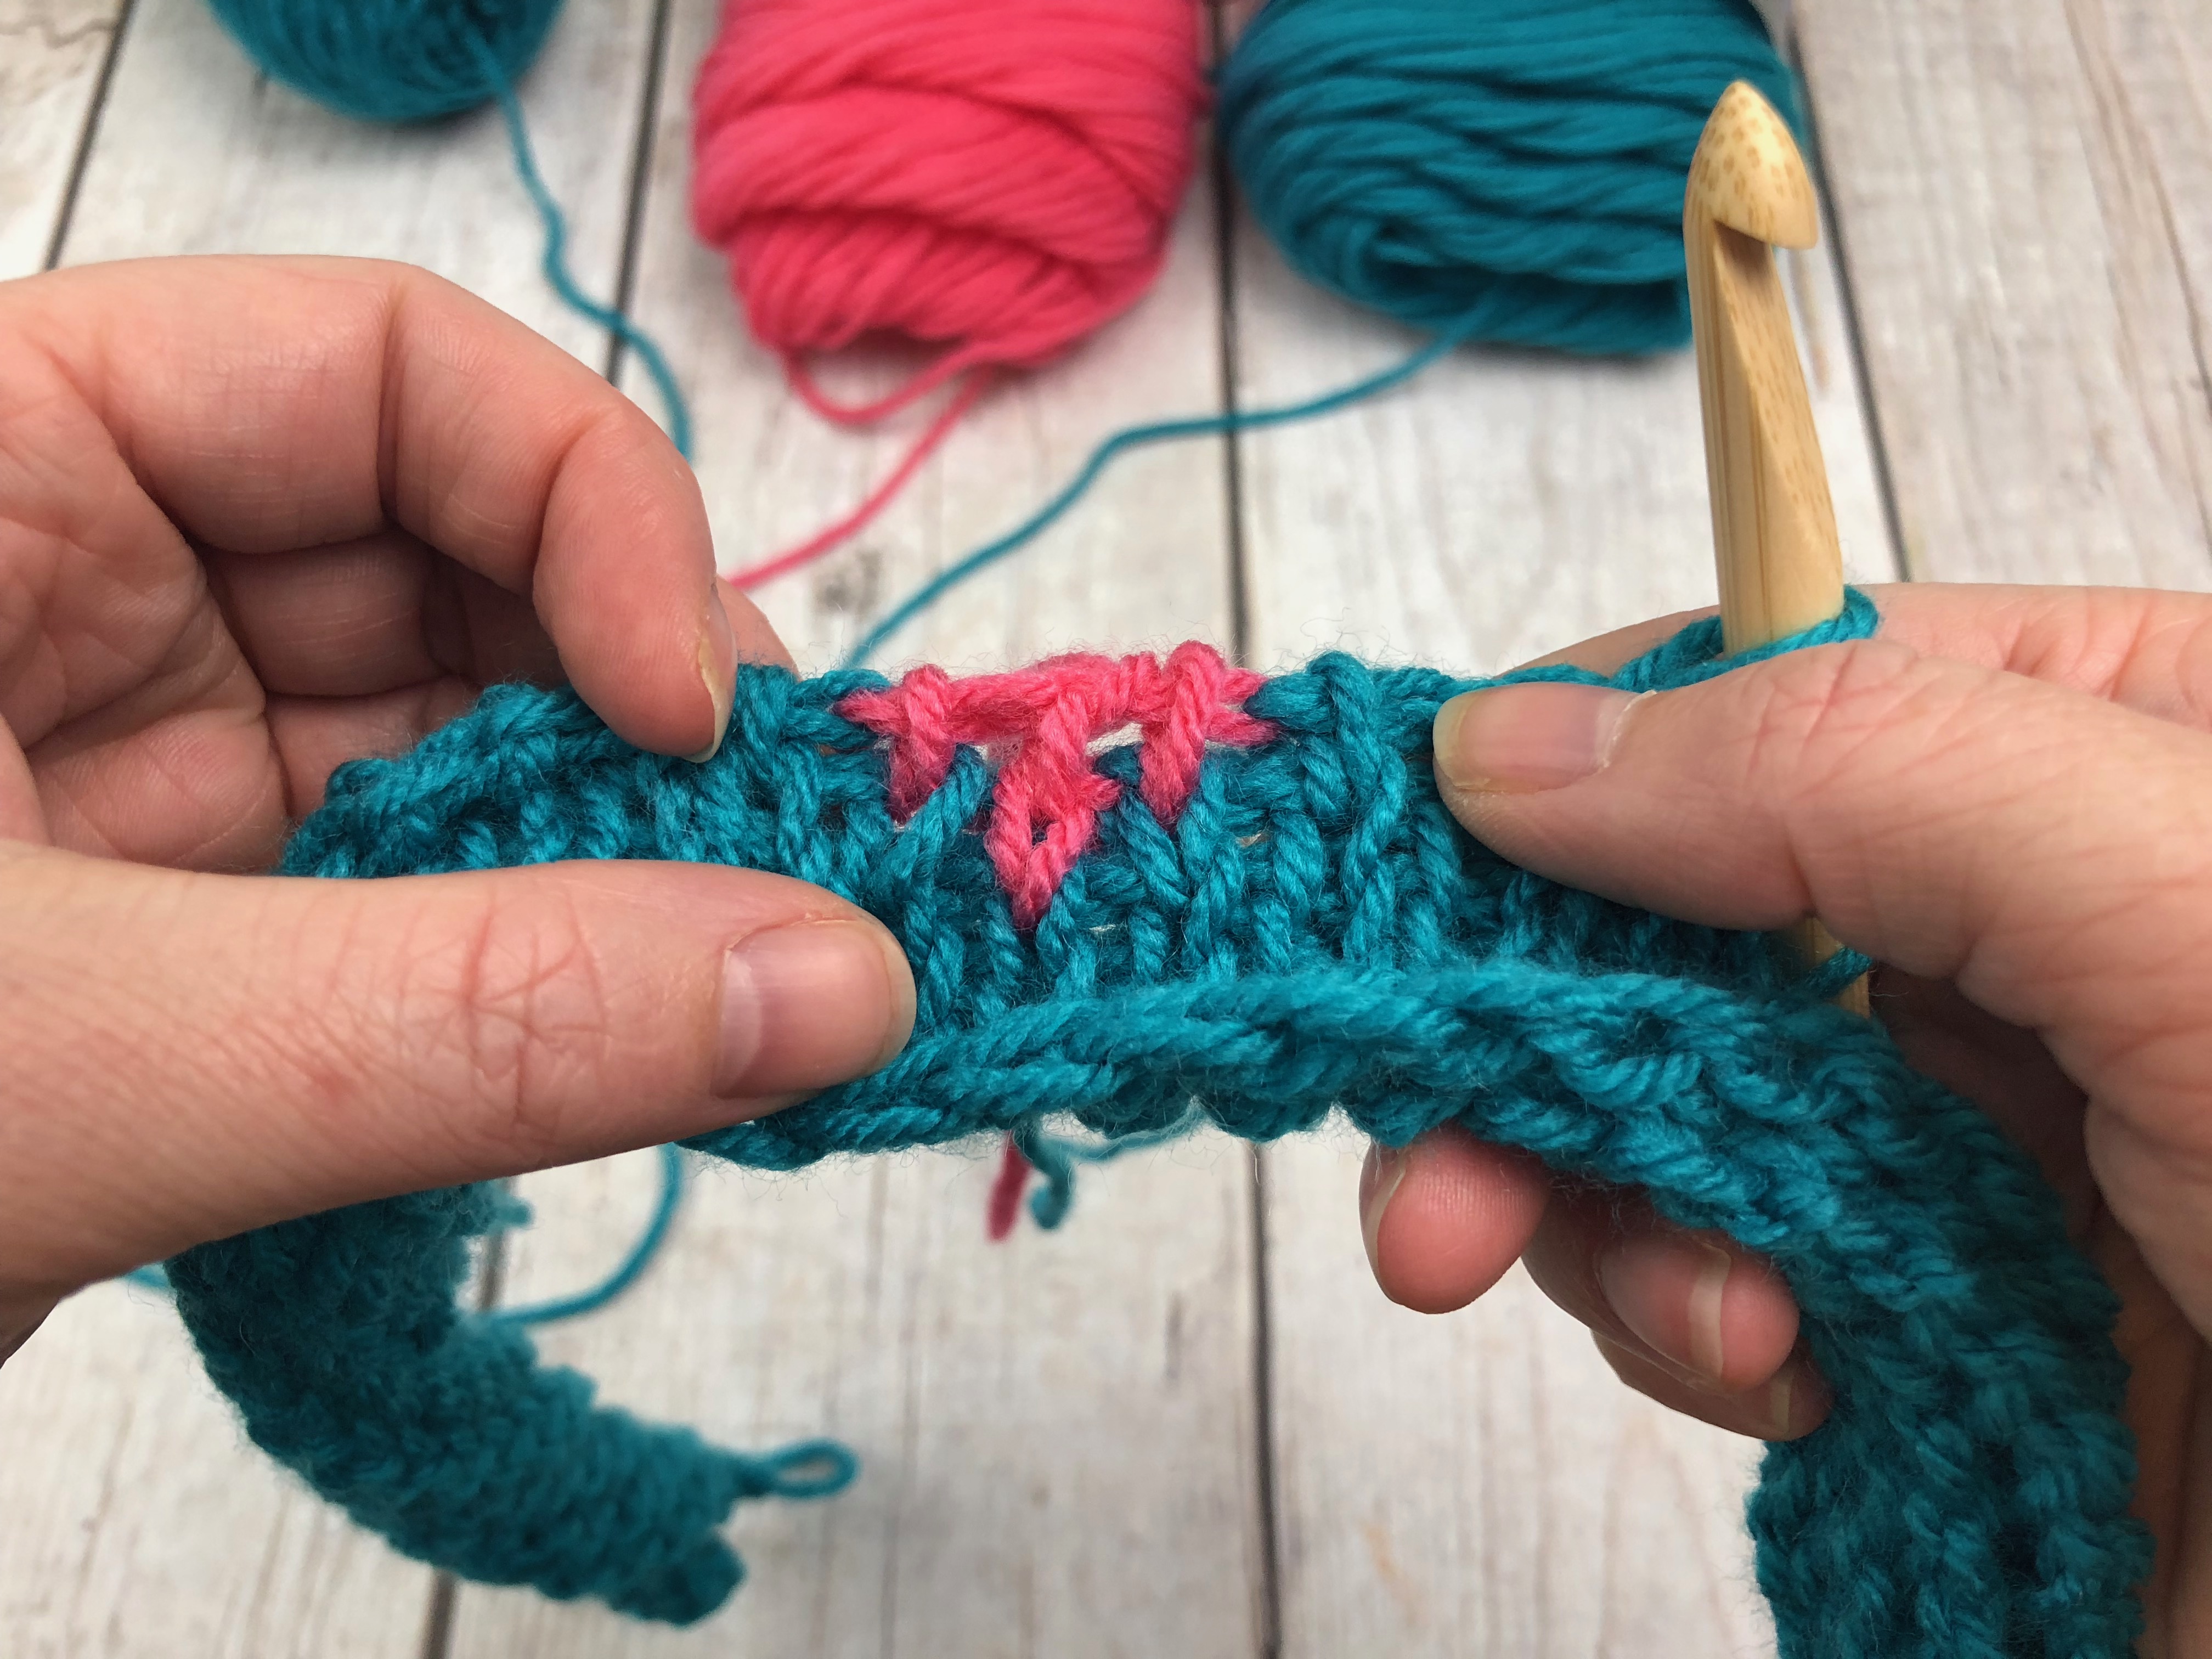
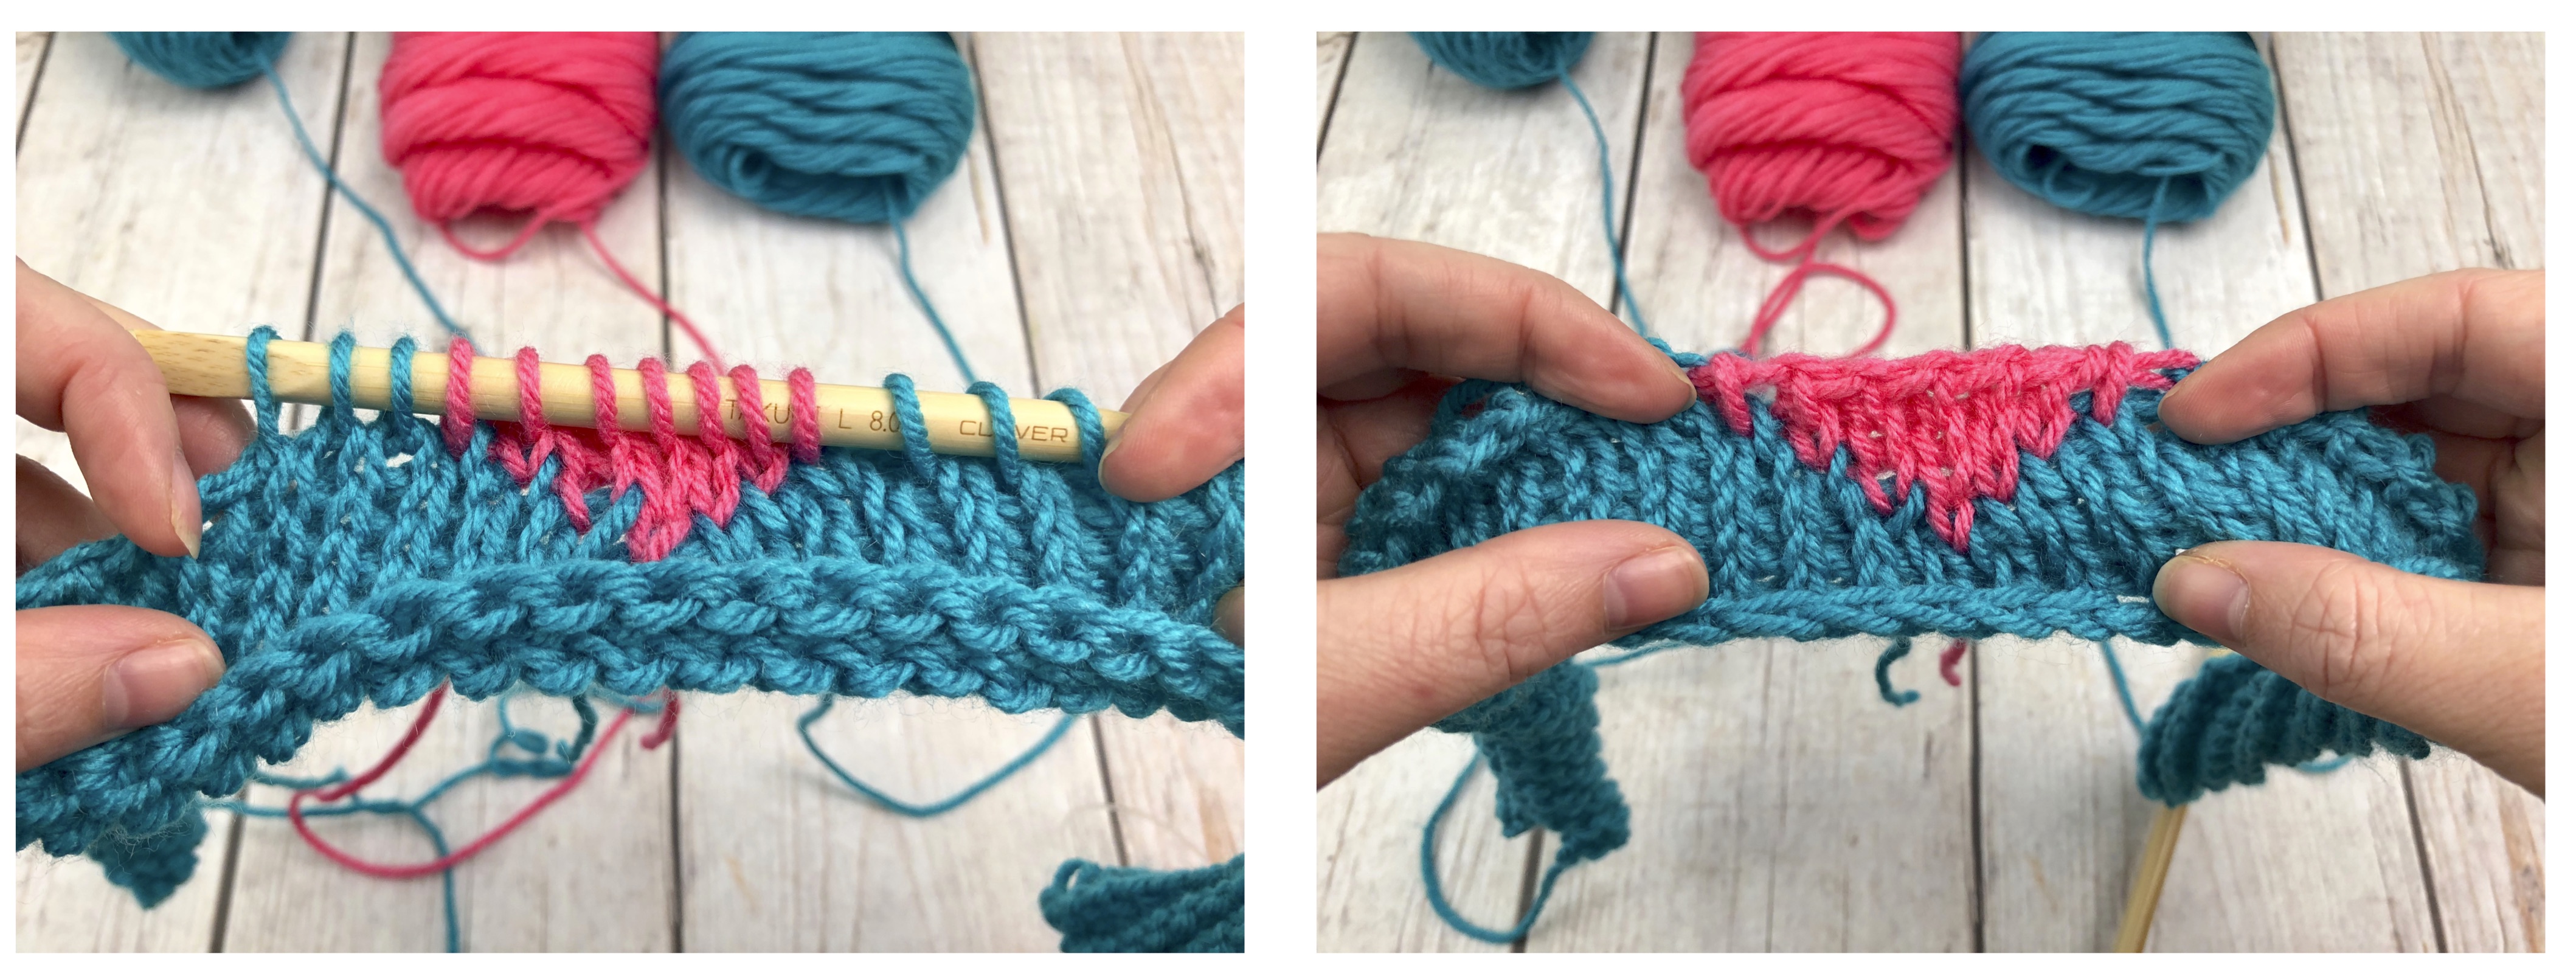
Row 5: TKS 28 stitches. Insert your hook into the next stitch, switch to your H1 heart yarn color and pull up a loop. Repeat for the next 2 stitches (3 total). You should now have 28 loops of B1 and 3 loops of H1 yarn on your hook.
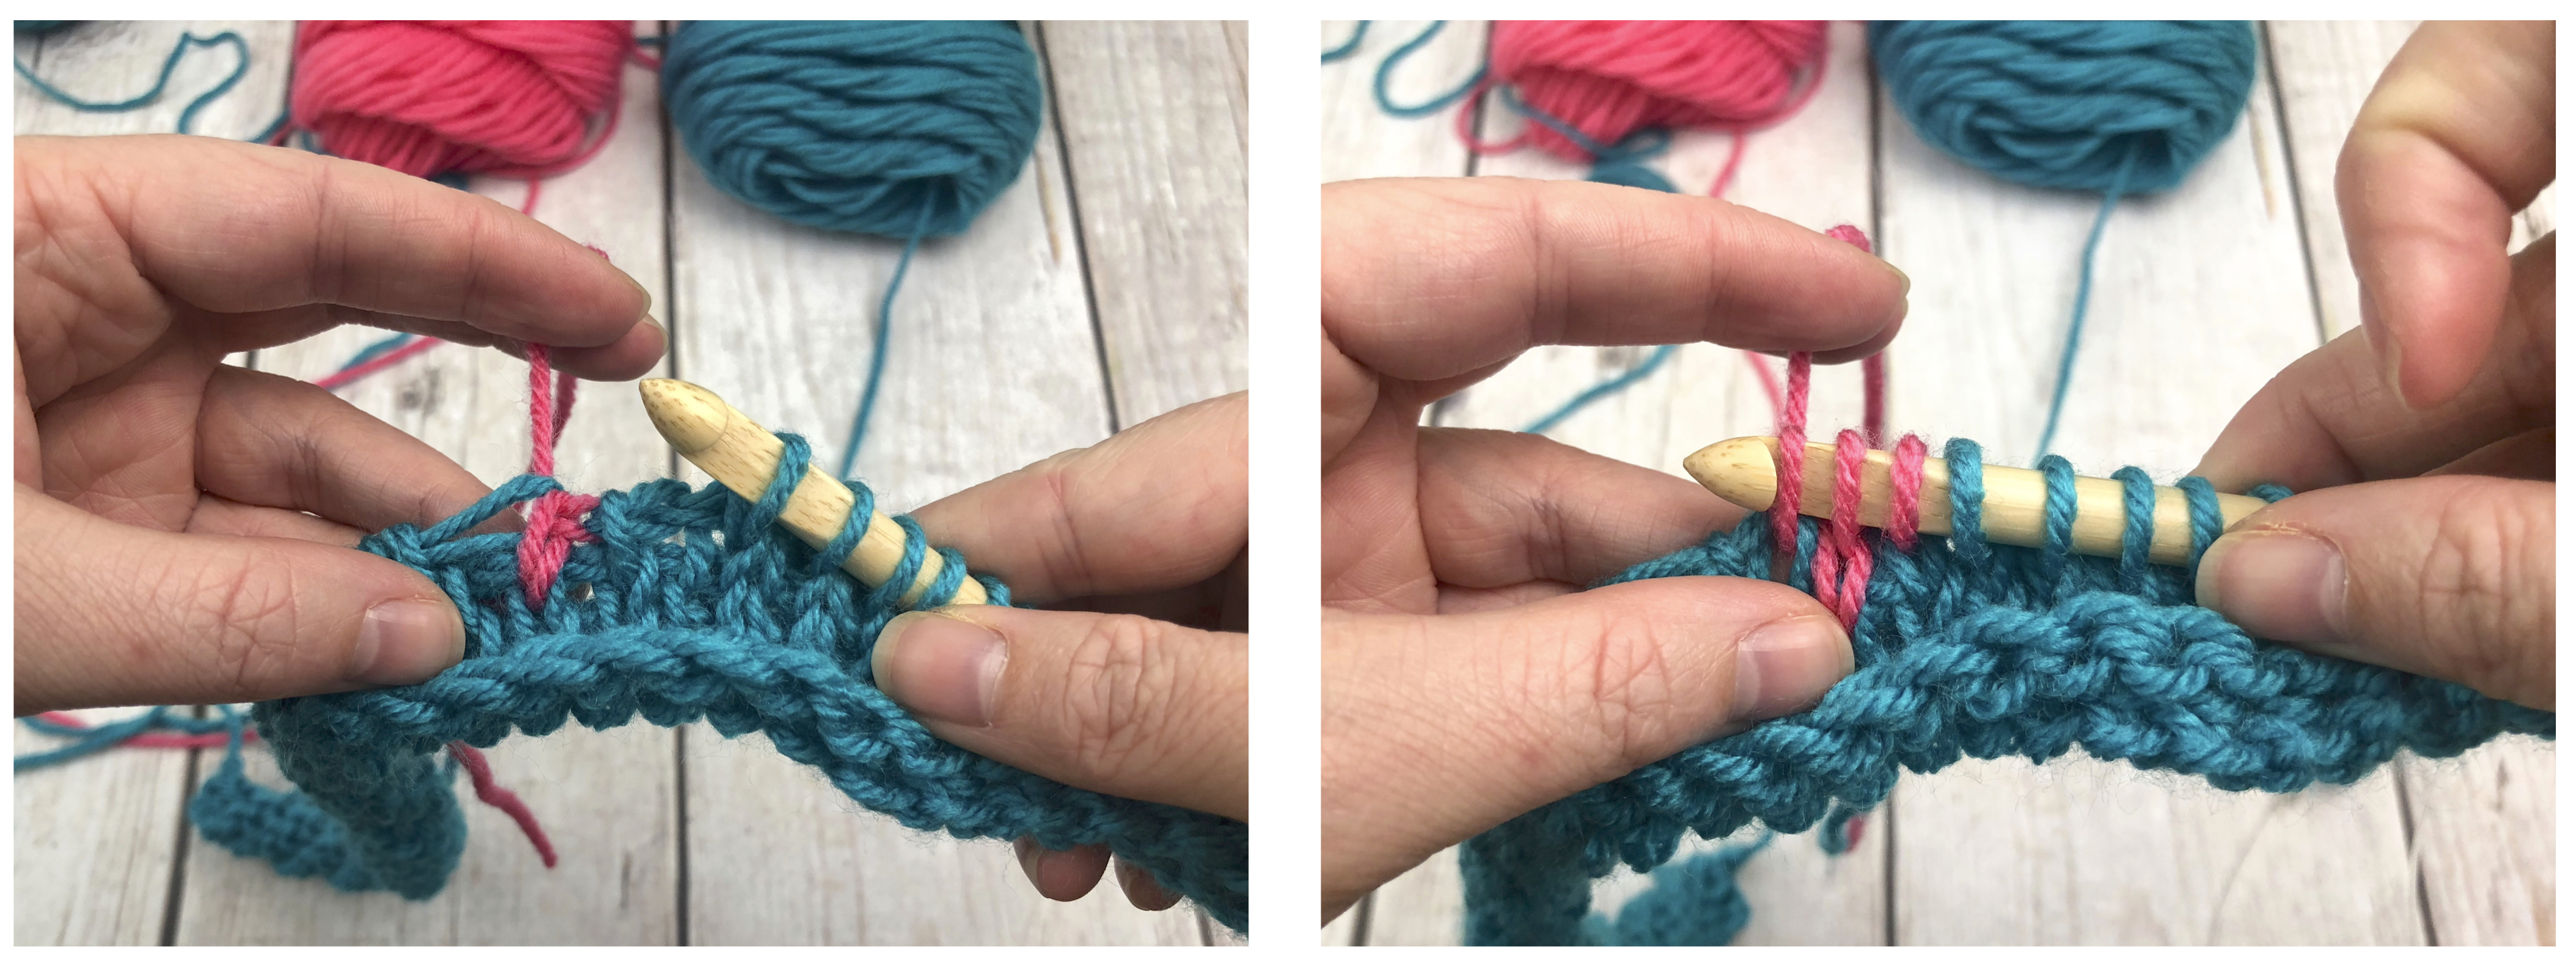
Insert your hook into the next stitch, switch to your B2 skein of beanie color and pull up a loop. Continue with B2 yarn all the way down the row (28 loops total).
Complete your CH stitch then begin to yarn over and pull through two, still with your B2 yarn. After you get 28 stitches, pick up your H1 yarn and pull through two, for a total of 3 stitches.
Pick up your B1 beanie color yarn and pull through two. Continue using that yarn for the rest of the row. You should have 28 stitches with B2 beanie yarn, 3 stitches with H1 heart yarn, 28 stitches of B1 beanie yarn.
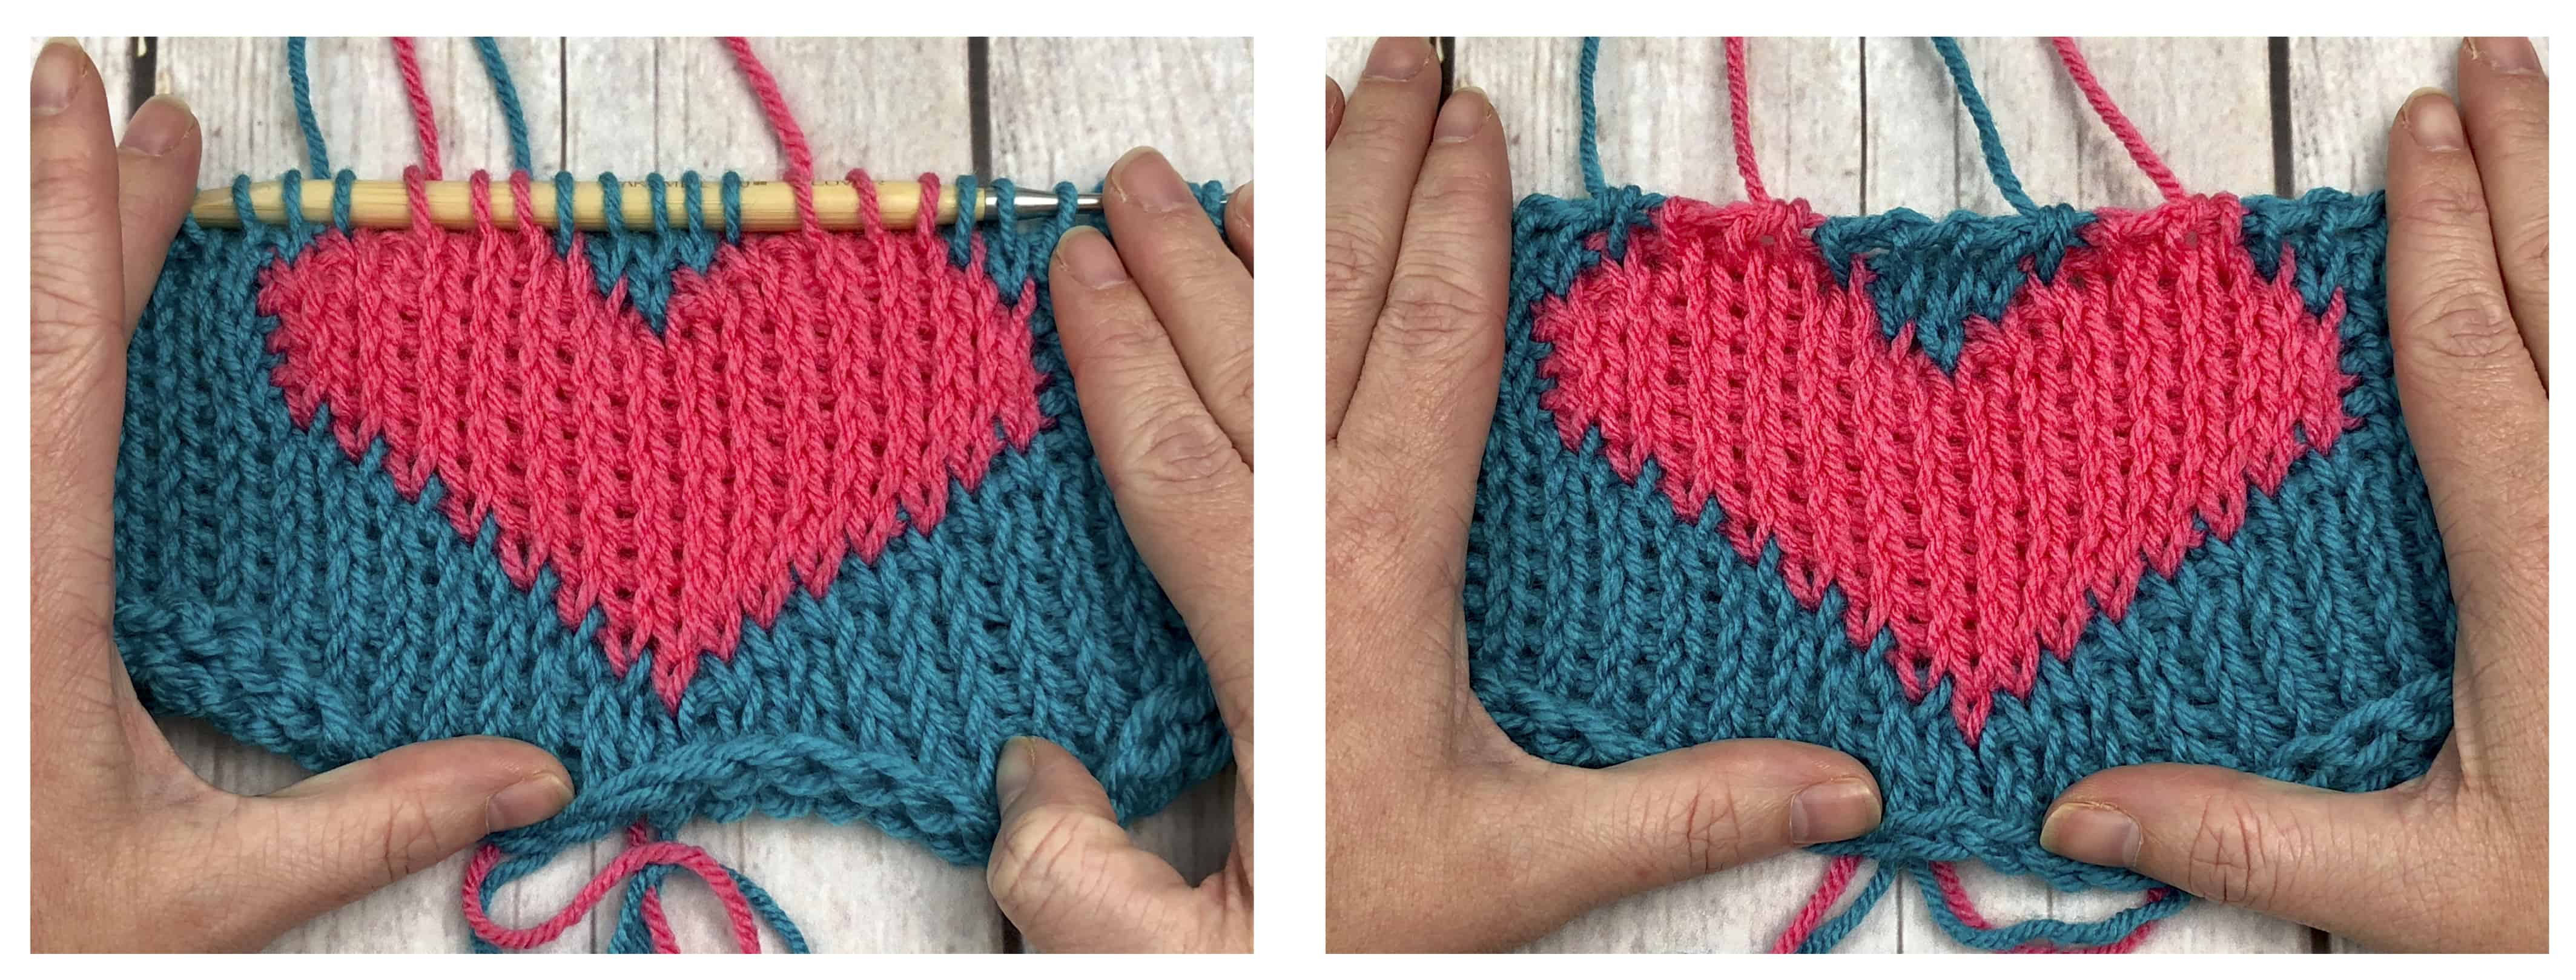
Row 6: TKS 27 stitches with B1, 5 stitches with H1, 27 stitches with B2. (59).
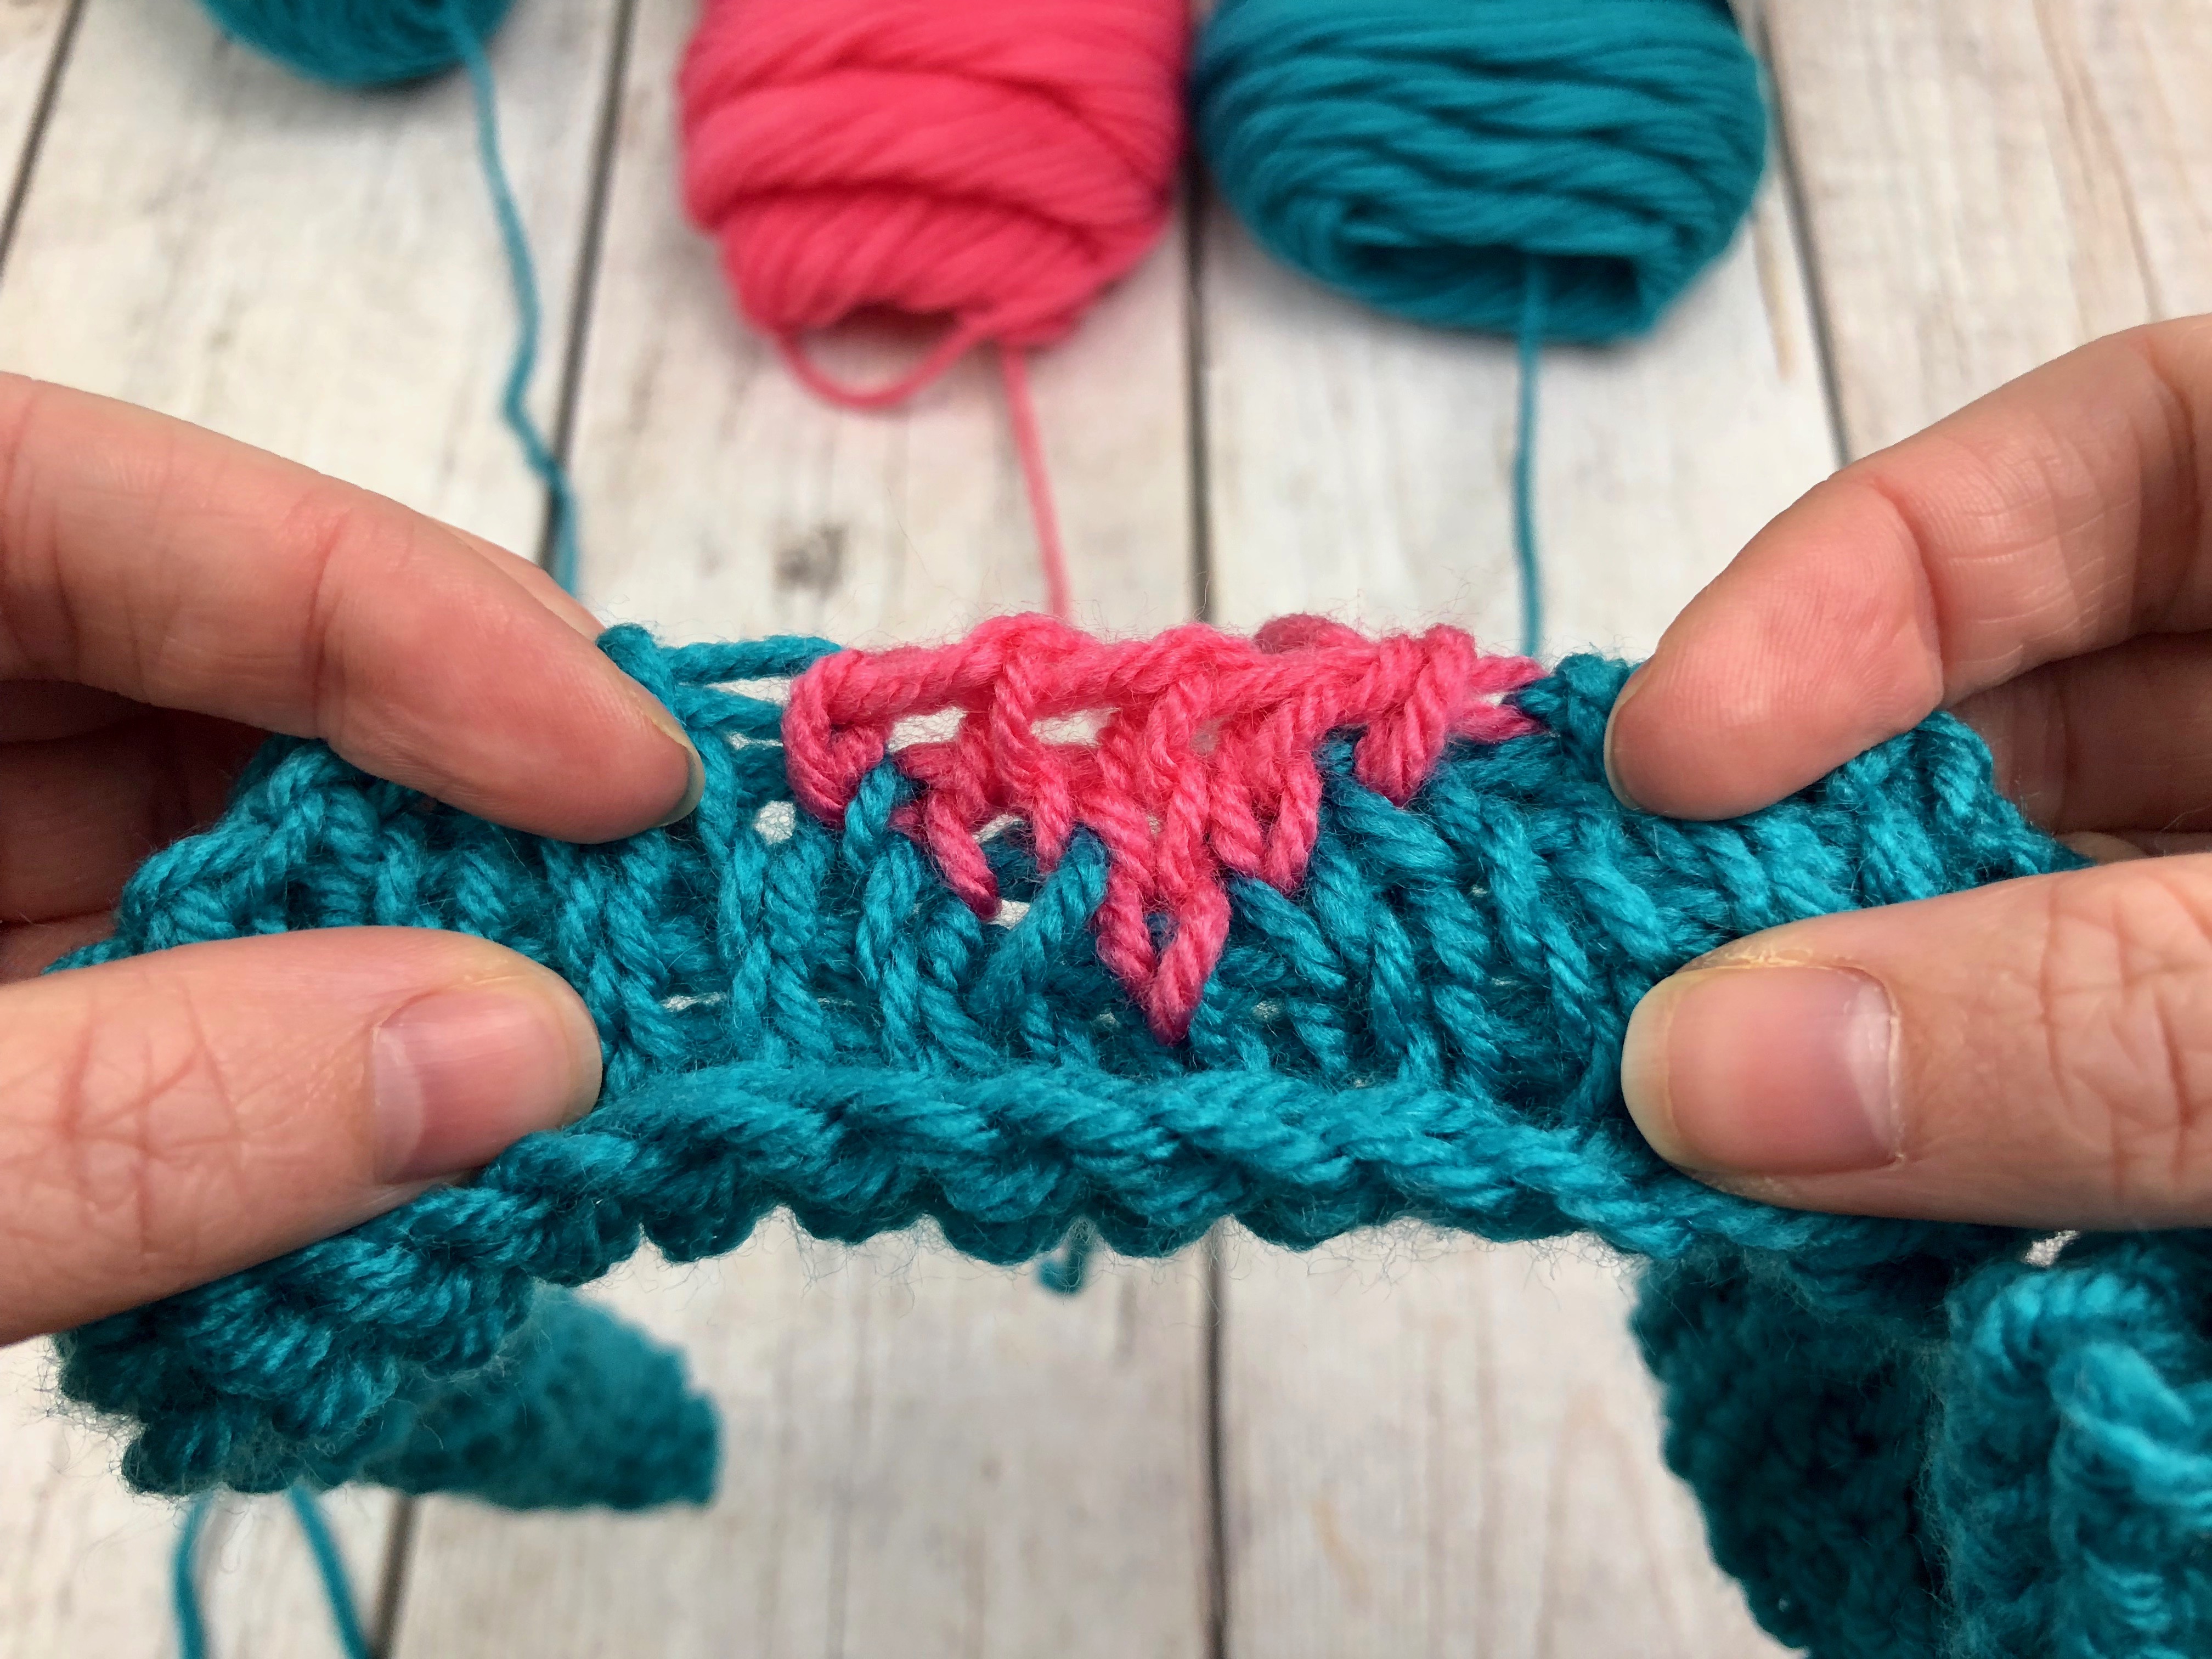
Row 7: TKS 26 stitches with B1, 7 stitches with H1, 26 stitches with B2. (59)
Row 8: TKS 25 stitches with B1, 9 stitches with H1, 25 stitches with B2. (59)
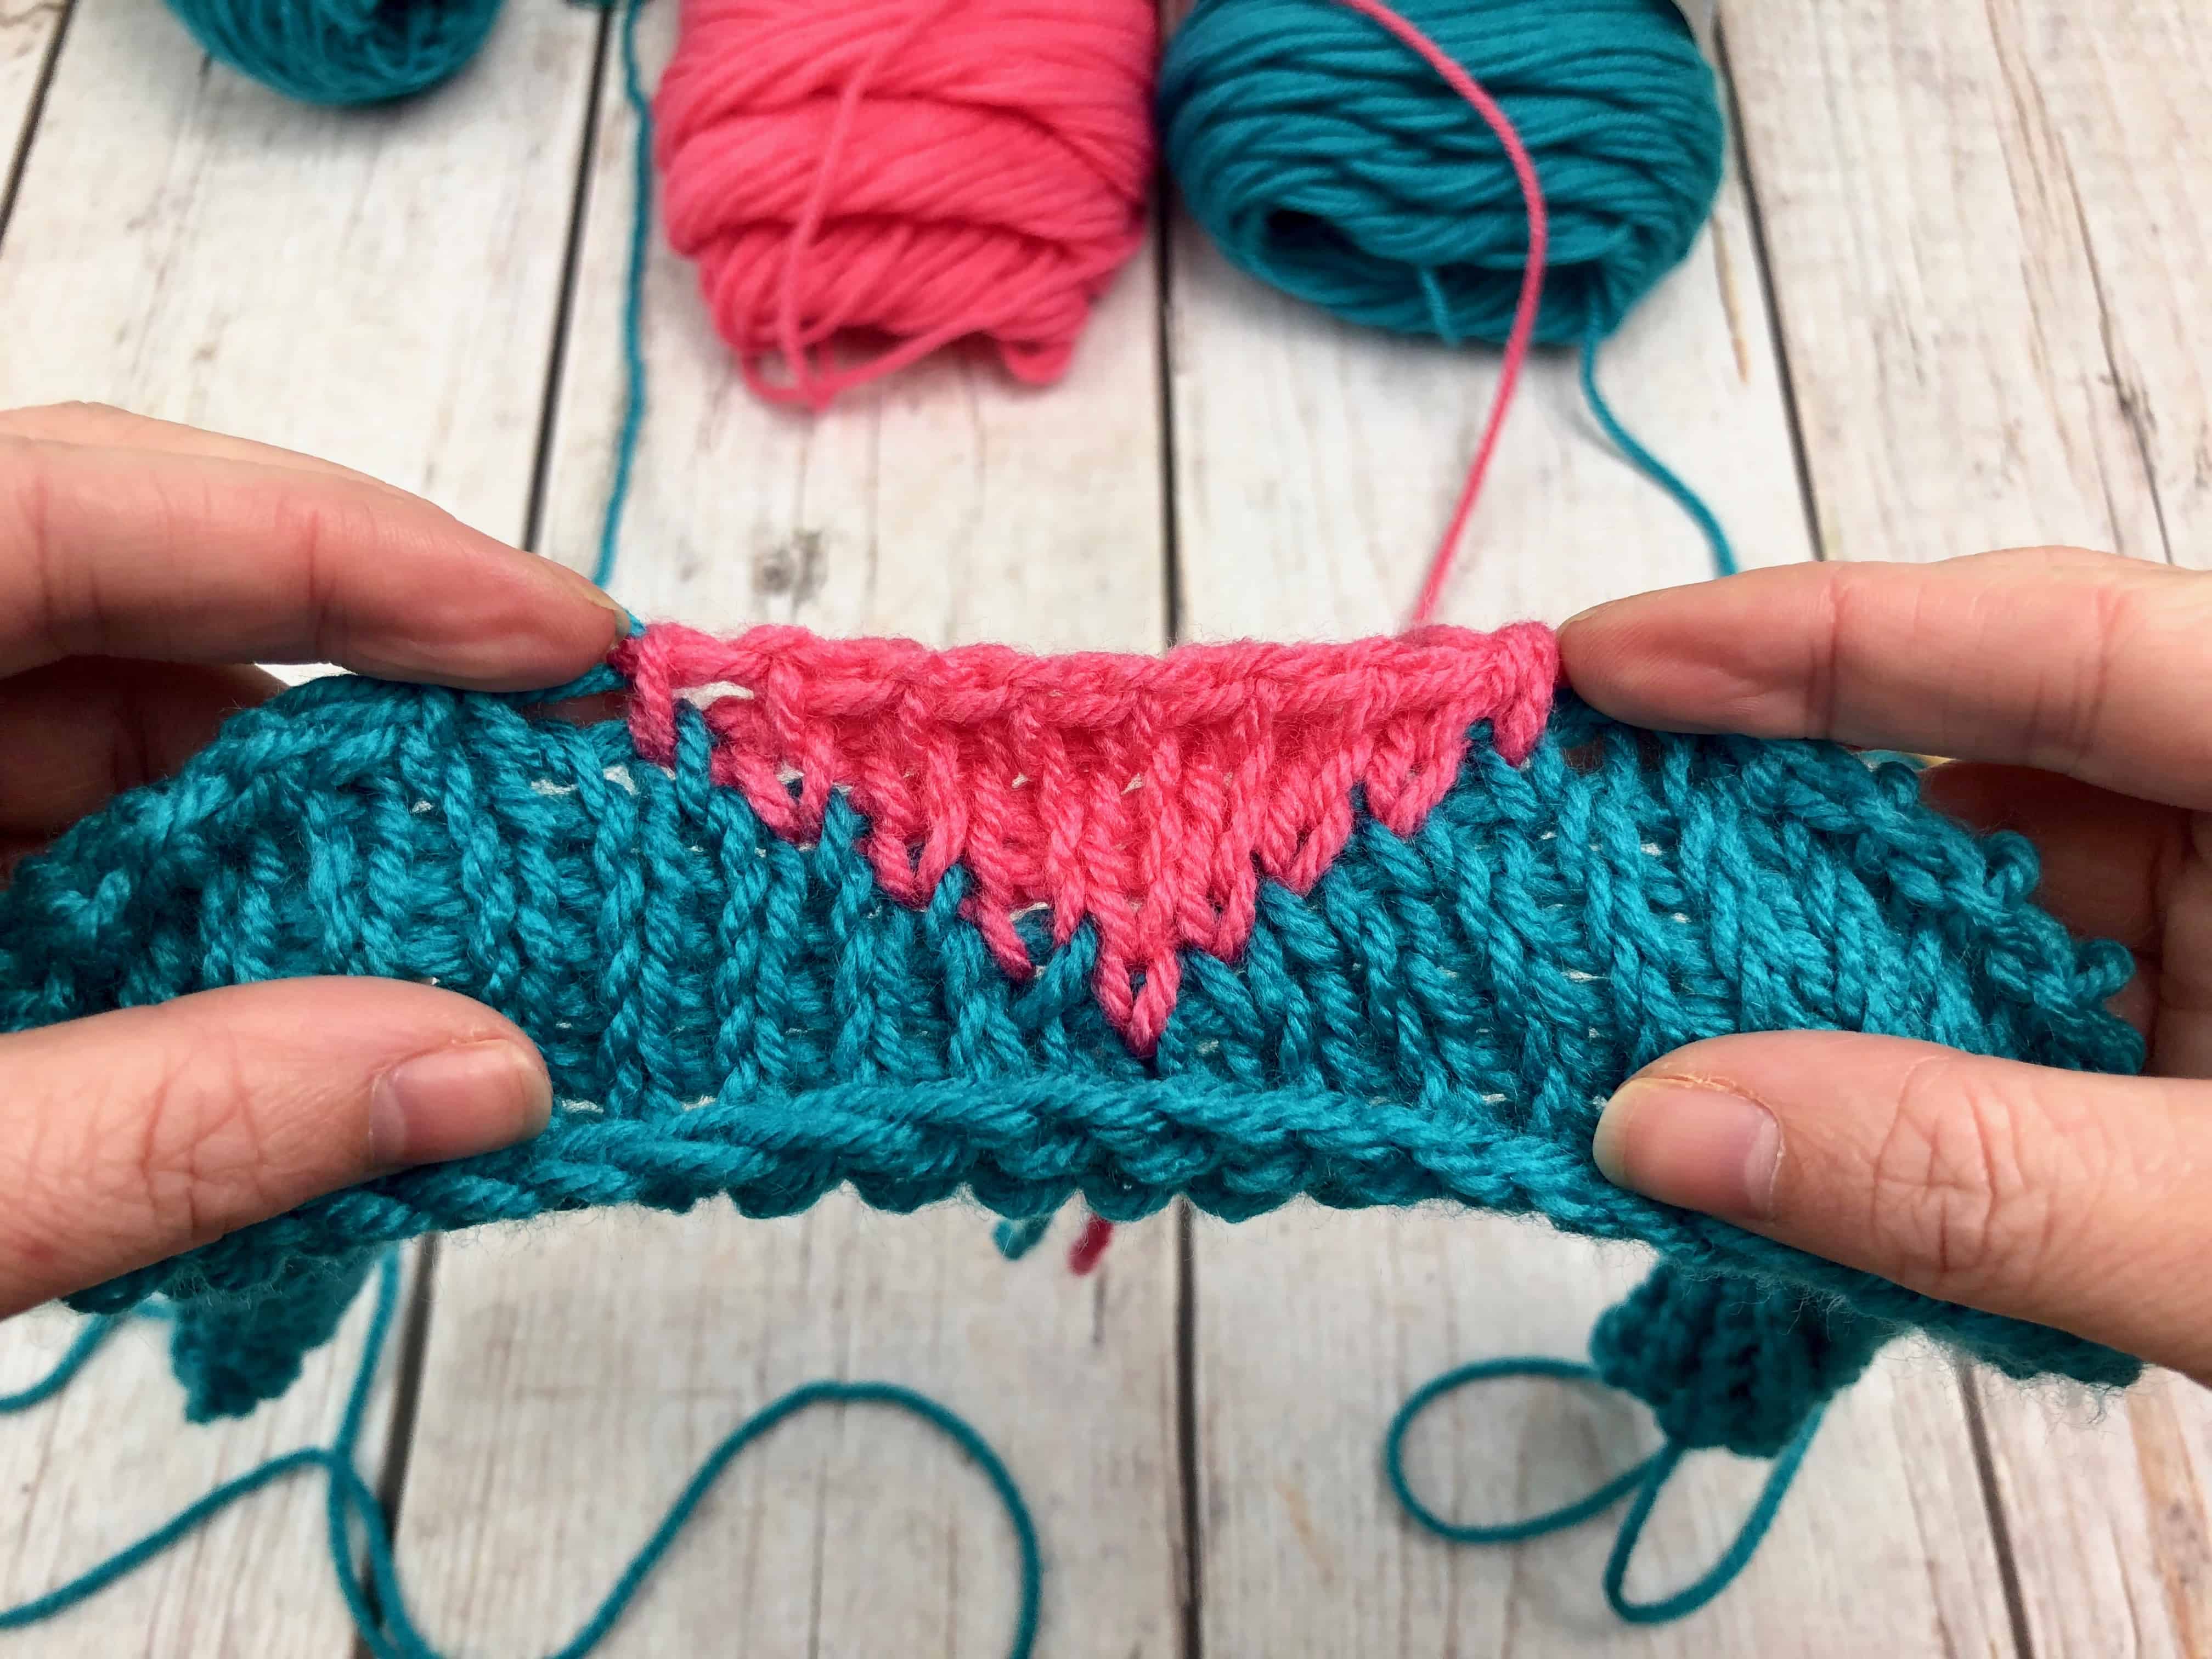
Row 9: TKS 24 stitches with B1, 11 stitches with H1, 24 stitches with B2. (59)

Row 10: TKS 23 stitches with B1, 13 stitches with H1, 23 stitches with B2. (59)

Rows 11-13: TKS 22 stitches with B1, 15 stitches with H1, 22 stitches with B2. (59)
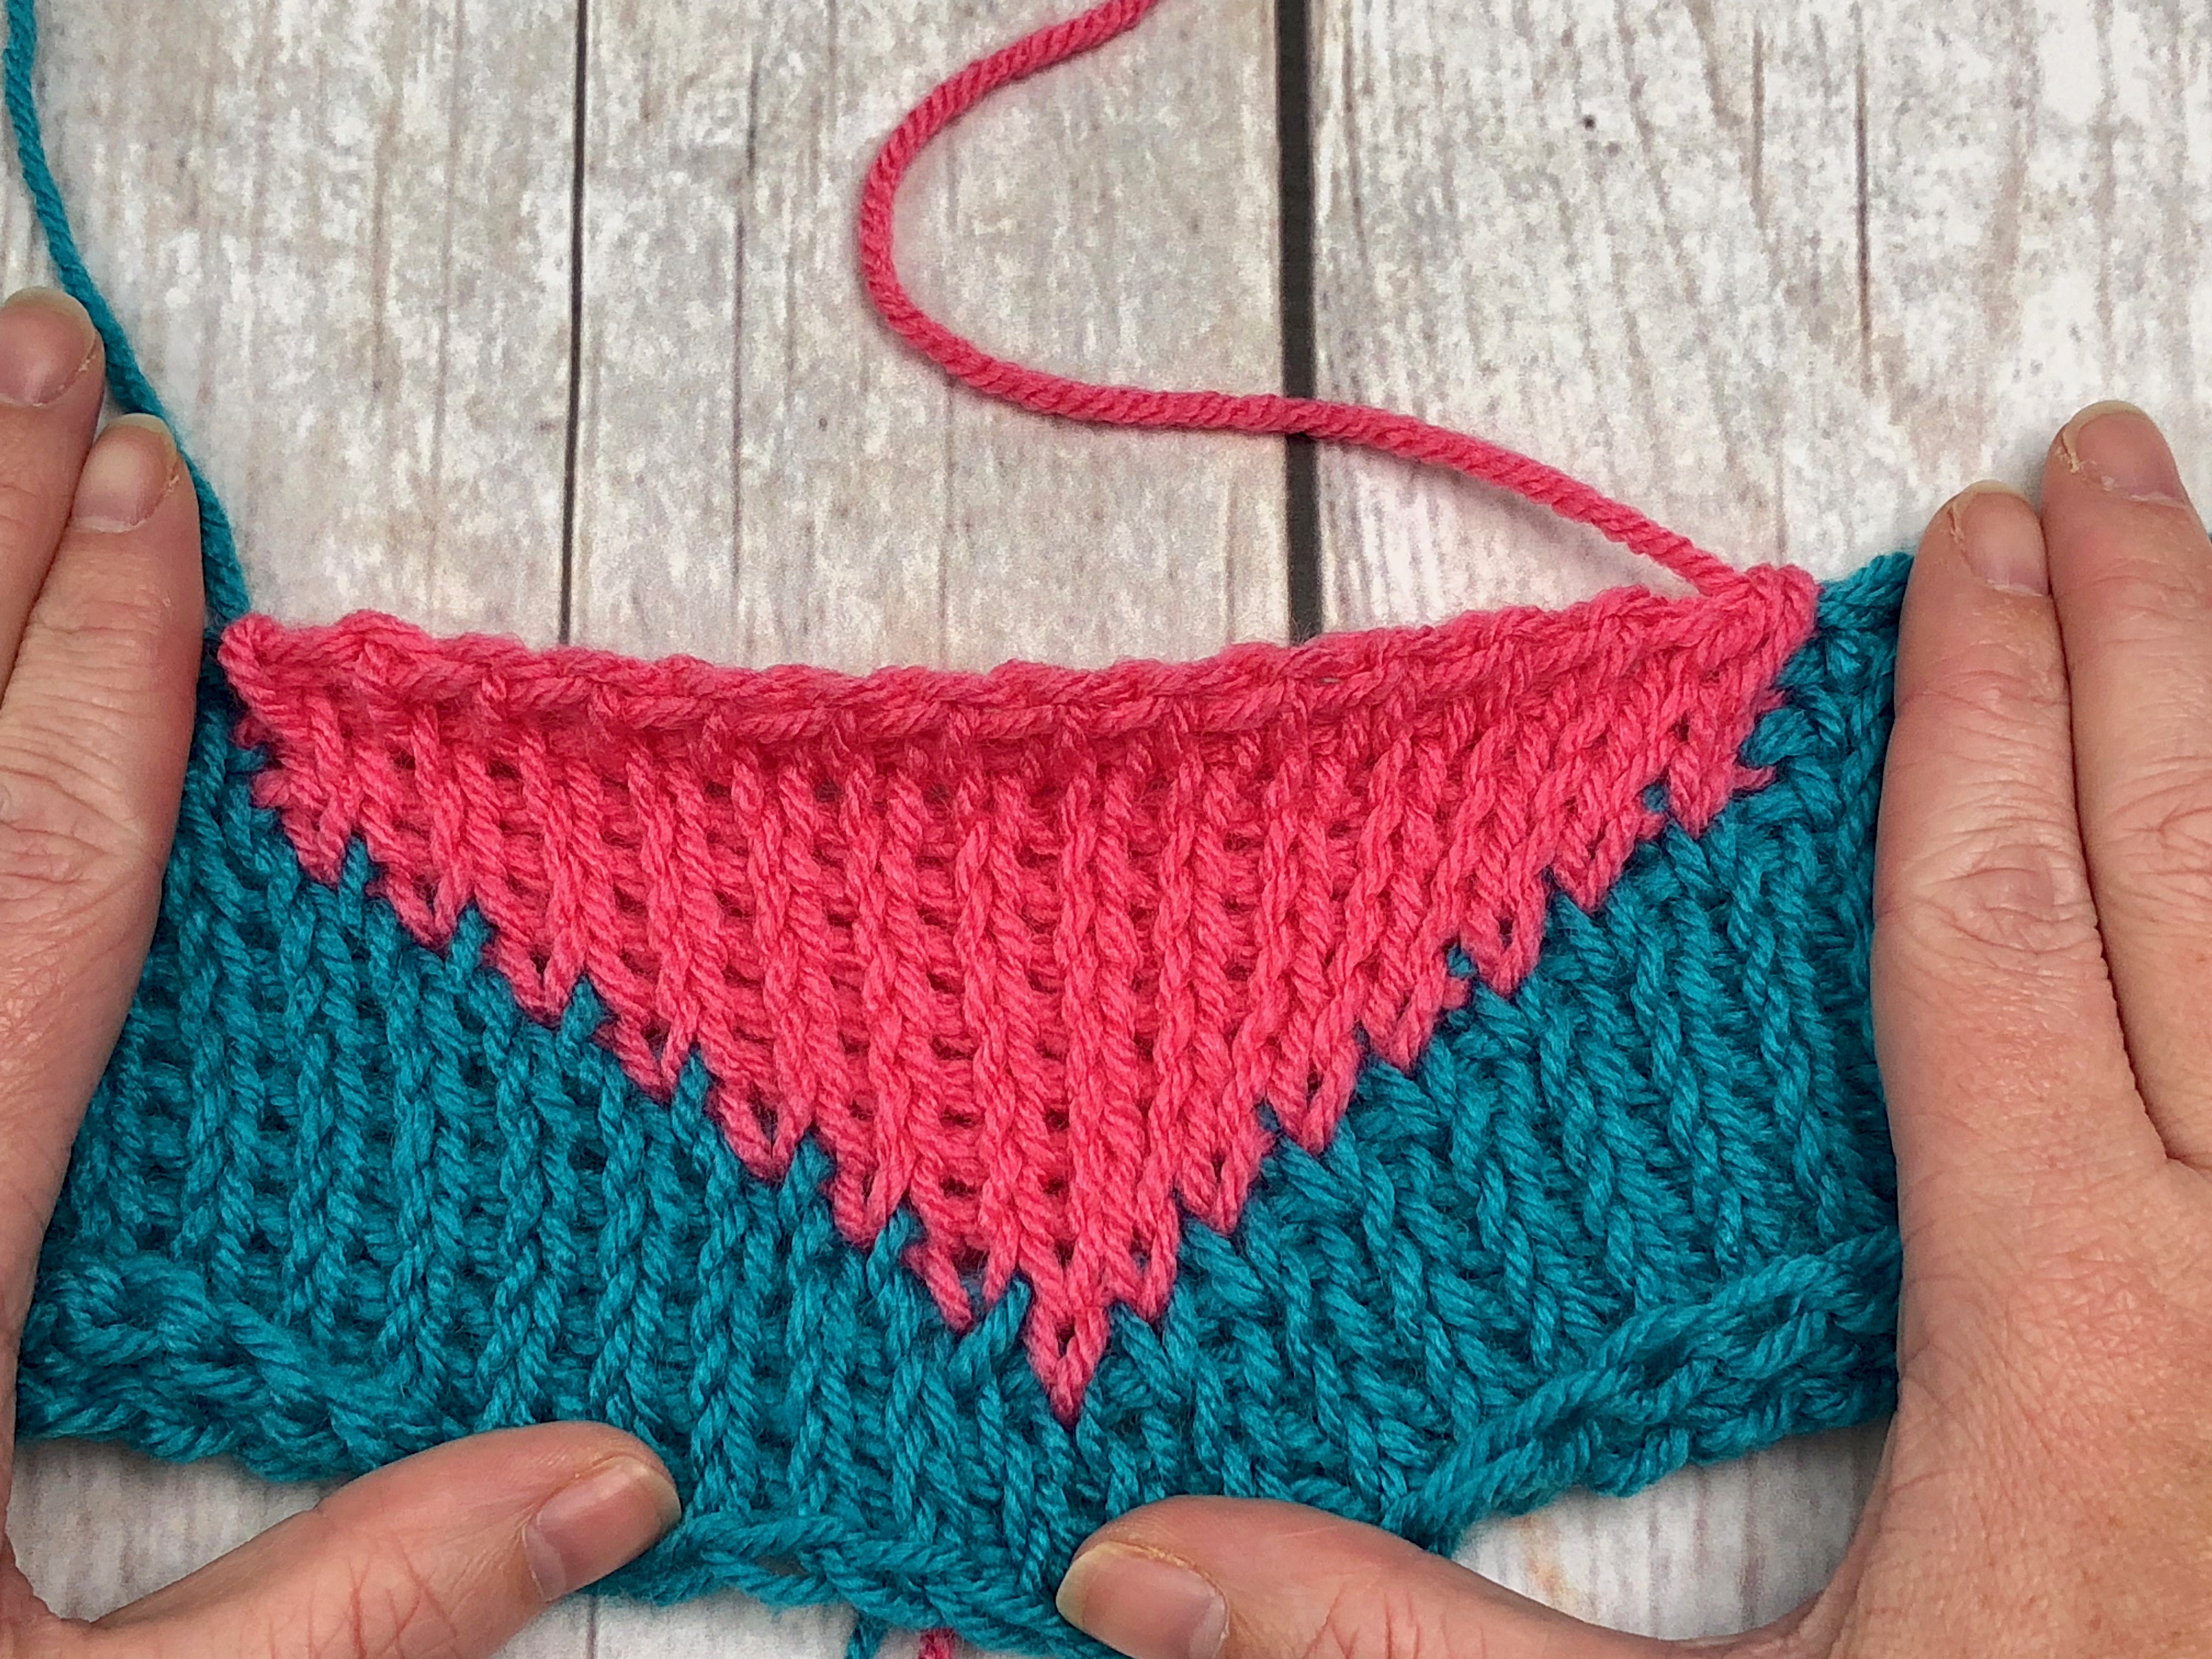
In row 14 you are going to pick up your B3 and H2 yarns. Refer back to Row 4 for explanation.
Row 14: TKS 22 stitches with B1, 7 stitches with H1, 1 stitch with B3, 7 stitches with H2, 22 stitches with B2. (59)
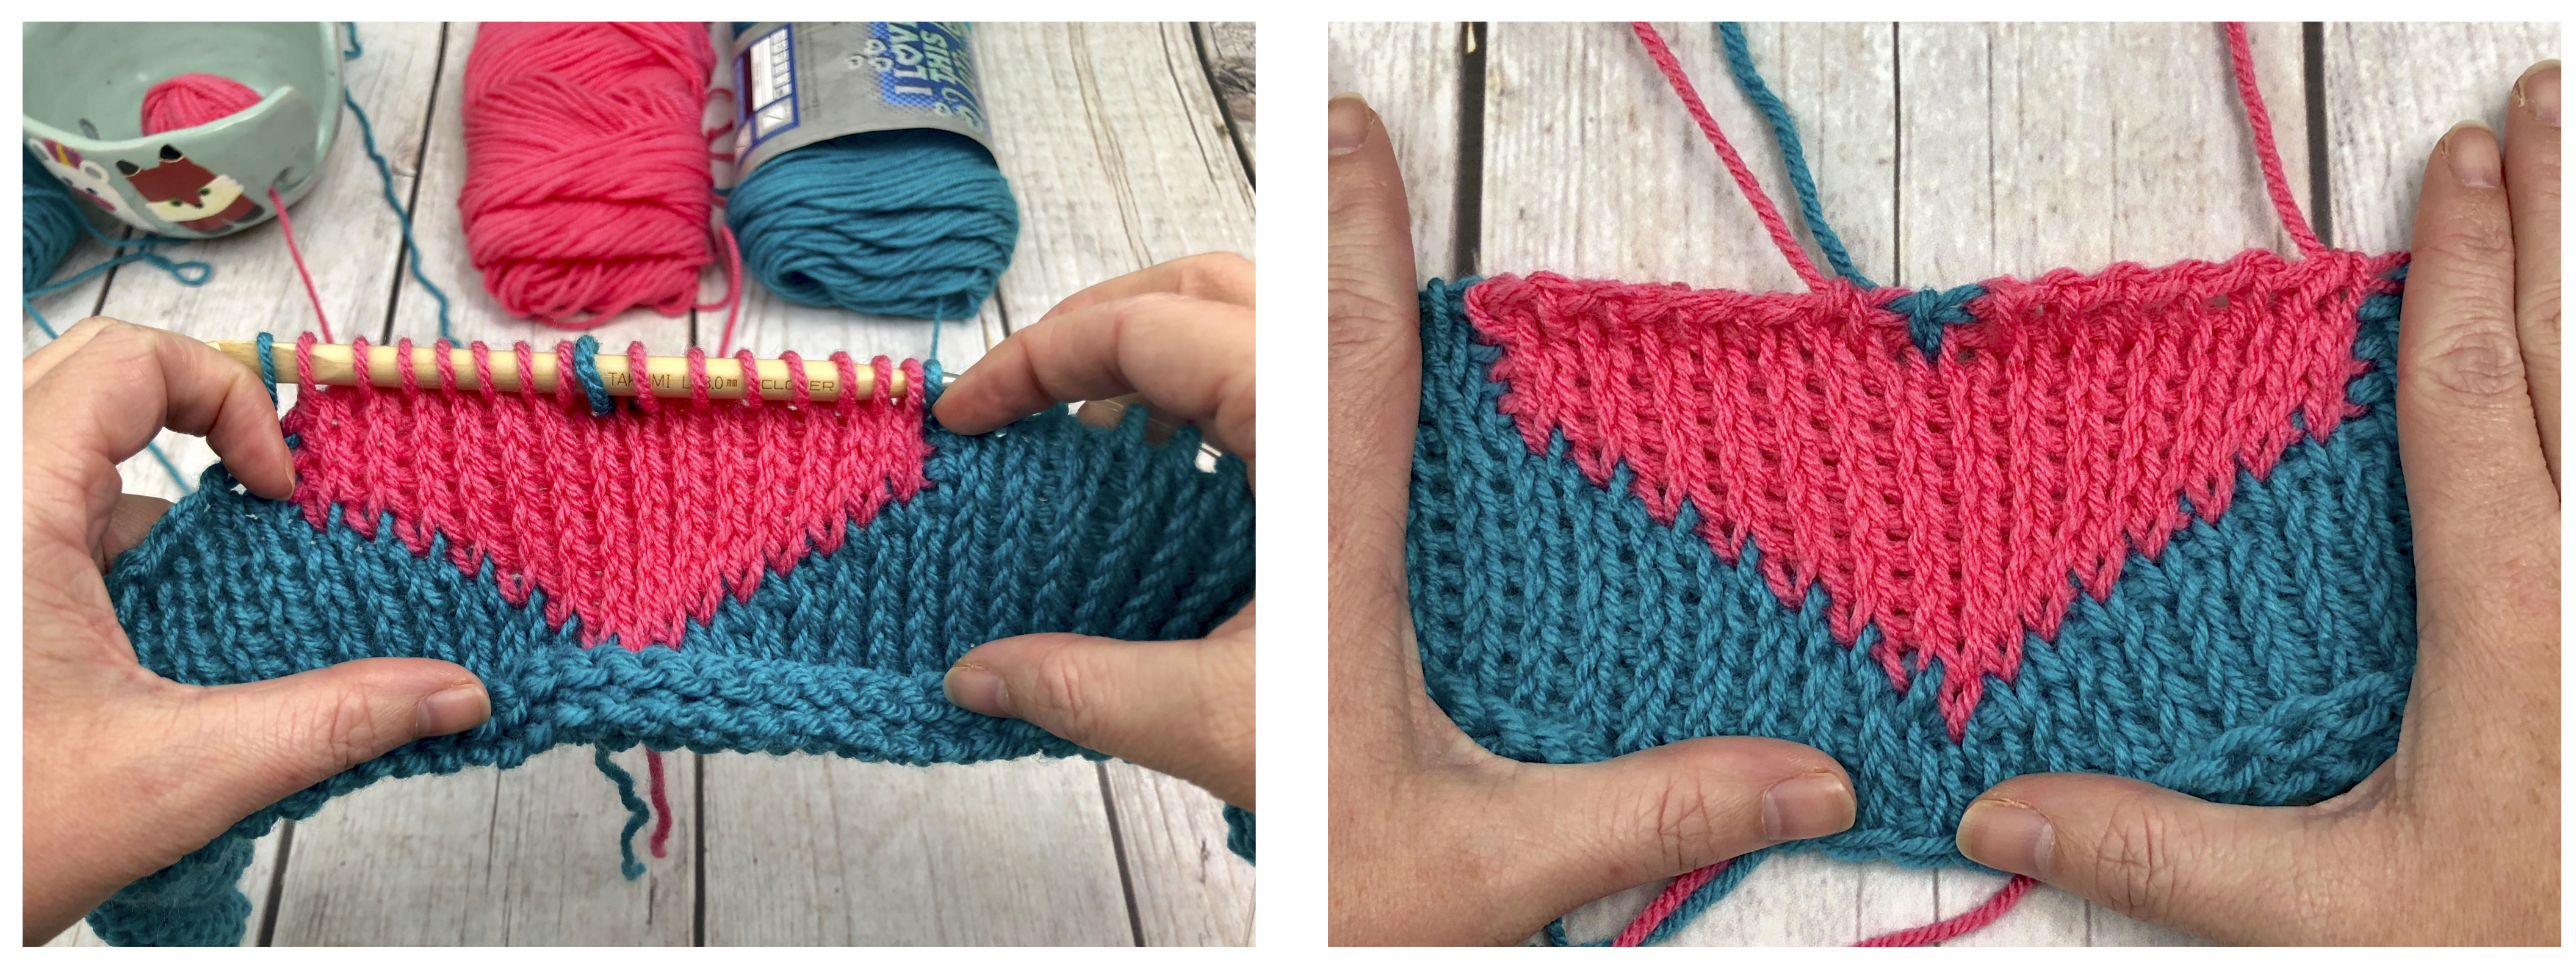
Row 15: TKS 23 stitches with B1, 5 stitches with H1, 3 stitch with B3, 5 stitches with H2, 23 stitches with B2. (59)
Row 16: TKS 24 stitches with B1, 3 stitches with H1, 5 stitch with B3, 3 stitches with H2, 24 stitches with B2. (59)
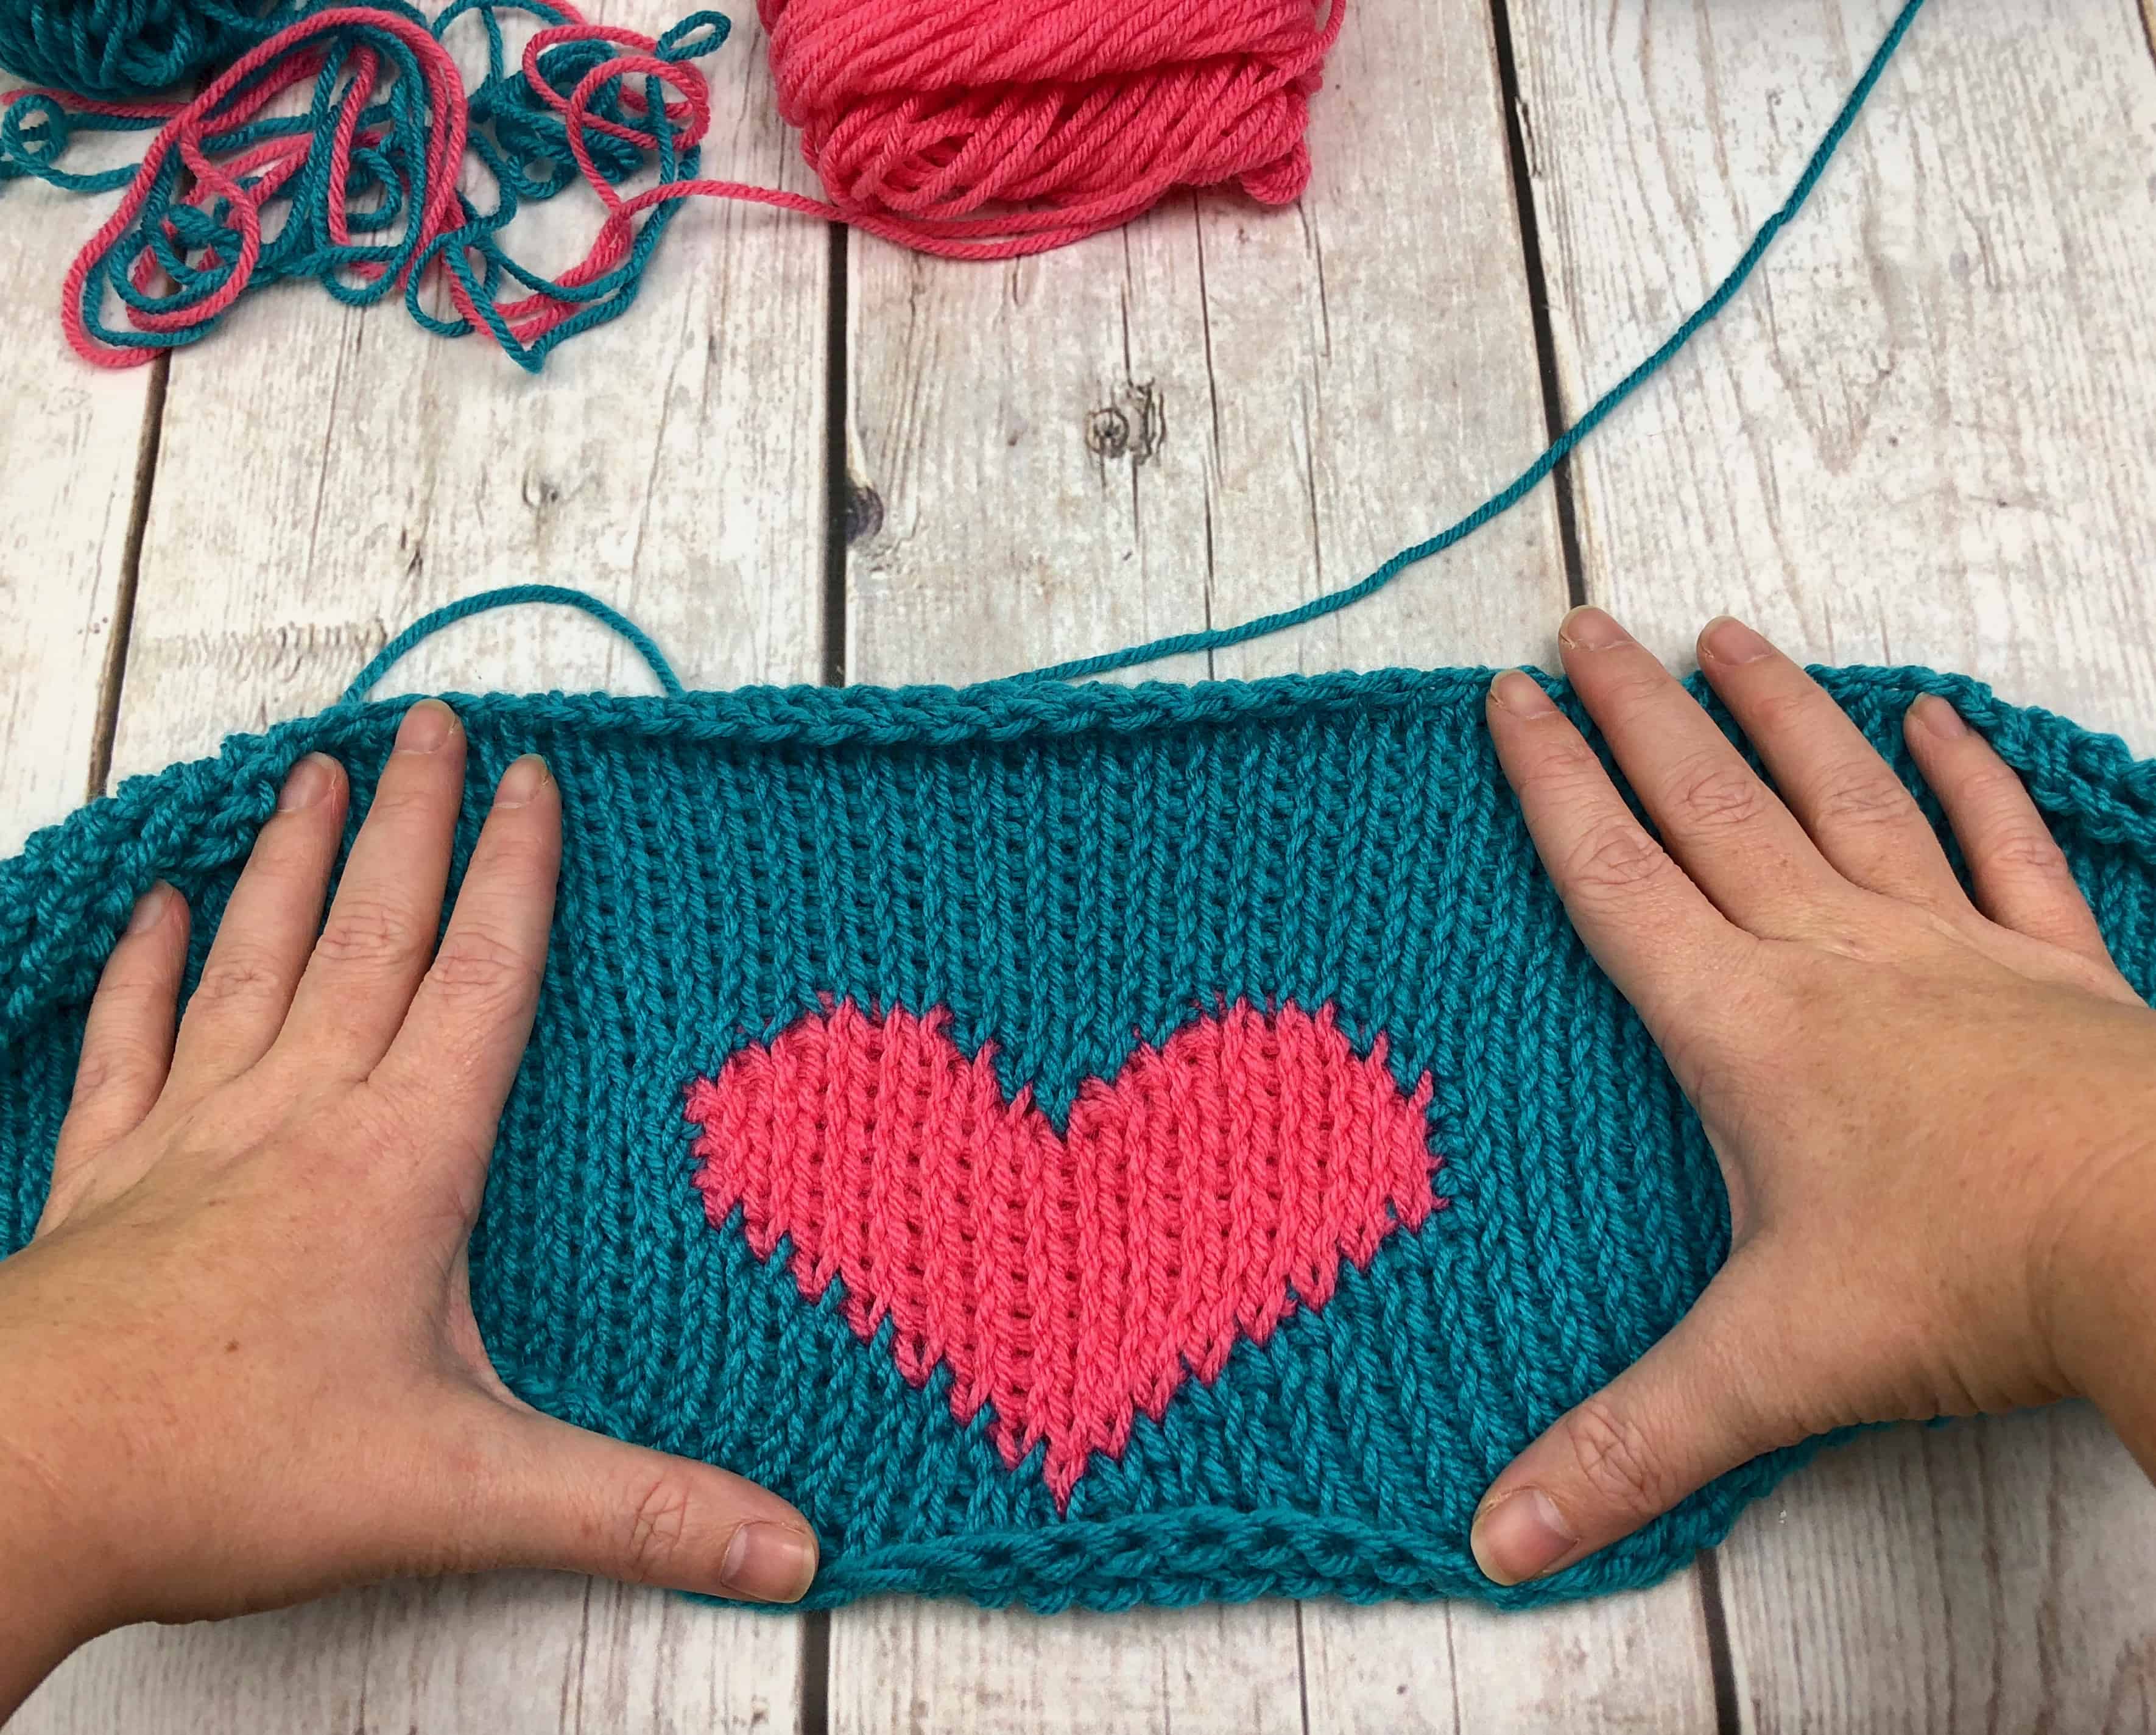
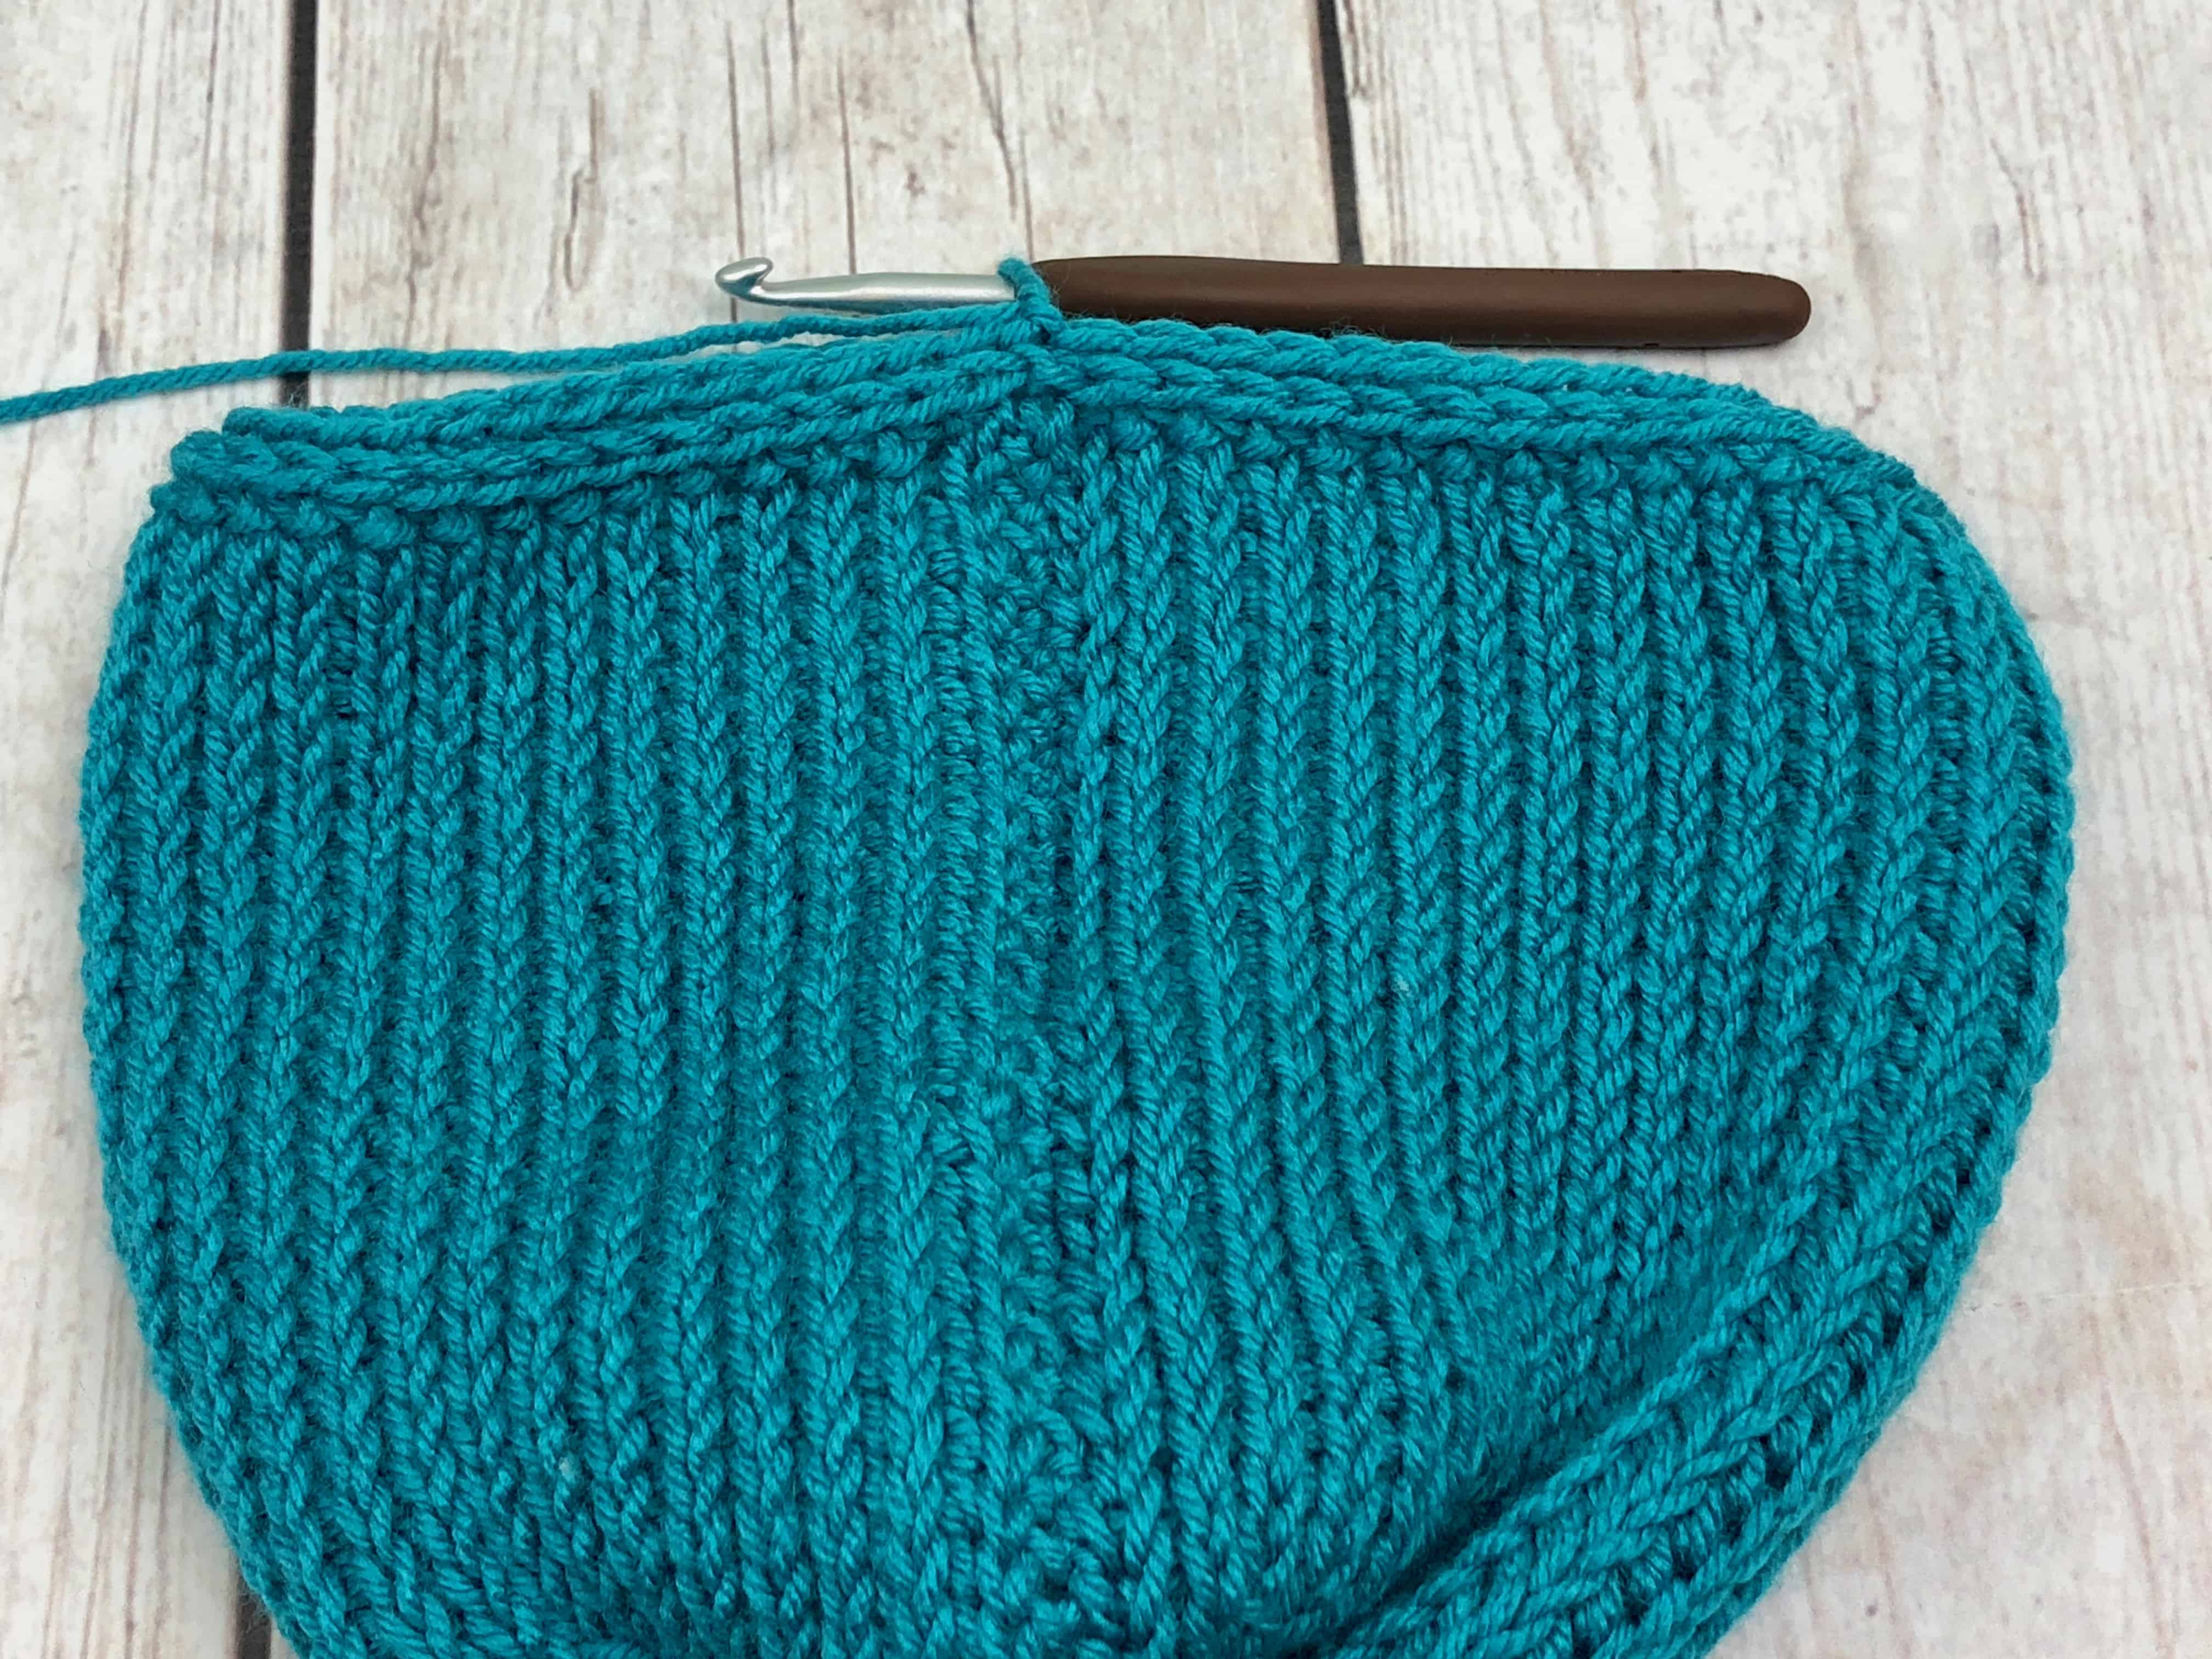
Rows 17-27: TKS 59 stitches with B1 (after row 16 you can cut off all other yarns besides B1, just leave tails long enough to be sewn in)
Row 28: TKS 2 (the first one being the loop thats already on your hook).
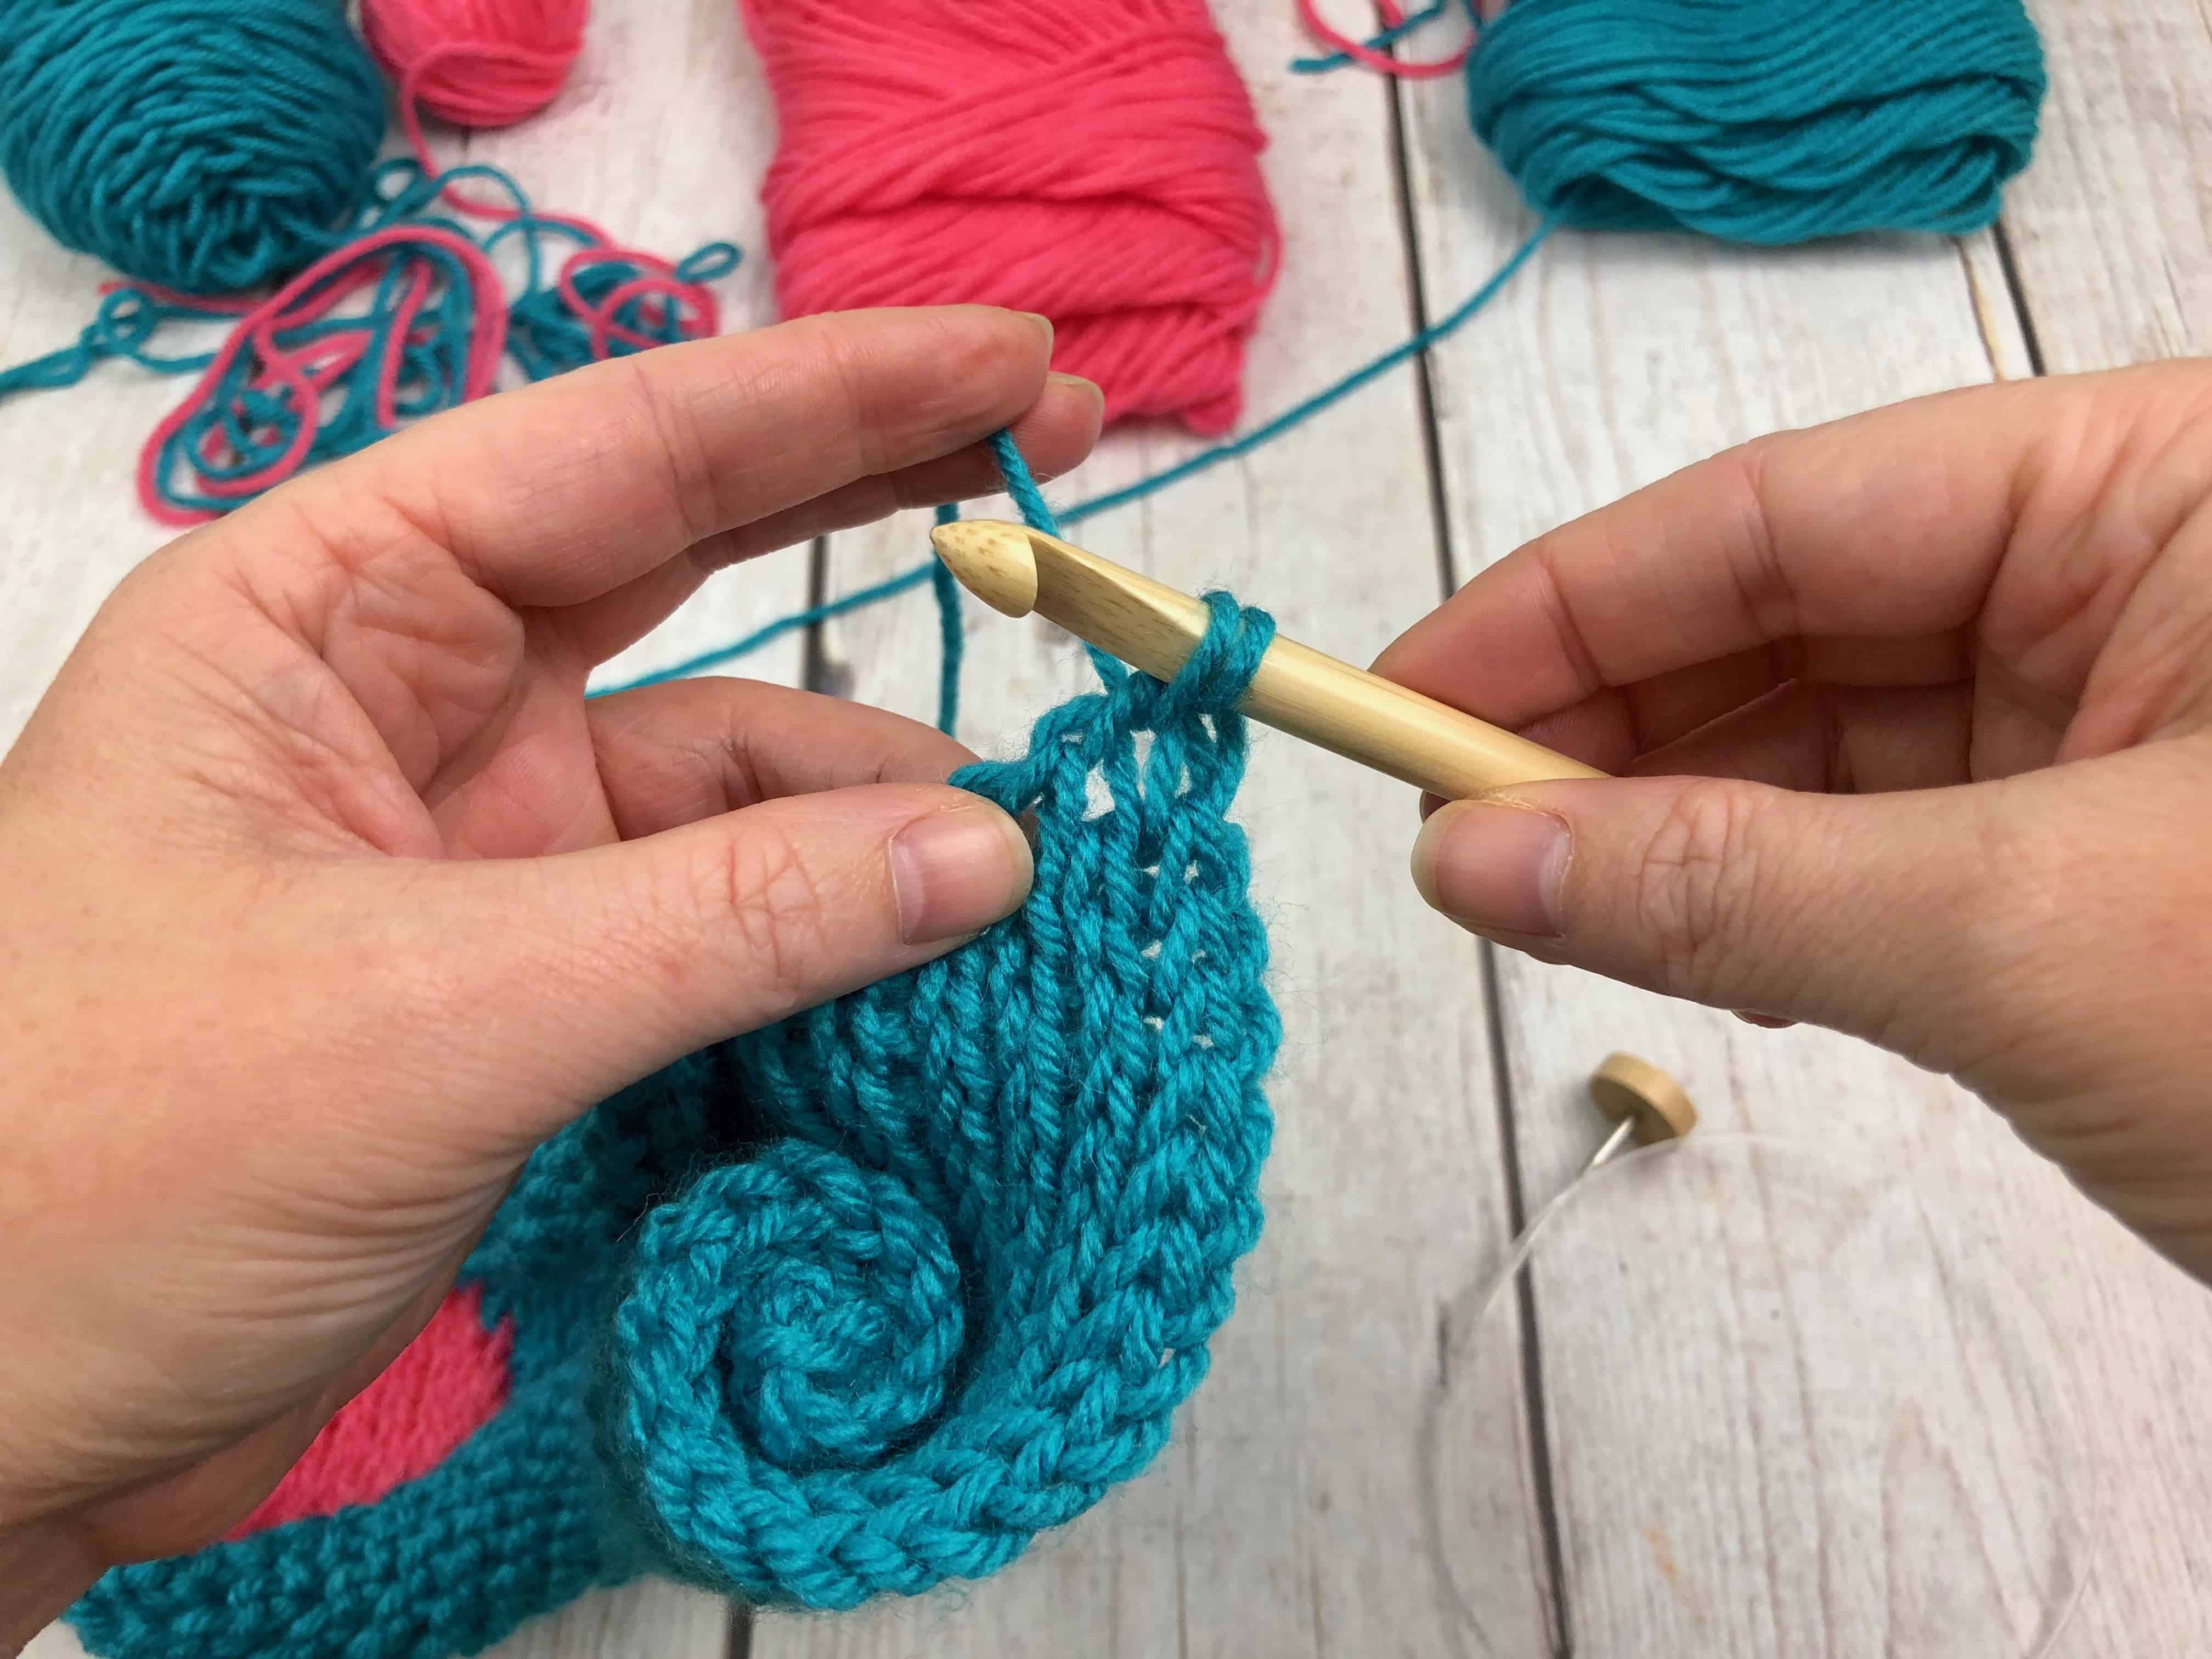
K2TOG over the next two stitches (explained under special stitches). *TKS 5, K2TOG over the next two stitches.* Repeat from * 6 more times. End with TKS 6. (51)
Row 29: TKS 2 (the first one being the loop thats already on your hook). K2TOG over the next two stitches (explained under special stitches). *TKS 4, K2TOG over the next two stitches.* Repeat from * 6 more times. End with TKS 5. (43)
Row 30: TKS 2 (the first one being the loop thats already on your hook). K2TOG over the next two stitches (explained under special stitches). *TKS 3, K2TOG over the next two stitches.* Repeat from * 6 more times. End with TKS 4. (35)
Row 31: TKS 2 (the first one being the loop thats already on your hook). K2TOG over the next two stitches (explained under special stitches). *TKS 2, K2TOG over the next two stitches.* Repeat from * 6 more times. End with TKS 3. (27)
Row 32: SLST 1.
SL2TOG over the next two stitches (explained under special stitches).
*SLST 2, SL2TOG over the next two stitches.* Repeat from * 6 more times. End with SLST 3. (19)
Tie off leaving about a 6 inch tail.
Sew in all your tails that were made during the color changes. Make sure not to sew them in too tight or it will make your beanie pucker. Don’t sew in your last tail you just cut yet, we are going to use that one to help assemble your beanie.
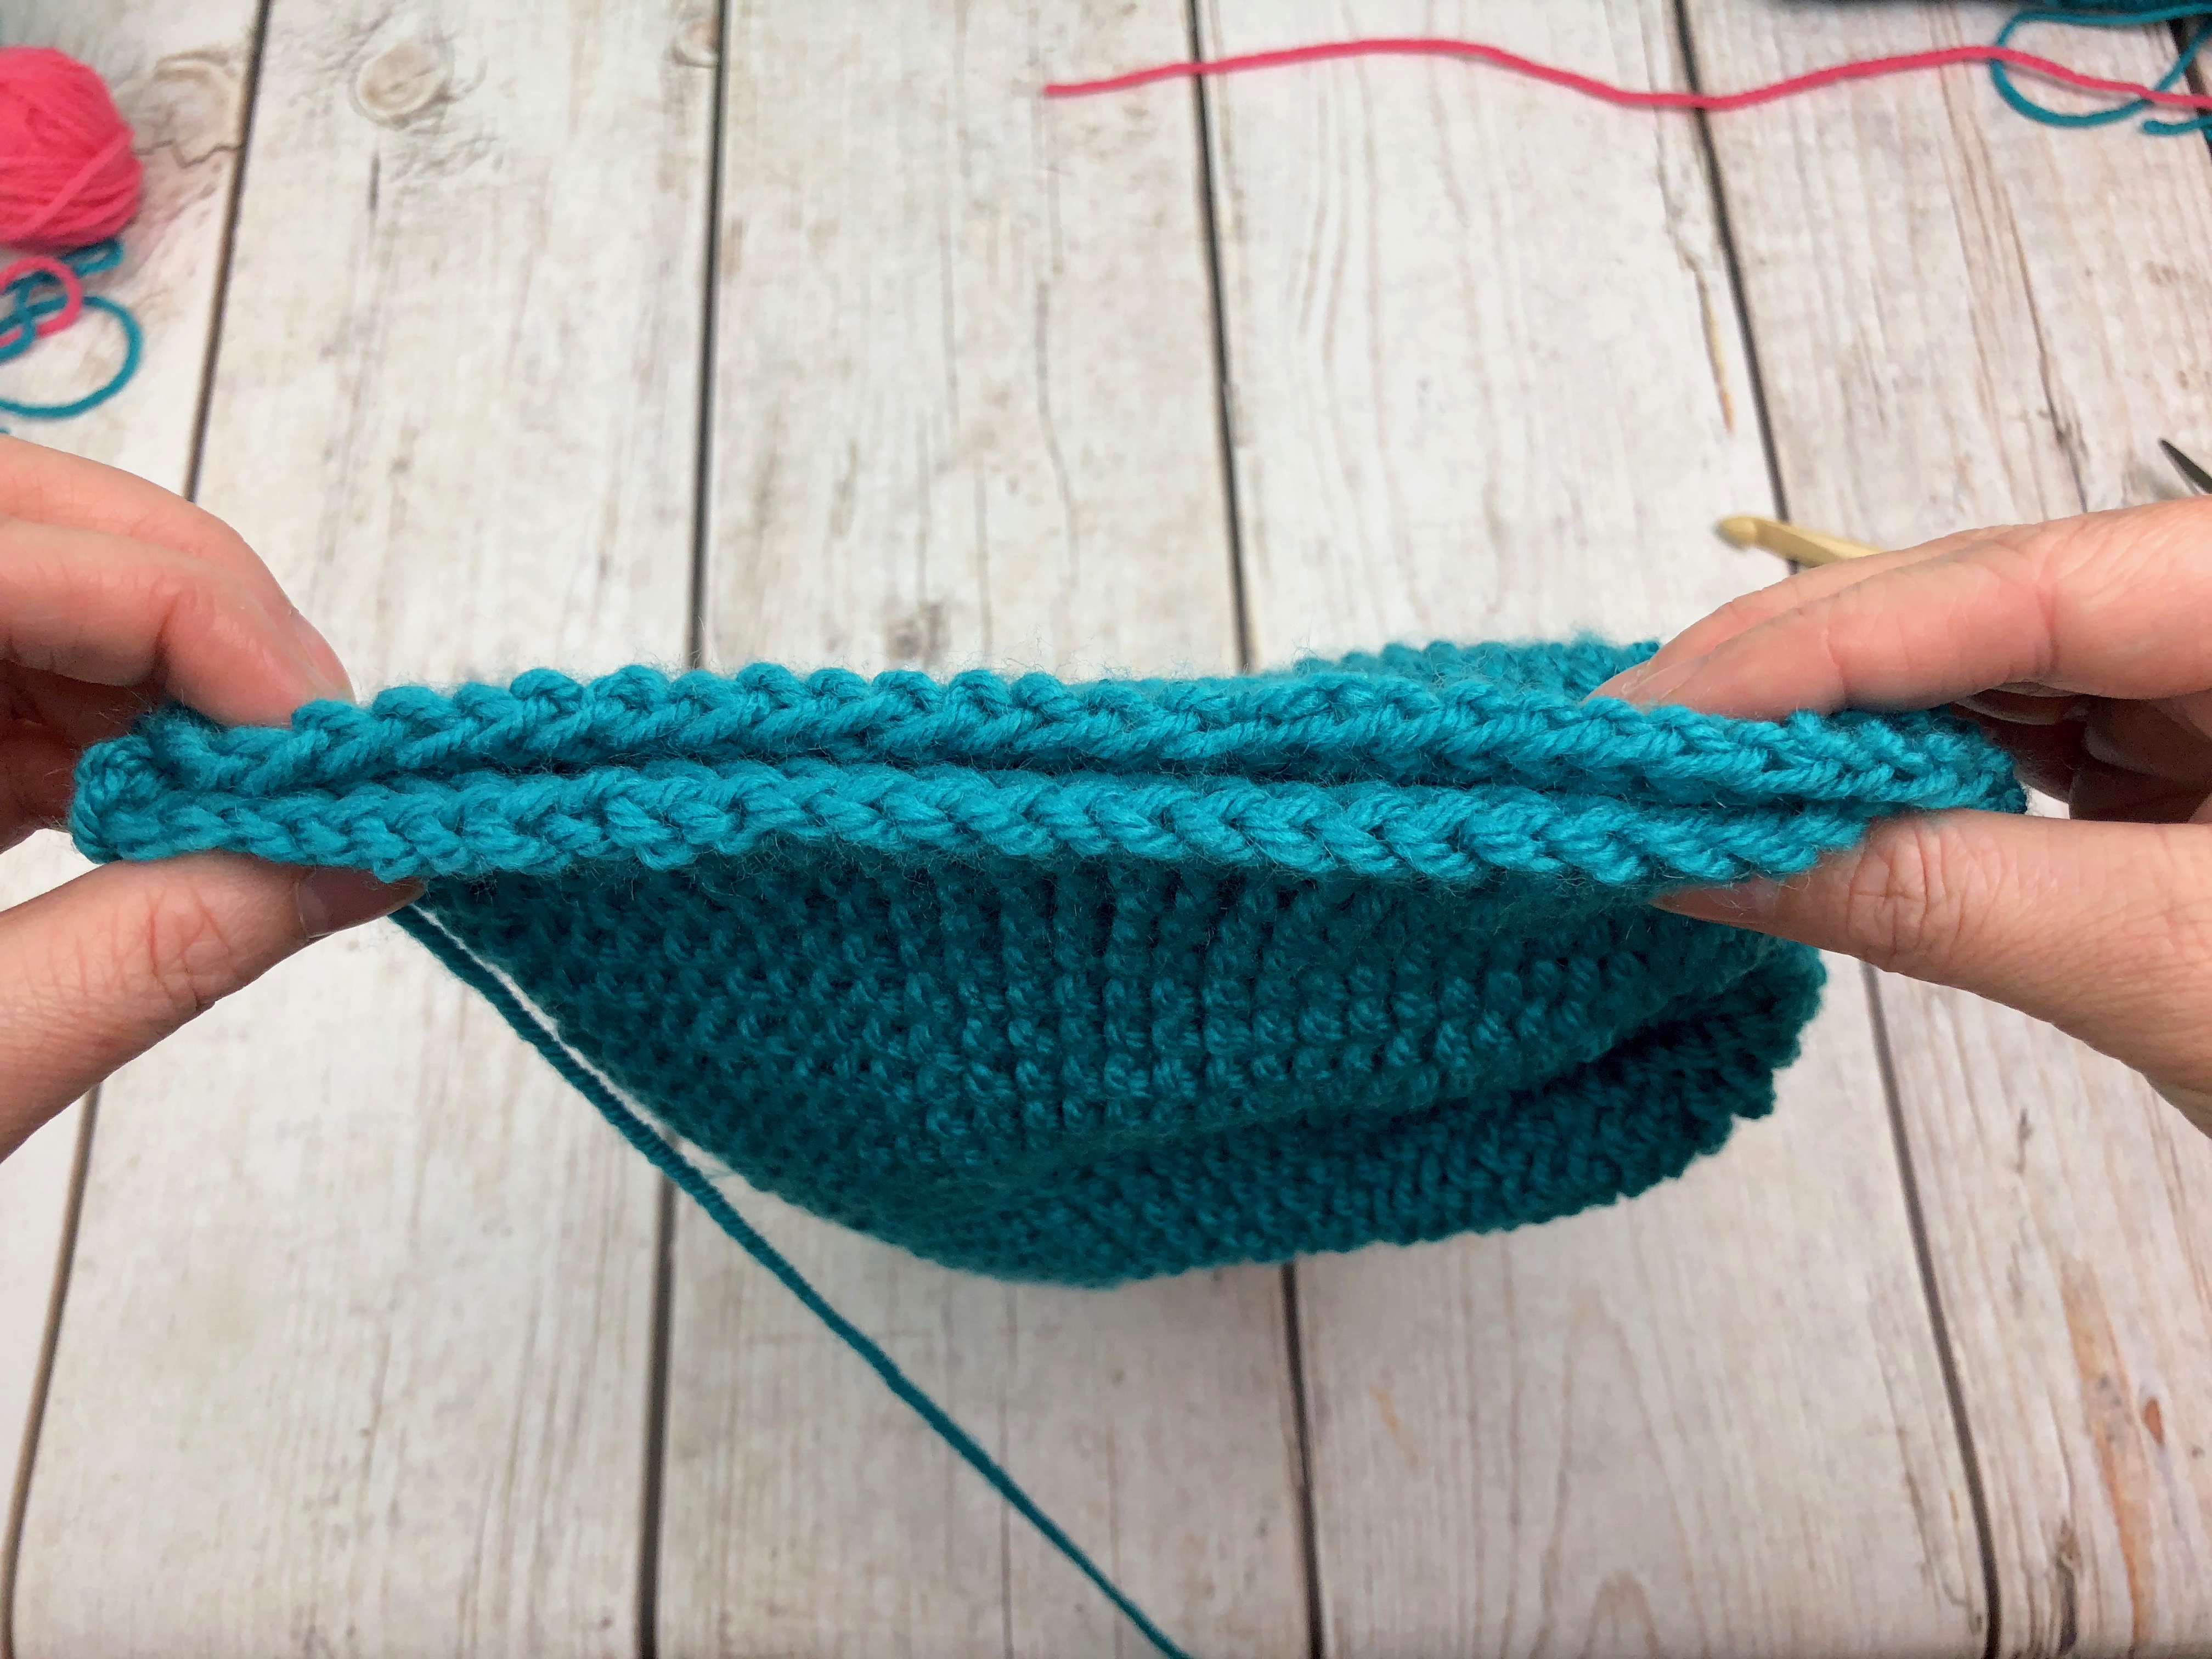
Fold your beanie in half so the right and left sides are touching and the wrong side is facing out.
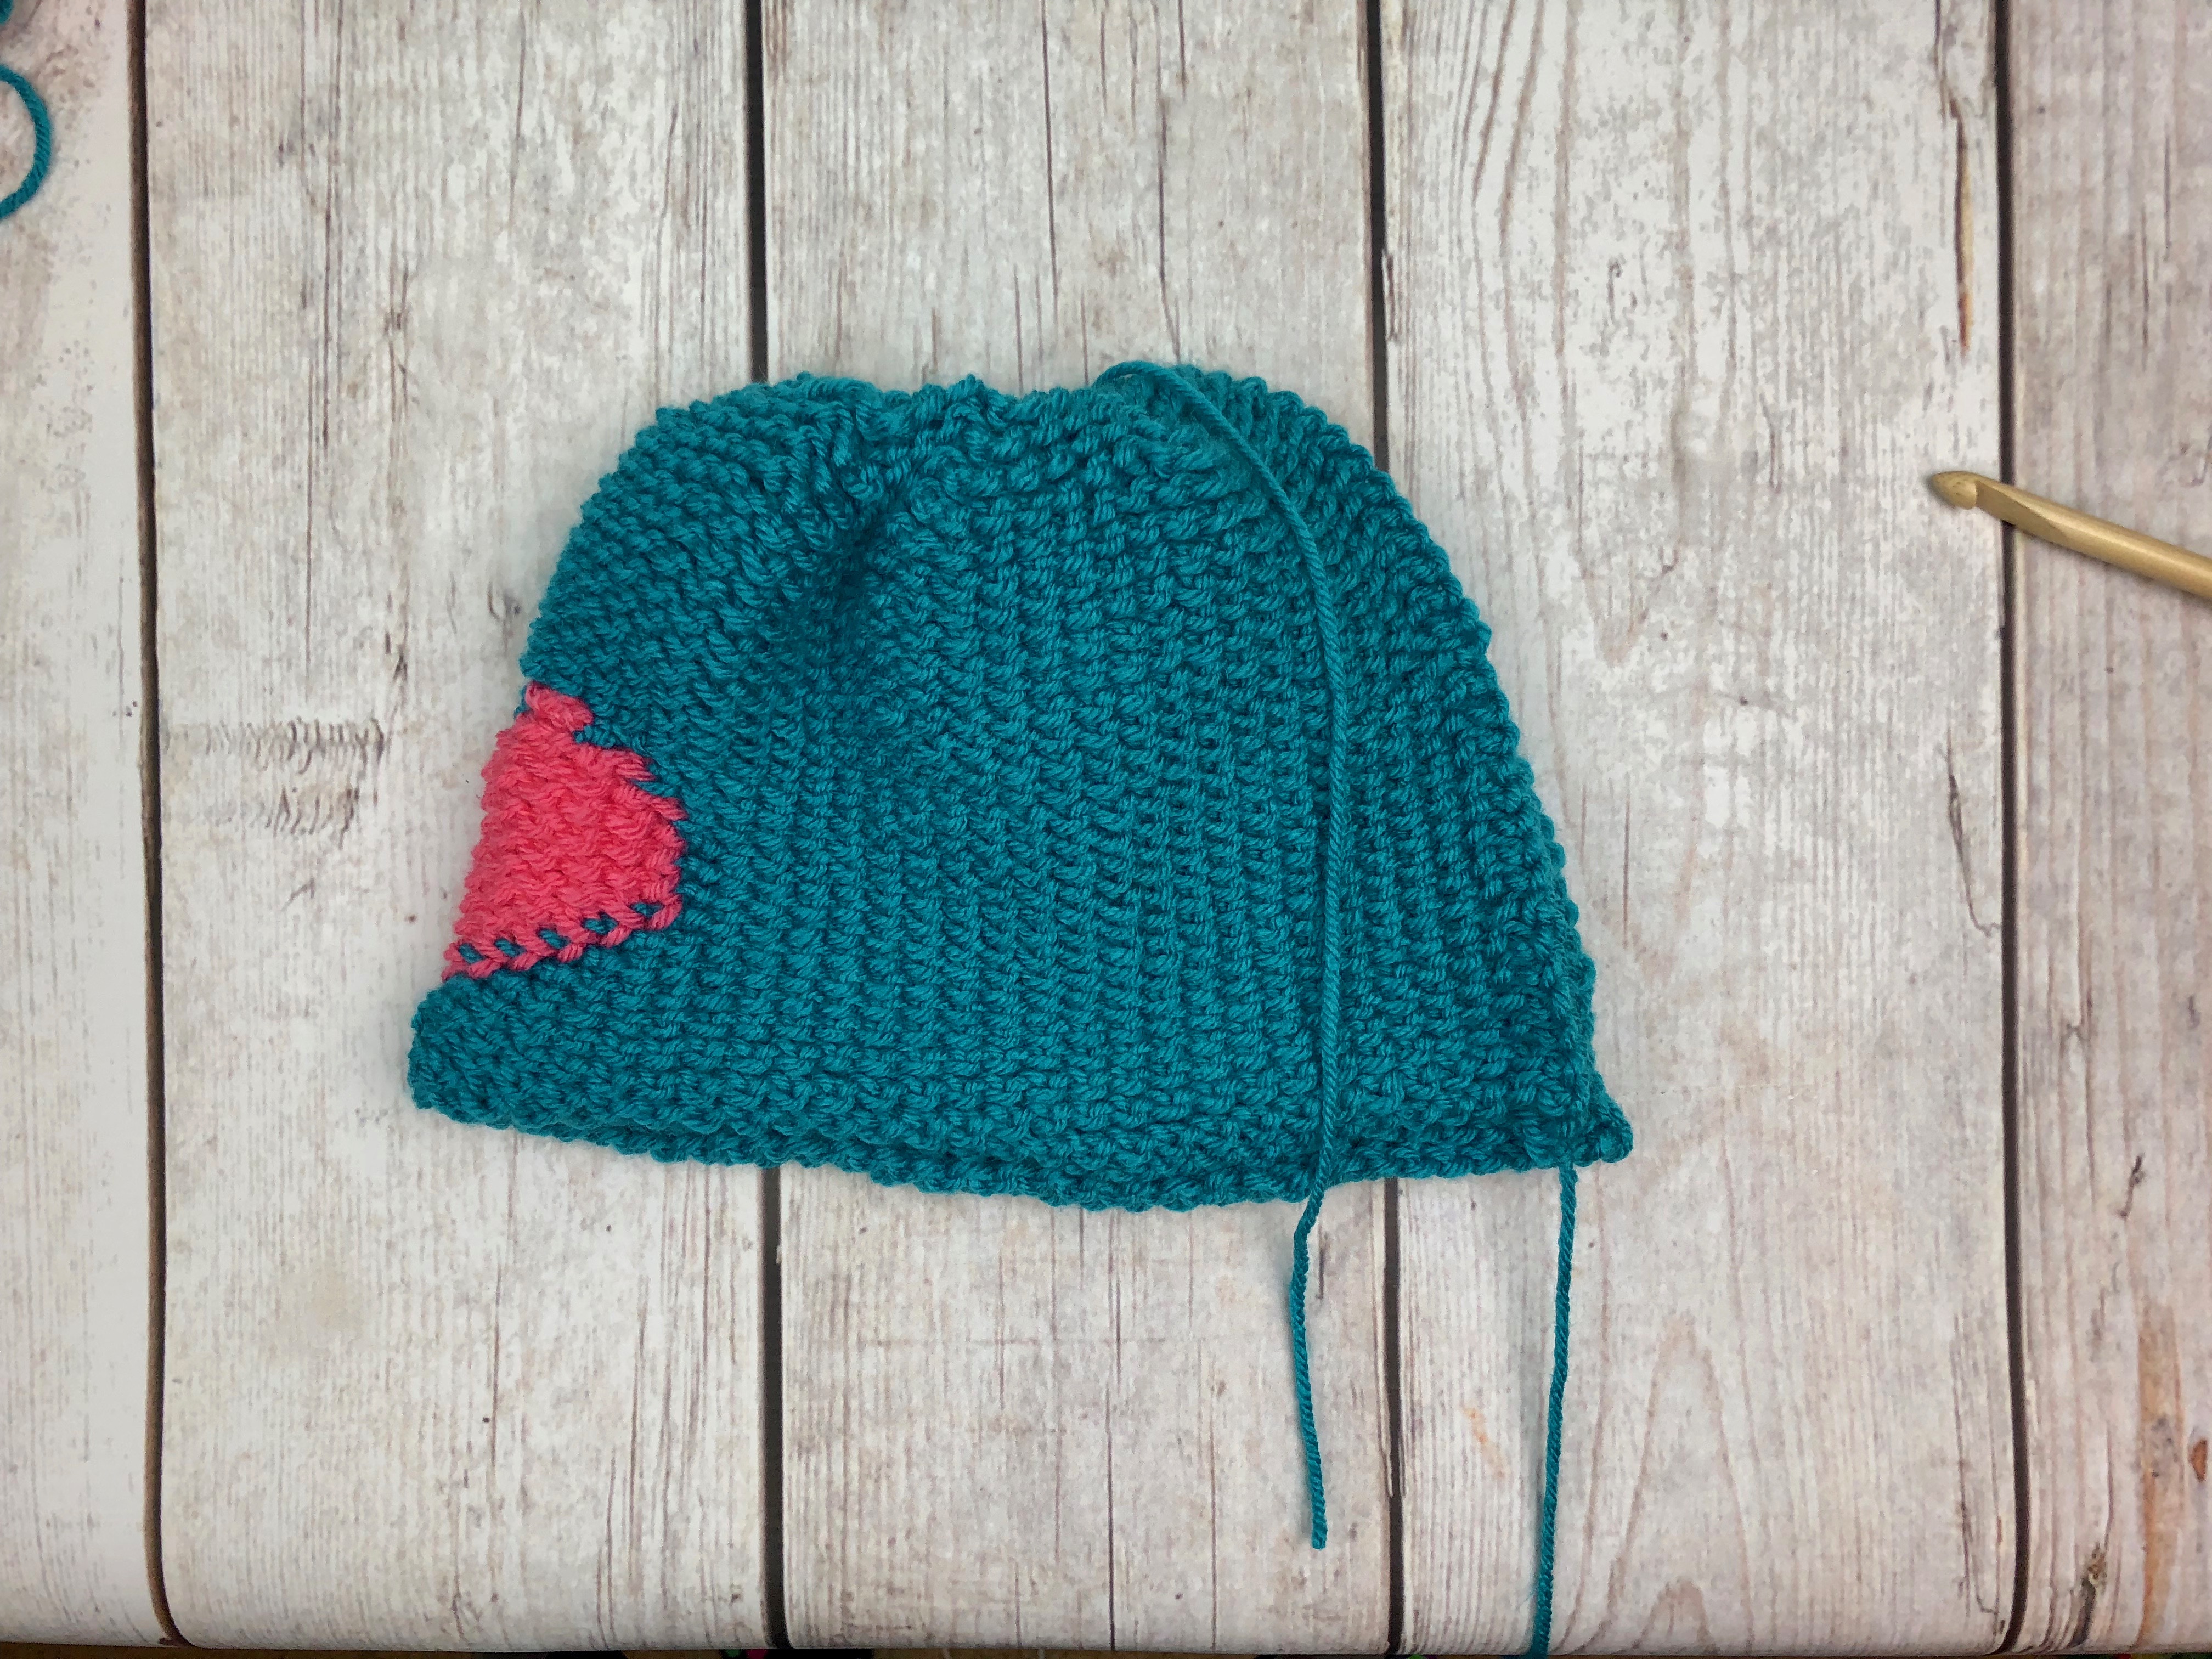
Thread your tapestry needle onto the first tail left when you made your chain at the beginning. Using the mattress stitch, sew up the two sides, making sure to line up the beginning and end of each row together. It should be about 32 stitches since there were 32 rows.
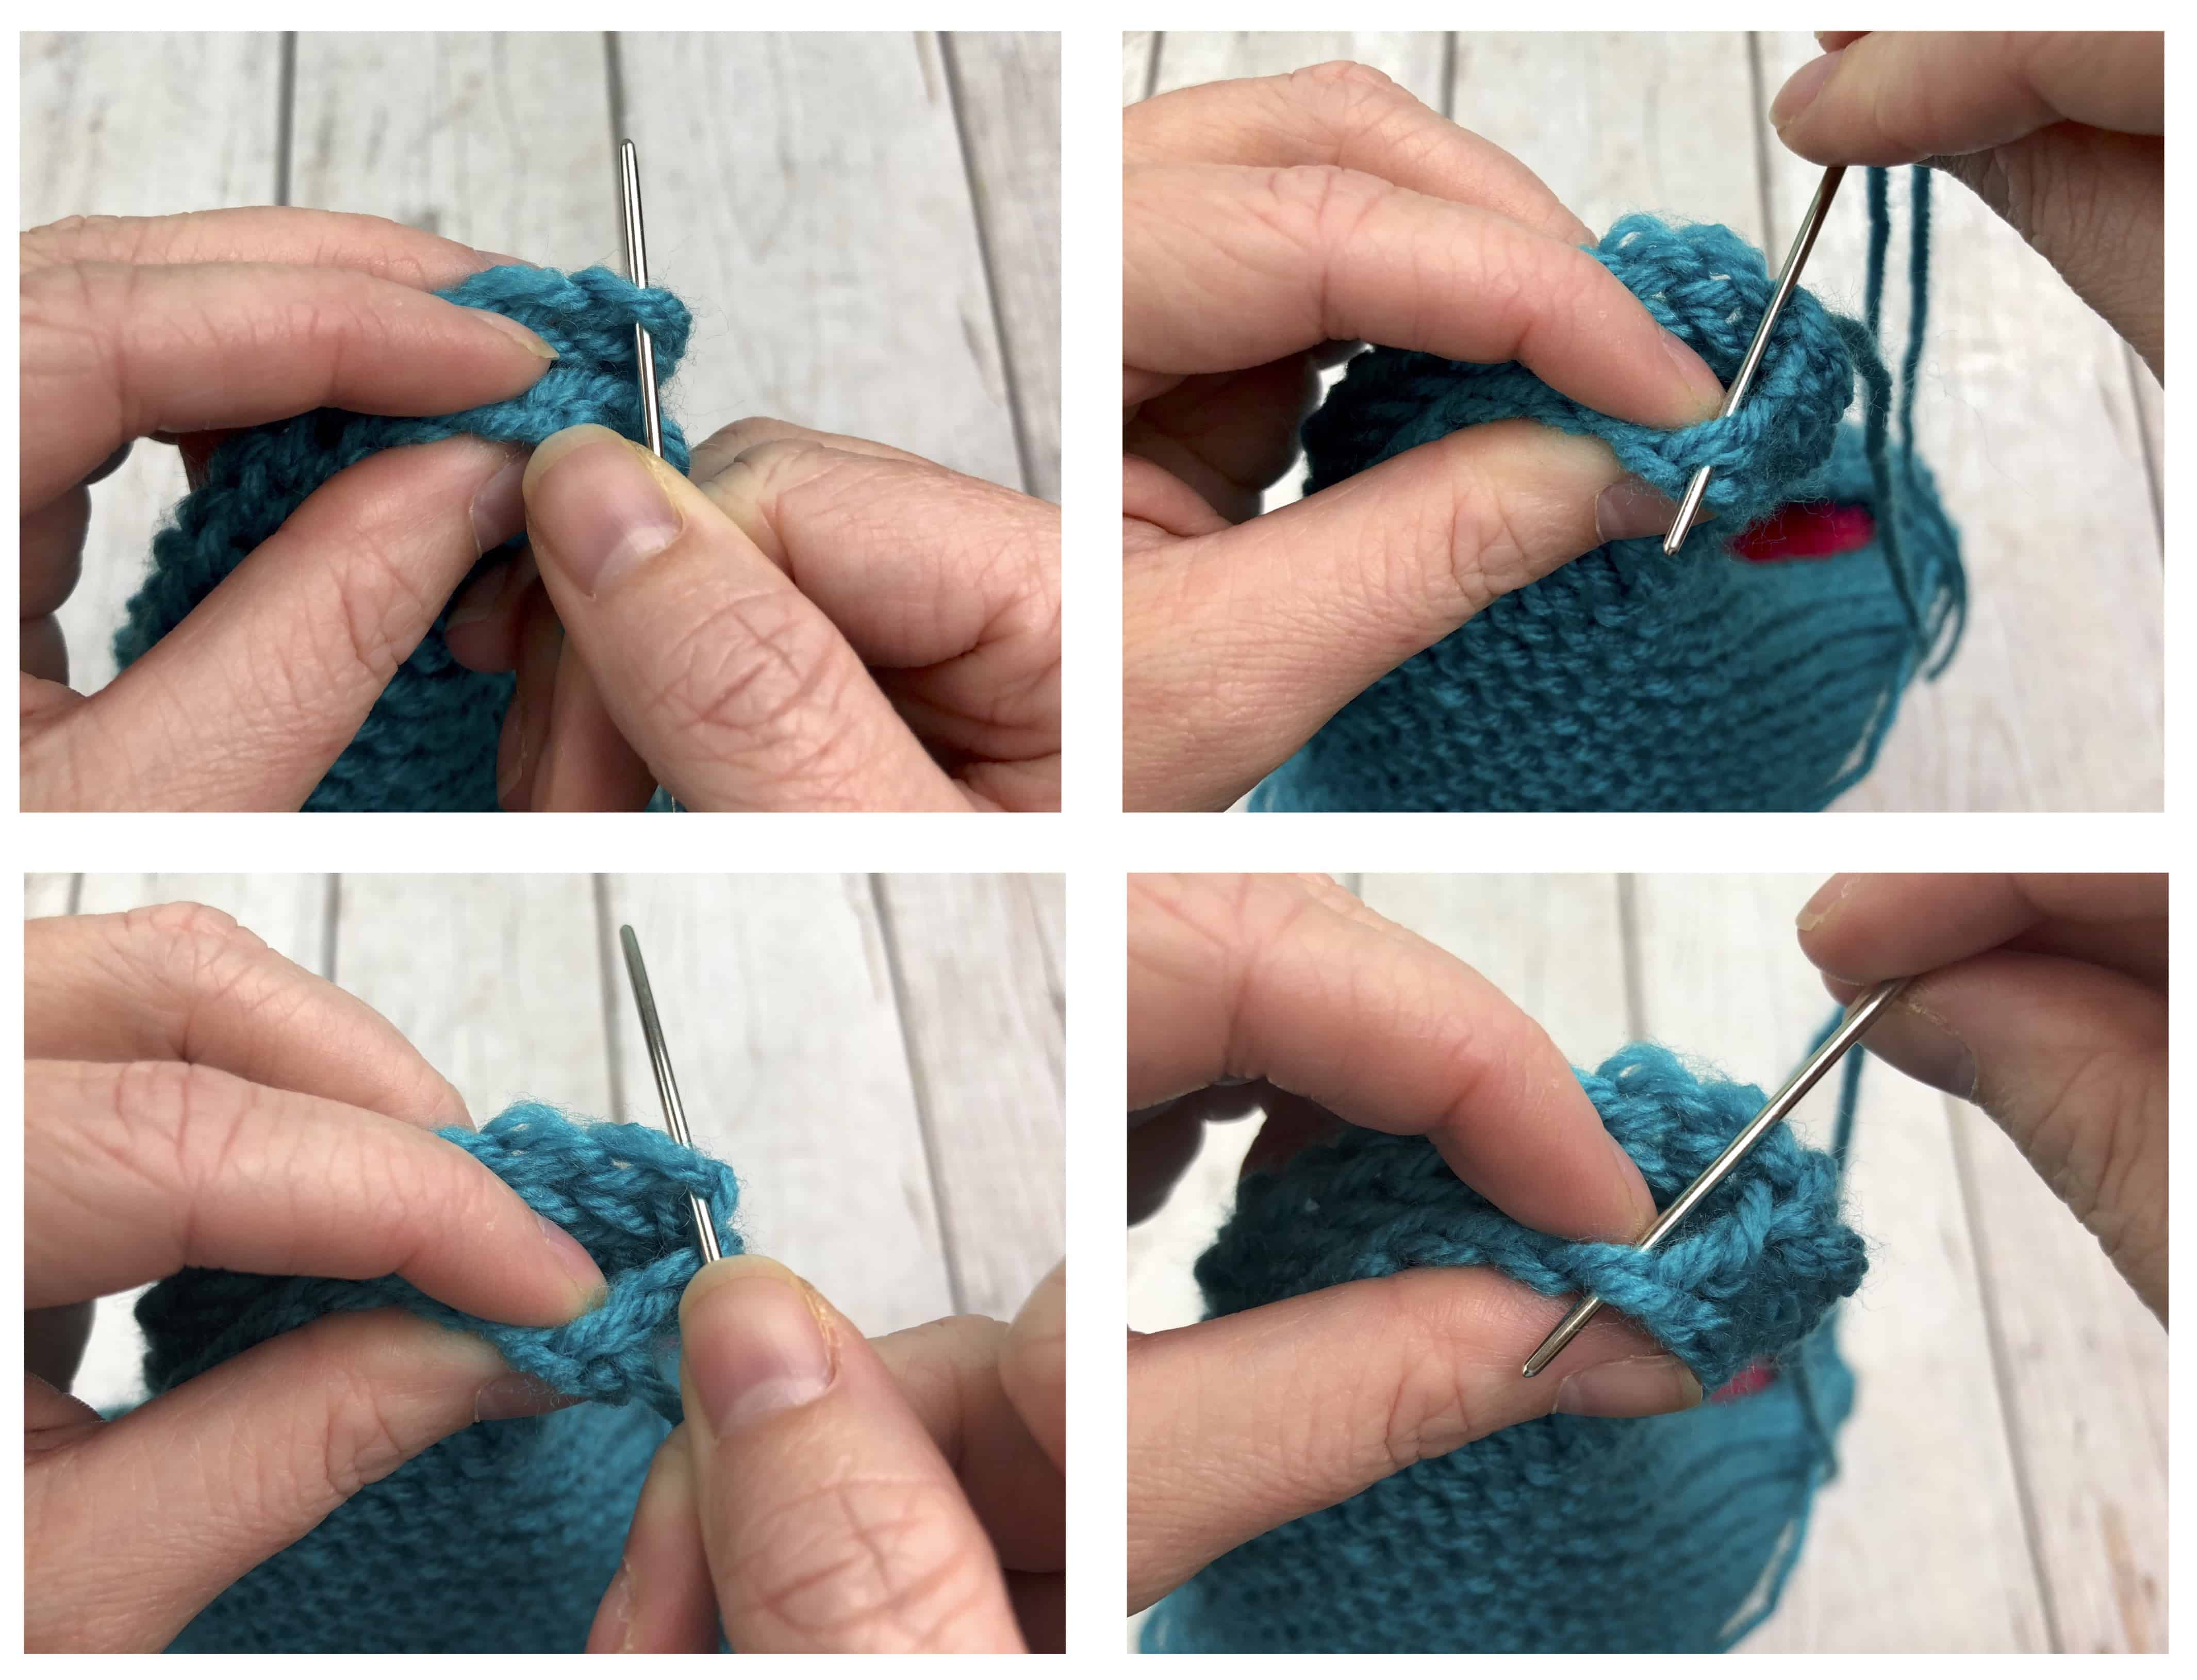
Once you get to the top opening of your beanie, tie a knot with the tail that’s on your needle, and the other tail you left at the end of your beanie. Turn your beanie so the right side is facing out, and begin closing the top opening. My favorite method for this is the Magic Fasten Off.
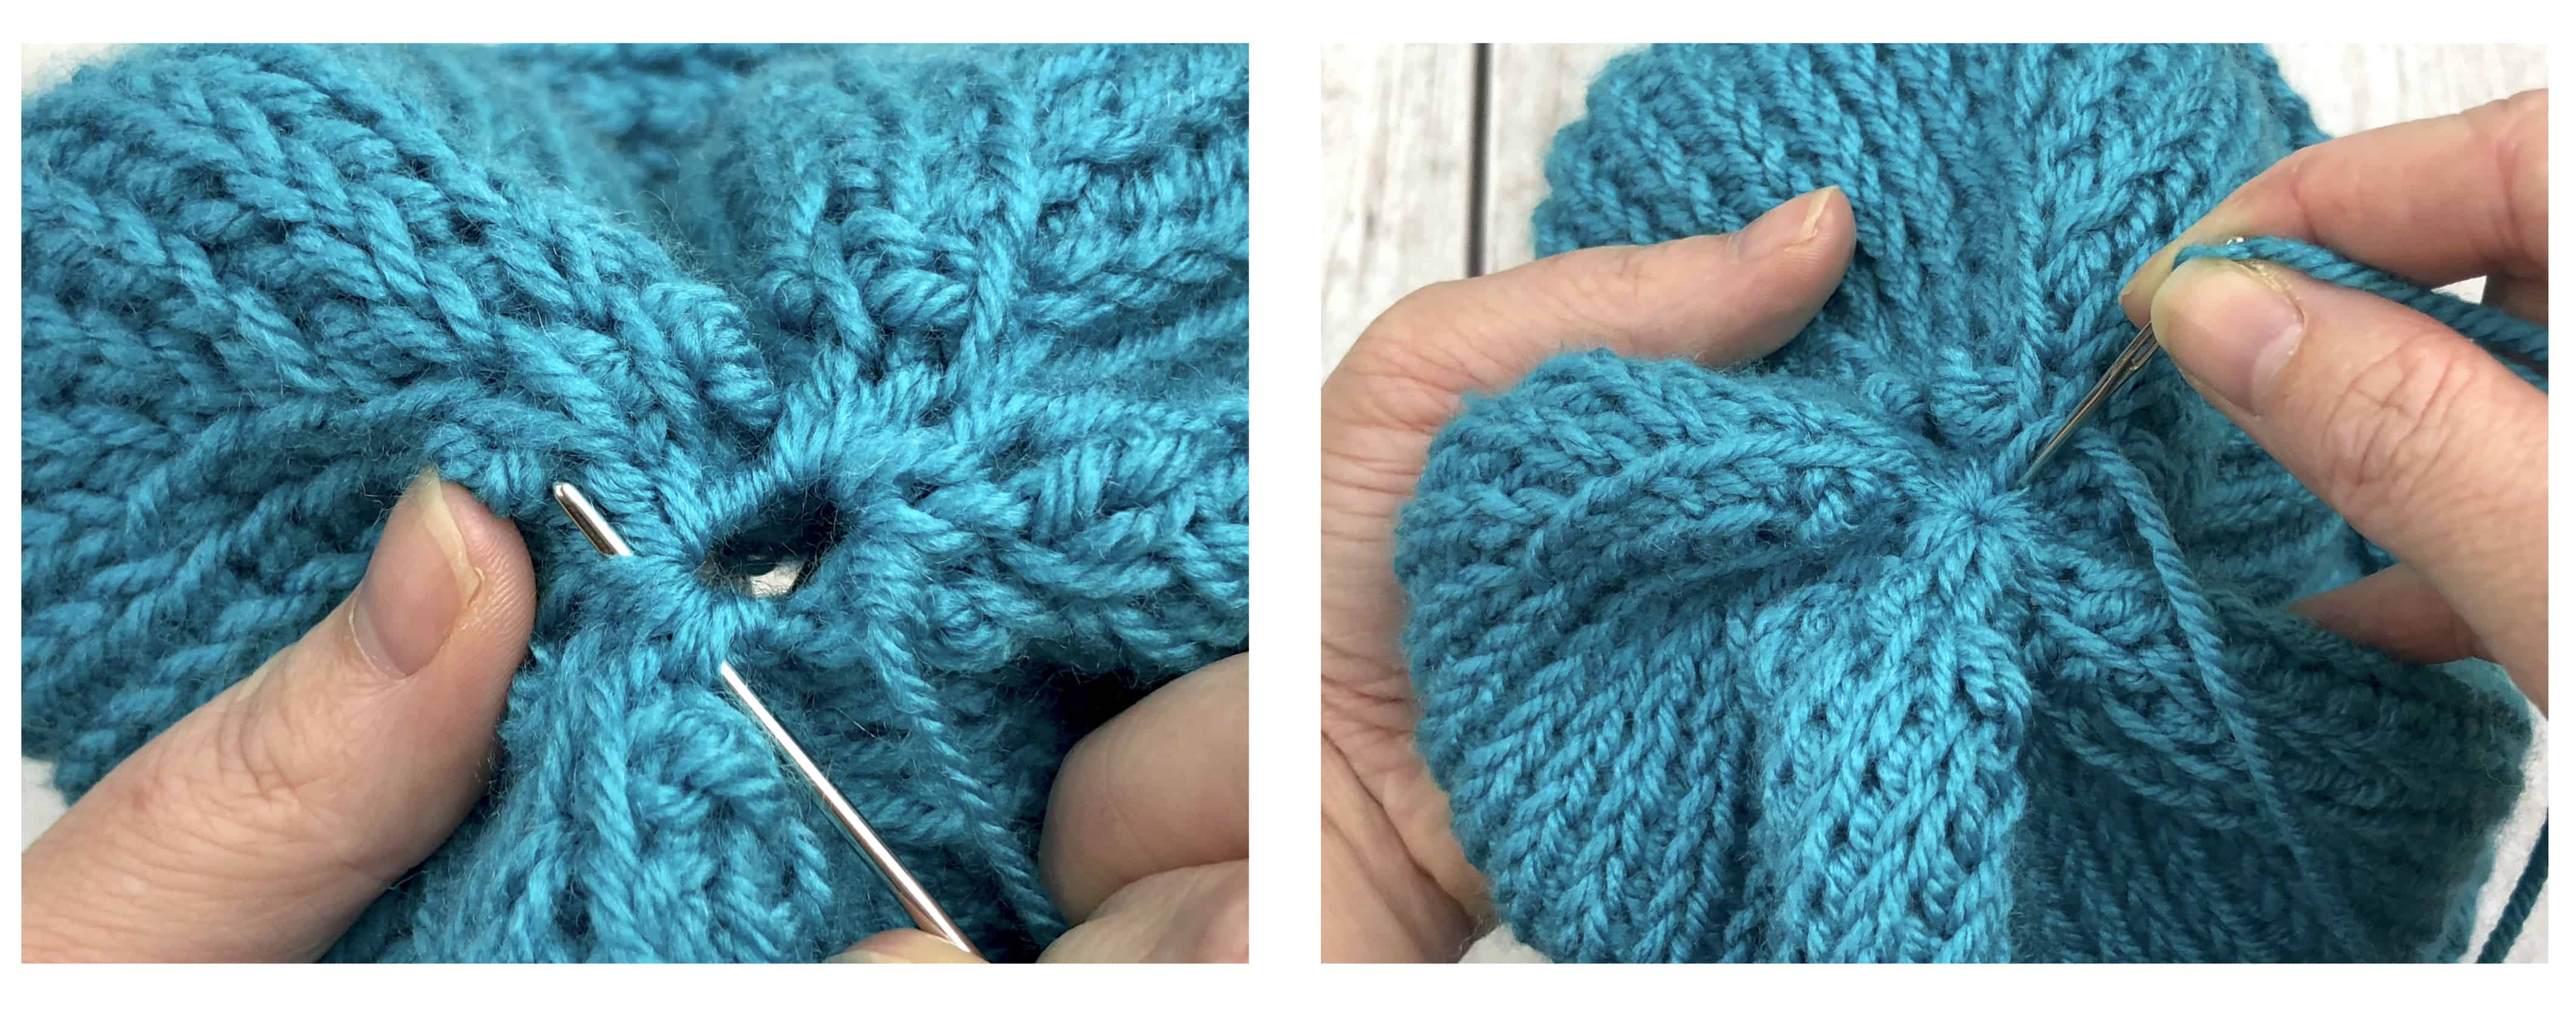
Magic Fasten Off: Insert your needle into the front loop of the stitch closest to your hook, wrap the point of your needle around to the front of the beanie and insert into the front loop of the next stitch. Continue pickup up front loop stitches then pull your yarn though once you get enough front loops on your needle. Go around the entire opening, picking up the front loops and pulling your yarn though. Once you get back to the beginning, gently pull your yarn tight to draw all the loops together and close up your beanie.

Run your needle under the loops a few more time and continue gently pulling tight until the hole is completely closed. Secure by running a few more passes under the stitches and around the circle that was created, tie off and sew in your tails.
Brim
Using a size J (6mm) hook
Attach beanie color yarn where you just joined your two sides of the beanie together CH 1.

Row 1: SC 59 around, join into the top of your first SC, CH1.
Row 2-3: SC 59 around in the Camel Hump of the stitches in the previous row. To find the camel hump look at the back of your stitches in row 1, Insert your hook into the loop that looks like its holding the first and second SC together.
Tie off and sew in tails.
Now you can add a fun pom pom or a tag to complete your new Tunisian Heart Beanie. I like making yarn poms with my clover pom maker, or a handmade faux fur pom in a coordinating color!
I hope you love this pattern as much as I loved designing it. Be sure to subscribe to my blog so you will be the first to know when new free patterns are posted, and follow me on Instagram for a lot of behind the scenes action of a crafty Mompreneur!
This entire pattern is also available on YouTube. You can find it by following this link,
“If you loved making this beanie, and are now addicted to Tunisian crochet (you’re welcome), check out the free Beta Beanie Pattern by my friend Kelsey over at Happily Yarn Hooked! This was the first Tunisian crochet beanie pattern I made and what got me hooked -pun intended- on Tunisian crochet!”
©PATTERN COPYRIGHT
Please do not copy, redistribute or sell my pattern in any way. You are more than welcome to sell your finished piece. I hope it is a very hot item for you!! I just ask that you please credit me for the pattern so other makers can find me as well. You may not use my pictures and pass them off as your own for they are my property. Thank you for your understanding.