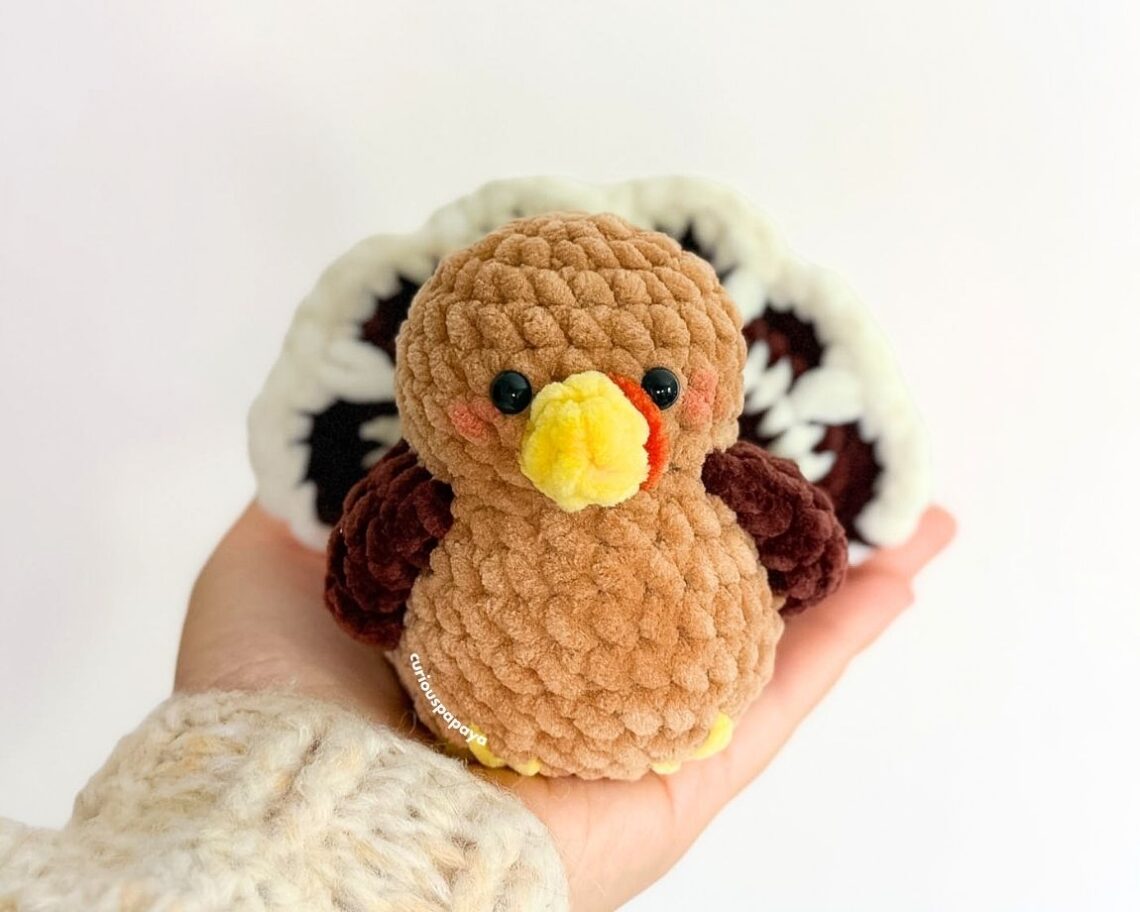
Thanksgiving Turkey *crochet pattern*
Gobble, gobble! This little chibi turkey works up in a flash and is ready to gobble up all the Thanksgiving goodies.
– Amy (@curiouspapaya)
MATERIALS:
- Clover Amour Hook (4.5 mm)
- Clover Patchwork Scissors (small)
- Clover Stitch Markers
- Clover Yarn Needle
- Clover Darning Needle
- #6 super bulky chenille yarn
- Light brown
- Dark brown
- Cream
- Yellow
- Burnt orange
- 6 mm safety eyes
NOTES:
- Please do not copy/redistribute any part of this pattern as your own. This includes reposting/translating without permission. Feel free to sell your finished products in small quantities as long as you give credit to help support my work. Tag your creations with @curiouspapaya so I can feature you!
- This pattern is written in US terminology.
- The pattern is worked in continuous rounds (a spiral).
- Difficulty: intermediate-beginner+
- Measurements: 4 in. x 5 in. if using the prescribed materials
- Time: ~2.5 hr
ABBREVIATIONS:
- ch: chain
- dec: (invisible) decrease
- flo: front loops only
- inc: increase
- rnd(s): round(s)
- sc: single crochet
- slst: slip stitch
- st(s): stitch(es)
- [#]: stitch count
- (…) x#: repeat instructions the number of times
SPECIAL STITCHES:
- SPsc: spike stitch – Yarn over for this special stitch instead of yarning under. To make a spike stitch, insert the hook into the stitch of the round below. Pull up the loop to the height of the current round you are on and make a single crochet stitch as you normally would.
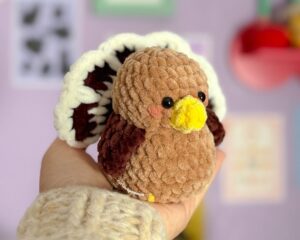
TURKEY PATTERN:
MATERIALS:
- Clover Amour Hook (4.5 mm)
- Clover Patchwork Scissors (small)
- Clover Stitch Markers
- Clover Yarn Needle
- Clover Darning Needle
- #6 super bulky chenille yarn
- Light brown
- Dark brown
- Cream
- Yellow
- Burnt orange
- 6 mm safety eyes
NOTES:
- Please do not copy/redistribute any part of this pattern as your own. This includes reposting/translating without permission. Feel free to sell your finished products in small quantities as long as you give credit to help support my work. Tag your creations with @curiouspapaya so I can feature you!
- This pattern is written in US terminology.
- The pattern is worked in continuous rounds (a spiral).
- Difficulty: intermediate-beginner+
- Measurements: 3.5 in. x 5 in. if using the prescribed materials
- Time: ~2 hrs
ABBREVIATIONS:
- ch: chain
- dec: (invisible) decrease
- flo: front loops only
- hdc-inc: half double crochet increase
- inc: increase
- sc: single crochet
- slst: slip stitch
- st(s): stitch(es)
- [#]: stitch count
- (…) x#: repeat instructions the number of times
SPECIAL STITCHES:
- SPsc: spike stitch – Yarn over for this special stitch instead of yarning under. To make a spike stitch, insert the hook into the stitch of the round below. Pull up the loop to the height of the current round you are on and make a single crochet stitch as you normally would.
TURKEY PATTERN:
WINGS (make two)
Using dark brown yarn with a 4.5 mm Clover Amour Hook:
- Round 1: ch 2, work into the second ch from the hook, (sc) x4 [4]
- Round 2: (sc, inc) x2 [6]
- Round 3: sc all around [6]
- Round 4: (sc, inc) x3 [9]
Flatten the piece and make 4 sc through both layers.
Fasten off and leave a short yarn tail.
HEAD/BODY
Using light brown yarn with a 4.5 mm Clover Amour Hook:
- Round 1: ch 2, work into the second ch from the hook, (sc) x8 [8]
- Round 2: (inc) x8 [16]
- Round 3: (sc, inc) x8 [24]
- Round 4-6 (3 rounds total): sc all around [24]
- Round 7: (2 sc, dec) x6 [18]
*In the next round, we will crochet in the wings. Each wing will span 4 sts.
- Round 8: (flo) 3 sc, (in both loops of the wing and front loop only of the body) *wing*, (flo), 4 sc, (in both loops of the wing and front loop only of the body) *wing*, (flo) 3 sc [18]
- Round 9: (2 sc, inc) x6 [24]
- Round 10: (3 sc, inc) x6 [30]
- Rounds 11-13 (3 rounds total): sc all around [30]
- Round 14: (3 sc, dec) x6 [24]
- Round 15: (2 sc, dec) x6 [18]
Center the eyes with the wings. Insert the safety eyes between rounds 5-6, 4 sts apart.
Stuff well.
- Round 16: (sc, dec) x6 [12]
Fasten off and leave a yarn tail for closing up the piece.
Use the Clover darning needle to weave through the flo of the last round. Gently tug every 3 sts so that the yarn doesn’t snap. Once you pull the hole closed, weave in the remaining yarn tail.
BEAK
Using yellow yarn with a 4.5 mm Clover Amour Hook:
- Round 1: ch 2, work into the second ch from the hook, (sc) x4 [4]
- Round 2: (sc, inc) x2 [6]
Fasten off and leave a tail for sewing.
Lightly stuff with yarn scraps.
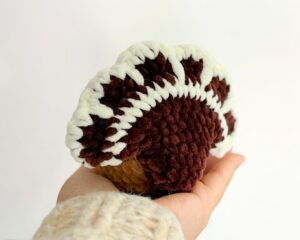
TAIL
Starting in Dark Brown yarn with a 4.5 mm Clover Amour Hook:
Leave a long tail (for sewing the tail to the body) before beginning a slipknot.
- Round 1: ch 2, work into the second ch from the hook and (sc) x5 [5]
- Round 2: (inc) x5 [10]
- Round 3: sc all around [10]
- Round 4: (sc, inc) x5 [15]
- Round 5: sc all around [15]
- Round 6: (2 sc, inc) x5 [20]
- Round 7: sc all around [20]
- Round 8: (3 sc, inc) x5 [25]
- Round 9: (inc) x25, [50]
Change to Cream yarn and do not cut off the Dark Brown yarn.
- Round 10: sc all around [50]
Change to Dark Brown yarn and do not cut off the Cream yarn.
- Round 11: sc all around [50]
Bring the Cream yarn to the outer right side of the tail and then flatten it (mirror this if you are working left handed). We will pick up this color for the final round. Do not stuff. [img 1]
To make the edges of the tail in the next rnd, flatten the piece and sc through both layers.
- Round 12: (sc, hdc-inc, sc, slst) x6 [30]
Fasten off the Dark Brown yarn. Pick up the Cream yarn that we left on the outside of the tail and use the “yarning over” method of crocheting instead of “yarning under” for the next rnd.
- Round 13: (4 sc, SPsc) x6 [30]
*Watch the video tutorial HERE.
Fasten off and leave a tail for weaving in.
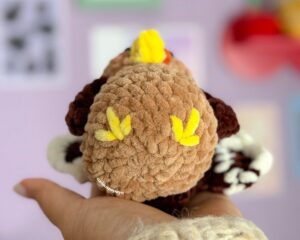
FEET (make two)
- Step 1: Cut 10 in. of yellow yarn
- Step 2: Use the Clover darning needle and weave into the side of the body, leaving a 3 in. yarn tail
- Step 3: Embroider 3 lines for each foot, spanning rounds 14-15, 4 sts apart.
- Step 4: Weave back out where you entered in from and secure the yarn tails into a knot.
- Step 5: Weave in the remaining ends.
Fasten off and leave a yarn tail for sewing.
ASSEMBLY
- Beak: Sew the beak between the eyes, spanning rnds 6-7.
- Wattle: Cut 5 in. of burnt orange yarn and embroider the wattle against the beak.
- Tail: Sew the tail onto the pointy part of the back of the body.
- Blush: Use a cotton swab and carefully add rosy cheeks.
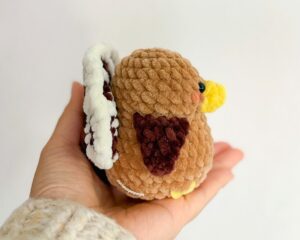
You’re finished! Tag your creations with @cloverusa and @curiouspapaya to share your makes 🙂
If you want to keep up with me, Amy, on social media for other fun projects, follow me on: Instagram
If you want to keep up with all things Clover, follow us on: Facebook | Twitter | Instagram | Pinterest | YouTube | Ravelry