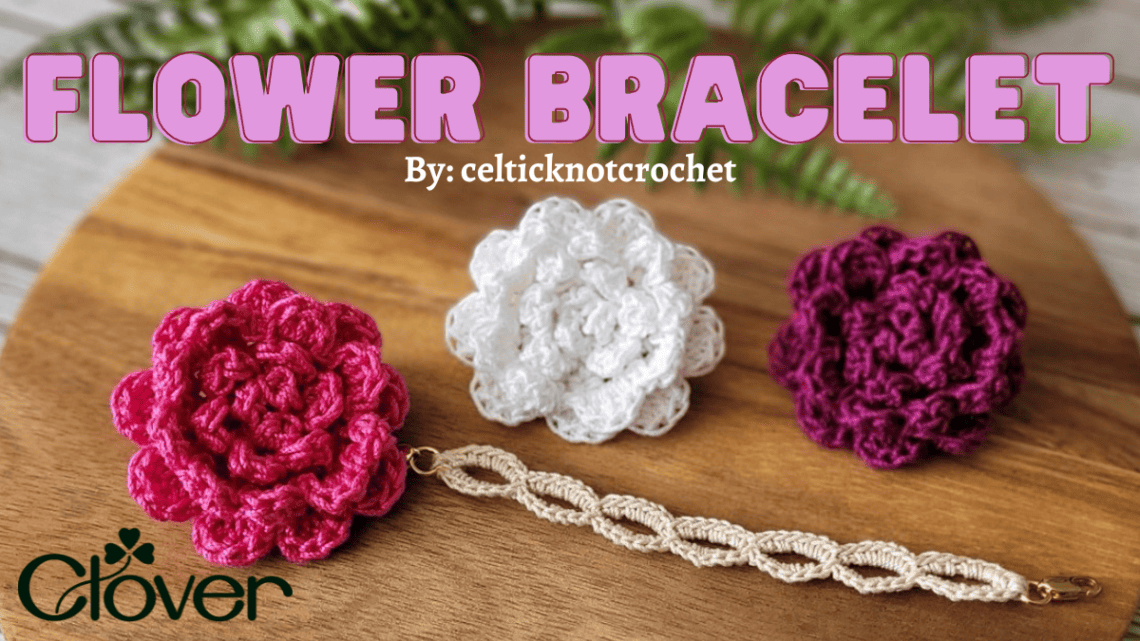
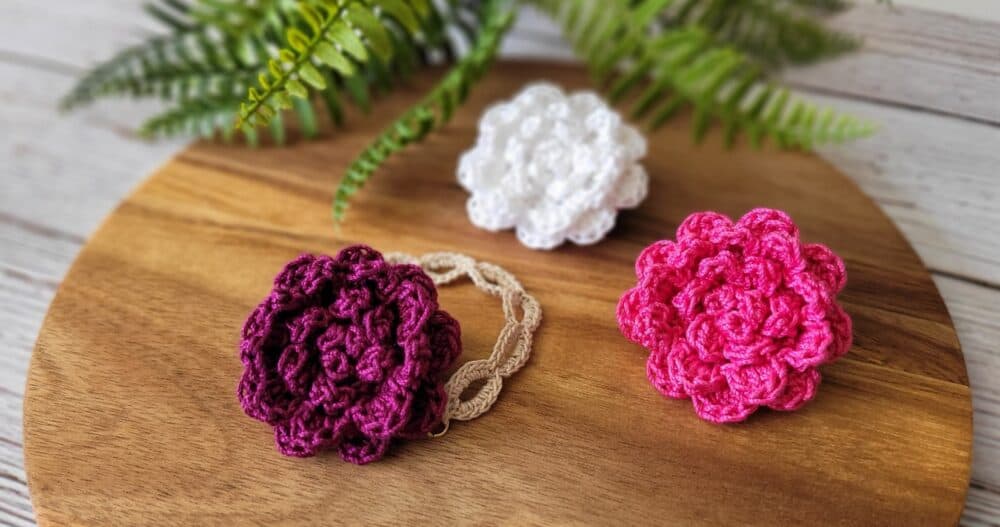
Flower Bracelet- Crochet Pattern
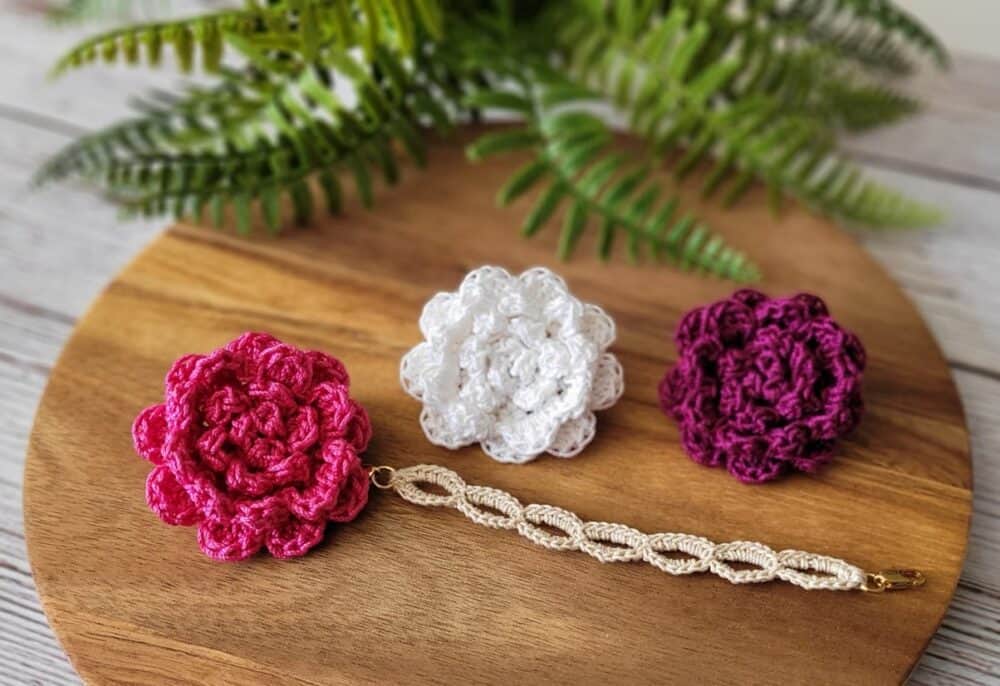
Hello! It’s Jennifer Ryan, the designer, and blogger behind Celtic Knot Crochet. I am excited to be sharing the Flower Bracelet project here on the Clover blog! This bracelet is designed to be able to easily switch out each flower so you can quickly change the accessory to match your outfit or mood.
I love to crochet jewelry. I love how it is a small and quick project that can be worn the same day you start making it! Plus, crocheted jewelry is very unique and adds an eye-catching touch to any outfit. This would make a great gift for Mom on Mother’s Day.
For this Flower Bracelet project, you’ll need a small amount of cotton crochet thread and a few jewelry findings. I’ll take you through each step of the project with several photos.
Let’s get started!
Skill Level: Intermediate
(The stitches used in the flowers are basic crochet stitches but working with thread and into front loops of tiny stitches takes some practice)
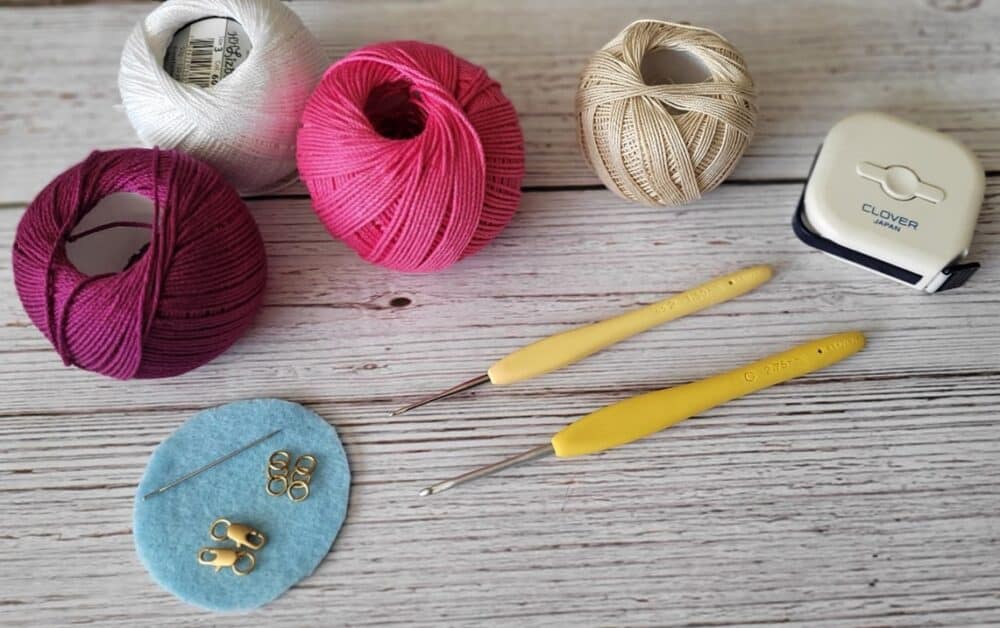
Supplies:
Cotton crochet thread – Size 3 – 1 ball of each flower color desired
Cotton Crochet Thread – Size 10 – 1 ball in color “Bone” (light tan)
2.75 Amour Crochet Hook B by Clover- Art No. 1040/B
1.5 mm Amour Steel Crochet Hook by Clover- Art No. 1221
2 clasps with jump rings attached
2 jump rings per flower (6 mm)
Embroidery needle
Measuring Tape
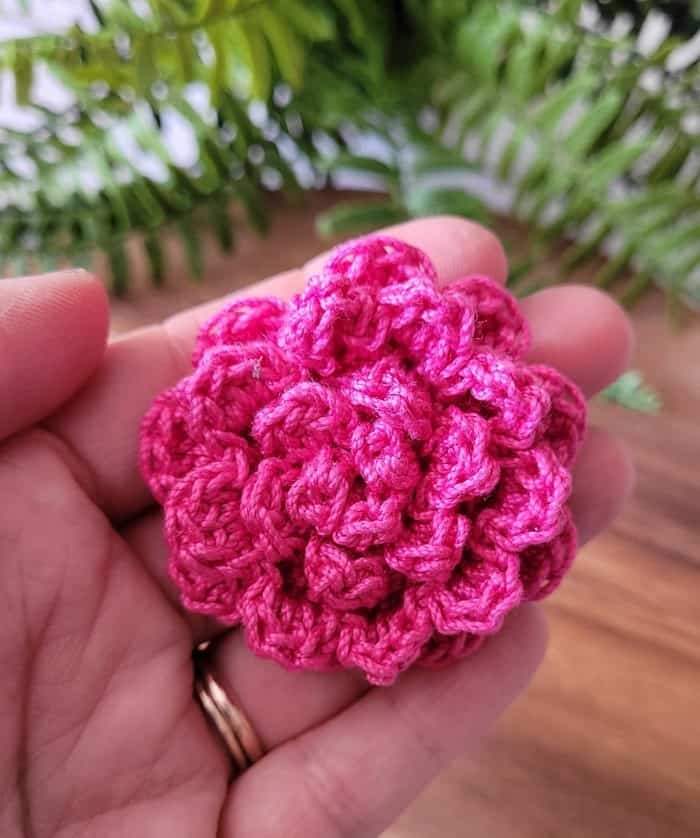
Finished Measurements: Flower diameter = 2 ¼” ; Bracelet length = 4” to 6” (depends on wrist measurement)
Gauge: 5 sc (with Size 10 thread and 1.5mm hook) = approximately ½”
Abbreviations:
YO (yarn over)
Hk (hook)
Lp (loop)
Ch (chain)
St (stitch)
Sl st (slip stitch)
Dc (double crochet)
Sk (skip)
Special Stitches:
Adjustable Ring -Wrap yarn around hand to create a loop; pull working end of yarn through lp with hk; work stitches into loop and then pull yarn tail to tighten and close up center hole
*Watch a short video tutorial of this technique here*
Back Loop Only = insert hk through back loop of each stitch
Notes:
Flower is worked in the round as usual up to Round 5
Then remaining petals are added in center of flower to create the 3D look
**You can purchase an instant downloadable PDF of the project here in my Etsy shop**
[Esty shop link: https://www.etsy.com/shop/CelticKnotCrochet]
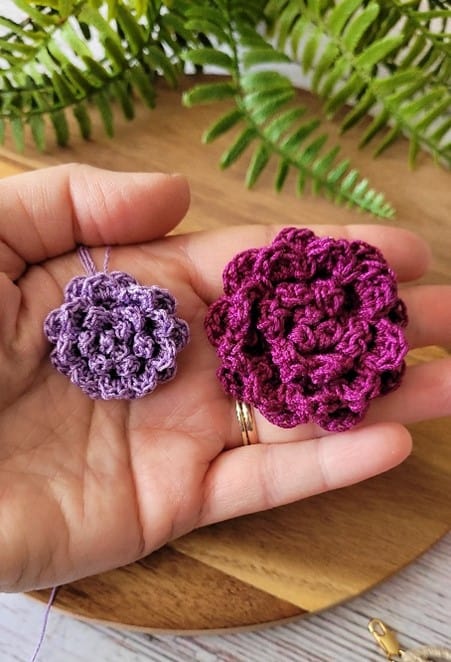
You can crochet the flower with the Size 10 thread and the smaller hook and it will come out about half the size of the flowers crocheted with the Size 3 thread – I think this smaller size would make a pretty pin or earrings.
Instructions:
Special stitches are printed in bold and italicized text and defined above
Flower:
Round 1: With 2.75mm hook and Size 3 thread work 6 sc in an adjustable ring
Round 2: Working in the back loop only, work 2 sc in each st around. Do not join.(12 sc)
Round 3: Continue working in the back loop only, (2 sc in next st, sc in next st) around. Do not join. (18 sc)
Round 4: Now working in both loops, (sl st in next st, ch 3, sk next st) around ending with sl st in 1st sl st of round. (9 ch-3 sps)
Round 5: (Sl st, hdc, 3 dc, hdc, sl st) in each ch-3 sp around. (9 petals)
This is what your flower should look like after completing Round 5 – now you will start to work in front of the petals that you just crocheted and fill-in the center circle of the flower
Round 6: Ch 1, (sl st in next st from Round 4 that is in center of next ch-3 sp, ch 3) around ending with sl st to 1st sl st. (9 ch-3 sps)
Round 7: (Sl st, hdc, 2 dc, hdc, sl st) in each ch-3 sp around; sl st in 1st sl st of round. Fasten off. (9 petals)

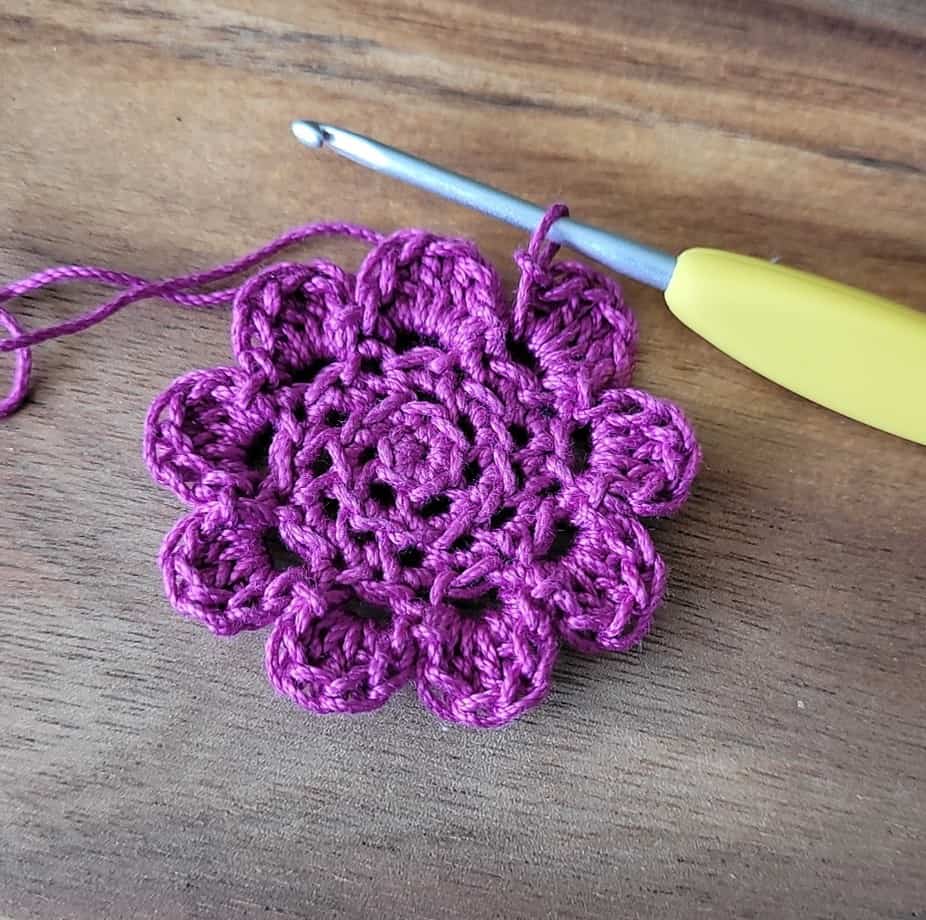
The photo above shows the flower completed after Round 7 – the arrow shows where you will start the “Last Round of Petals”
Last Round of Petals: Starting in unused front loop of very 1st st (of Round 1 – this will be in the center of flower), join with sl st; (2 hdc, sl st) in same st; [sk next st; (sl st, 2 hdc, sl st) in next st] 2 times; [sk next st; (sl st, ch 1, 2 dc, ch 1, sl st) in next st] 6 times; sl st in 1st sl st of 6th petal from hook. Fasten off.
Bracelet Length:
With 1.5 mm hook and Size 10 thread, ch amount from list below
Round 1: Sc in 2nd ch from hk, (ch 4, sk each of next 4 chs, sl st in next ch) across; sc in last ch; ch 1, sl st in bottom of last sc just made; Now working on other side of ch, sl st in next ch; (ch 4, sk each of next 4 chs, sl st in next ch) across; sl st in bottom of sc at end.
Round 2: Ch 1, sl st in sc at beginning of round; (6 sc in next ch-4 sp, sl st in next sl st) across; sl st in last st; ch 1; Now working on other side, sl st in 1st st; (sl st in next sl st, 6 sc in next ch-4 sp) across; sl st in sc at end. Fasten off with long yarn tails for attaching clasp.
Calculating Bracelet Length:
Using measuring tape measure length around wrist (A)
Subtract 2 inches from this length (B)
A – 2 = B
Pick ch amount from list below that corresponds with answer “B”
(These measurements are approximate – if your measurement falls in between the numbers given, go with the larger number)
Then complete instructions above for Bracelet Length
“B” Length – Chain amount (# of ovals in length after stitching completed):
4” – Ch 38 (7 ovals)
4 ½” – Ch 43 (8 ovals)
5” – Ch 48 (9 ovals)
5 ½” – Ch 53 (10 ovals)
(For a longer length simply increase starting ch by 5 chs for each ½”)
Finishing/Assembly:

Wet block bracelet length – pin openings in place and let dry completely
I put a paper towel under my bracelet length while it dried

Using needle sew on jump ring and clasp to each end with Right Side facing
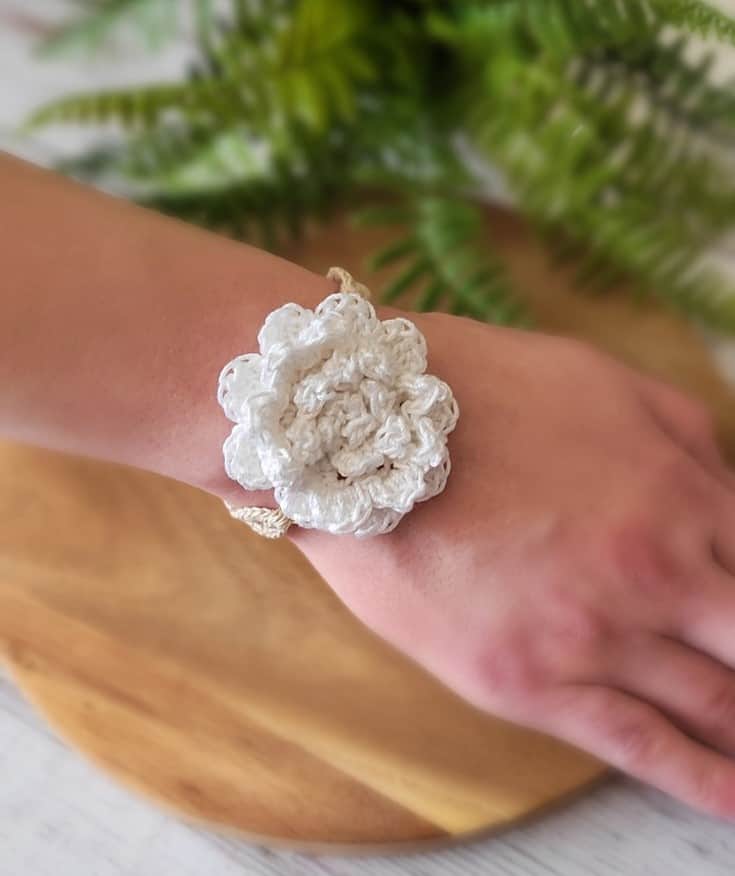
Using photo as a guide sew jump rings to Wrong Side of flower about 1 inch apart making sure rings are sitting vertically (so easier to attach to clasp)
Weave in all ends
Tada! Your Flower Bracelet is complete ? I hope you enjoyed making and gifting this project. Happy crocheting!
You can find a large-print instant downloadable PDF of this pattern by clicking here and purchasing it in my Etsy shop.
[Etsy shop link: https://www.etsy.com/shop/CelticKnotCrochet]
Please tag me @celticknotcrochet or use the #celticknotcrochet on Instagram – I would love to see your bracelet!
Find Celtic Knot Crochet on the internet: Blog Youtube Instagram Etsy Pinterest
Stay connected with Clover on Facebook | Twitter | Instagram | Pinterest | YouTube | Ravelry