

Hey everyone! Fall is finally here, which means it’s time for cool weather, cozy drinks, and fun crafts. Today, I’m going to show you how to make cute pumpkin coasters! Instead of turning everything inside out, we are making these in a raw-edge style and fraying the sides for a fuzzy look. This project is really easy, super quick, and so much fun to make!
MATERIALS:
- Clover Rotary Cutter (45mm)
- Clover Metal Hera with Stylus
- Clover Wonder Clips (Standard Size)
- Clover Point 2 Point Turner
- Clover Seam Ripper
- Clover Craft Storage Wrap (Kiku)
- Clover Heart-Shaped Pins
- Clover 5-in-1 Sliding Gauge
- Clover Patchwork Scissors
DIMENSIONS FOR 1 COASTER:
- top fabric: 1 piece of cotton (fabric 5.5″ x 5.5″)
- back fabric: 1 piece of cotton fabric (5.5″ x 5.5″)
- stem fabric: 1 piece of cotton fabric (1″x 1″)
- double sided fusible interfacing: 1 piece (5.5″ x 5.5″) + 1 piece (1″x1″)
- matching thread


SIMPLE PUMPKIN COASTERS:
Step 1: Cut Your Squares
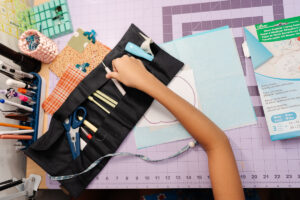
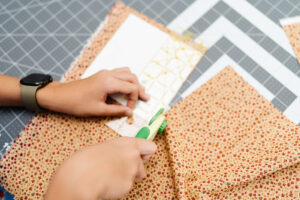
First, pull out your tools. I store mine in my Craft Storage Wrap (Kiku) and pick out your favorite fall fabric for the front, back, and stem of the pumpkin. Using the Rotary Cutter (45mm), I cut out 5.5″ x 5.5″ squares for your top fabric, back fabric, and your double-sided fusible interfacing.

Step 2: Draw, Trace, Cut, and Fuse Your Pumpkin
Now comes the fun part!
Draw Your Shape: On a scrap piece of paper, freehand draw your ideal pumpkin shape. Don’t worry about making it perfect—REAL pumpkins have all kinds of unique shapes!
Transfer the Outline: Place a sheet of Water Erasable Tracing Paper face down on your top front fabric square, lay your freehand drawing on top, and trace over the lines with your Metal Hera with Stylus. When you lift the paper, your pumpkin outline is neatly transferred right onto your fabric!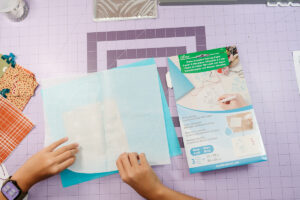

Cut Out the Shape: Using your Patchwork Scissors, carefully cut out your pumpkin shape directly along the traced outline.
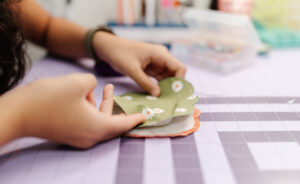
Fuse the Layers: Next, layer your pieces together like a sandwich! Place your back fabric square right-side down, put the double-sided fusible interfacing in the middle, and top it with your freshly cut pumpkin piece facing right-side up. I used my Heart-Shaped Pins to hold everything into place. Press everything with a hot iron so all the layers fuse firmly together.

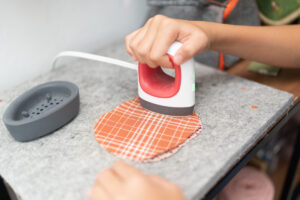
Step 3: Gauge Your Seam Allowance
Set your 5-in-1 Sliding Gauge to 1/4″. Place the edge of the gauge along the outer edge of your cut pumpkin shape and draw a second line 1/4″ inside the curve all the way around. This gives you an exact line to guide your needle on the sewing machine!
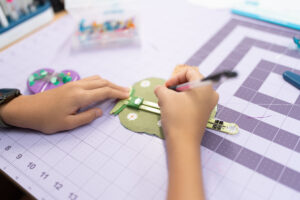
Step 4: Make the Stem and Sew
To make the stem, we follow the exact same process as the pumpkin!
Draw & Trace: Freehand draw a stem shape on a scrap piece of paper, keeping the whole design inside a 1″ x 1″ square. Place Water Erasable Tracing Paper face down on your faux leather or felt, put your drawing on top, and trace it using your Metal Hera with Stylus.
Cut: Use your Patchwork Scissors to cut out your stem along the traced line.
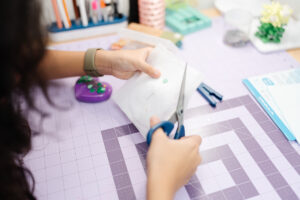
Attach & Sew: Tuck the bottom edge of your finished stem under the top edge of your pumpkin and use your Metal Hera with Stylus to hold in place. Take your fabric sandwich to the machine and stitch right along the 1/4″ seam allowance line you marked with your sliding gauge. Sew all the way around the curve, securing the stem in place! You can also add a few extra stitched curves down the center to give your pumpkin extra detail.
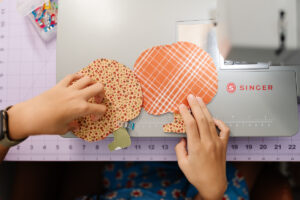
Step 5: Trim and Fray the Edges!
Since we aren’t turning this coaster inside out, grab your Patchwork Scissors to trim away any excess back fabric and interfacing around the outside of your pumpkin shape, leaving a little bit of fabric outside your stitch line.


Now for the best part! Take your Seam Ripper and gently drag the point along the raw fabric edges outside your stitch line. This pulls the threads loose and frays the edges, giving your coaster a super cozy, feathery border!
You’re done! You now have an adorable, raw-edge pumpkin coaster ready for your favorite fall drink. Make a few in different autumn colors to set out around the house or give as gifts!

Happy Sewing!
— Cataleya
If you want to keep up with me, Cataleya, on social media, follow her on social media: Instagram
If you want to keep up with all things Clover, follow us on: Facebook | Twitter | Instagram | Pinterest | YouTube | Ravelry