

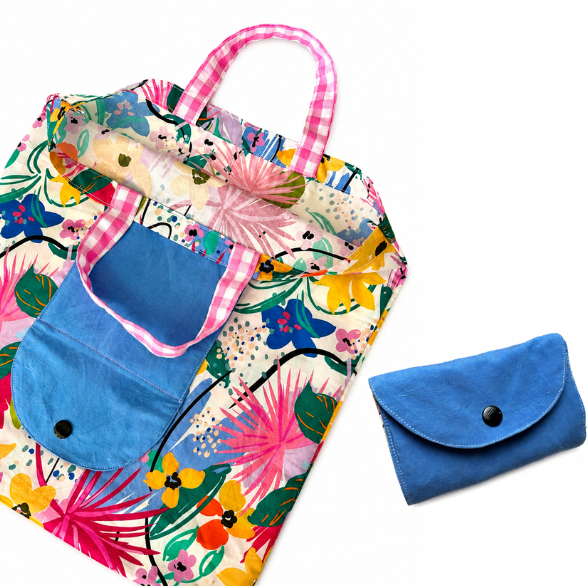
Hello, everyone! Summer is here, which means the kids are home from school and the calendar is quickly filling up with vacations, beach days, and fun outings. Whether you’re stopping by the farmers market, collecting seashells at the beach, browsing local shops on vacation, or making a quick grocery run, it’s always helpful to have an extra bag on hand. In this tutorial, I’ll show you how to sew a foldable shopping tote that folds into a compact clutch when not in use. It’s lightweight, practical, and easy to toss into your purse, car, or suitcase so you’re always ready for whatever summer adventures come your way. I loved the idea of creating a reusable tote that is both functional and easy to take anywhere. It’s one of those bags you don’t realize you need until you have it, and then you find yourself reaching for it all the time.
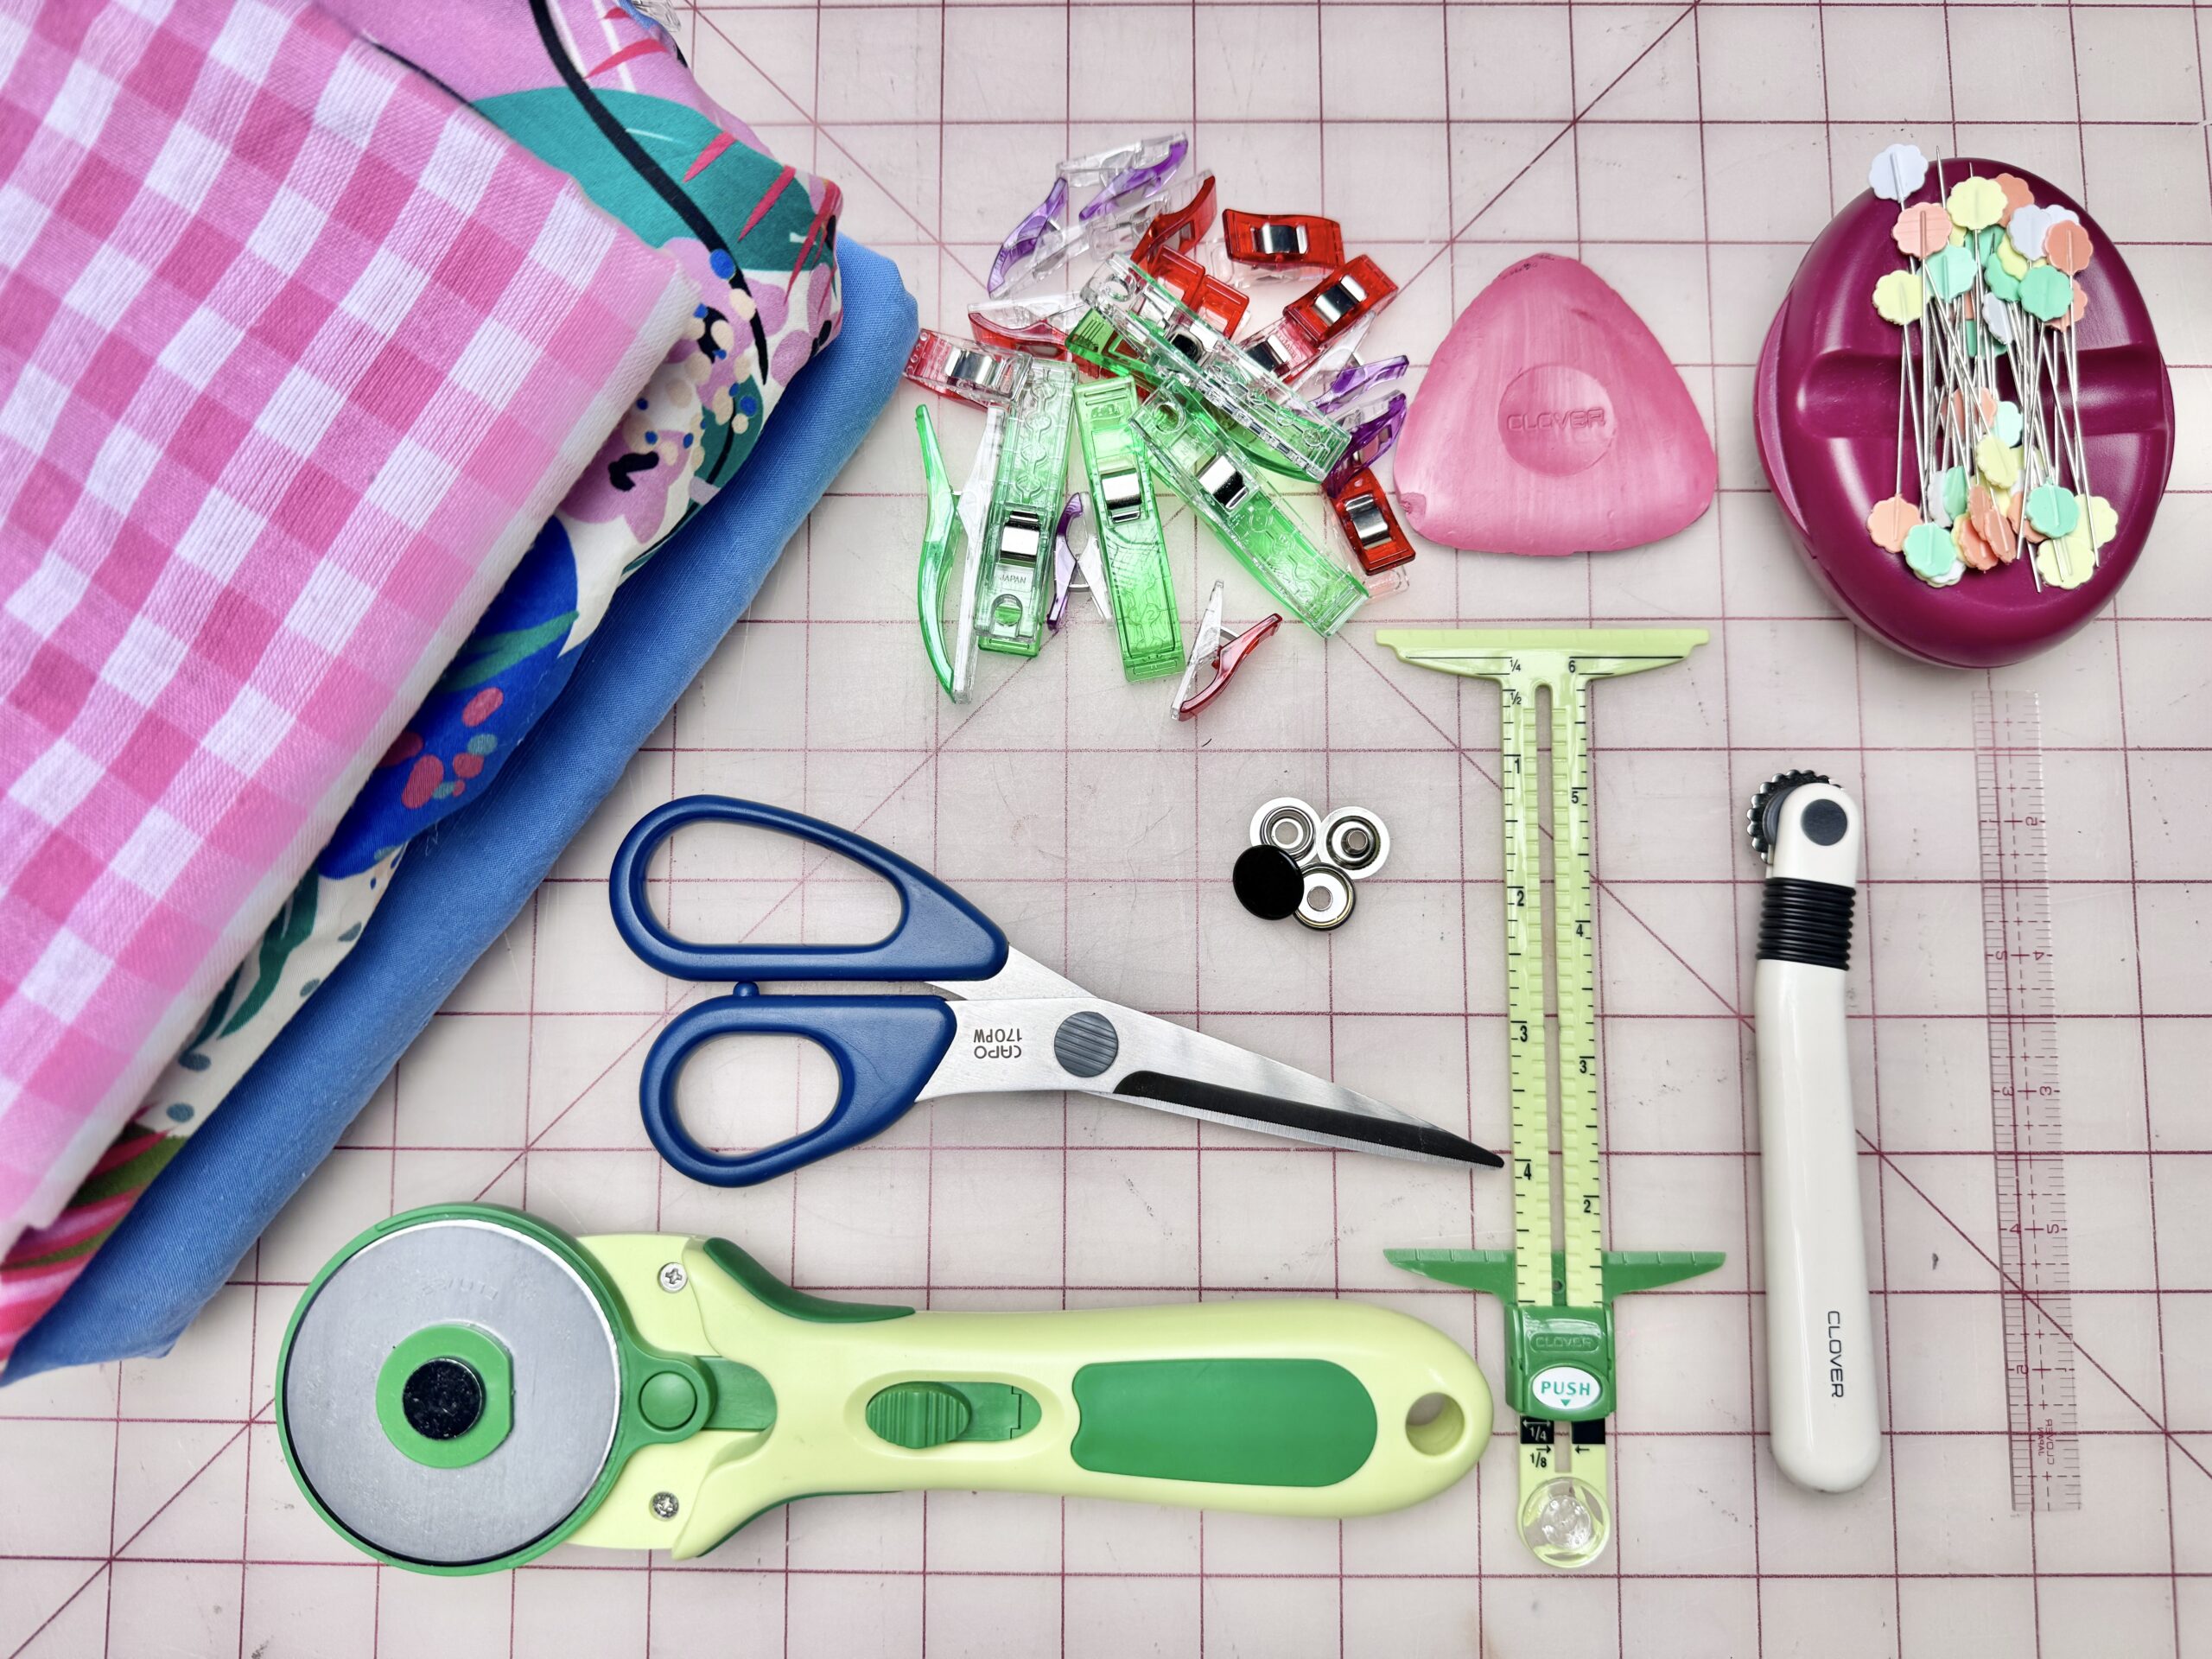
MATERIALS:
- Clover Rotary Cutter (60 mm)
- Clover Flower Head Pins
- Clover Wonder Clips
- Clover 5-in-1 Sliding Gauge
- Clover Magnet Pin Caddy
- Clover Triangle Tailor’s Chalk (Red)
- Clover Patchwork Scissors
- Clover Curve Ruler (with Mini Ruler)
- one 1/2″ (13 mm) snap button set
- snap tools
- paper
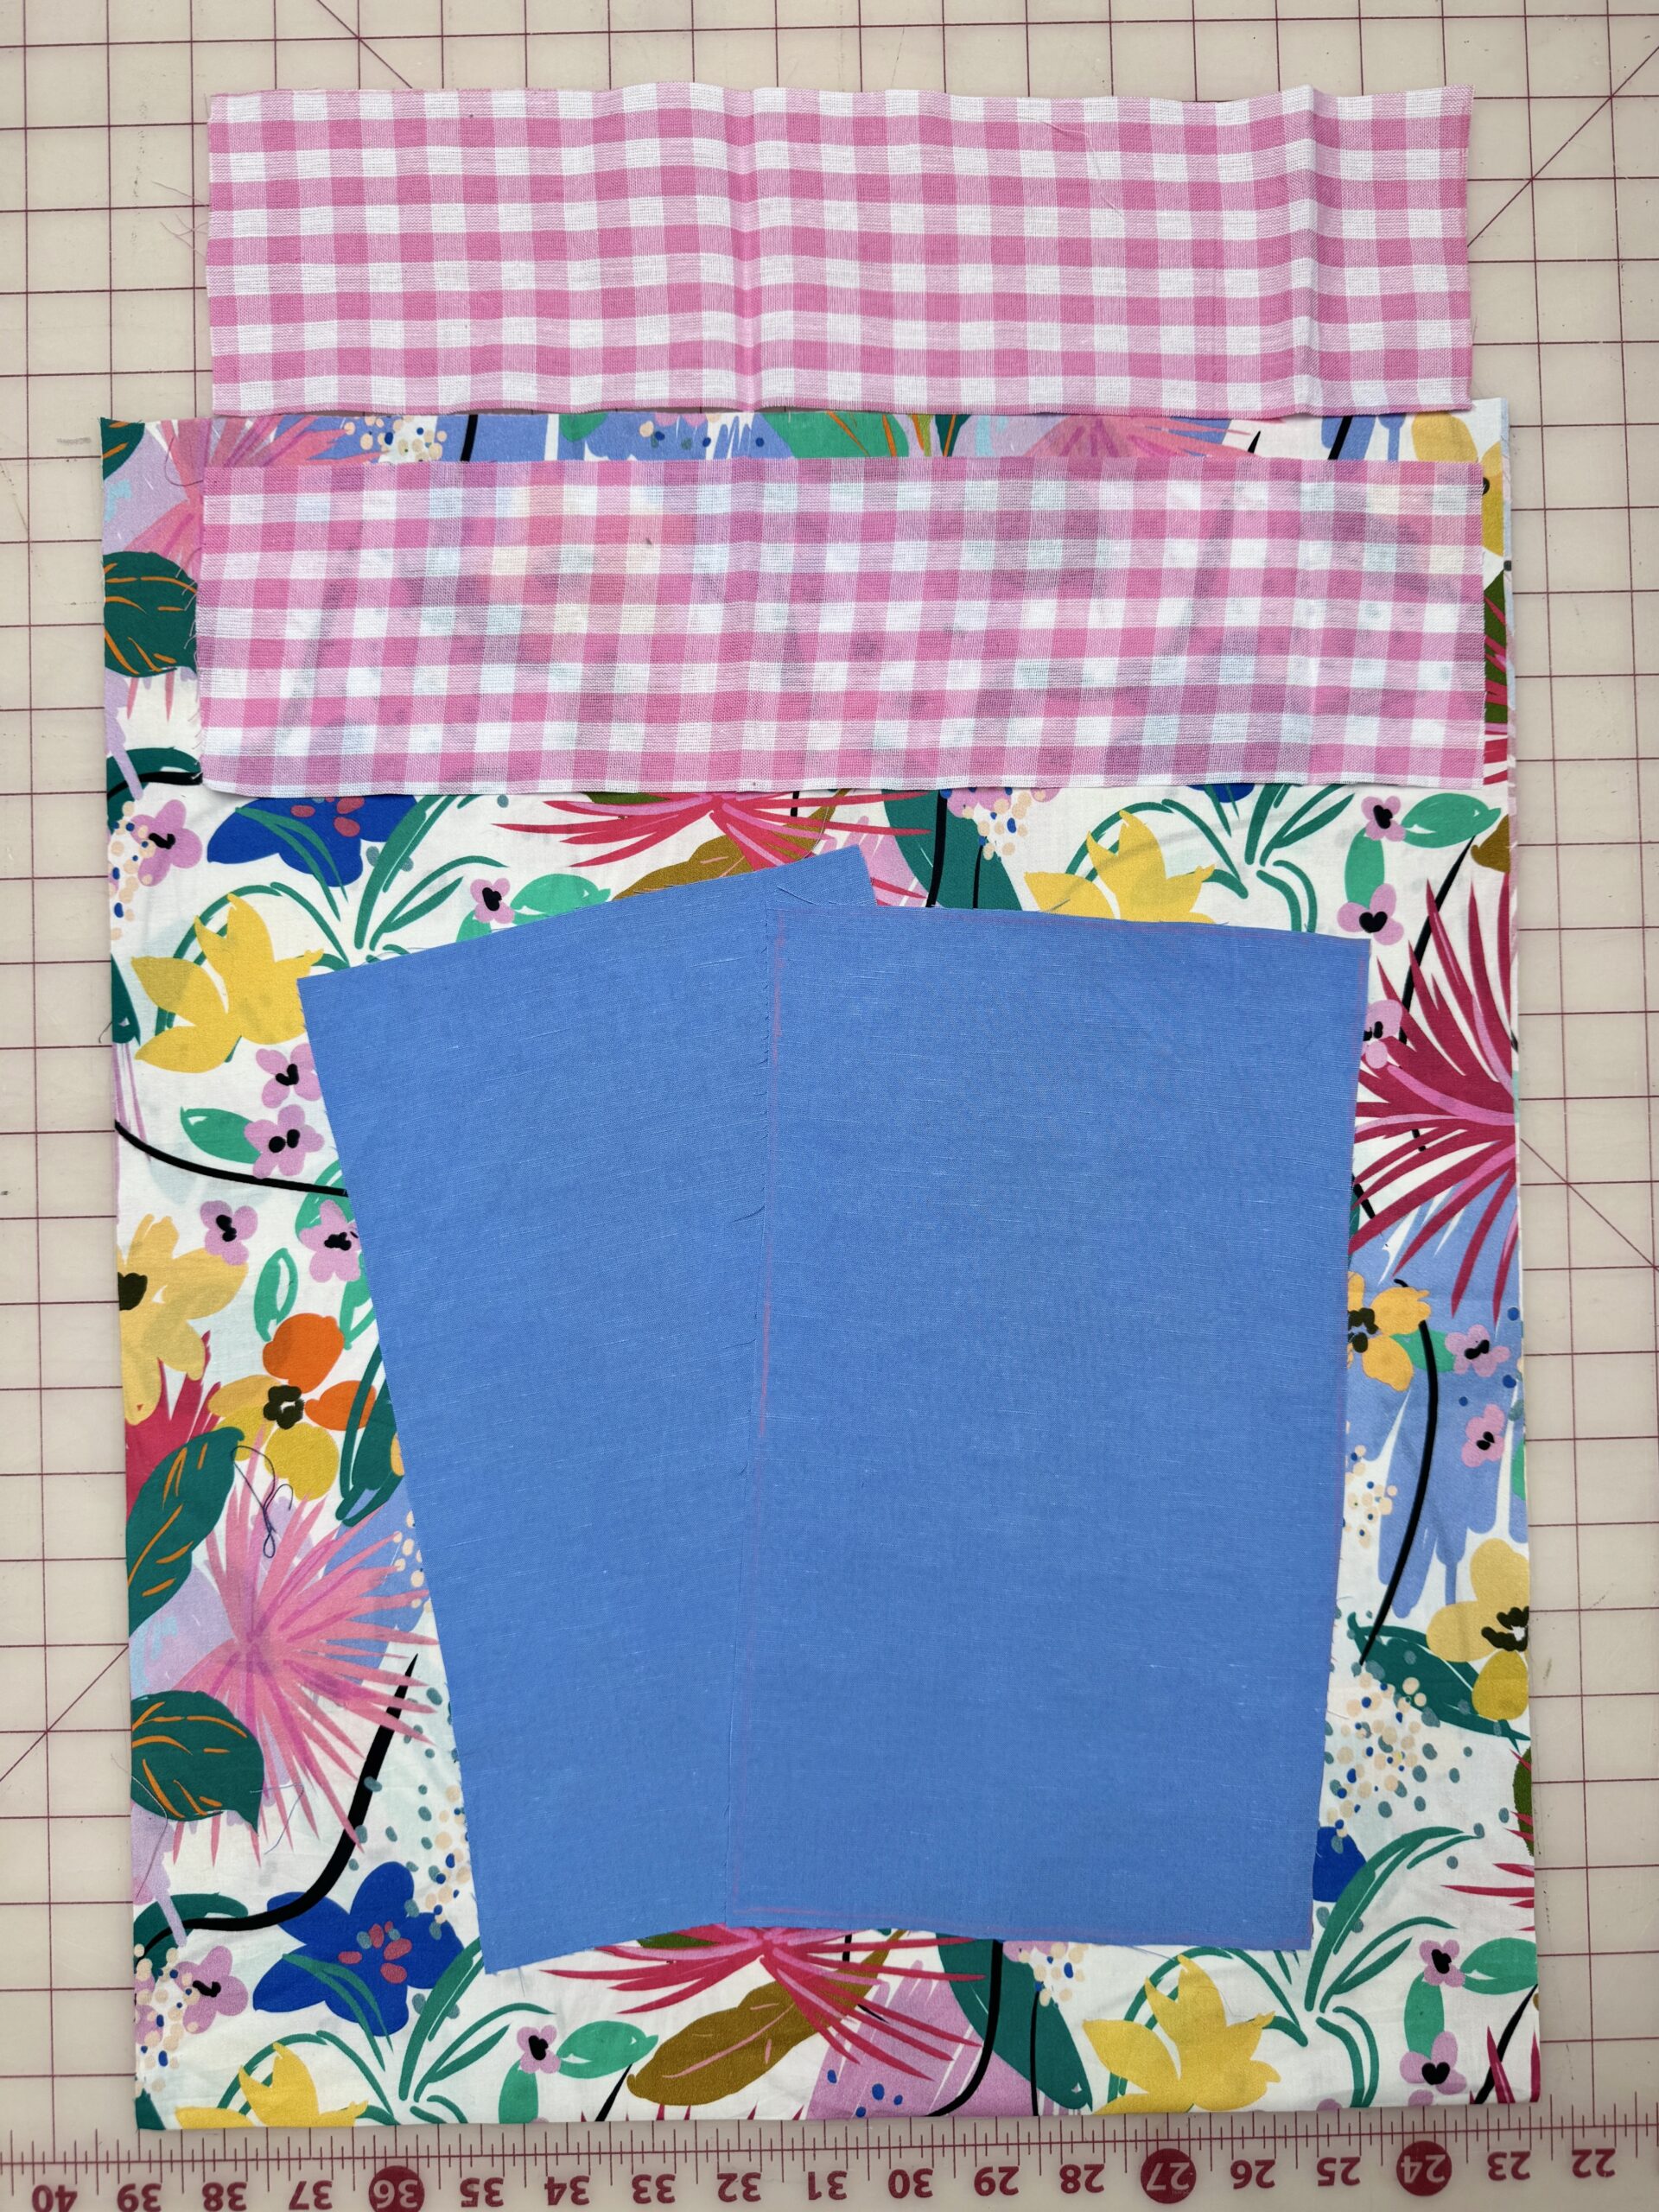
- main fabric: one 16.5″ x 39.4″ (42 cm x 100 cm) rectangle
- pocket fabric: two 6.7″ x 11.8″ (17 cm x 30 cm) rectangles
- handle fabric: two 4″ x 15″ (10 cm x 38 cm) rectangles
Finished Measurements:
- folded:
- width: 5.9″ (15 cm)
- weight: 4.1″ (10.5 cm)
- unfolded:
- width: 15″ (38 cm)
- height: 15.7″ (40 cm)
- bottom depth: 3.9″ (10 cm)
FOLDABLE SHOPPING BAG TUTORIAL:
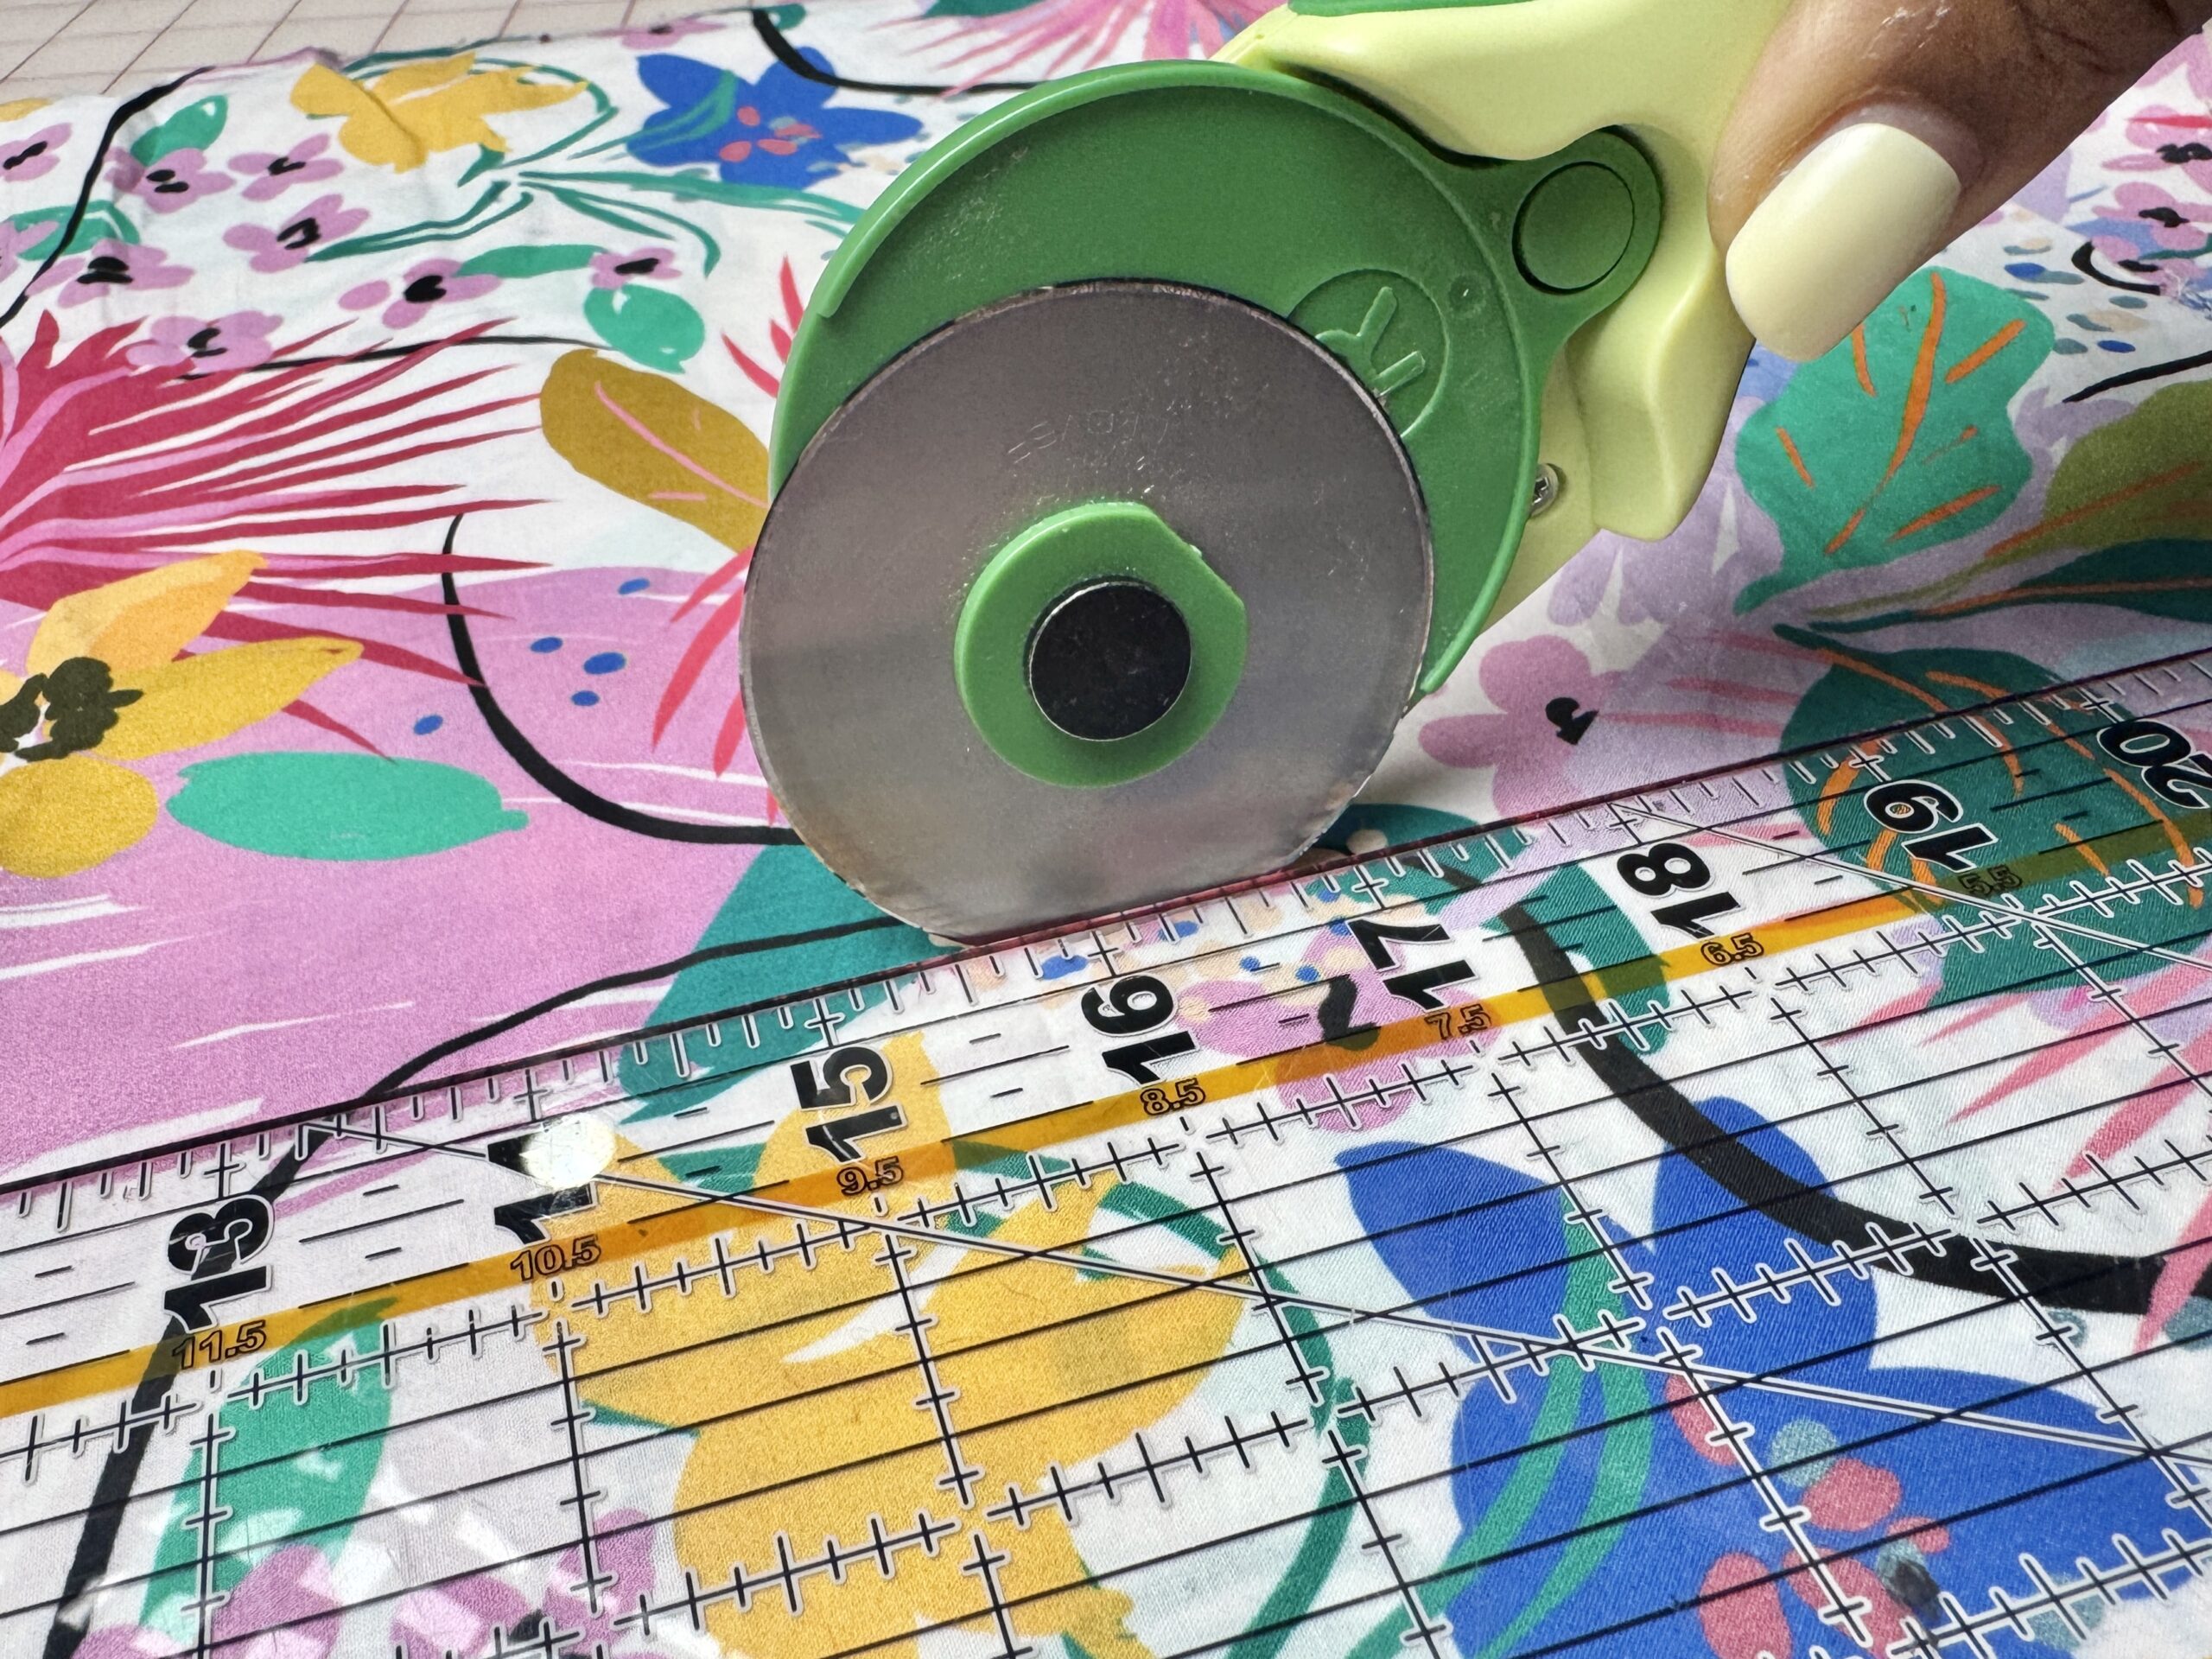
Step 1: Prepare the Fabric
- Measure the fabric and cut the following pieces using the Clover Rotary Cutter (60 mm):
- Main Fabric: One 16.5″ x 39.4″ (42 cm x 100 cm) rectangle
- Pocket Fabric: Two 6.7″ x 11.8″ (17 cm x 30 cm) rectangles
- Handle Fabric: Two 4″ x 15″ (10 cm x 38 cm) rectangles
Step 2: Make the Handles
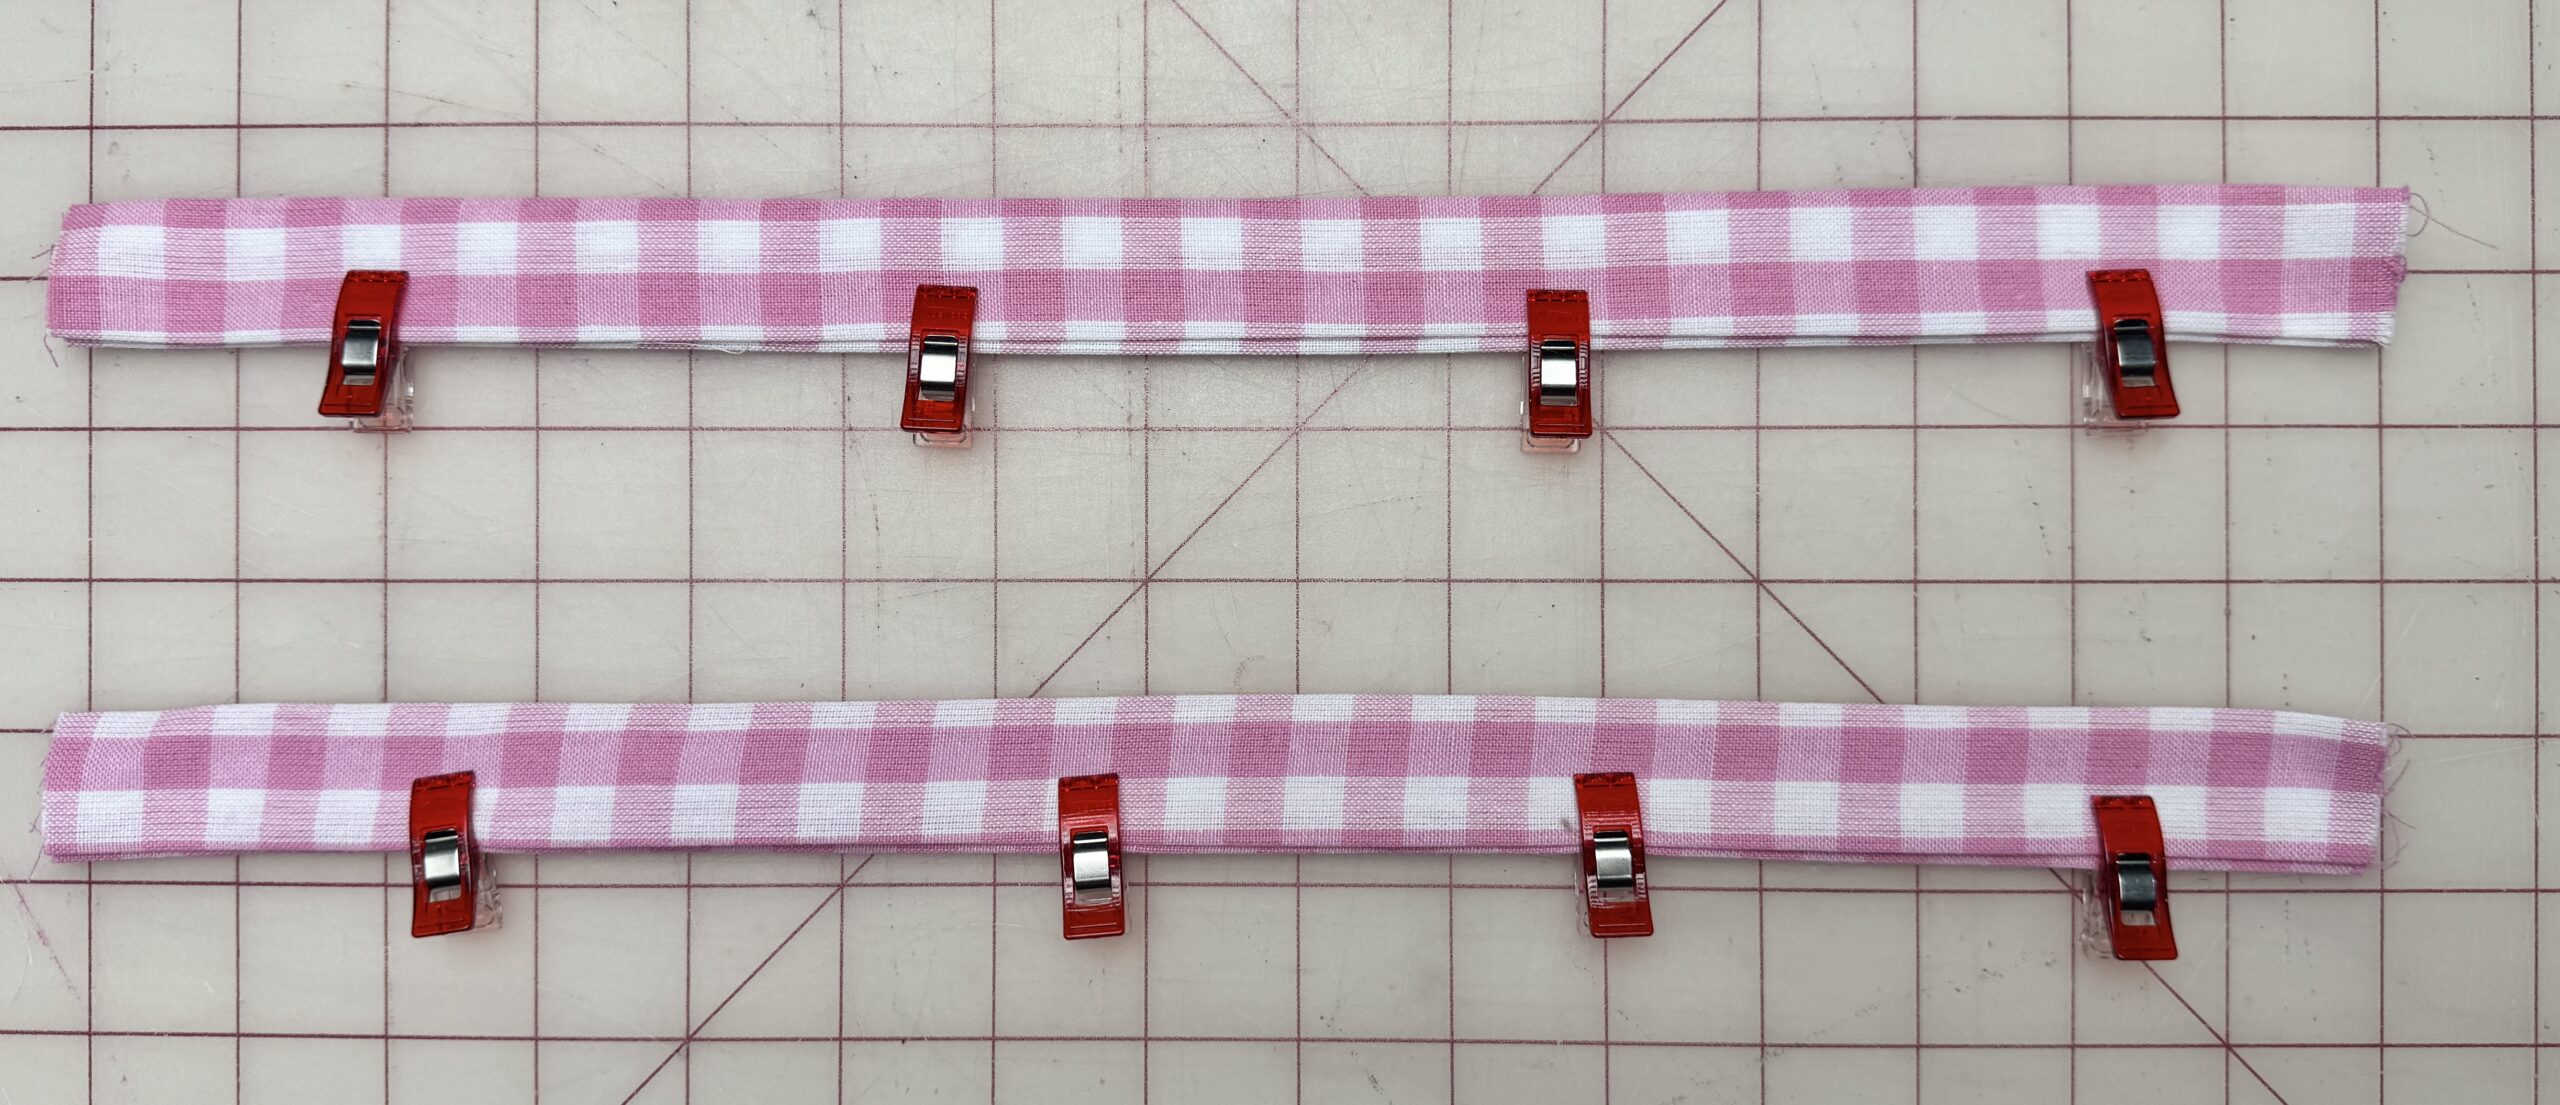
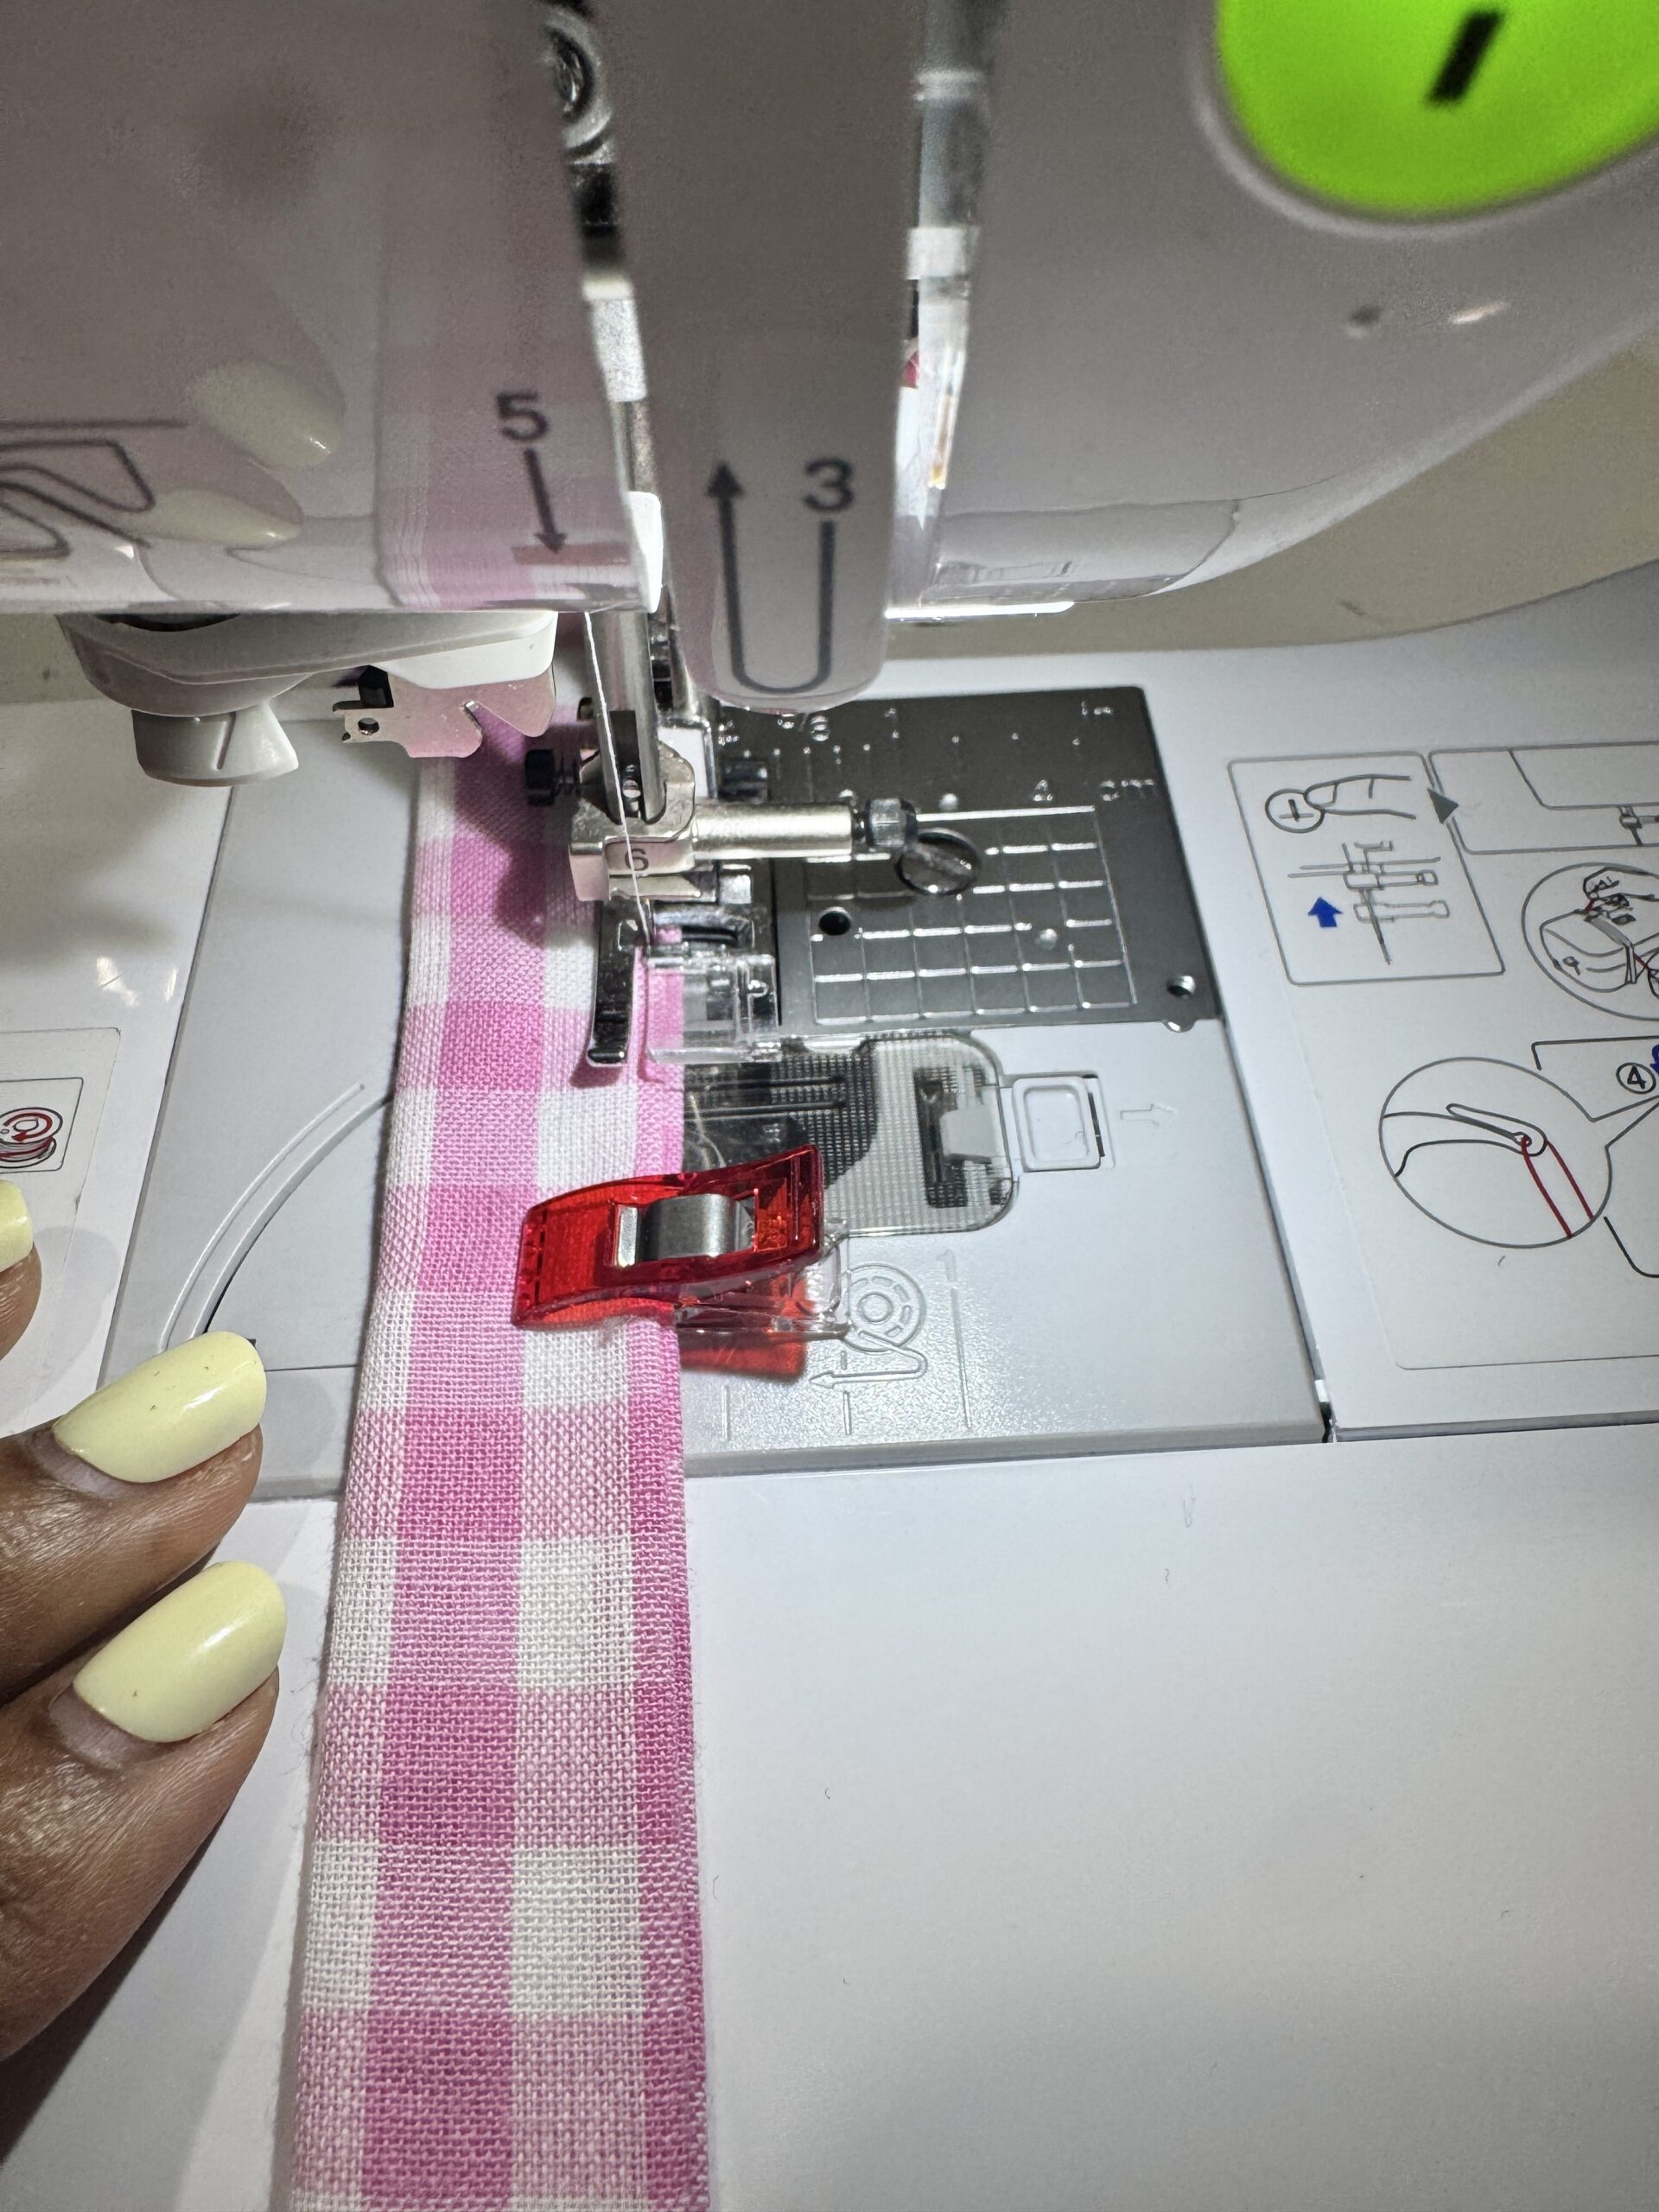
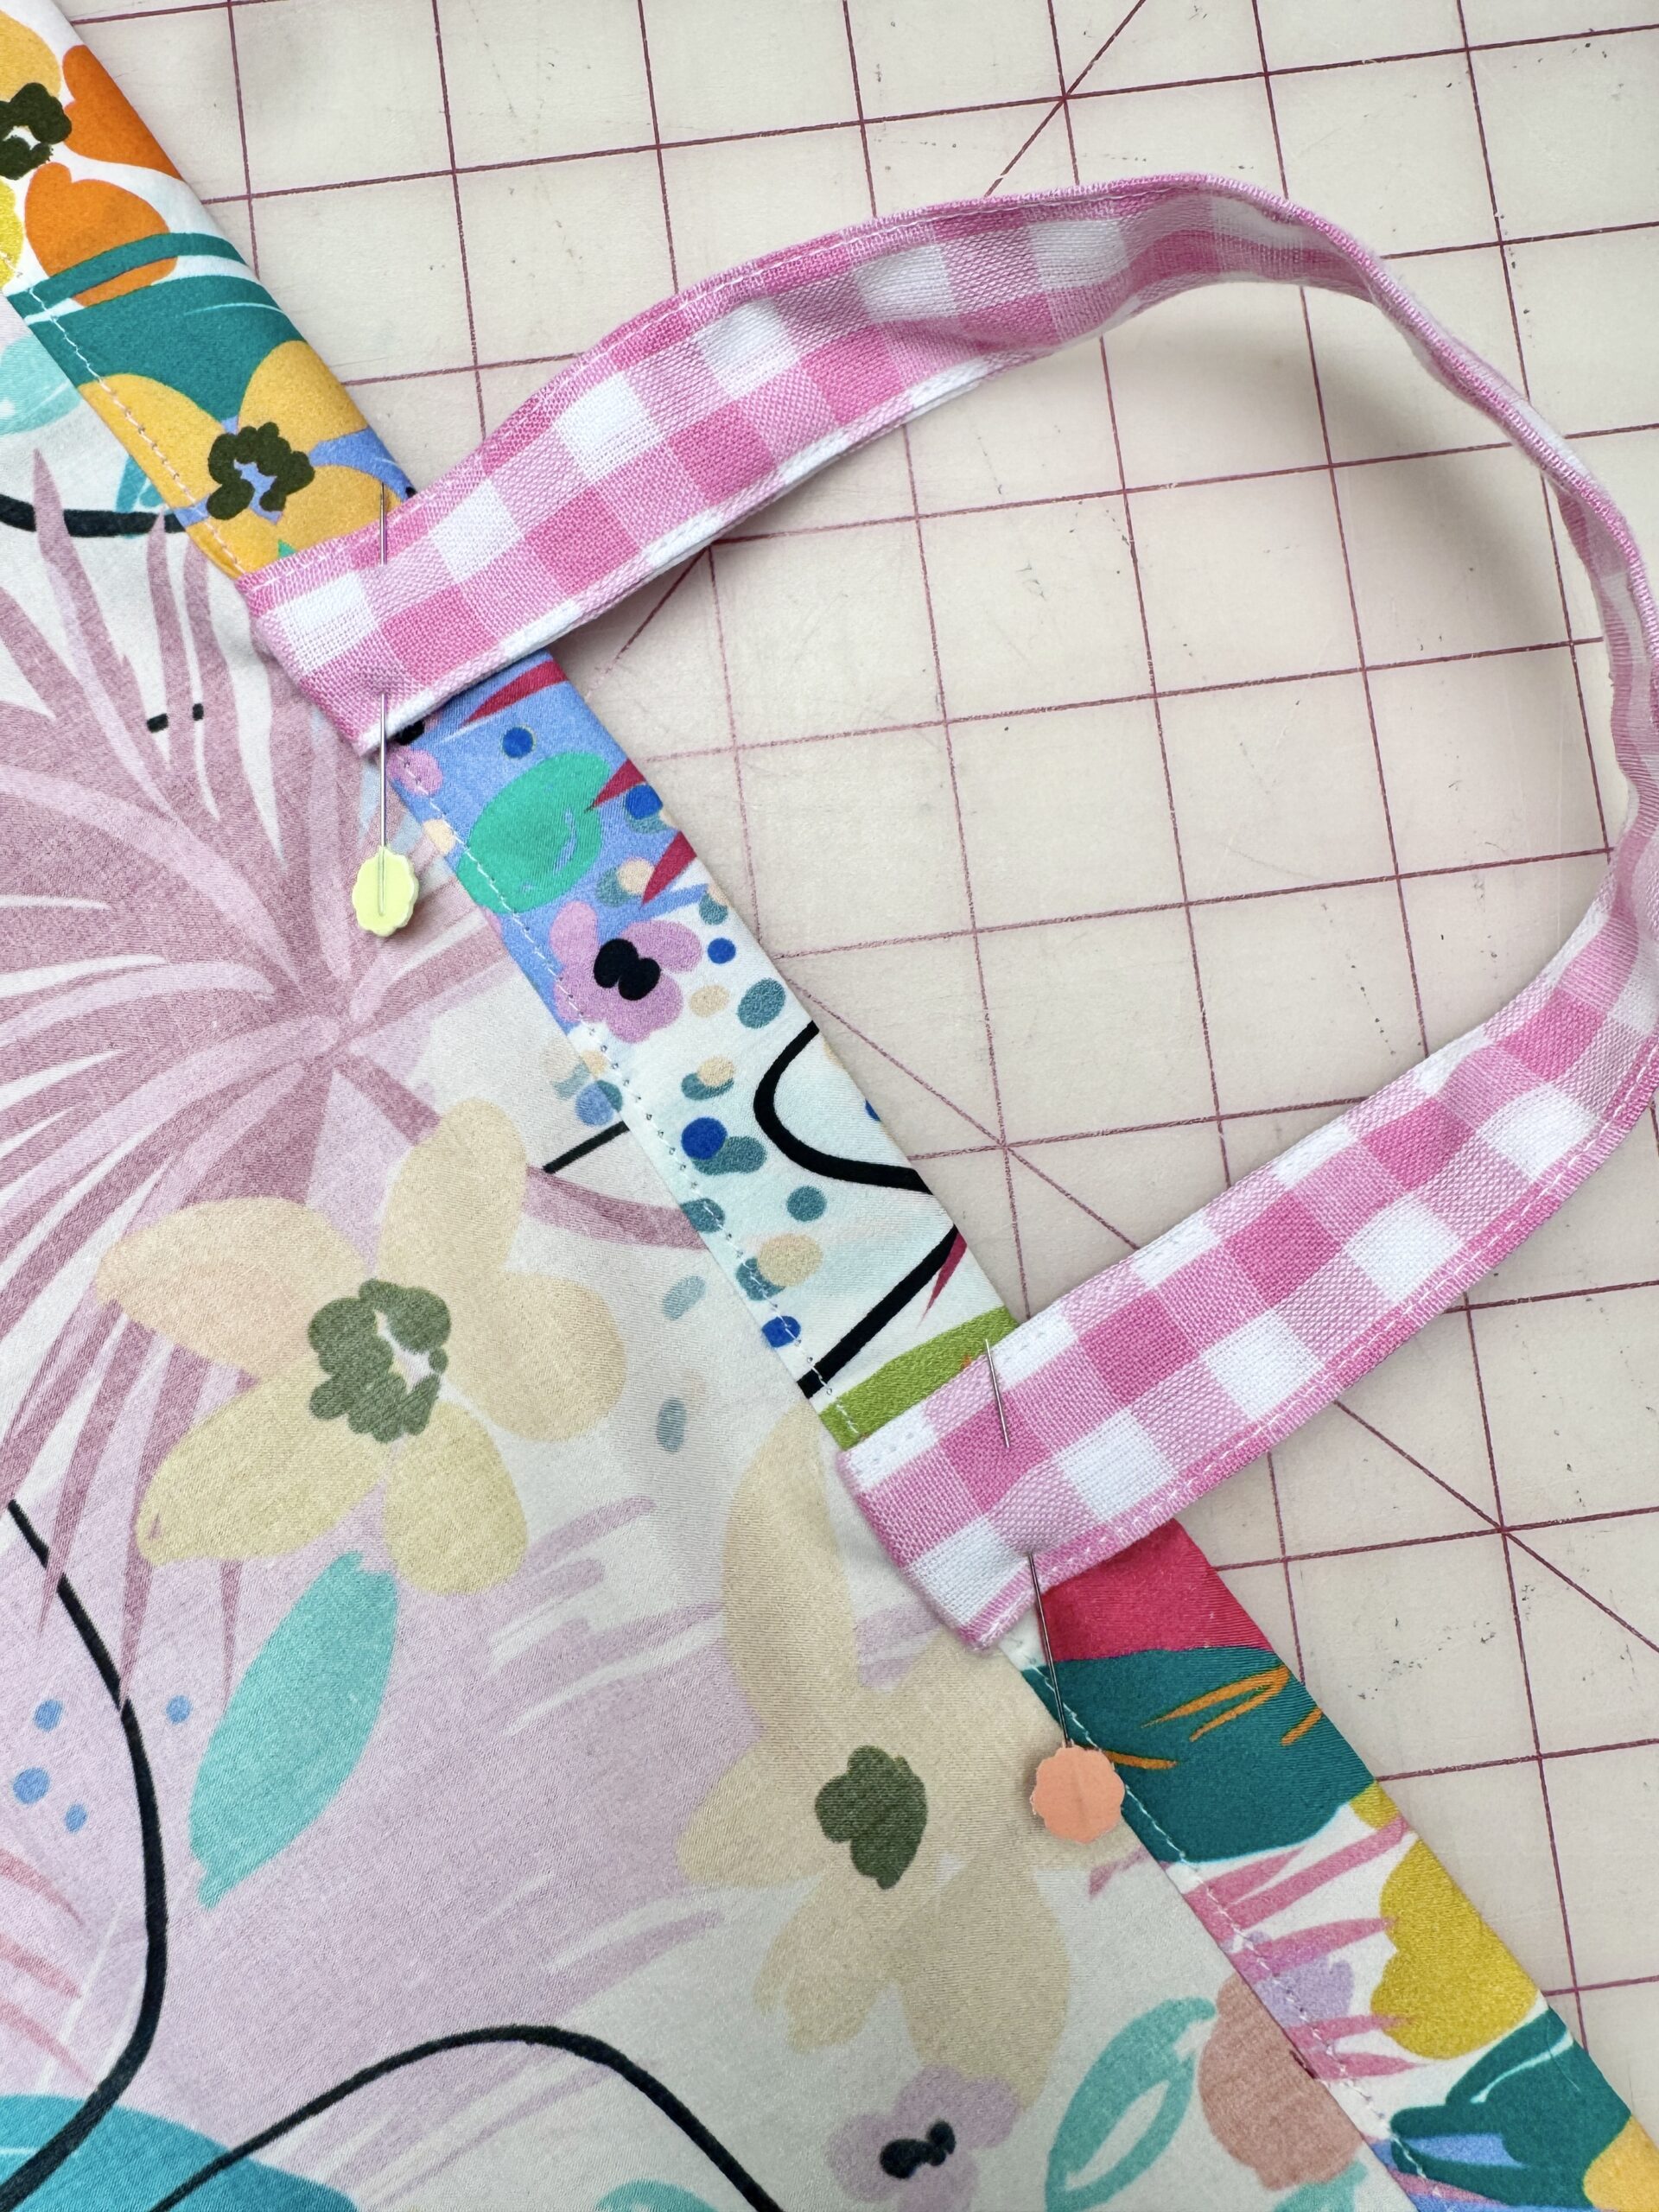
- Fold each handle piece in half lengthwise and press. Open the fabric and fold each long raw edge toward the center crease. Press well. Fold the handle in half again to enclose the raw edges, similar to making double-fold bias tape. Topstitch or edgestitch along both long edges of each handle.
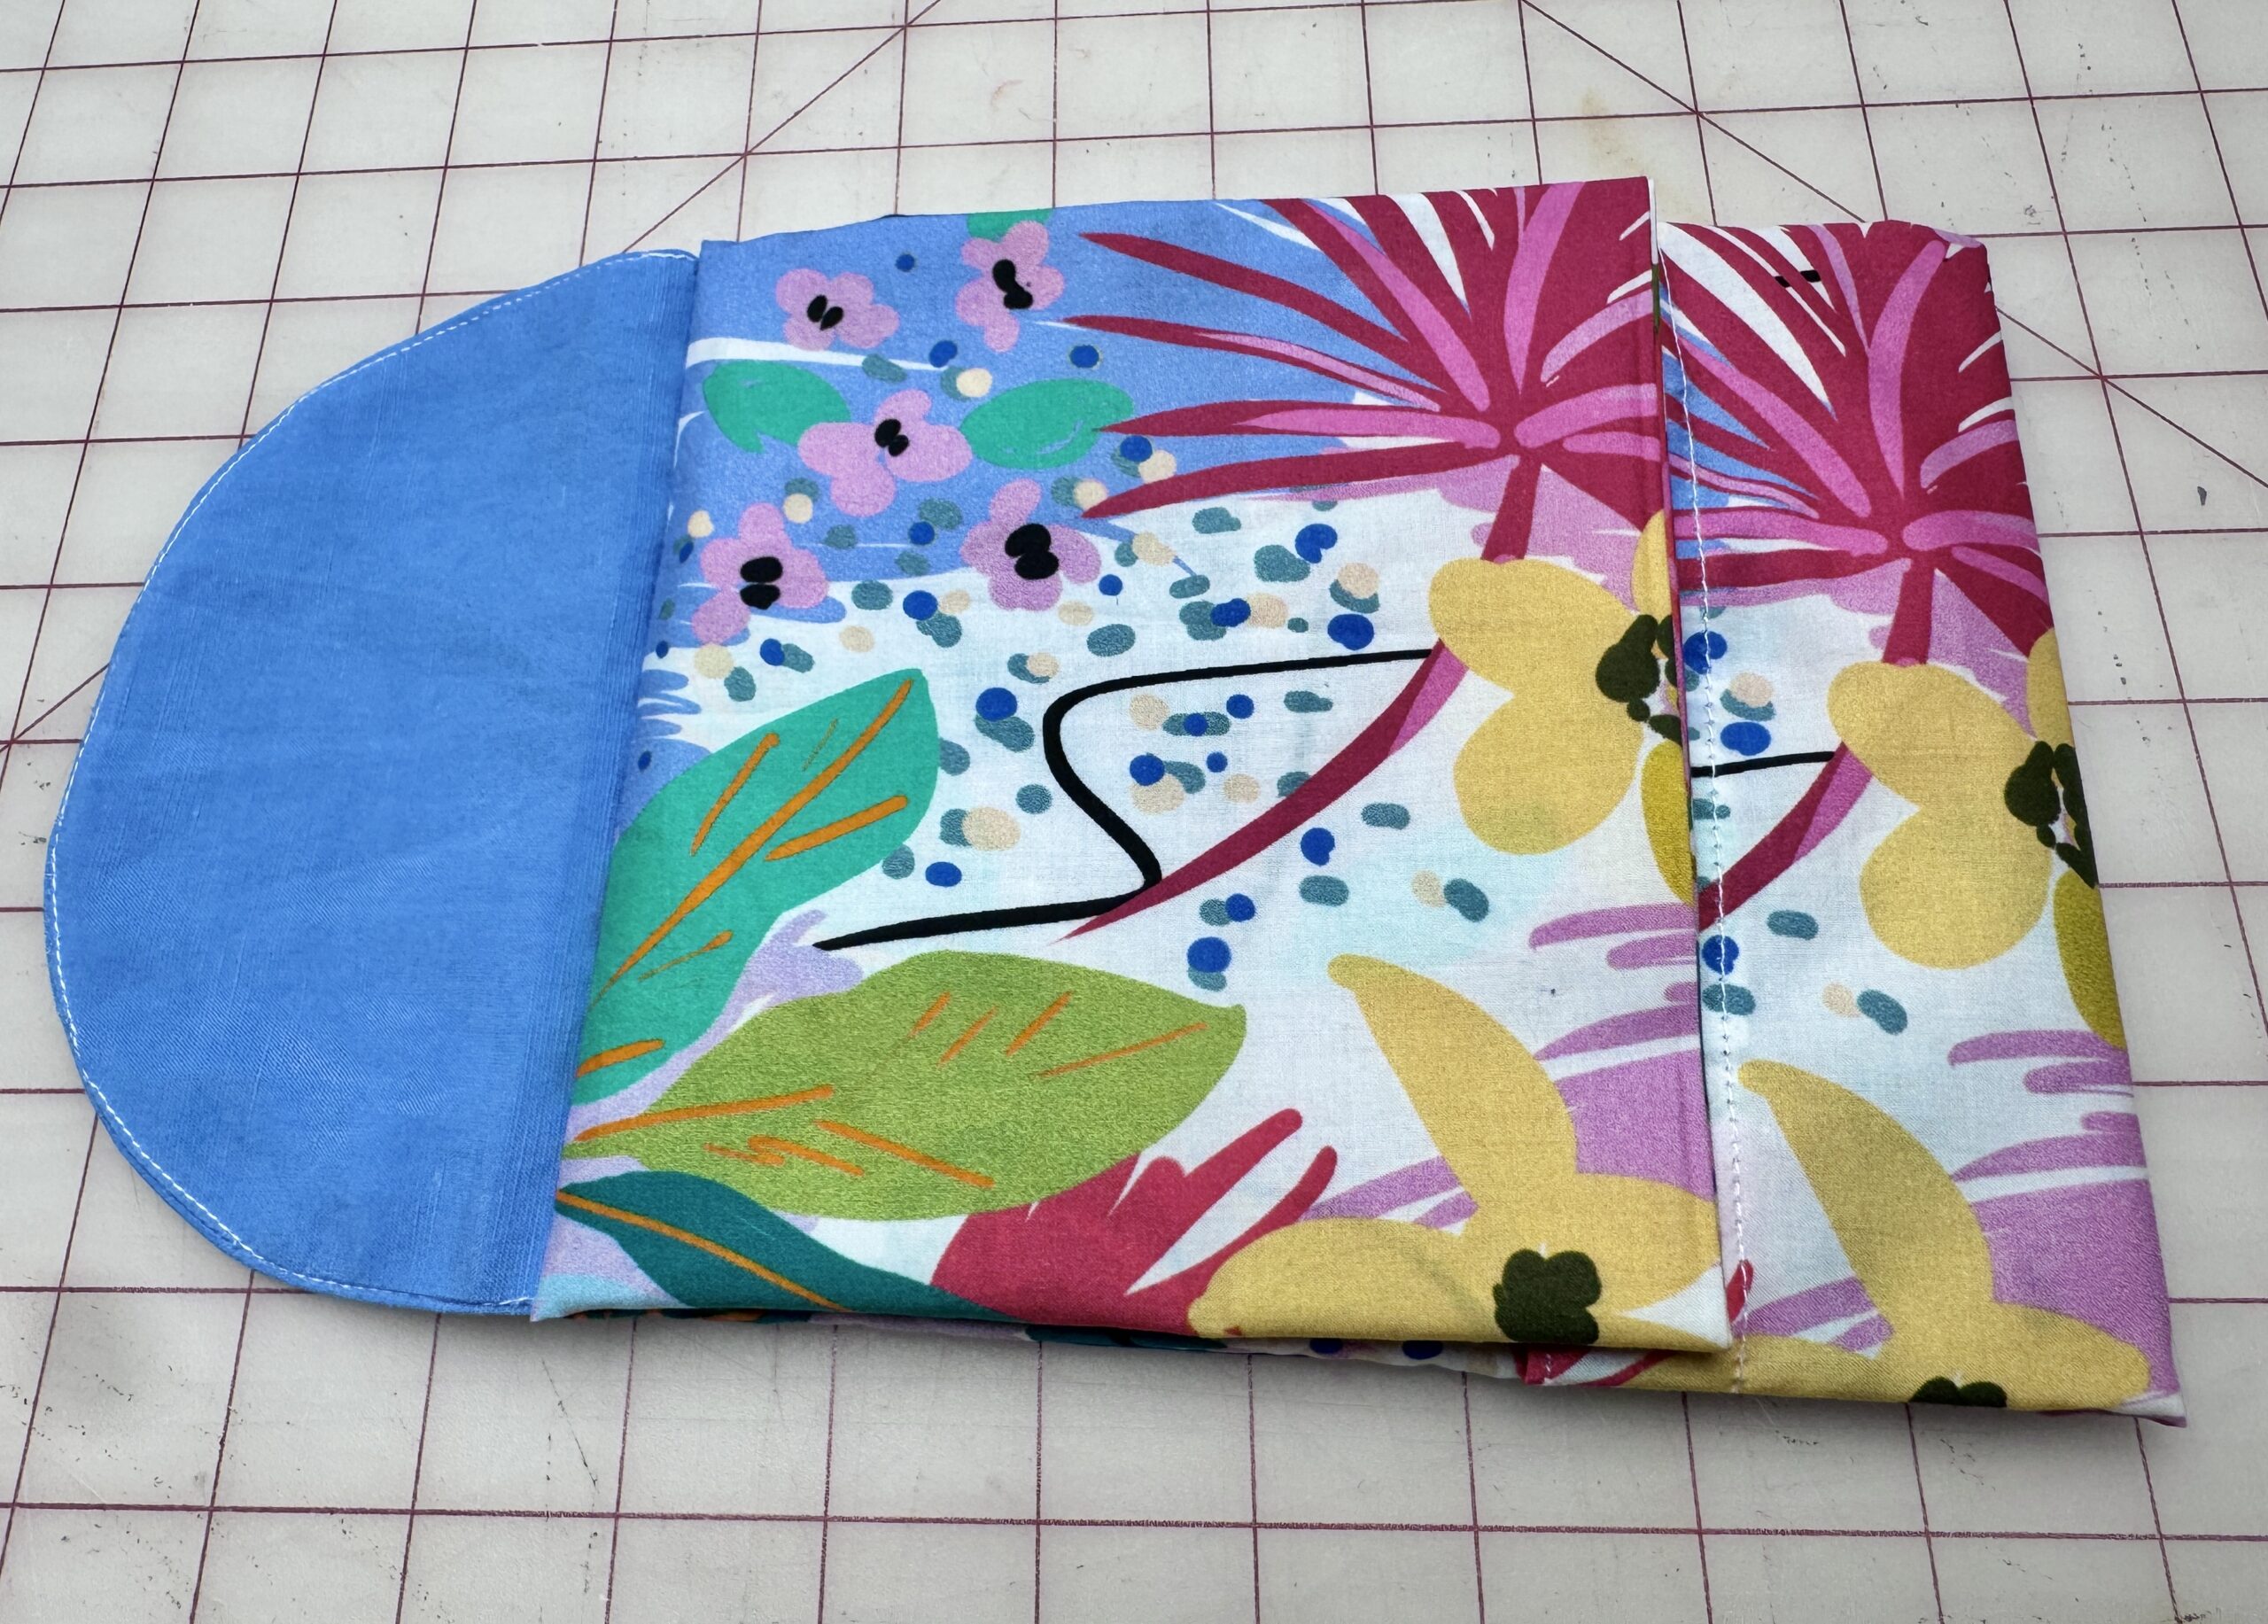
- Fold each short end of the main fabric toward the wrong side by 1″ (2.5 cm) and press. Fold the edge over by another 1″ (2.5 cm) and press again. Hold in place using Clover Wonder Clips.
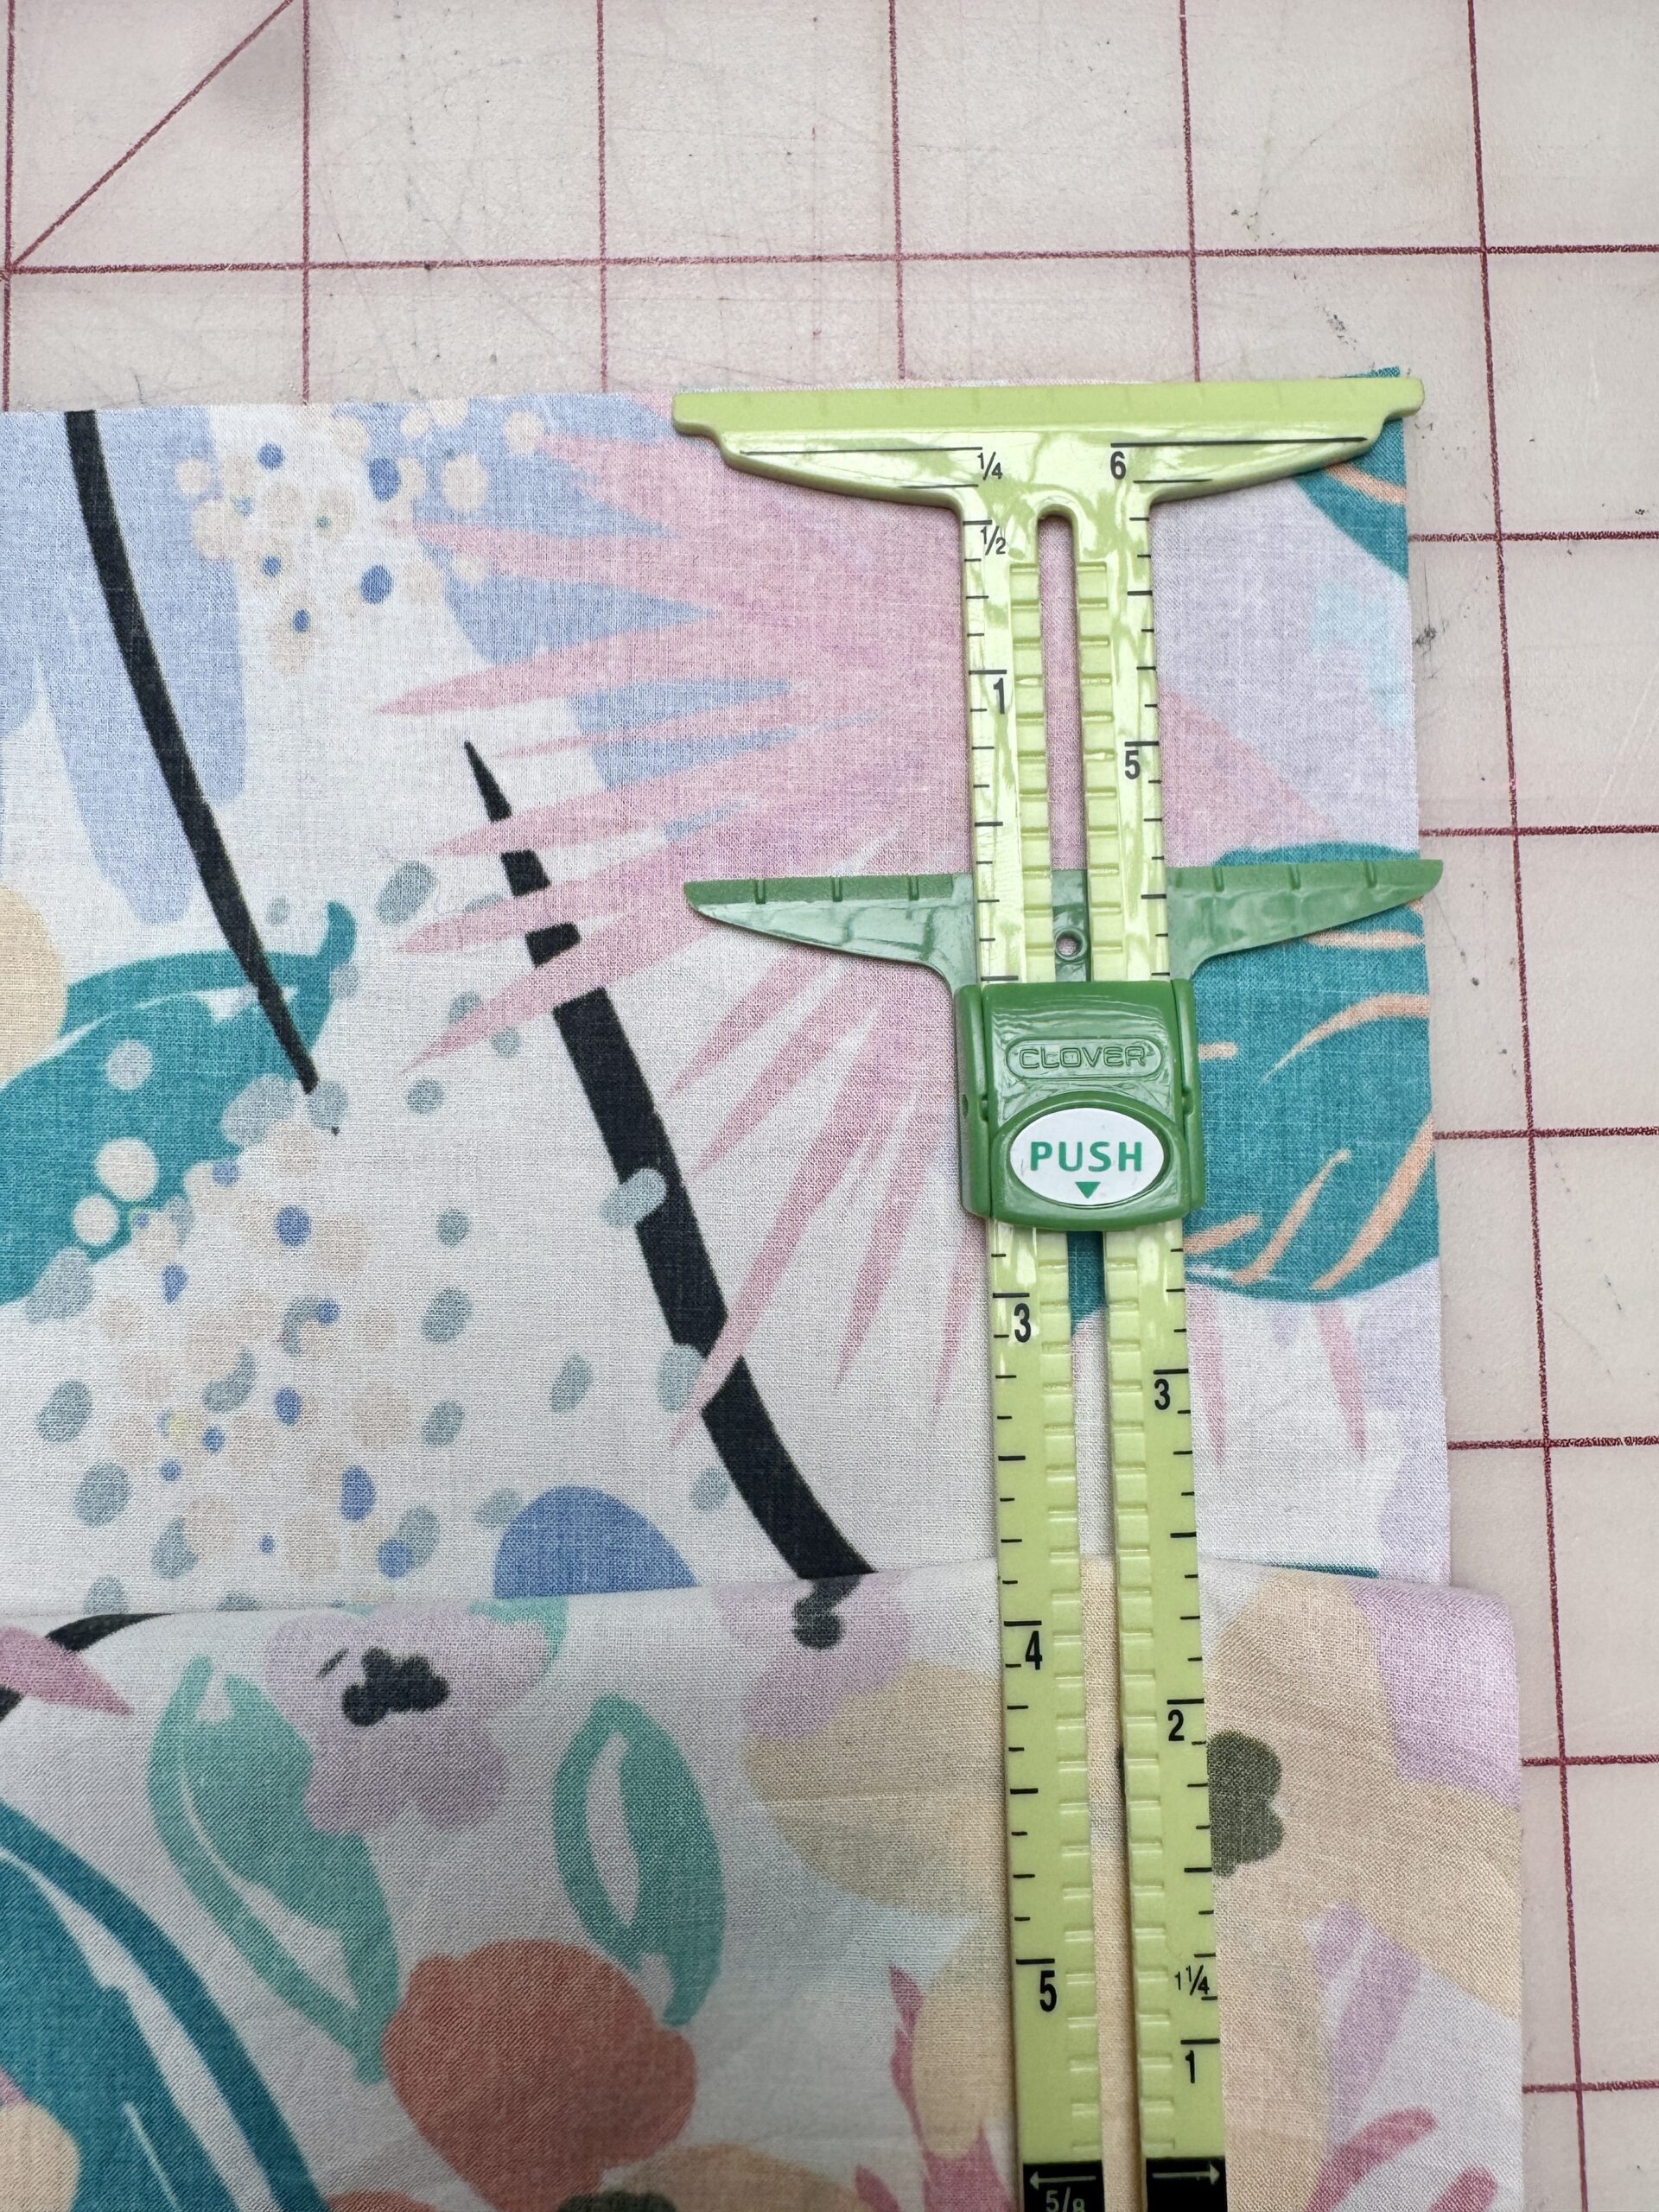
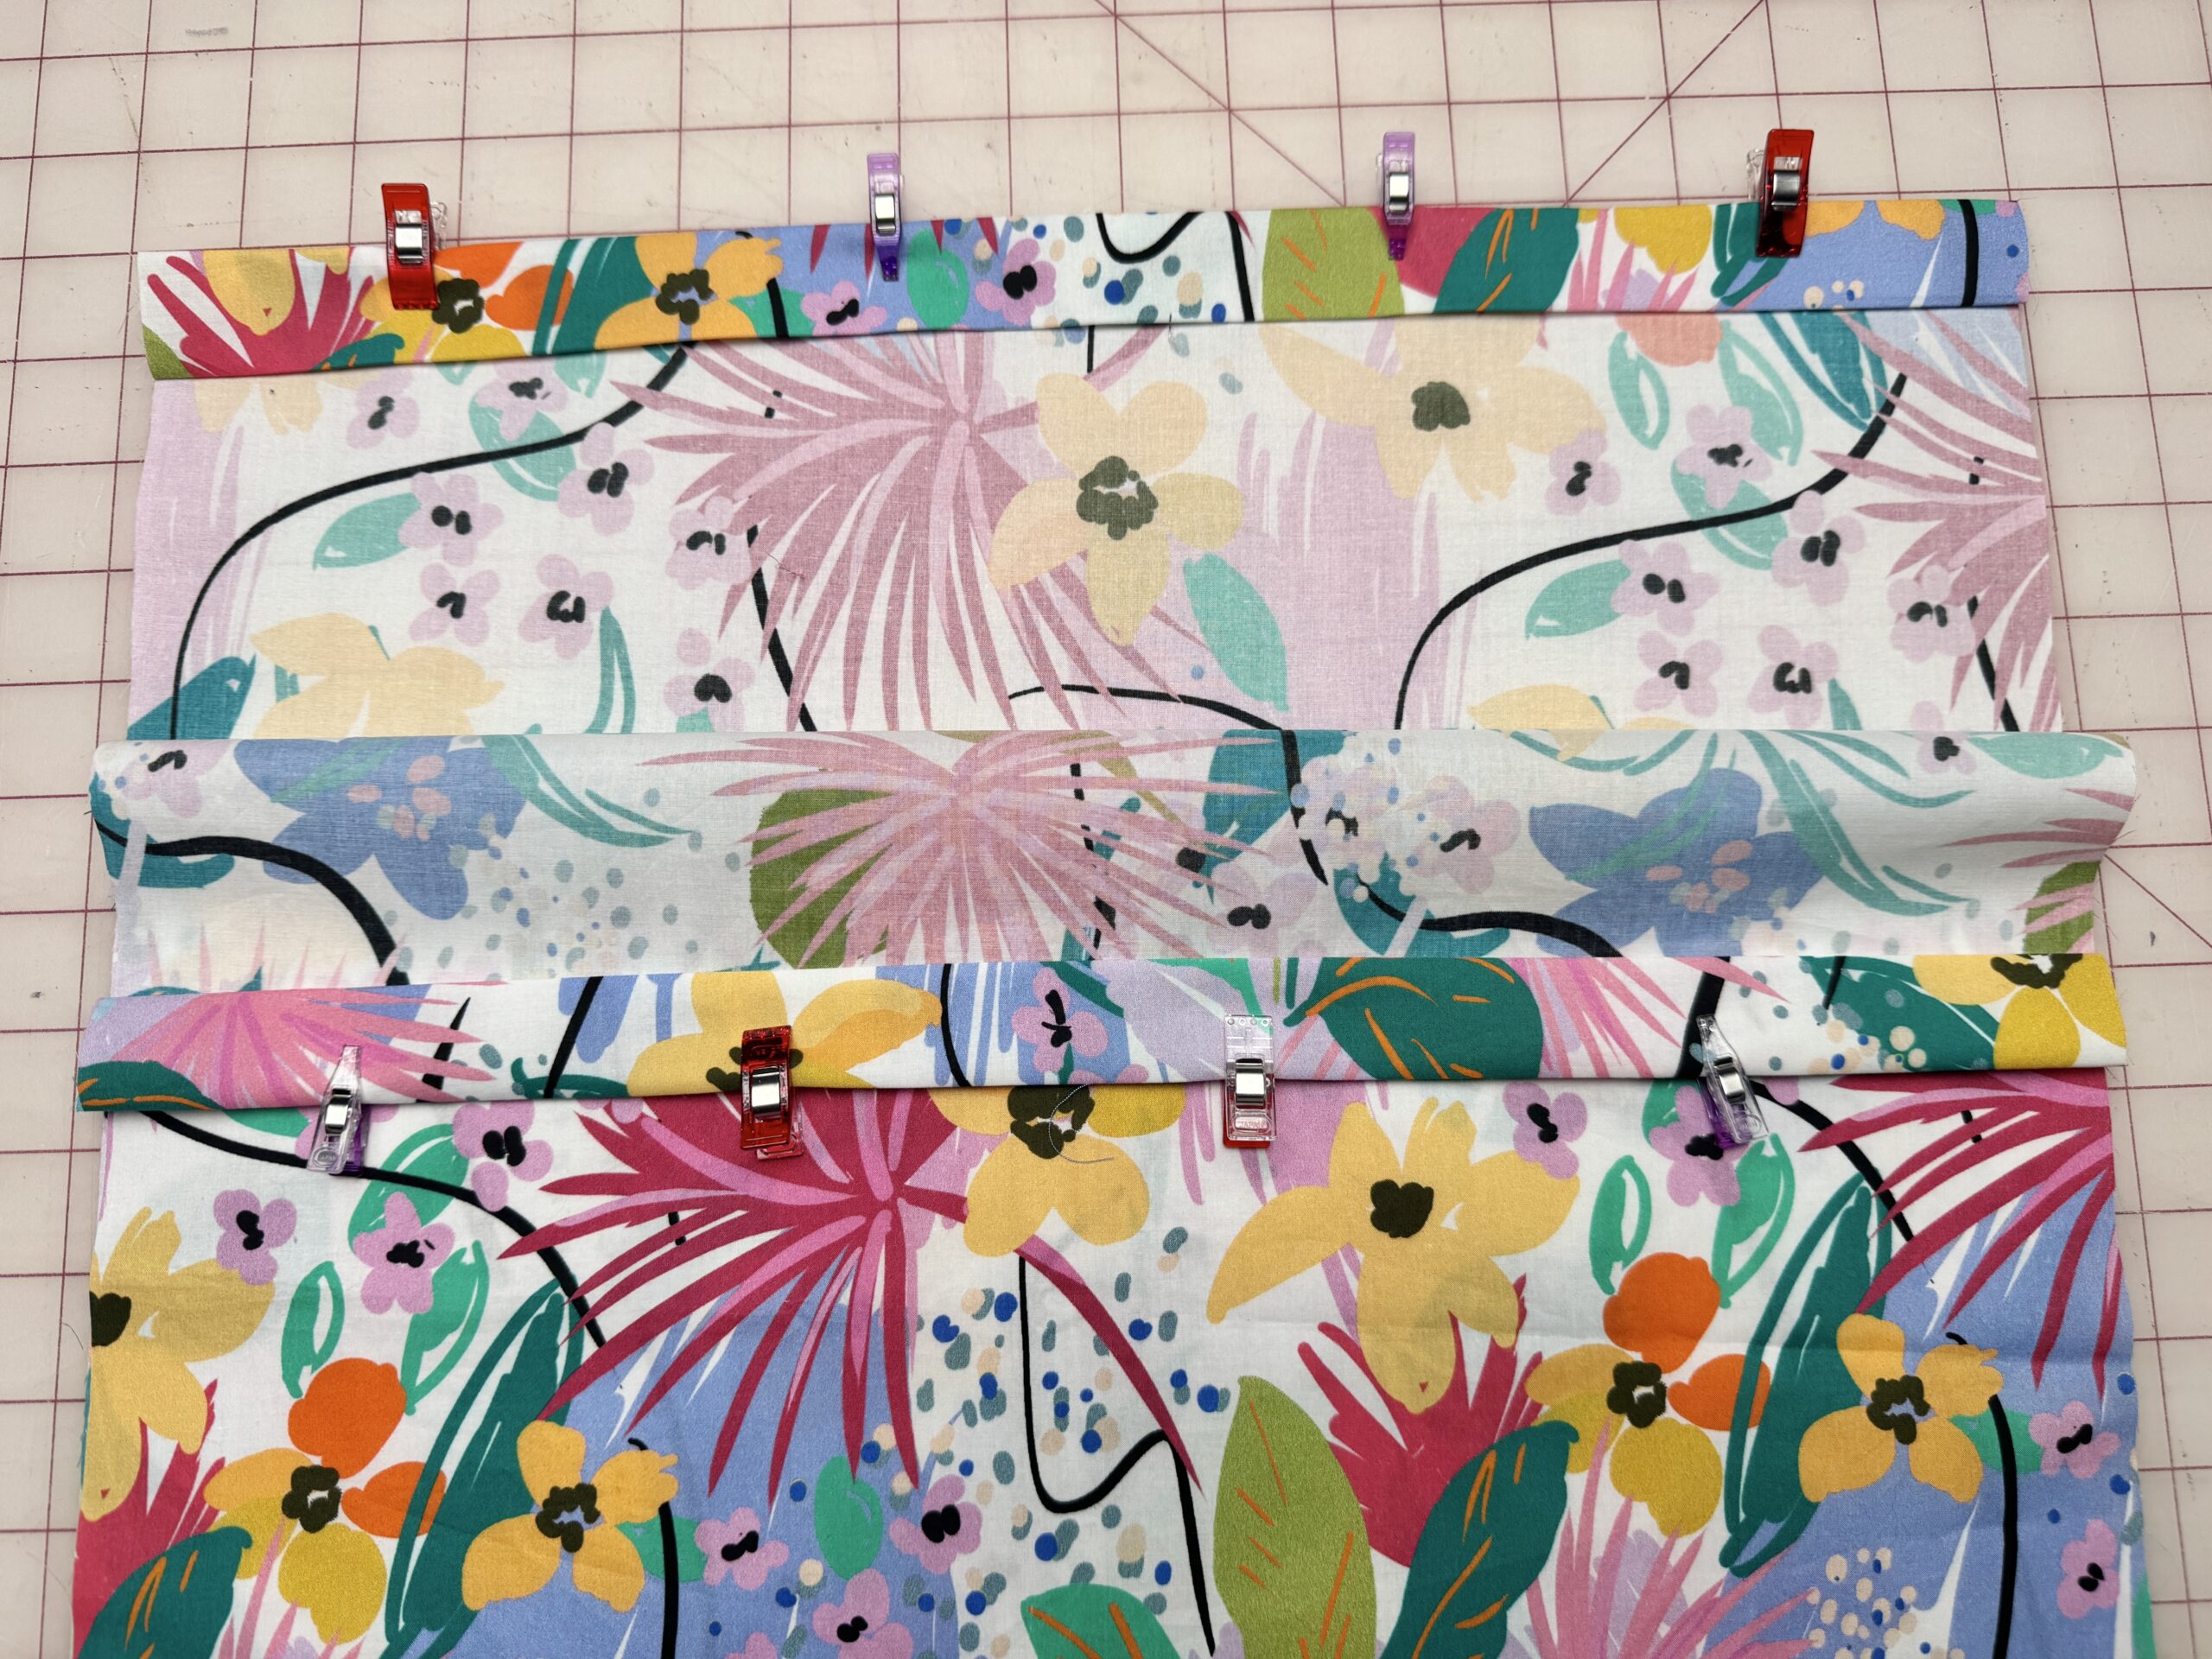
- With wrong sides together, fold the main fabric in half lengthwise and press to create a center crease. Open the fabric, then locate the center crease and mark 2″ (5 cm) on either side of the center.
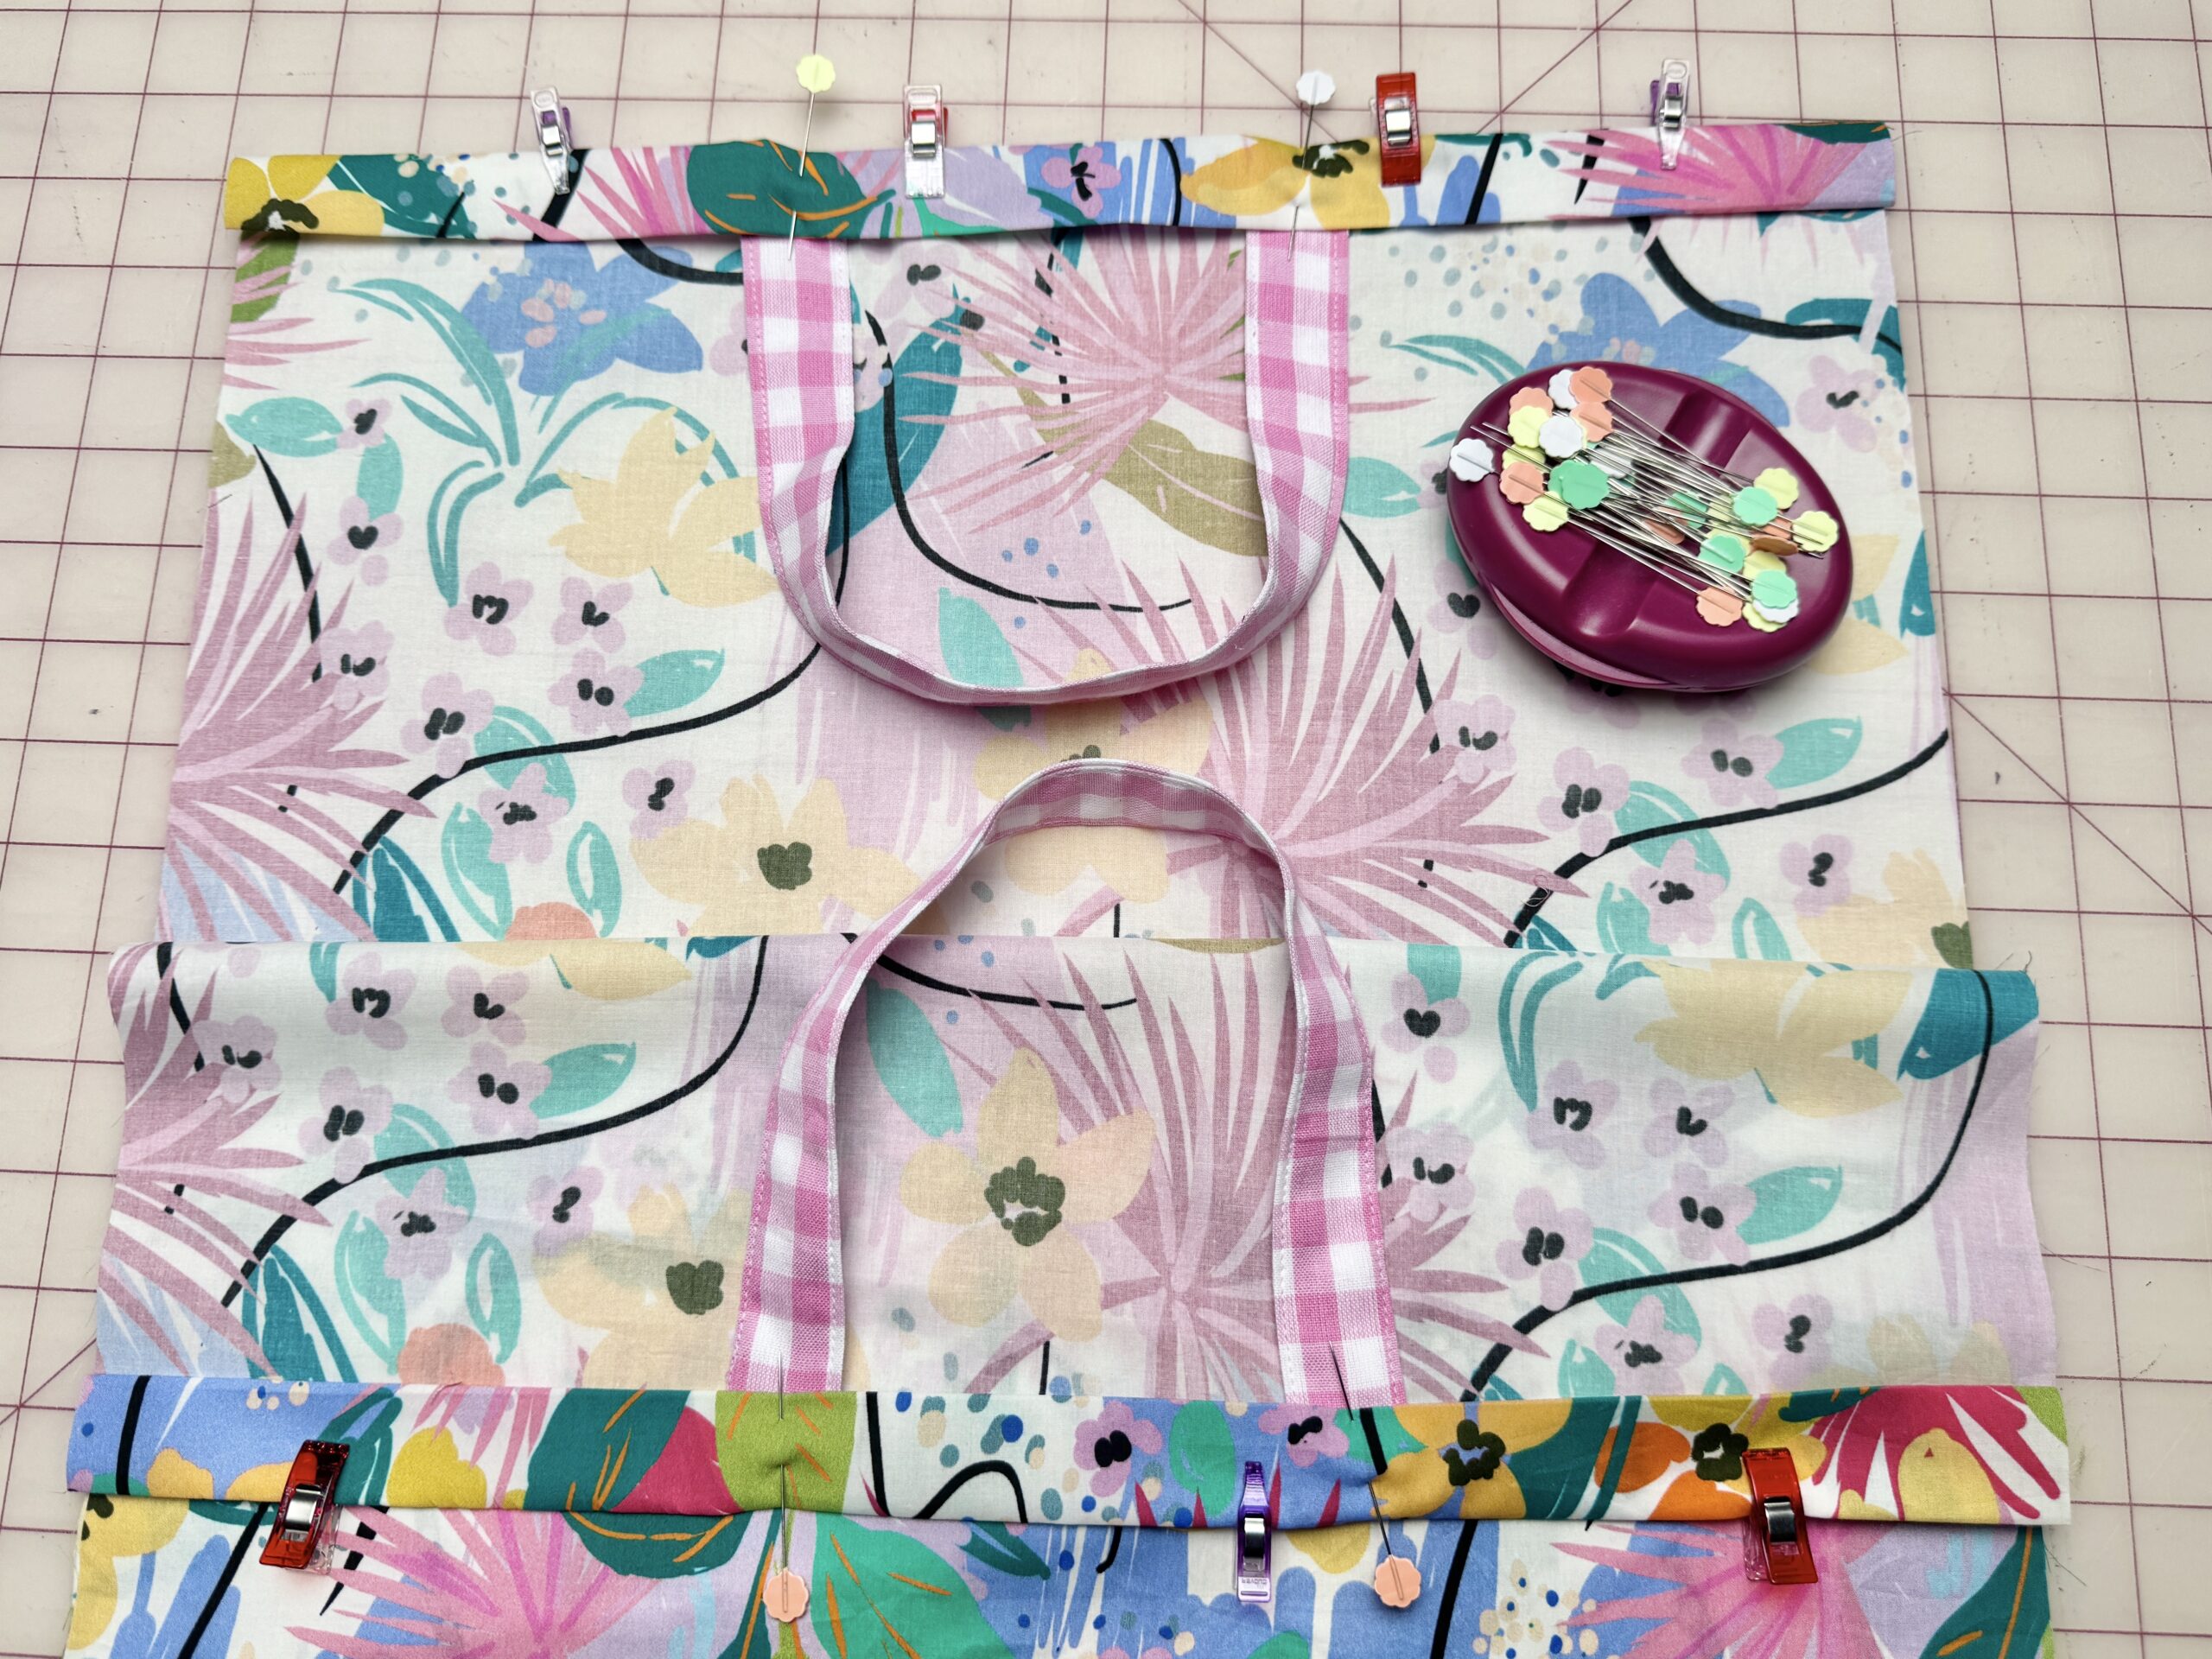
- Position the raw ends of the handles at the outer markings. Insert the handle ends into the folded hems. Pin in place using Clover Flower Head Pins. Repeat for the opposite side of the bag.
- Topstitch across each folded hem, sewing from one side to the other to secure the handles in place. Edgestitch along the top edge of the bag where the handles are attached.
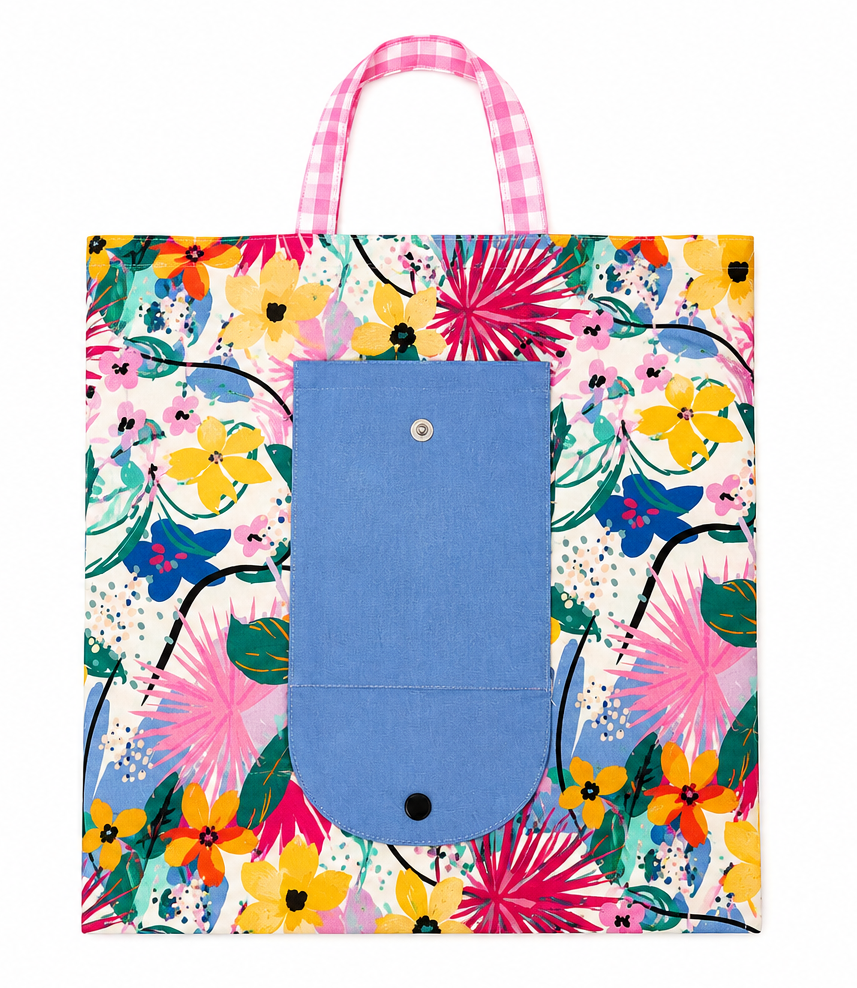
Step 3: Create the Pocket
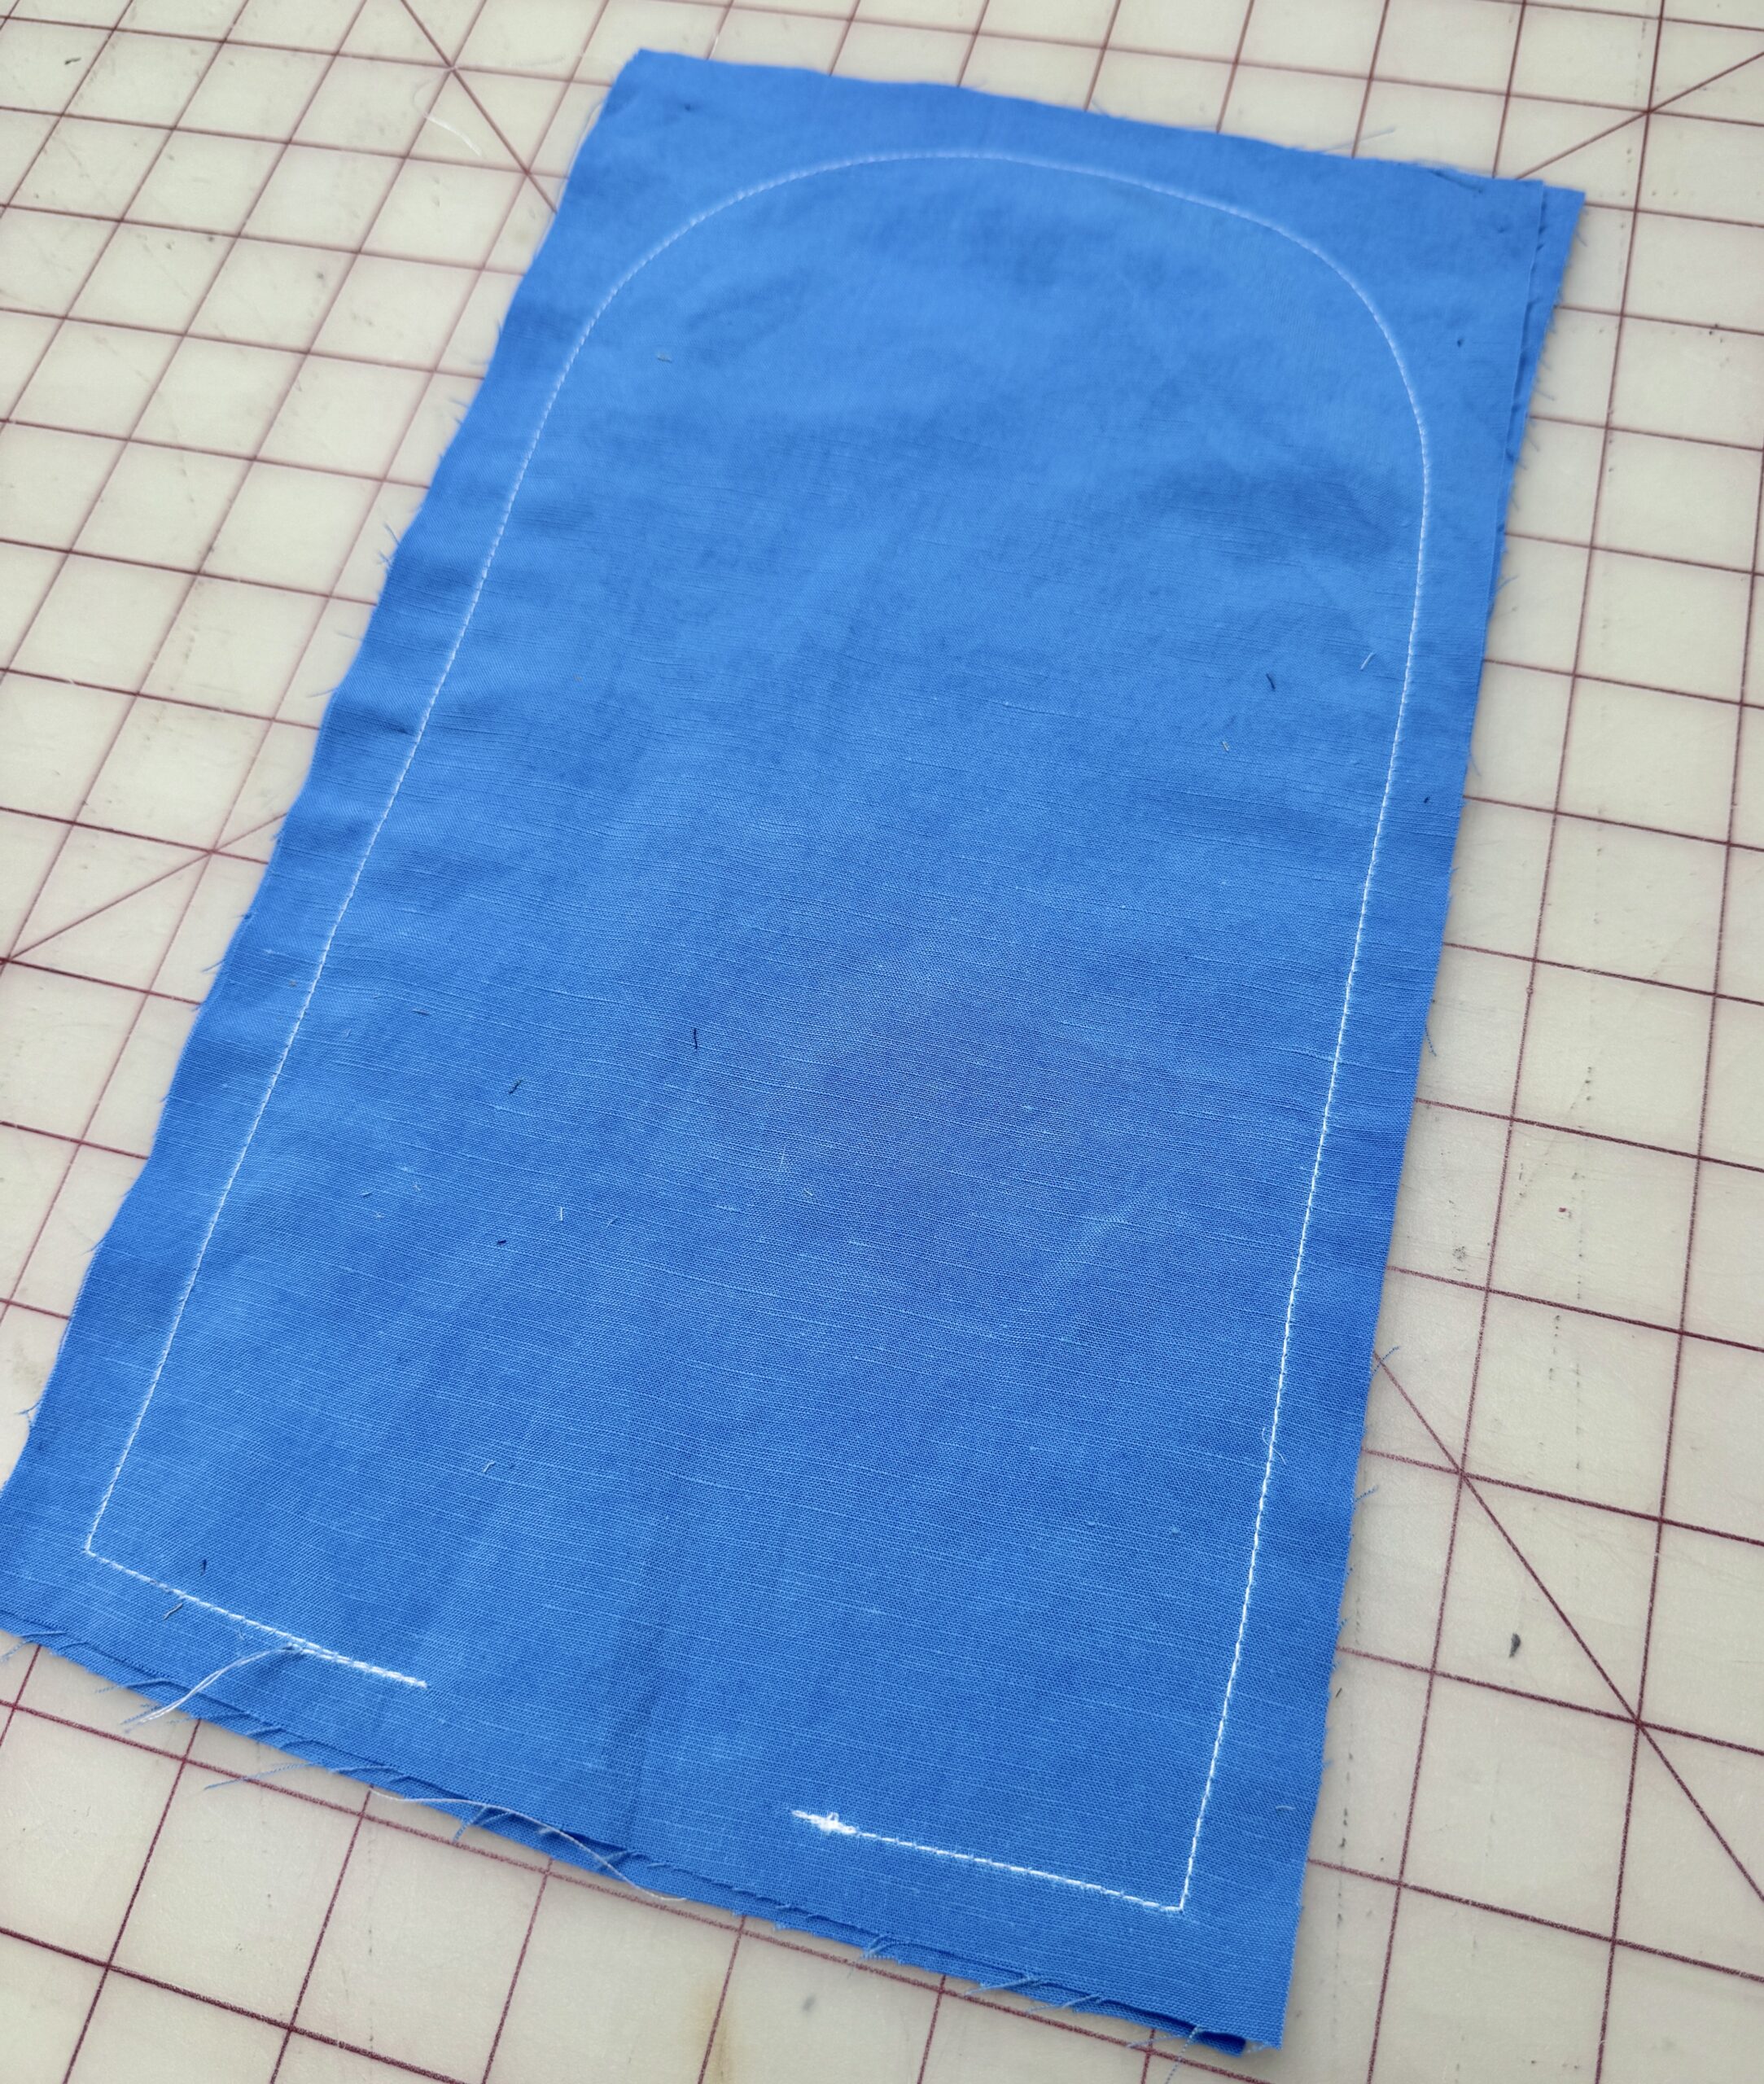
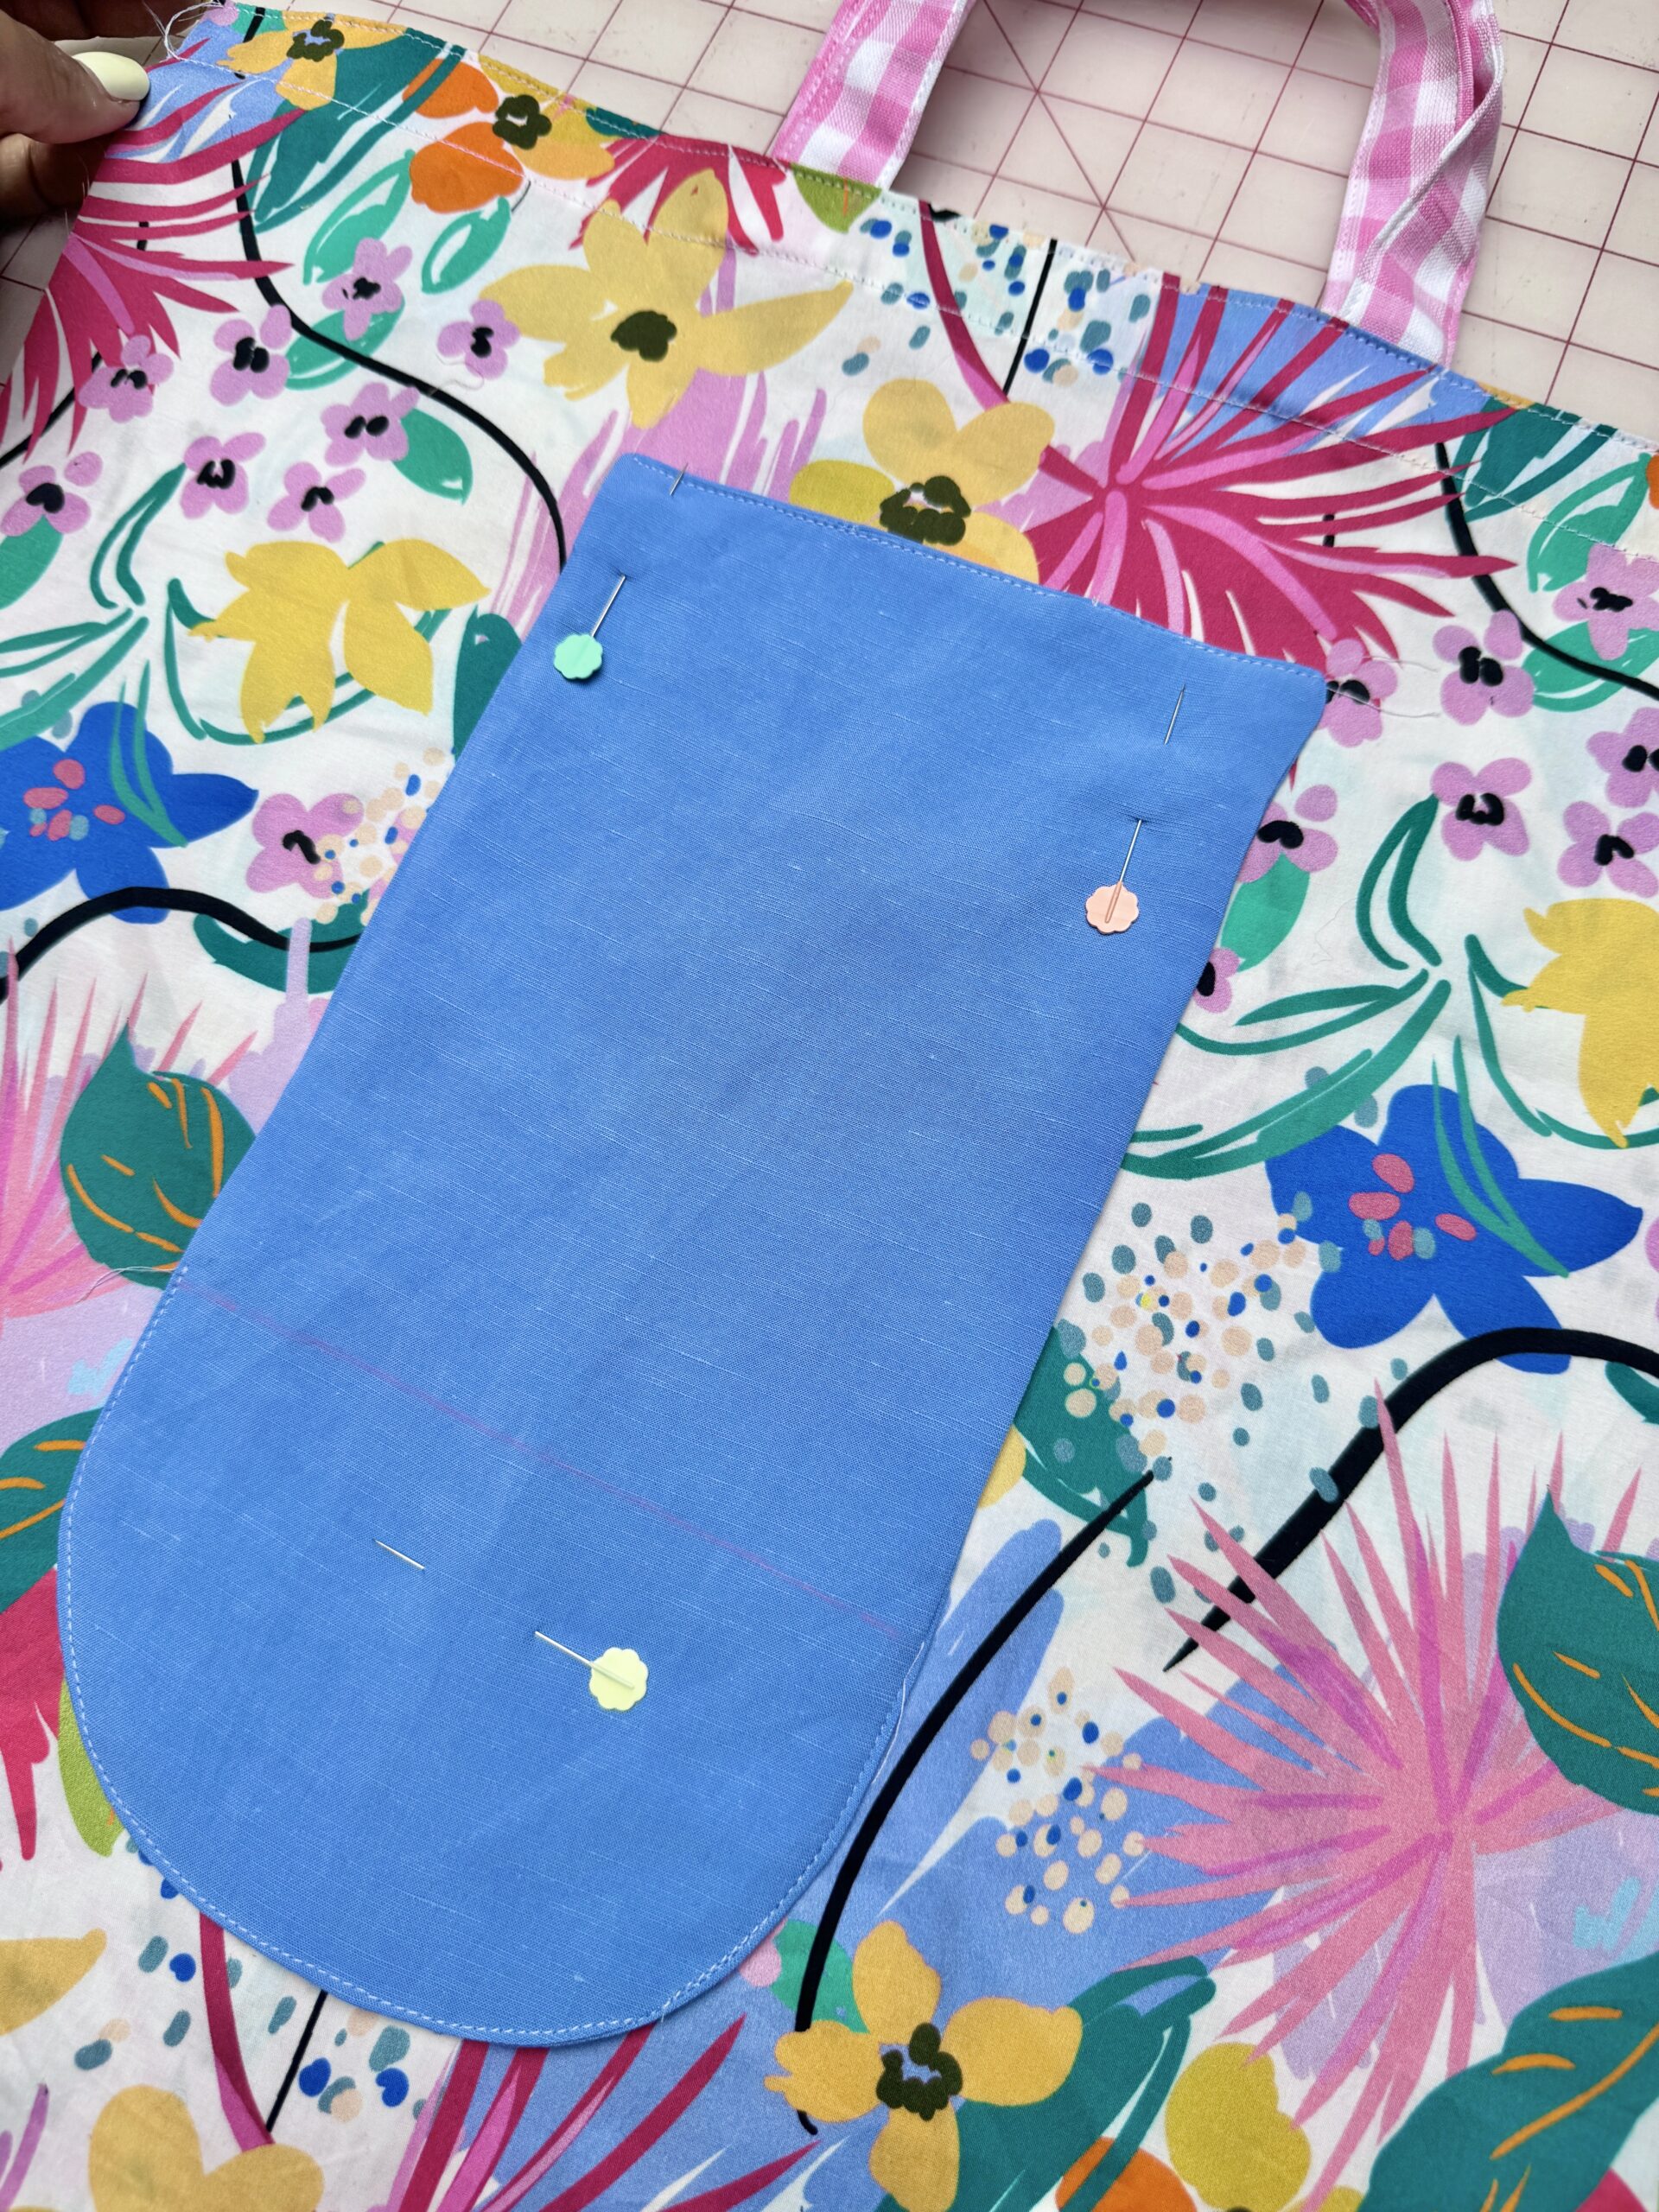
- Using Clover Triangle Tailor’s Chalk (Red) and Clover Mini Ruler, draw a stitching line approximately 1 cm from the raw edges of the pocket fabric pieces. Leave about 2″ (5 cm) unmarked on one short end for turning. Then, mark the center point on the opposite short end.
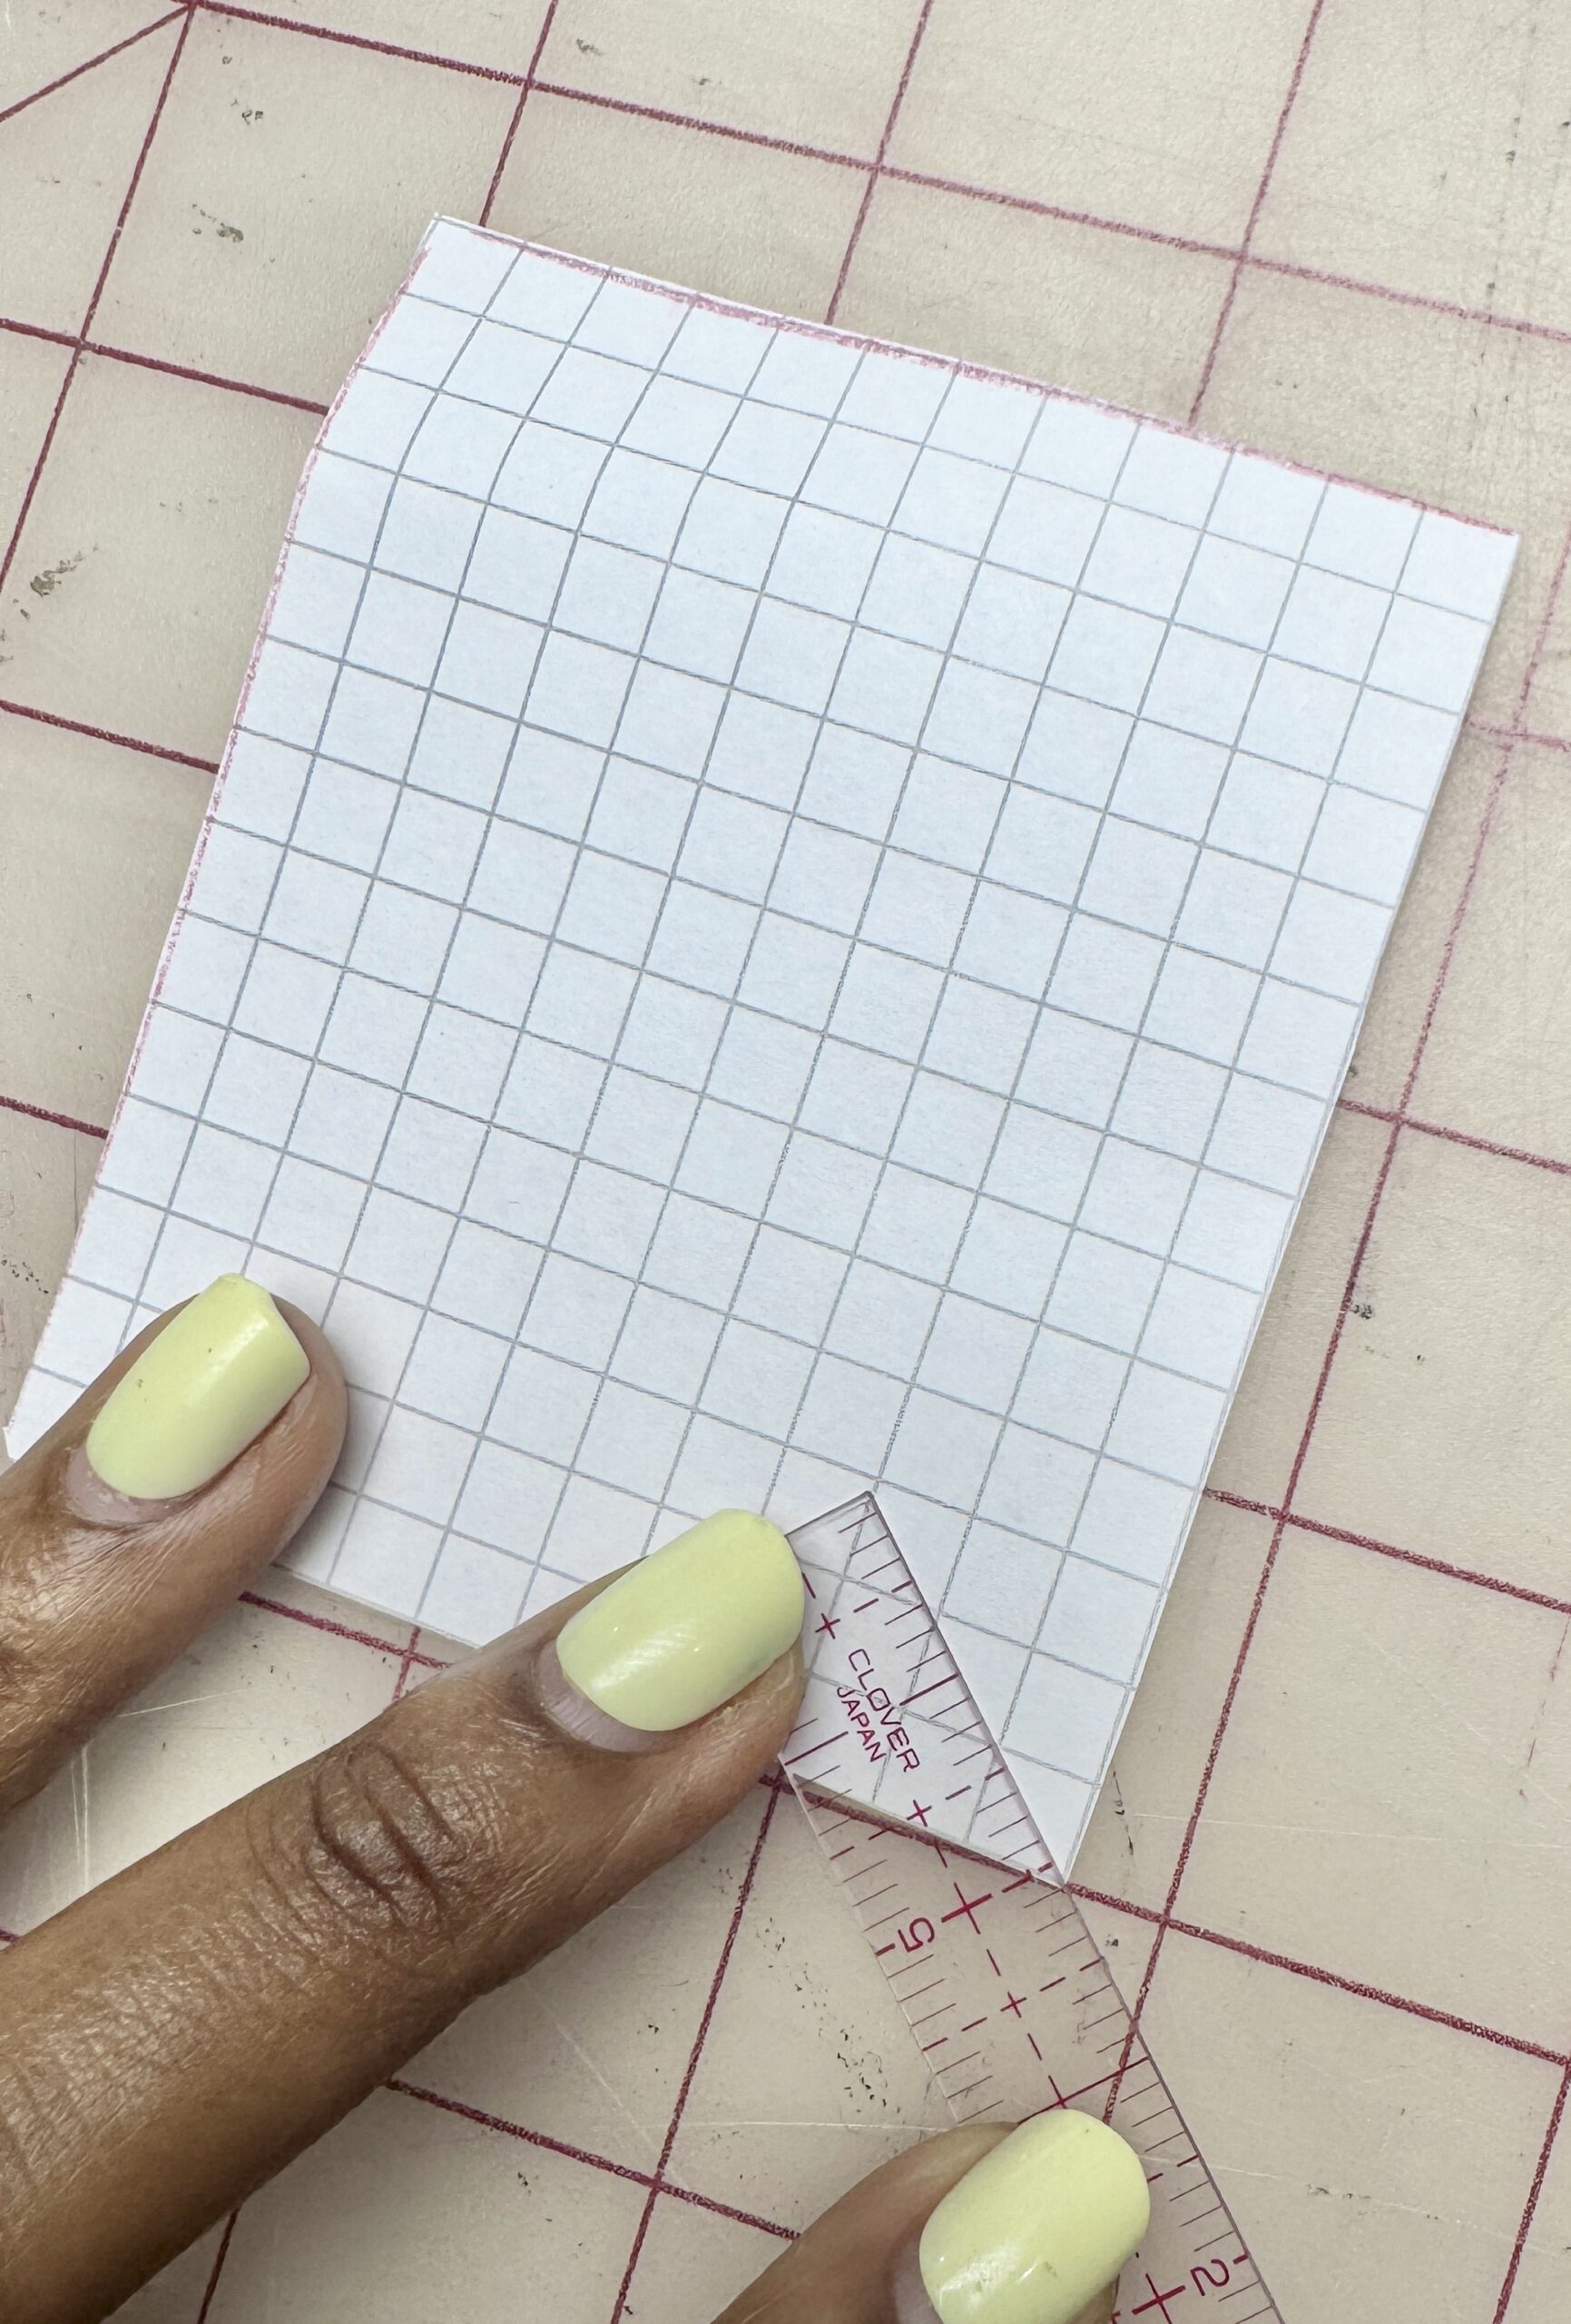
- Create a pocket flap template using a piece of paper measuring 3″ x 3.5″ (7.6 cm x 8.9 cm). Measure 1″ (2.5 cm) diagonally from one corner using the Clover Mini Ruler and mark it with the Clover Triangle Tailor’s Chalk (Red). Measure 2.4″ (6 cm) above that corner and mark a second point. Connect the points with a curved line using the chalk and cut along the curve to create the template. Trace the flap template onto the wrong side of one pocket piece using the chalk.

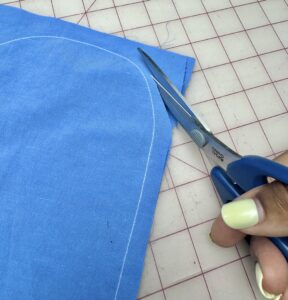
- Place the pocket pieces right sides together. Sew along the marked lines, leaving the unmarked opening unsewn. Trim the corners using Clover Patchwork Scissors and curves to reduce bulk. Turn the pocket right sides out and press well. Carefully push out the corners and smooth the curved flap edge.

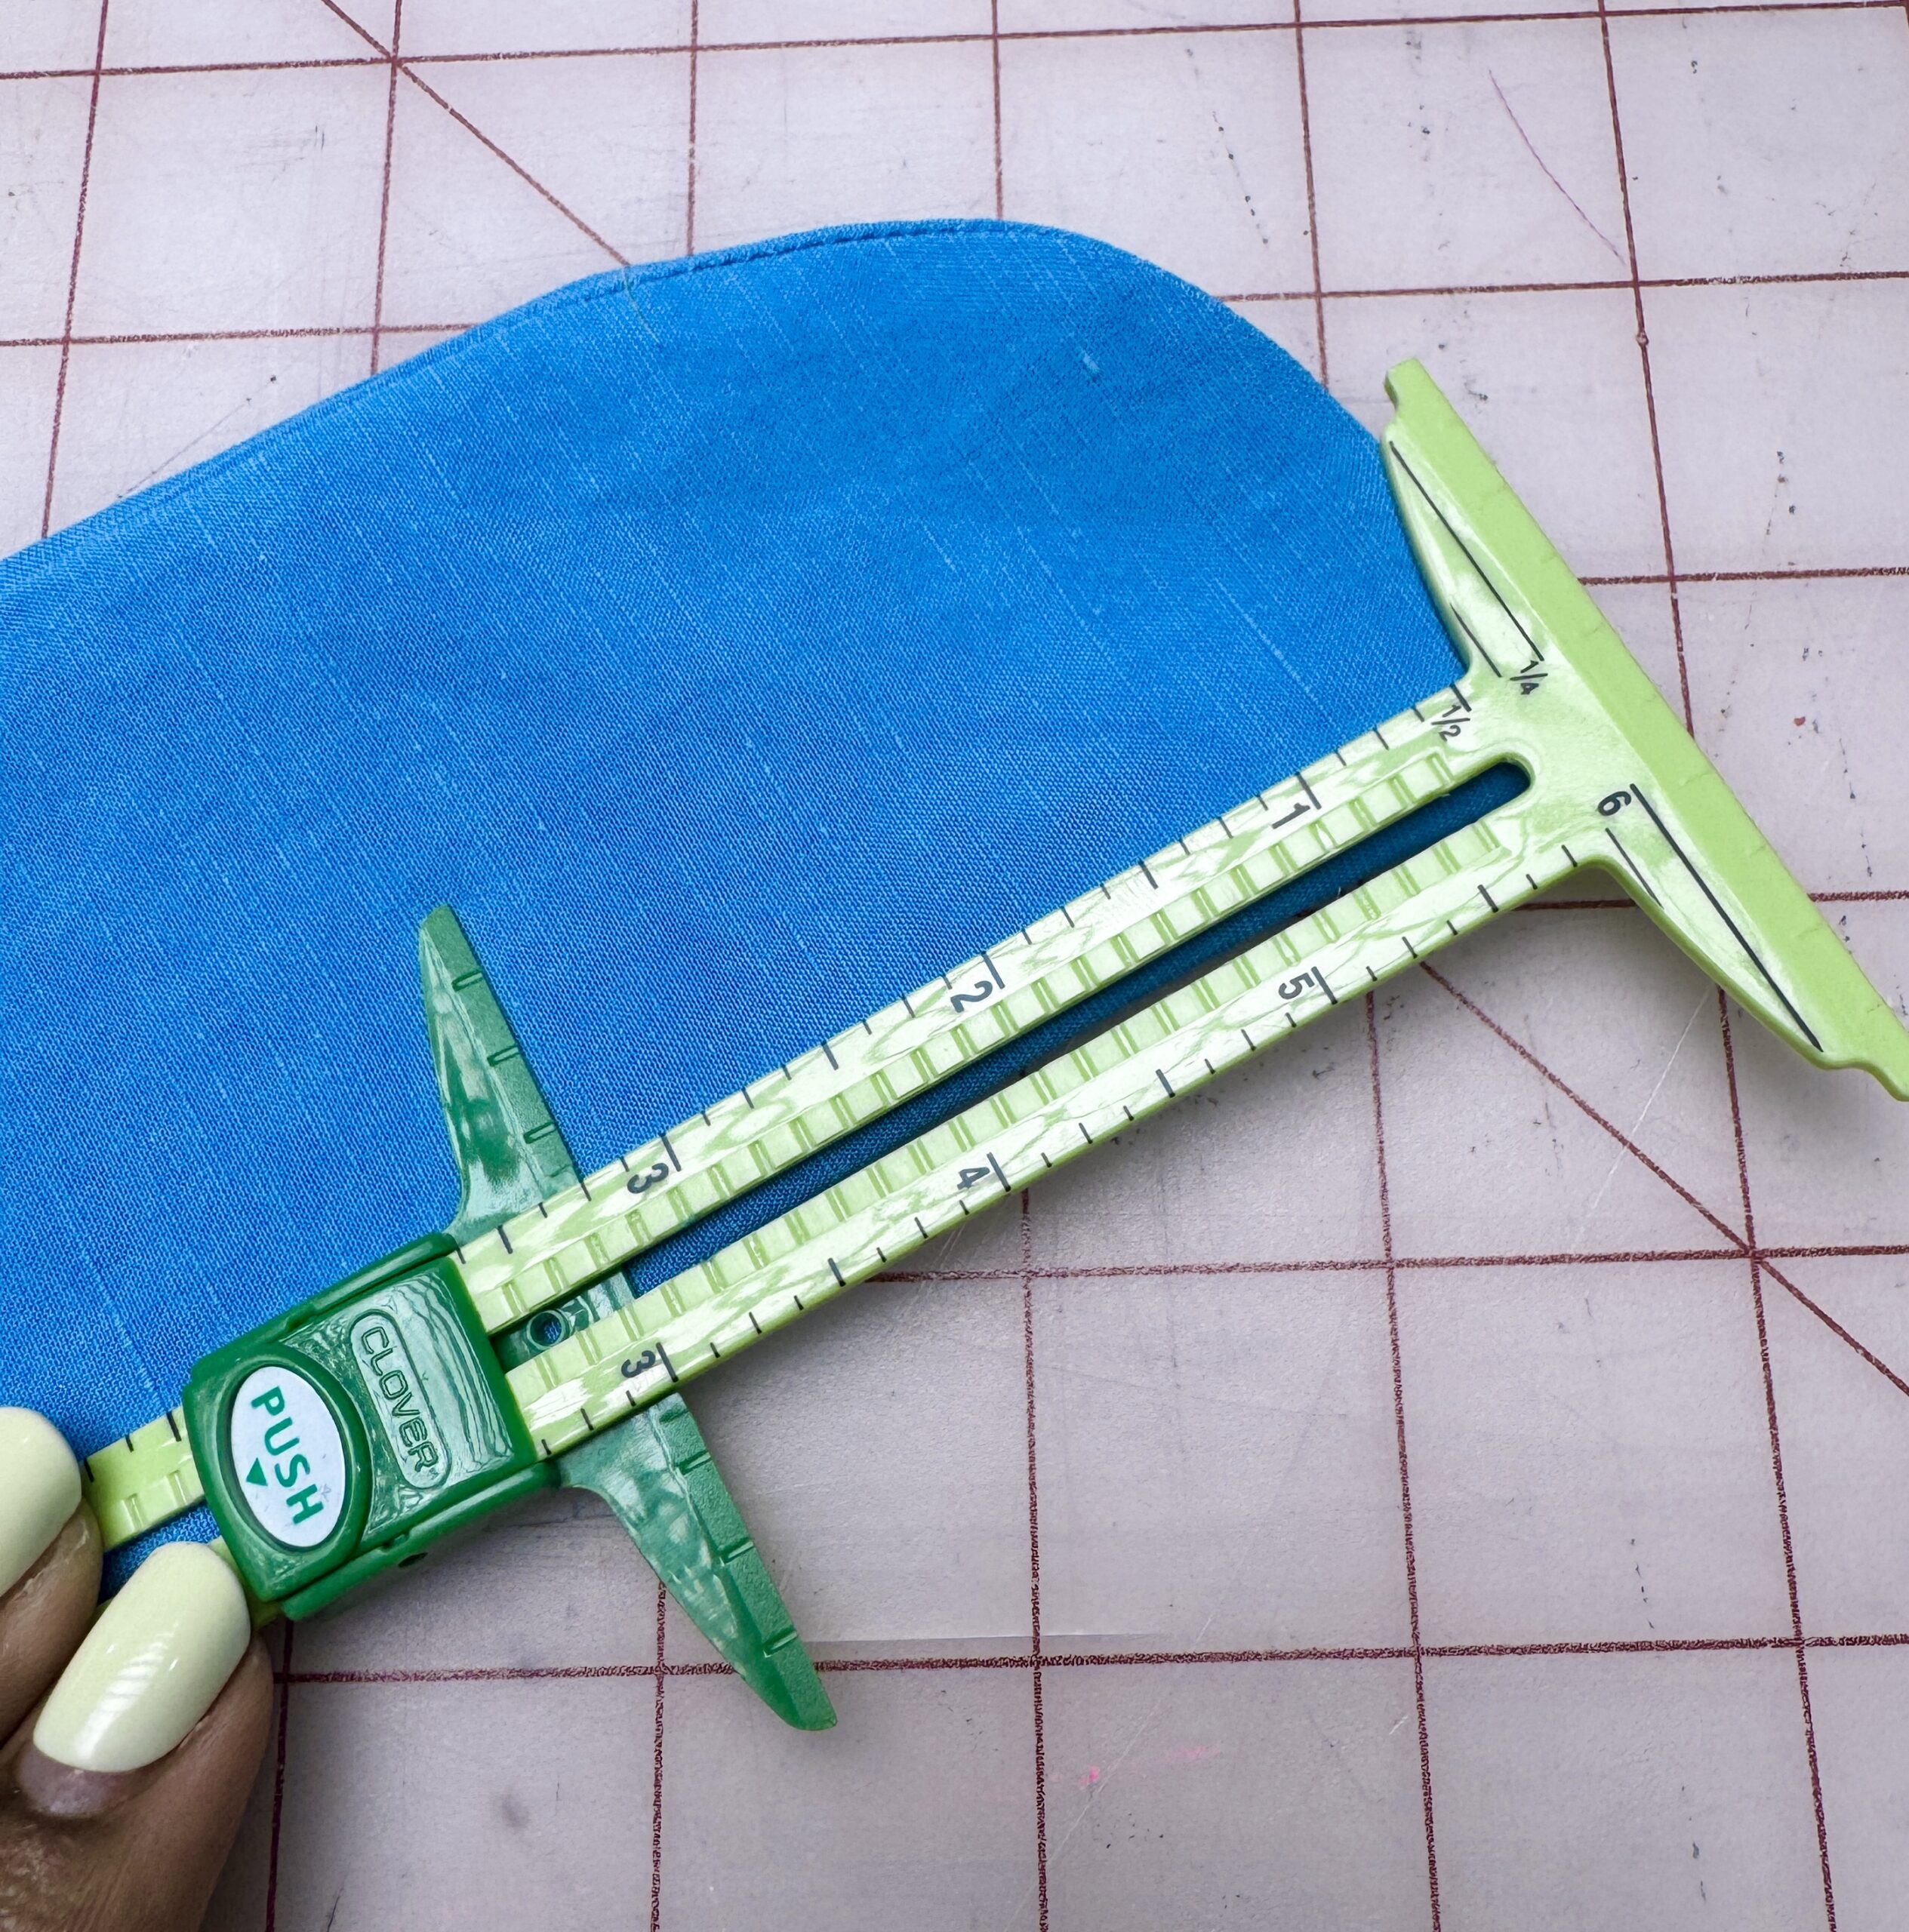
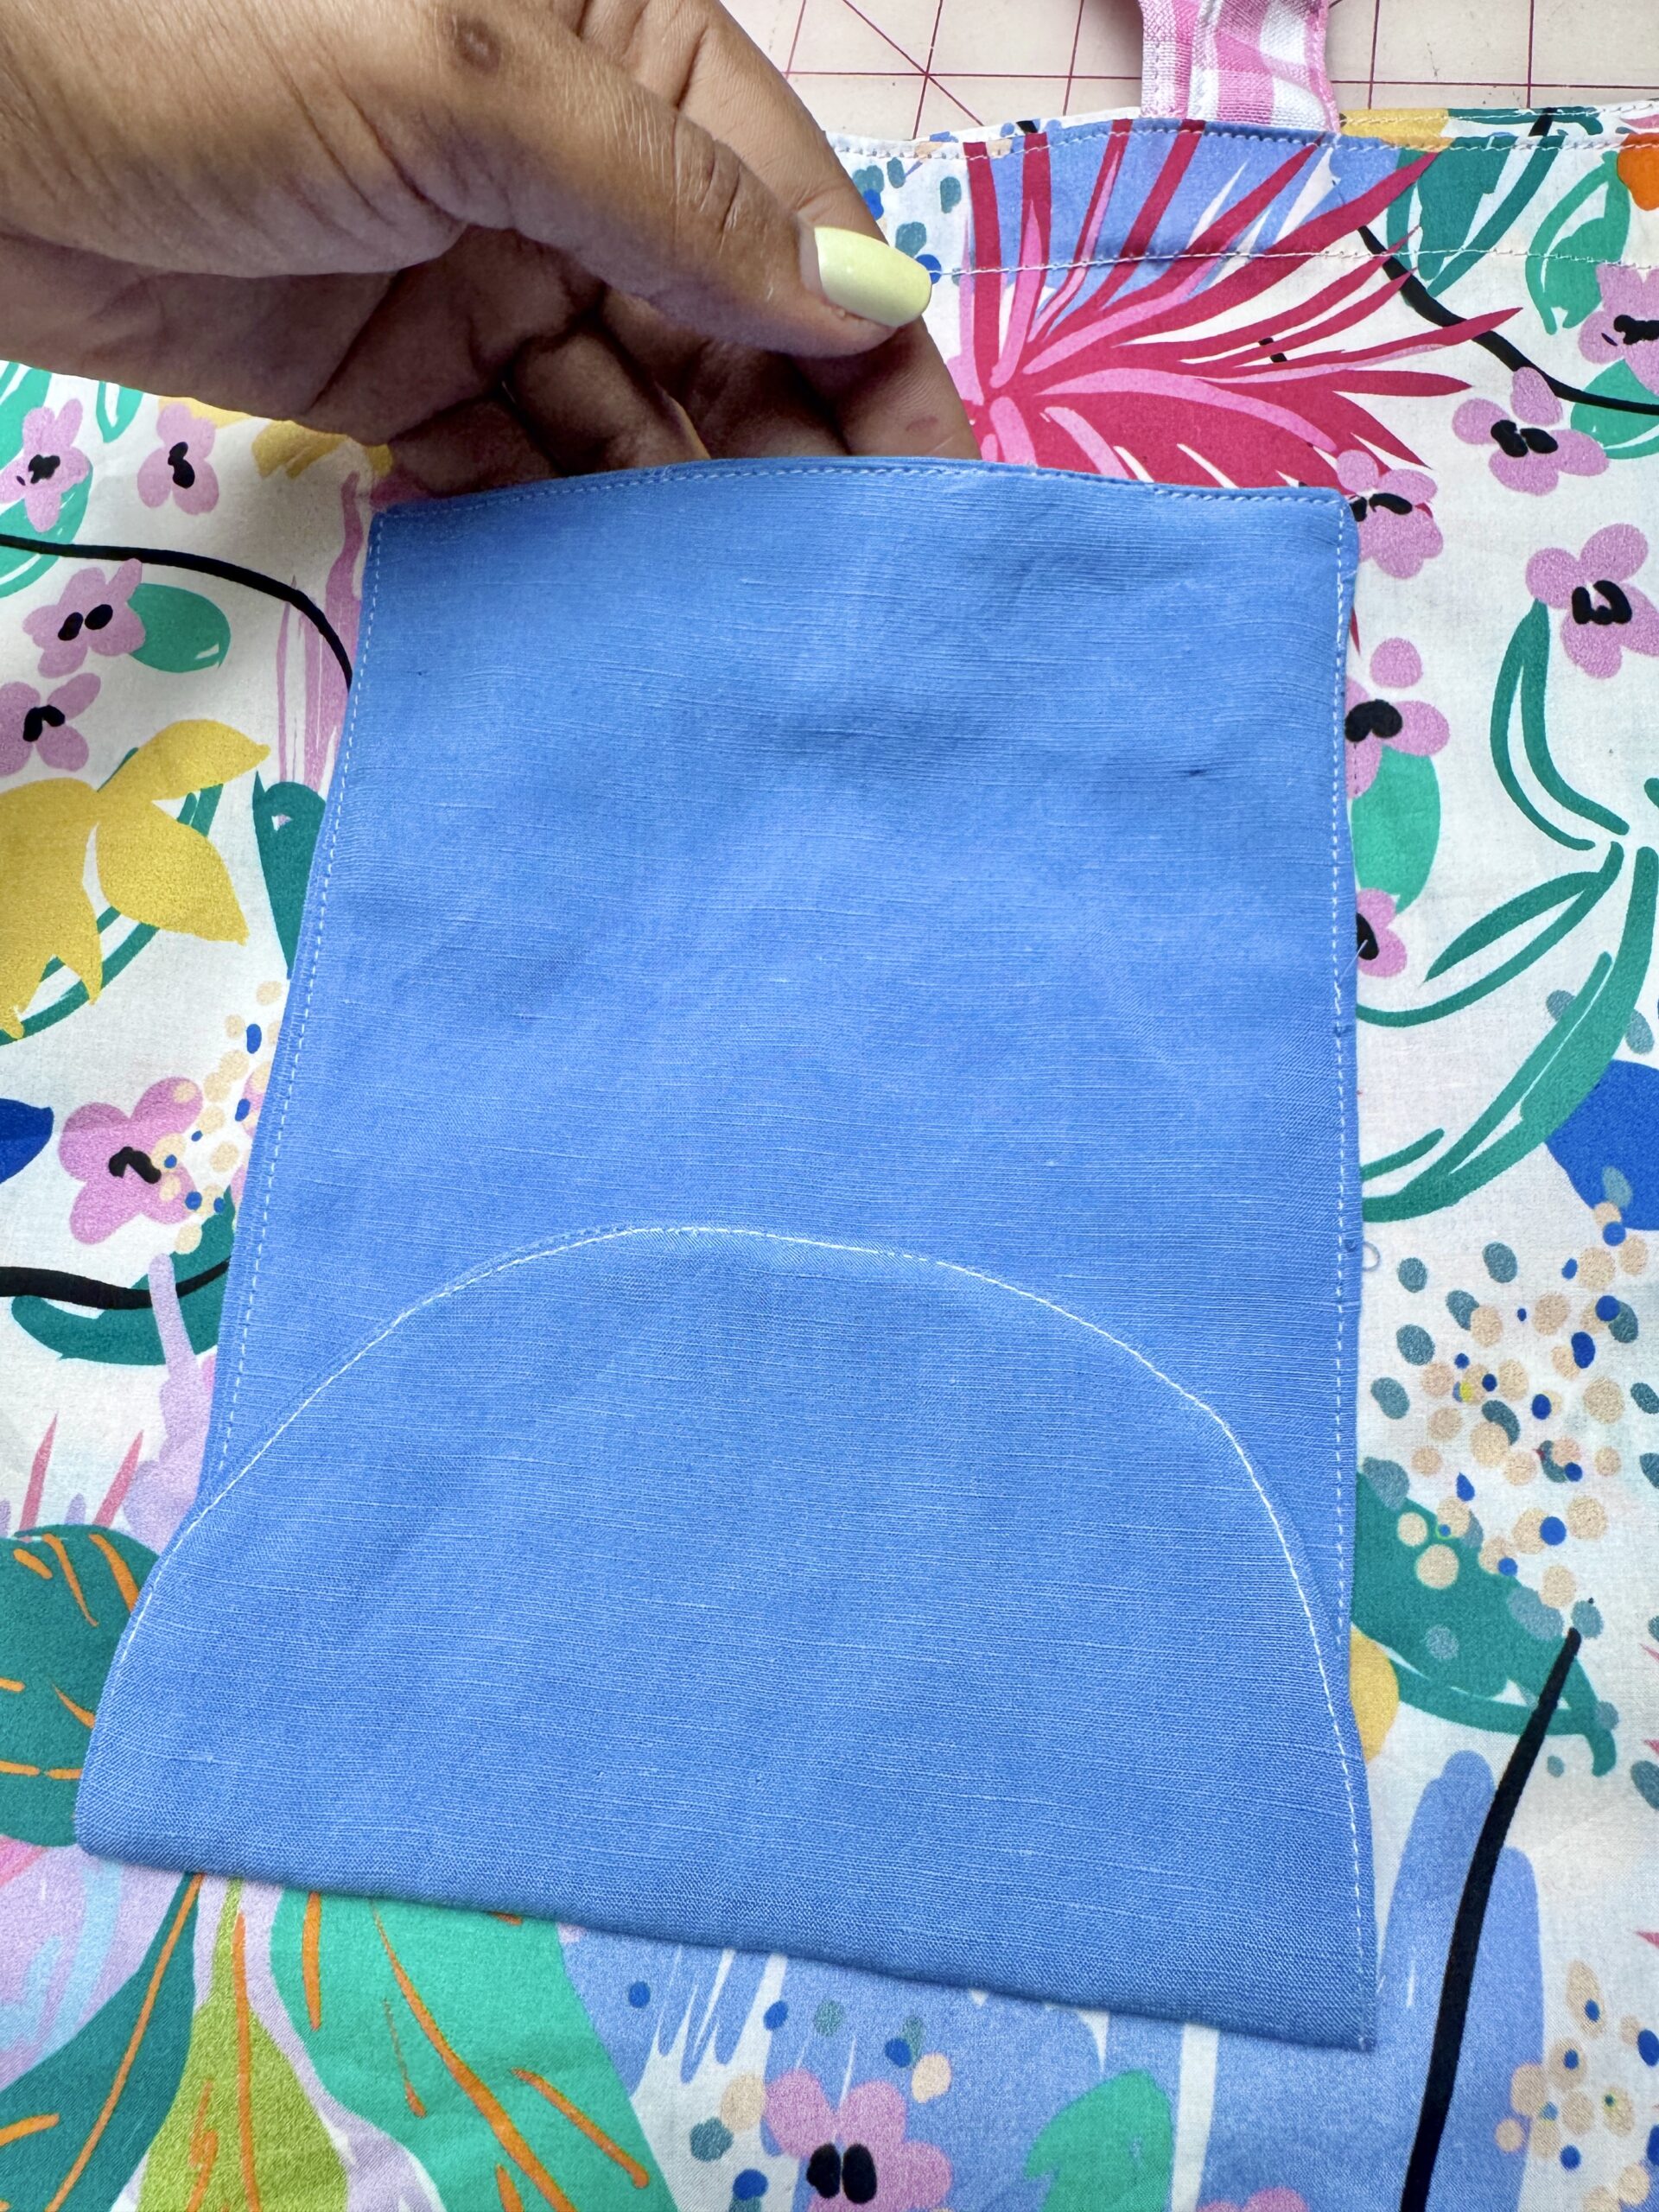
- Measure and mark 3.5″ (8.9 cm) down from the rounded edge on both sides of the pocket. Draw a guideline connecting the marks. Edgestitch around the curved flap edge down to the marked line, then edgestitch along the bottom straight edge of the pocket.
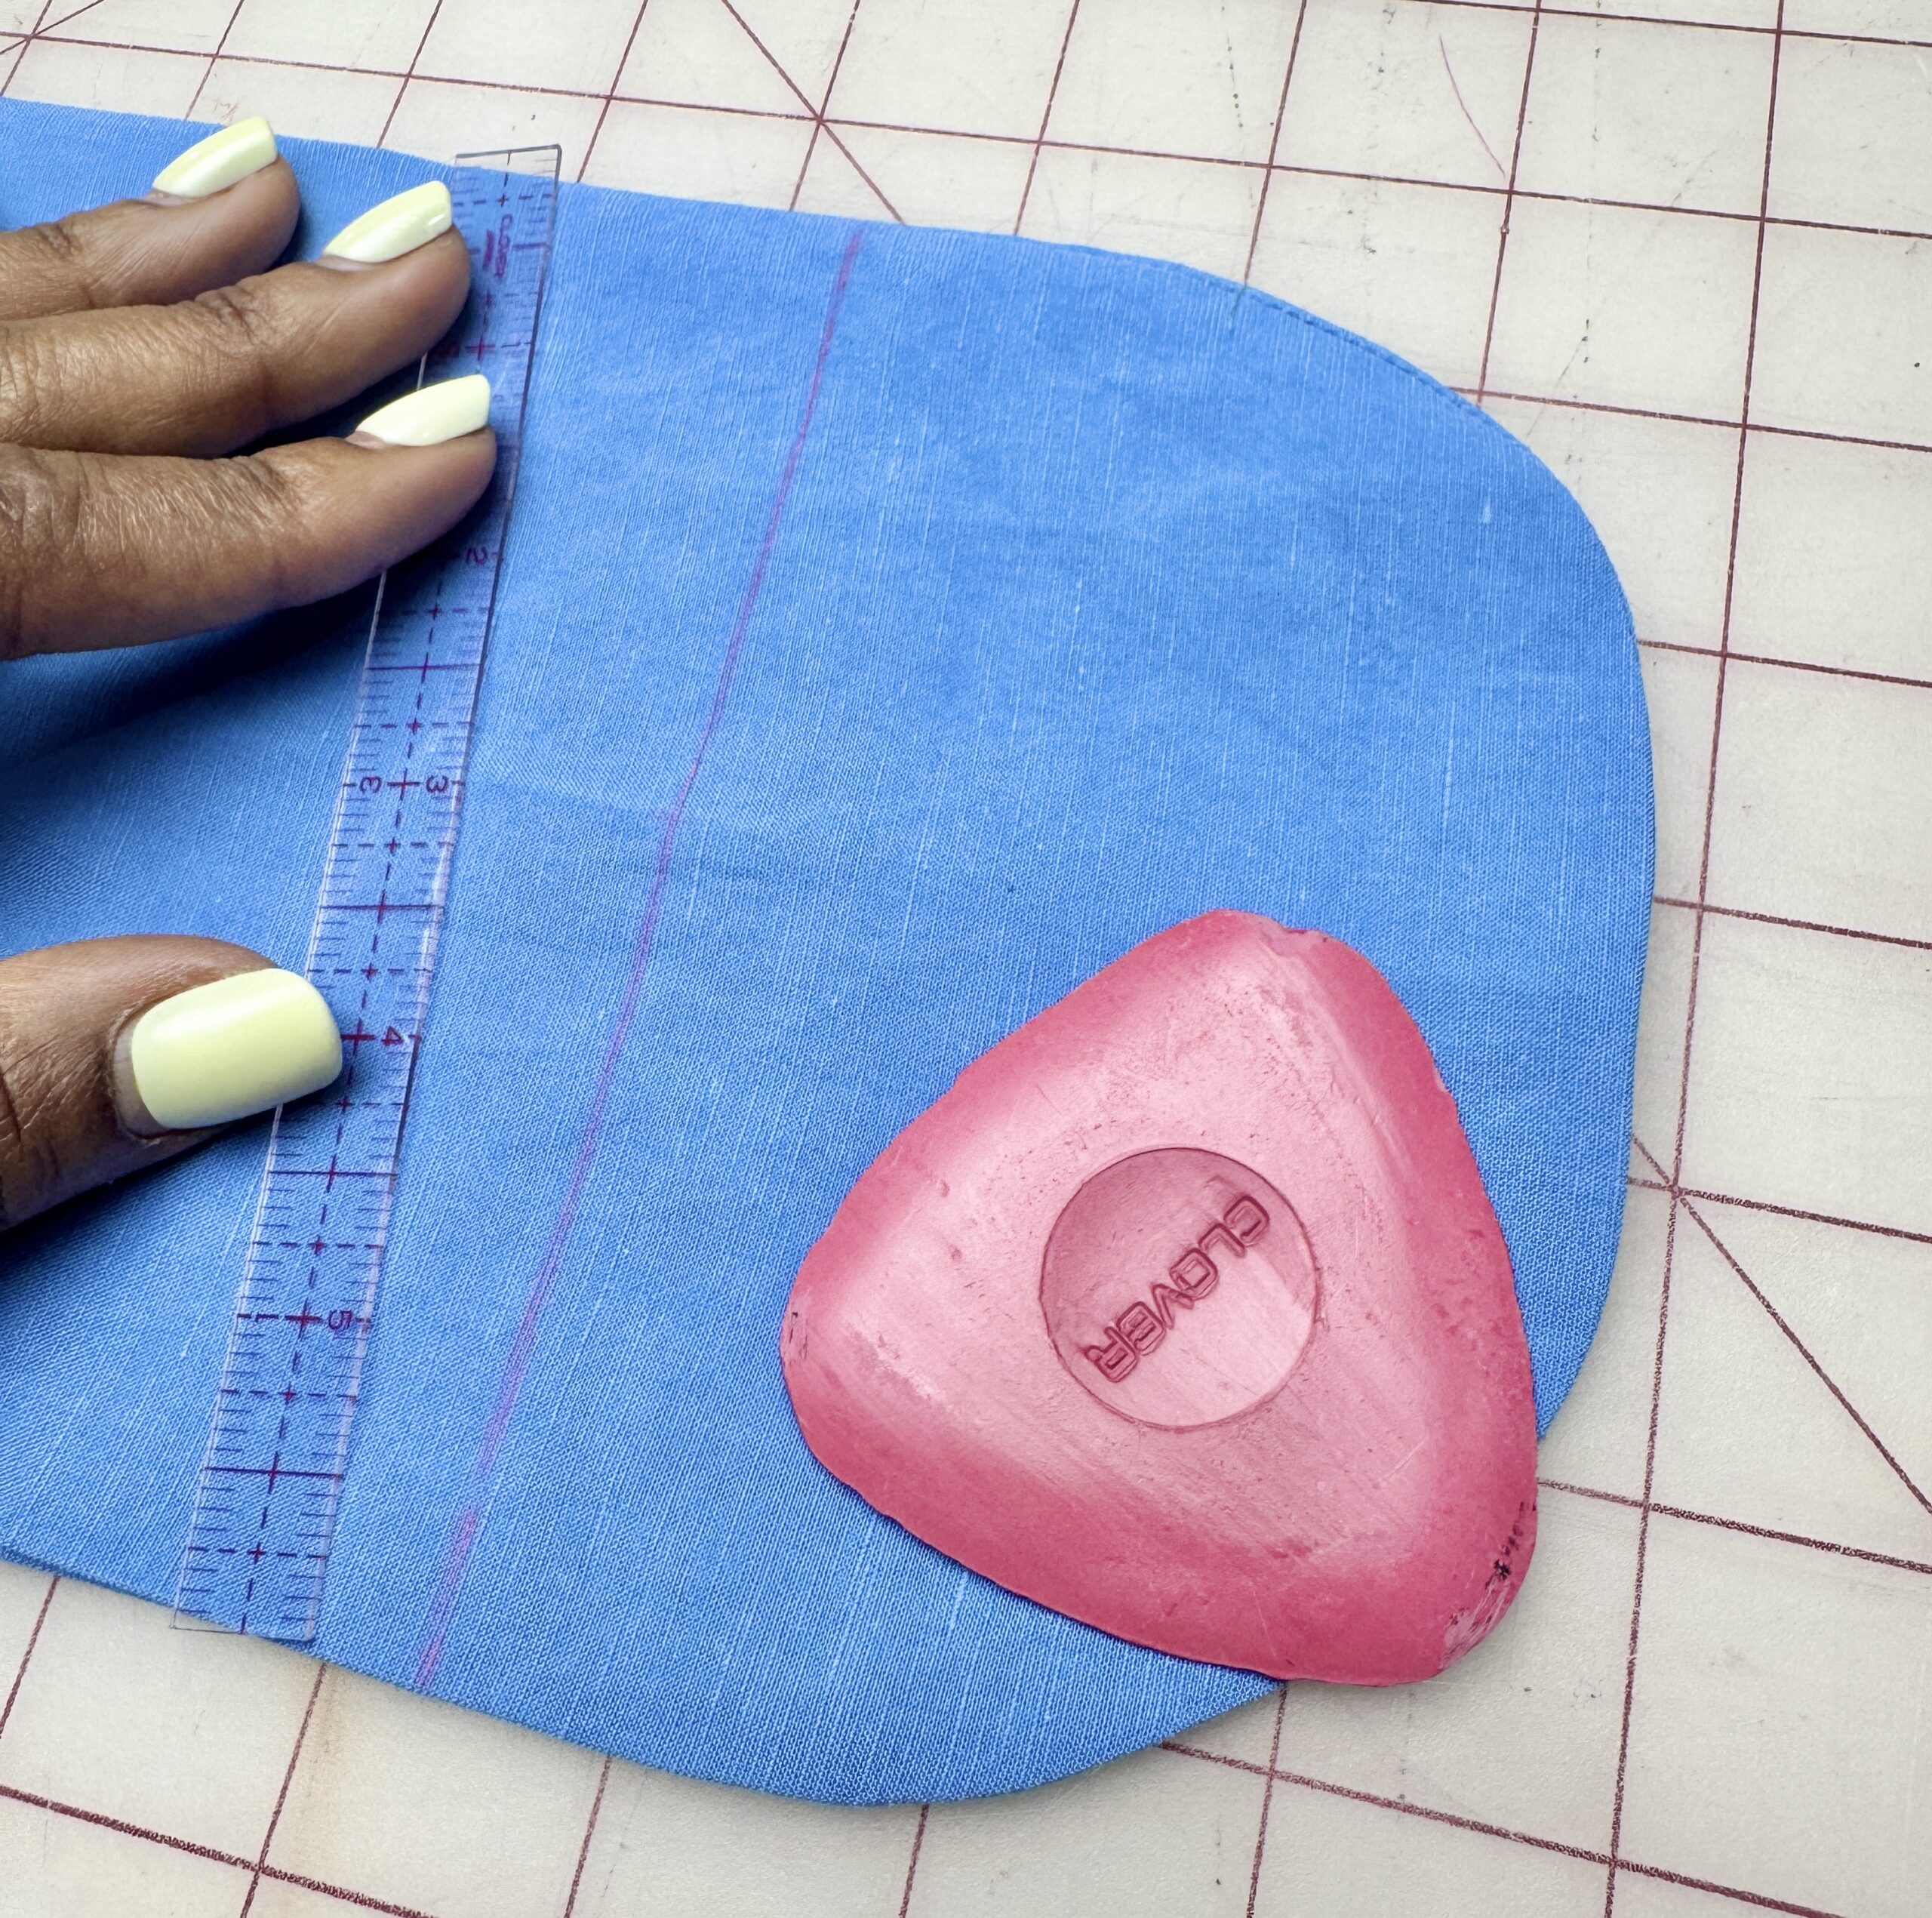
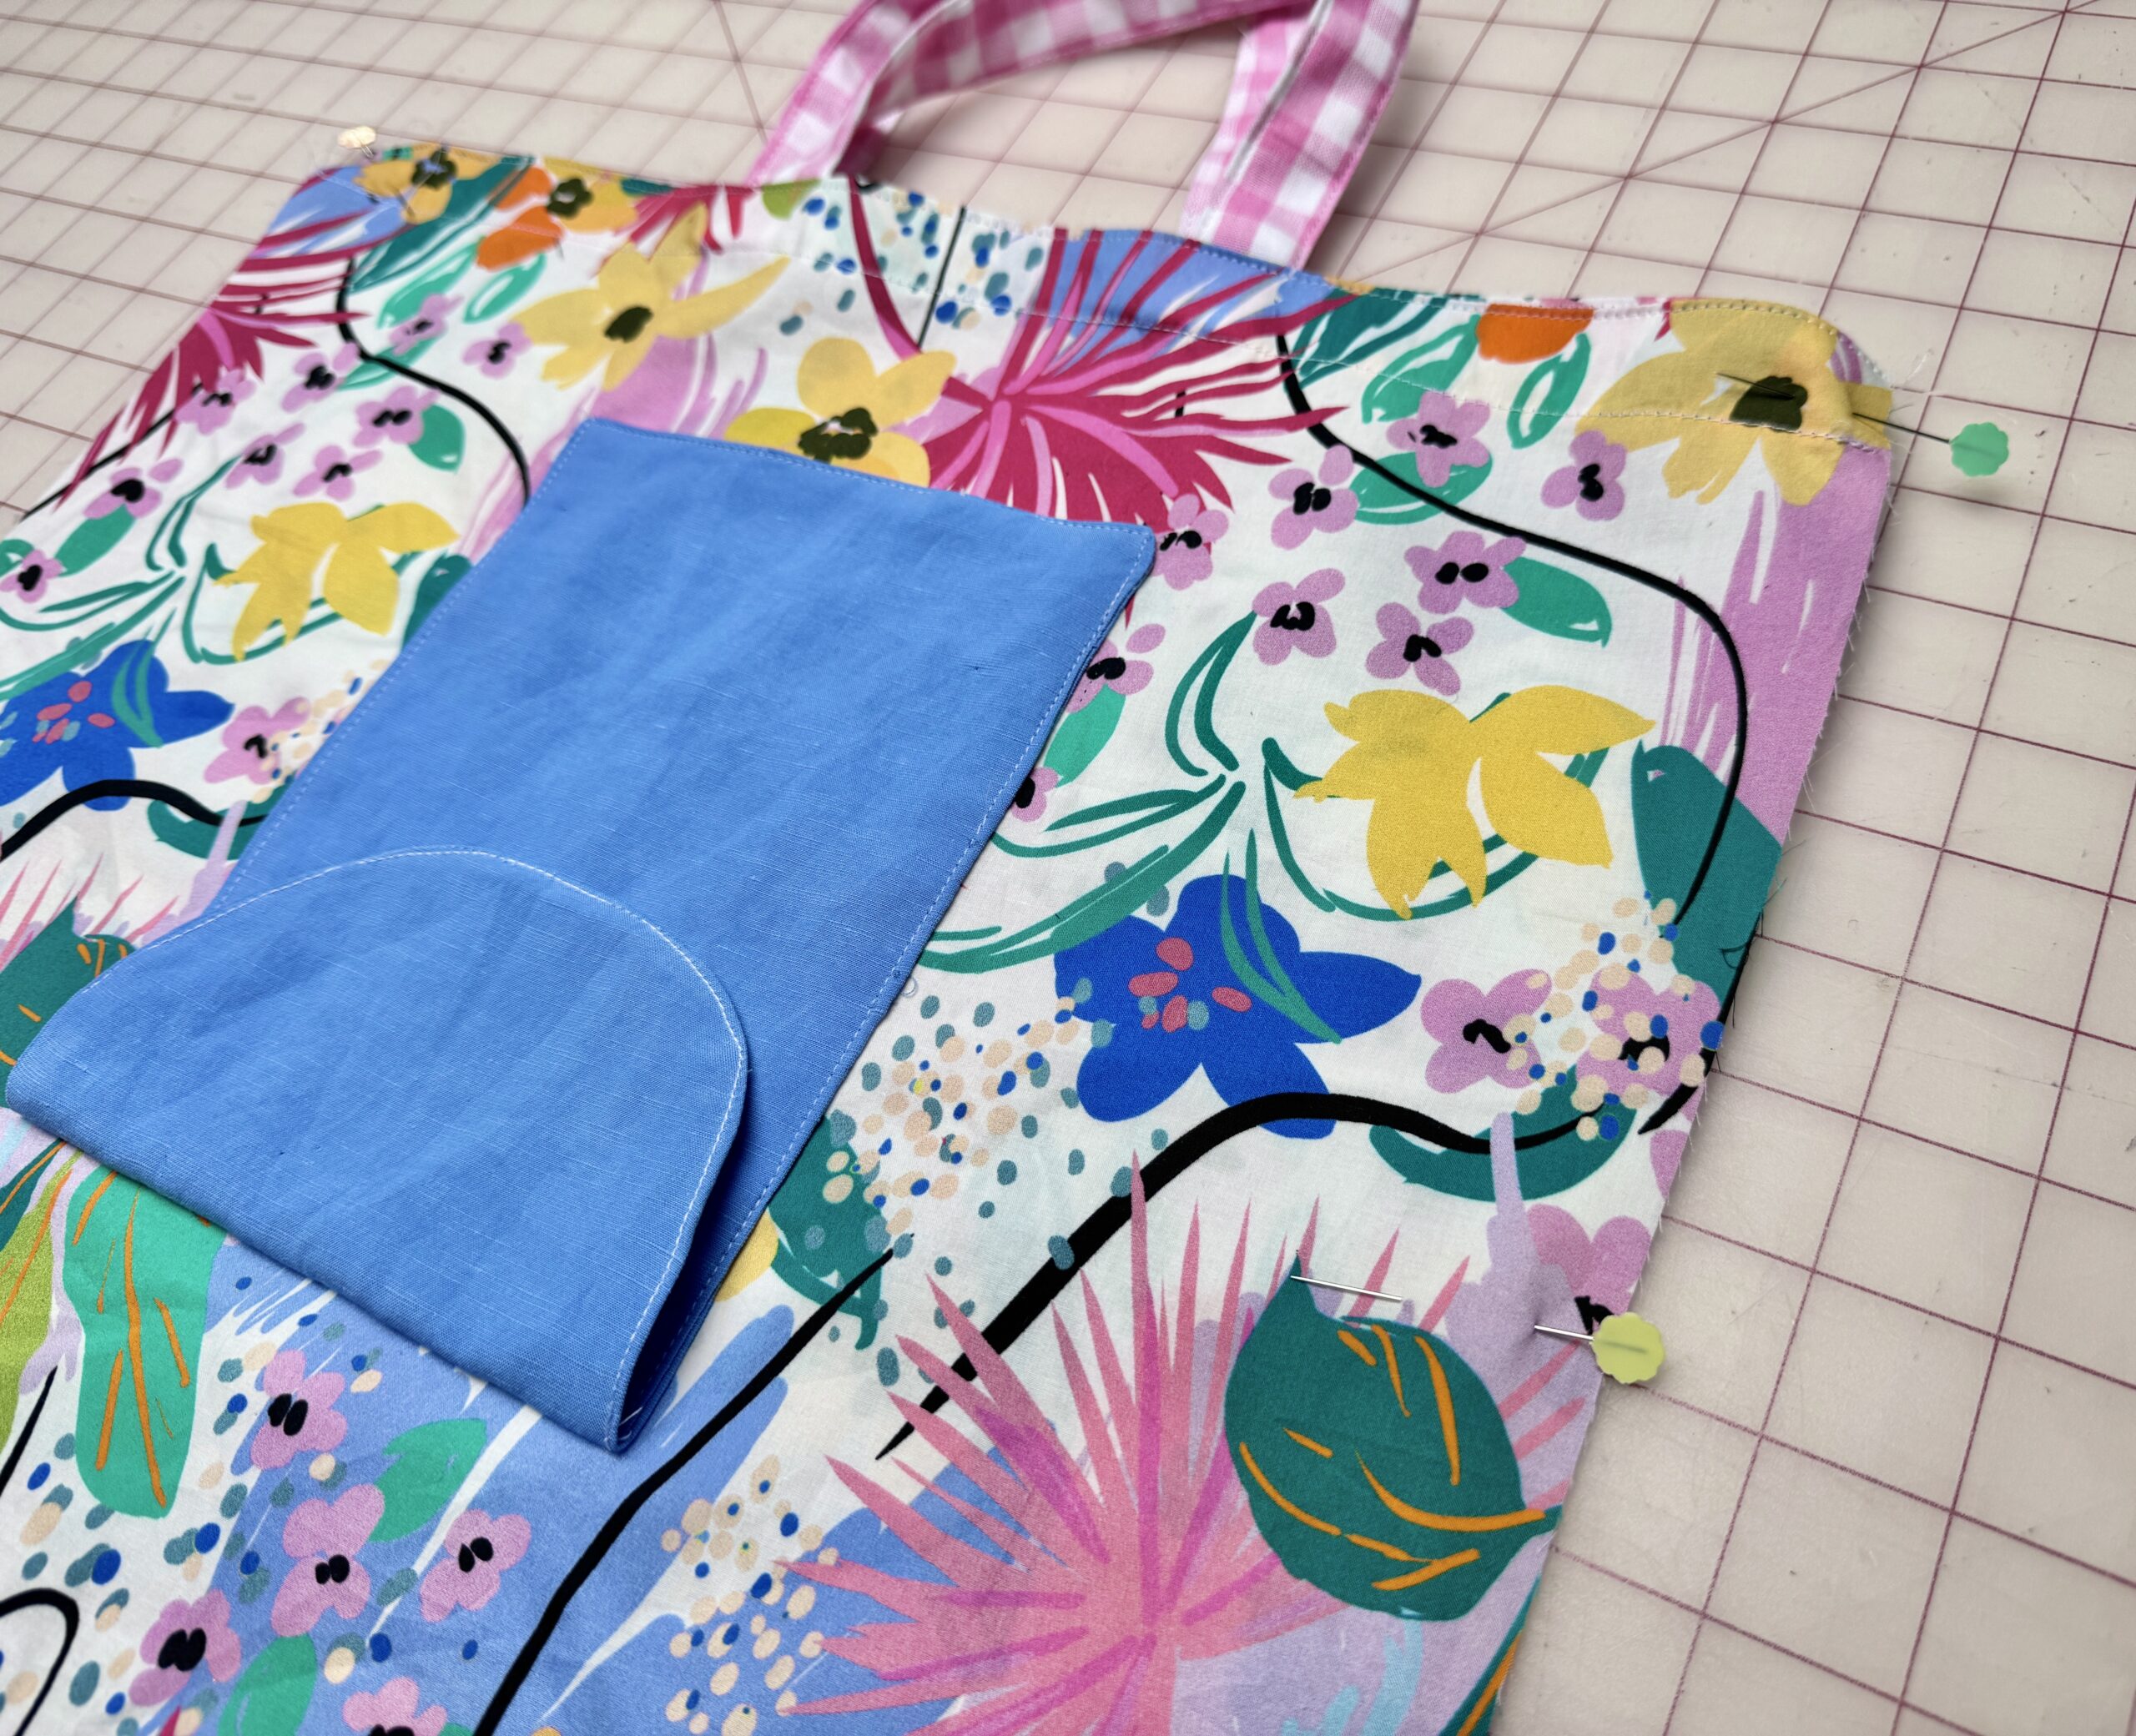
- Measure 2.8″ (7 cm) down from the center top edge of the tote bag. Position the straight edge of the pocket at this location and pin in place using the Clover Flower Head Pins. Edgestitch around the sides and bottom of the pocket to attach it to the tote bag. Sew along the marked line beneath the rounded edge to create the pocket flap. Do not sew the very bottom straight edge of the pocket closed.
Step 4: Construct the Tote
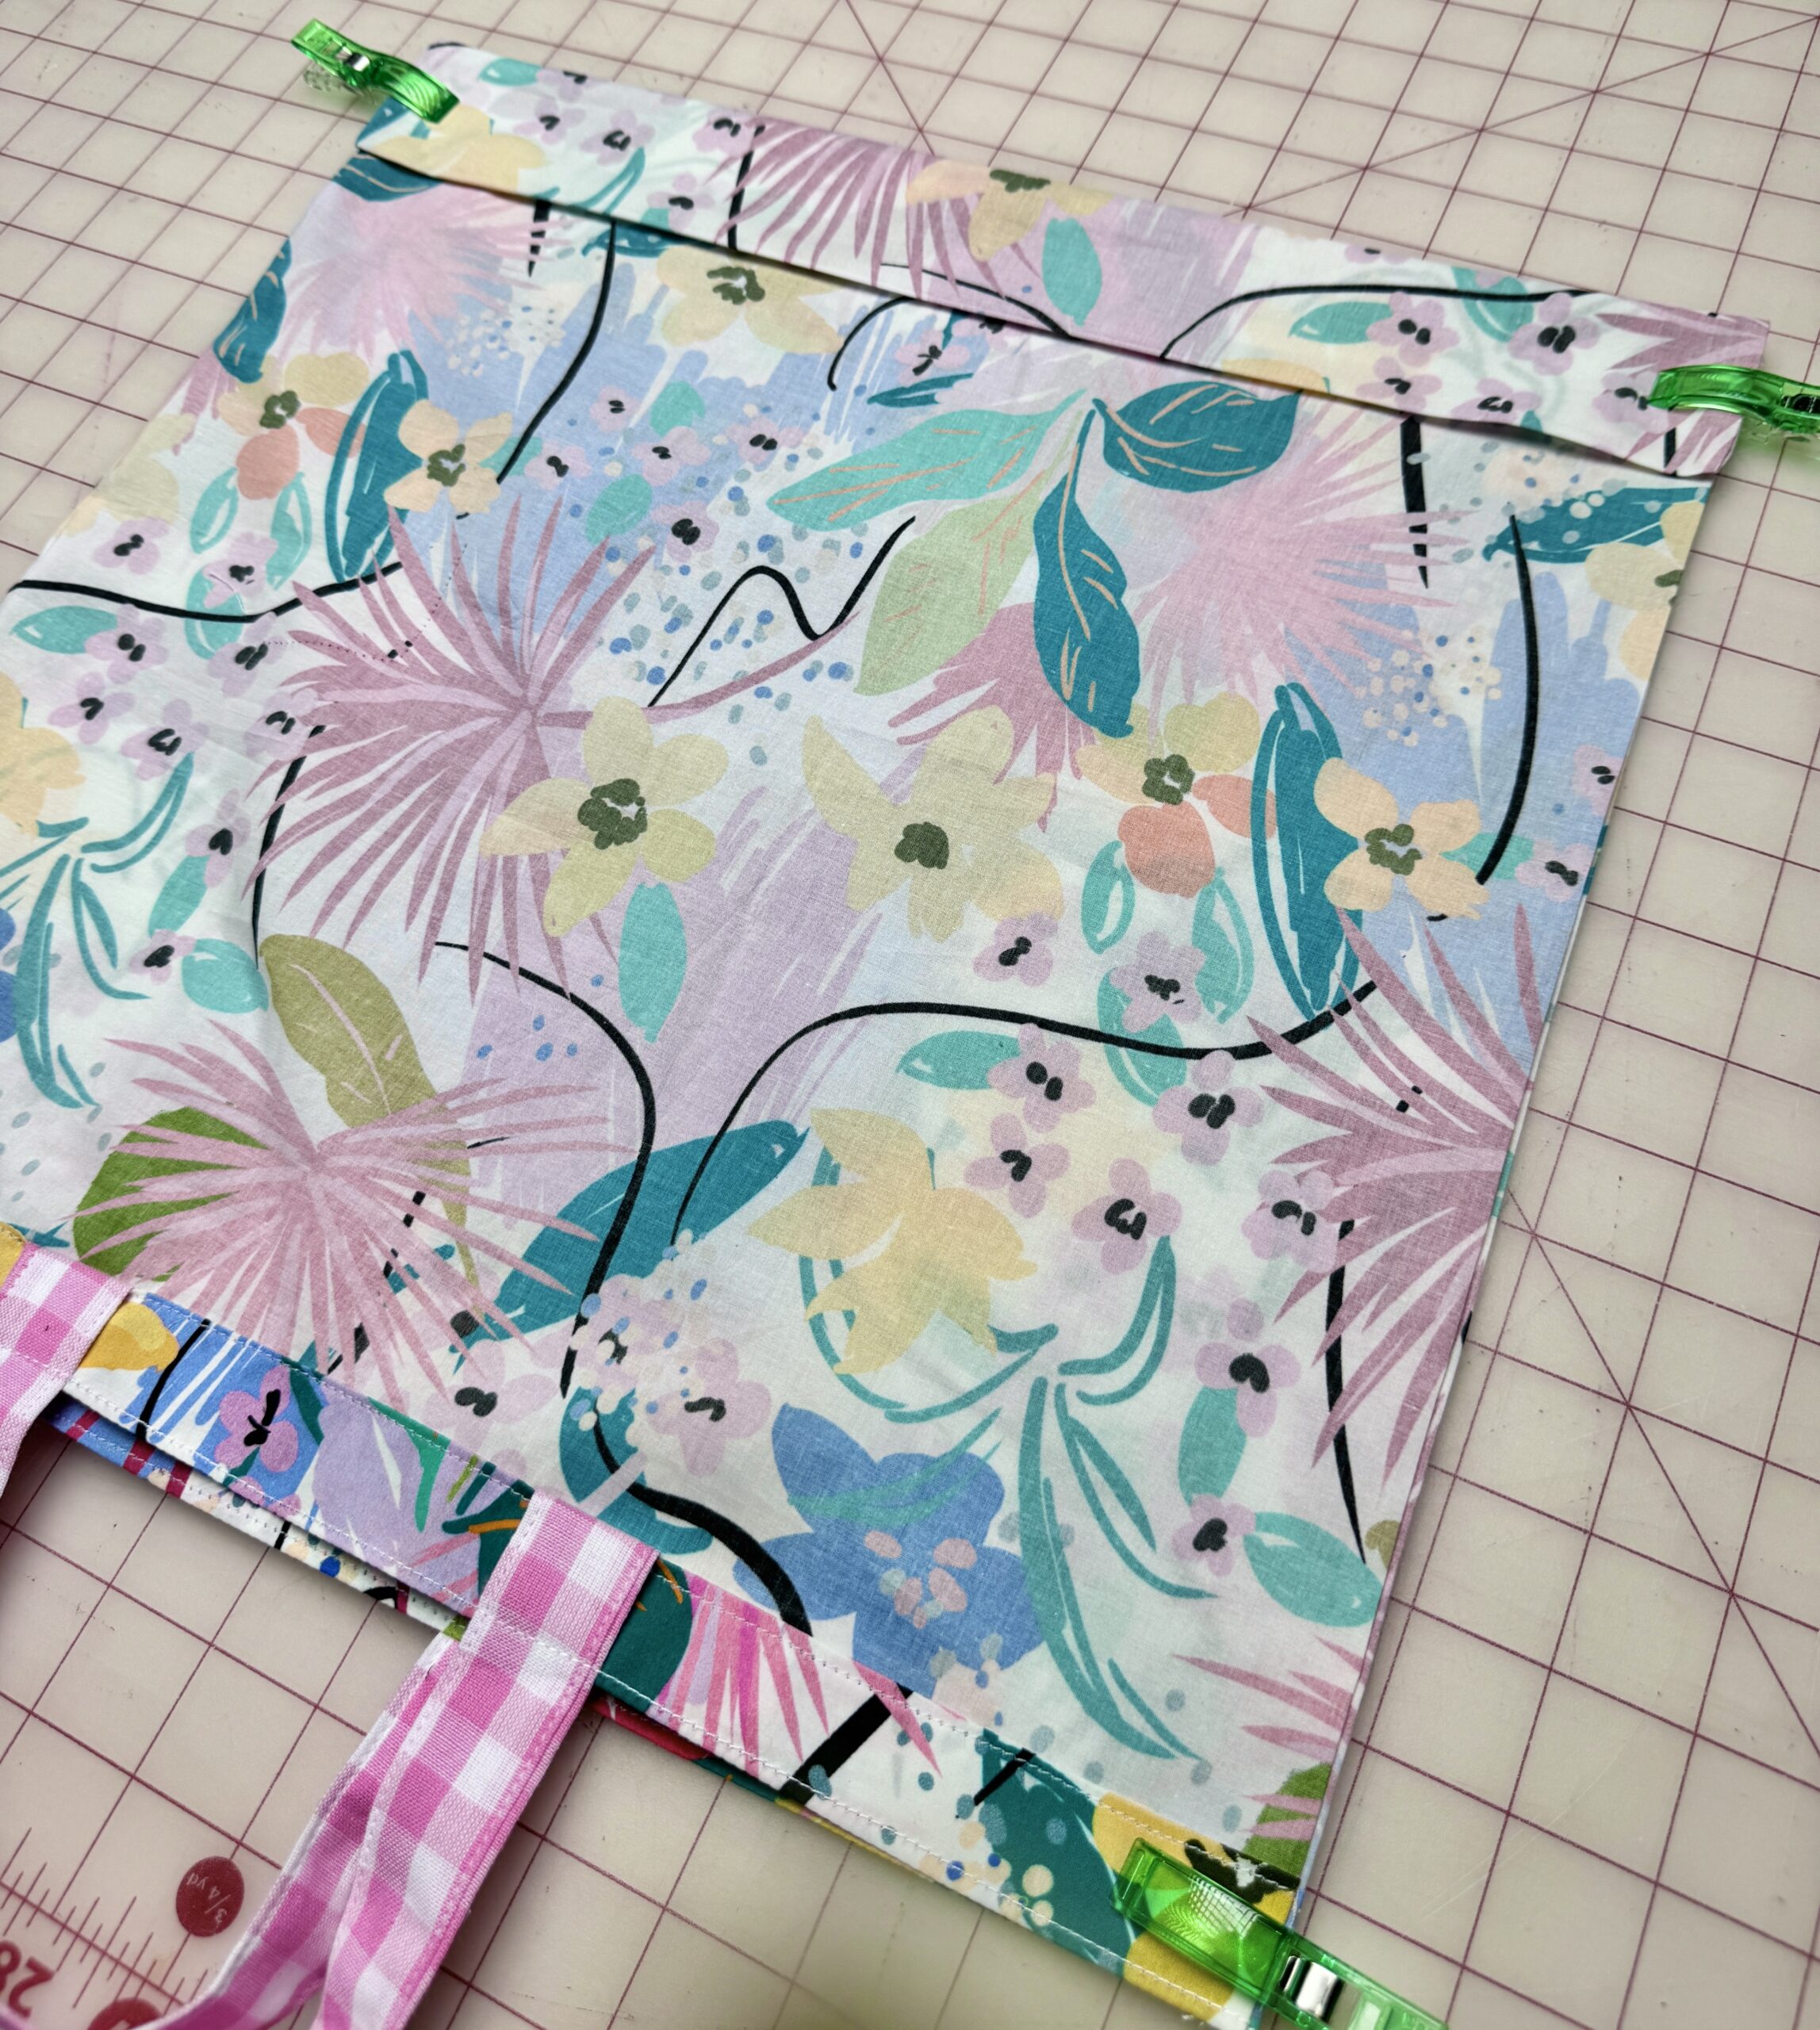
- With the wrong sides together, fold the tote in half, matching side seams and sew the side seams using a 1/2 cm seam allowance. Turn the bag so the right sides are together and press the side seams flat.
- On the side of the bag without the pocket, measure 2″ (5 cm) up from the bottom edge. Fold the bottom upward toward the pocket side and press. Sew the side seam edges using a 1 cm seam allowance. Turn the bag right side out and press.

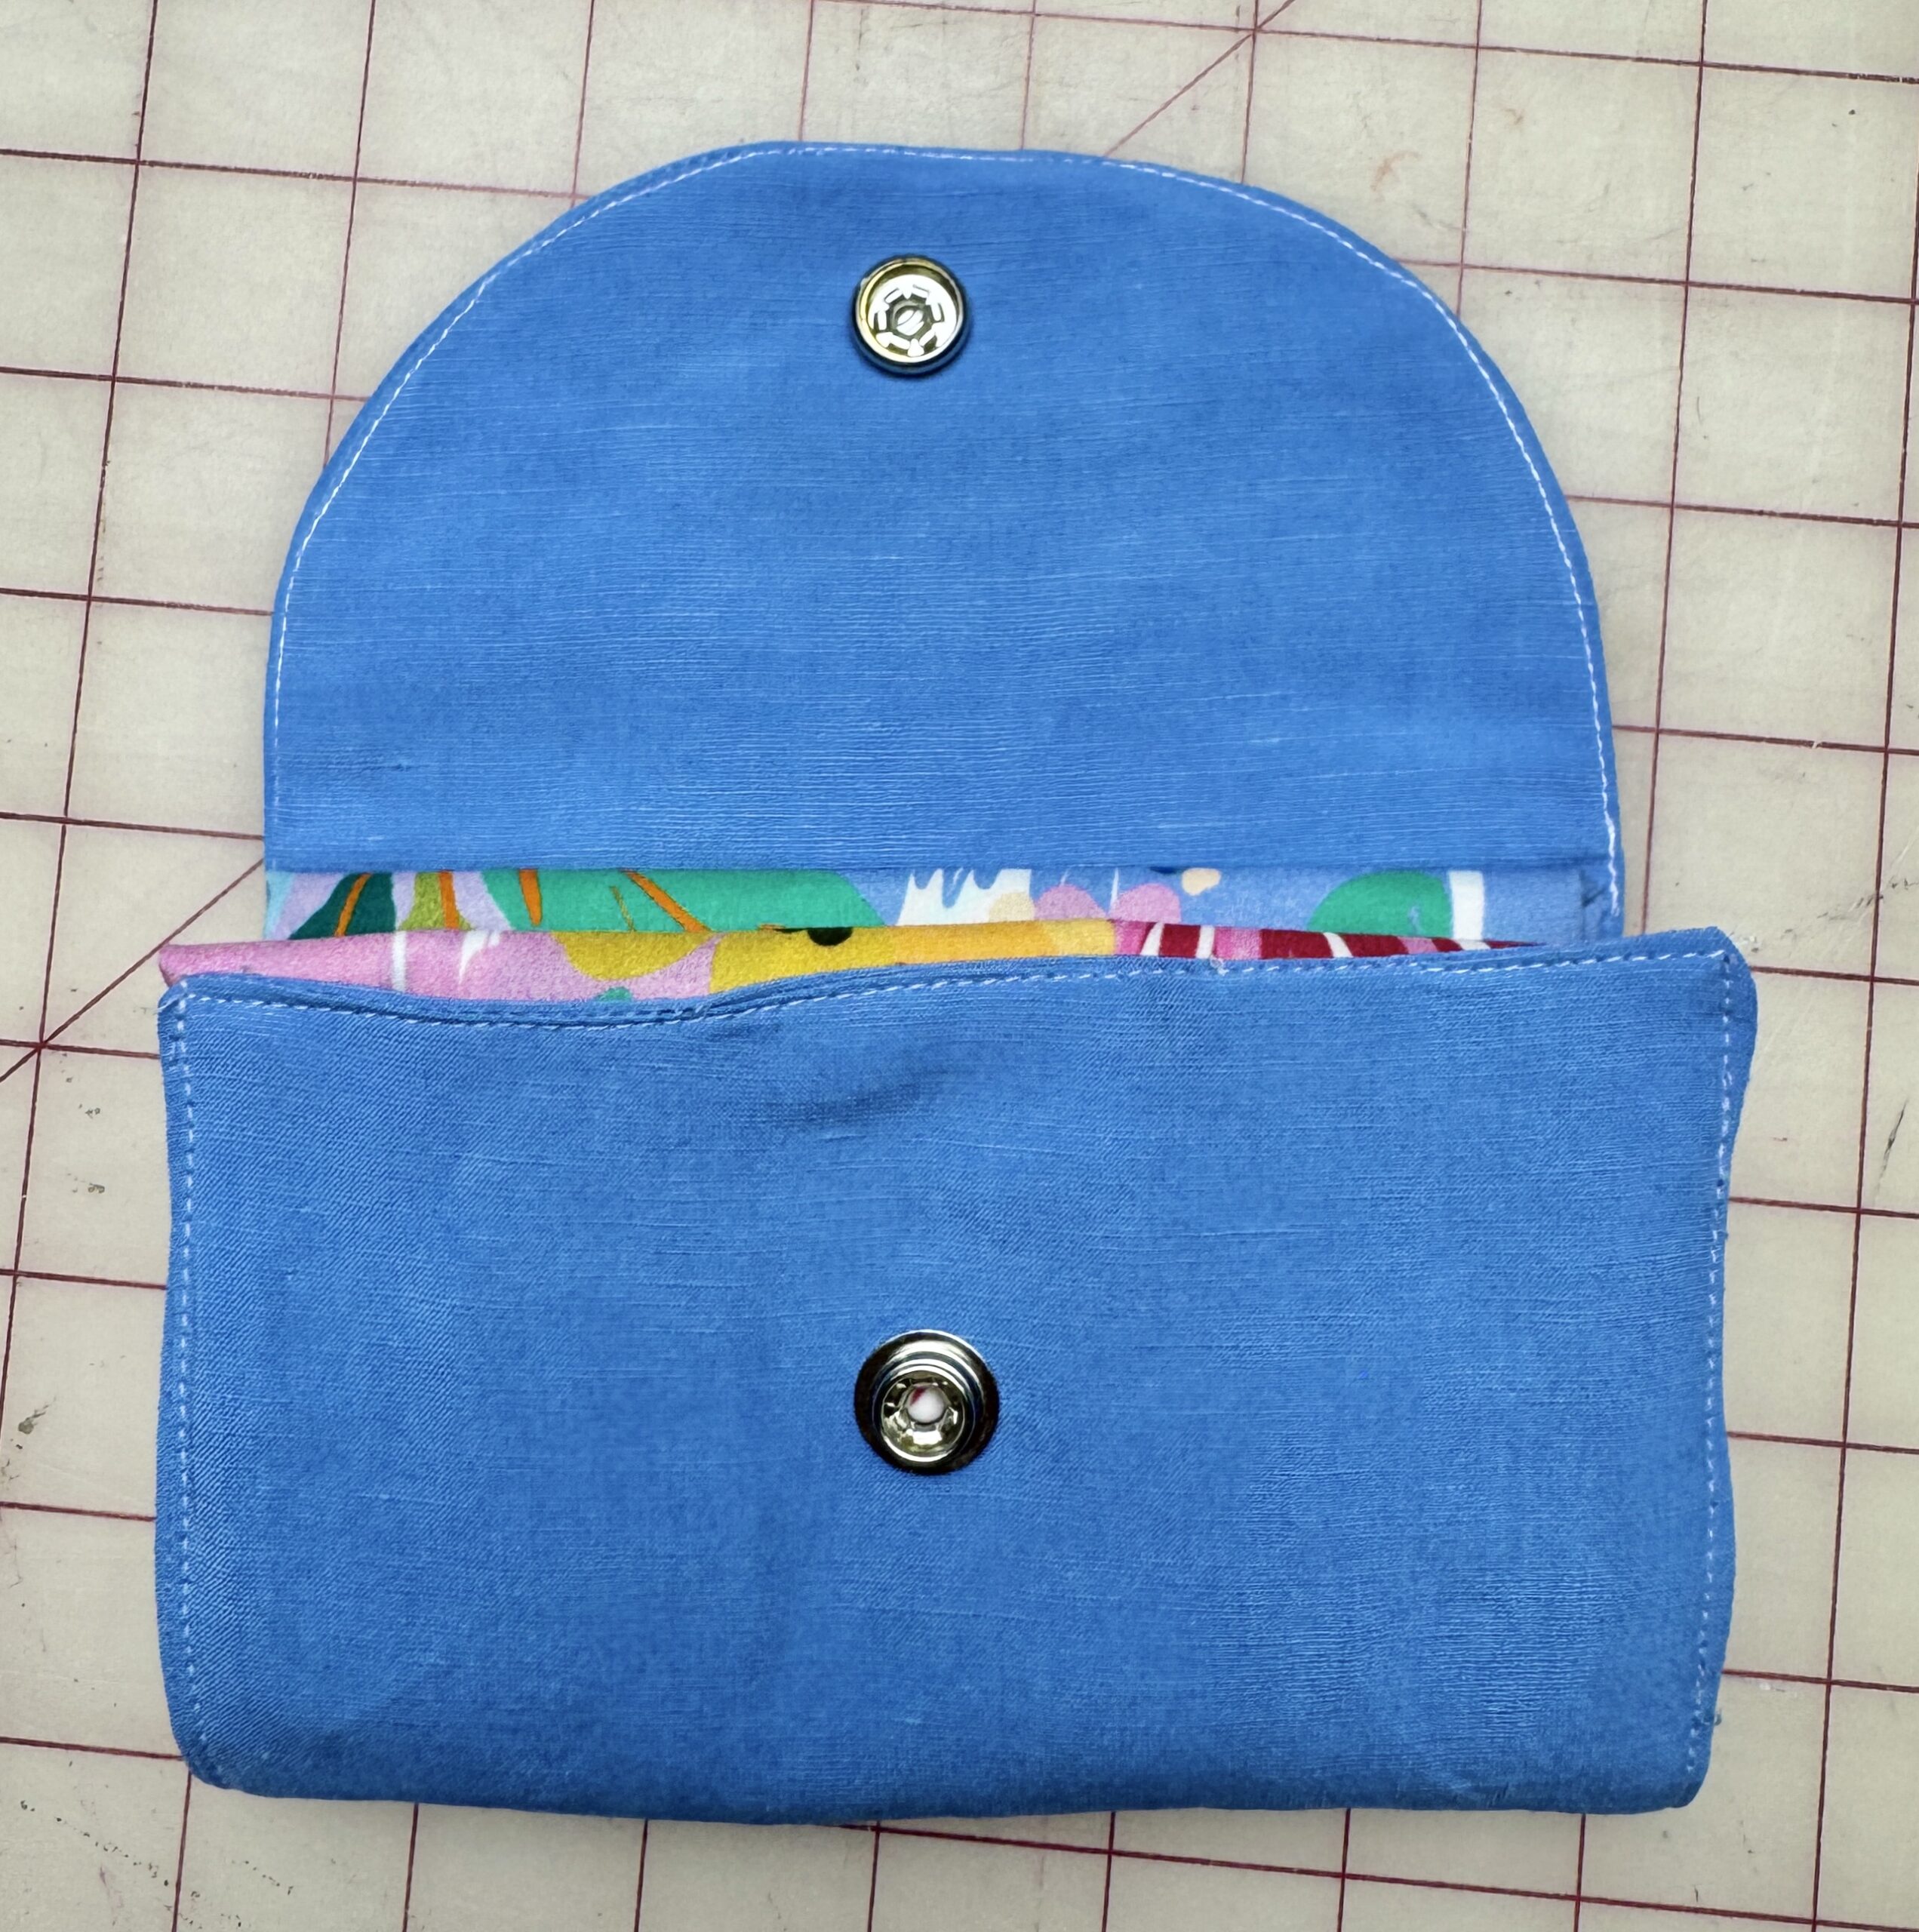
Step 5: Add the Snap Closure
- Fold and roll the tote into its compact clutch shape, making sure the pocket flap remains on the outside.


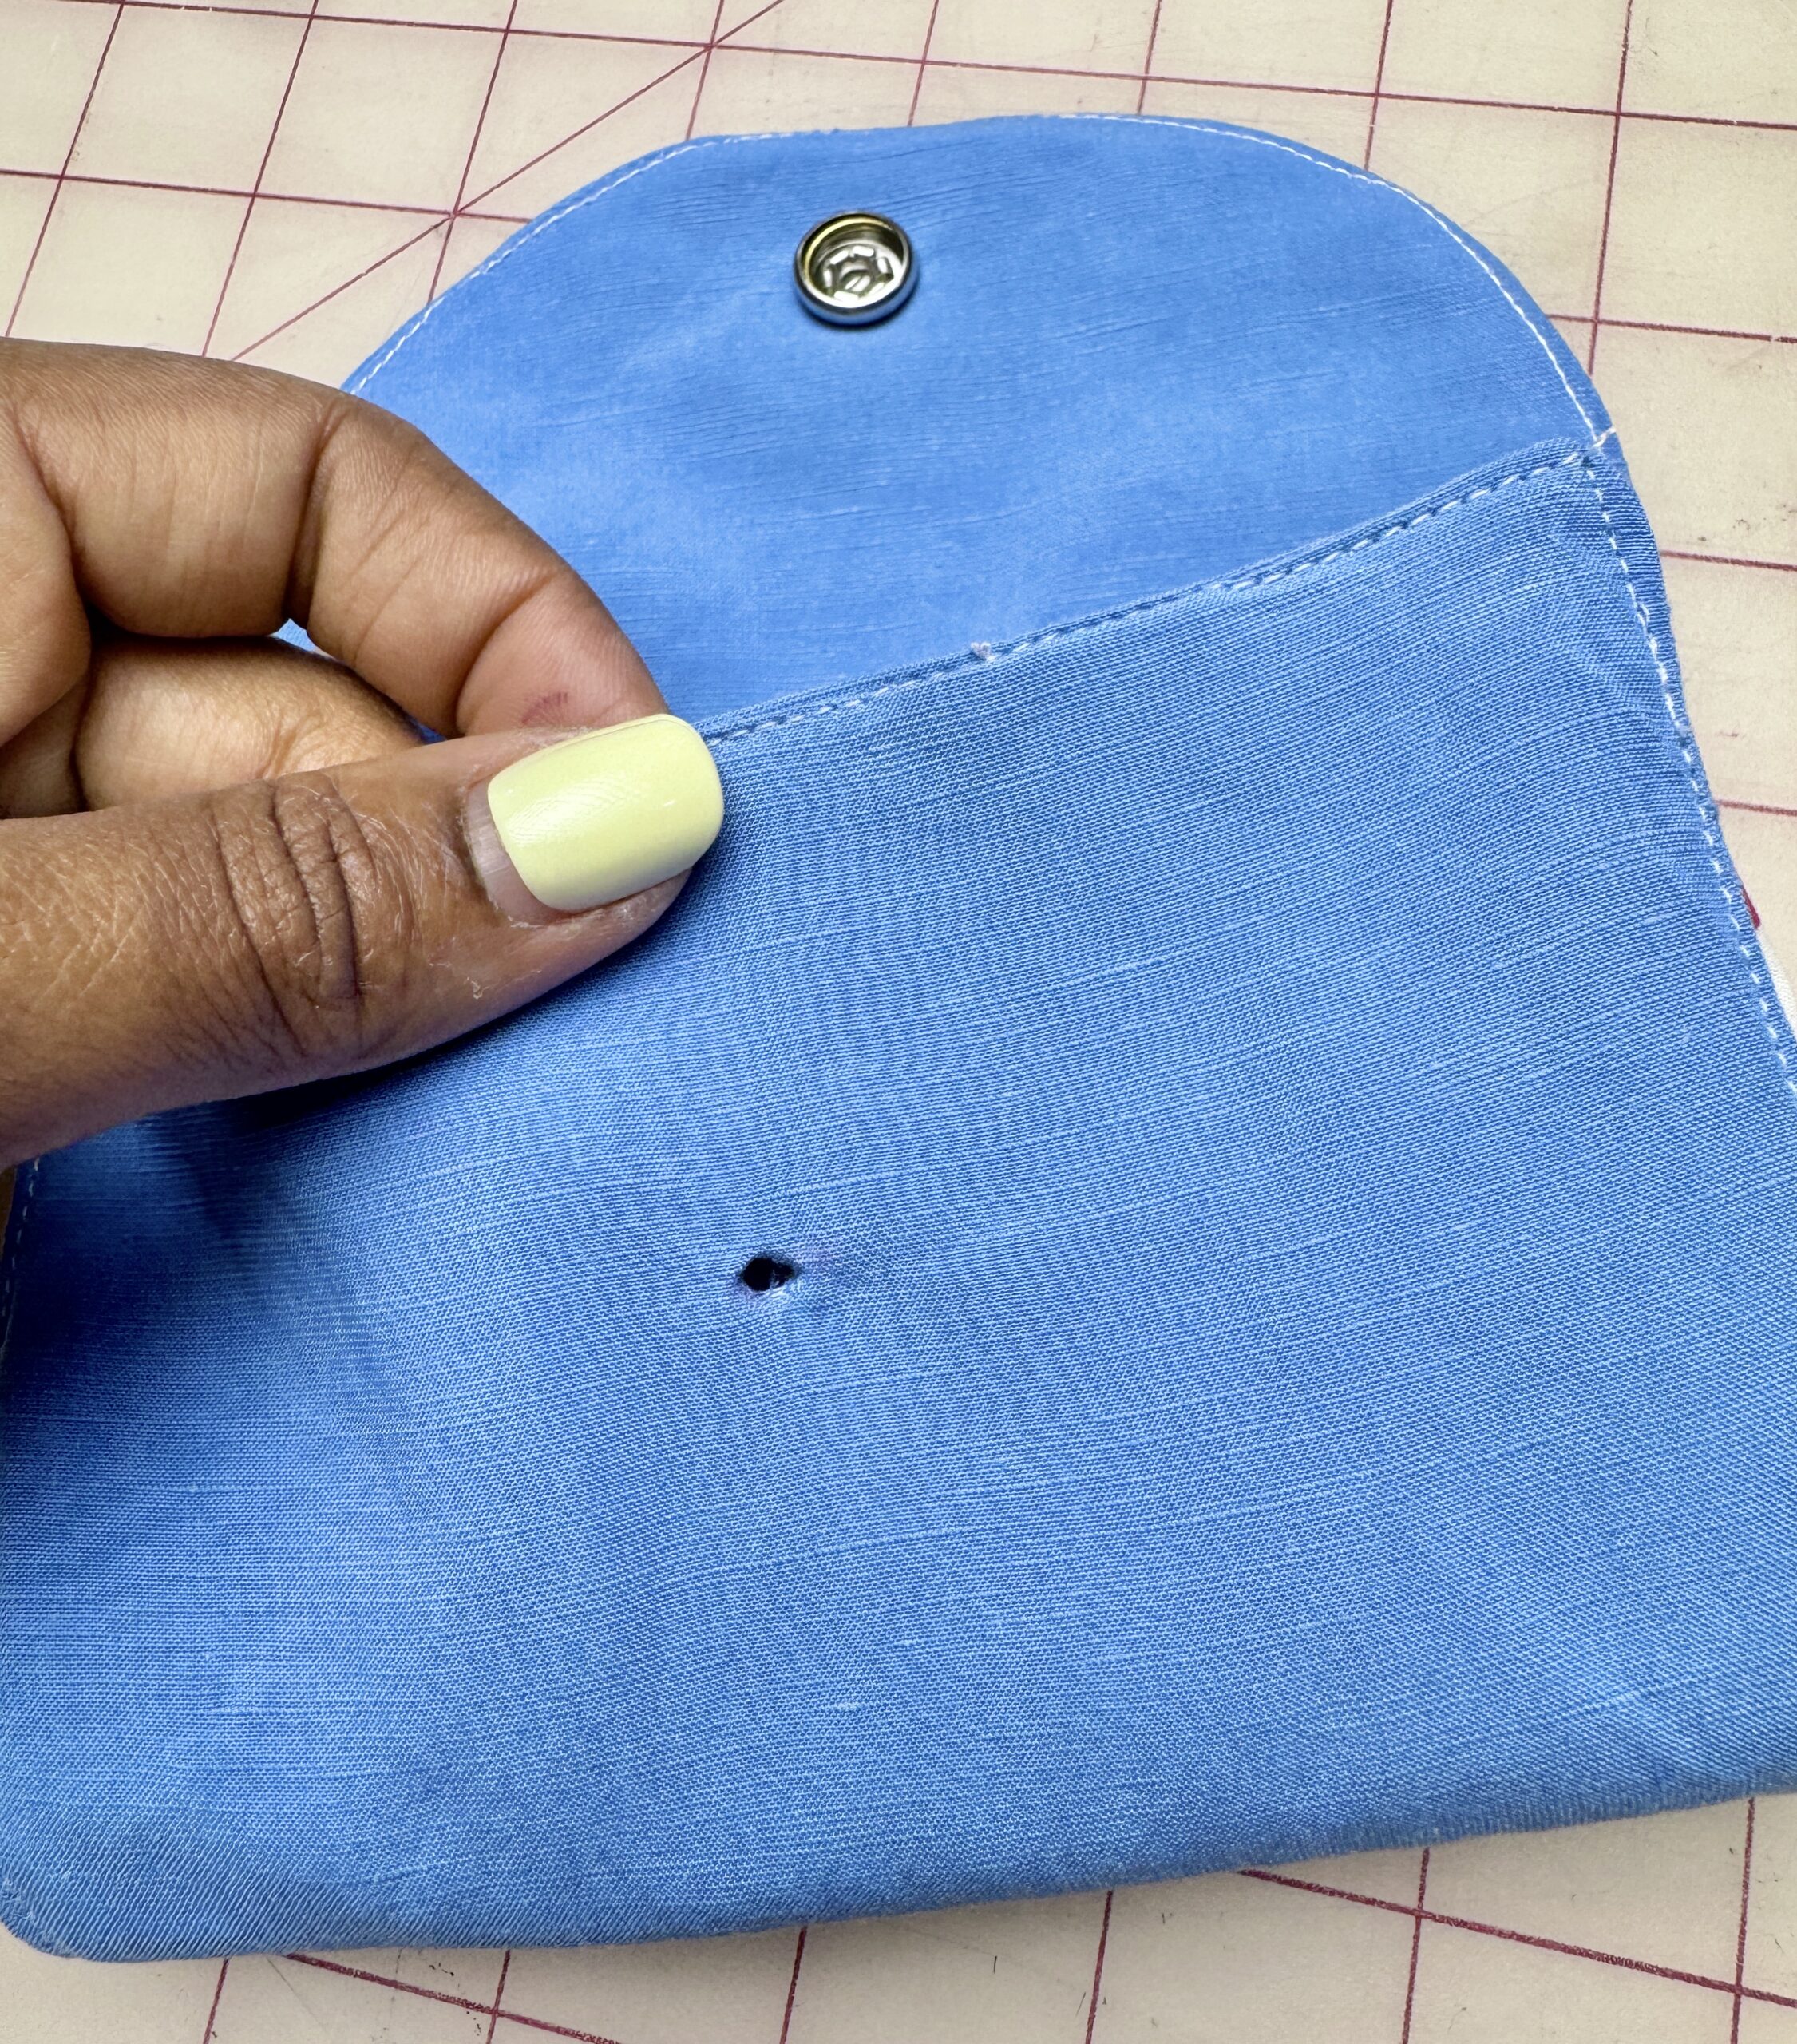
- Measure 2 cm from the folded edge using a Clover 5-in-1 Sliding Gauge to determine the placement of the outer snap. Mark the corresponding snap location on the pocket flap. Use an awl to create the hole and install the remaining snap using the snap tool.
Your foldable shopping tote is now ready to go wherever summer takes you. Whether you tuck it into your purse for a spontaneous shopping trip, keep it in the car for grocery runs, or pack it in your suitcase for vacation, this is one of those projects that is as practical as it is fun to sew. I hope you enjoyed this tutorial and found a new favorite bag to add to your handmade collection. Happy sewing!
If you want to keep up with me, Duana, on social media for other fun projects, follow me on social media: Instagram
If you want to keep up with all things Clover, follow us on: Facebook | Twitter | Instagram | Pinterest | YouTube | Ravelry