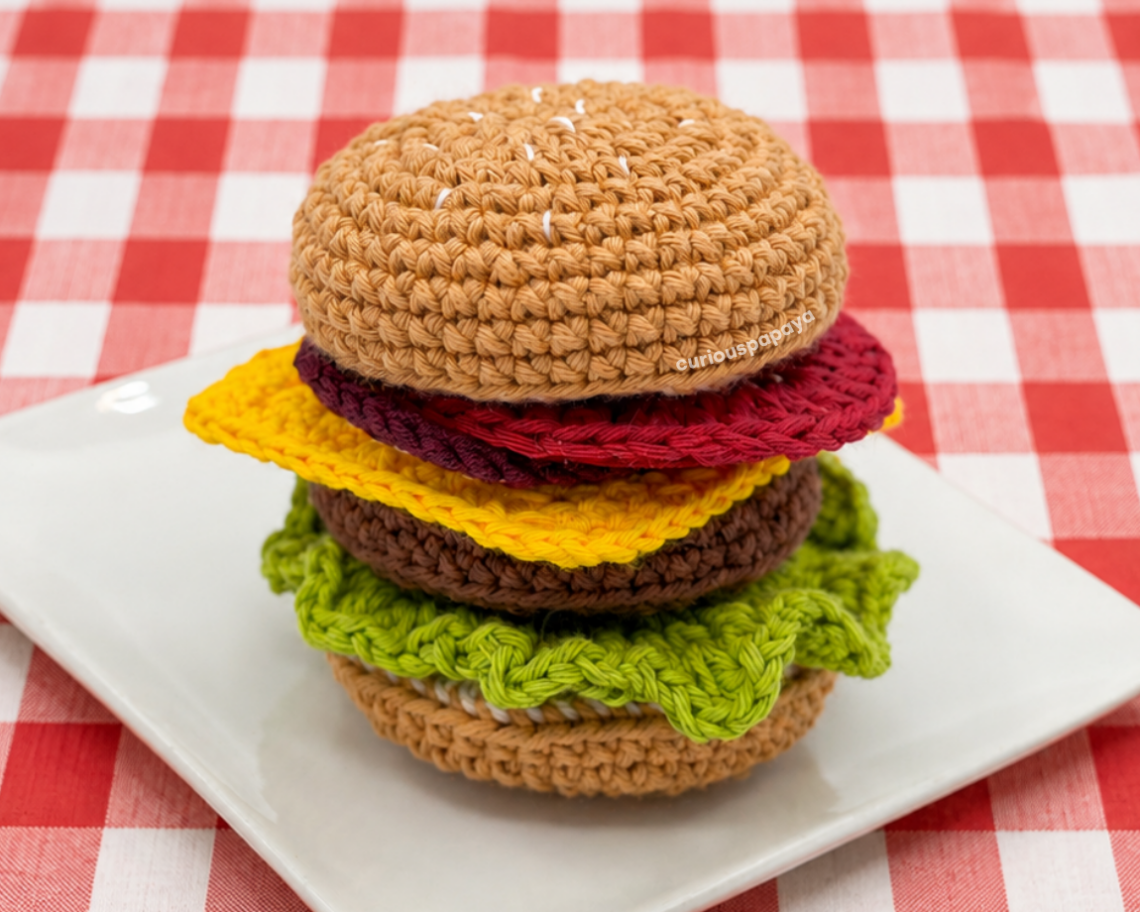
Build Your Own Burger! *crochet pattern*
DID YOU KNOW that May 28th is National Burger Day!? Fire up the grill (in this case, get your Clover notions out) & let’s get cooking 😀
– Amy (@curiouspapaya)
MATERIALS:
- Clover Amour Hook (2.75 mm)
- Clover Patchwork Scissors (small)
- Clover Yarn Needle
- Clover Stitch Markers
- fiber fill stuffing
- foam insert (provides structure to the patty – can substitute with fiber fill stuffing)
- #3 light worsted cotton yarn
- 1 skein of light tan
- 1 skein of white
- 1 skein of cream
- 1 skein of yellow
- 1 skein of dark brown
- 1 skein of red
- 1 skein of dark red
- 1 skein of burgundy
- 1 skein of light green
- 1 skein of dark green
- embroidery floss
- cream
- light yellow
- black
- stiff felt
- red
- green
NOTES:
- Please do not copy/redistribute any part of this pattern as your own. This includes reposting/translating without permission. Feel free to sell your finished products in small quantities as long as you give credit to help support my work. Tag your creations with @curiouspapaya so I can feature you!
- This pattern is written in US terminology.
- The pattern is worked in continuous rounds (a spiral), rows, and joined rounds.
- “Yarn under, yarn under” creates tighter, X-shaped stitches. Your finished size may vary depending on tension and method.
- Difficulty: intermediate-beginner+
- Techniques used: magic circle, invisible finish
- Measurements: 3 in. x 3.5 in. [~8 cm x ~9 cm] if using the prescribed materials
- Time: ~3 hrs
ABBREVIATIONS:
- blo: back loops only
- ch: chain
- dc: double crochet
- dc-inc: double crochet increase
- dec: (invisible) decrease
- flo: front loops only
- inc: single crochet increase
- rs: right side
- sc: single crochet
- slst: slip stitch
- st(s): stitch(es)
- ws: wrong side
- [#]: stitch count
- (…) x#: repeat instructions the number of times
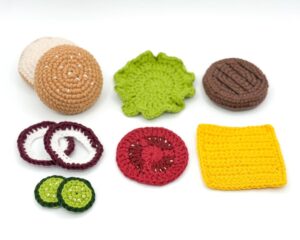
PATTERN:
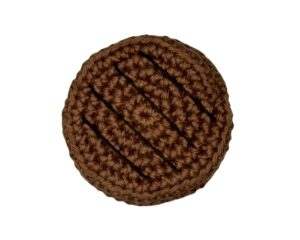
TOP BUN:
Start in light tan yarn and with a 2.75 mm Clover Amour hook:
- Round 1: make a magic circle and (sc) x8 [8]
- Round 2: (inc) x8 [16]
- Round 3: (sc, inc) x8 [24]
- Round 4: (sc, inc, sc) x8 [32]
- Round 5: (3 sc, inc) x6 [40]
- Round 6: sc all around [40]
- Round 7: (2 sc, inc, 2 sc) x8 [48]
- Rounds 8-10 (3 rounds total): sc all around [48]
Use the invisible finish and leave a short yarn tail.
Next, we will embroider the sesame seeds.
- Step 1: Cut 12 in. [~30 cm] of cream embroidery thread.
- Step 2: Use the Clover darning needle and weave from the ws to the rs of the piece.
- Step 3: Embroider diagonal lines, 1 st tall, all along the top bun.
- Step 4: Weave back to the ws.
- Step 5: Secure the thread tails into a knot.
Join cream yarn into the blo of one of the sts.
- Round 11: (blo) sc all around [48]
- Round 12: (2 sc, dec, 2 sc) x8 [40]
- Round 13: (3 sc, dec) x8 [32]
- Round 14: (sc, dec, sc) x8 [24]
- Round 15: (sc, dec) x8 [16]
Stuff.
- Round 16: (dec) x8 [8]
Fasten off and leave a 6 in. [~15 cm] yarn tail for closing up the piece. Use your Clover darning needle and weave through the flo. Pull the hole closed.

BOTTOM BUN:
Start in light tan yarn and with a 2.75 mm Clover Amour hook:
- Round 1: make a magic circle and (sc) x8 [8]
- Round 2: (inc) x8 [16]
- Round 3: (sc, inc) x8 [24]
- Round 4: (sc, inc, sc) x8 [32]
- Round 5: (3 sc, inc) x6 [40]
- Round 6: (2 sc, inc, 2 sc) x8 [48]
- Rounds 7-8 (2 rounds total): sc all around [48]
Use the invisible finish and leave a short yarn tail.
Join cream yarn into the blo of one of the sts.
- Round 9: (blo) sc all around [48]
- Round 10: (2 sc, dec, 2 sc) x8 [40]
- Round 11: (3 sc, dec) x8 [32]
- Round 12: (sc, dec, sc) x8 [24]
Stuff.
- Round 13: (sc, dec) x8 [16]
- Round 14: (dec) x8 [8]
Fasten off and leave a 6 in. [~15 cm] yarn tail for closing up the piece. Use your Clover darning needle and weave through the flo. Pull the hole closed.
PROTEIN PATTY:
In dark brown yarn and with a 2.75 mm Clover Amour hook:
- Round 1: make a magic circle and (sc) x8 [8]
- Round 2: (inc) x8 [16]
- Round 3: (sc, inc) x8 [24]
- Round 4: (sc, inc, sc) x8 [32]
- Round 5: (3 sc, inc) x6 [40]
- Round 6: (2 sc, inc, 2 sc) x7, 2 sc, inc, sc, slst into the last st [48]
*Note: The slst will help alleviate the height difference from working in a spiral.
- Round 7: (blo) sc all around [48]
- Round 8: 47 sc, slst into the last st [48]
Place your Clover stitch marker into the current loop.
Measure and cut a circle out of the foam. Insert it into the piece and continue to crochet around it.

*Note: If using fiber fill stuffing, the patty may not lay as flat – but you can wait to stuff the piece after round 12!
- Round 9: (2 sc, dec, 2 sc) x8 [40]
- Round 10: (3 sc, dec) x8 [32]
- Round 11: (sc, dec, sc) x8 [24]
- Round 12: (sc, dec) x8 [16]
- Round 13: (dec) x8 [8]
Fasten off and leave a 6 in. [~15 cm] yarn tail for closing up the piece. Use your Clover darning needle and weave through the flo. Pull the hole closed.
Next, we will embroider the Grill Marks.
- Step 1: Cut 24 in. [~61 cm] of black embroidery thread.
- Step 2: Use your Clover darning needle and weave into the side the piece, leaving a short yarn tail.
- Step 3: Embroider a line spanning rounds 1-5.
- Step 4: Weave in a zig zag motion embroider the other 3 lines, each 2 sts apart.
- Step 5: Weave back to where you entered in from.
- Step 6: Secure the thread tails into a knot.
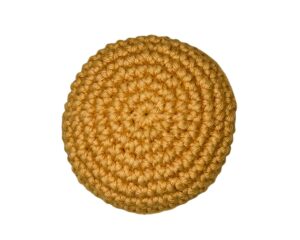
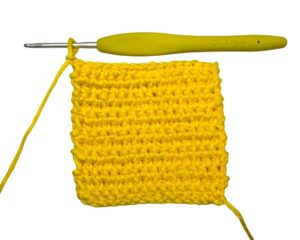
CHEESE:
In yellow yarn and with a 2.75 mm Clover Amour hook:
*Note: This part of the pattern is worked in rows.
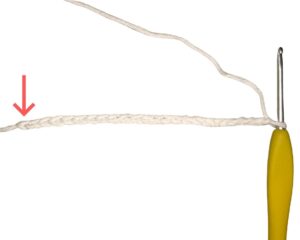
- Row 1: make a slipknot and ch 15, work into the second ch from the hook and make 14 sc, ch 1, turn [14]
- Rows 2-13 (12 rows total): 14 sc, ch 1, turn [14]
- Row 14: 14 sc [14]
Do not fasten off. Next, we will continue onto the border.
Each corner will be made up of *sc, ch 1, sc* into the same st. The first corner already has the sc made, so we will complete the rest of the sts.
- Left side: *ch 1, sc* into the same st, 12 sc
- Bottom side: *corner*, 12 sc
- Right side: *corner*, 12 sc, *corner*
Skip the top side.
Use the invisible finish and weave in the remaining yarn tail.

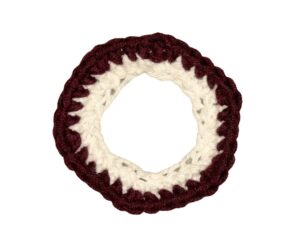
ONION SLICE (make two):
Start in white yarn and with a 2.75 mm Clover Amour hook:
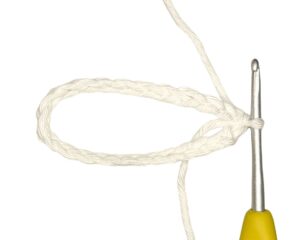
Make a slipknot and ch 24, slst into the first ch to form a loop. Make sure the loop isn’t twisted.
*Note: Crochet over the yarn tails or weave them in at the end.
- Round 1: ch 1 (counts as the first st), sc into the same st, 3 sc, (inc, 3 sc) x5, in burgundy yarn, slst into the first st to join the round [30]
Continue in the burgundy yarn and cut the white yarn.
- Round 2: ch 1 (counts as the first st), sc into the same st, 2 sc, (inc, 4 sc) x5, 2 sc [36]
Use the invisible finish and weave in the remaining yarn tail.
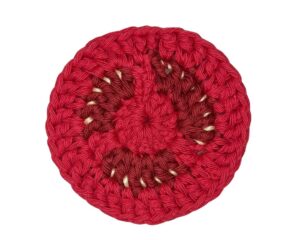
TOMATO SLICE:
Start in red yarn and with a 2.75 mm Clover Amour hook:
*Note: This part of the pattern is worked in joined rounds. Crochet over the yarn tails when making the color changes. The ch at the beginning of each round counts as the first st.
- Round 1: make a magic circle, ch 2 (counts as first st), (dc) x11, slst into the first st to join the round [12]
- Round 2: ch 2, dc into the same st (counts as the first dc-inc), change to dark red, (dc-inc) x3, change to red, dc-inc, change to dark red, (dc-inc) x3, change to Red, dc-inc, change to dark red, (dc-inc) x3, in red yarn, slst into the first st to join the round [24]
Continue in the red yarn and cut the dark red yarn.
- Round 3: ch 2, dc into the same st (counts as the first dc-inc), dc into the next st, (dc-inc, dc) x11, slst into the first st to join the round [36]
Use the invisible finish and weave in the remaining yarn tail.
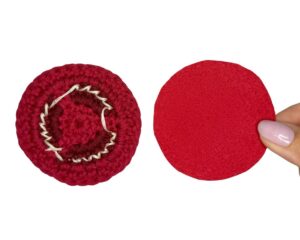
Next, we will embroider the Tomato Seeds.
- Step 1: Cut 18 in. [~46 cm] of light yellow embroidery thread.
- Step 2: Use your Clover darning needle and weave from the ws to the rs of the piece.
- Step 3: Embroider 5 lines, 1 st tall, all along the dark red section of the tomato slice.
- Step 4: Weave back to the ws.
- Step 5: Secure the thread tails into a knot.
Next, we will add a Felt Backing.
- Step 1: Trace the tomato slice onto red felt.
- Step 2: Use the Clover Small Patchwork Scissors and cut it out.
- Step 3: Secure the felt circle onto the back of the tomato slice to cover up the embroidery thread. This will provide structure and make the piece neater.
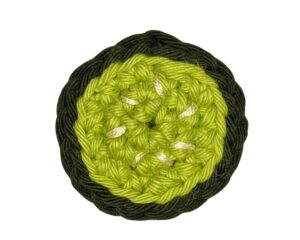
PICKLES (make two):
Start in light green yarn and with a 2.75 mm Clover Amour hook:
- Round 1: make a magic circle and (sc) x6 [6]
- Round 2: (inc) x6 [12]
- Round 3: (sc, inc) x6 [18]
Use the invisible finish. Join dark green yarn into the blo of one of the sts.
- Round 4: loosely slst all around [18]
Use the invisible finish and weave in the remaining yarn tail.
Next, we will embroider the Pickle Seeds.
- Step 1: Cut 18 in. [~46 cm] of light yellow embroidery thread.
- Step 2: Use your Clover darning needle and weave from the ws to the rs of the piece.
- Step 3: Embroider 6 lines, 1 st tall, spanning round 2 of the pickle slice.
- Step 4: Weave back to the ws.
- Step 5: Secure the thread tails into a knot.
Next, we will add a Felt Backing.
- Step 1: Trace the pickle slice onto green felt.
- Step 2: Use your Clover Small Patchwork Scissors and cut it out.
- Step 3: Secure the felt circle onto the back of the pickle slice to cover up the embroidery thread. This will provide structure and make the piece neater.
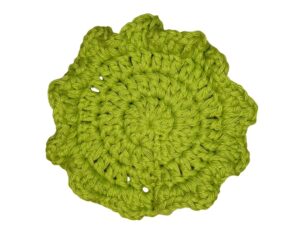
LETTUCE:
Start in light green yarn and with a 2.75 mm Clover Amour hook:
*Note: This part of the pattern is worked in joined rounds. Crochet over the yarn tails when making the color changes. The ch at the beginning of each round counts as the first st.
- Round 1: make a magic circle, ch 2 (counts as first st), (dc) x11, slst into the first st to join the round [12]
- Round 2: ch 2, dc into the same st (counts as the first dc-inc), (dc-inc) x11, slst into the first st to join the round [24]
- Round 3: ch 2, dc into the same st (counts as the first dc-inc), dc into the next st, (dc-inc, dc) x11, slst into the first st to join the round [36]
- Round 4: ch 2, dc-inc into the same st (3 dc in one st total), 3 hdc into the next st, 3 sc into the next st, (3 dc in the next st, 3 hdc in the next st, 3 sc in the next st) x11 [108]
Use the invisible finish and weave in the remaining yarn tail.
You’re finished! Tag your creations with @cloverusa and @curiouspapaya to share your makes 🙂
If you want to keep up with me, Amy, on social media for other fun projects, follow me on: Instagram
If you want to keep up with all things Clover, follow us on: Facebook | Twitter | Instagram | Pinterest | YouTube | Ravelry