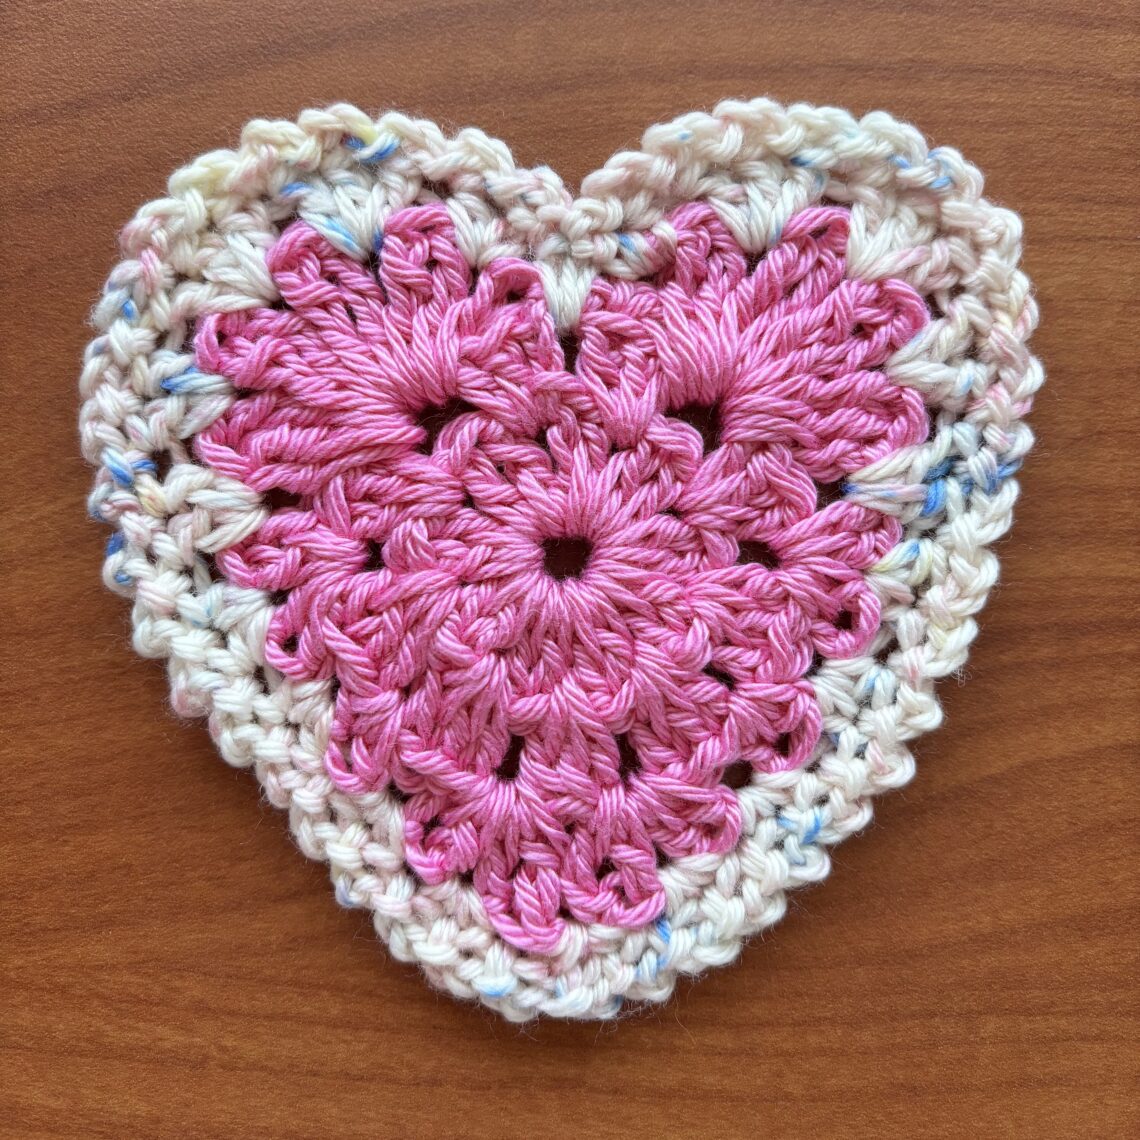
Crochet Heart Coasters (last minute valentine’s gift!)
There’s just something about crochet hearts that never gets old. These heart coasters were designed with Valentine’s Day in mind, but honestly? They’re perfect any time you want to add a little handmade love to your space. Using a classic granny-style method, this pattern transforms simple stitches into a bold, charming heart that works up fast and feels familiar in the best way. This is an easy, beginner-friendly pattern that’s quick to whip up; great for last-minute gifts, craft fairs, or a cozy afternoon project. Whether you make a single coaster or a whole stack, these hearts are a sweet reminder that the simplest designs are often the most meaningful.
Click the link HERE to follow along with the video tuutorial too! Thank you for supporting this blog so that we can provide you with visual tutorials to accompany our blog posts 🙂
MATERIALS:
- Amour Crochet Hook G (4.0 mm)
- Patchwork Scissors
- small amount of sport weight yarn (pick 2 colors)
- yarn needle
NOTES:
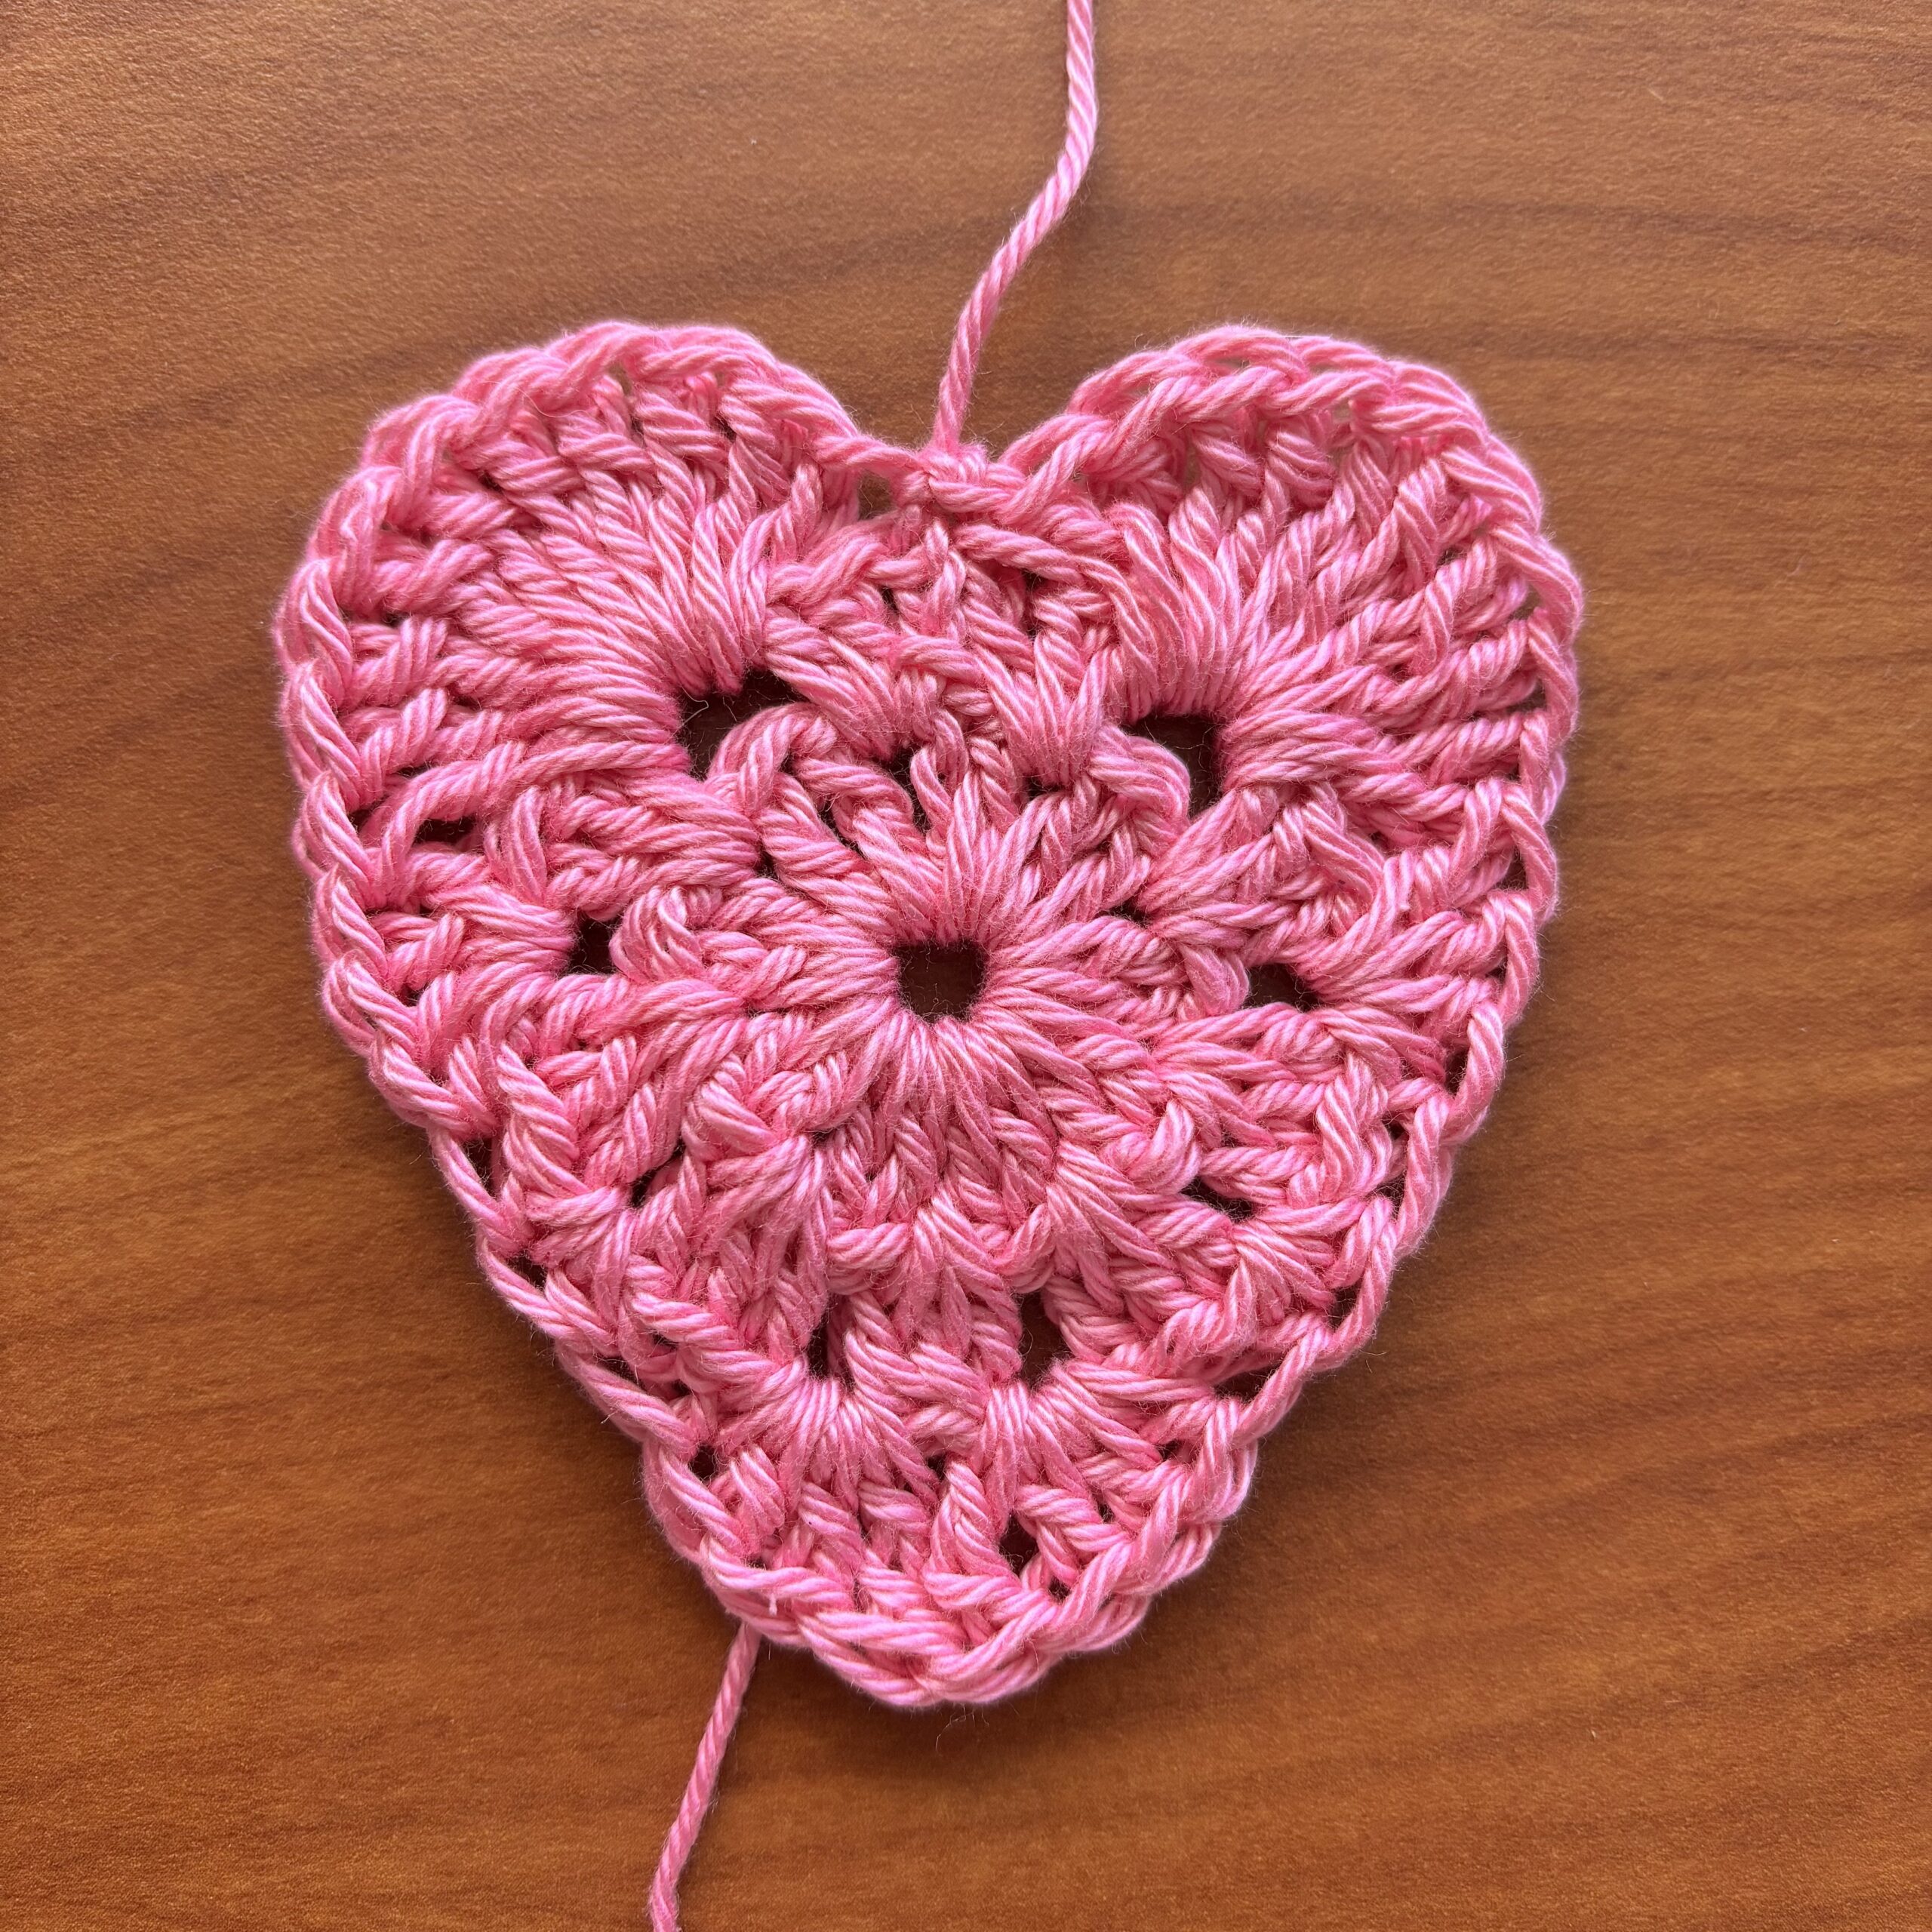
- The finished coaster should be 4” high by 4 ¼” wide.
- Color A: pink
- Color B: speckled
HEART COASTER PATTERN:
With Color A:
Ch 5, sl st in the first ch to form a circle.
- Round 1: Ch 3 (counts as a dc), 17 dc in the circle. Join with a sl st in the top of the beginning ch 3. (18 sts)
- Round 2: Sl st in between the ch 3 and the next dc (so you are working in the space between the posts from here on out), ch 3, 2 dc in the same sp, *sk 2 dc, place 3 dc in the next sp,* repeat two more times, ch 1, sk 2 dc, place a 3dc cluster in the next sp, ch 1, [sk 2 dc, place 3 dc in the next sp] four times, join with a sl st in the top of the beginning ch 3. (27 sts)
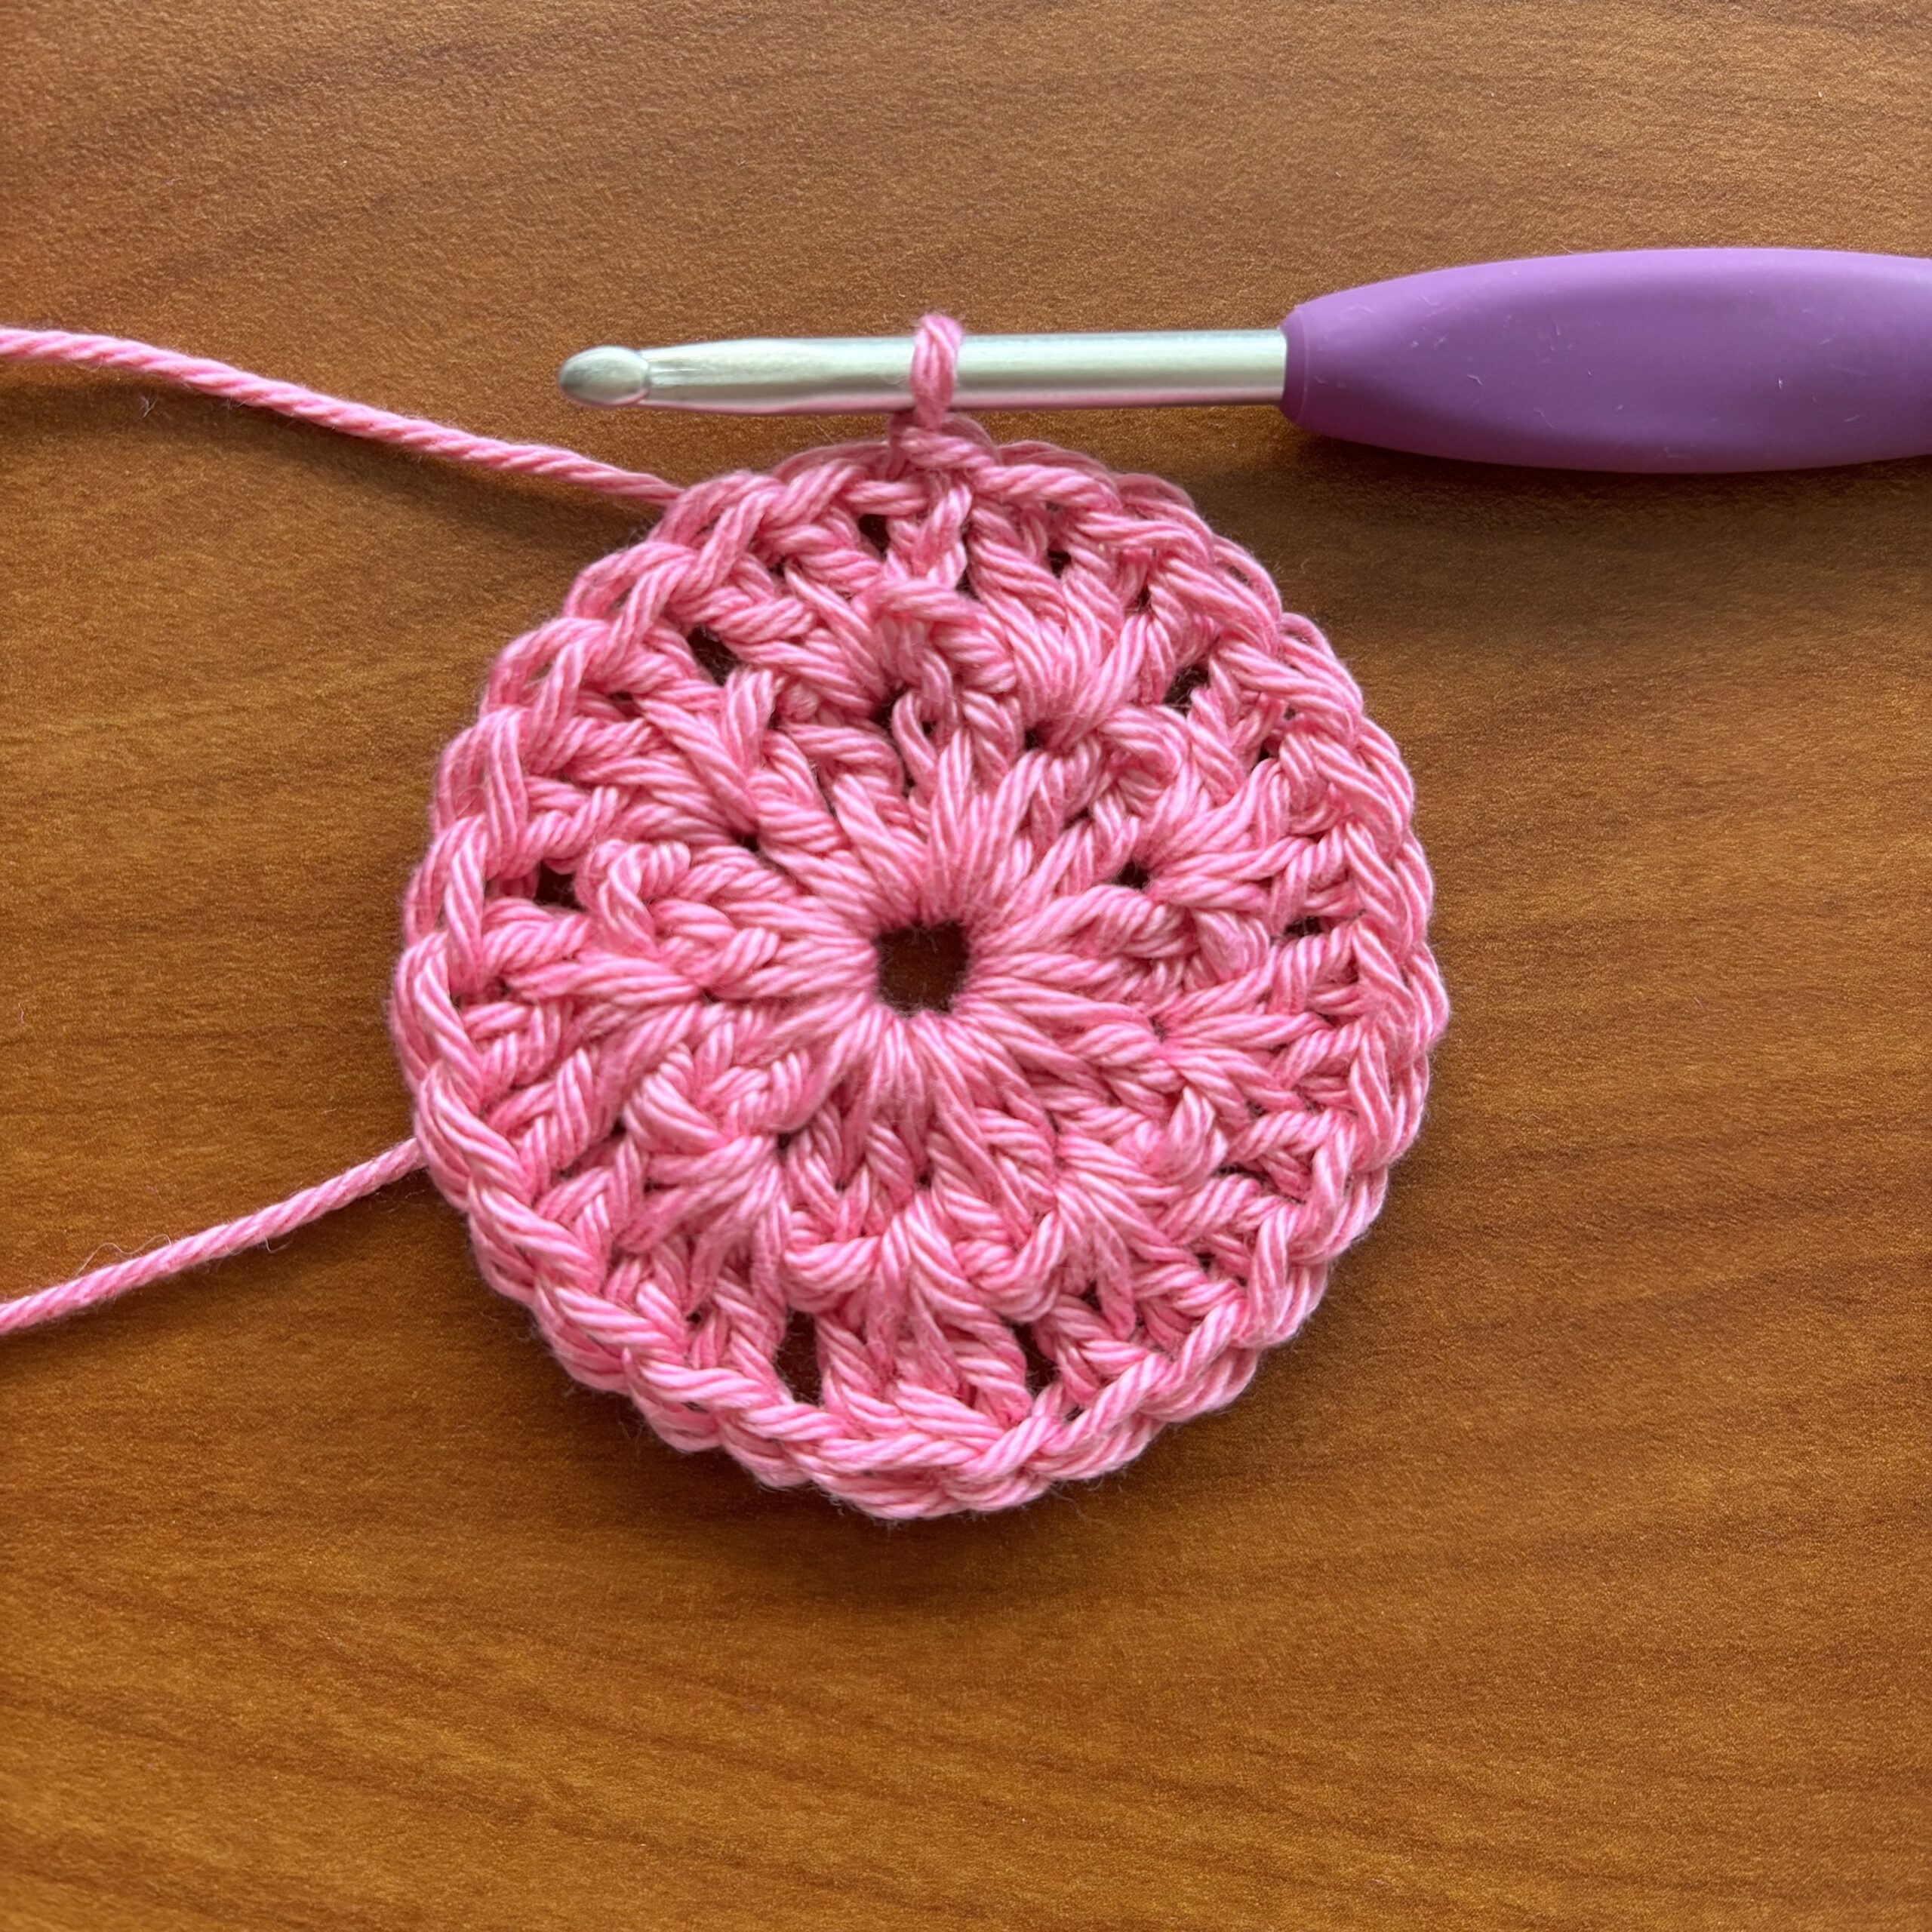
- Round 3: Sk the next 3 dc and place 1 dc in between the 3 dc sets (from here, when it says “space” that is between the sets of 3 dc), 8 tr in the same space as dc, dc2tog using the same space and the next space, [1 dc, 2 hdc] in same space, 2 hdc into the next space, [1 hdc, 2 dc, 1 tr] in the next ch 1 space (before your cluster), [1 tr, 2 dc, 1 hdc] in the next ch 1 space (after the cluster), 2 hdc into the next space, [2 hdc, 1 dc] in the next space, dc2tog using the same space and the next space, 8 tr in the same space, 1 dc in the same space, join with a sl st to the beginning sl st. Finish off Color A.
Join Color B in the same space where you finished off Color A. Ch 1.
- Round 4: 1 sc in the same st, [1 sc, 1 hdc] after the first dc (in the space between the posts, from here on out that is what “space” means), *sk 2 tr, 3 dc in the next space, * twice, sk 2 tr, 2 dc in the next space, sk 2 tr and the first half of the dc2tog, 2 dc into the sp between the dc2tog, [sk 2 sts, 2 hdc in the next st] twice, [sk 2 sts, 2 sc in the next sp] twice, sk 2, [1 sc, ch 2, 1 sc] in between the two tr, [sk 2 sts, 2 sc in the next space] twice, [sk 2, 2 hdc in the next space] twice, sk the next st and first half of the dc2tog, 2 dc in between the dc2tog, sk 3, 2 dc in the next space, [sk 2, 3 dc in the next space] twice, sk 2, [1 hdc, 1 sc] in the next space, join with a sl st in the first sc.
- Round 5: Sl st in the next st, *ch 2, sl st in the next st, * repeat from * to * in each st around, joining with a sl st to the first sl st. Finish off. Weave in ends.

If you want to keep up with me, Julie, on social media for other fun projects, follow me on: Instagram
If you want to keep up with all things Clover, follow us on: Facebook | Twitter | Instagram | Pinterest | YouTube | Ravelry