Butterfly Pillow *free crochet pattern*
There’s something magical about butterflies—their delicate wings, vibrant colors, and effortless grace. Inspired by their beauty, I designed this cozy crochet butterfly that’s perfect for cuddling, decorating, or gifting! Whether you see it as a pillow to brighten up a space or a stuffed companion for little hands to hold, this project is a joy to make. With simple stitches and a playful shape, it’s beginner-friendly and bursting with charm!
MATERIALS:
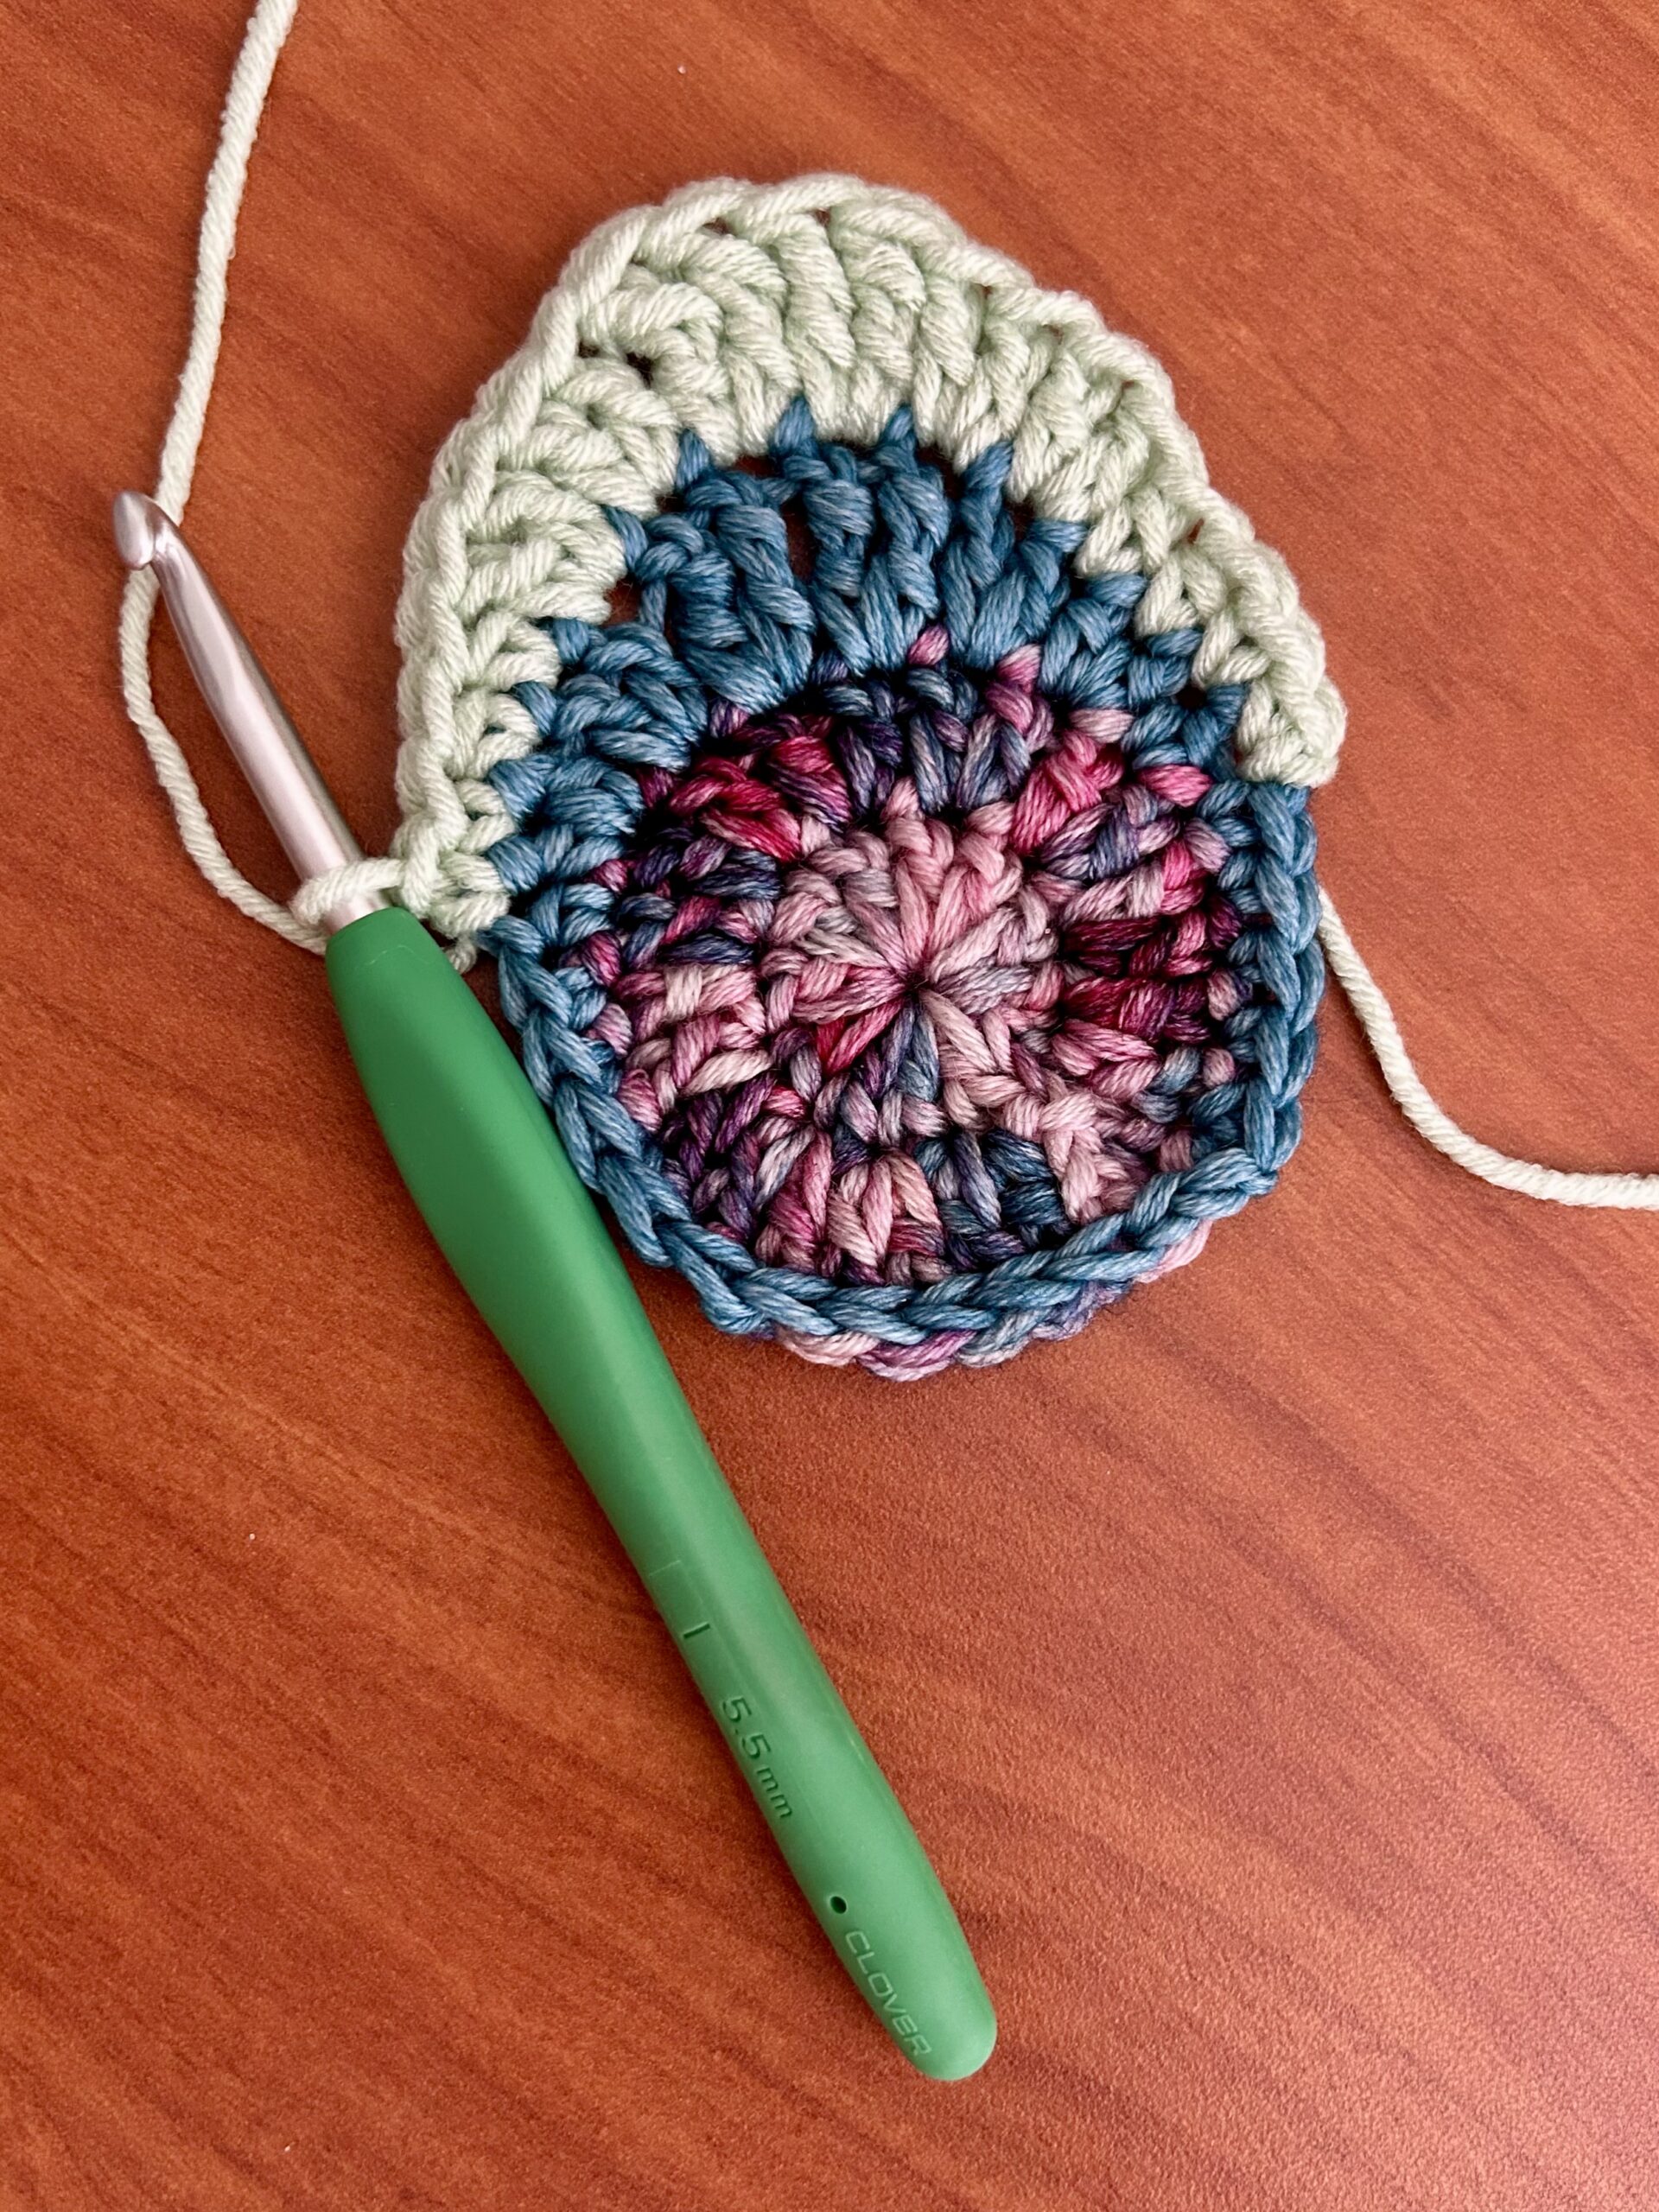
- Clover Amour Crochet Hook I (5.5mm)
- small amount of worsted weight yarn in 5 different colors
- Color A – multicolor
- Color B – blue
- Color C – mint green
- Color D – burgundy
- Color E – yellow
- Patchwork Scissors
- Gold Eye Chenille Needles
- polyfil stuffing
- safety eyes
- black yarn/thread for mouth
- pipe cleaner for antennae
PATTERN INSTRUCTIONS:
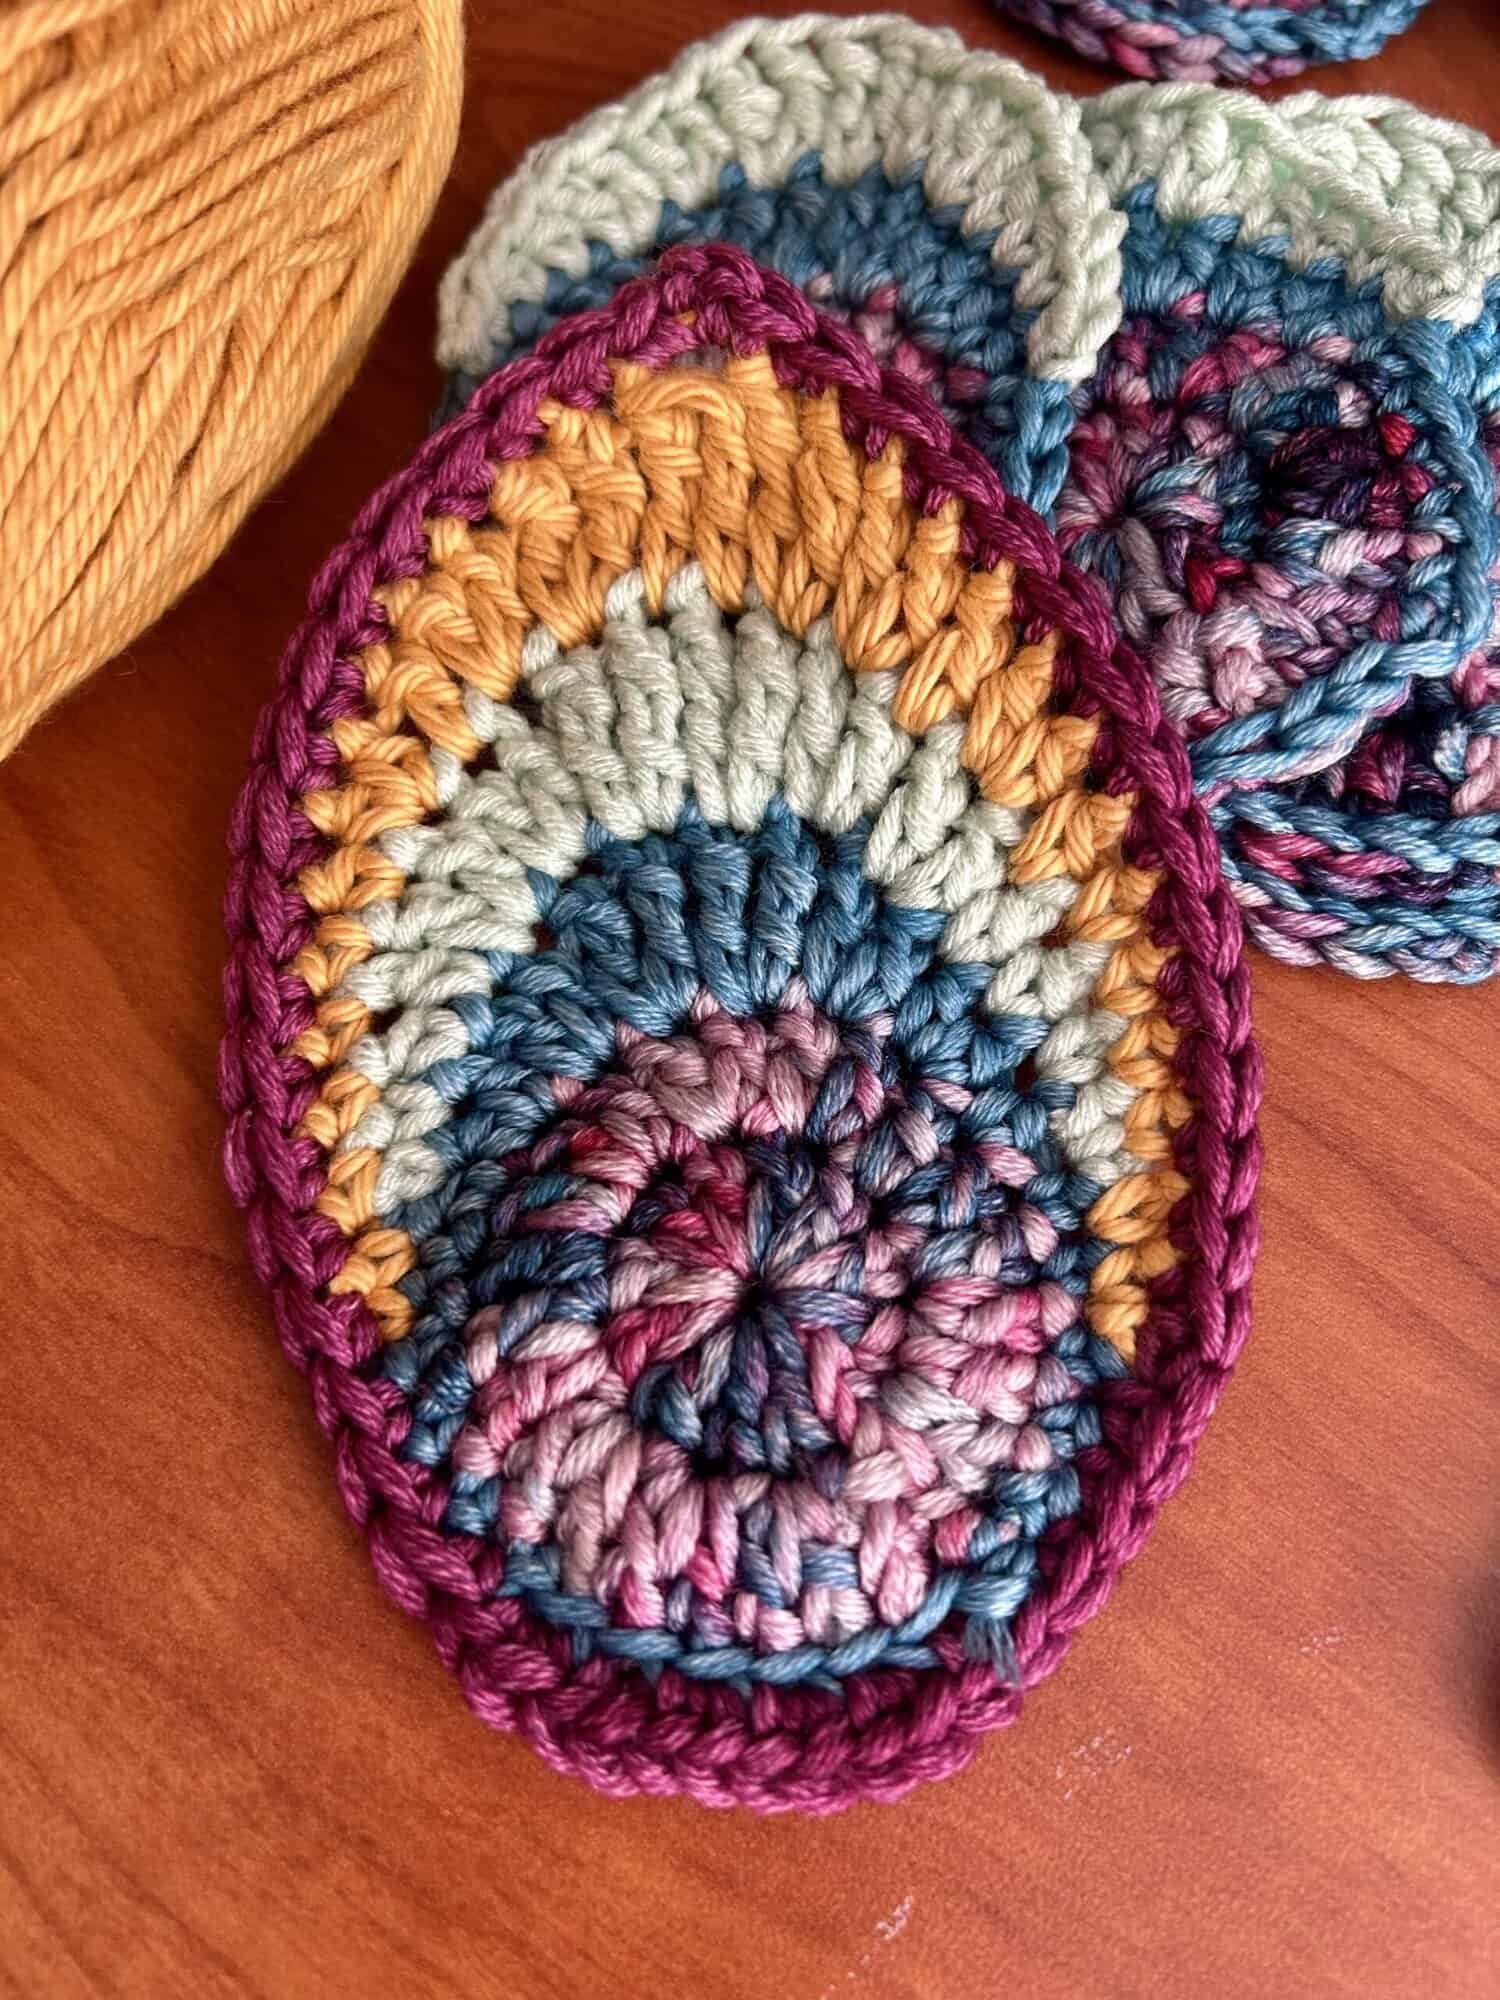
SMALL WING (make 4):
- With Color A, start with a magic circle.
- Round 1: Ch 3 (count as dc), 11 dc in the magic circle, join with a sl st in the top of the ch 3. (12 dc)
- Round 2: Ch 3 (count as dc), 1 dc in the same st, 2 dc in each st around. Join with a sl st in the top of the ch 3. (24 dc)
- Finish off Color A.
- Join Color B in any stitch.
- Row 3: Ch 1, 1 sc in the same st and in the next 4 sts, 1 hdc in the next st, 2 hdc in the next st, 2 dc in the next st, 2 tr in the next, 2 tr in the next, 2 dc in the next, 2 hdc in the next, 1 hdc in the next, 1 sc in each of the next 5 sts, sl st in each of the next 6 sts. Join with a sl st to the first sc.
- Finish off Color B.
- Join Color C in the 1st hdc of the previous round.
- Row 4: Ch 1, 1 sc in the same st, 1 sc in the next st, 1 hdc in each of the next 2 sts, 2 dc in each of the next 2 sts, 2 tr in each of the next 2 sts, 2 dc in each of the next 2 sts, 1 hdc in each of the next 2 sts, 1 sc in each of the next two sts. Leave the remaining sts unworked.
- Finish off Color C.
- Join Color D in the first st of Row 4.
- Round 5: Ch 1, 1 sc in the first st and in each st until you reach the 2nd tr from the previous row, 2 sc in the 2nd tr, ch 2, 2 sc in the next tr, 1 sc in each st down the other side of the wing until you reach the slip stitches, place 2 sc in the BLO of each of the next 6 sl sts. Sc in each of the remaining sts. Join with a sl st in the first sc.
- Finish off Color D.
ASSEMBLY (small wings):
- Place 2 wings (right sides together) and whip stitch all the way around leaving about 2 inches open. Turn right side out, stuff with polyfil, then sew the rest up. Repeat for the other wing.
LARGE WING (make 4):
- With Color A, start with a magic circle.
- Round 1: Ch 3 (count as dc), 11 dc in the magic circle, join with a sl st in the top of the ch 3. (12 dc)
- Round 2: Ch 3 (count as dc), 1 dc in the same st, 2 dc in each st around. Join with a sl st in the top of the ch 3. (24 dc)
- Finish off Color A.
- Join Color B in any stitch.
- Row 3: Ch 1, 1 sc in the same st and in the next 4 sts, 1 hdc in the next st, 2 hdc in the next st, 2 dc in the next st, 2 tr in the next, 2 tr in the next, 2 dc in the next, 2 hdc in the next, 1 hdc in the next, 1 sc in each of the next 5, sl st in each of the next 6 sts. Join with a sl st in the first sc.
- Finish off Color B.
- Join Color C in the 1st hdc of the previous round.
- Row 4: Ch 1, 1 sc in the same st, 1 sc in the next st, 1 hdc in each of the next 2 sts, 2 dc in each of the next 2 sts, 2 tr in each of the next 2 sts, 2 dc in each of the next 2 sts, 1 hdc in each of the next 2 sts, 1 sc in each of the next two sts.
- Finish off Color C.
- Join Color E two sts before the beginning of Row 4.
- Row 5: Ch 1, 1 sc in the first st and in the next 5 sts, 1 hdc in the next st, 2 hdc in the next, 1 dc in the next st, 2 dc in the next st, 2 tr in the next st, tr2tog over the next 2 tr, 2 tr in the next st, 2 dc in the next st, 1 dc in the next st, 2 hdc in the next st, 1 hdc in the next st, 1 sc in the next 6 sts.
- Finish off Color E.
- Join Color D in the first st of Row 5.
- Round 6: Ch 1, 1 sc in the first st and in each st until you reach the tr2tog from the previous round, (1 sc, ch 2, 1 sc) in tr2tog st, 1 sc in each st down the other side of the wing until you reach the slip stitches, place 2 sc in the BLO of each of the next 6 sl sts. 1 sc in each of the remaining sts. Join with a sl st in the first sc.
- Finish off Color D.
ASSEMBLY (large wings):
- Place 2 wings (right sides together) and whip stitch all the way around leaving about 2 inches open. Turn right side out, stuff with polyfil, then sew the rest up. Repeat for the other wing.
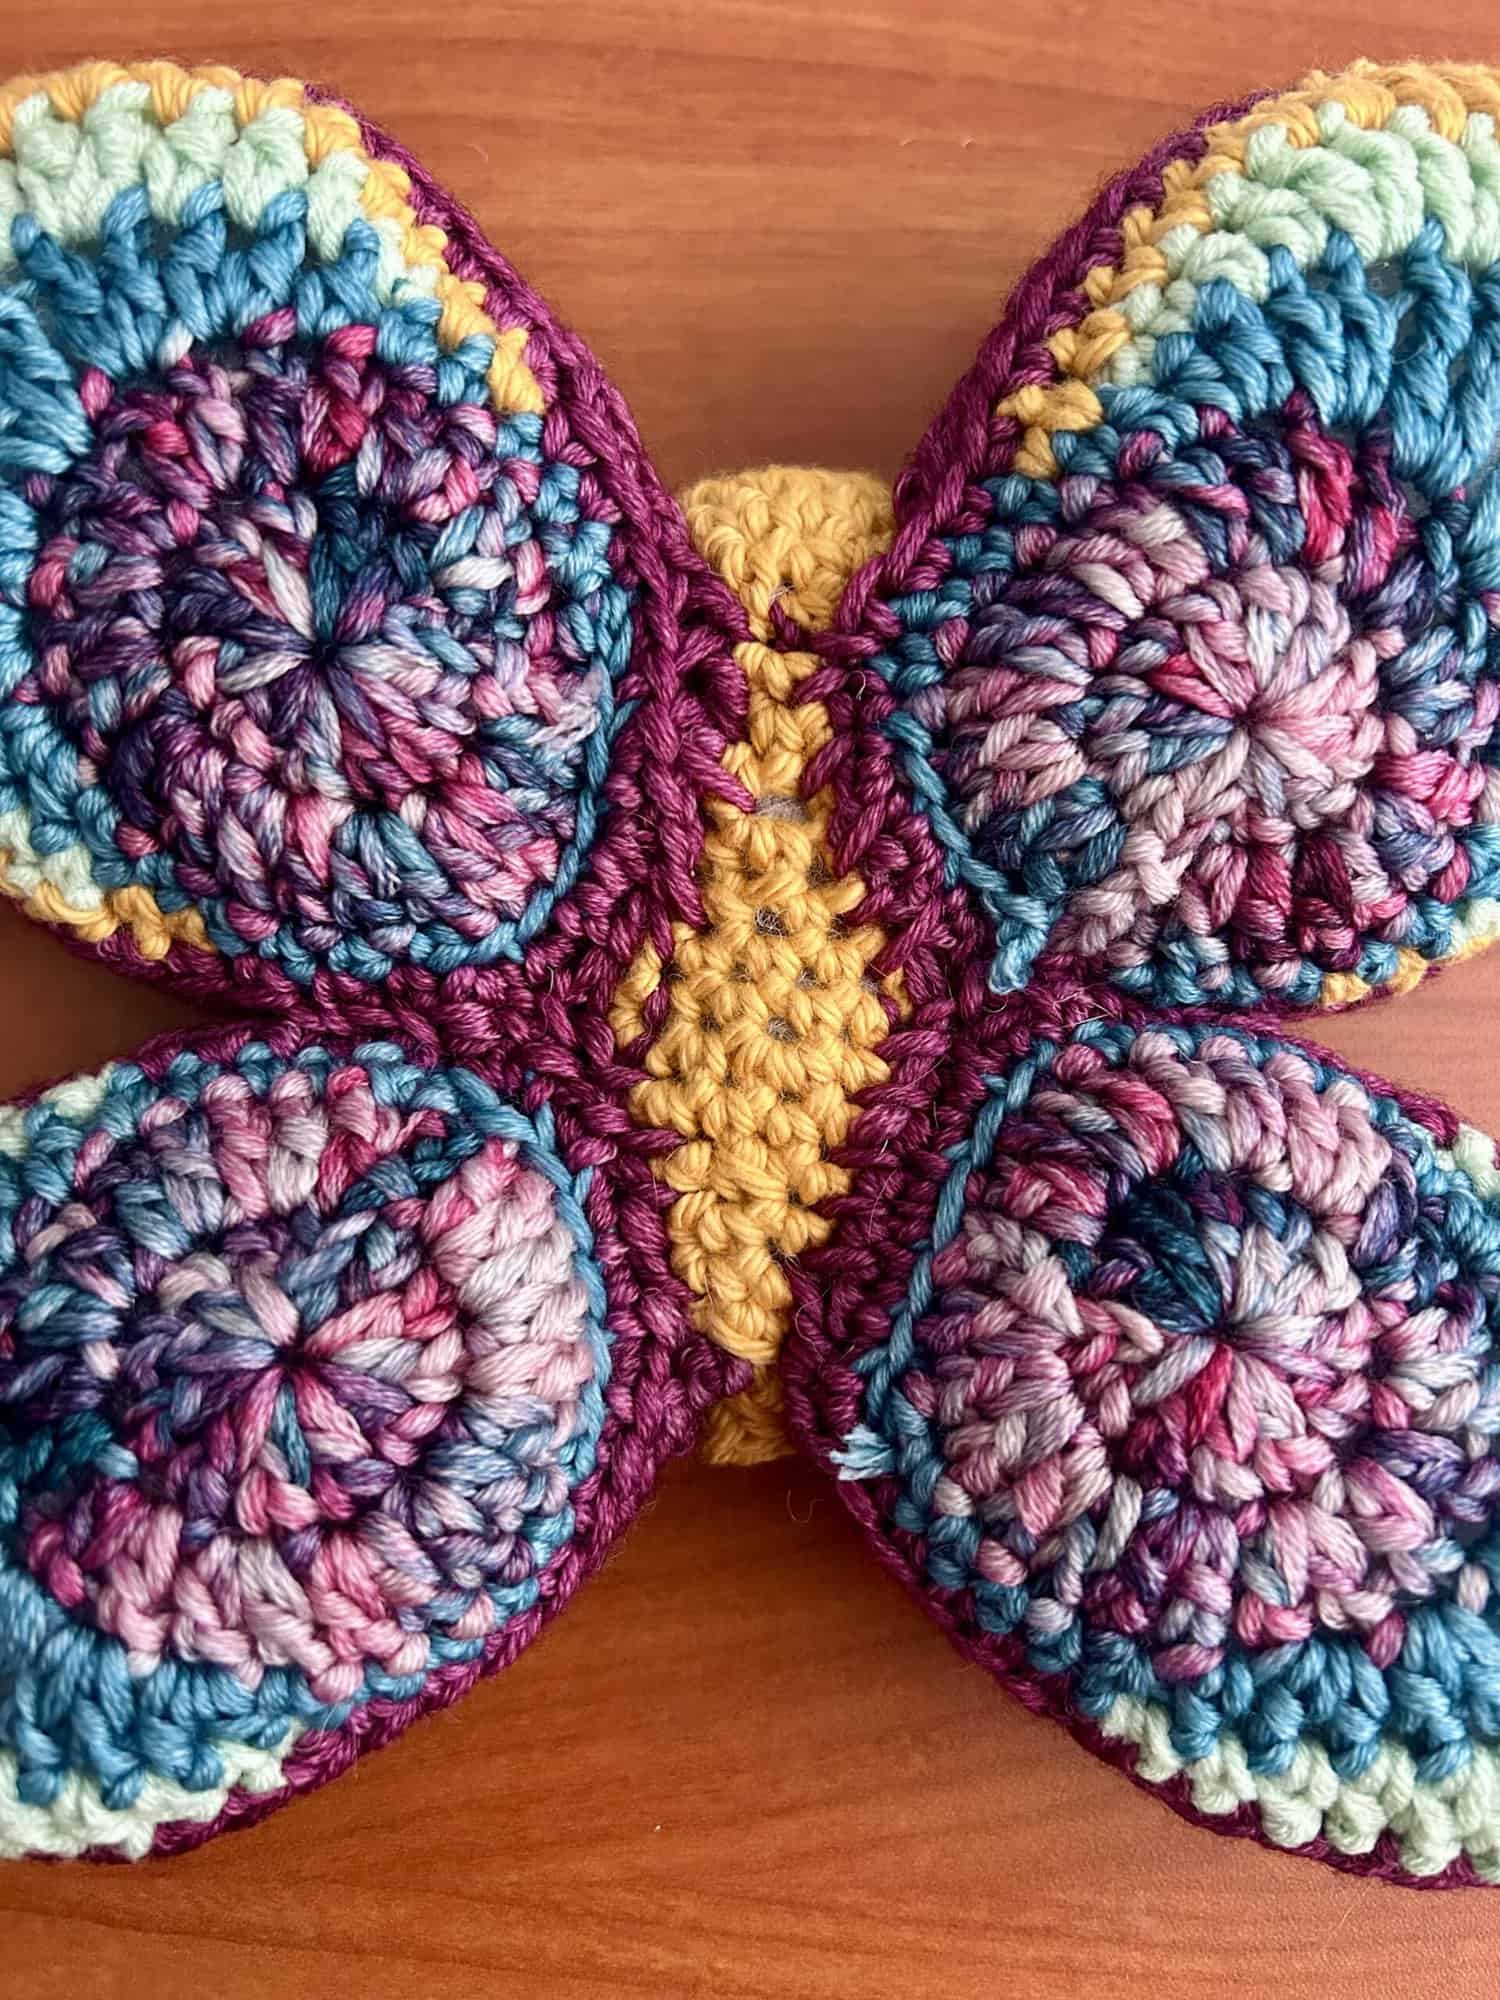
BODY OF BUTTERFLY:
- With Color E, make a magic circle.
- Round 1: Ch 1, 10 sc inside the magic circle. Pull tight to close, do not join. Place st maker in 10th st. (10 sc)
- Round 2: 2 sc in each st around – last 2 sc will be in the place where the st marker is. Place st marker in the last st of the round and repeat for all the following rounds. (20 sc)
- Round 3-6: 1 sc in each st around. (20 sc)
- Round 7: Sc dec over the first two sts, *st dec over the next two sts*, repeat from * around. (10 sc)
- Head is now formed. Place safety eyes between rows 4 and 5. Start stuffing with polyfil.
- Round 8: 1 sc in each st around. (10 sc)
- Round 9: *2 sc in the next st, 1 sc in the next st,* repeat around. (14 sc)
- Round 10-12: 1 sc in each st around. (14 sc)
- Round 13: 2 sc in the next st, *1 sc in the next 2 sts, 2 sc in the next st,* repeat from * around, 1 sc in the last st. (19 sc)
- Round 14: 1 sc in each st around. (19 sc)
- Round 15: Sc dec over the next two sts, *1 sc in the next st, 1 sc dec over the next two sts,* repeat from * around, 1 sc in each of the remaining two sts. (13 sc)
- Round 16-17: 1 sc in each st around. (13 sc)
- Round 18: 1 sc dec over the next two sts, *1 sc in the next st, sc dec over the next two sts,* repeat from * around, 1 sc in each of the remaining two sts. (9 sc)
- Fill body with polyfil.
- Round 19: *Sc dec over next two sts*, repeat from * around. Finish off and sew up the bottom.
- Take some black yarn or thread and sew on the mouth.
- Now sew the wings onto the back of the body. The smaller wings go on the bottom and the larger ones go on top.
- Place pipe cleaner through stitches on top of head.

Thank you for creating this project with us! If you want us to see your final result, tag us on IG @cloverusa or use the hashtags #cloverusa #butterflypillow!
If you want to keep up with me, Julie, on social media for other fun projects, follow me on: Instagram
If you want to keep up with all things Clover, follow us on: Facebook | Twitter | Instagram | Pinterest | YouTube | Ravelry