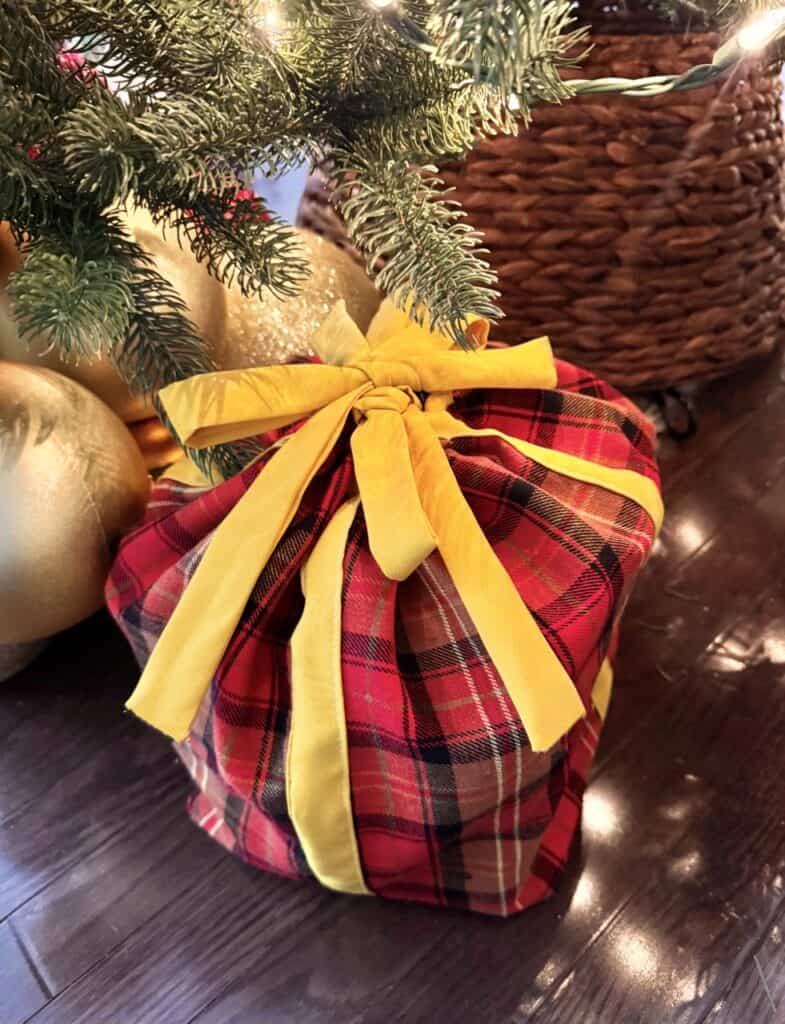
Hello, everybody! It’s Duana with @duana_m_chandler and @duanastudio, and Christmas is next week! Every Christmas, I am wrapping gifts last minute or maybe I can’t find a clean way to wrap an oddly shaped gift. I will also admit that I am not the greatest gift wrapper and if it’s not square or rectangle, it’s a struggle. This year, I wanted to try a cute way to “wrap” my daughter’s oddly shaped Christmas gifts by creating fabric bags! It is also reusable, which makes it even better because you can reuse it each year and save yourself some last minute wrapping time. This tutorial was inspired by Paige Handmade with some changes. With that being said, let’s get started on this tutorial! I hope you enjoy! 🙂
MATERIALS:
- Clover 5-in-1 Sliding Gauge
- Clover Rotary Cutter
- Clover Wonder Clips
- Clover White Marking Pens
- Clover Flower Pins
- Clover Easy Loop Turner
- 1 yard main fabric
- 1 yard contrast fabric (roll of 1” wide ribbon)
INSTRUCTIONS:
- For a medium size bag, cut your main fabric into a 18” x 36” rectangle using the Clover Rotary Cutter.You can also use a ruler to help keep your lines straight. Fold it in half lengthwise and widthwise. Press. This is just to mark the centers of each side for the ribbon placement.
2. If you want to use a fabric ribbon, cut four pieces of contrast fabric 2 ½” x 38”. I marked the 2.5″ width with a Clover 5-in-1 Sliding Gauge. To create the ribbon, fold each strip in half lengthwise right sides facing. Use Clover Wonder Clips to hold in place. Stitch the raw edge using a ¼” seam allowance, leaving both ends opened. Turn right sides out using the Clover Easy Loop Turner. Press. Use fabric glue to seal the open end or slip stitch.
3. Using one of the 38” long ribbons, place along the center of the length of the rectangle. Pin in place using the Clover Flower Pins. Stitch on both sides.
4. Fold the main fabric in half, hold in place with the Clover Wonder Clips and stitch on the sides, but leave the top open.
5. Create a corner by matching the side seam with the bottom seam. Press flat. Measure out 8” of the corner and use the marking pen to mark the corner. Do that to both sides.
6. Align the next piece of ribbon with the side seam. Make sure it’s in the center. Sew down the side seam, along the bottom, and back up the other side. Sew carefully. Tuck in corner triangles toward the bottom center of the bag. Sew along the other side of the ribbon in the same way.
7. Turn the bag right sides out. Mark 2.5″ down from the top of the bag using the sliding gauge and mark a small line that’s a little less than 1″. Cut a line or sew on a buttonhole. This will be where your next set of ribbons pass through. Fold the top of the bag 1/2″ and press. Fold another 1″ and press. Stitch along the edge of the fold. Stitch all the way around. The casing for your ribbon is ready. Use a safety pin or Clover Easy Loop Turner to pass the ribbon through the casing. Repeat with the other ribbon on the other side. Pull the ends and tie a bow.
If you want to keep up with me, Duana, on social media for other fun projects, follow me on social media: Instagram
If you want to keep up with all things Clover, follow us on: Facebook | Twitter | Instagram | Pinterest | YouTube | Ravelry

