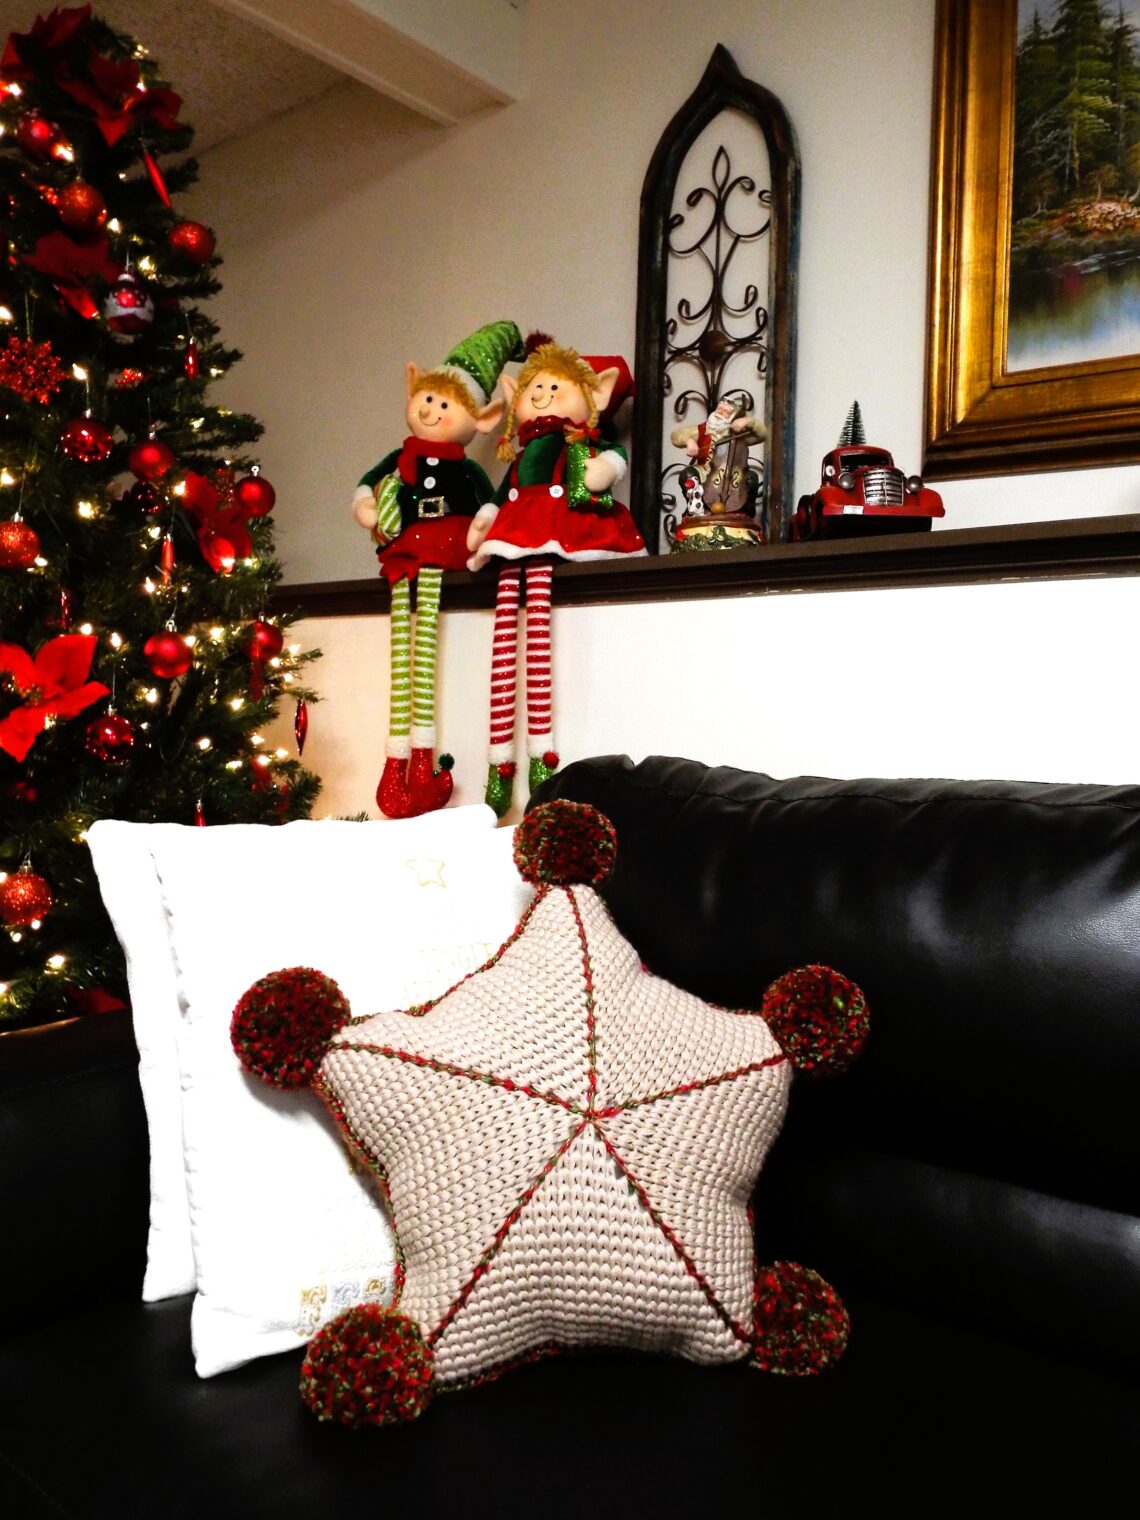
Christmas Star Pillow *crochet pattern*
Christmas is quickly approaching! Are you prepared? Is your house decked out in all the festive and cheerful décor?
Today, I would like to share another idea I came up with. It is a decorative accent pillow for your bedroom or living room. This design was inspired by my Parol Coaster, one of Clover’s latest blogs! If you haven’t already, click here to read the details of the coaster pattern. Without further ado, let’s get into the pillow pattern!
NOTES:
- Read the pattern carefully before starting.
- This pattern is worked in rounds. Use a stitch marker to mark the beginning stitch of each round. Remember to move the stitch marker as you progress.
- The beginning ch 1 does not count as a stitch.
- The number of stitches in each round is indicated by the numbers at the end of the round.
- ( ) work instructions within parentheses as many times as directed or work a group of stitches all in the same stitch or space.
- * * repeat instructions between asterisks as many times as directed or repeat at specified locations.
- This pattern uses US crochet terms.
- gauge: 6 sts X 5 rows = 2” in Waistcoat Crochet Stitch
- skill level: intermediate
- finished measurement: Approximately 18” width (from the widest part of the pillow – point to point, excluding pompom)
MATERIALS:
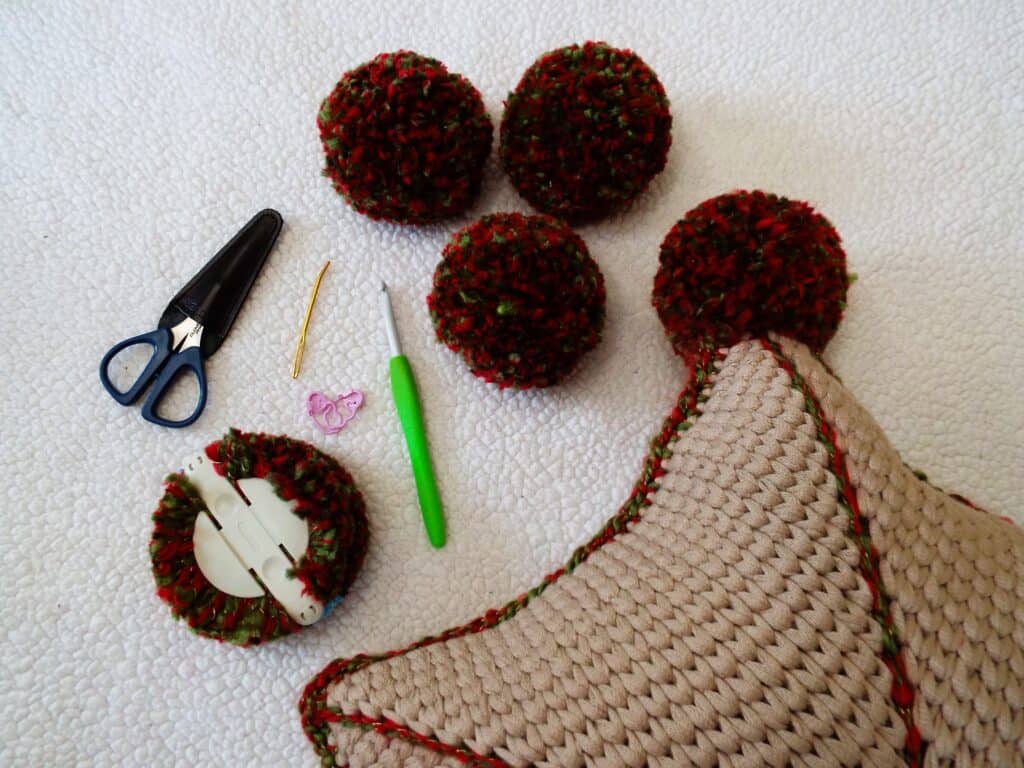
- Clover Amour Crochet Hook – size K (6.5 mm)
- Clover Patchwork Mini Scissors
- Clover Jumbo Tapestry Needle (Bent Point)
- Clover Tape Measure
- Clover Pom-Pom Makers
- 1 or 2 colors of bulky weight (#5) yarn
- 1 or 2 colors of bulky (5) yarn (I used about 270 yards of yarn for the main color and about 150 yds of yarn for the contrasting color)
- polyfil fiber filler (I used an old pillow stuffing!)
ABBREVIATIONS:
- ch(s): chain(s)
- mr: magic ring
- pm: place marker
- rep: repeat
- ssc: single crochet
- slst(s) :slip stitch(es)
- st(s): stitch(es)
- wc: waistcoat (or knit stitch crochet): insert the hook in the center of the stitch, between the legs of the ‘V’ shape, yarn over and pull up a loop, yarn over again, and pull through both loops on the hook.
PILLOW PATTERN:
- make 2 panels
- Round 1: With main color, start with a MR, ch 1, (SC, ch 2) into the ring five times and pull the yarn tail to close the ring. Make sure to leave a small center hole, the size of your hook, for later use. PM in the 1st st. DO NOT slst to join. From this point on, you will be working continuously. ~ 5 SC sts, 5 ch-2-sps
- Note: These ch-2-sps will serve as the corners of this star-shaped pillow.
- Round 2: *WC in 1st st, (SC, ch 2, SC) in ch-2-sp*; Rep from * to * around. ~ 15 SC sts, 5 ch-2-sps
- Round 3: WC in each st to ch-2-sp, *(SC, ch 2, SC) in ch-2-sp, WC in each st to next ch-2-sp*; Rep from * to * to last ch-2-sp, (SC, ch 2 SC) in last ch-2-sp, WC in last st. ~ 25 SC sts, 5 ch-2-sps
- Round 4: WC in each st to ch-2-sp, *(SC, ch 2, SC) in ch-2-sp, WC in each st to next ch-2-sp*; Rep from * to * to last ch-2-sp, (SC, ch 2 SC) in last ch-2-sp, WC in each st to marked st. ~ 25 SC sts, 5 ch-2-sps
- Rounds 5-17: Repeat round 4. Slst in next 2 sts. Fasten off and weave in all ends. ~ 165 SC sts, 5 ch-2-sps
- Round 1: With main color, start with a MR, ch 1, (SC, ch 2) into the ring five times and pull the yarn tail to close the ring. Make sure to leave a small center hole, the size of your hook, for later use. PM in the 1st st. DO NOT slst to join. From this point on, you will be working continuously. ~ 5 SC sts, 5 ch-2-sps
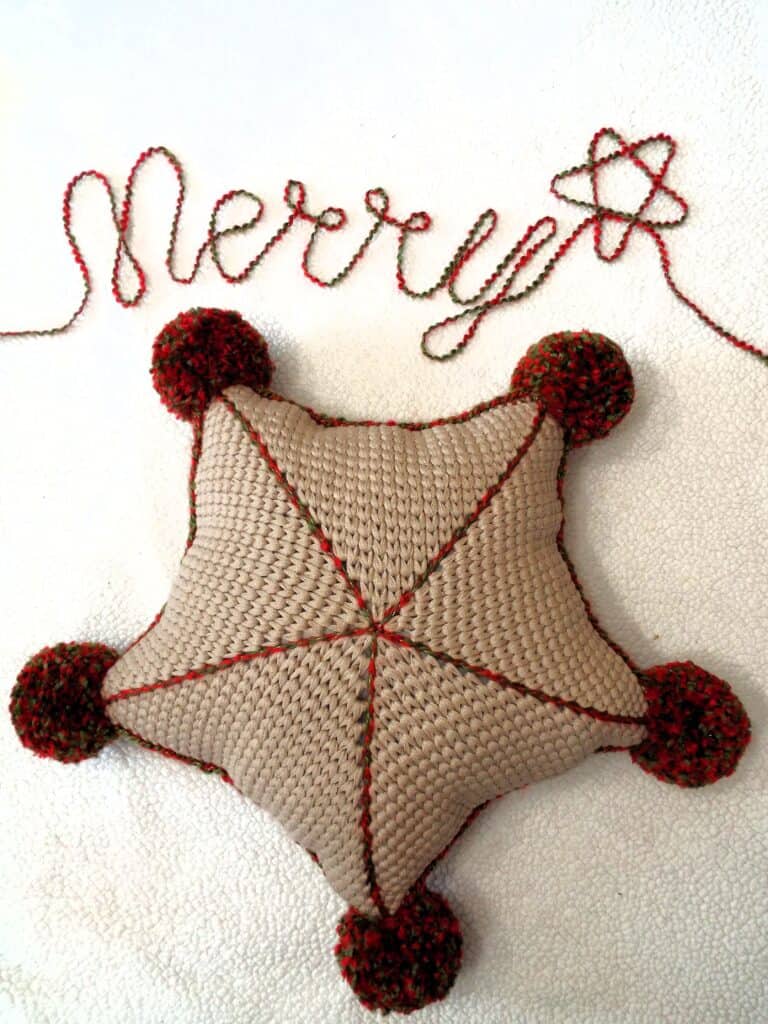
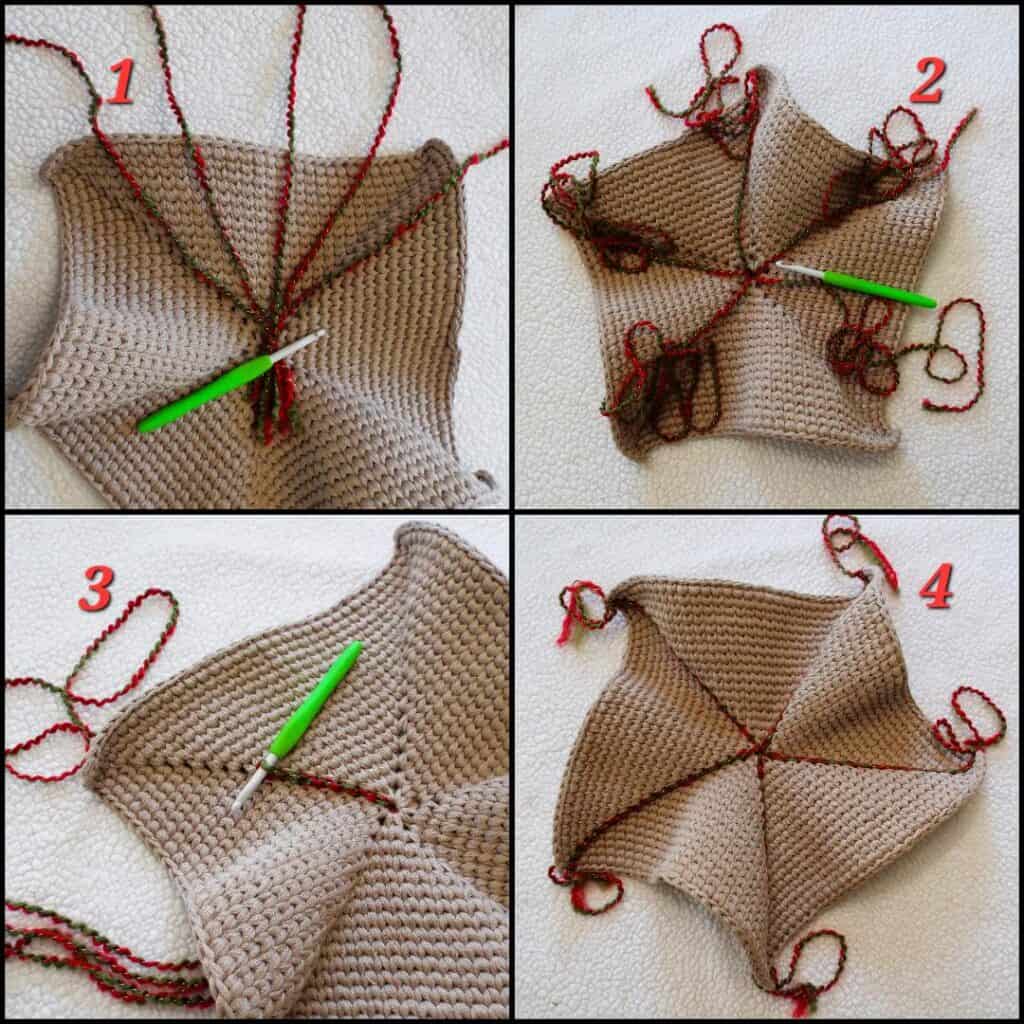
- add contrasting color (refer to image below)
- Cut five strands of contrasting yarn measuring approximately 35” each. Bring the ends together and tie them in a knot.
- Shows the placement of each yarn strand.
- With the right side facing out, put the strands of yarn behind your star (pentagon-shaped) panel, making sure the knotted section is situated at the center of the panel. You will then work a surface slip stitch in each ch-2-sp starting from the center of Round 1. Separate one strand and set aside the other four so they won’t interfere with your work. Insert your hook into the hole in Round 1, yarn over, pull up a loop, and work a slst (loosely) in each ch-2-sp from Round 1–17.
- Repeat the same steps on the other 4 ch-2-sp corners of the star panel.
PILLOW ASSEMBLY:
- With the wrong sides of both panels facing each other and the right sides facing out, put stitch markers in each corner, or you can use the ends of each strand and tie them together. Make sure that each stitch from both panels is aligned properly. You can refer to the image below.
- Now, attach contrasting yarn to any stitch of both panels and work an SC in each around. I started the 1st st next to one of the corners of the star panel. Ch 1 and SC in each st around, placing 4 SC in each ch-2-sp.
- When you are about 4” away from finishing this last round, start filling your pillow with fiber stuffing. Once you are satisfied with the appearance of your pillow, continue finishing the last round with SC sts. Slst in 1st to join the round.
- Fasten off and weave in all ends.
- You can leave your pillow like this, or add pom-poms to each corner of the star! Make 5 pom-poms and attach them to your pillow.
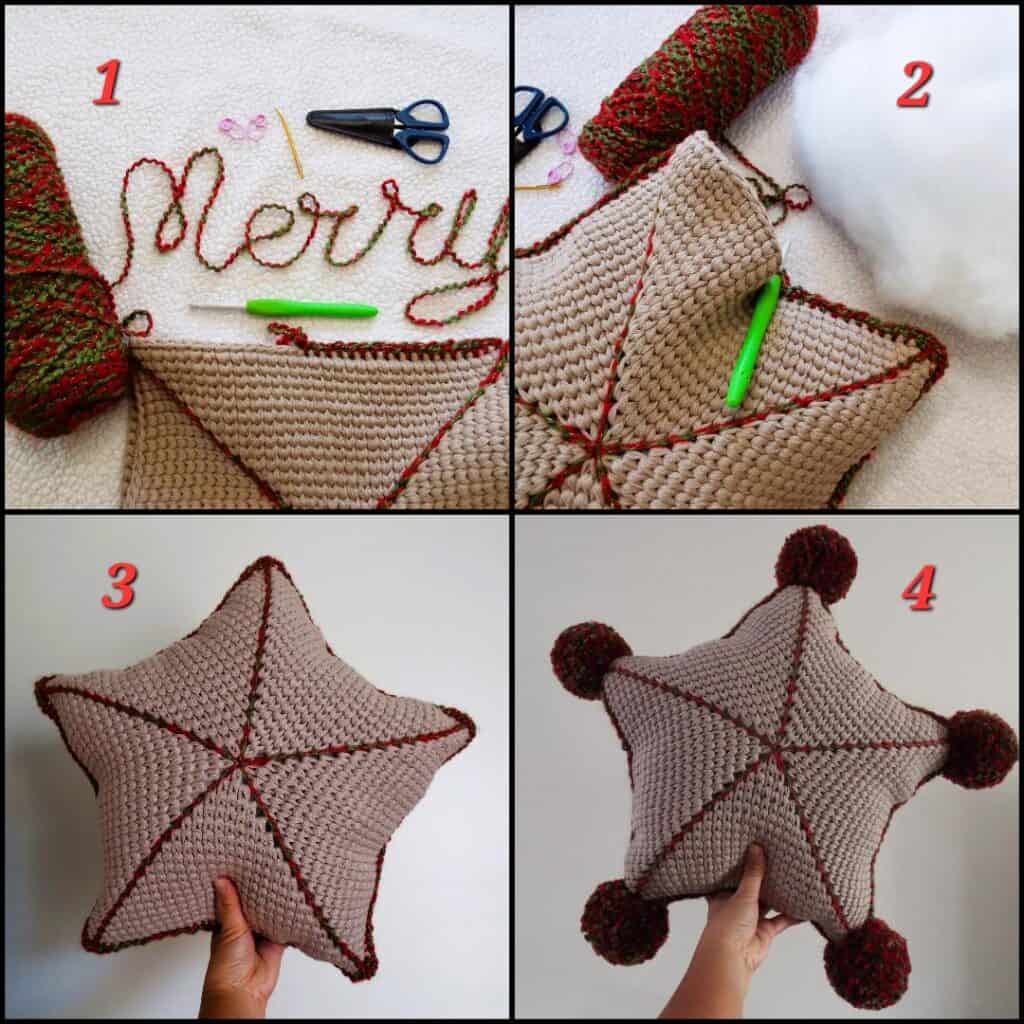
You are done! It’s time to display your festive pillow accent in your happy place!
Please don’t hesitate to reach out with questions regarding this pattern. I would love to see your version of the Star Pillow! Please tag me on IG @stringsandcuddles and use these hashtags when sharing: #stringsandcuddles, #stringsandcuddlesdesigns, #starpillow
If you want to keep up with me, Elisa, on social media for other fun projects, follow me on social media: Instagram | Pinterest | Facebook | Blog | Ravelry
If you want to keep up with all things Clover, follow us on: Facebook | Twitter | Instagram | Pinterest | YouTube | Ravelry


