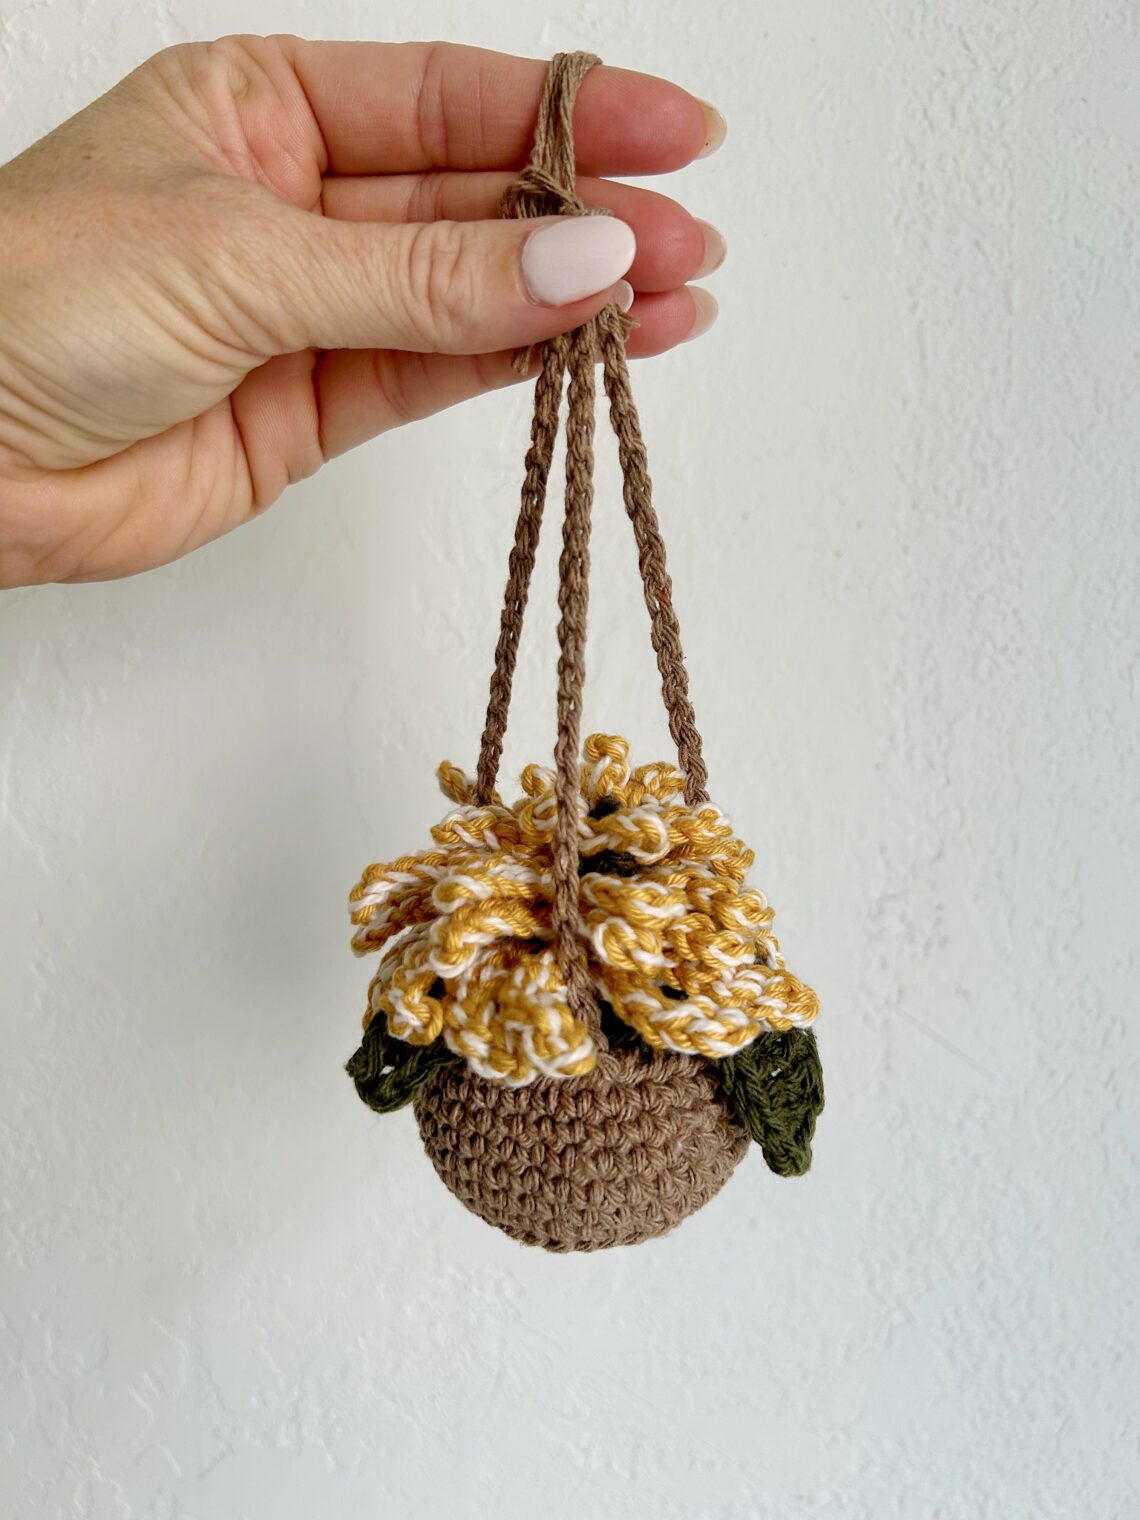
Leaf and Blossom Crochet Car Charm
Happy autumn! Add a cozy touch of fall to your car with this crochet pattern for the Leaf & Blossom Car Charm. Featuring delicate leaves and a vibrant hawkbit flower, this seasonal accent is the perfect way to bring the warmth and beauty of autumn to your rearview mirror! Let’s get started 🙂
MATERIALS:
- Clover Amour Crochet Hook (Size 4.0mm)
- Clover Patchwork Scissors
- Yarn Needle
- polyfil or cotton balls
- keyring or round wooden dowel
- light worsted weight yarn in green, brown, cream, and white
INSTRUCTIONS:
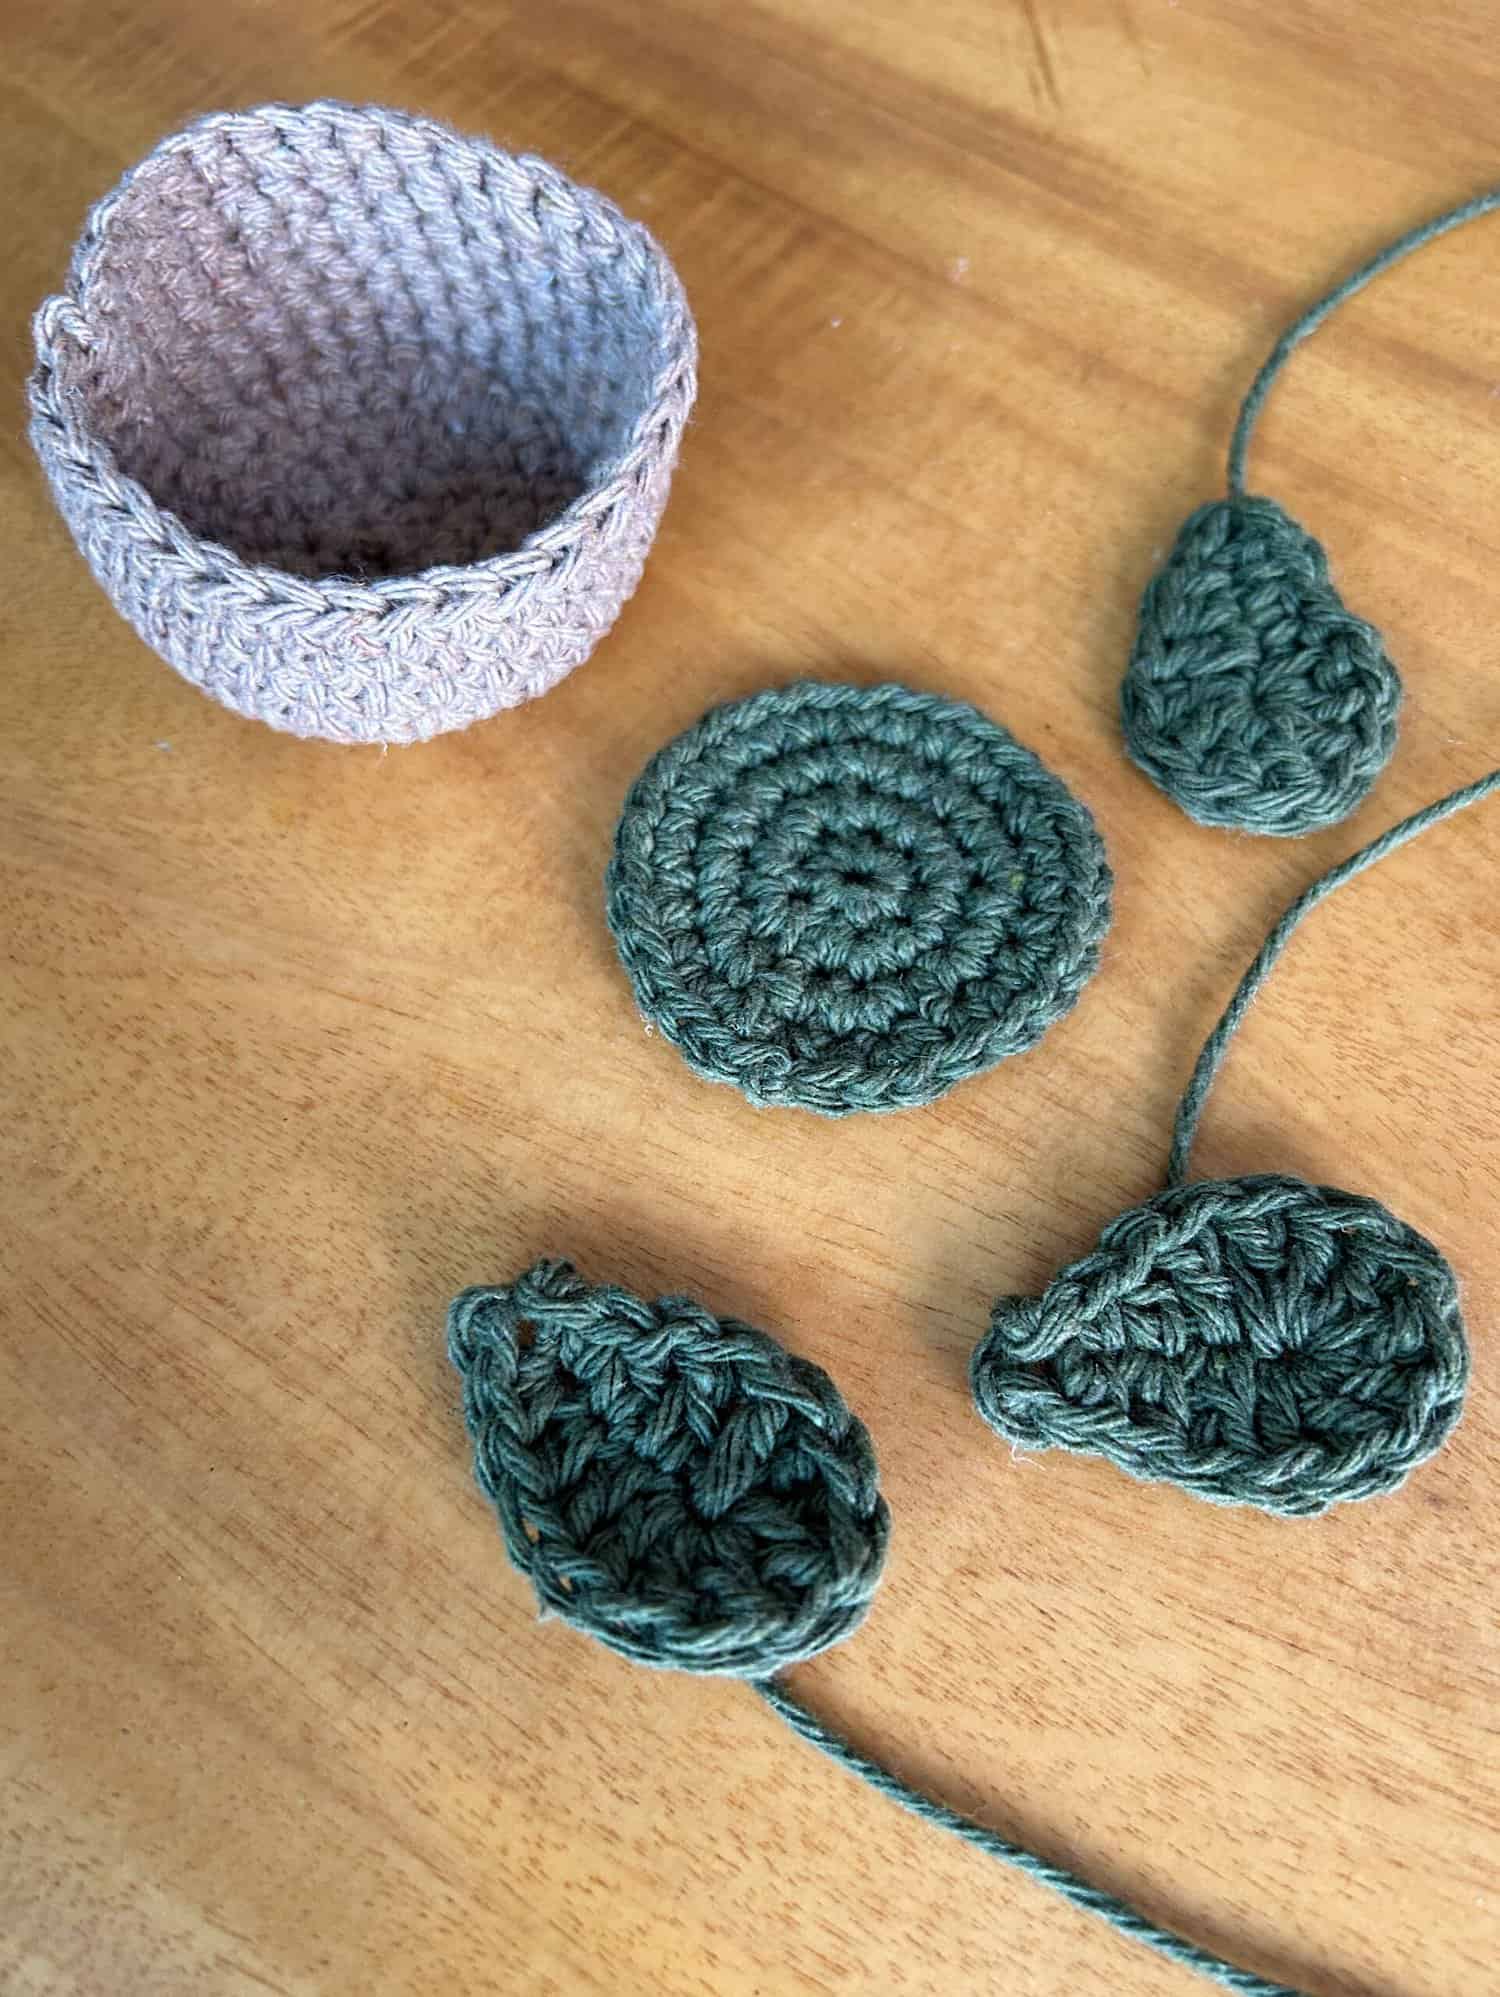
You will start with the plant hanger base. With brown yarn, make a magic ring.
- Round 1: Ch 1, 8 sc into magic ring and pull tight to close, join to first sc. (8 sc)
- Round 2: Ch 1, 2 sc into the same st as joining and in each st around. Join to the first sc. (16 sc)
- Round 3: Ch 1, *1 sc in the first st, 2 sc in the next st*, repeat around. Join to the first sc. (24 sc)
- Round 4: Ch 1, 1 sc in each of the first 2 sts, 2 sc in the next st, *1 sc in each of the next 2 sts, 2 sc in the next st*, repeat around. Join to the first sc. (32 sc)
- Round 5: Ch 1, in back loop only, sc in each st around. Join to the first sc. (32 sc)
- Round 6 – 10: Ch 1, sc in each st around, join to the first sc. (32 sc) Cut yarn, weave in ends.
Now you will start on the base for the leaves. With dark green yarn, make a magic ring.
- Round 1: Ch 1, 8 sc into magic ring and pull tight to close, join to first sc. (8 sc)
- Round 2: Ch 1, 2 sc into the same st as joining and in each st around. Join to the first sc. (16 sc)
- Round 3: Ch 1, *1 sc in the first st, 2 sc in the next st*, repeat around. Join to the first sc. (24 sc)
- Round 4: Ch 1, 1 sc in each of the first 2 sts, 2 sc in the next st, *1 sc in each of the next 2 sts, 2 sc in the next st*, repeat around. Join to the first sc. (32 sc)
Now you will start making the leaves. Make 3.
- Row 1: Ch 6, sl st in 2nd ch from hk. Sc in next ch, hdc in next ch, dc in next ch, 4 dc in next ch, turn slightly to continue working on the bottom of the foundation chain and dc 3 more (7 total in that chain), dc in next ch, hdc in next ch, sc in next ch, sl st in next, fasten off.
HAWKBIT FLOWER:
With green, ch 37
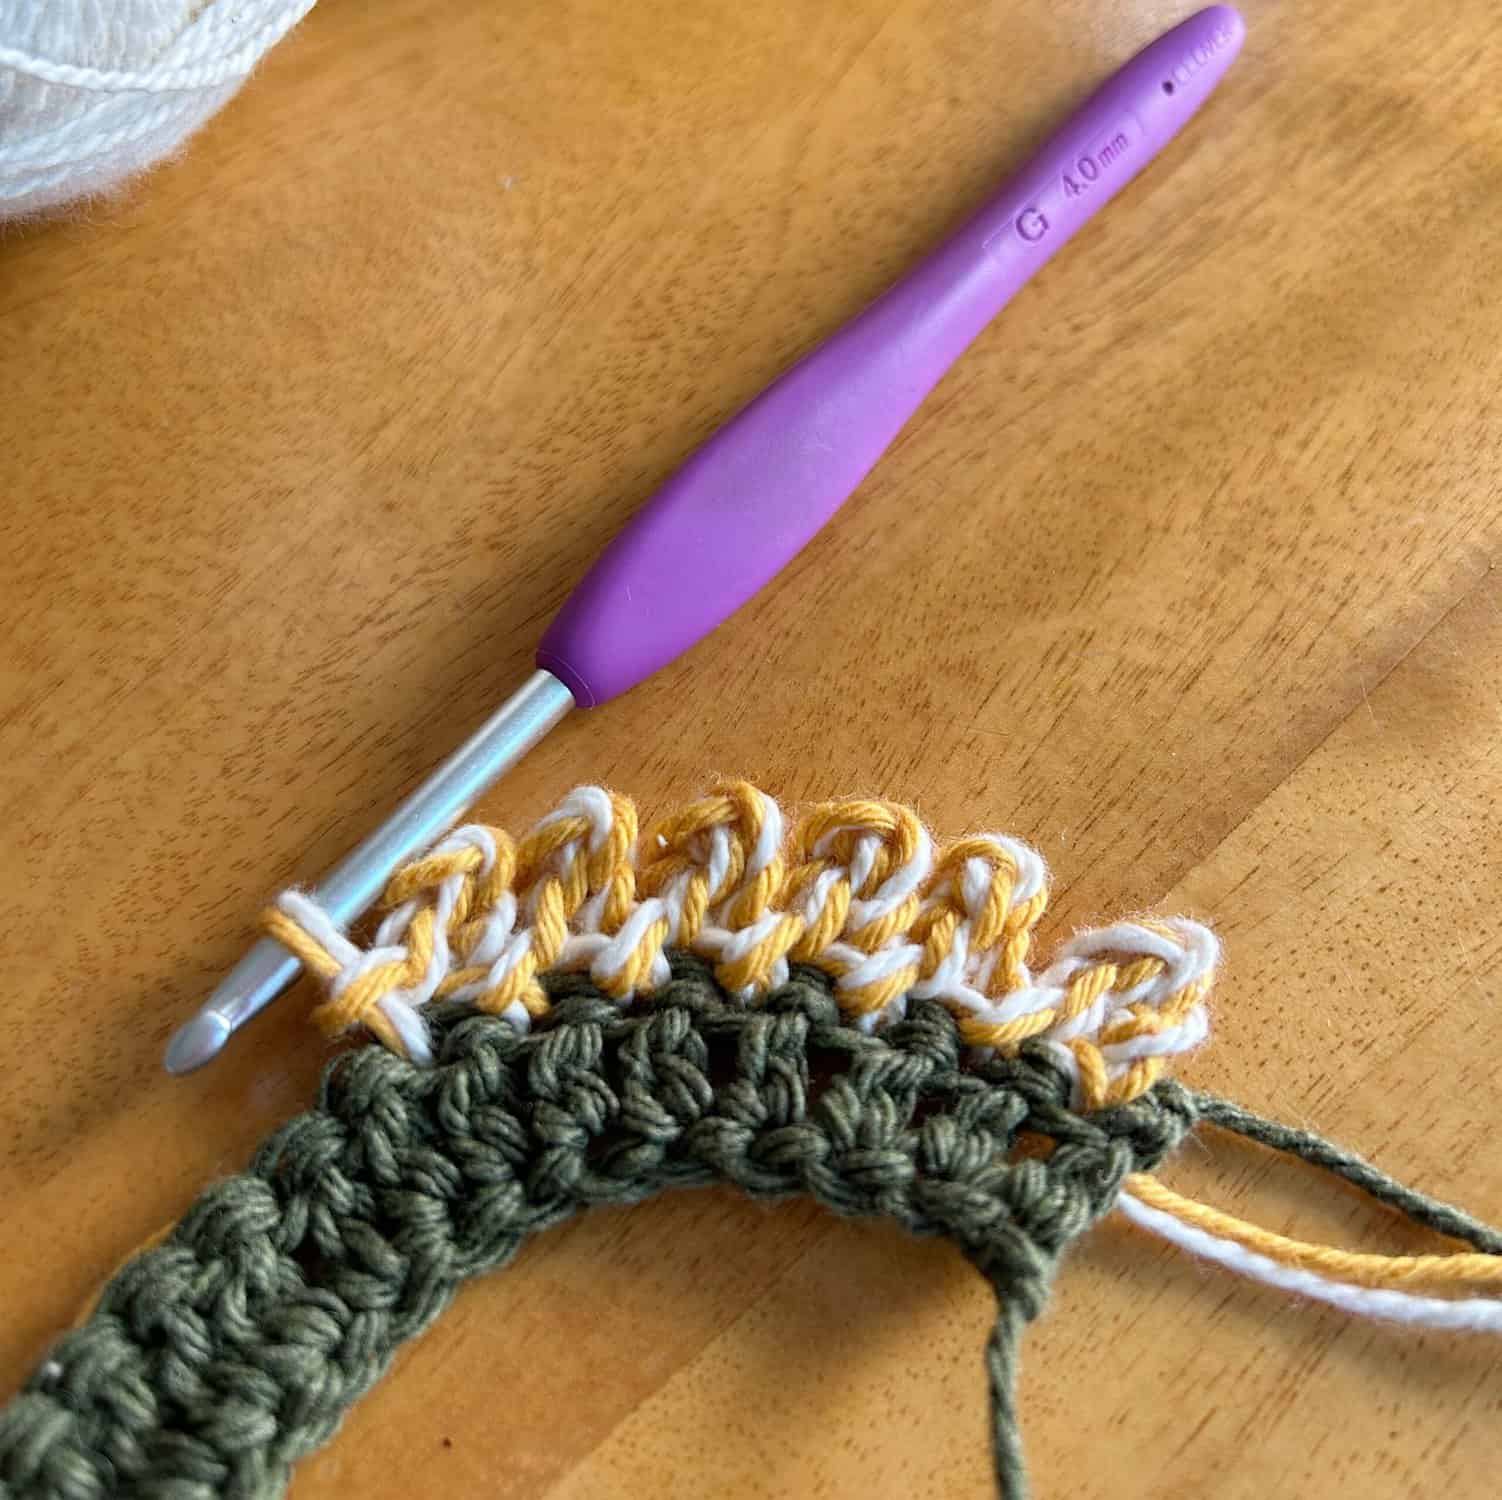
- Row 1: 1 sc in the second ch from the hook and in the next 5 chs. 1 hdc in each of the next 12 chs. 1 dc in each of the next 18 chs. Fasten off, leave a long tail.
- Row 2: Turn your work and join your yellow/white yarn in the same st. *Ch 3, 1 sl st in the second and then the third ch from the hook, sl st to the next st, * repeat from * 5 more times. (6 petals in total). – *Ch 5, 1 sl st in the second and then third and then fourth chs from the hook, sl st to the next st, * repeat from * 11 more times. (12 midsize petals total). – *Ch 7, 1 sl st in the second and then third and then fourth and then fifth chs from the hook, sl st to the next st, * repeat from * 17 more times. (18 long petals total). Finish off.
- Now place your tapestry needle on the end of the green yarn and start rolling your flower up starting with the small petals first. After every few stitches, make some overcast sts so your flower doesn’t unravel. See bottom of flower below.
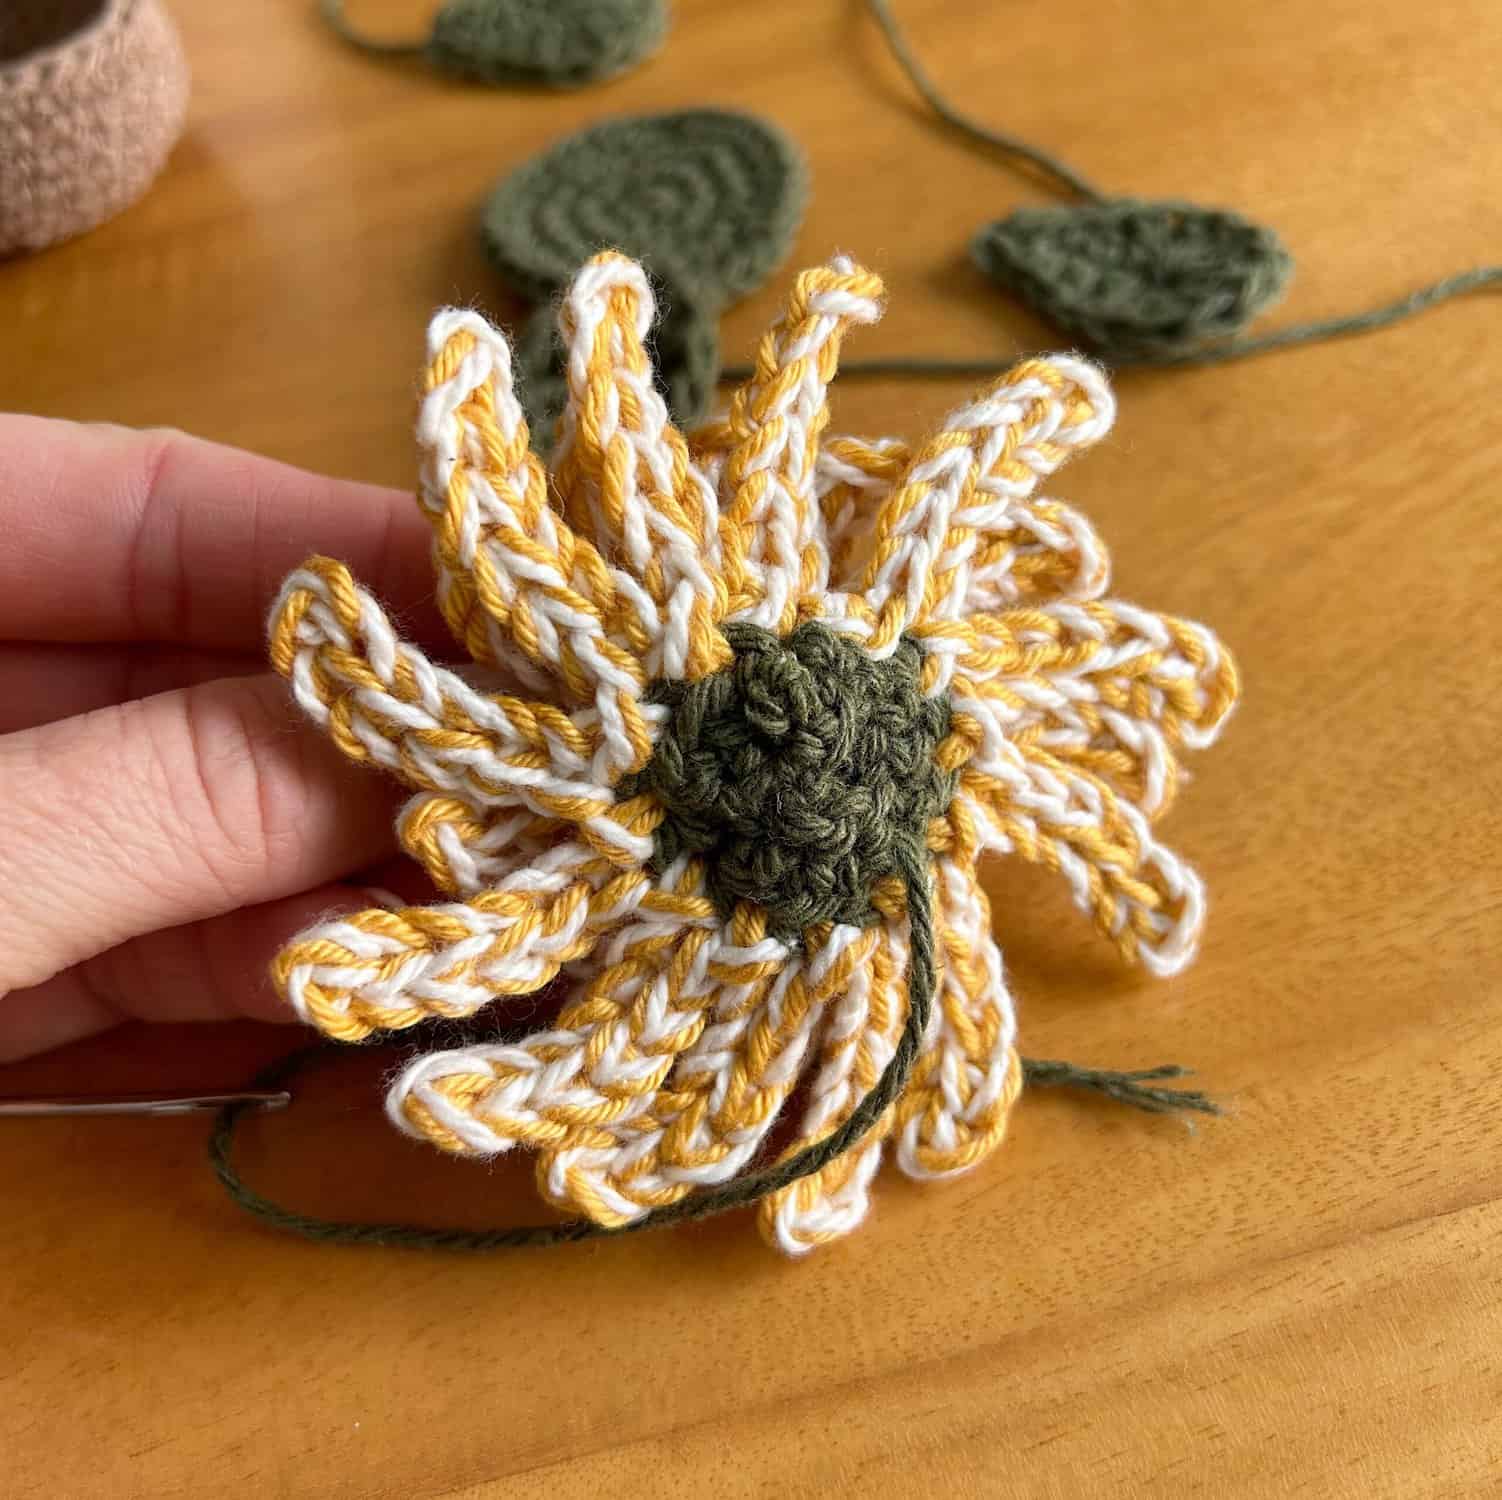
- Now sew on your leaves and your flower to the green base you made earlier. I recommend placing the leaves first and then the flower.
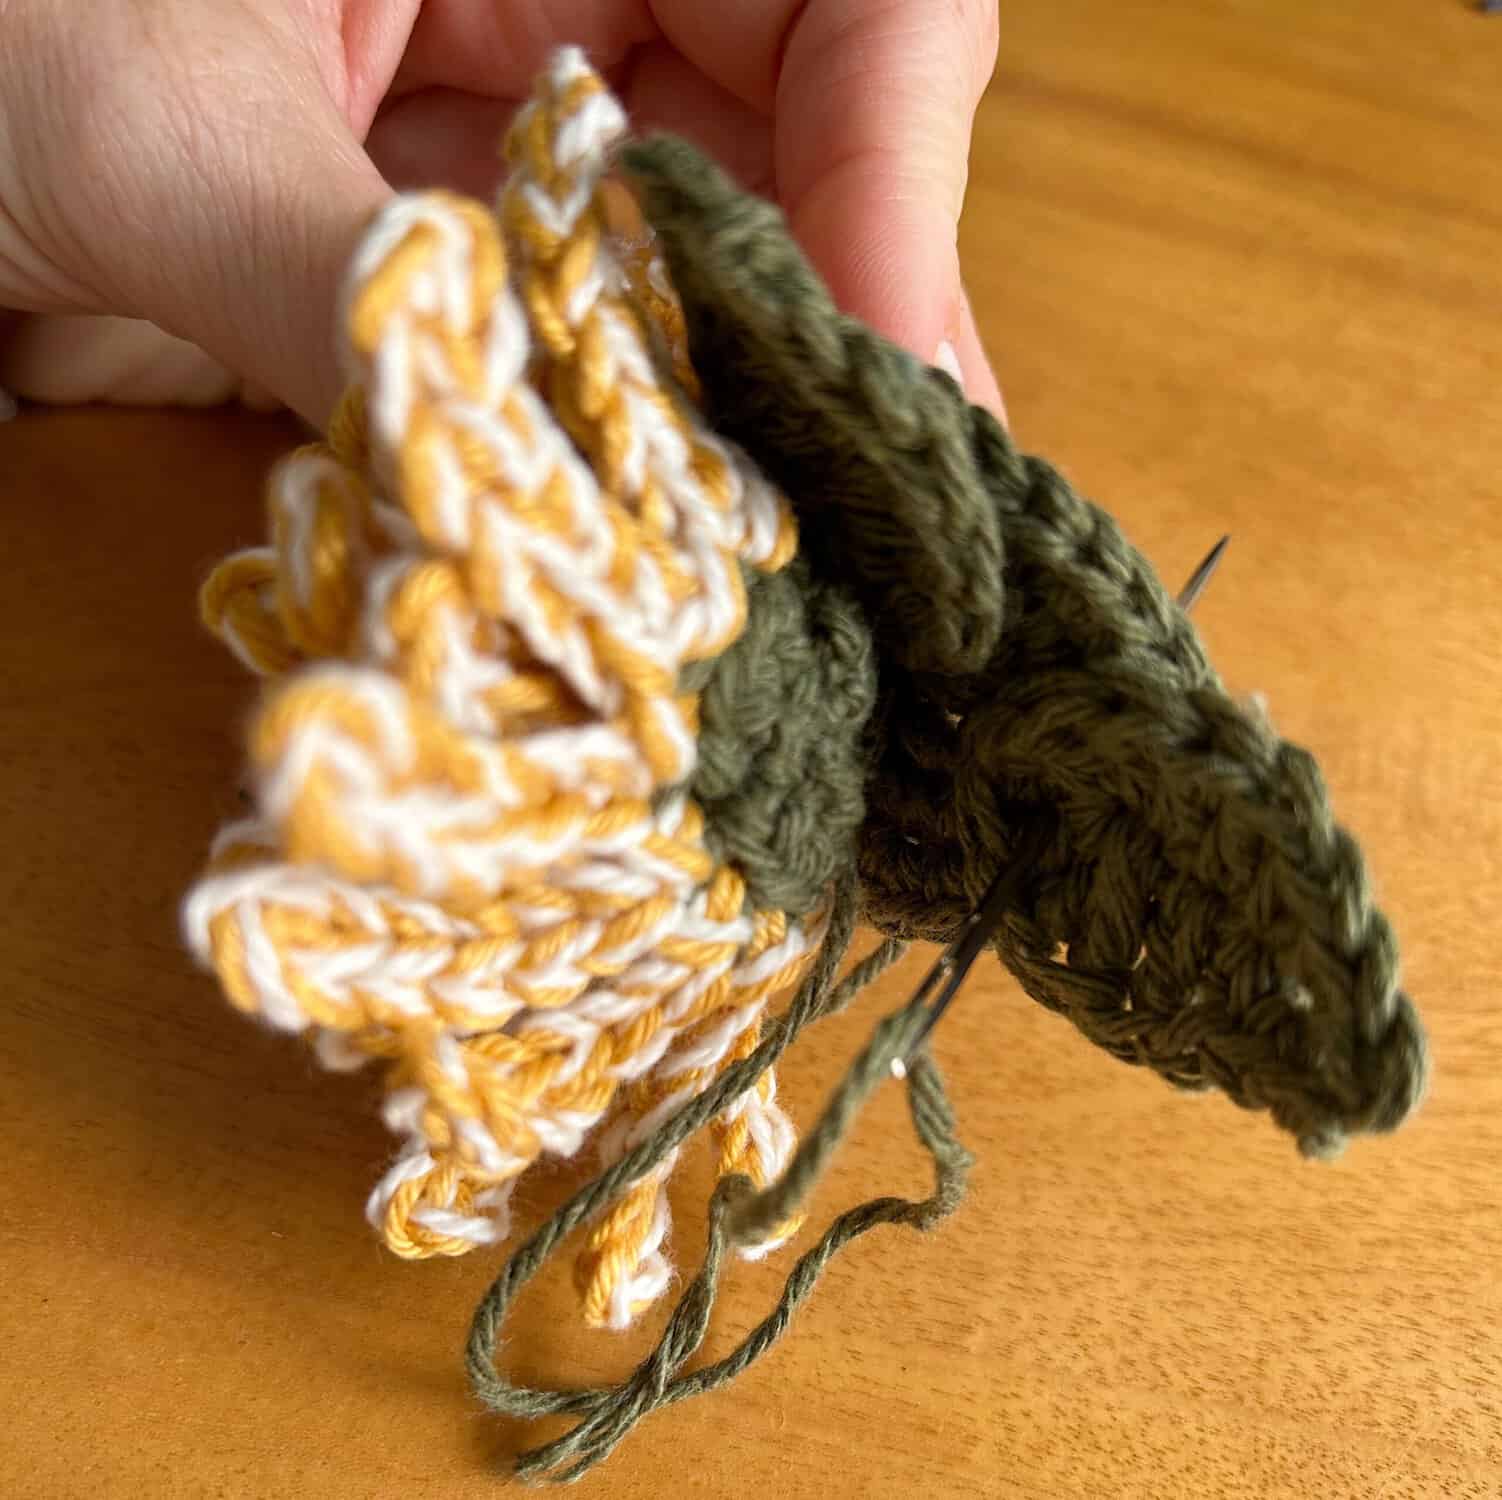
- Now sew the base to the flower pot leaving a few sts unworked before enclosing. Stuff with polyfil or cotton balls and then sew up the rest.
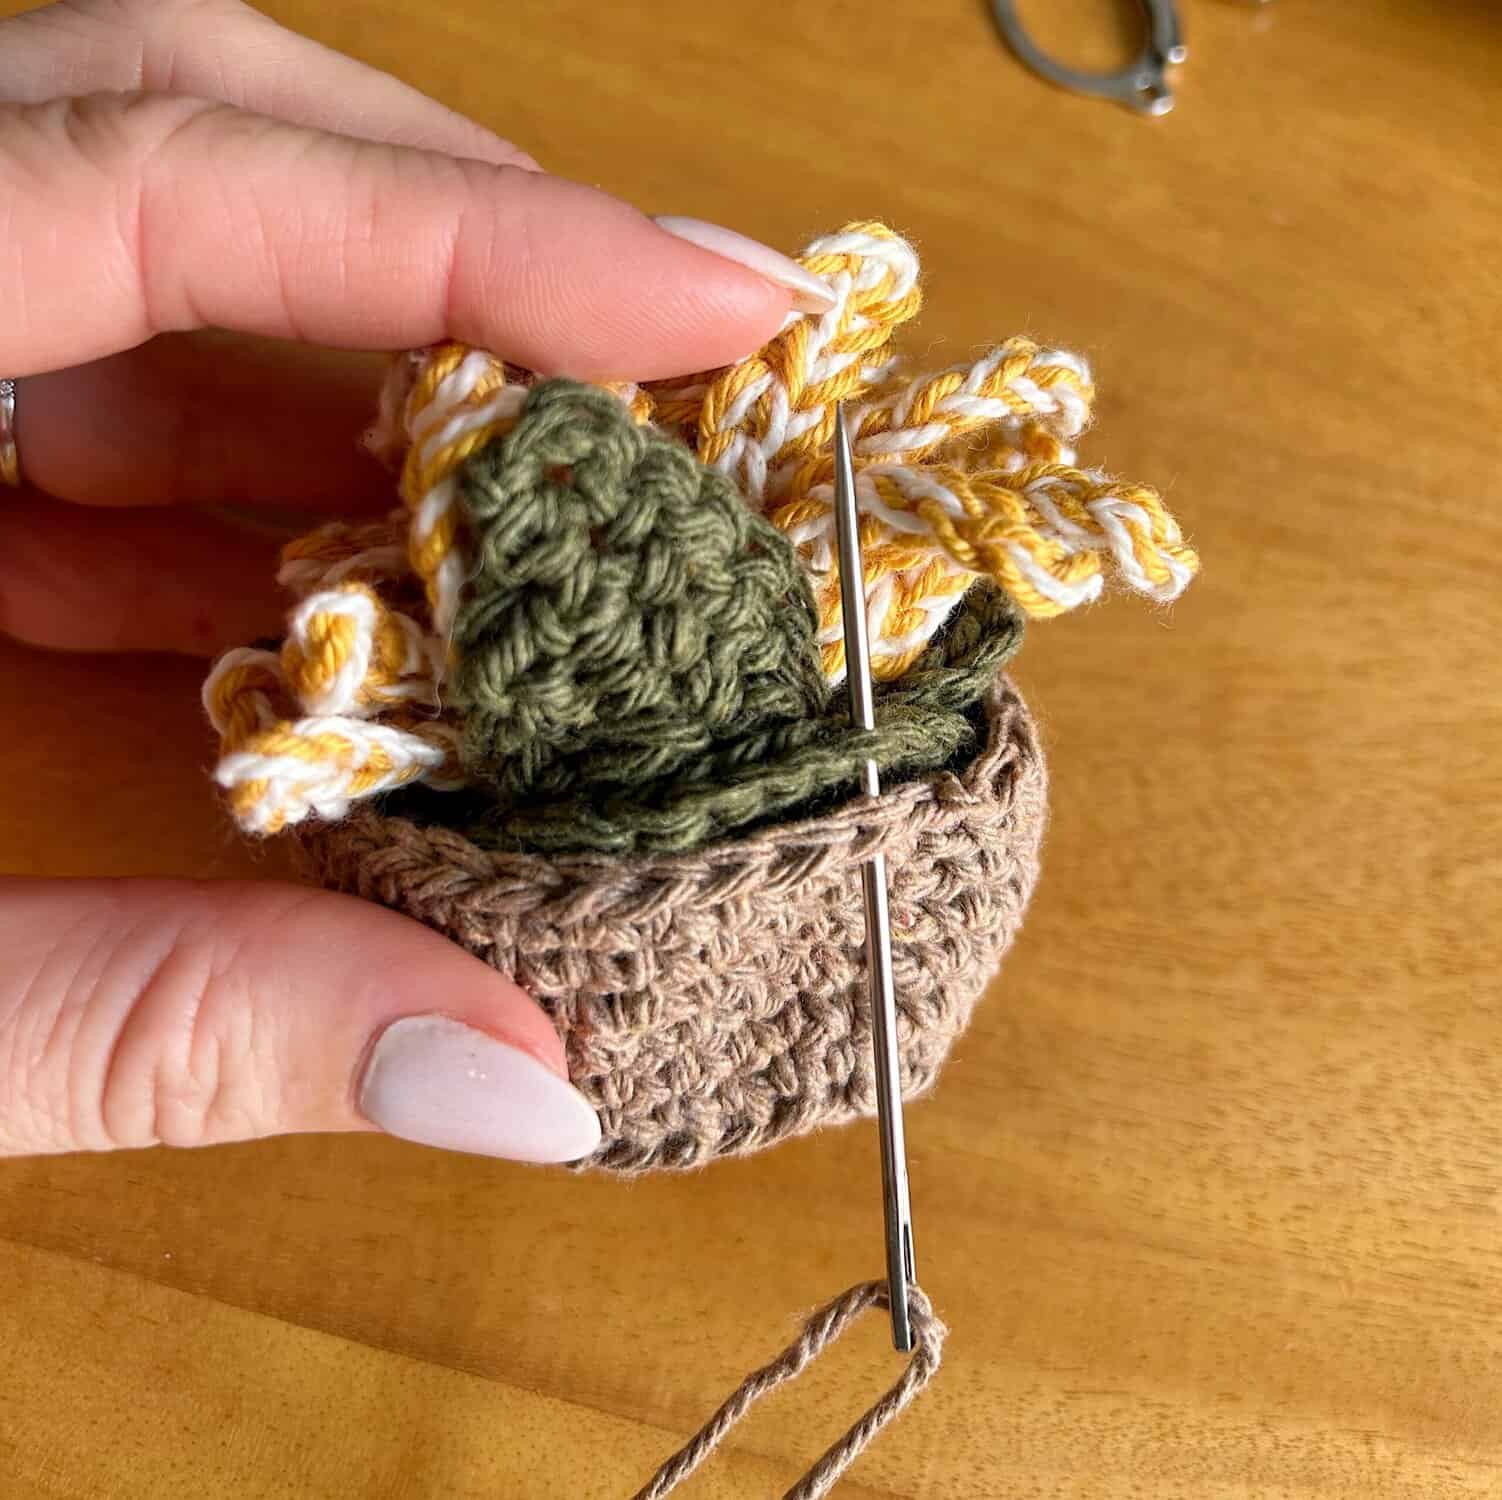
- Along the rim of the flower pot, attach yarn at three different places equally spaced apart and ch 23 for each strand. Meet them at the top and tie them in a knot.
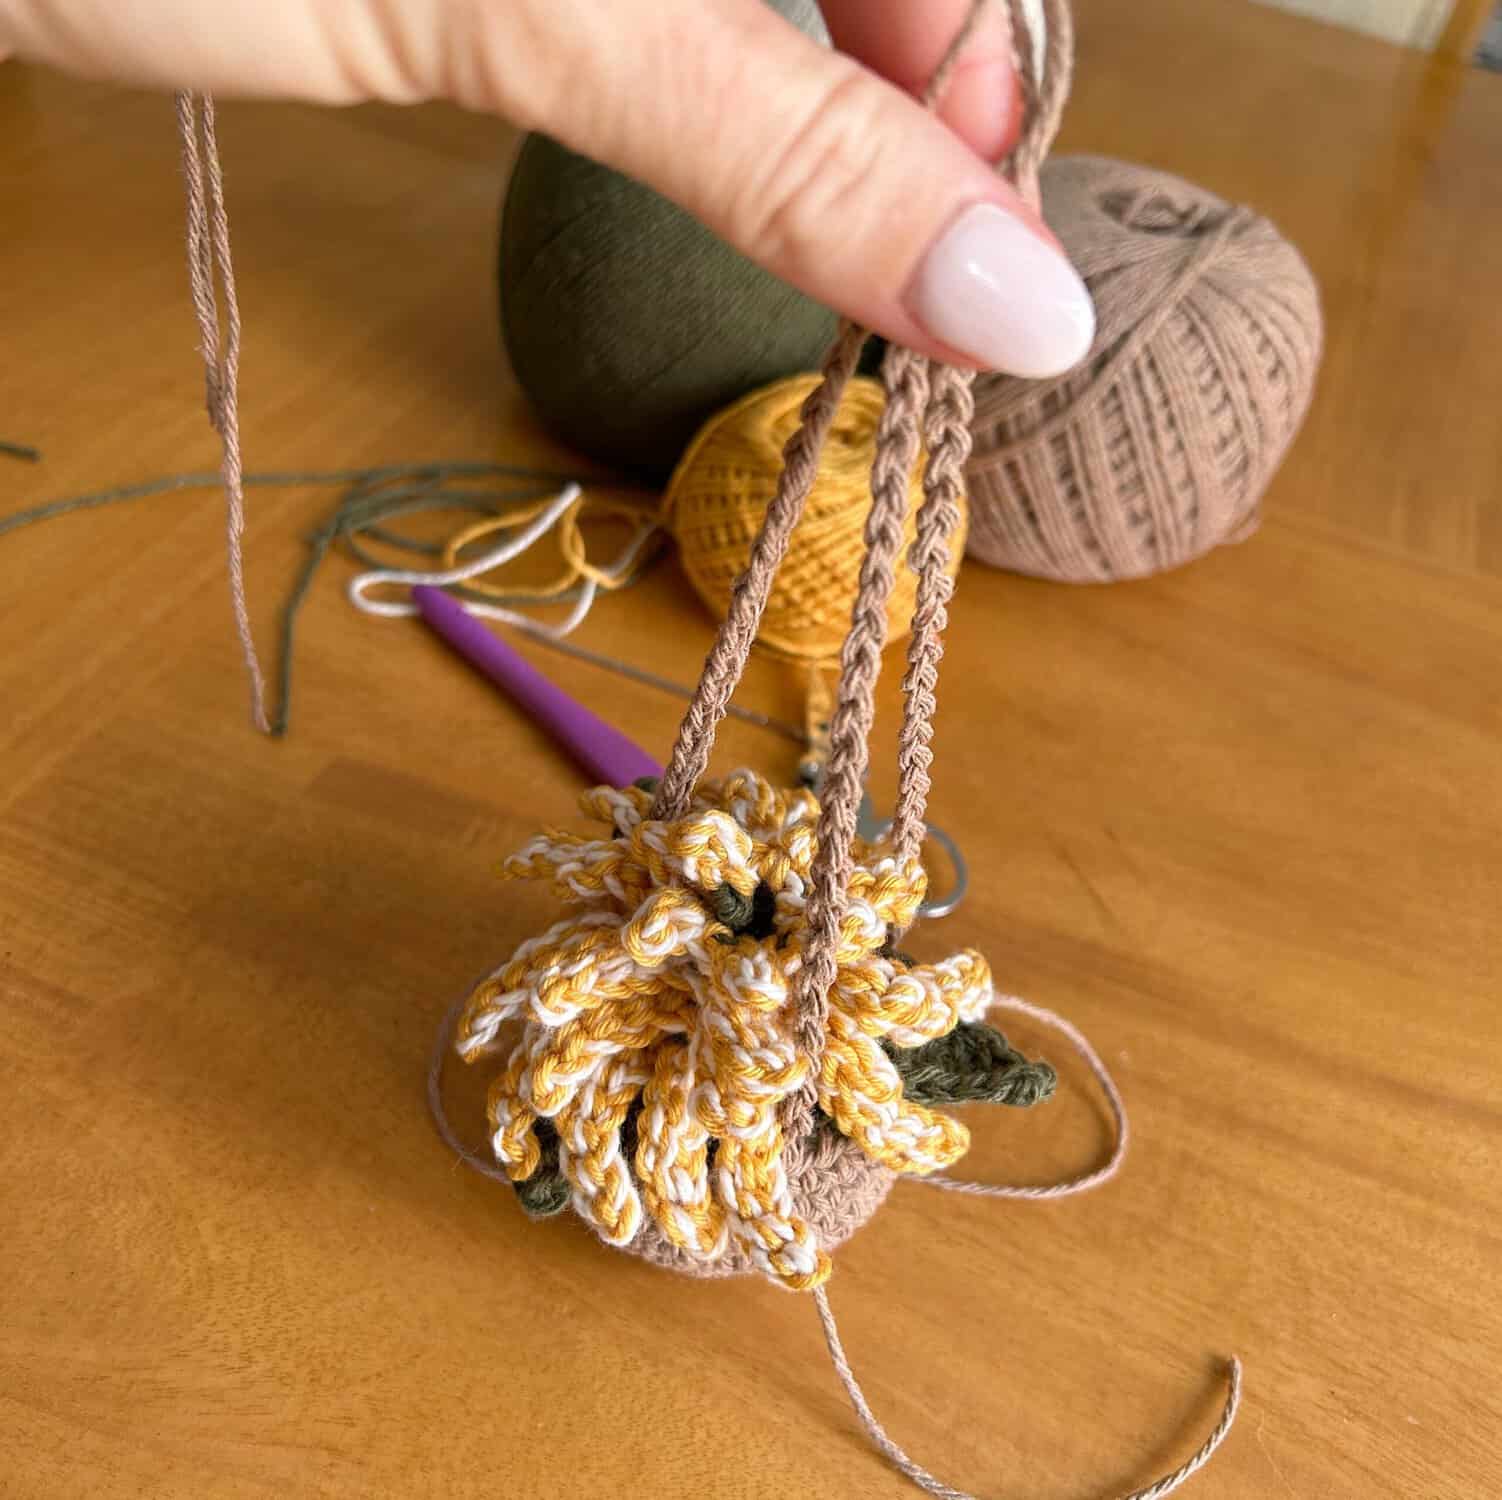
- You can then tie the strands onto a key ring or wooden circle dowel to hang. Weave in all remaining ends.
Super simple easy project perfect for the fall season! Once you make you own, make sure you tag us on Instagram! 🙂
If you want to keep up with me, Julie, on social media for other fun projects, follow me on: Instagram
If you want to keep up with all things Clover, follow us on: Facebook | Twitter | Instagram | Pinterest | YouTube | Ravelry