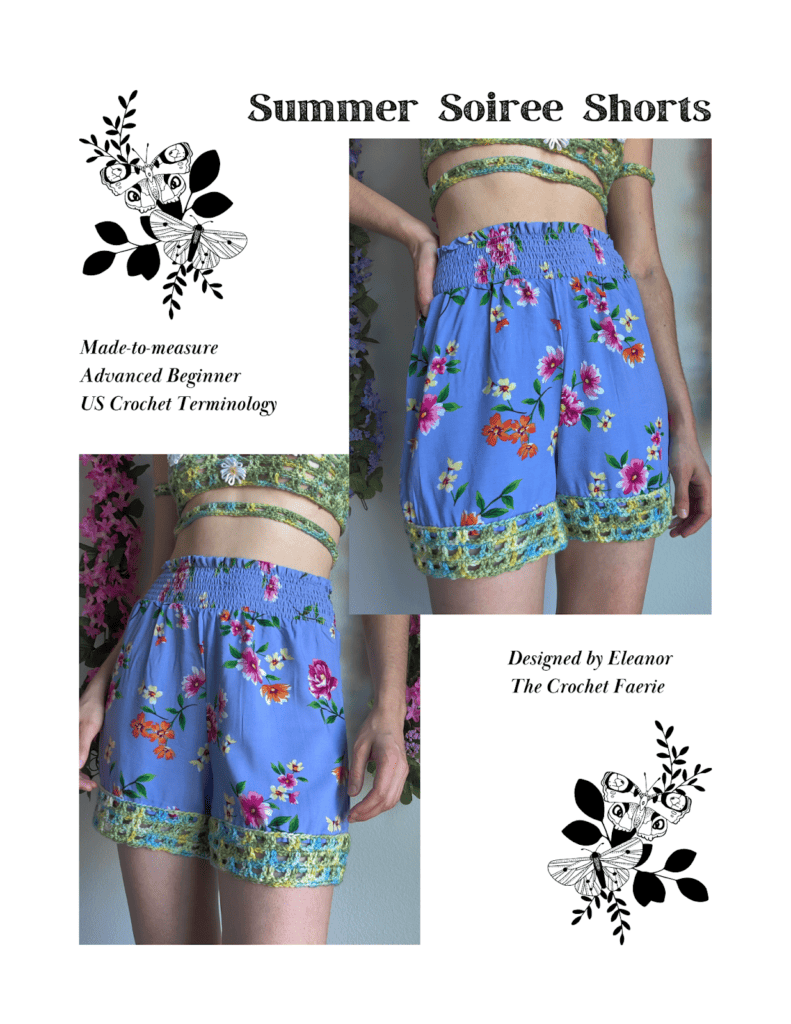
As my name, The Crochet Faerie, suggests, I am heavily inspired by faeries and fantasy. I recently designed a lovely little Faerie Soiree Top, and really wanted a cute pair of shorts to wear with it, but also didn’t want the outfit to be purely crochet… As a fanatic of mixing mediums and fabrics, I took the same yarn & stitch used for my top and combined it with a light pair of already made shorts. The result: absolutely adorable magic! I can’t wait for you to give it a try!
Notes:
Materials:
Yarn, hook, scissors, darning needle, measuring tape
Embroidery Needle
Shorts – (light weight fabric)
Yarn – Worsted Weight from Arcane Fibre Works
Hook – 5mm US
Gauge – 8dc x 2 rows = 2” x 1.25” (this is general suggestion and can be changed according to fit and preferences)
Size – Made to Measure
TIP: You can use from weight 1 to 4 yarn thanks to the made-to-measure instructions of this pattern, but I don’t recommend going above that!
Abbreviations:
Chain – Ch
Stitch – St
Slip Stitch – Sl St
Single Crochet – SC
Double Crochet – DC
Right Side – RS
Yarn over – YO
Instructions:
Read Chain Stitch Embroidery Instructions before starting your project. Turn work after each row of the Pant Leg section.
Process:
Using an embroidery needle, chain stitch all around the bottom borders of both leg openings. Next, attach the yarn to the inner seam of either leg, and, using the embroidered chain stitches, crochet around the border of the shorts. Work down, crocheting in horizontal rows, until you reach your desired length. Repeat steps for the pant leg for the second half of your shorts <3
Embroidery:
Thread your embroidery needle with a long string of yarn. Bring the needle up through the back of the fabric, next to the inner seam of either leg opening, just above the hem. From there, chain stitch all the way around the bottom border of the entire leg hole. (your stitches NEED to be a quarter inch long so that you will be able to fit a 5mm hook through them). Repeat for the second leg hole. Make sure the stitches aren’t too tight so that the fabric doesn’t crease.
Pant Leg: Using a 5mm hook, attach yarn into the top loop (the loop closest to the border of the shorts) of an embroidered chain stitch by the inner seam of either leg.
Row 1: With the RS facing down, DC into the top loop of the next embroidered chain stitch, *Ch 2, skip next 2 chain stitches, DC in the top loop of the next 2 embroidered chain stitches,** repeat from * to ** all the way around the border,Sl St into 2nd Ch of the Ch 2 from the beginning of this row, turn work.
IMPORTANT: In order to keep the proper mesh pattern, you need to end Row 1 with a Ch 2 space following your final 2 DC. Depending on how many chain stitches you have left when you reach the end of this row, you may need to place 2 DC in the same chain stitch (like I did), or skip a chain stitch in order to keep the mesh pattern consistent.
Row 2: Ch 2 (counts as a Ch 2 space) SC in next 2 Sts, *Ch 2, skip next 2 Sts, SC in next 2 Sts,** repeat from * to ** all the way around until you reach your initial Ch 2, (do NOT Sl St at the end of this row), turn work.
Row 3: Ch 2 (counts as a DC), DC in next St *Ch 2, skip next 2 Sts, DC in next 2 Sts,* repeat from * to ** all the way around, Sl St into 2nd Ch of the Ch 2 from the beginning of this row, turn work.
Row 4: Repeat Row 2.
Repeat Rows 3 -4 until you reach your desired pant length. Cut & fasten yarn, and weave in your ends. Repeat Pant Leg instructions for the second leg, making sure you have the same amount of mesh squares for both legs so that neither one is wider or longer than the other.
Thank You!
I hope you enjoyed making this little mashup as much as I did. If you would also like to craft a matching top, here is the The Faerie Soiree Top Pattern. I look forward to connecting with you lovlies again next month for another whimsical tutorial. Until then, stay magical! <3

