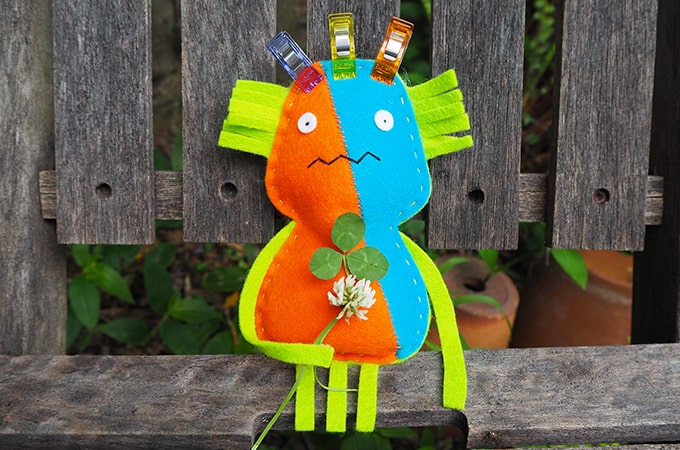
Millicent the Softie (Halloween Pattern!)
This is Millicent. Firstly, she wants to thank everyone at Clover for inviting her to spend Halloween with them.
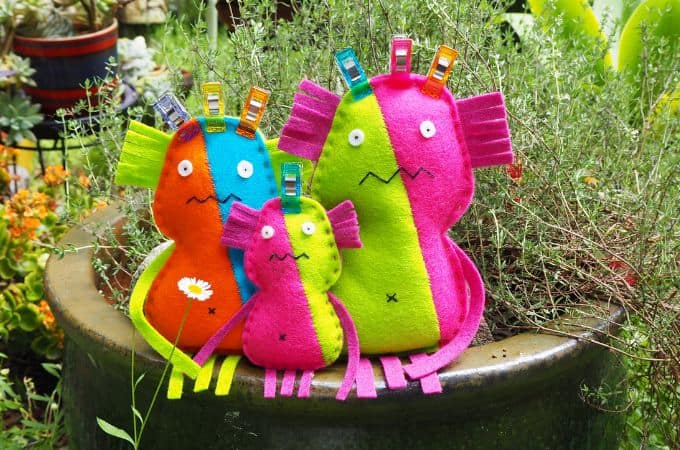
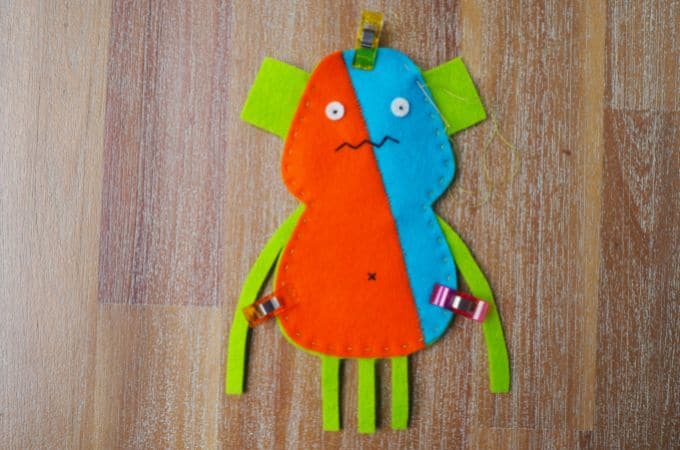
Millicent is, as you can see, a monster. In fact, she’s a mommy monster. From the outside, she might look different to people you know, but on the inside, which is after all the most important side, she’s as soft and caring as any mom is.
Moreover, Millicent is a zenki softie, which means, she’s a unique kind of softie that I created to be super-fun and super-simple for parents and teachers to sew with their kids and students.
So, if you’re a parent or grandparent looking to spend some enjoyable quality time with your kids or grandkids, Millicent is here to help. And if you’re a teacher, Millicent is more than happy to assist in getting your young students into the quirky creative spirit of the day.
And once you can sew Millicent, you can also sew her family using the very same pattern. Here’s a recent family photo of Millicent with her husband, Julius, and their son, JJ (Julius Junior).
If you want to try your hand at other zenki sewing projects for Halloween, or for any other day of the year, you are welcome to visit my blog Sew a Softie where I post dozens of free tutorials or you can take a look at my latest book The Zenki Way: A Guide to Designing & Enjoying Your Own Creative Softies by Trixi Symonds.
Happy Halloween sewing from Millicent and family!
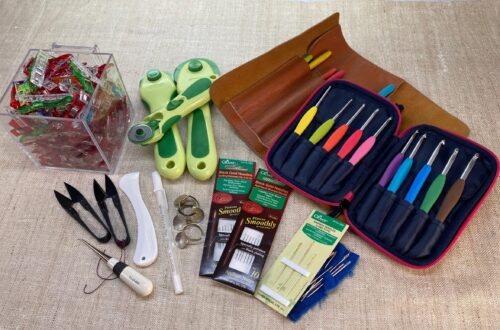
What You Need
Green felt
Orange felt
Blue felt
White felt for eyes
Needle (link to chenille 22)
Thread
Sewing Clips or Pins
Stuffing
Weighting material
What To Do
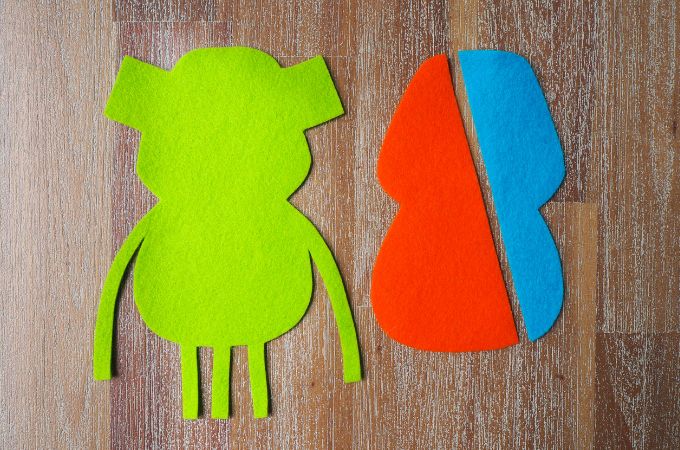
Download the templates here. Trace and cut out the back of Millicent’s body from green felt. Trace and cut out one side of the front of her body from orange felt and one side from blue felt.
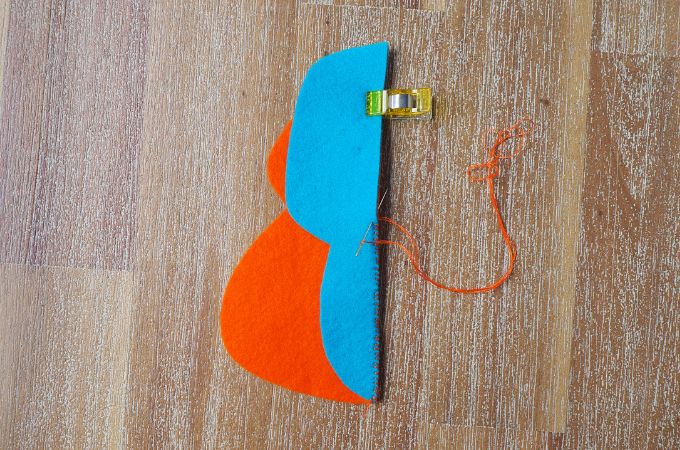
Clip or pin the orange and blue sides of her front together as shown in the image above. Use an overstitch to sew the two sides together. Here’s my simple quick overstitch tutorial.

Open the two sides and press or iron flat as in the image above.
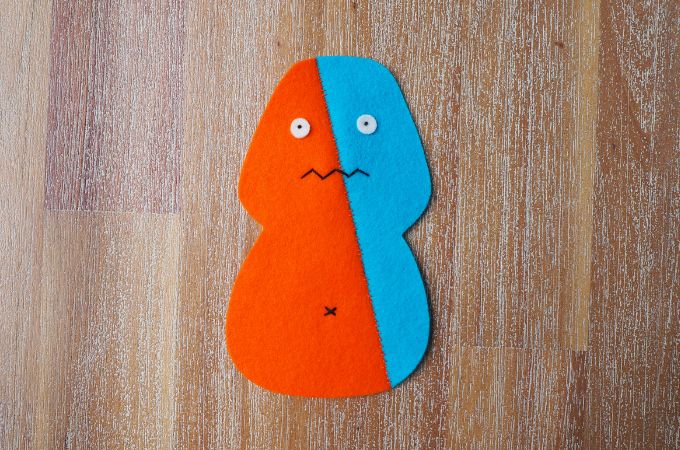
Add Millicent’s eyes, mouth and belly button.
I’ve used a hollow punch to punch out small white felt circles for her eyes. Here’s my simple quick tutorial on how to make perfect circles with a hollow punch.
I used a French knot for the pupils to hold her eyes in place. Here’s my simple quick tutorial on how to sew a French knot.
I’ve used a single stitch for each segment of her zigzag mouth.
I’ve used a single cross stitch for her belly button. Here’s my simple quick cross stitch tutorial.
Clip or pin and sew the back and front of her body together. Remember to leave an opening for weighting material and stuffing at the top of her head.
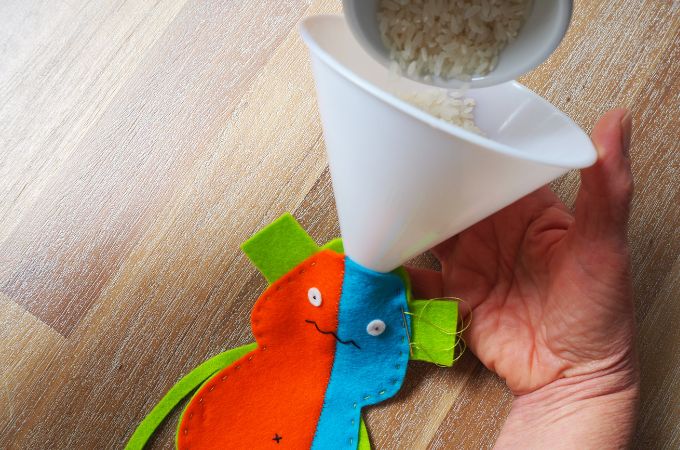
Fill the bottom half of her body with a granular weighting material. I’ve used dry rice grains. Millicent tells me they tickle as I pour them in. She likes that.
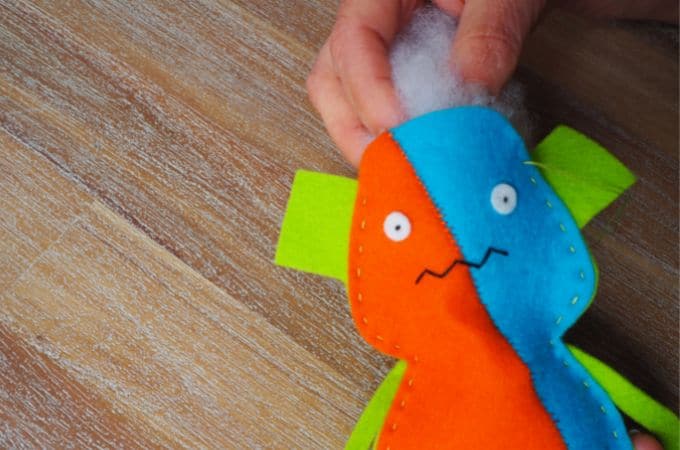
Fill the top half of her body with stuffing. I’ve used polyester fibrefill.
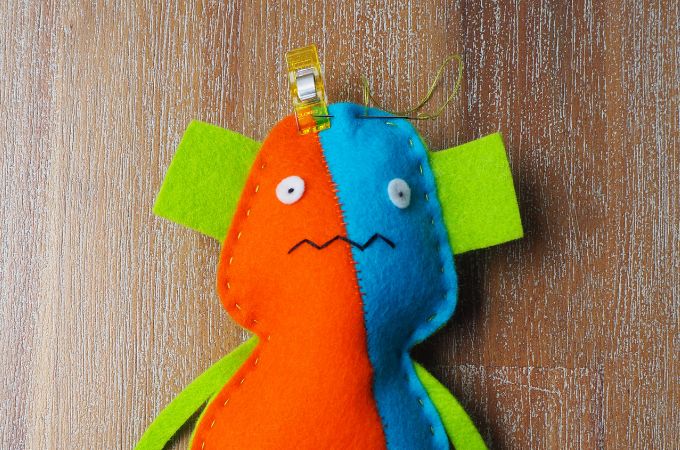
Clip or pin…
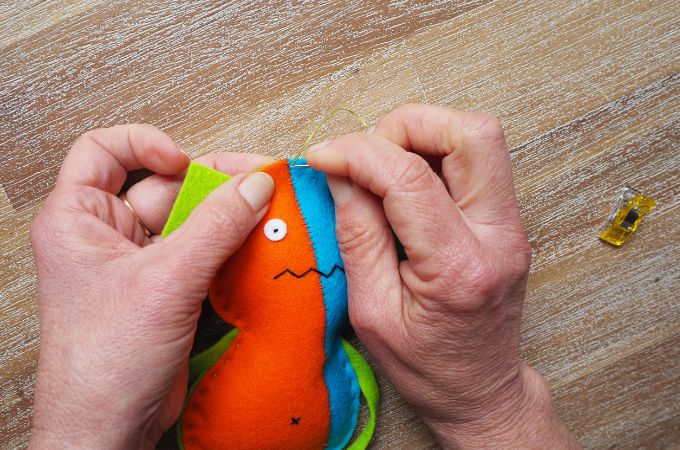
…and sew the opening closed. Millicent’s not so keen on this part.

OK, all she needs now is a quick trip to the hairdresser for some fringing.
Don’t make her fringes too thin. If felt fringes get too thin, they can break off.
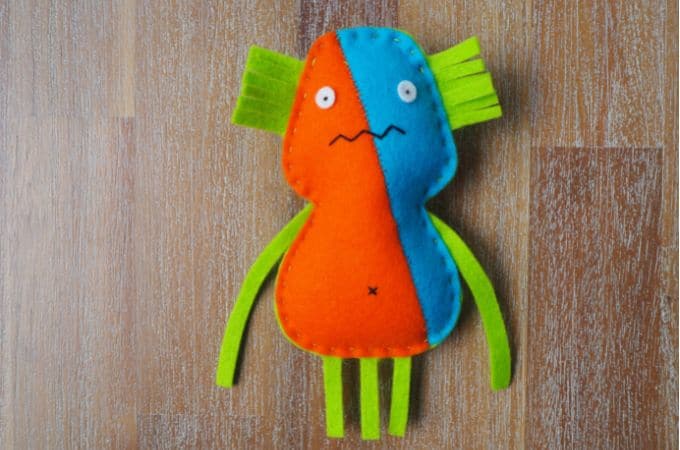
And now, with her beautiful hairdo, Millicent is ready to make the most of Halloween and life with you!
Happy trick or treating!
– Trixi 🙂
And if you have any questions you’d like to ask, you can find me on IG or find me on Facebook!
Or email me at: trixi@sewasoftie.com!