Mother’s Day Box of Chocolates- Amigurumi Pattern
Hi everyone! I’m Julia from Little World of Whimsy, and I’m here to share a cute box of chocolates amigurumi pattern just in time for Mother’s Day!
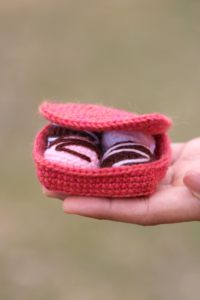
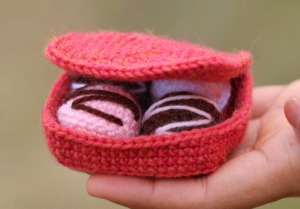
This adorable box of chocolates is perfect as a gift or to bring for the host at your next dinner party. The chocolates can be customized to your favorite flavors and you can go crazy on the decorations! Best of all, they last forever, unlike real chocolates 🙂
You can get the inexpensive, beautifully formatted, printable PDF on Etsy here.
Materials
Clover Amour Crochet Hook D (3.25 mm)- Art. No 1042/D
Hobbii Amigo (Sport)
Mini Patchworks Scissors – Art. No 493/CW
Quick Locking Stitch Marker (Small) – Art. No 3030
Darning Needle Set (Bent Tip) – Art. No 3121
Fiberfill stuffing
Abbreviations
CC: contrast color
ch: chain
dec: decrease
inc: increase (2 scs in the same stitch)
MC: main color
MR: magic ring
rnd: round
sc: single crochet
slst: slip stitch
st(s): stitch(es)
x sc: sc x number of times
(x sts): x total stitches in round/row
(…) x: repeat stitches within brackets x times
Technical Notes
1.Crochet in continuous spiral rounds, unless specified otherwise. Use a stitch marker or piece of yarn to keep track of the last stitch in each round.2.When filling with polyester stuffing, pull apart each large chunk into many smaller chunks. This ensures an even distribution of firmness within the amigurumi.
Color Coding
The MC is red, CC1 is brown, CC2 is pink, and CC3 is white.
Final Size
3″ x 3″ x 0.5″

PATTERN
BOX BOTTOM (in MC.)
Round 1: 4 sc in MR (4 sts)Round 2: *3 sc* x4 (12 sts)Round 3: sc, (*3 sc*, 2 sc) x3, *3 sc*, 1 sc (20 sts)
Round 4: 2 sc, (*3 sc*, 4 sc) x3, *3 sc*, 2 sc (28 sts)
Round 5: 3 sc, (*3 sc*, 6 sc) x3, *3 sc*, 3 sc (36 sts)
Round 6: 4 sc, (*3 sc*, 8 sc) x3, *3 sc*, 4 sc (44 sts)
Round 7: 5 sc, (*3 sc*, 10 sc) x3, *3 sc*, 5 sc (52)
Round 8: 6 sc, (*3 sc*, 12 sc) x3, *3 sc*, 6 sc (60 sts)
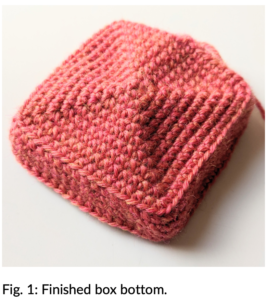
Round 9: 7 sc, (*3 sc*, 14 sc) x3, *3 sc*, 7 sc, sl st to first stitch. (68 sts)Begin working in joined rounds.Round 8: Ch 1 (does not count as a stitch), and working in BLO, sc around. Sl st to first stitch (68 sts)Round 9: 7 sc, (sc3tog, 14 sc) x3, sc3tog, 7 sc, sl st to first stitch (60 sts)Round 9-11 (3 rnds): ch, sc around, sl st to first stitch (60 sts)Invisible finish off and weave in end (fig. 1).
BOX LID (in MC.)
Round 1: 4 sc in MR (4 sts)Round 2: *3 sc* x4 (12 sts)Round 3: sc, (*3 sc*, 2 sc) x3, *3 sc*, 1 sc (20 sts)
Round 4: 2 sc, (*3 sc*, 4 sc) x3, *3 sc*, 2 sc (28 sts)
Round 5: 3 sc, (*3 sc*, 6 sc) x3, *3 sc*, 3 sc (36 sts)
Round 6: 4 sc, (*3 sc*, 8 sc) x3, *3 sc*, 4 sc (44 sts)
Round 7: 5 sc, (*3 sc*, 10 sc) x3, *3 sc*, 5 sc (52)
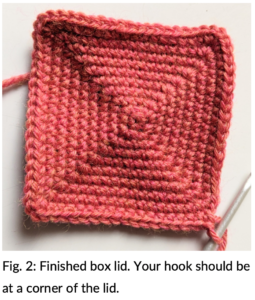
Round 8: 6 sc, (*3 sc*, 12 sc) x3, *3 sc*, 6 sc (60 sts)Continuing from the end of round 8, work 6 more scs so that you’re at a corner (fig. 2).Your box lid is finished, but do not break yarn.At this point, you should wet block or steam block the box lid to a square shape. Mine ended up being around 3” x 3”. Blocking will help the lid lie flat and even. Check out my tutorial here on blocking for more help!
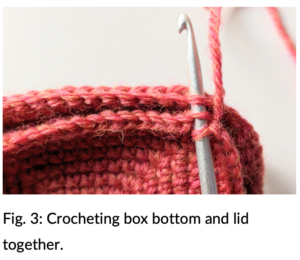
Attaching bottom and lid together: We will now crochet the lid and the side of the box together. Insert your hook through the back loop of the lid and the front loop of the box bottom and slip stitch together (fig. 3). Continue slip stitching through both the box lid and box bottom for a total of 17 stitches, all along one side. Do not break yarn and continue to next step.
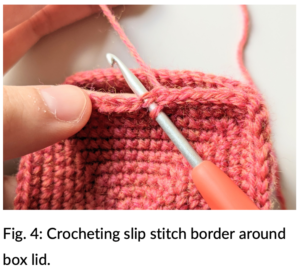
Slip stitch border around lid: After you’ve finished connecting the box lid and bottom, you will crochet a slip stitch border around the other three sides of the box top. Insert the hook through both loops of the box lid only (no longer working into the bottom of the box). See figure 4. Work slip stitches in every stitch around the box until you reach the place where the lid and bottom connect. Invisible finish off and weave in the end. Your box is now finished.
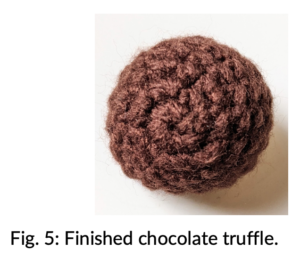
CHOCOLATE TRUFFLE (in CC1, CC2, or CC3. Make four in total.)
Round 1: 6 sc in MR (6 sts)Round 2: inc x6 (12 sts)Round 3: (sc, inc) x6 (18 sts)Round 4: (2 sc, inc) x6 (24 sts)Round 5-7 (3 rnds): sc around (24 sts) Round 8: In BLO, sc around (24 sts) Round 9: (2 sc, dec) x6 (18 sts) Round 10: (sc, dec) x6 (12 sts)Stuff.Round 11: dec x6 (6 sts)Finish off and weave in end (fig. 5).Using CC1, CC2, or CC3, embroider a zigzag onto the surface of the chocolate truffle. Make sure that the zigzag covers the entire top hemisphere (above the BLO line) by making the first and last zigzags small and the middle ones large. See here for a tutorial on how to embroider a zigzag, and see figure 6 for color combination ideas. Make 3 more truffles and place them in the box.

Your Box of Chocolates is all done!
I hope you enjoyed crocheting it and found the pattern helpful. I would love to see your finished amigurumi, so share a picture on Instagram with me by using the #littleworldofwhimsy and tagging me @littleworldofwhimsy.
This pattern is free but if you’d like to purchase a low-cost PDF, you can find it here.
Once again, if you have any questions don’t hesitate to reach out to me with a direct message on Instagram @littleworldofwhimsy or through email at littleworldofwhimsy@gmail.com.
Happy crocheting!