Hand Embroidered “Give Thanks” Kitchen Towel

Hey Clover Family, it’s Danielle from sprinklesofzeal and I want to start off by saying happy holidays. As we approach another Thanksgiving, I hope that you are able to reflect on the good times and appreciate every moment with your loved ones.
This week, I’m excited to share this lovely Give Thanks embroidery pattern with you. The stitches aren’t too complicated and the pattern can be completed in under an hour. Alright, are you ready to start stitching? Let’s Go!
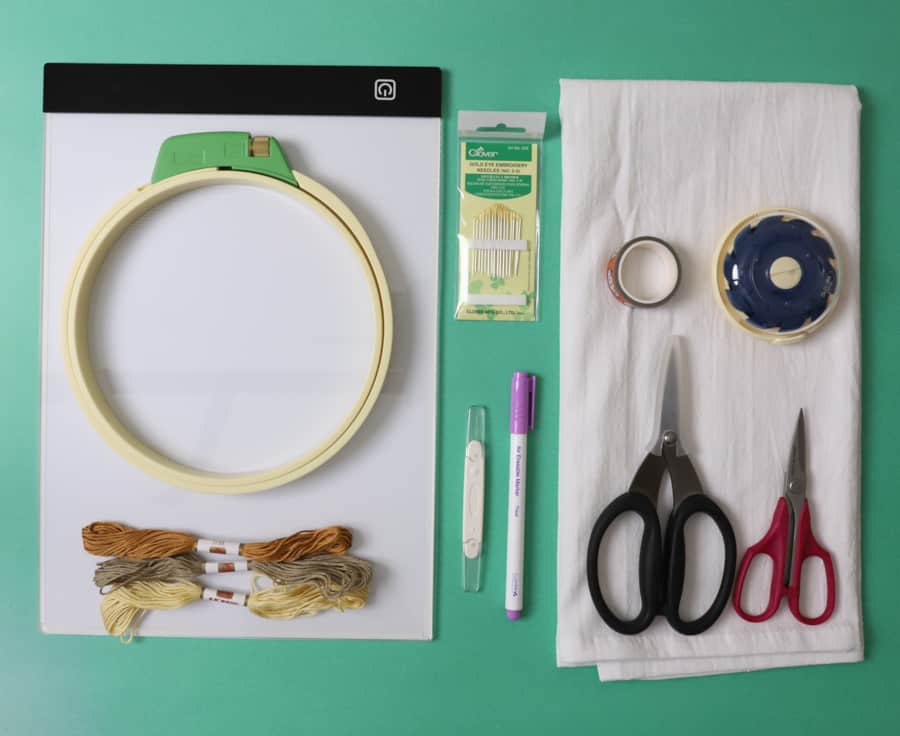
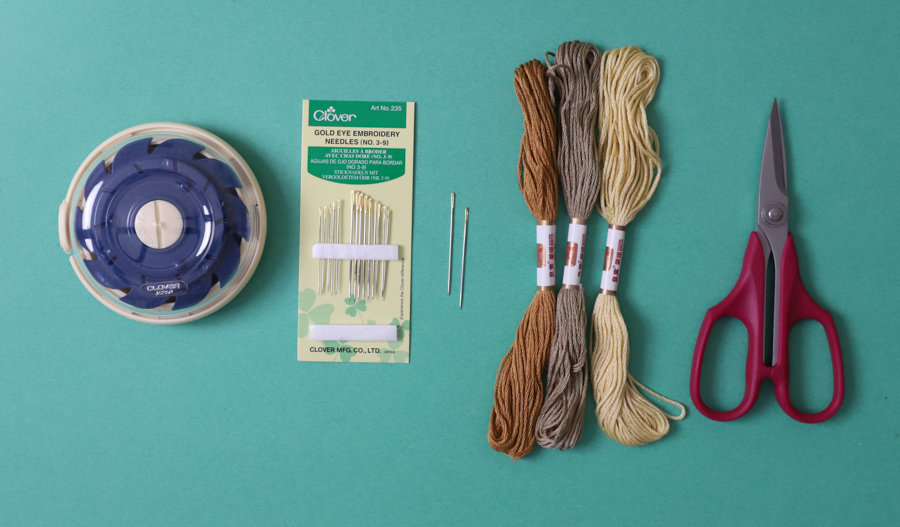
Here are the materials that you’ll need for this project:
- Clover Double Threader Art No. 462/NV
- Clover Embroidery Hoop Art No. 8812
- Clover Embroidery Needles Art No. 235
- Clover Bordeaux Ultimate Shears Art No.4940
- Clover Dome Threaded Needle Case Art No. 625
- Clover Air Eraseble Marker (Thick) Art No. 5031
- Washi Tape
- Lightbox or Window
- Lightweight Kitchen Towel
- Give Thanks Embroidery Pattern
- Any Embroidery Floss
Instructions:
Step 1. Print and Cut the Pattern.
Click here to download the free embroidery pattern.
Step 2. Trace the Pattern.
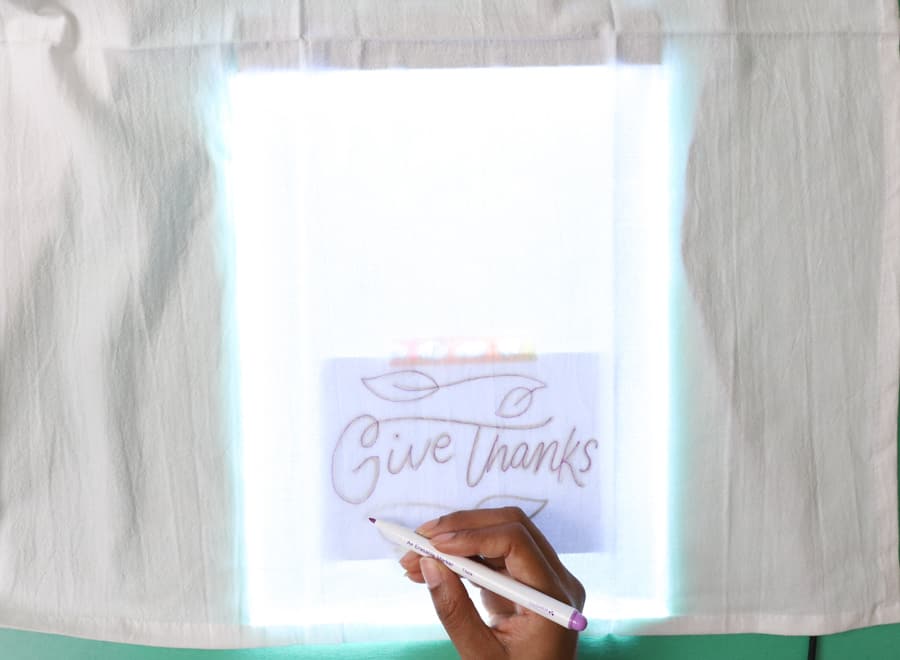
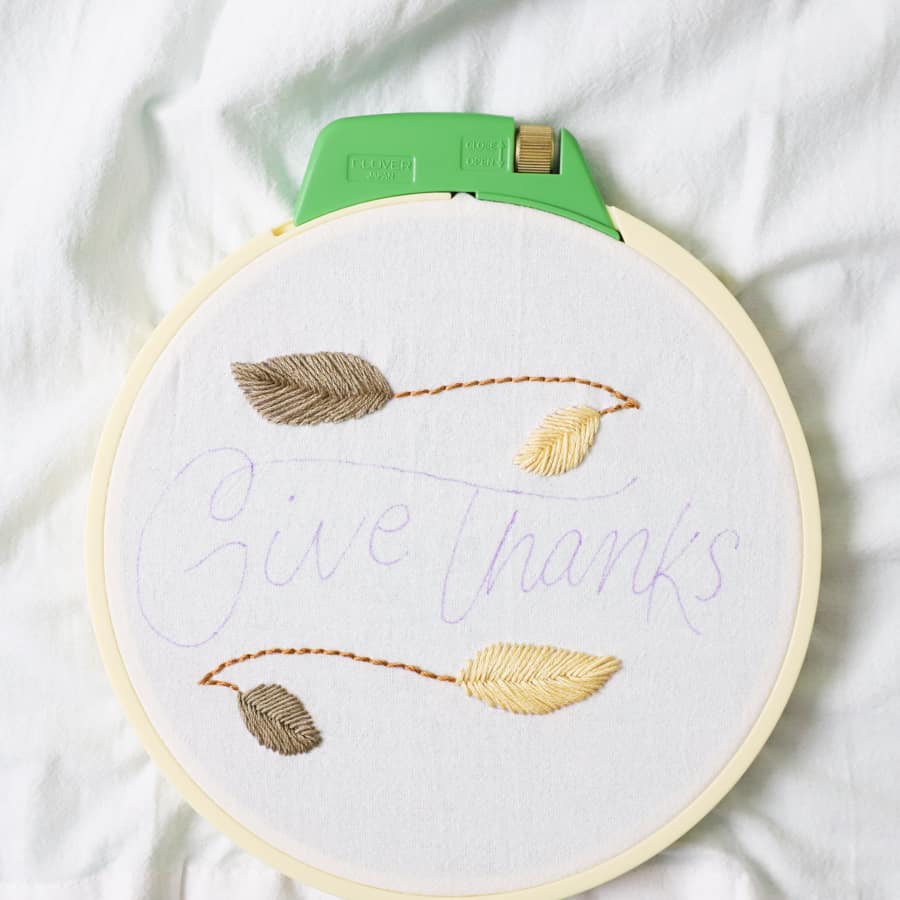
Lay the kitchen towel out on the lightbox, then trace the pattern inside the third folded box. Adding the pattern to the third box will ensure that the design can be seen when the towel is folded. If your towel isn’t pre-folded, then you can adjust the pattern placement however you see fit.
Quick Tip: Use washi tape to adhere the pattern to the lightbox.
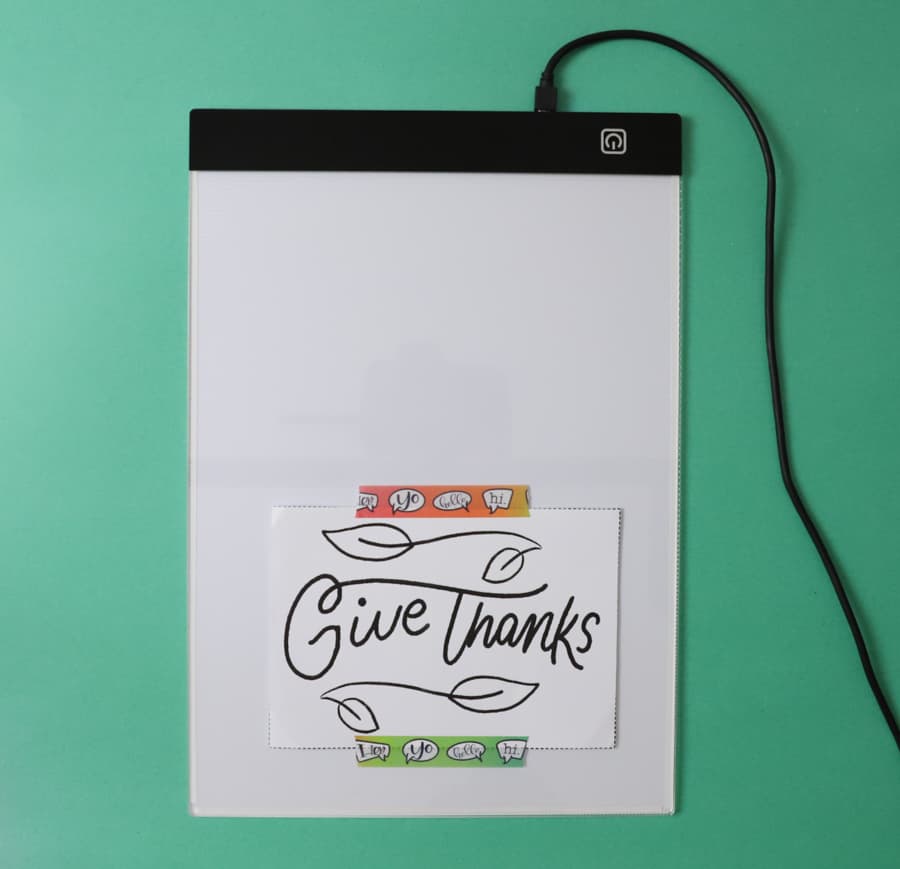
Before tracing the design, it’s best to double-check to make sure the pattern is straight and lined up neatly.

If you haven’t used Clover’s Air Erasable Marker, then you have to add it to your stash. It creates clean lines that disappear with water or air. Isn’t that cool?!
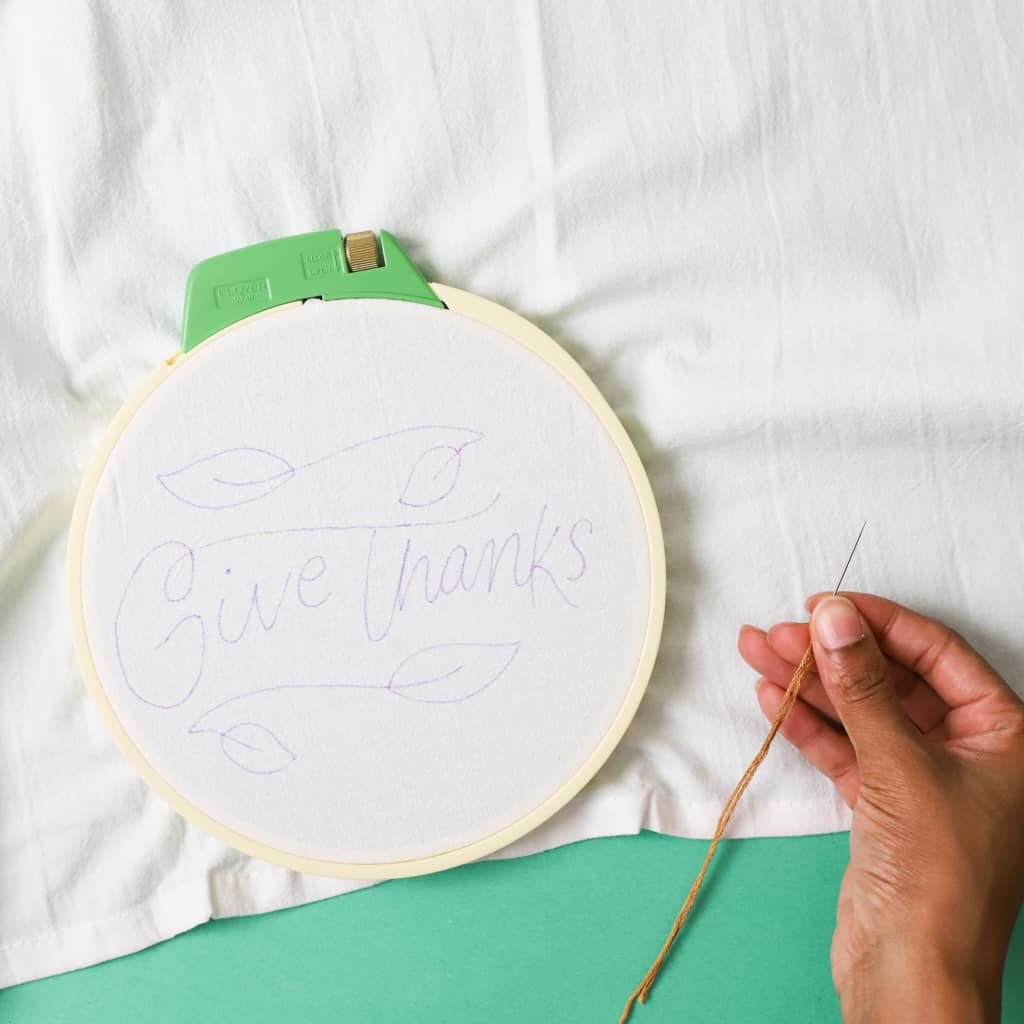
Step 3. Hoop the Kitchen Towel
Attach the Clover 7″ embroidery hoop to the kitchen towel. The tension mechanism is really easy to use and it prevents the fabric from shifting.
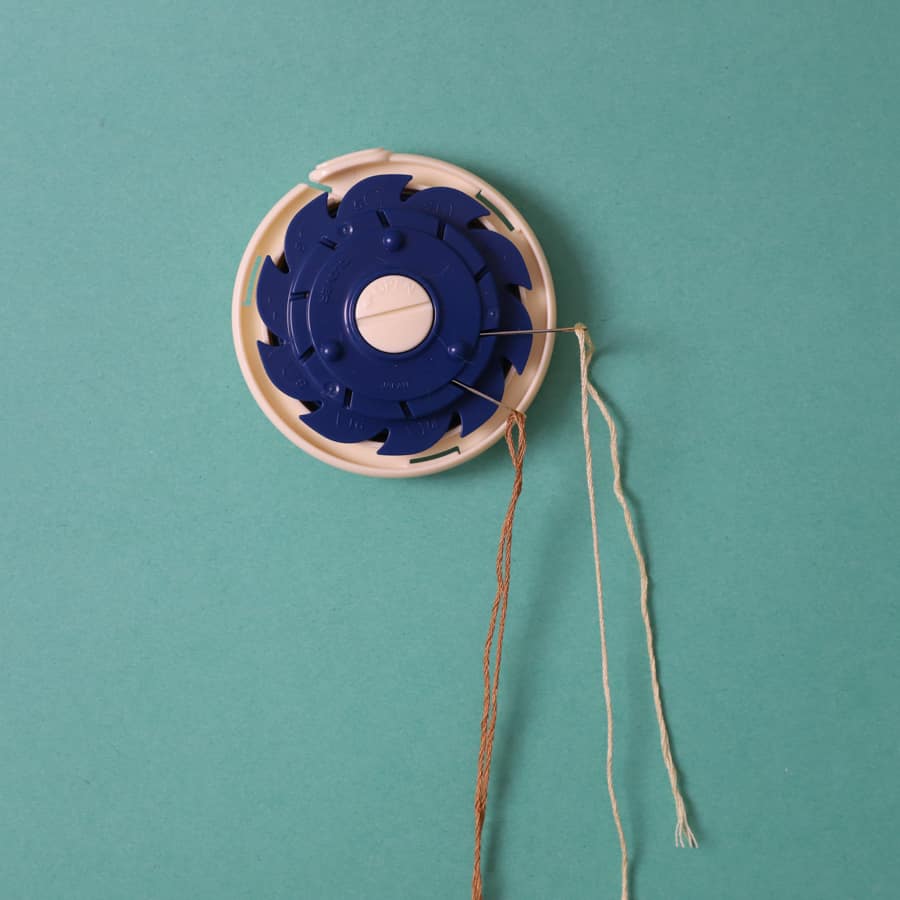
Step 4. Thread the Needles
Use Clover’s Double Needle Threader to thread the embroidery floss.
I like using the Clover Dome Threaded Needle Case for my embroidery and cross-stitching projects. If you want to learn more about the Dome Threaded Needle Case, check out the Newborn Cross Stitch blog for an in-depth review.
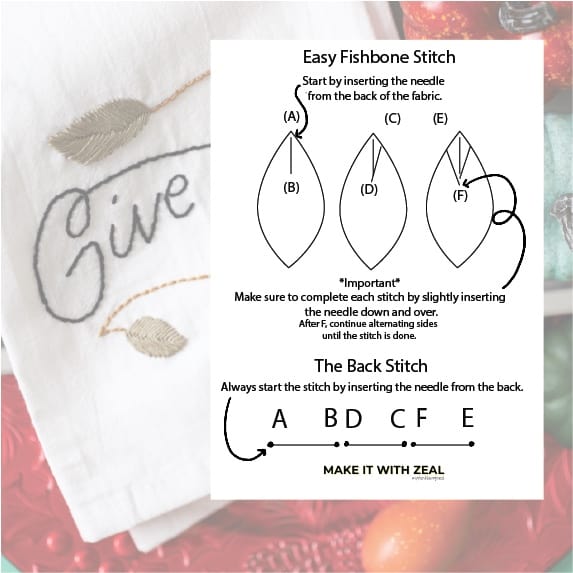
Step 5. Quick Stitch Tutorial
Here’s a quick guide to help you with Backstitch and the Fishbone Stitch.
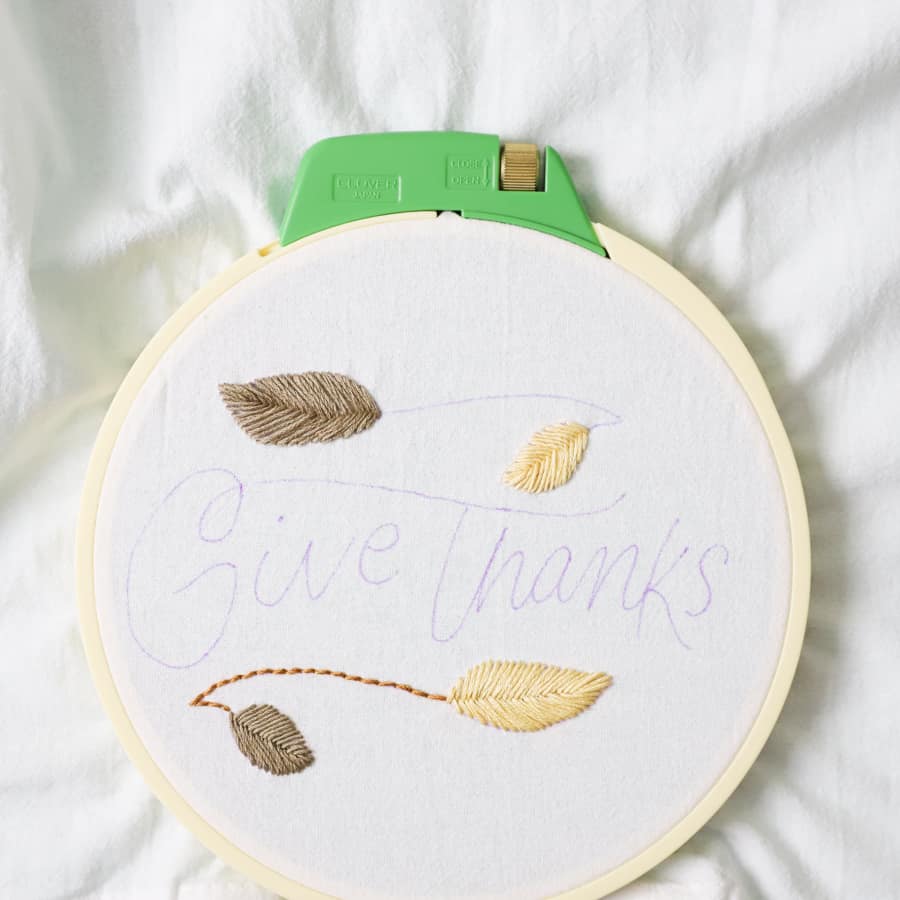
Step 6. Begin Stitching.
Start stitching the leaves using the fishbone stitch.
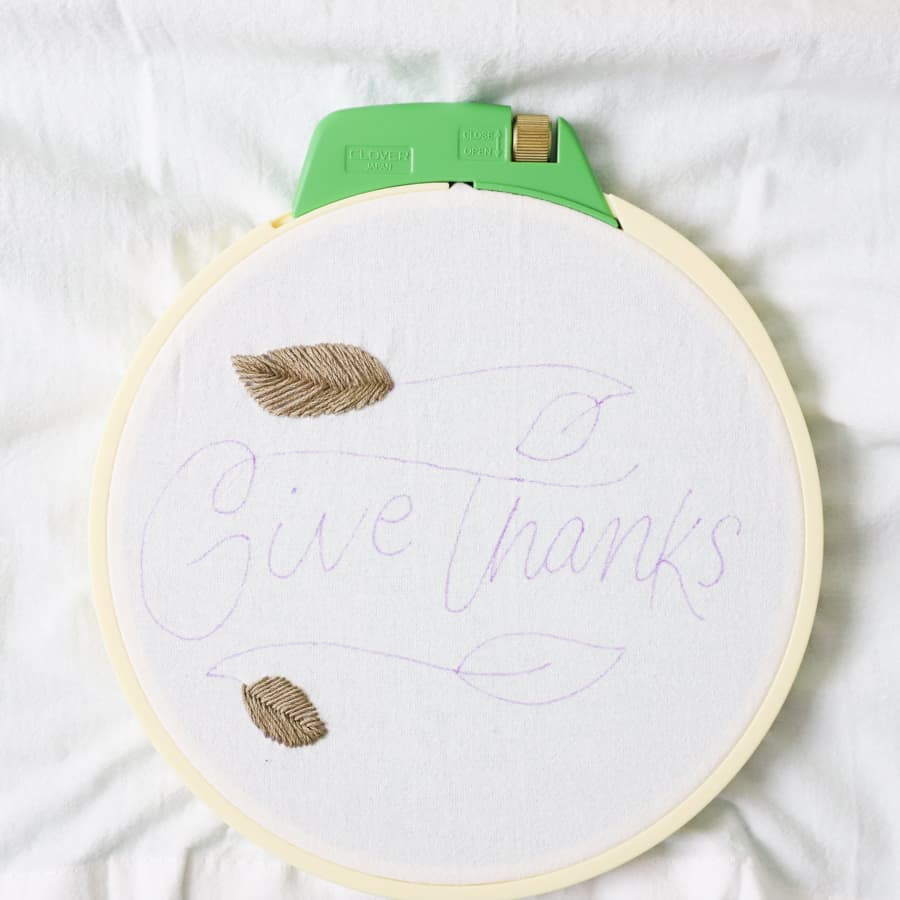
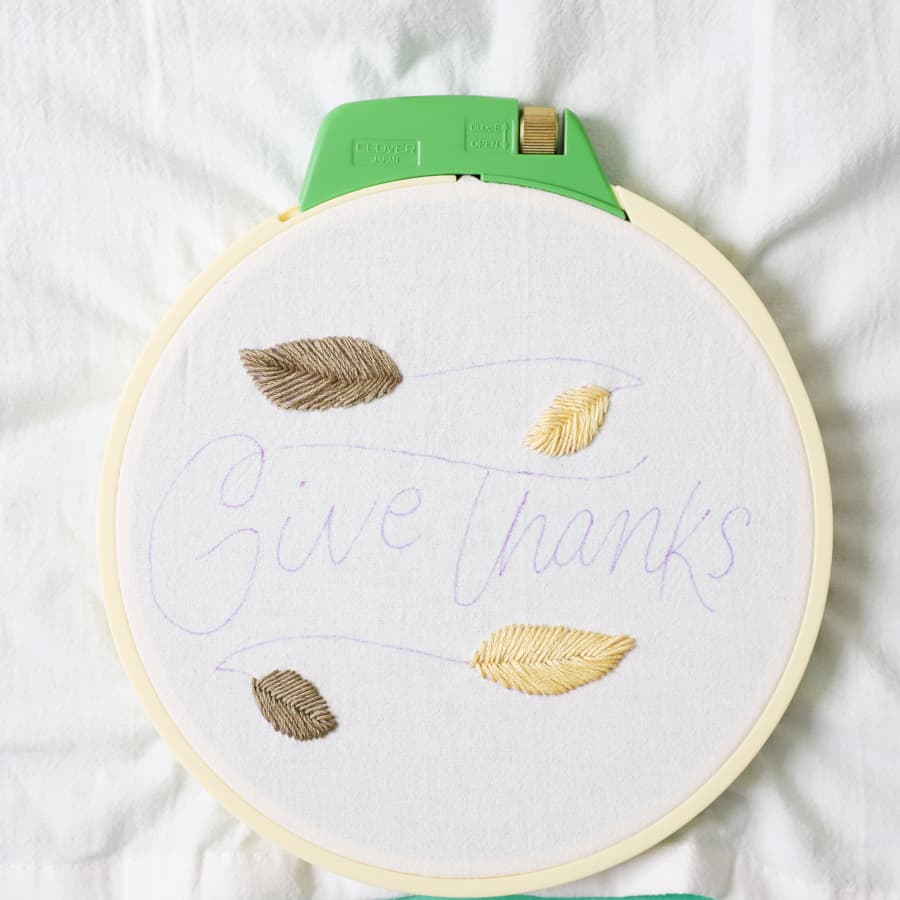
Then, continue with the backstitch for the stems and lettering.
Here’s a picture of the finished kitchen towel!
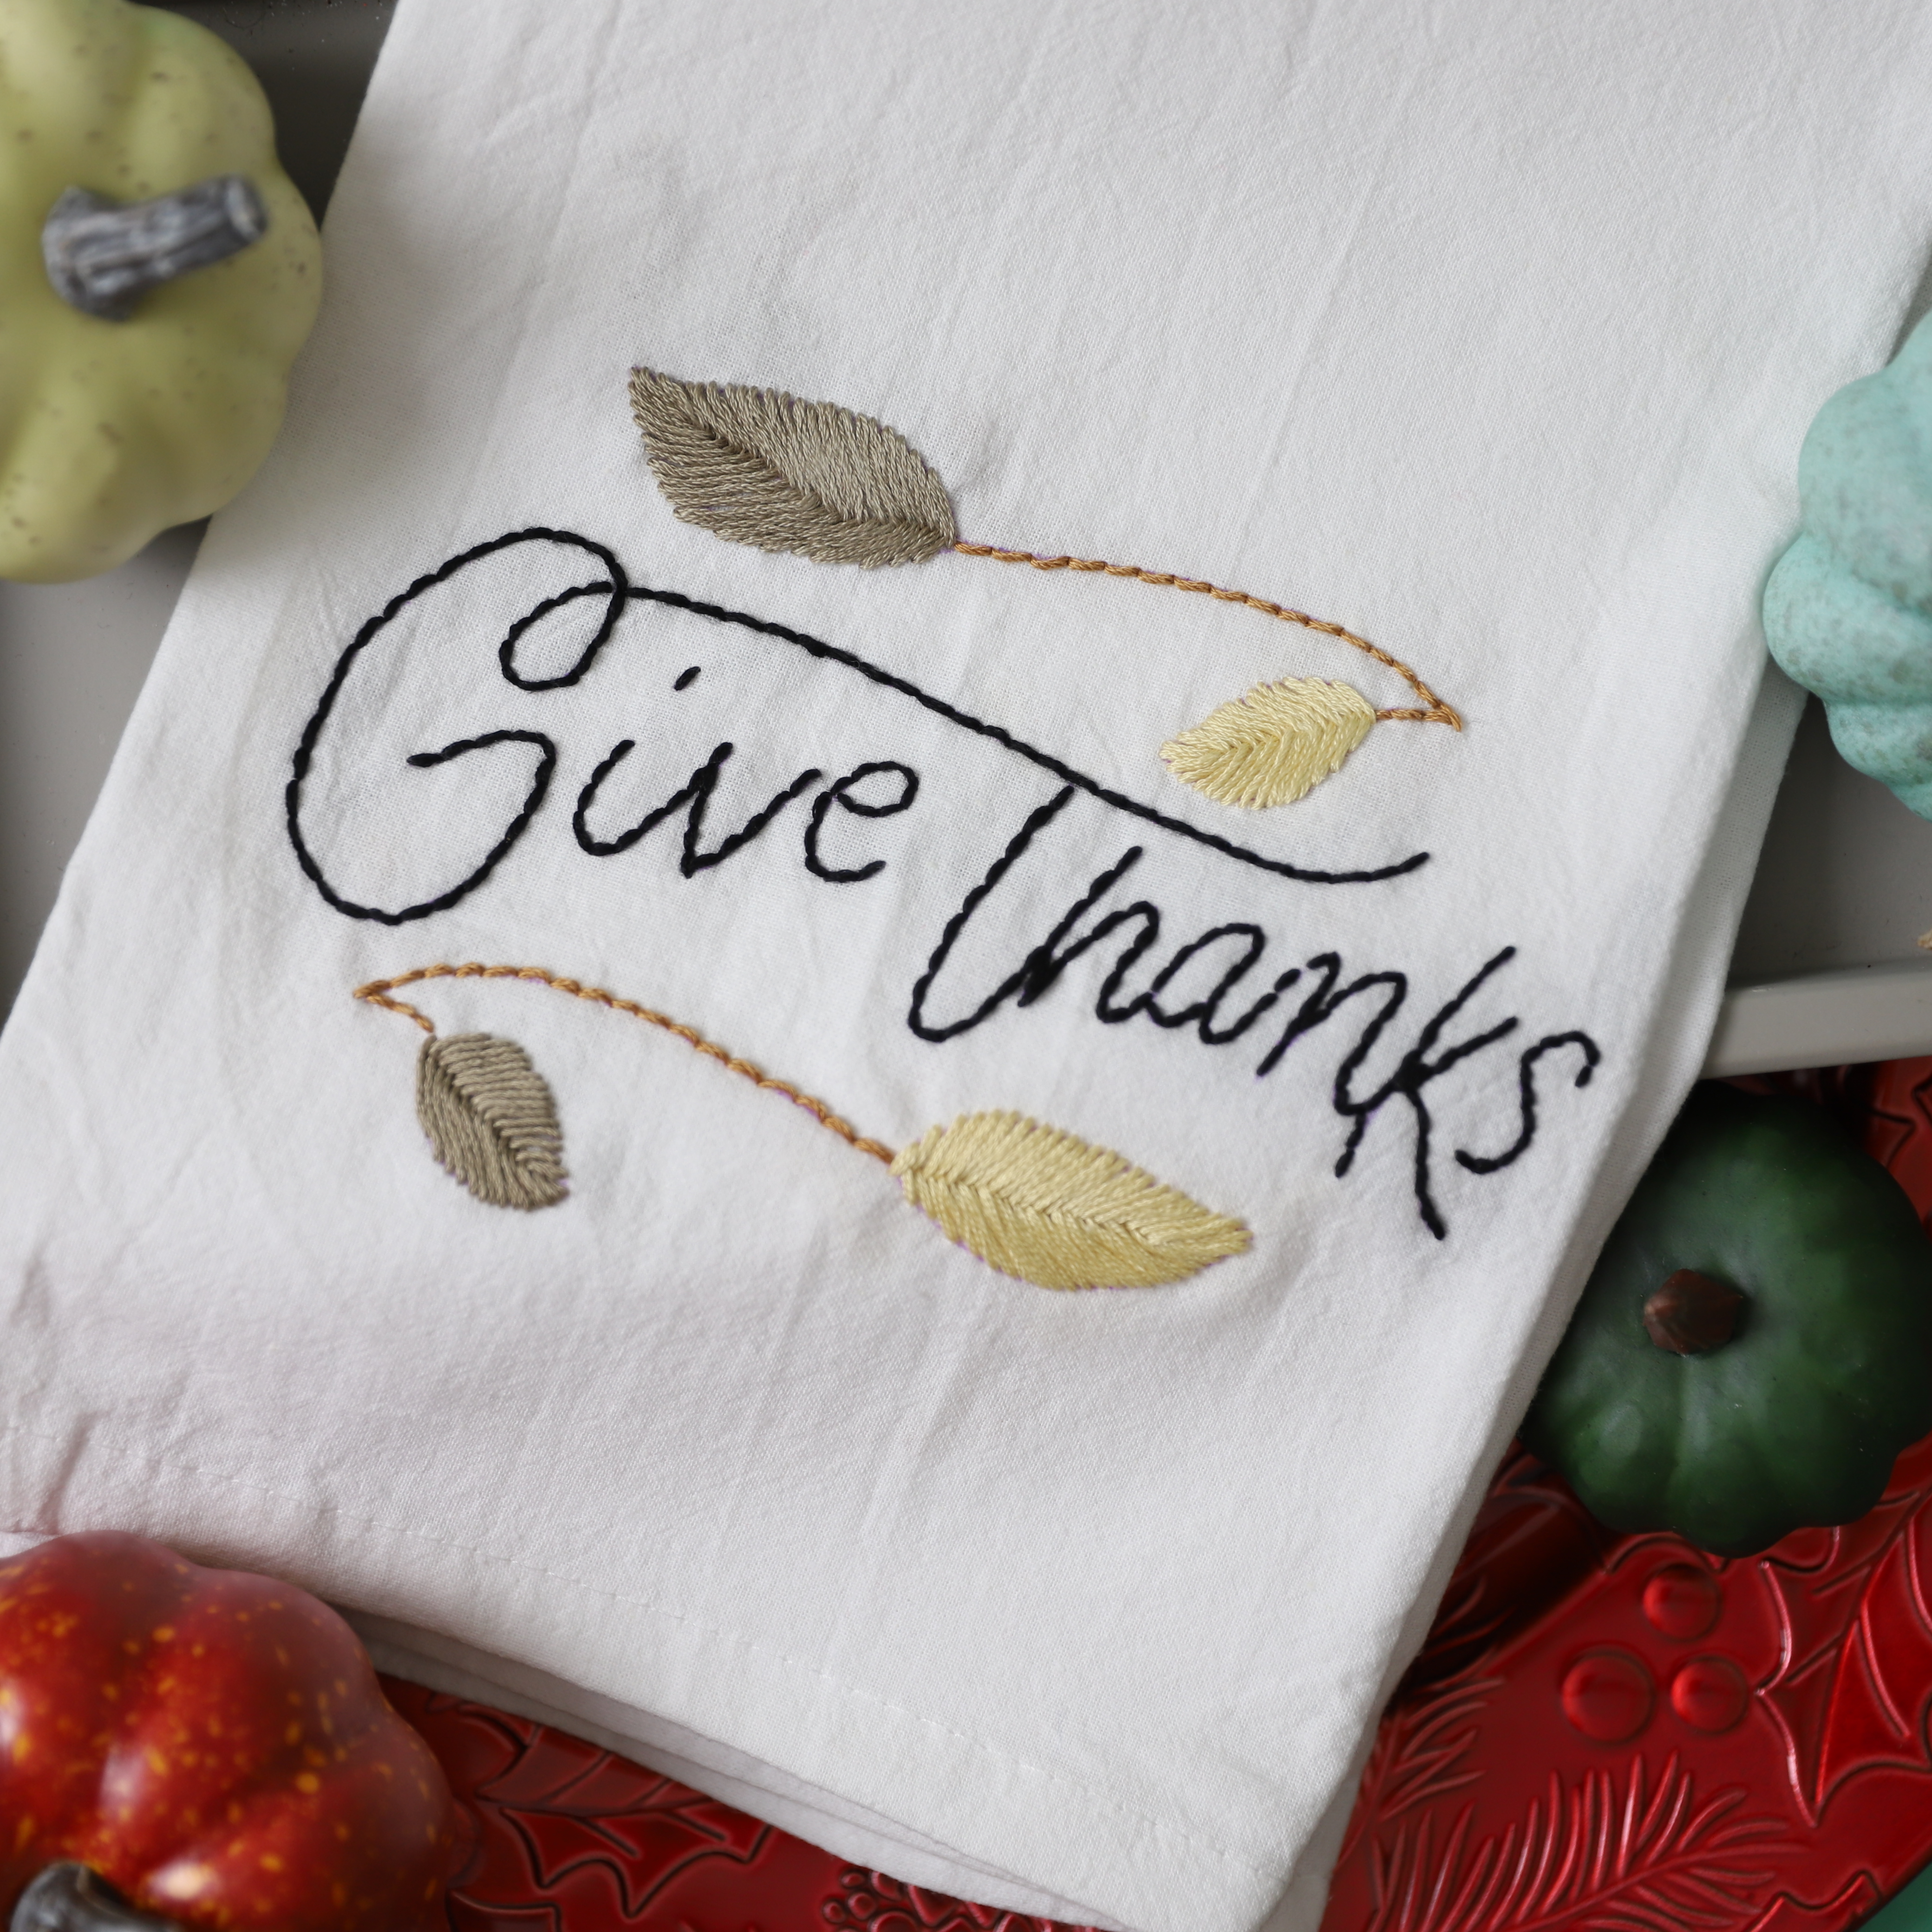
Whoohoo, that’s it! If you enjoyed creating this hand-embroidered kitchen towel, be sure to tag @cloverusa and #makeitwithzeal in your finished project.
Well, until next time, have a craftastic day!
-Danielle
Want to check out more of my blogs and tutorials? Here are my social links below!
Blog | Instagram | Facebook | Pinterest | YouTube
Stay connected with Clover on Facebook | Twitter | Instagram | Pinterest | YouTube | Ravelry
[mc4wp_form id=”11289″]