Squid Drawstring Bag
Hey everyone! I’m Rebecca, the designer and maker behind Lasheet. https://www.instagram.com/lasheet/ I’m honored to have this opportunity to share my Squid Drawstring Bag pattern with you on Clover’s blog! This Squid bag is big enough to carry a pen or crochet hook. Perfect for someone who plays DND and needs a small bag to carry both dice and a pen. It’s also ideal for crafters, it will hold a lot of stitch markers and other knickknacks.
This bag is made in rounds. Do not join rounds unless told to. Use a stitch marker to mark the start of the round. A small piece of yarn in a different color works great. If you don’t have stitch markers. I personally like to start my round with a magic ring method, but you can also use other trusted methods like: ch 2, work 6 sc into first ch. Whichever you use make sure you have 6 sc in a circle, with no holes in the first row before you continue.
A finished Squid Drawstring Bag is approximately 7” from tip to opening. I personally crochet tightly so your bag might be bigger than mine. That will not hurt anything.

![]()
Skill Level: Beginner friendly
Terminology: U.S. Terminology
Materials:
- Size H (5.0mm) Amour crochet hook – Art. No 1047/H
- Size 7 (4.5mm) Amour crochet hook – Art. No 1046/7
- Tapestry needle – Art. No 339
- Scissors
- Beacon Fabri-Tac
- Felt for the eyes. I made two 1” circles.
- 4 medium, Worsted weight yarn (I used Red Heart Super Saver – Favorite Stripe)
- Sewing thread for the Pom-pom (optional)
- Pom-Pom Maker Small – Art. No 3124
Abbreviations:
- ch = chain
- ss = slip stitch
- sc = single crochet (US)/double crochet (UK)
- hdc = half double crochet (US)/half double crochet (UK)
- dc = double crochet (US)/triple crochet (UK)
- inv dec = invisible decrease, by working two single crochets together, but you could also use sc2tog
- * = work everything in stars into the next stitch.
Squid bag: (starting at the top of the bag)
Row 1: magic ring. (6) or ch 2, work 6 sc into first ch, to form the ring. (6)
Row 2: 2 sc in the next stitch, sc in the next 5 stitches. (7)
Row 3: 2 sc in the next stitch, sc in the next 6 stitches. (8)
Row 4: 2 sc in the next stitch, sc in the next 7 stitches. (9)
Row 5: 2 sc in the next stitch, sc in the next 8 stitches. (10)
Row 6: 2 sc in the next stitch, sc in the next 9 stitches. (11)
Row 7: 2 sc in the next stitch, sc in the next 10 stitches. (12)
Row 8: *2 sc in the next stitch, sc in the next stitch* repeat 6 times. (18)
Row 9: *2 sc in the next stitch, sc in the next 2 stitches* repeat 6 times. (24)
Row 10: *2 sc in the next stitch, sc in the next 3 stitches* repeat 6 times. (30)
Row 11: *2 sc in the next stitch, sc in the next 4 stitches* repeat 6 times. (36)
Rows 12 – 25: sc in each stitch around. (36)
Row 26: *inv dec, sc in the next 4 stitches* repeat 6 times. (30)
Row 27: sc in each stitch around. (30)
Row 28: *inv dec, sc in the next 3 stitches* repeat 6 times. (24)
Row 29: sc in each stitch around. (24)
Row 30: *inv dec, sc in the next 2 stitches* repeat 6 times. (18)
Row 31: sc in each stitch around. (18)
Here we are making the holes for the drawstrings
Row 32: ch 3, skip the next stitch, *dc in the next stitch, ch 1, skip the next stitch* repeat 8 times, ch 1 joining to the beginning first chain 3 stitches.
Don’t break the yarn or turn your work.
Legs Make 8:
Row 1: Ch 26, 2 sc stitches in the 2nd loop from the hook, *2 sc in the next chain* repeat 4 times, 2 hdc in the next chain. Repeat in the remaining stitches along the chain. Join into the closet dc stitch from row 32. Sc in the ch stitch.
Row 2: Repeat row 1 till you have 8 legs. On the last leg. Ss to the beginning stitch to join. Break off and leave a tail to weave in the ends.

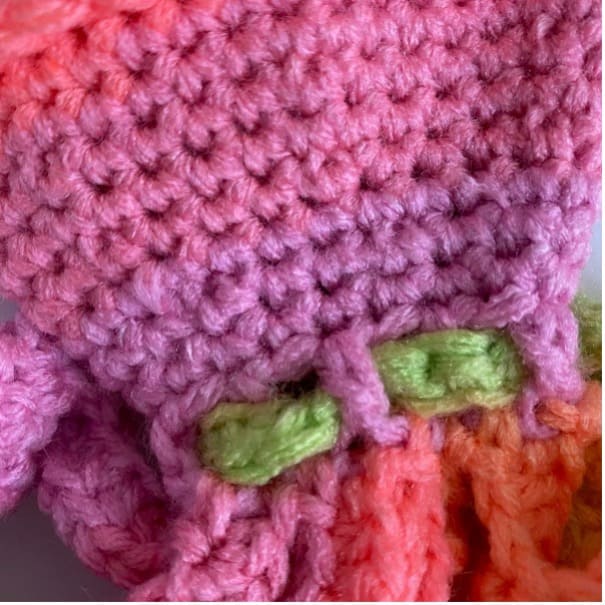
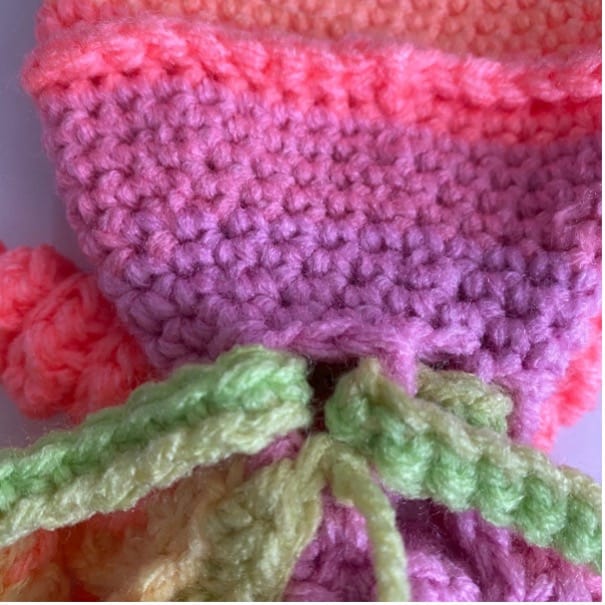
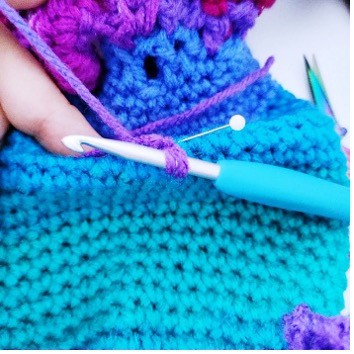
Note: This picture shows the body and what it looks like after you surface crochet around.
Drawstring Tie:
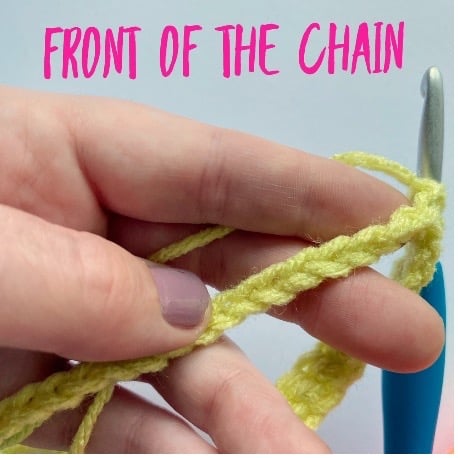
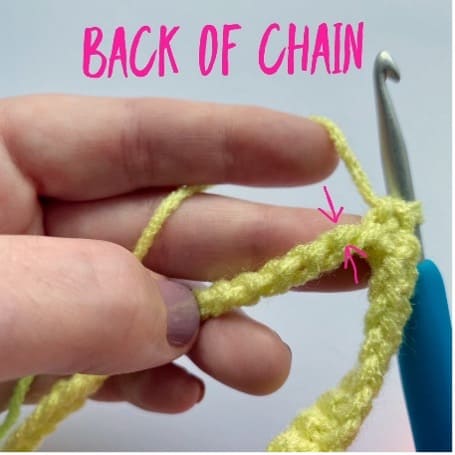
Optional: I like to crochet in the back loop of the chain. See pictures below.
Ch 151, sc in the 2nd loop from the chain, sc along the chain. Ss at the end break off and leave a tail to weave in the ends. 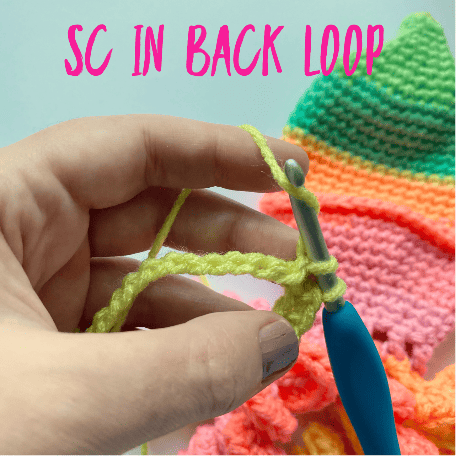
Pro Trip: Weave your drawstring tie through the dc post we made at row 32. Weaving under and over till you meet in the middle. At this time, you can make your pom-poms and sew them to the ends of the drawstrings. I like my drawstrings to be in the back. In the front is a cute idea as well. Kind of looks like a bow tie.
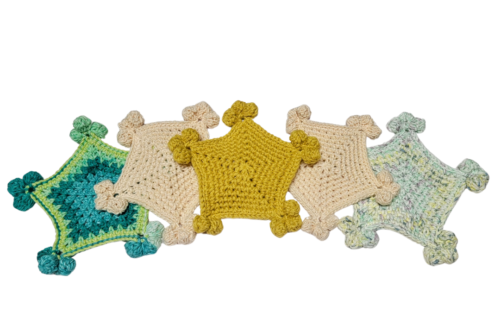
Fins make 2:
We are no longer working in a round. Do not join your rows. Don’t count the chain stitch.
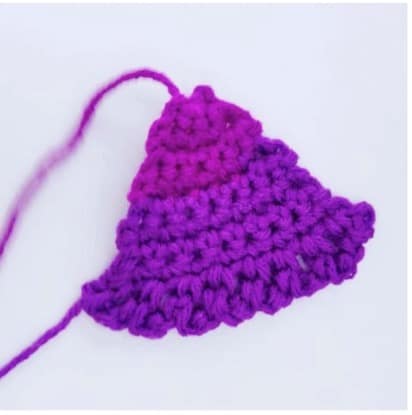
Row 1: magic ring (4) but do not join ends together. Or ch 2, work 4 sc into first ch, to form the ring. Ch 1 and turn. (4)
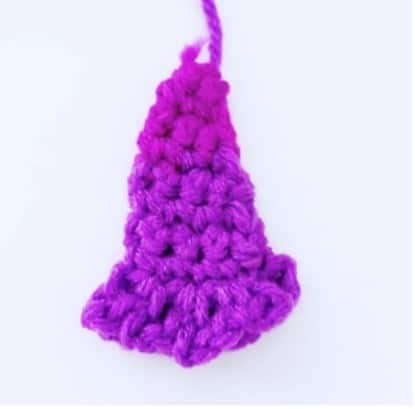
You’ll have a half circle currently.
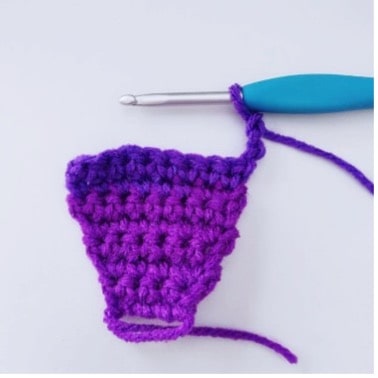
Row 2: sc in each stitch across. Ch 1 and turn. (4)
Row 3: 2 sc in the next stitch, sc in the next 2 stitches, 2 sc in the next stitch. Ch 1 and turn. (6)
Row 4: sc in each stitch across. Ch 1 and turn. (6)
Row 5: 2 sc in the next stitch, sc in the next 4 stitches, 2 sc in the next stitch. Ch 1 and turn. (8)
Rows 6 – 7: sc in each stitch across. Ch 1 and turn. (8)
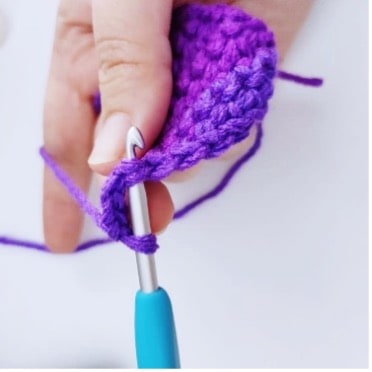
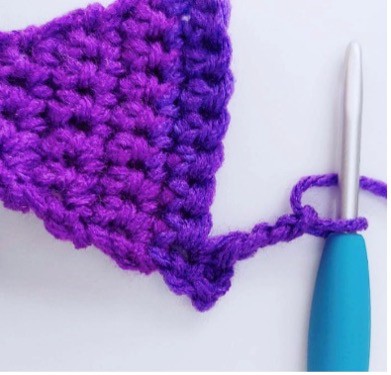
Row 8: sc in each stitch across. Ch 3 and turn. (8)
We are going to make the ruffles on the edge of the fin
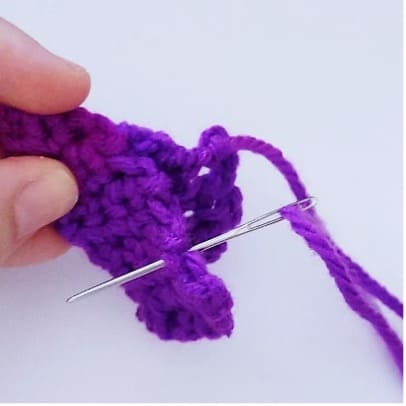
Row 9: sc in the 1st stitch, *ch 3, sc in the next stitch* repeat across the row. Break and leave a long tail for sewing fin together and then onto the squid’s body.
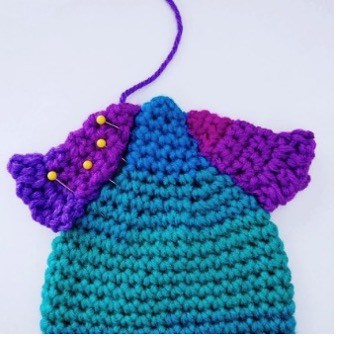
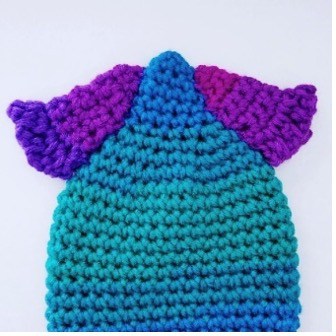
Assembly:
Fold each fin in half, where the magic ring is on top and the ruffes on the bottom. See picture above. Sew both edges together leaving the ruff part open. This will make it easy to attach to the squid’s head. At this time, I sewed my fins to opposite sides on top of the head between rows 2 – 10.
The Eyes:
Cut your felt eyes anyway you want. I made my circles 1 inch in white felt and then cute little squirls in black felt. Attach eyes between rows 6 – 7 above the DC post. (If using safety eyes leave about 8 spaces between eyes)

If you choose to use safety eyes to get the squid look. I recommend using no smaller then 12mm safety eyes, bigger is always better. You will also want to melt the backs of the safety eyes some, so they don’t get in the way of your dice or whatever you wish to stuff in your drawstring bag with.
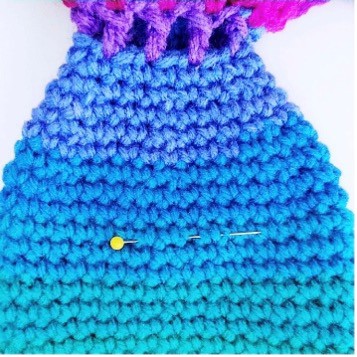
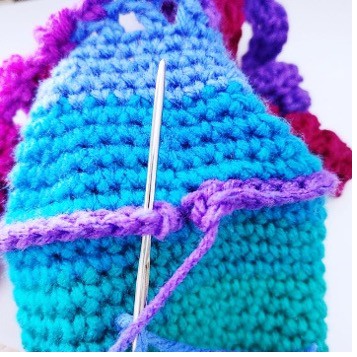
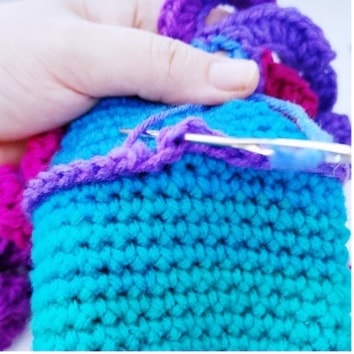
Head band: Use 7 (4.5mm) Hook. A smaller hook sometimes makes surface crocheting easier. Optional: Crochet in the back loop of the chain like shown for the drawstring tie. See pictures above.
Count 9 rows up from the dc posts. This is where we will sc around the surface of our work.
- If you cannot surface crochet. Then chain 36, sc in the 2nd loop from the chain, sc around the chain. (35) Break and leave a long tail for sewing to the squid’s body.
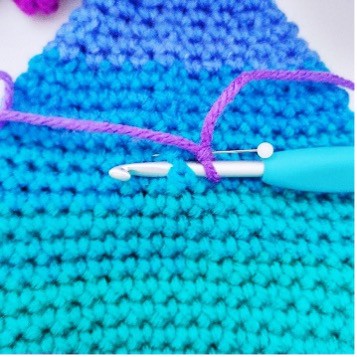
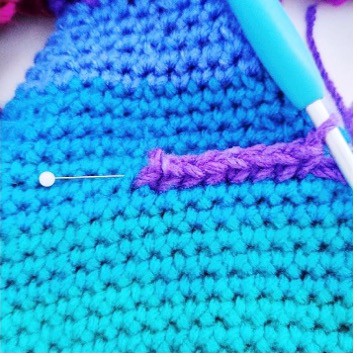
- Surface sc – Make a slip knot on the hook, push the hook through the back of the squid as close as you can to the middle. This is where you will start your sc surface stitches. You will proceed as if you were crocheting as normal stitches. Yarn over, pull through. You’ll have 2 loops on the hook. Then yarn over, pull through both loops. Repeat all the way around. ?
I hope you used your imaginations coming up with unique eyes for your squid, the possibilities are endless. This Squid Drawstring Bag will make a great gift for anyone who needs a place to hide their small Knickknacks. I’d love to see your finished projects! Please share your finished Squid Drawstring Bag by tagging the pattern on Ravelry, tagging me on Instagram and Facebook. Want to see what fun projects I work on next? Follow me on Instagram and Facebook.
https://www.instagram.com/lasheet/
https://m.facebook.com/lasheetgoodies/
You can purchase a PDF copy of the Squid Drawstring Bag pattern HERE in my Ravelry shop or HERE in my Esty shop. This pattern has a tutorial on makiing a pom-pom with a house hold item. If you don’t have a pom-pom maker.
https://www.ravelry.com/designers/rebecca-turner
https://www.etsy.com/shop/LaSheetsTreats?ref=simple-shop-header-name&listing_id=952570019

Disclaimer:
This pattern may not be reproduced, please do not copy, and paste any of the information. Instead, please share the direct link to this posting only. I thank you in advance for sharing. You may sell items that you make yourself from this pattern. I would greatly appreciate a design create when you sell or post your handmade items from this pattern. Again, thank you and I hope you enjoyed this pattern. Happy crocheting!!