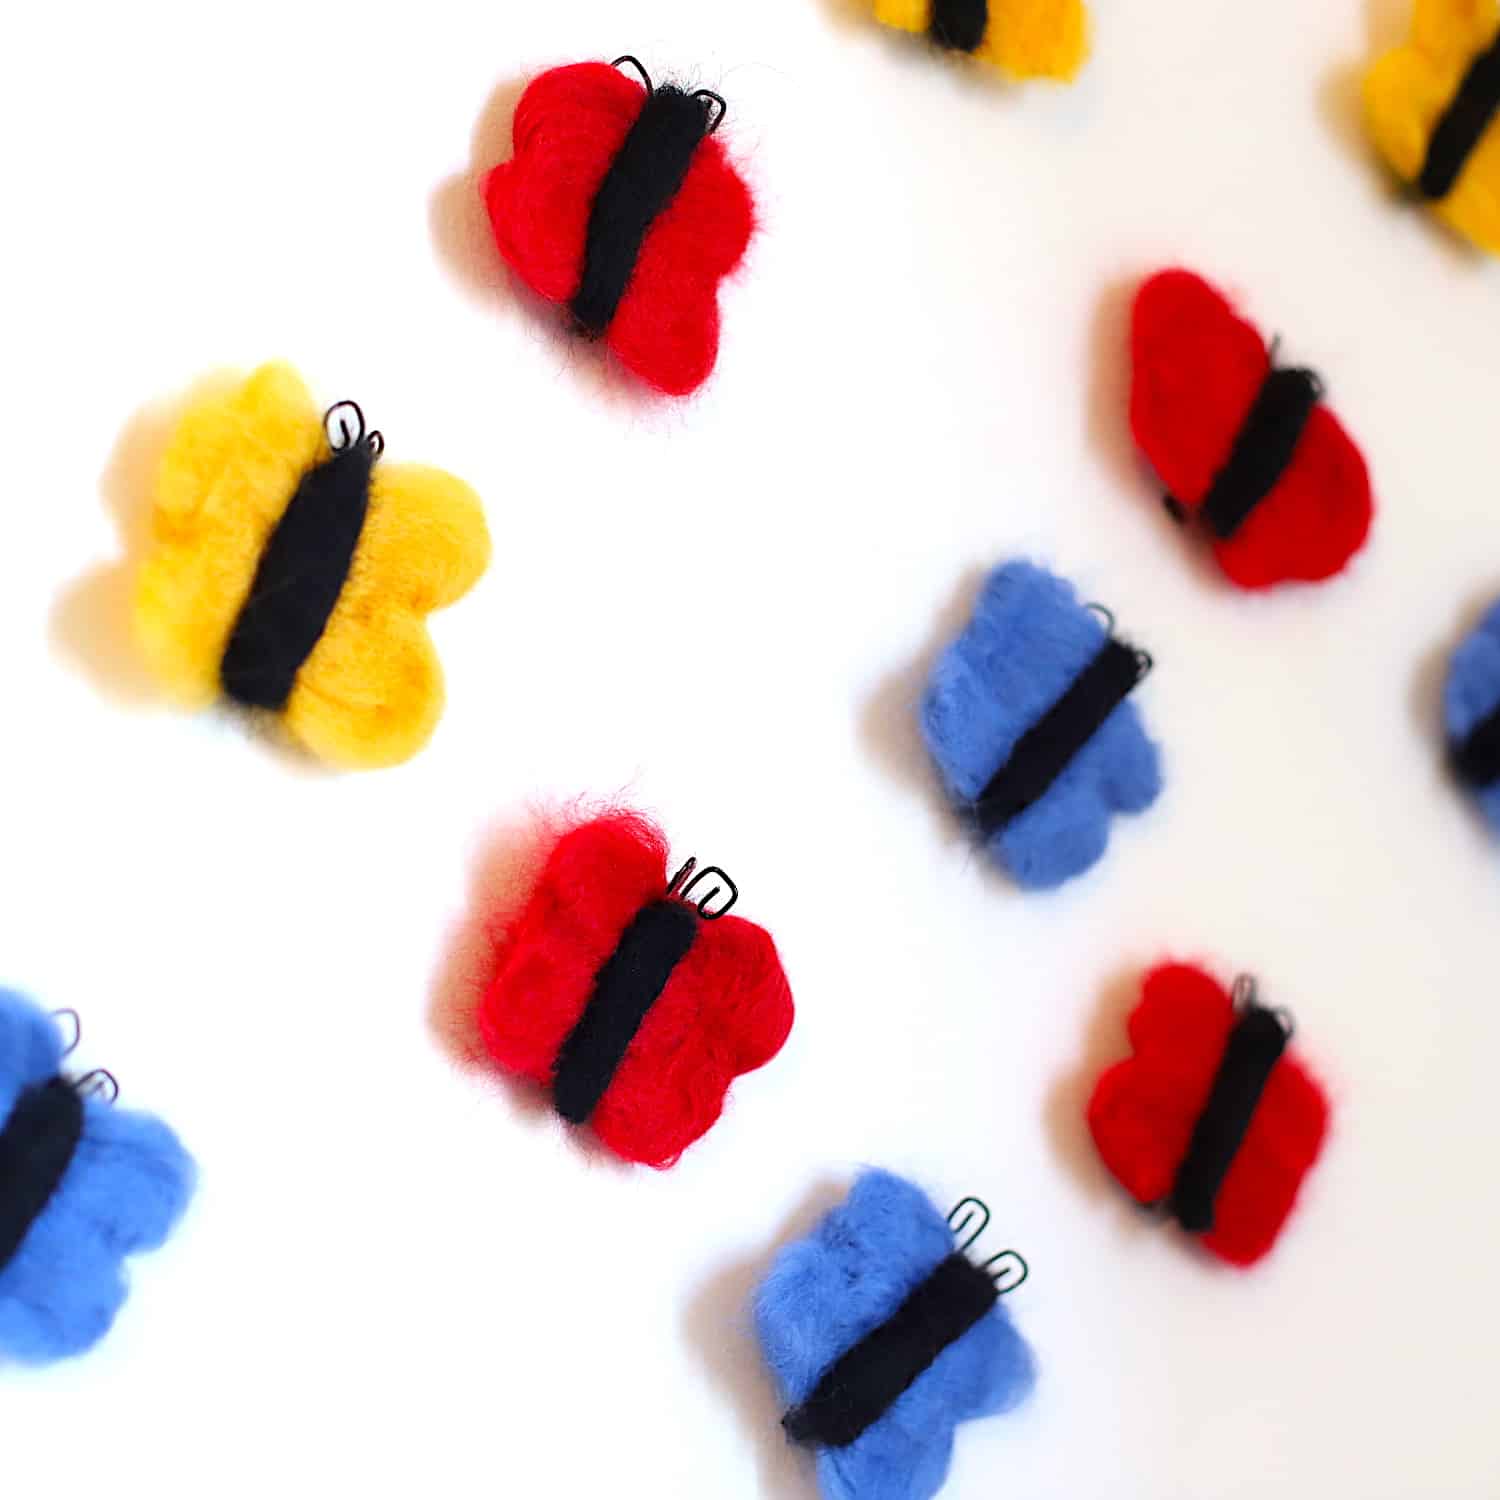
Wool Butterfly Wall Art
Hey Clover Family, it’s Danielle the artist and designer behind sprinklesofzeal and today I will be showing you how to create some wool butterflies that can be added to your wall. If you love colorful home decor and butterflies, you’re absolutely going to love this blog. Alright, let’s gather the supplies!
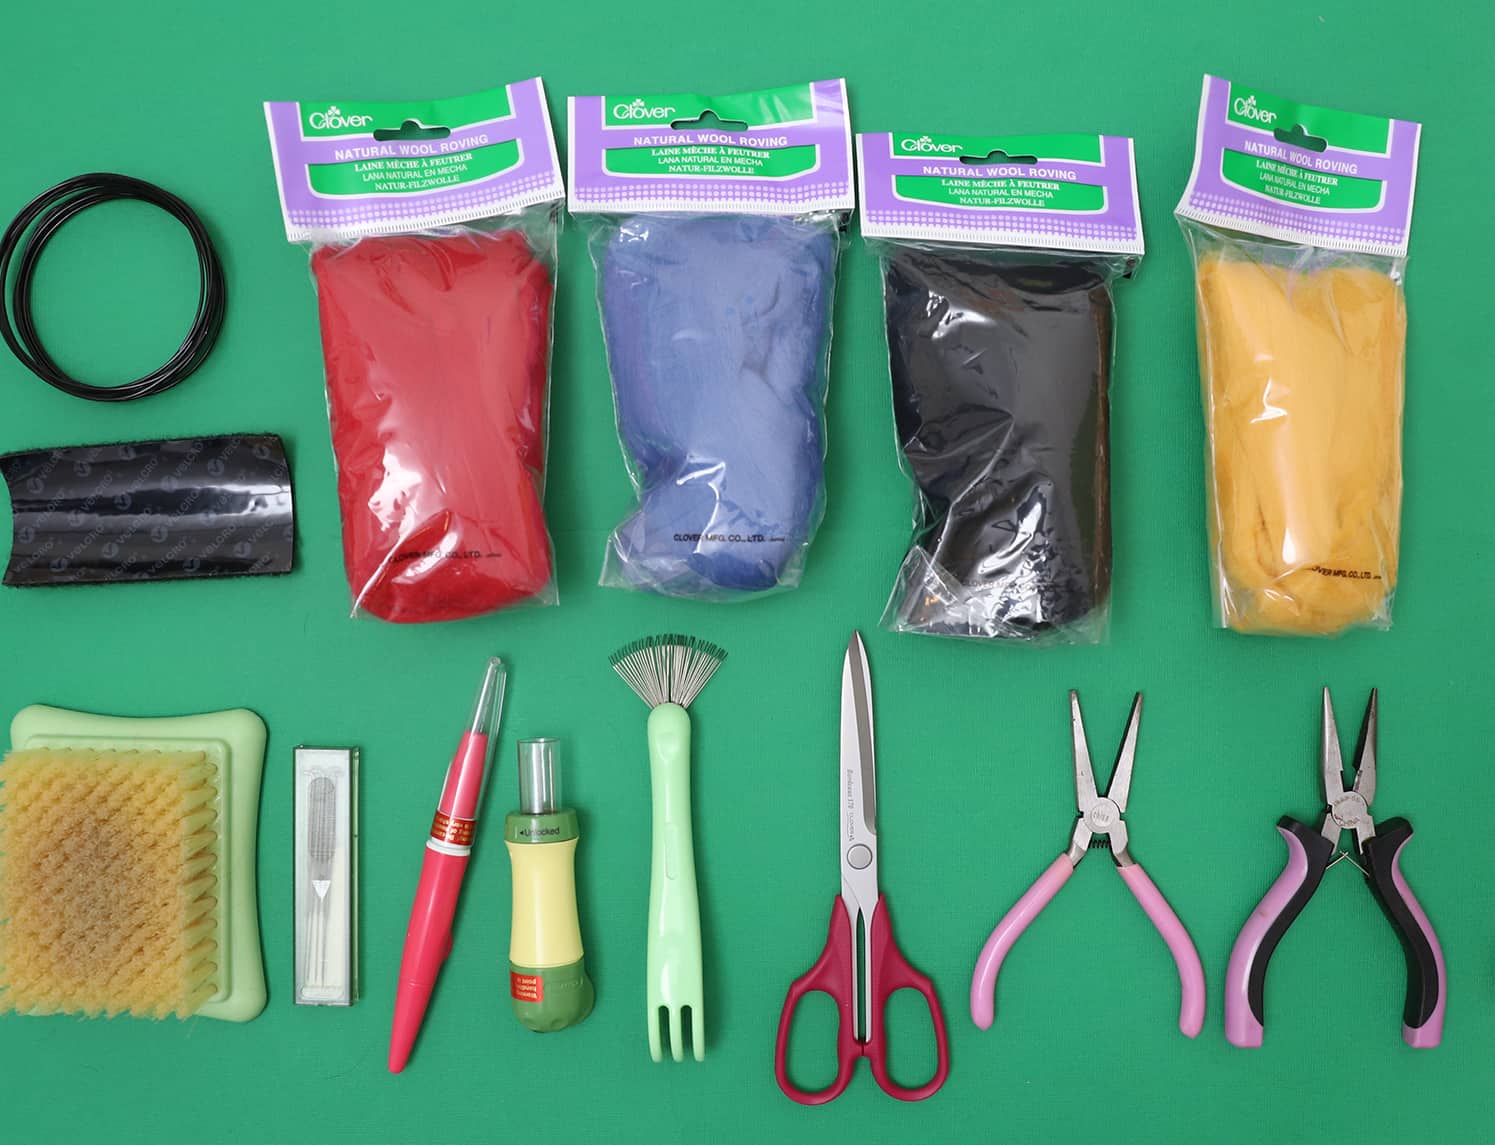
Supplies:
- Needle Felting Tool Art No. 8900
- Pen Style Needle Felting Tool Art No. 8901
- Needle Felting Brush Mat (S) Art No. 8910
- Claw and Mat Cleaner Art No. 8919
- Natural Wool Roving Art No. 7929 (Gold)
- Natural Wool Roving Art No. 7923 (Blue)
- Natural Wool Roving Art No. 7927 (Red)
- Natural Wool Roving Art No.7932 (Black)
- Needle Felt Refill Needle (Fine) Art No. 8905
- 16 Gauge Black Wire
- Needle Nose Jewelry Pliers with Nippers
- Flat Nose Pliers
- Adhesive velcro
- Hot Glue Gun
- Bordeaux Ultimate Scissors 170 Art. No 4941
Directions:
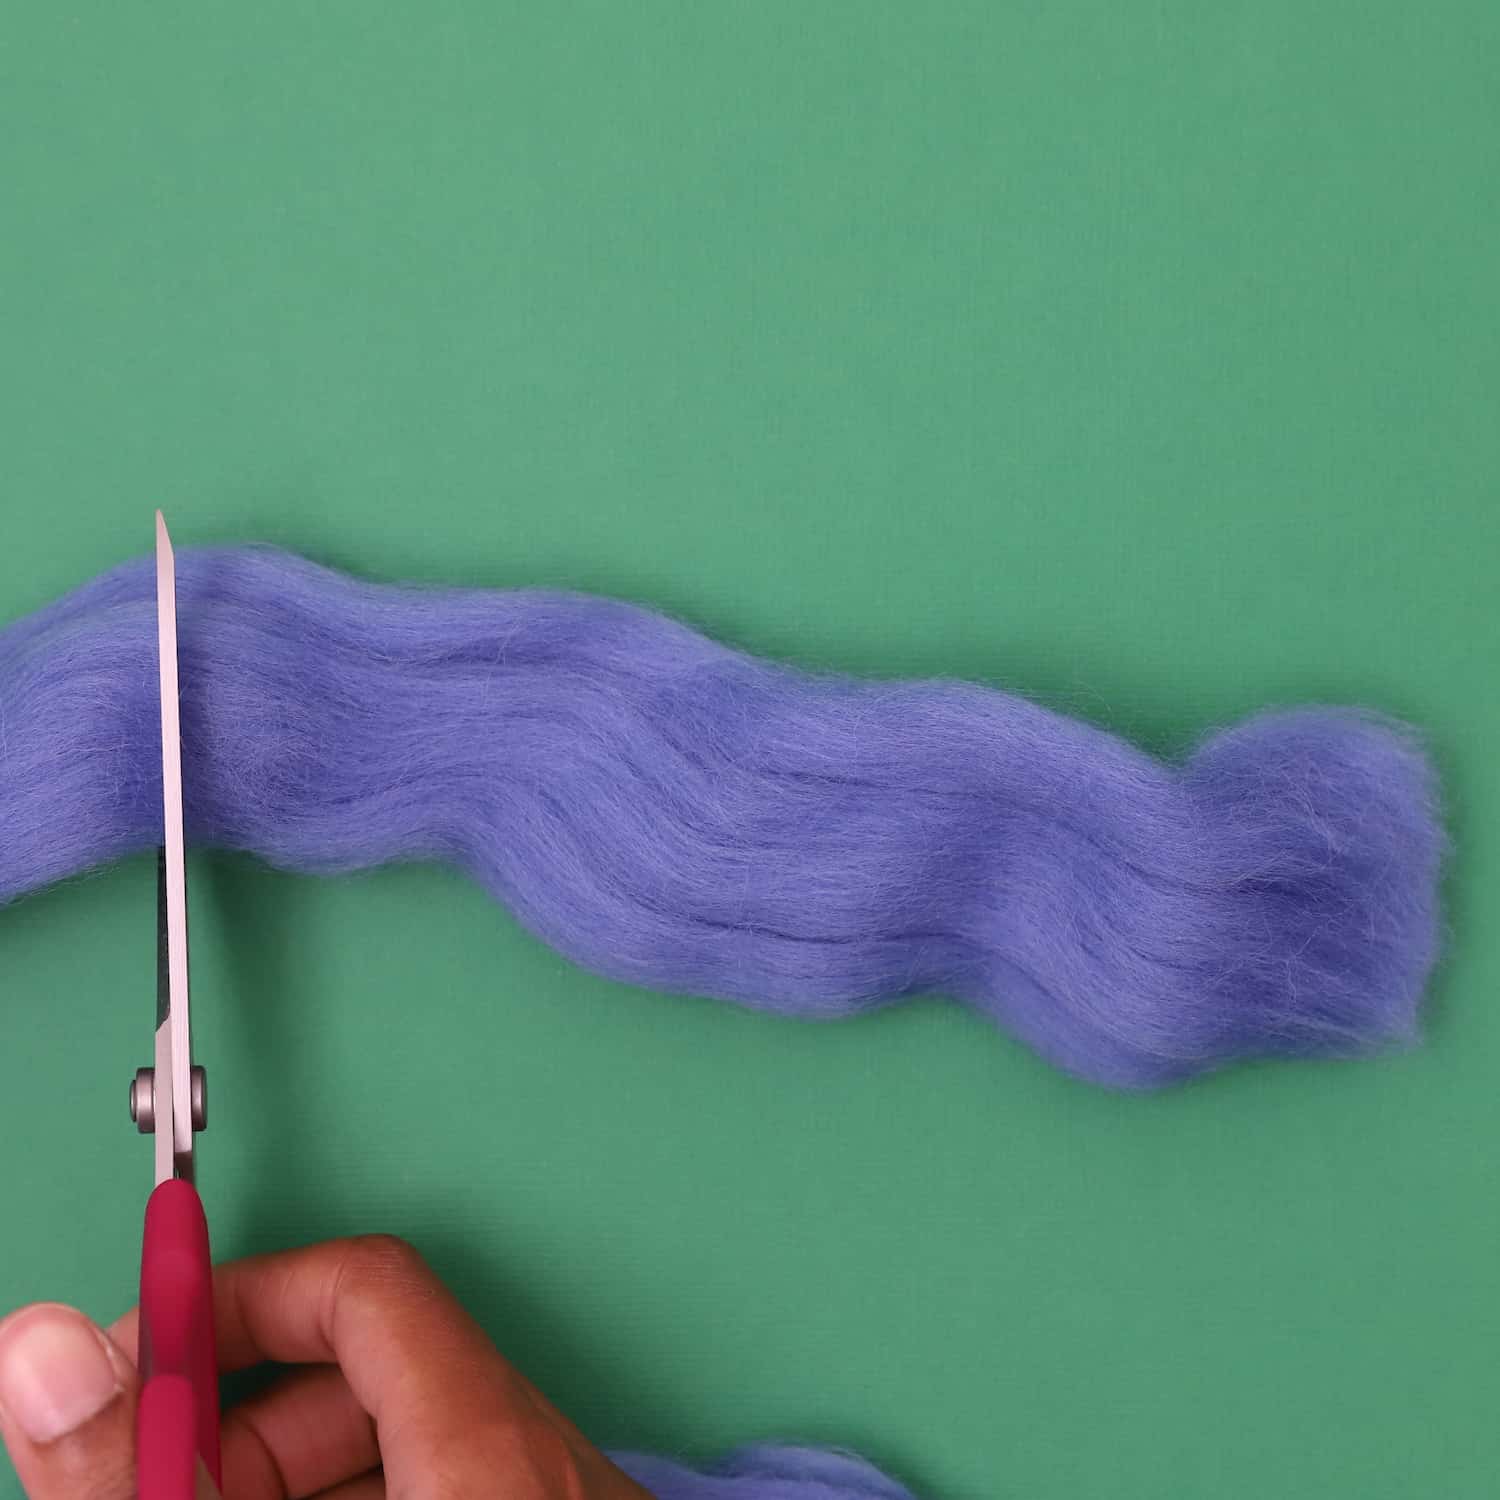
Step 1. Prep and Separate the Wool
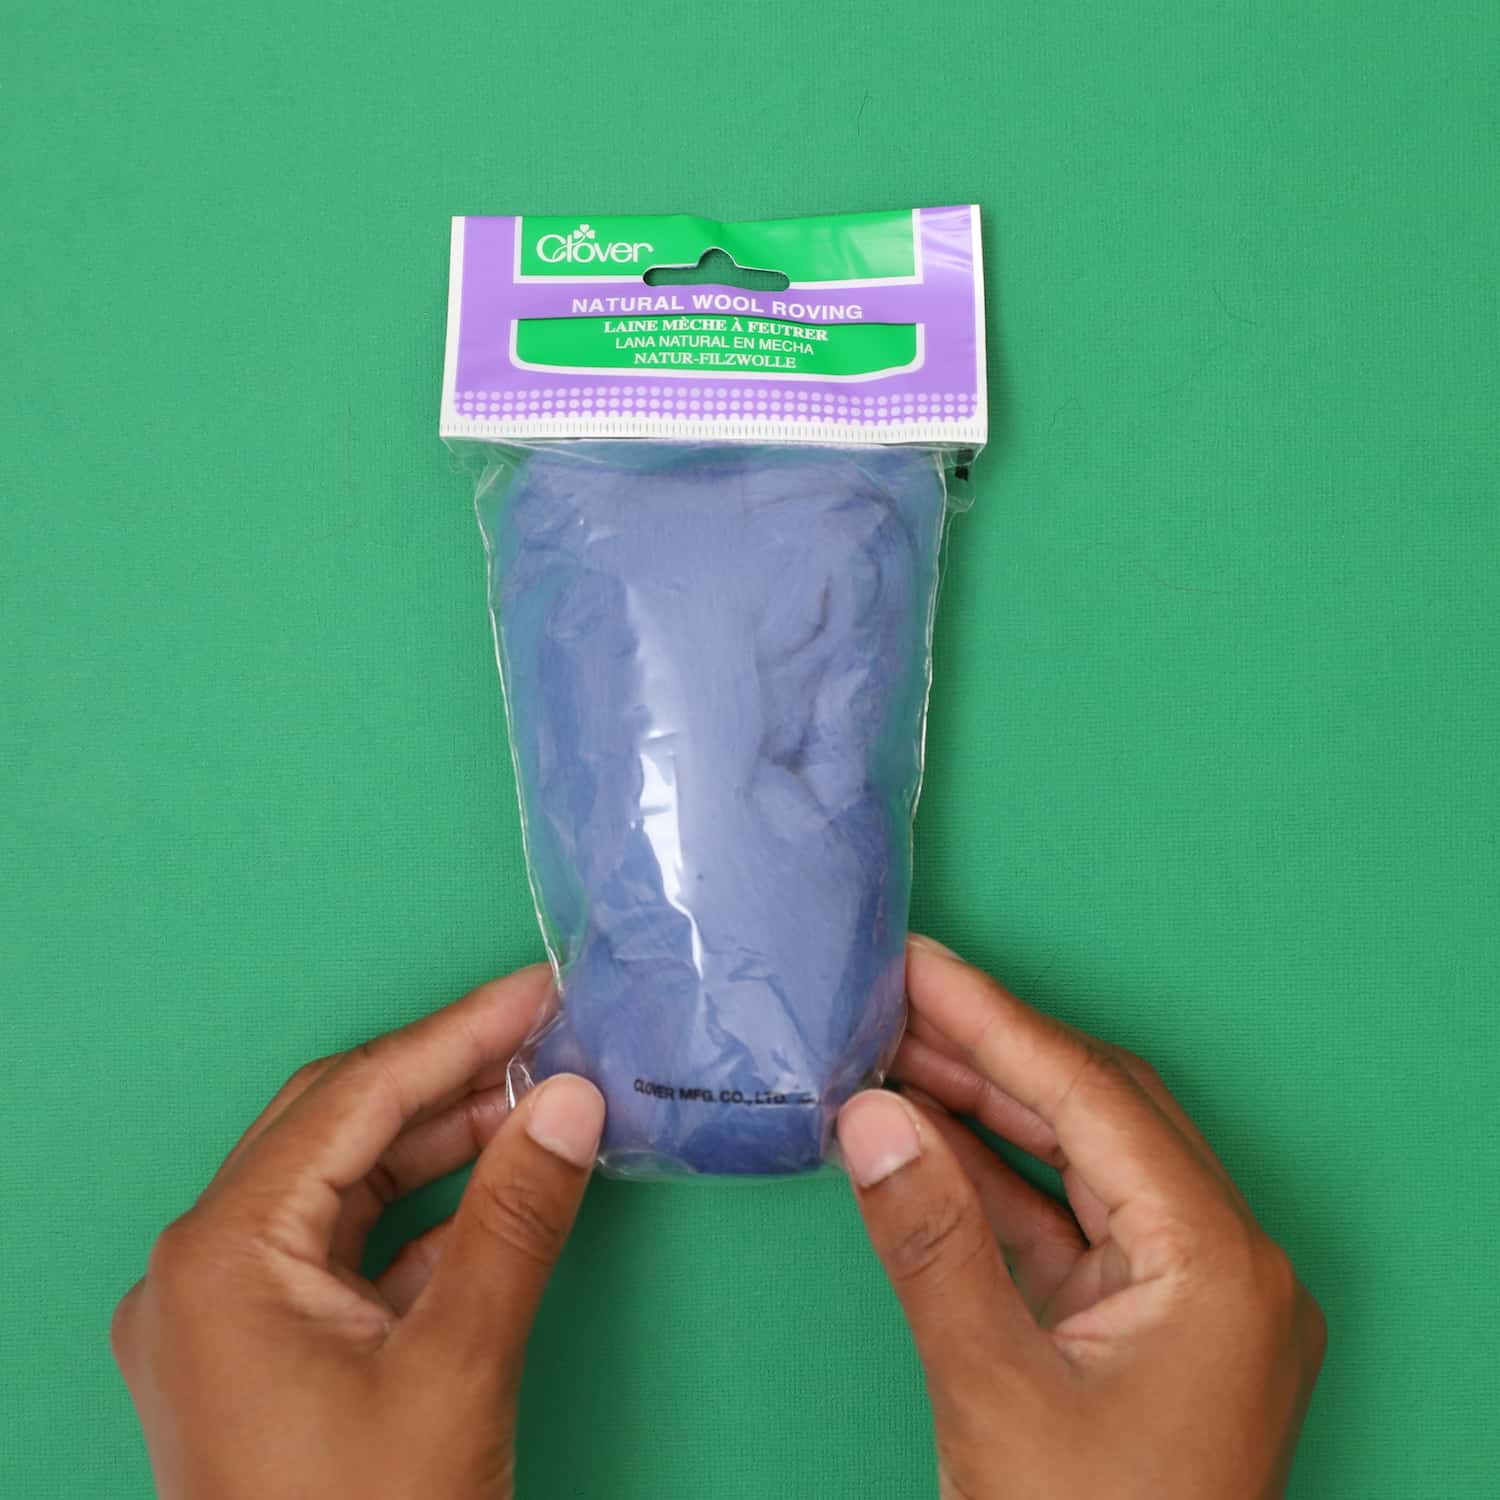
We will be using Clover’s Natural Wool Roving in Red, Blue ,Gold, and Black.
Cut the Wool Roving into 5 pieces using Clover Bordeaux Ultimate Shears 170.
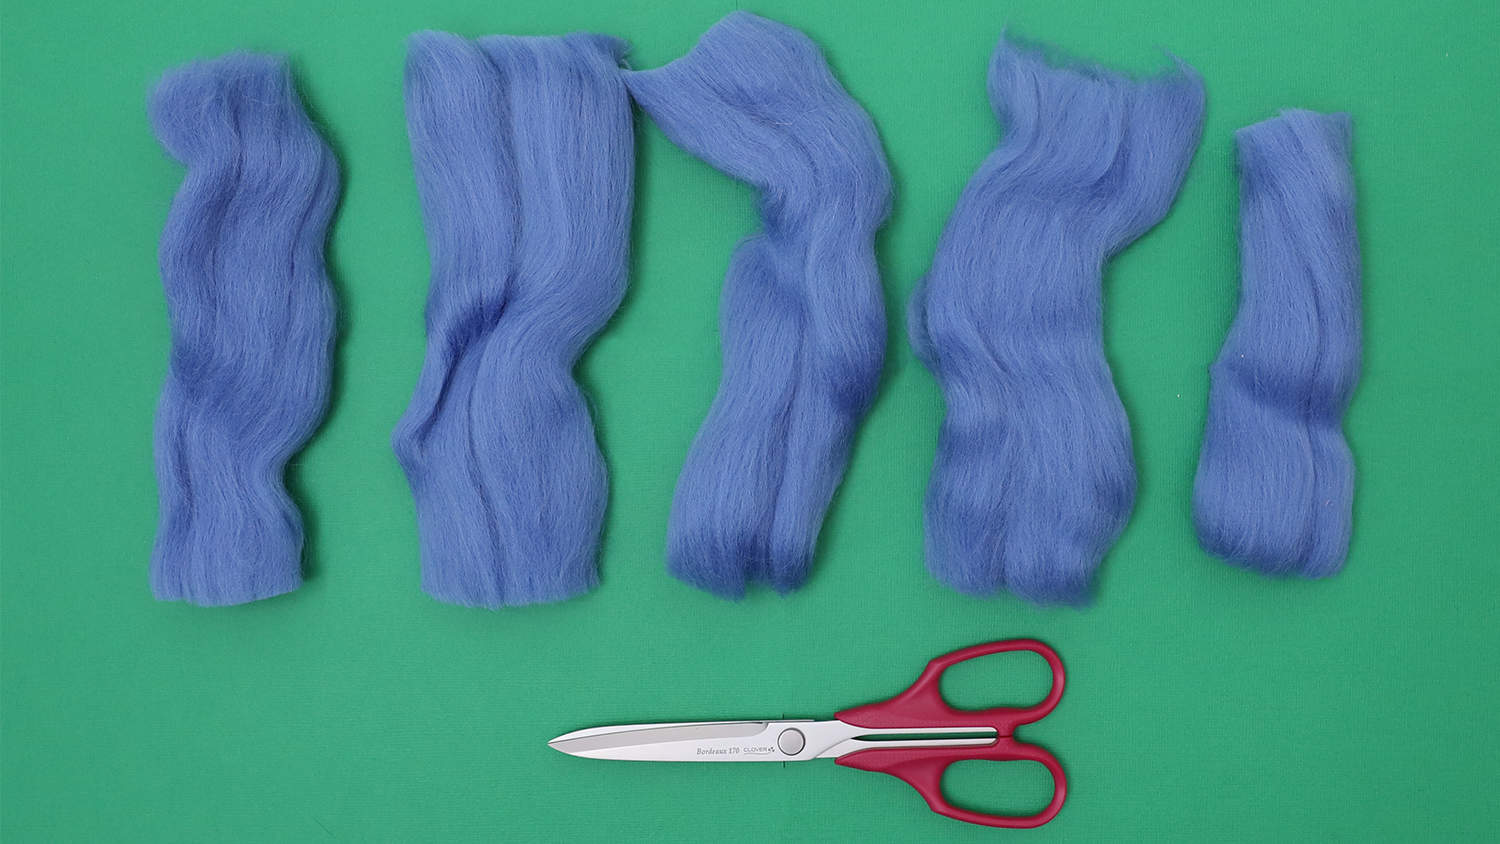
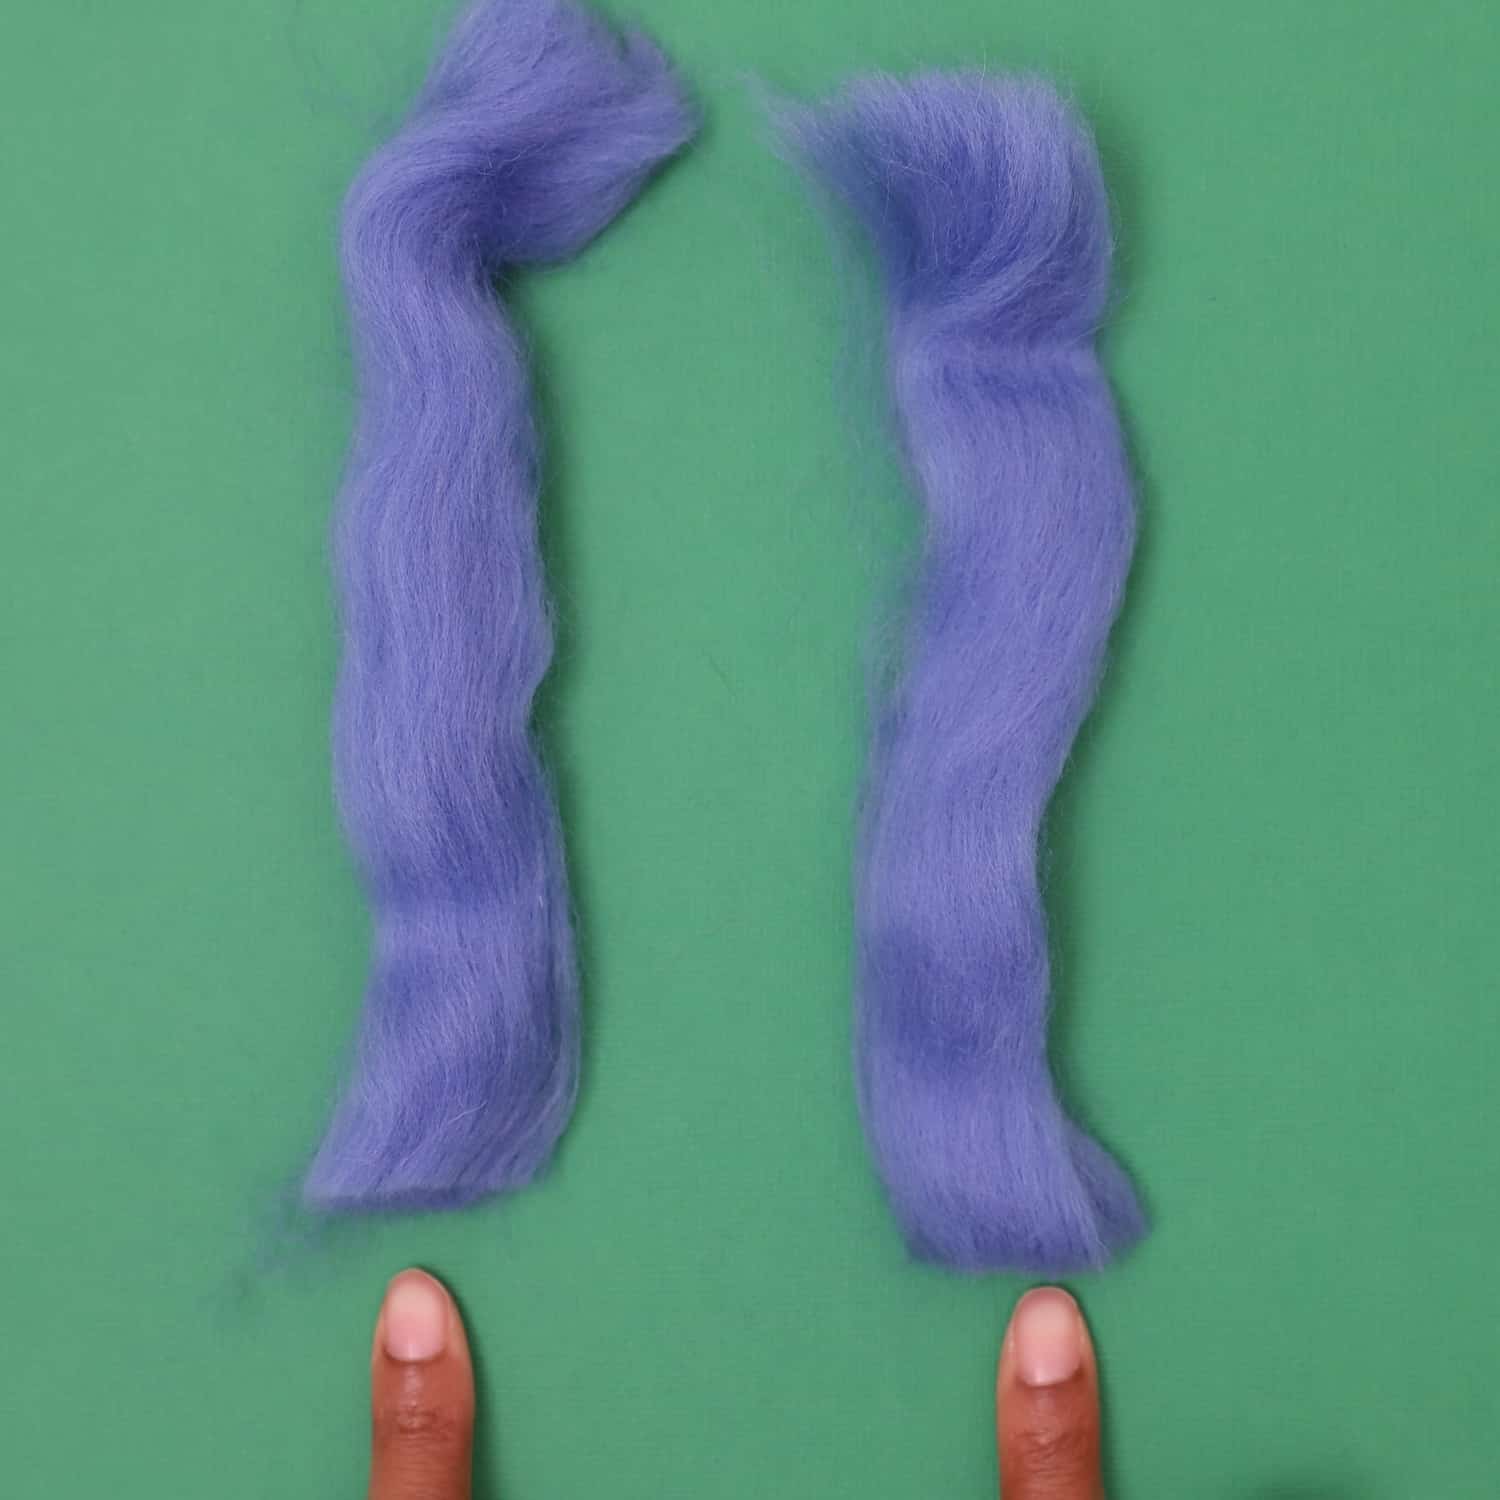
Then, separate the wool again until you have ten pieces. One pack of roving yields 10 butterflies.
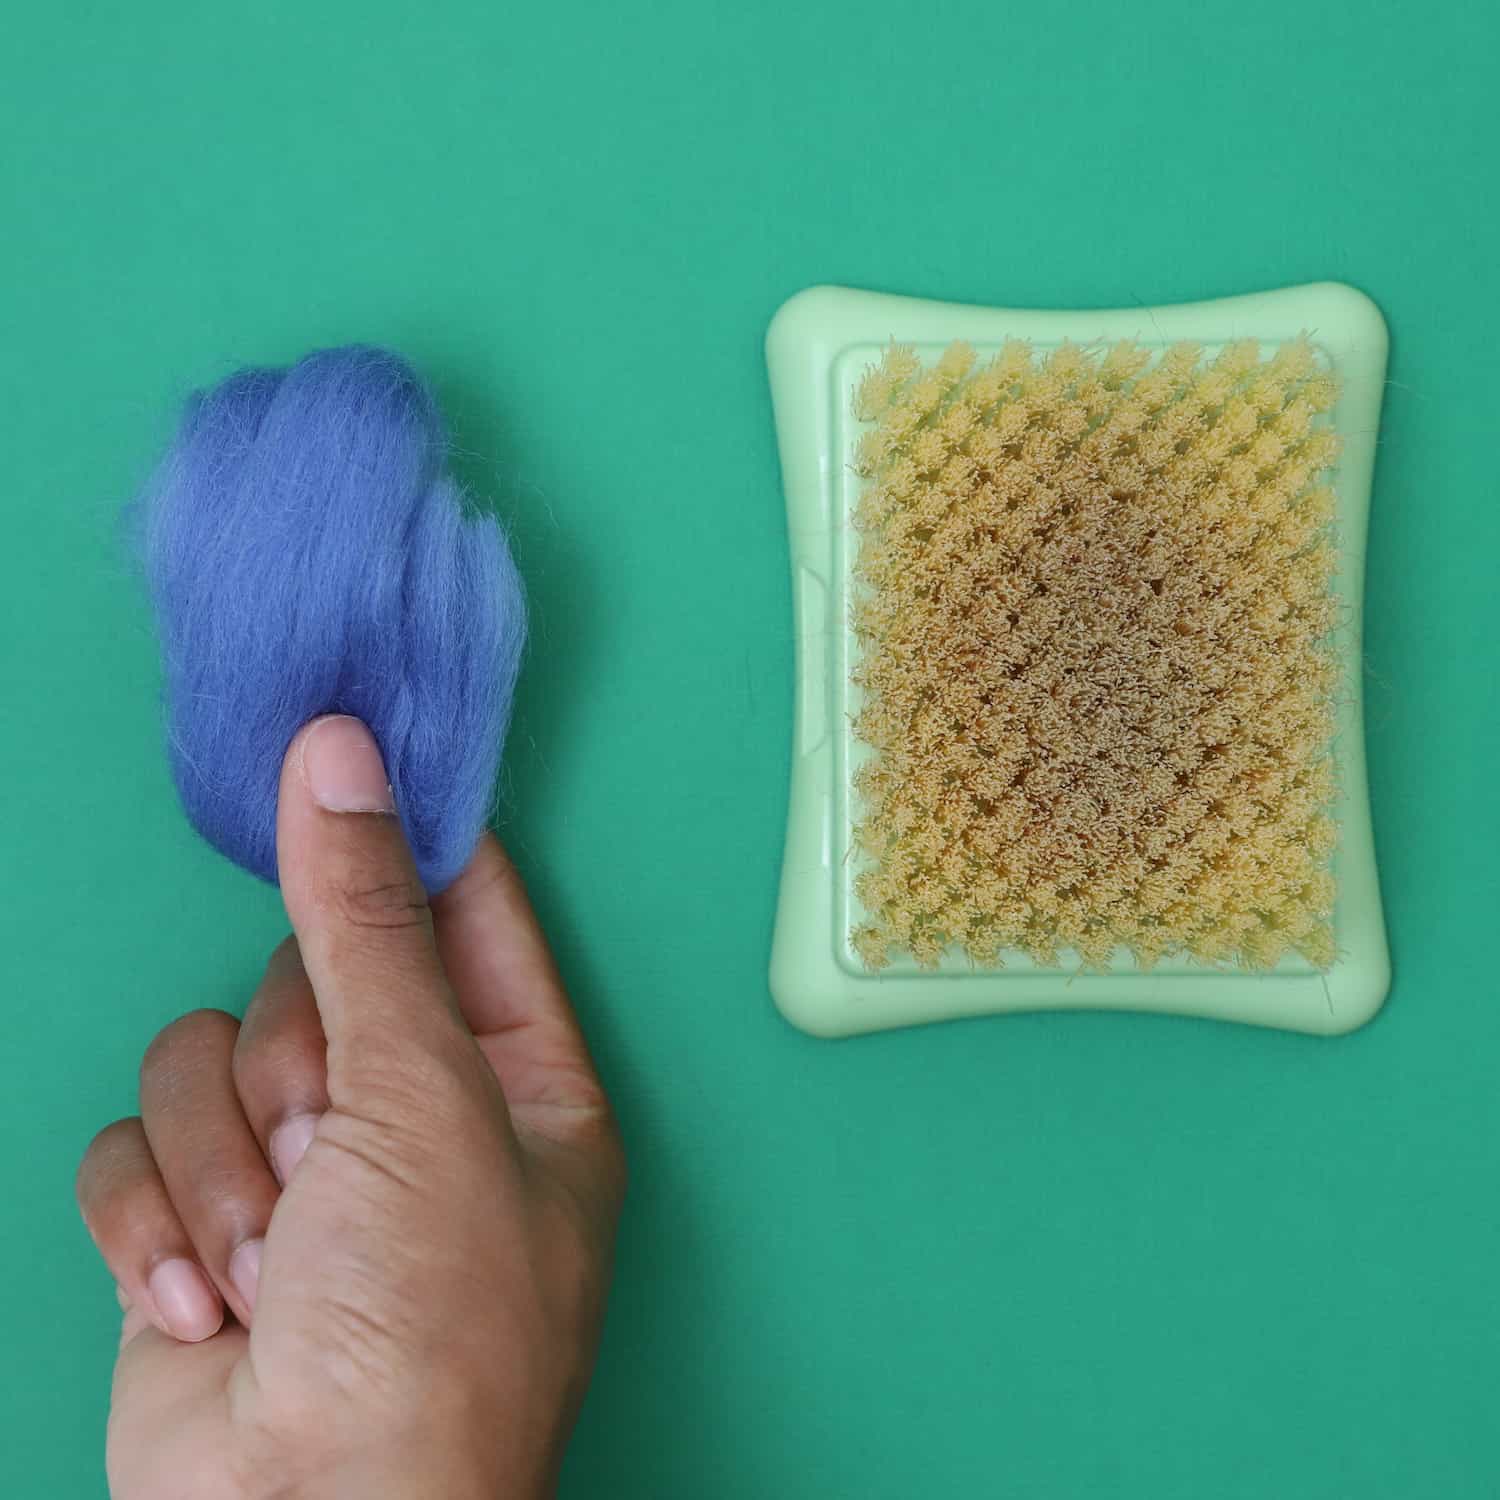
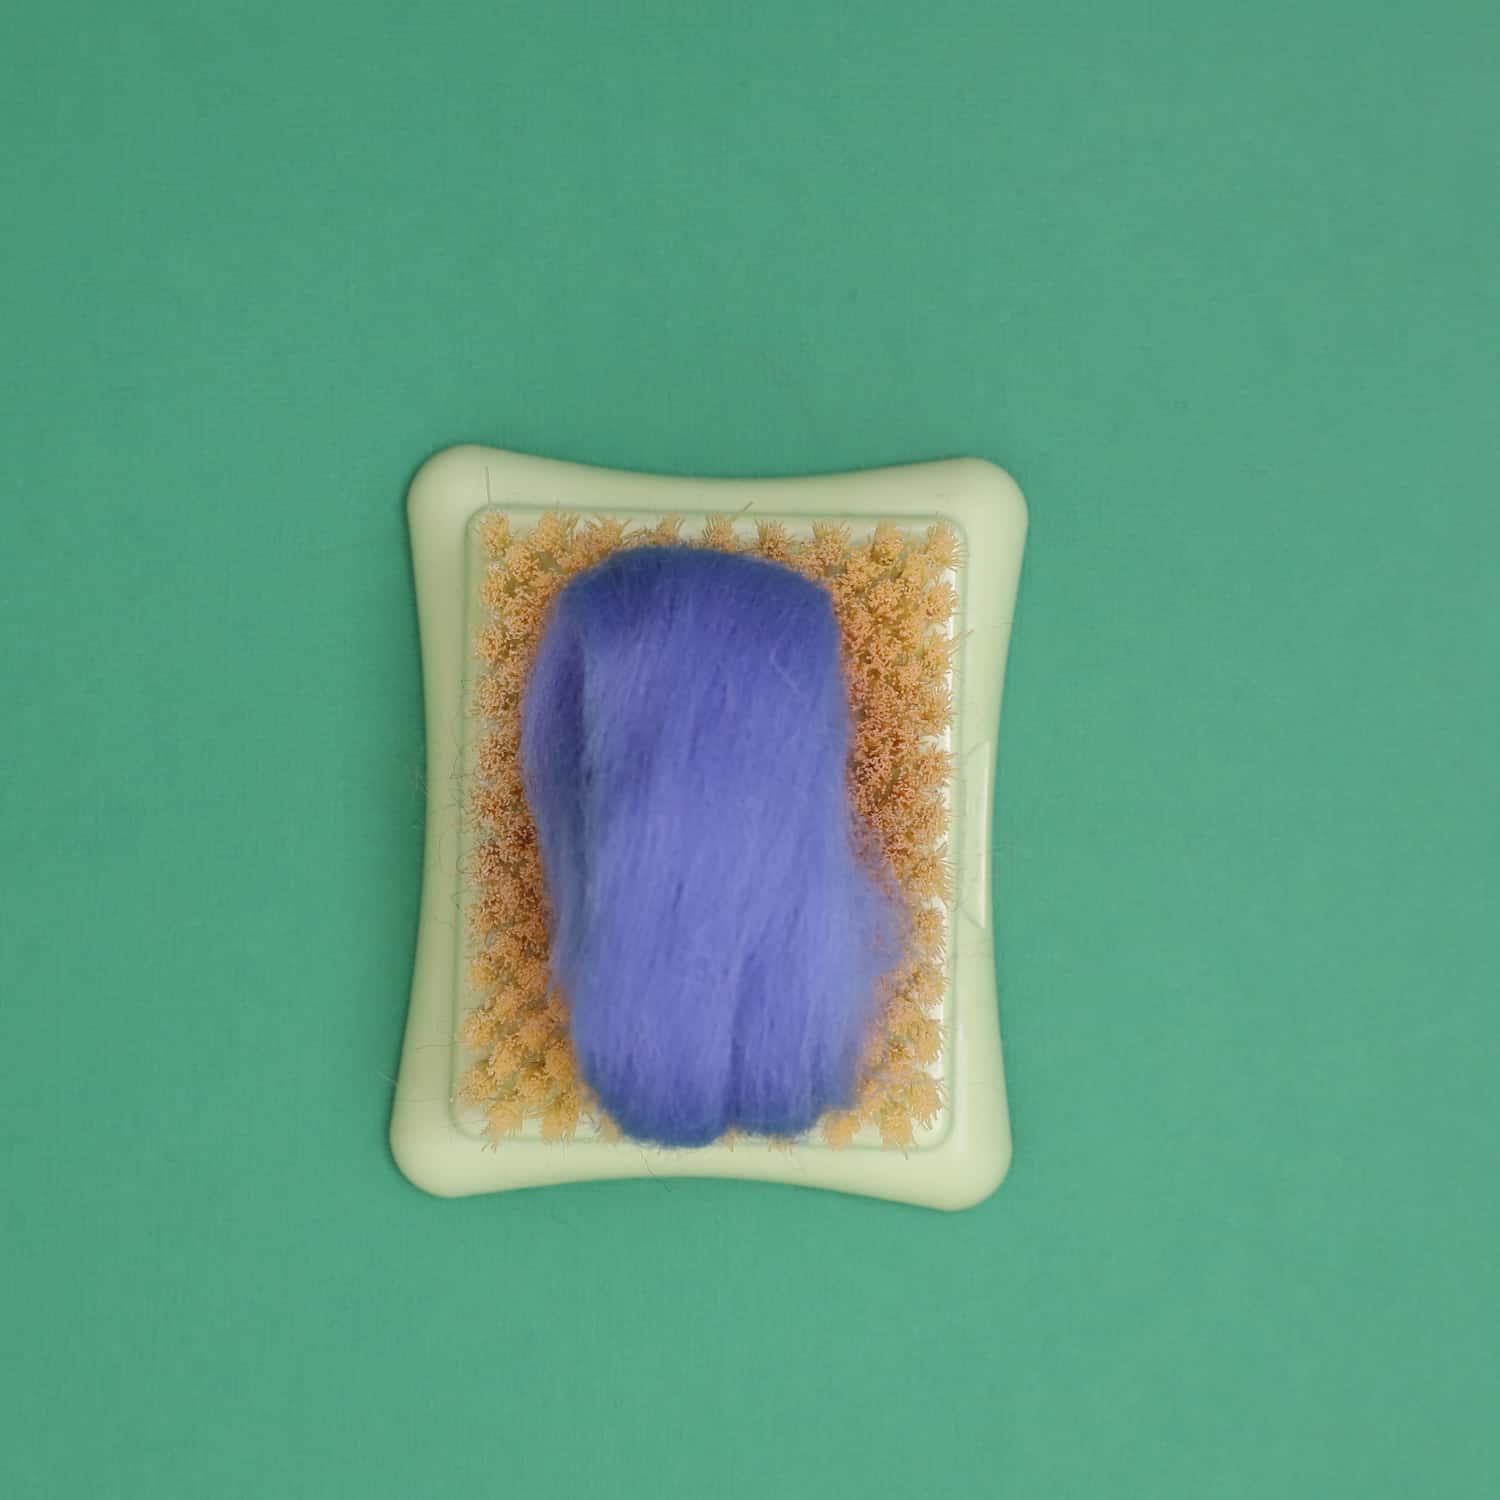
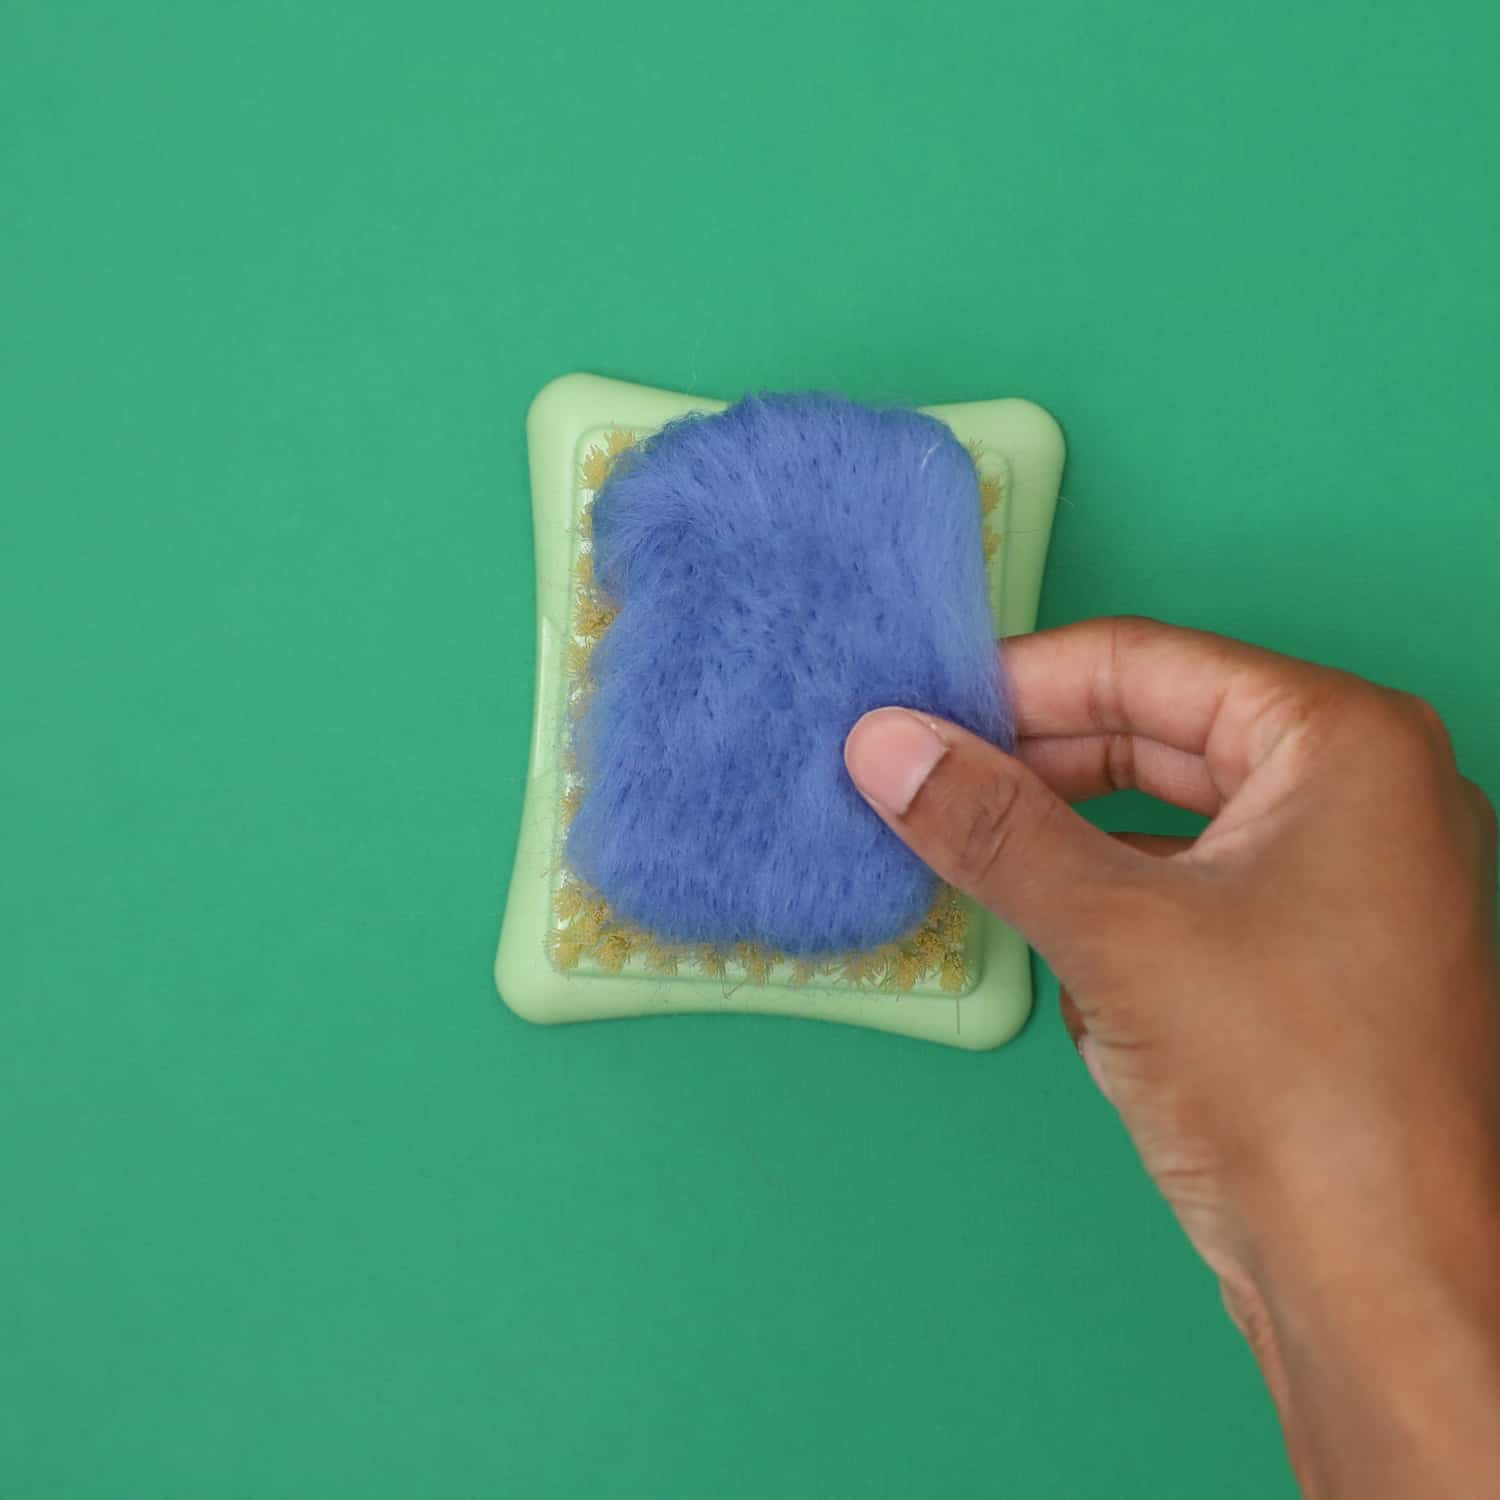
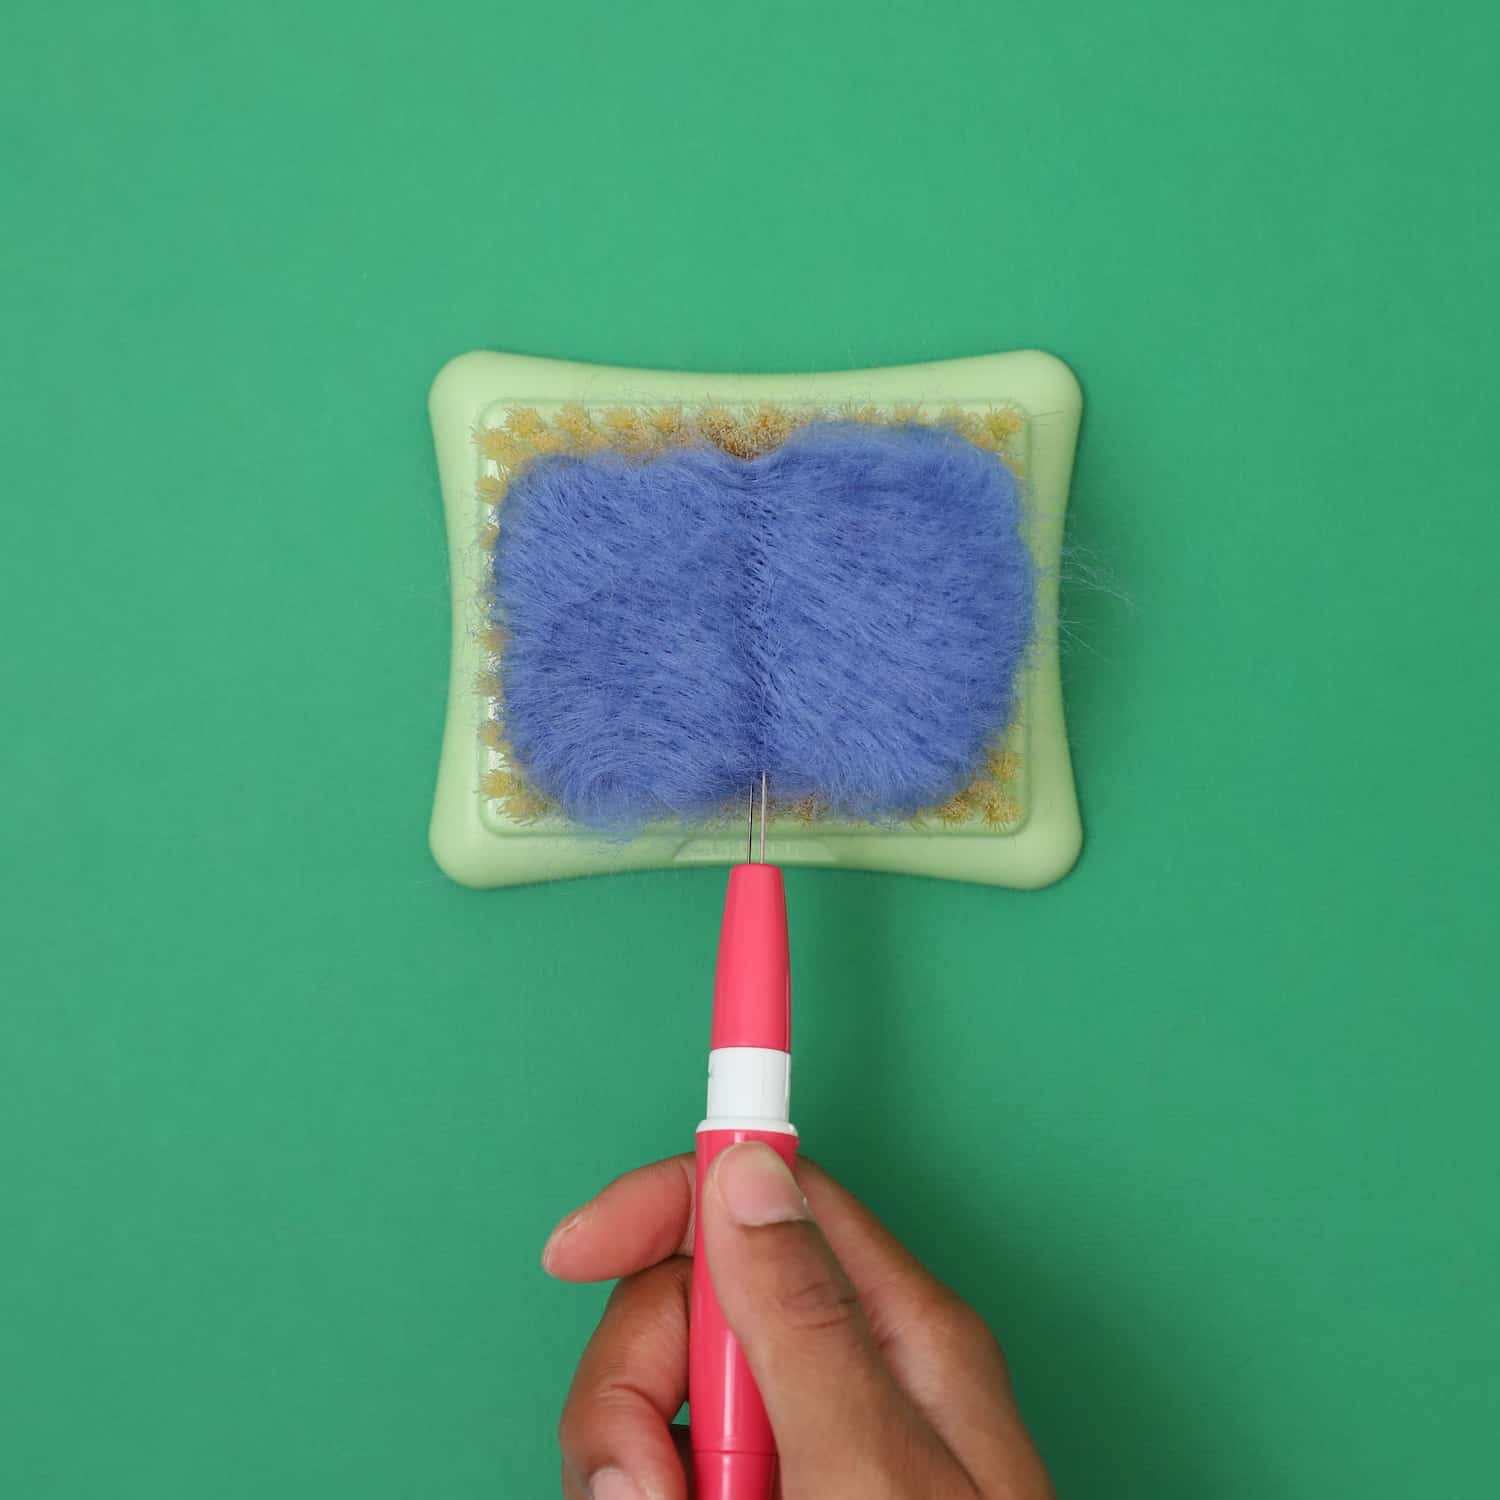
Step 2. Create the Wings
Create a ball with the roving, then use the Clover Needle Felting tool to flatten the ball.
Adjust the Needle Felting tool to unlocked to begin shaping the butterfly wings.
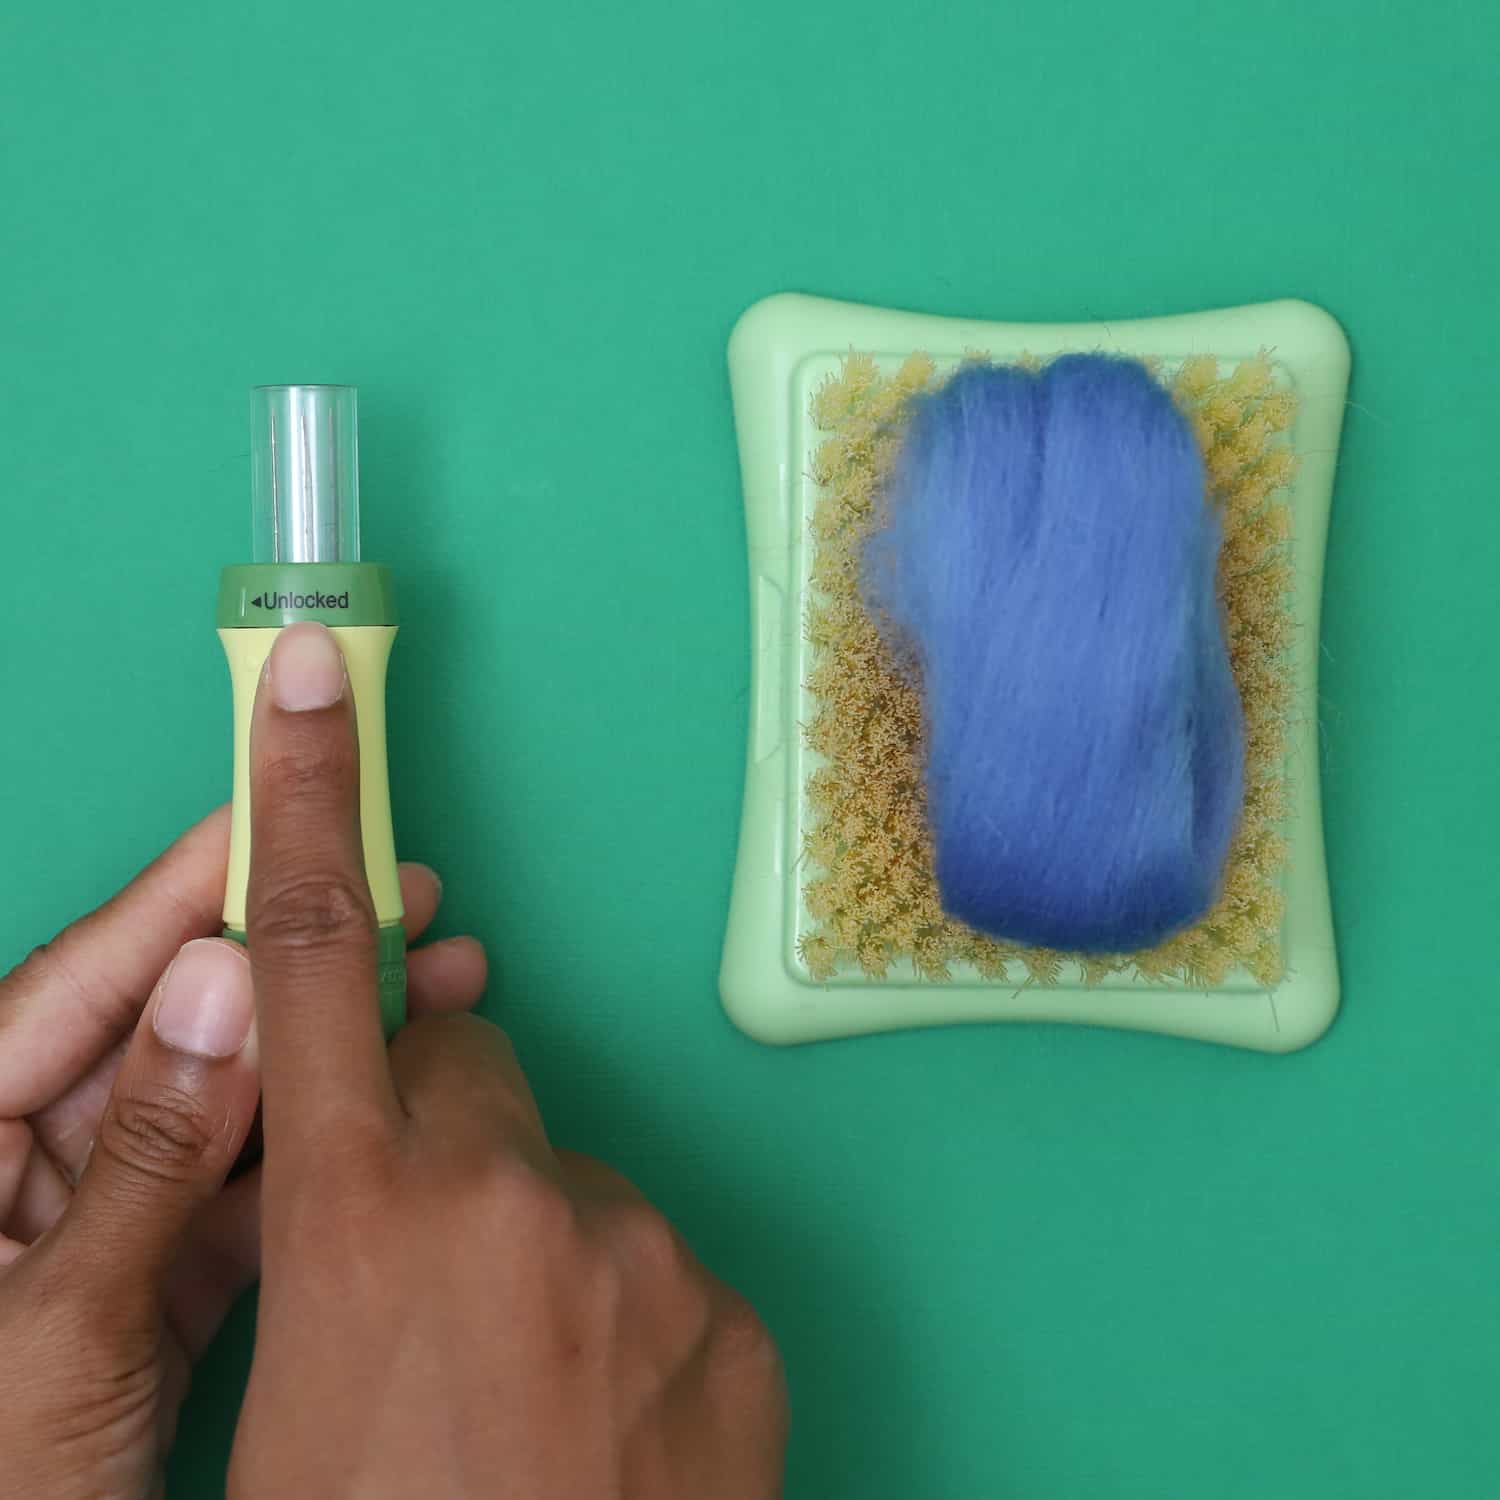
Begin pushing the needle felting tool into the roving in a downward motion. Be sure to not move too fast during this process because you will prick yourself.
The butterfly wings should look like a pancake on both sides.
Flip the wool roving a few times until you’re satisfied with the shape.
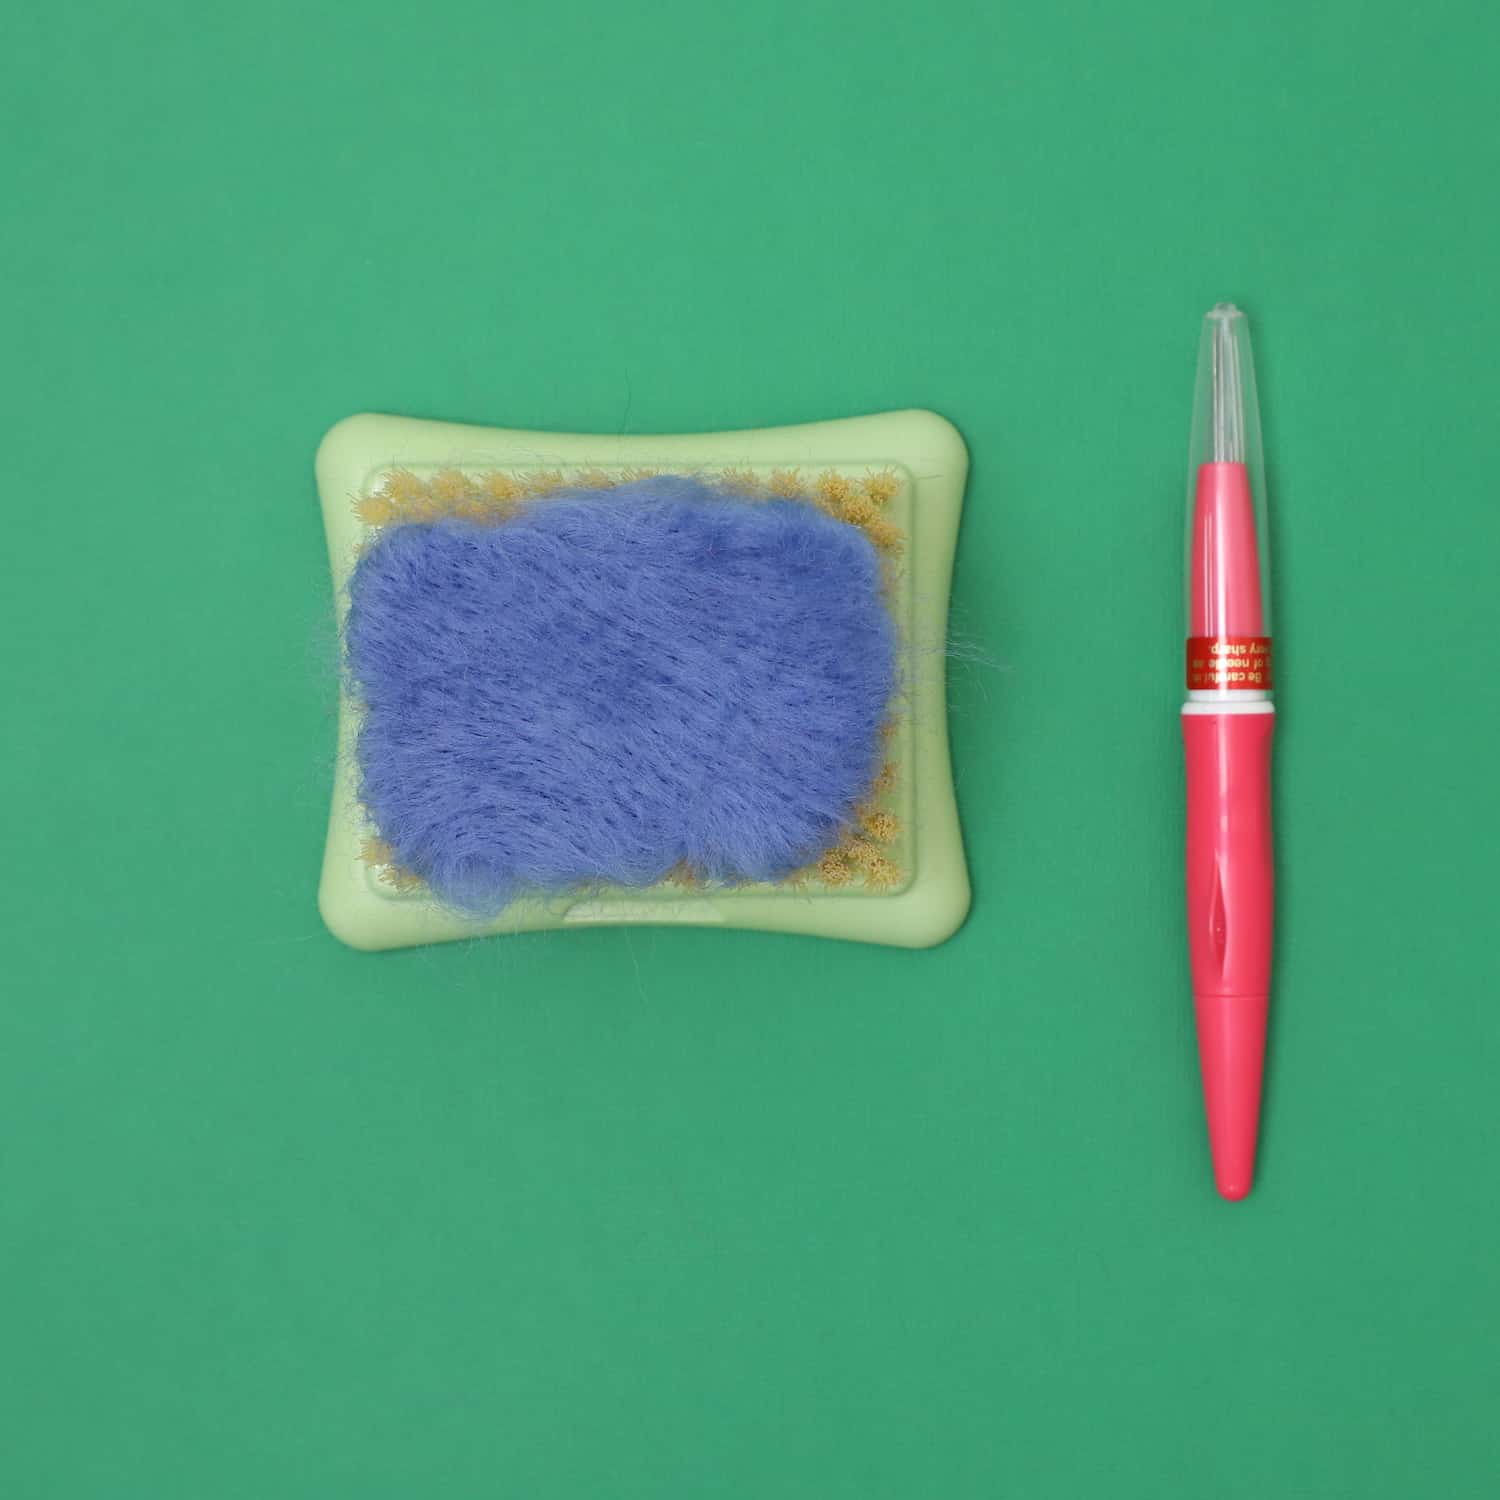
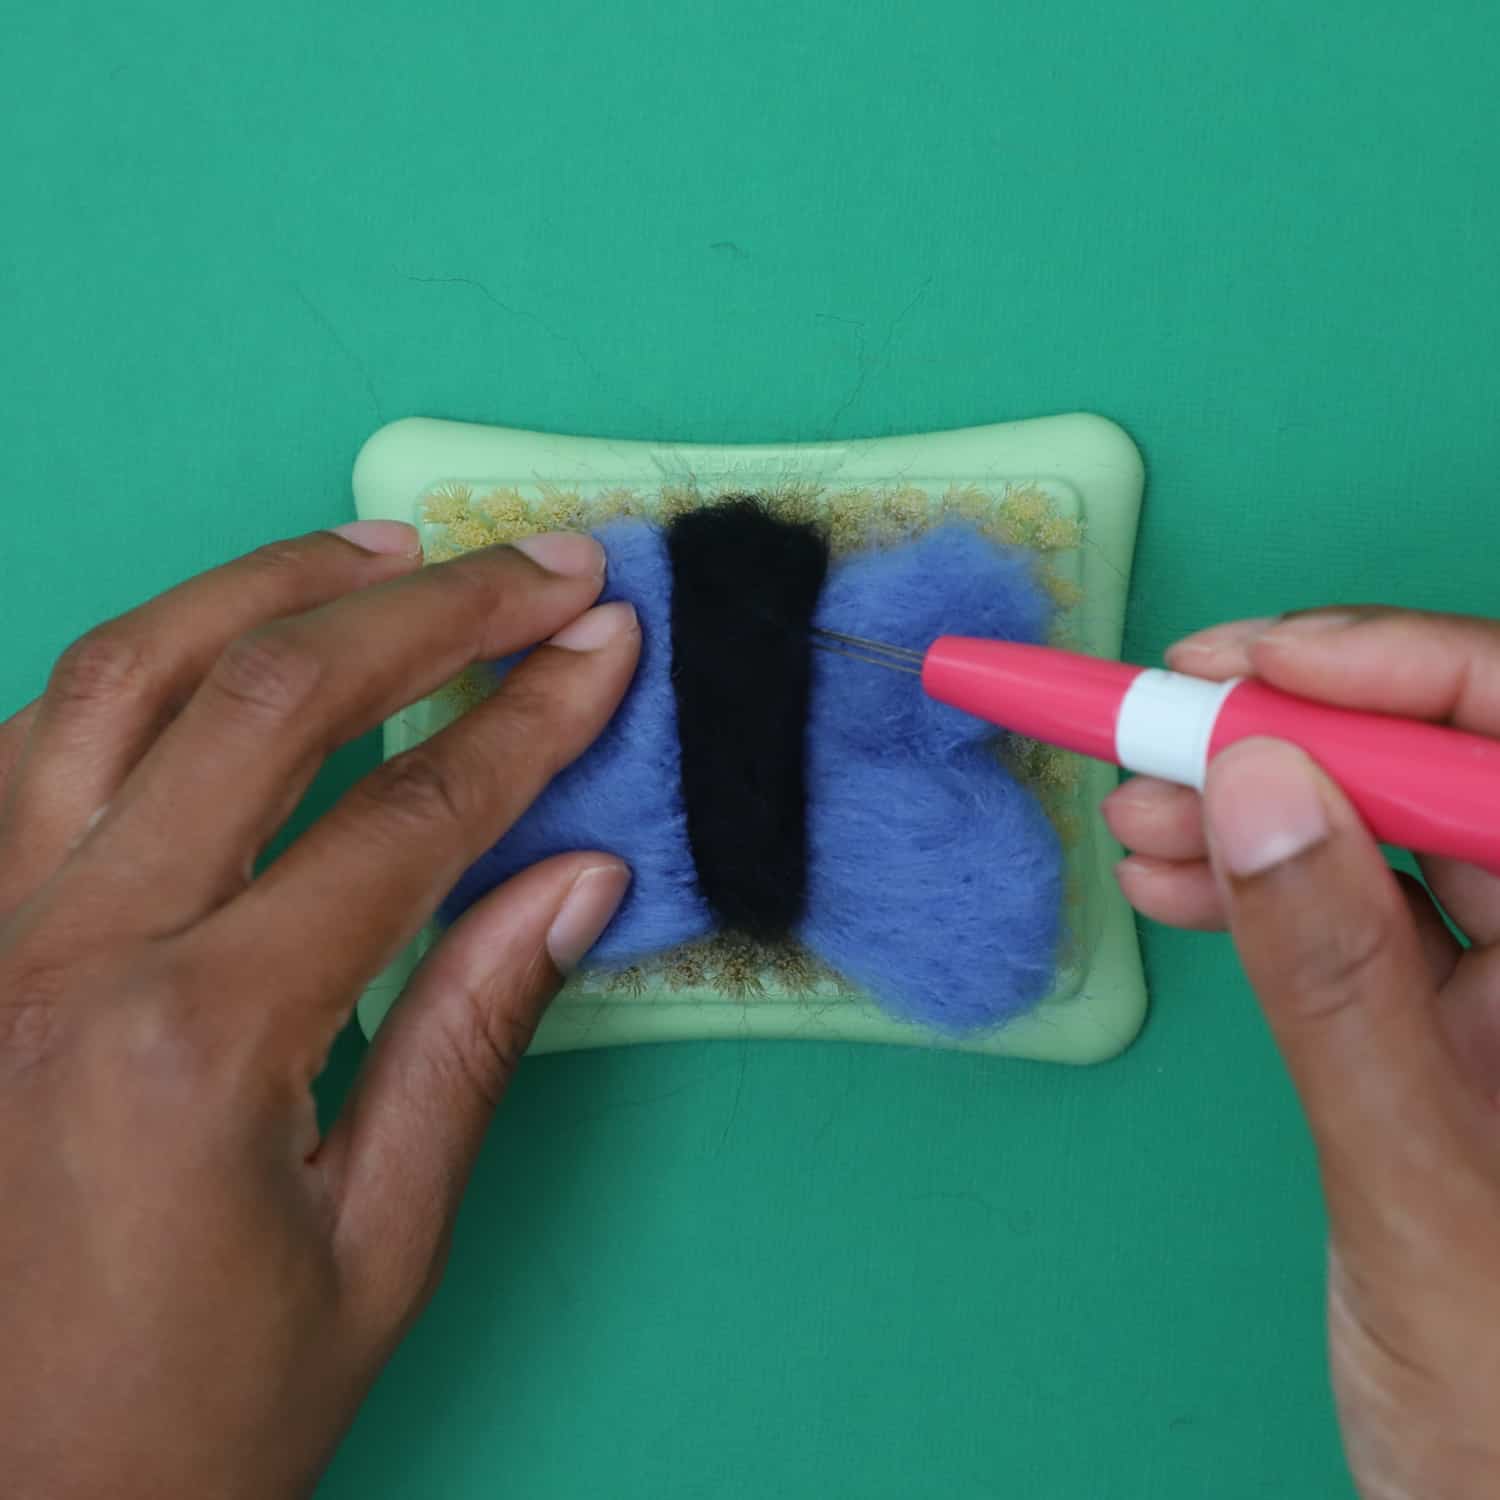
Step 3. Add more shape to the butterfly wings
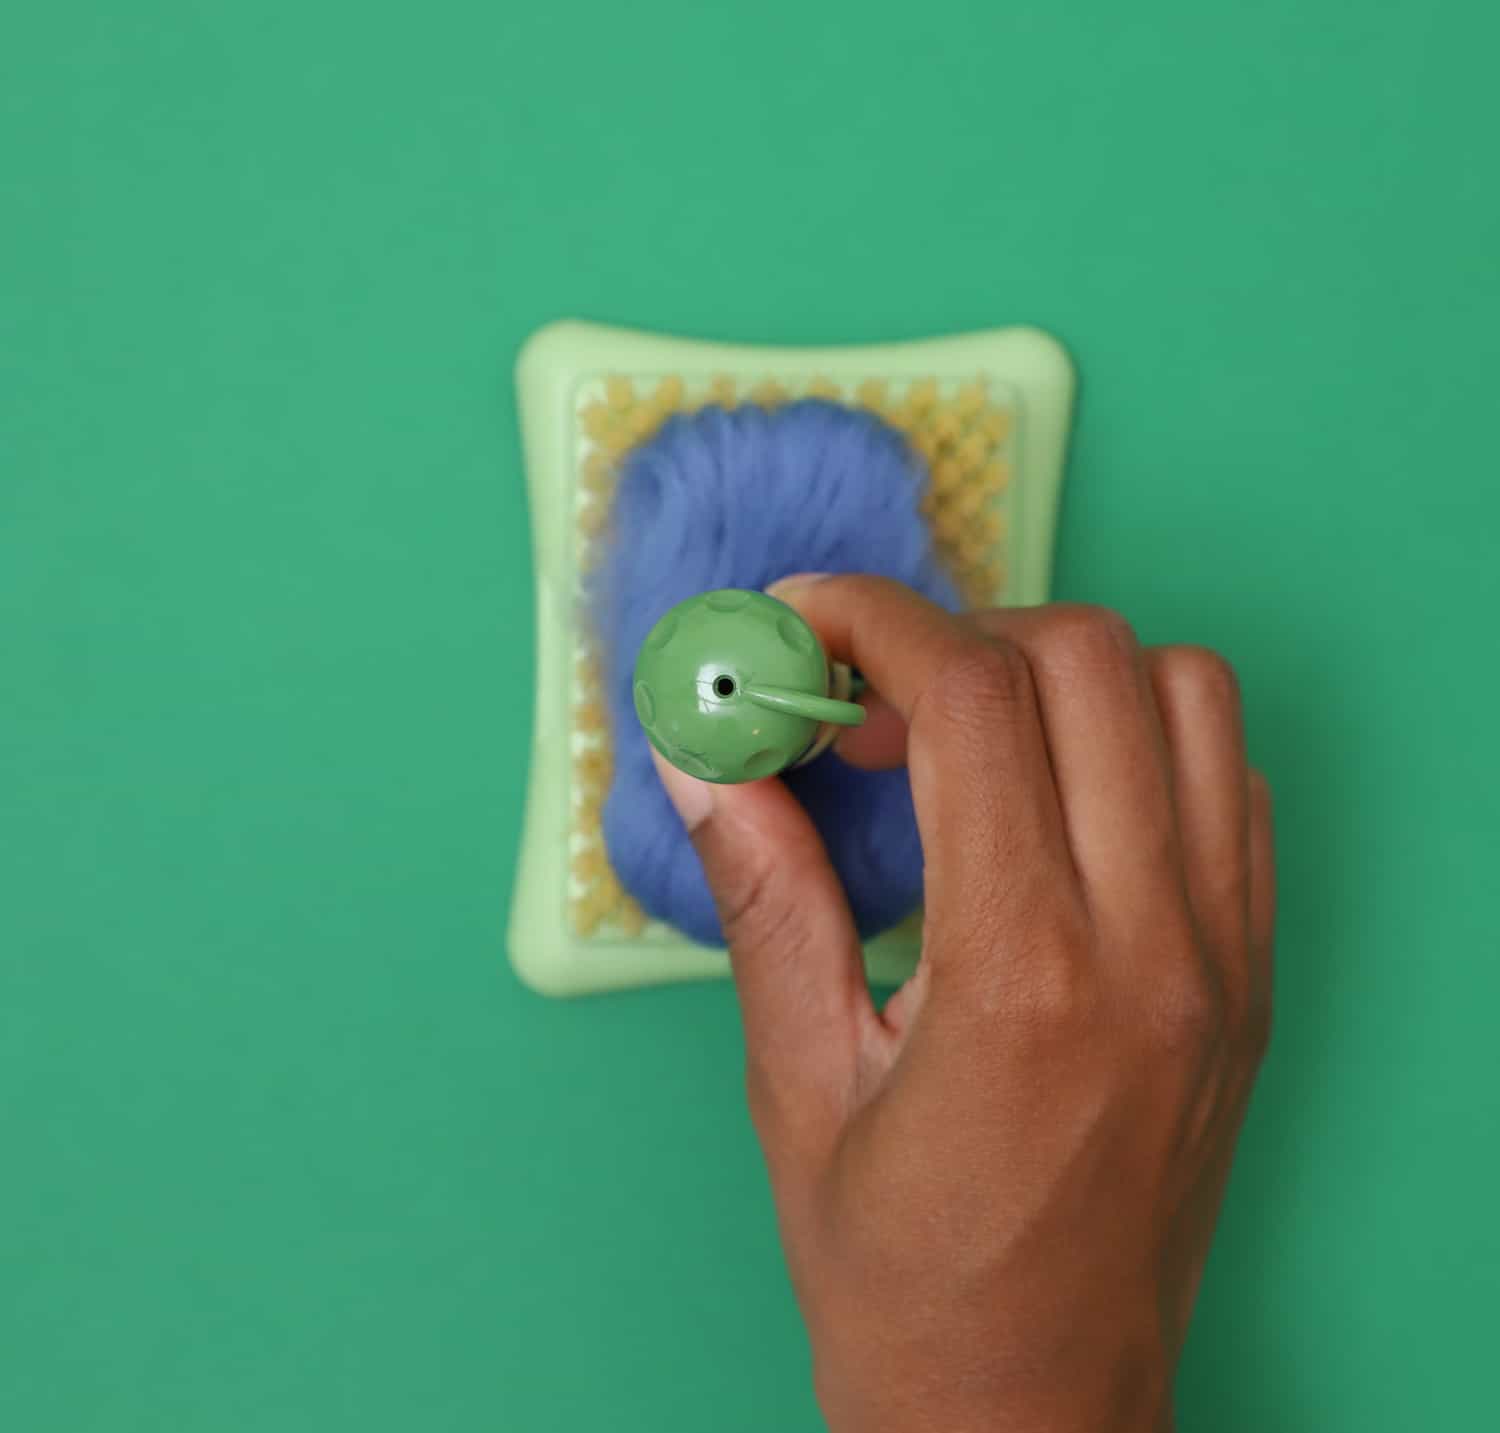
For this step, we’re going to use the Clover Pen Style Needle Felting Tool. It’s very helpful for smaller details and shaping lines in wool.
Begin by creating a vertical line for the body. It should be exactly in the center of the butterfly.
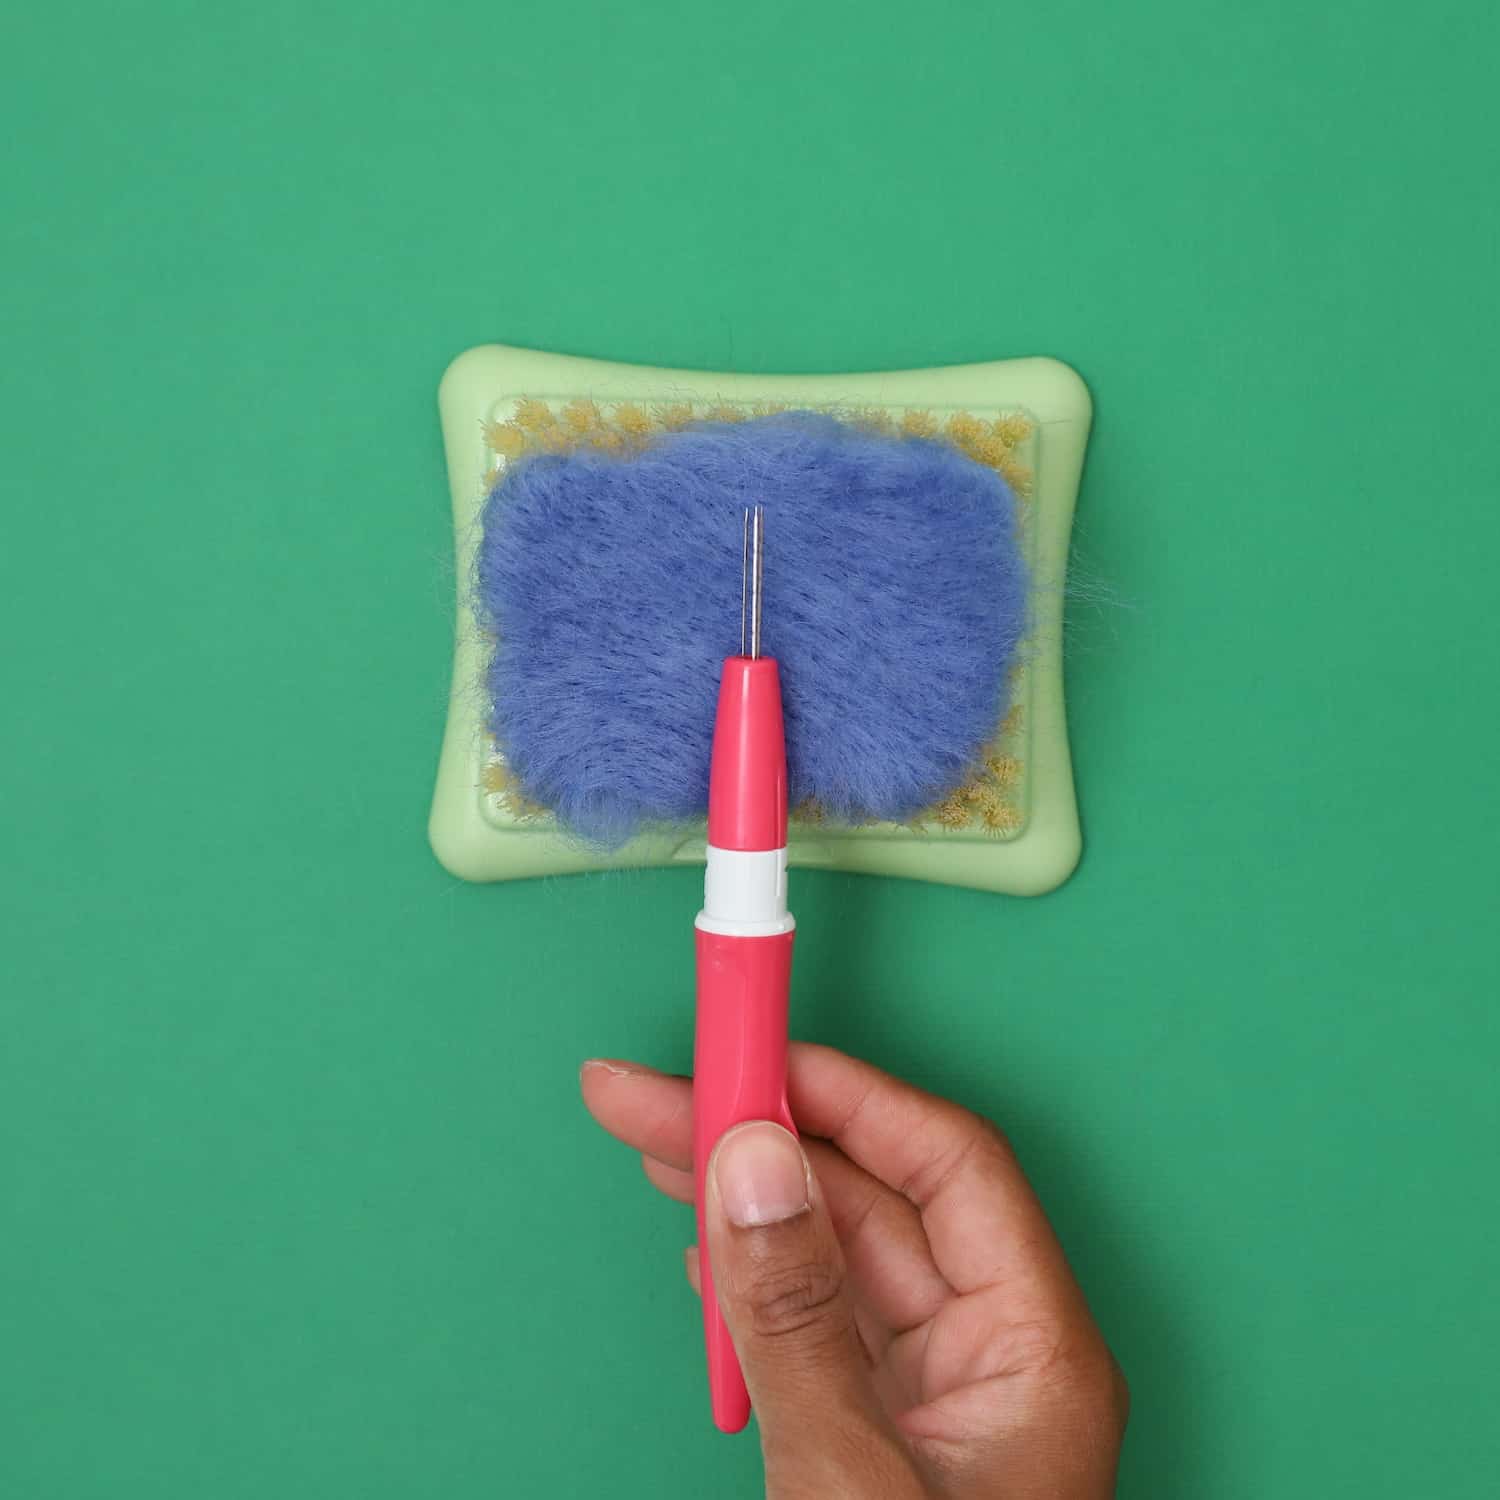
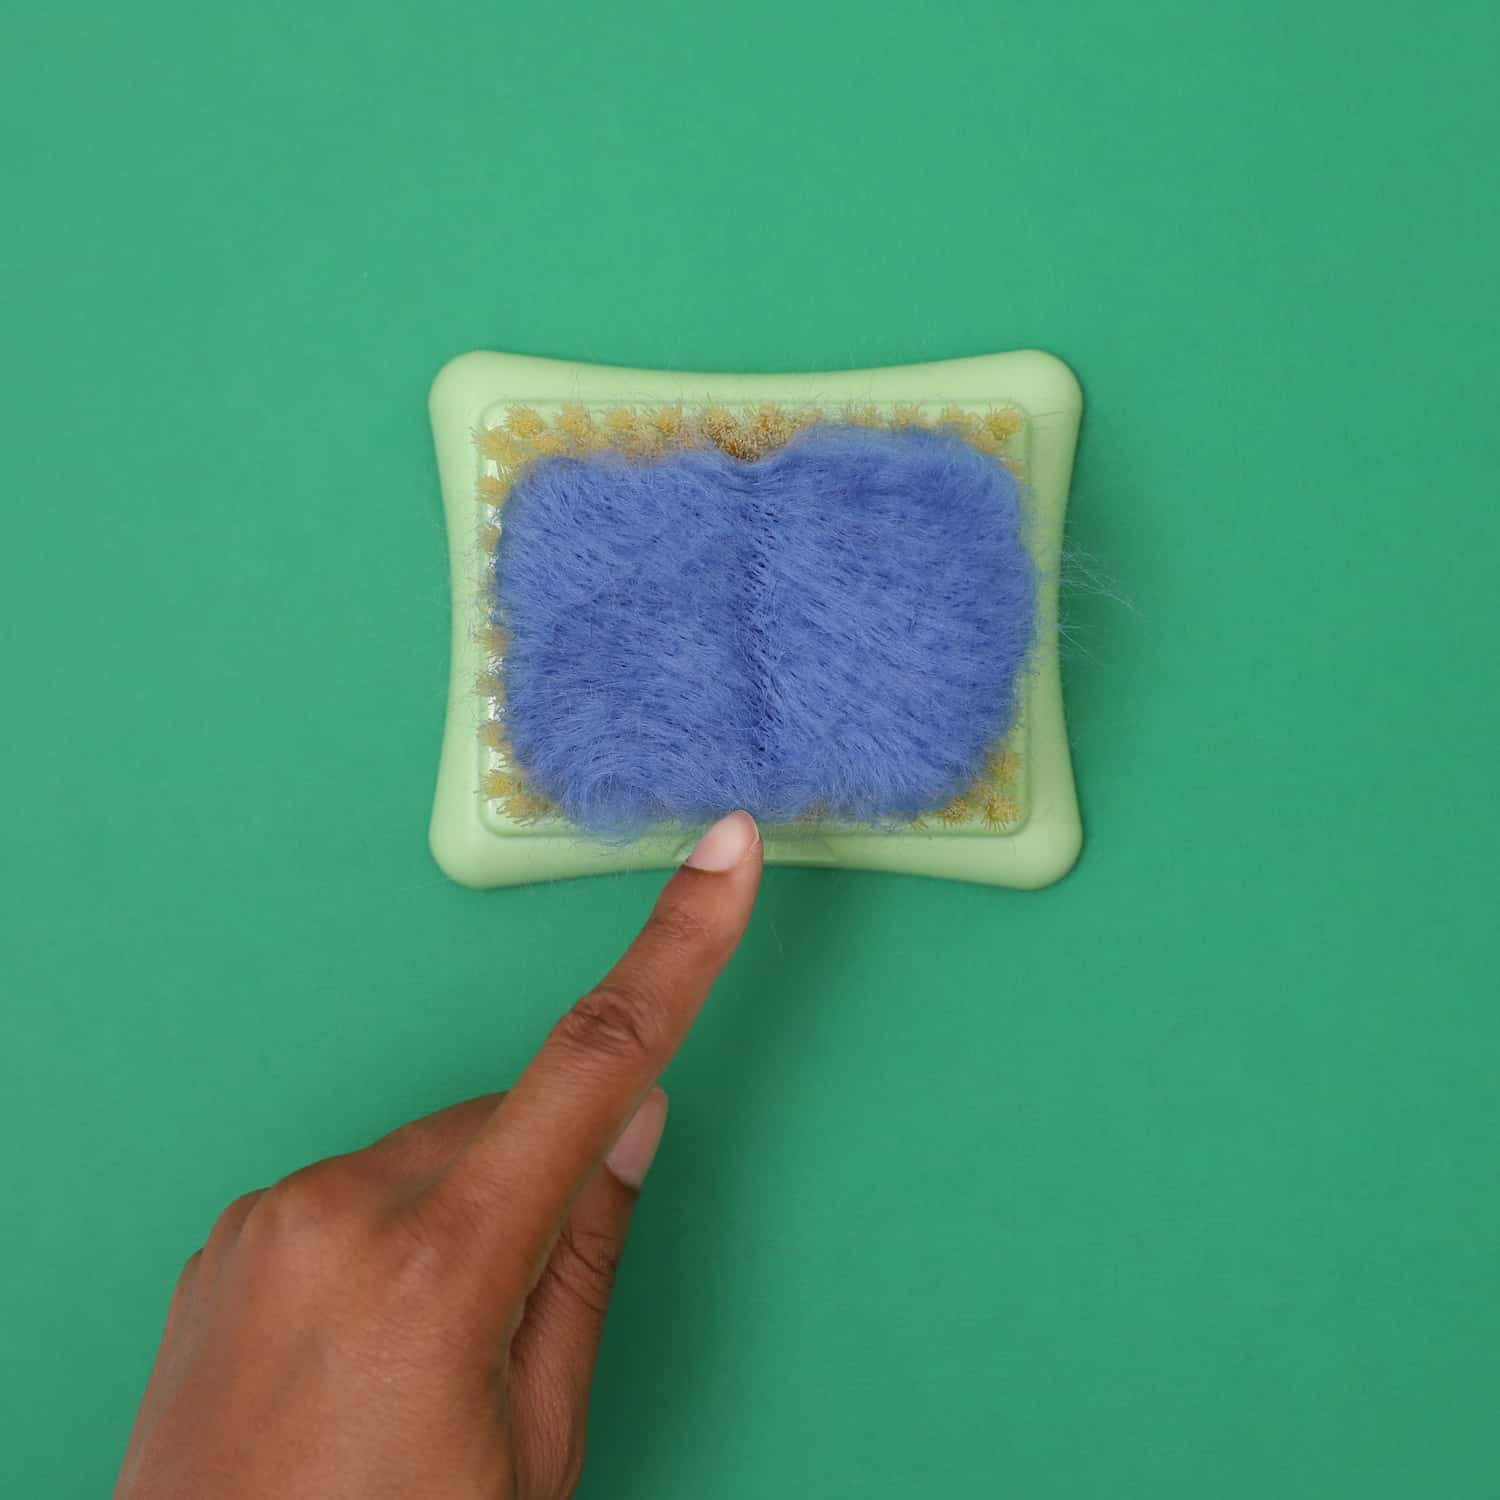
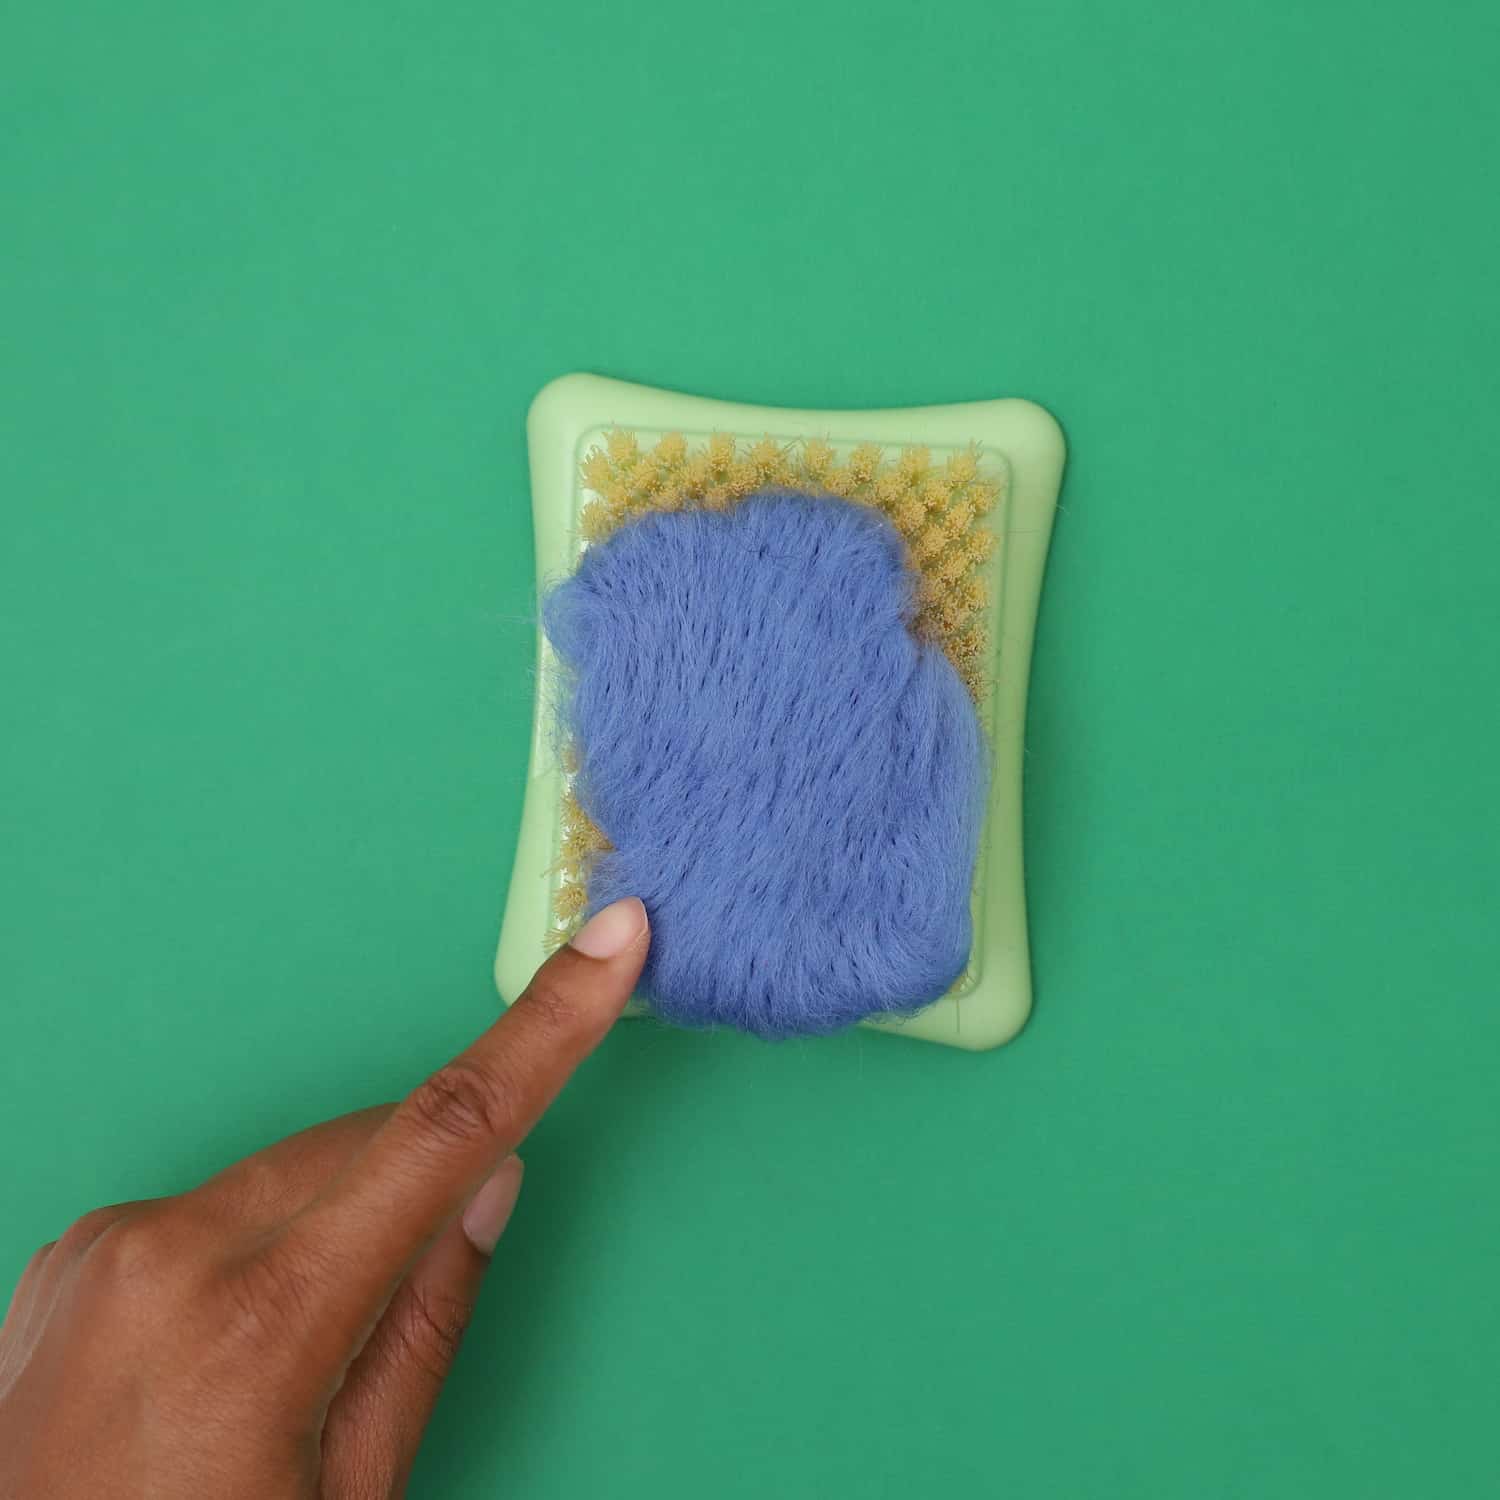
After shaping the center, begin shaping all four sides of the butterfly.
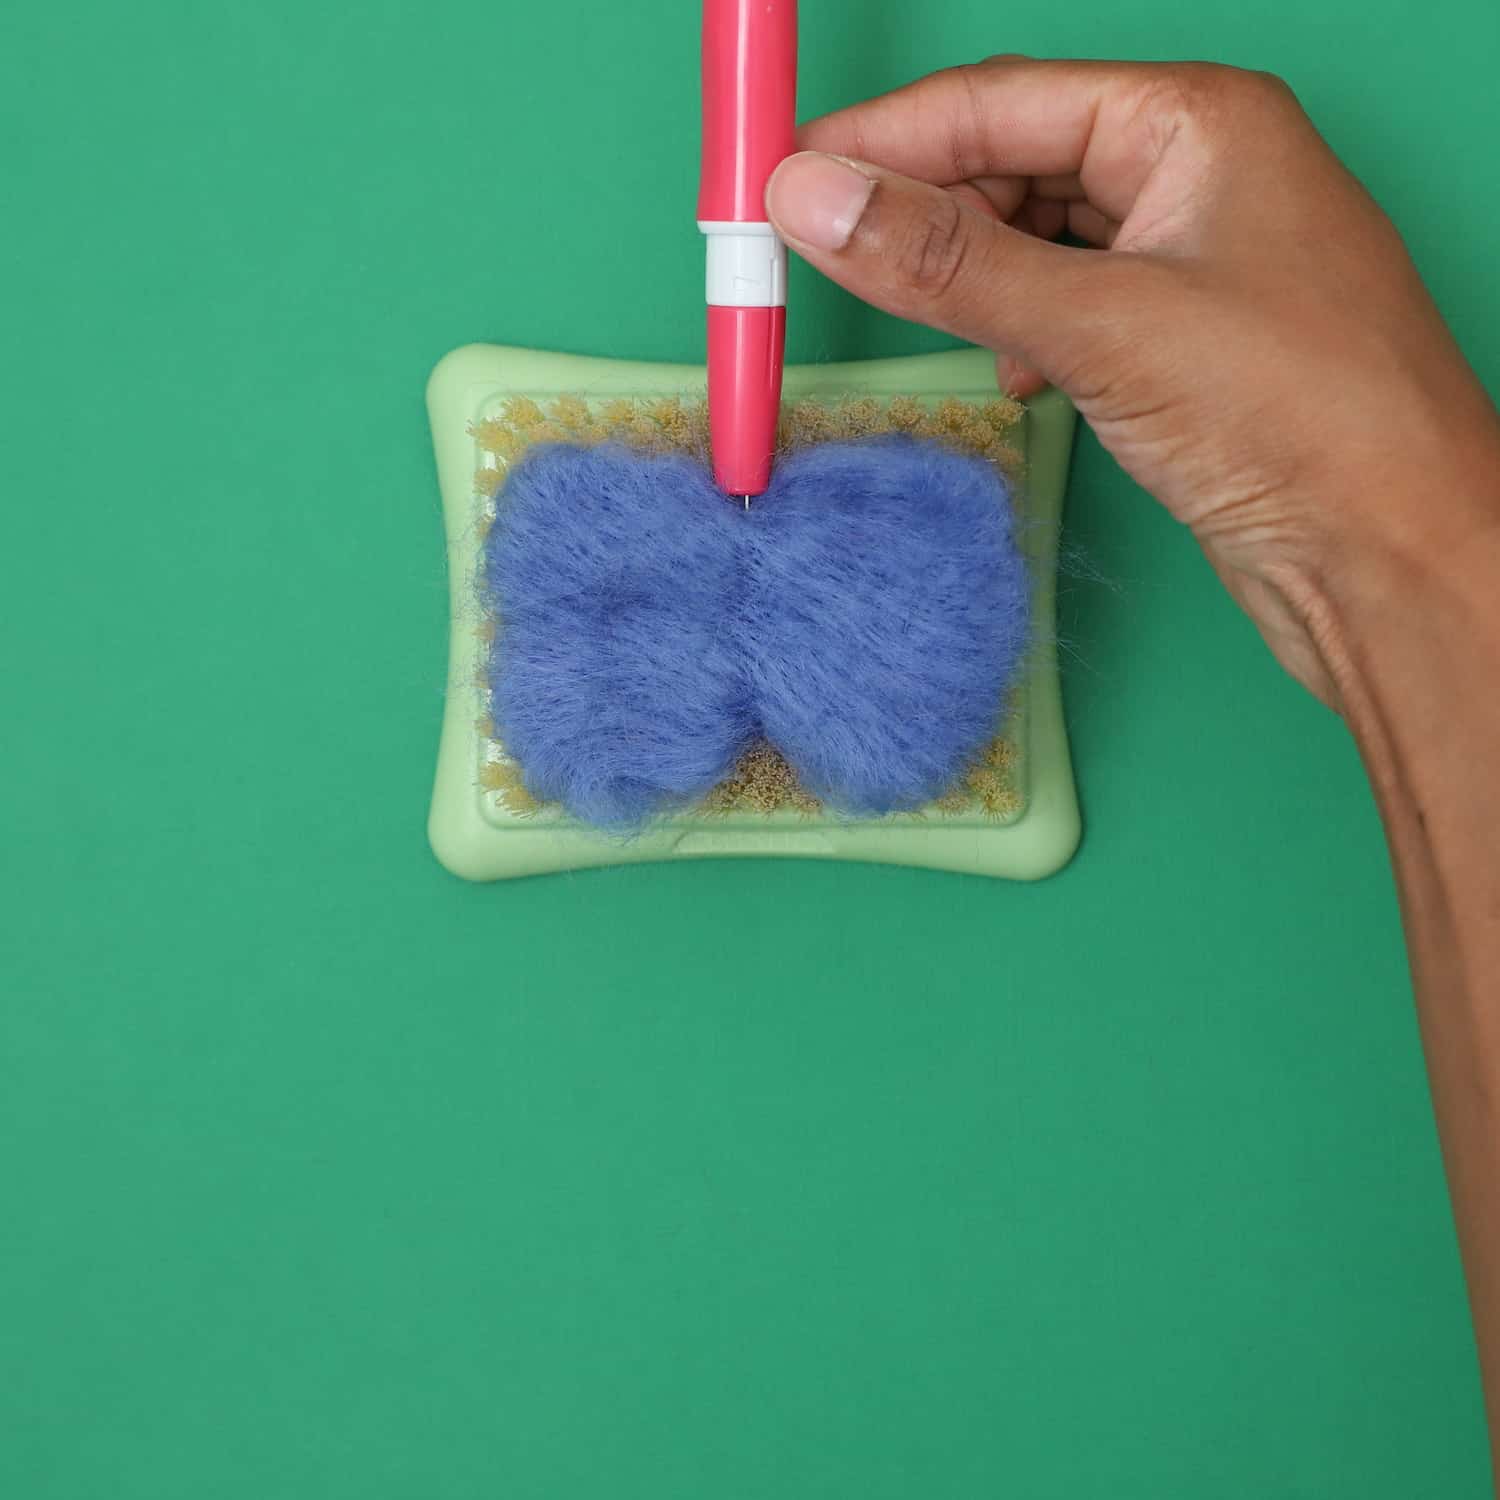
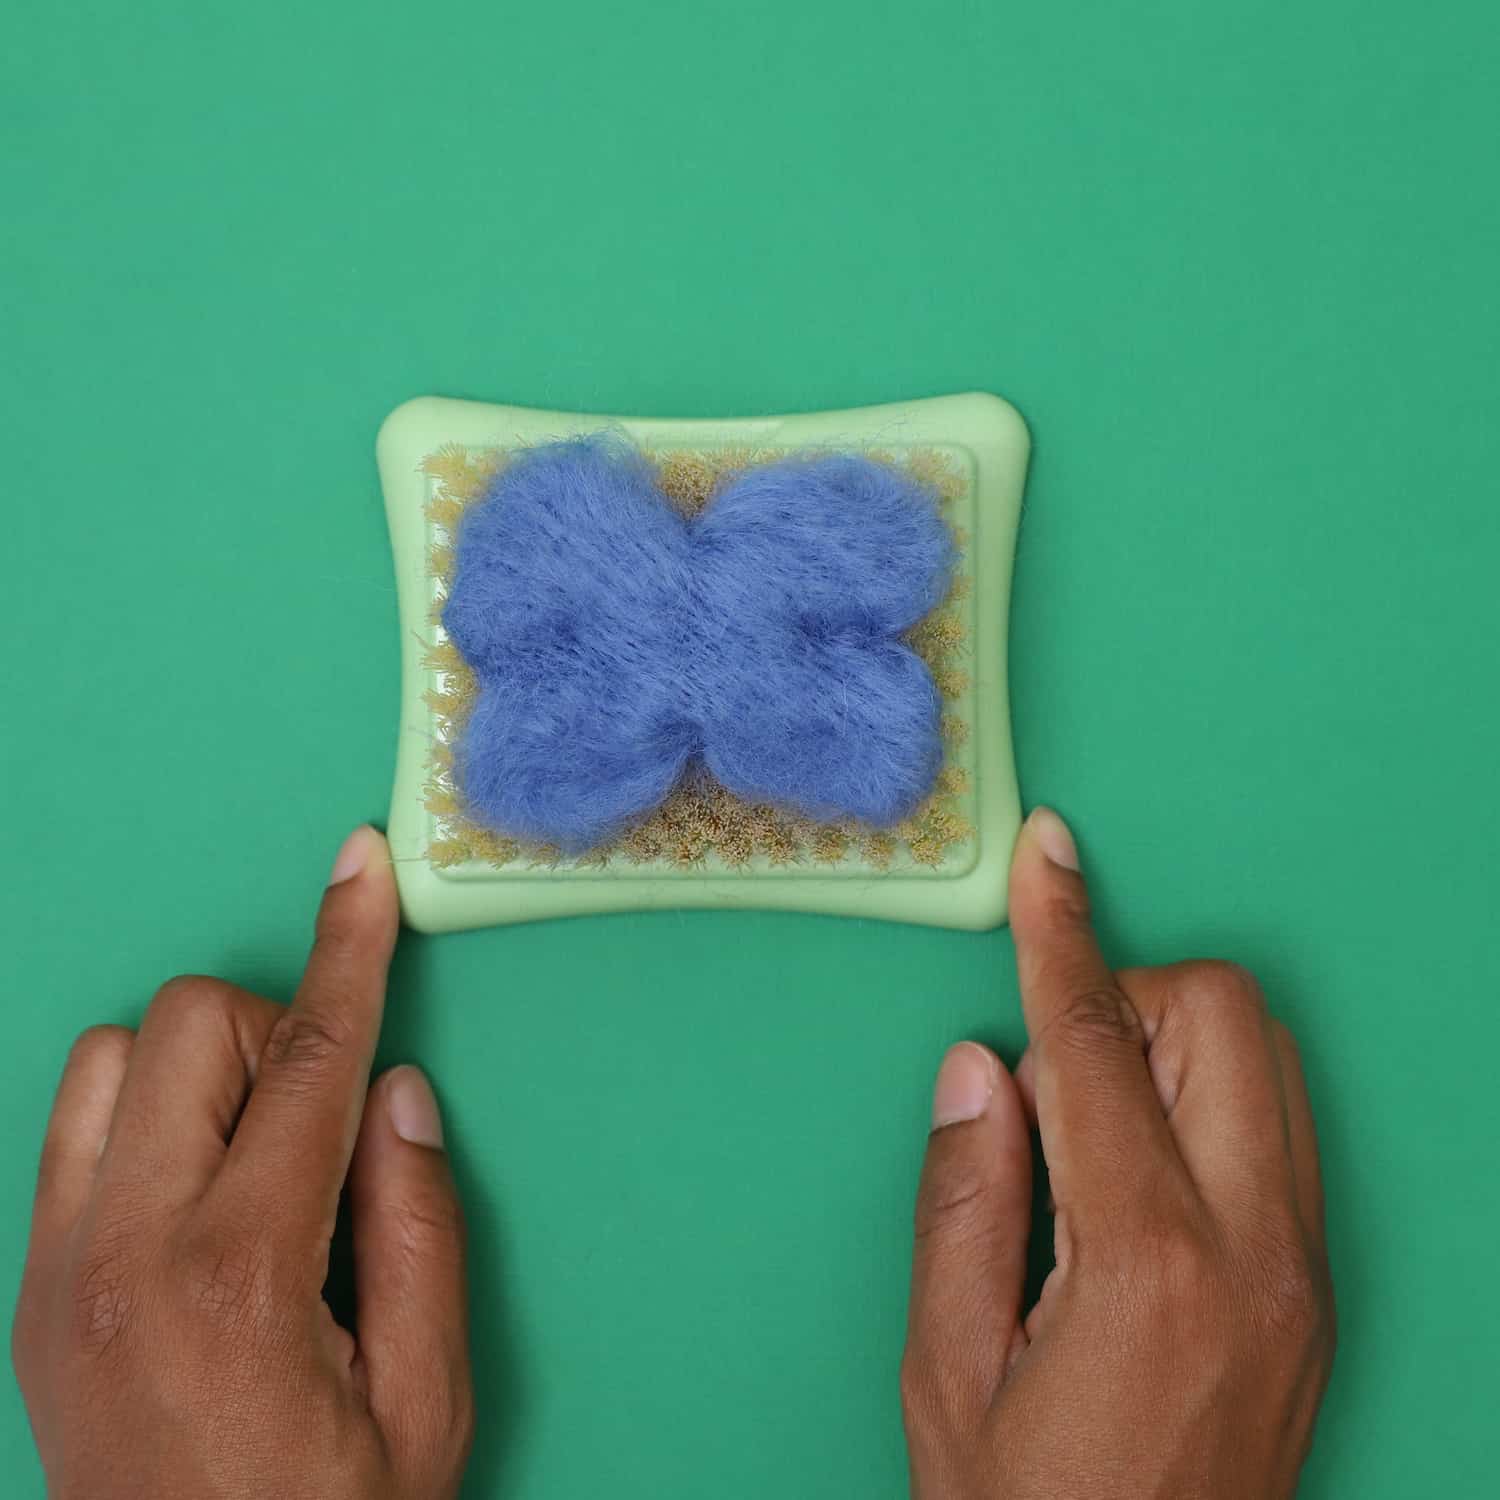
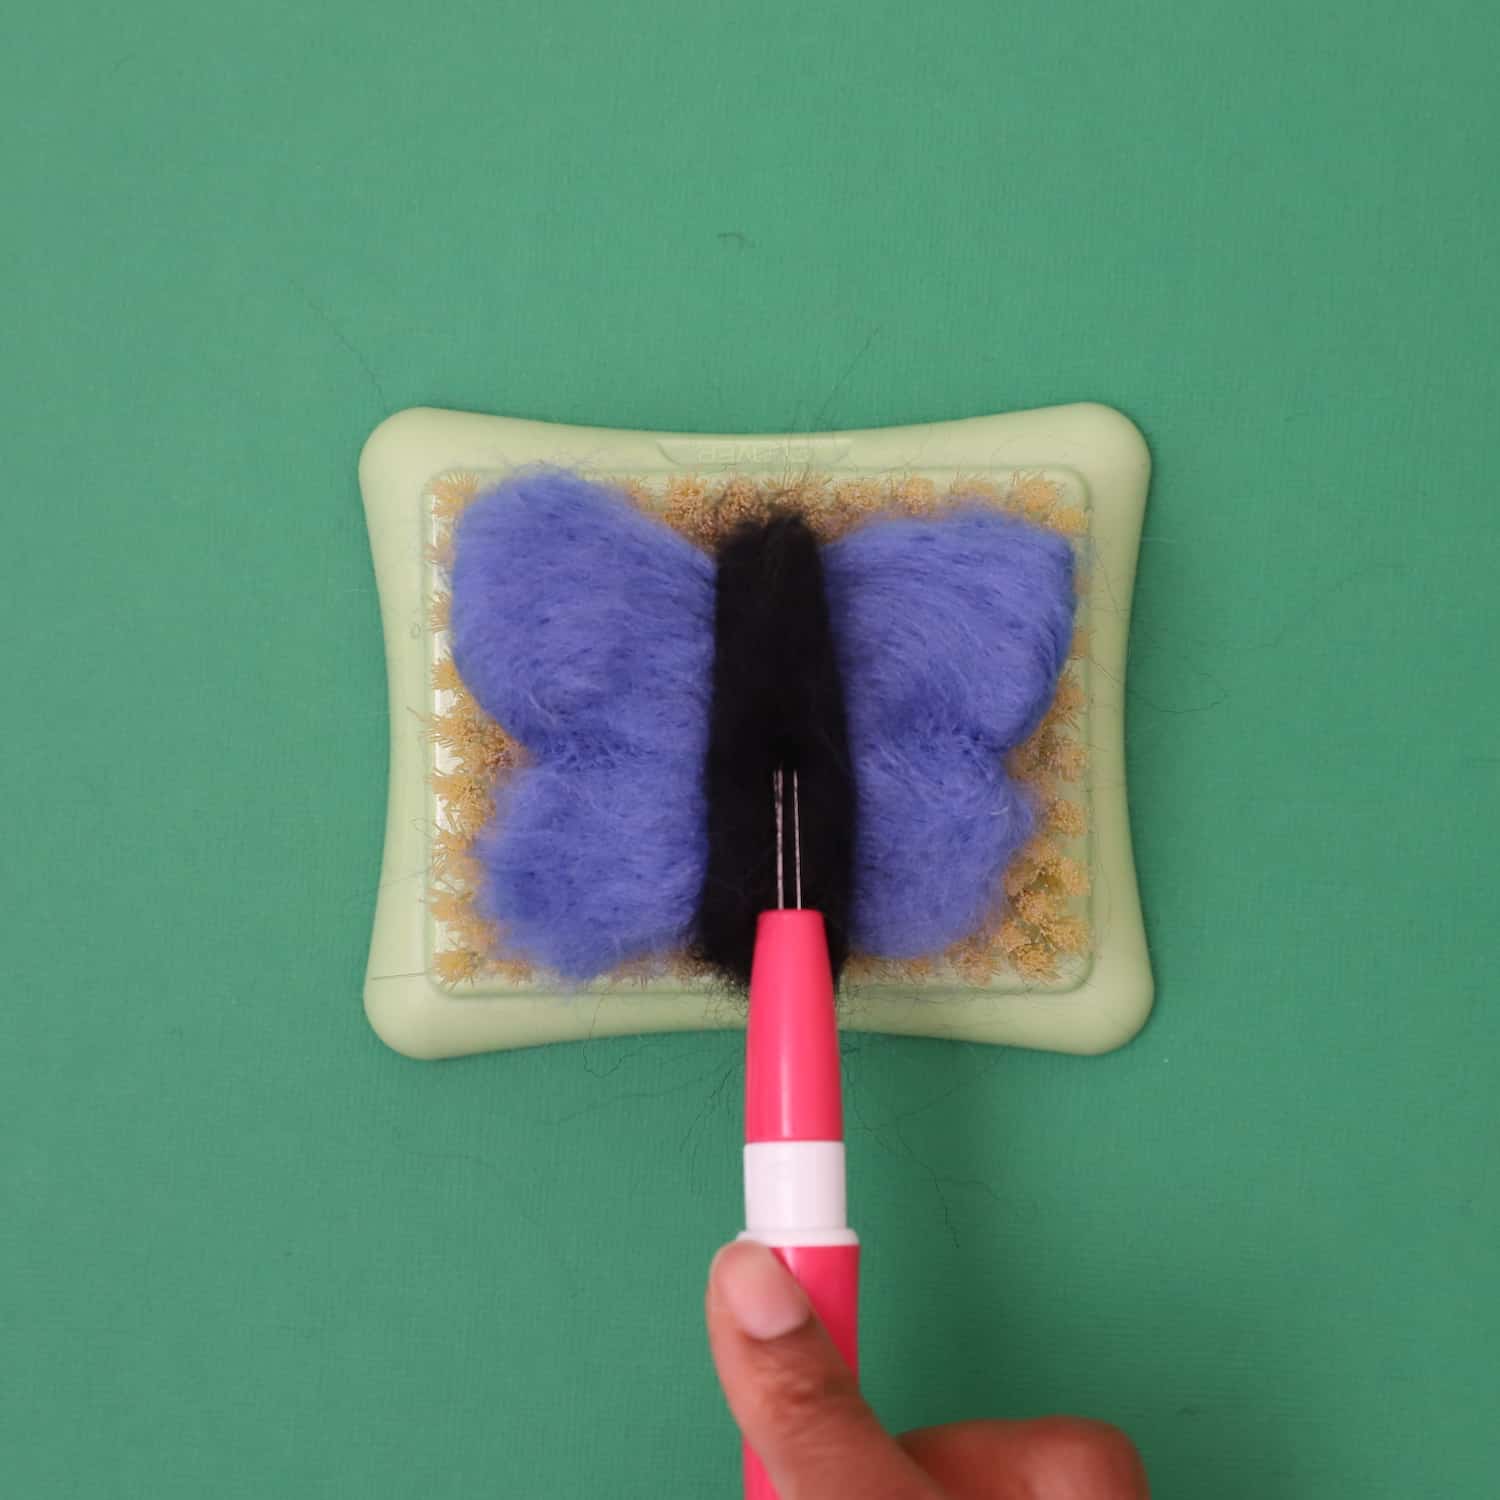
This is how your butterfly should look.
Step 4. Create the Body
Now let’s create the butterfly body by rolling the black wool roving into a tube, then using the pen felting tool to shape it.
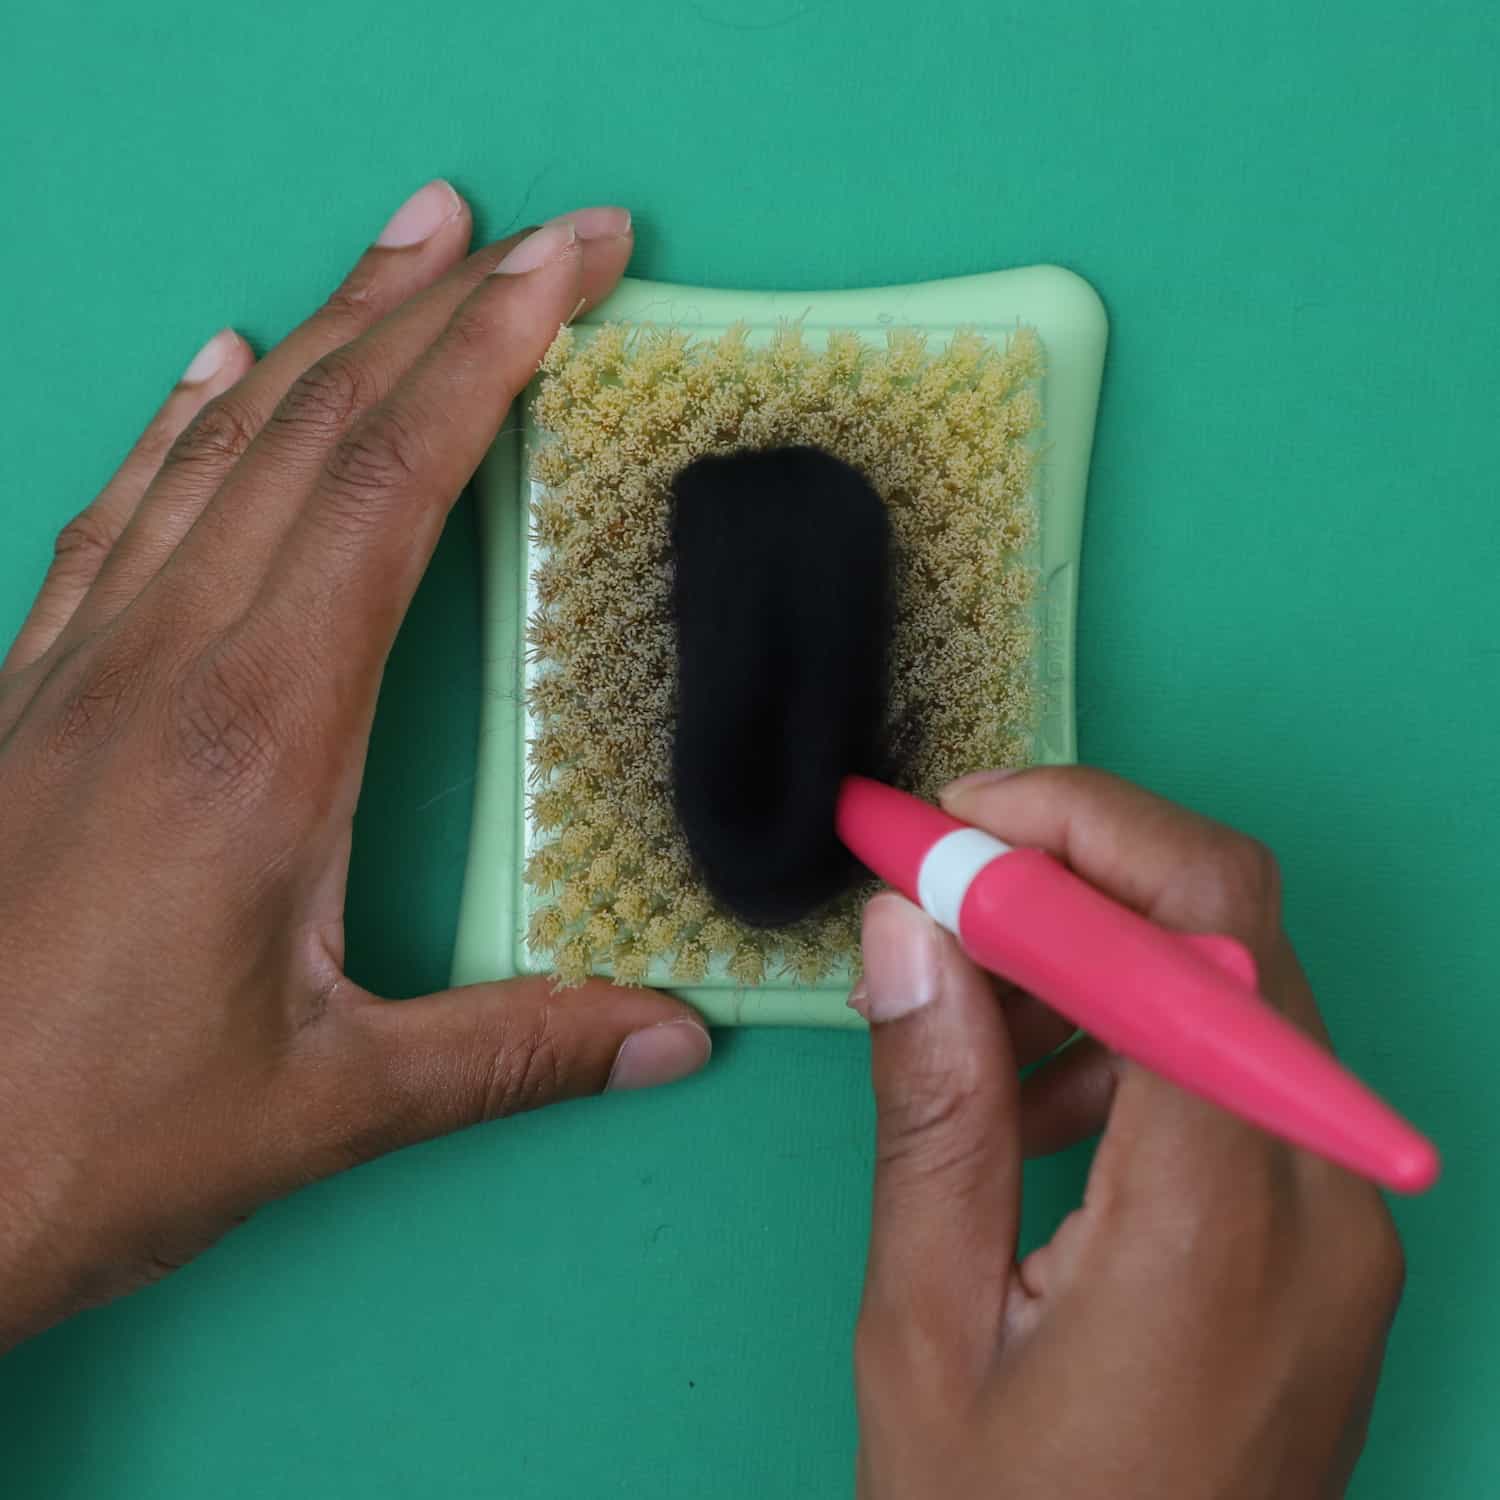
Keep folding and rolling the wool roving until you have a firm tube.
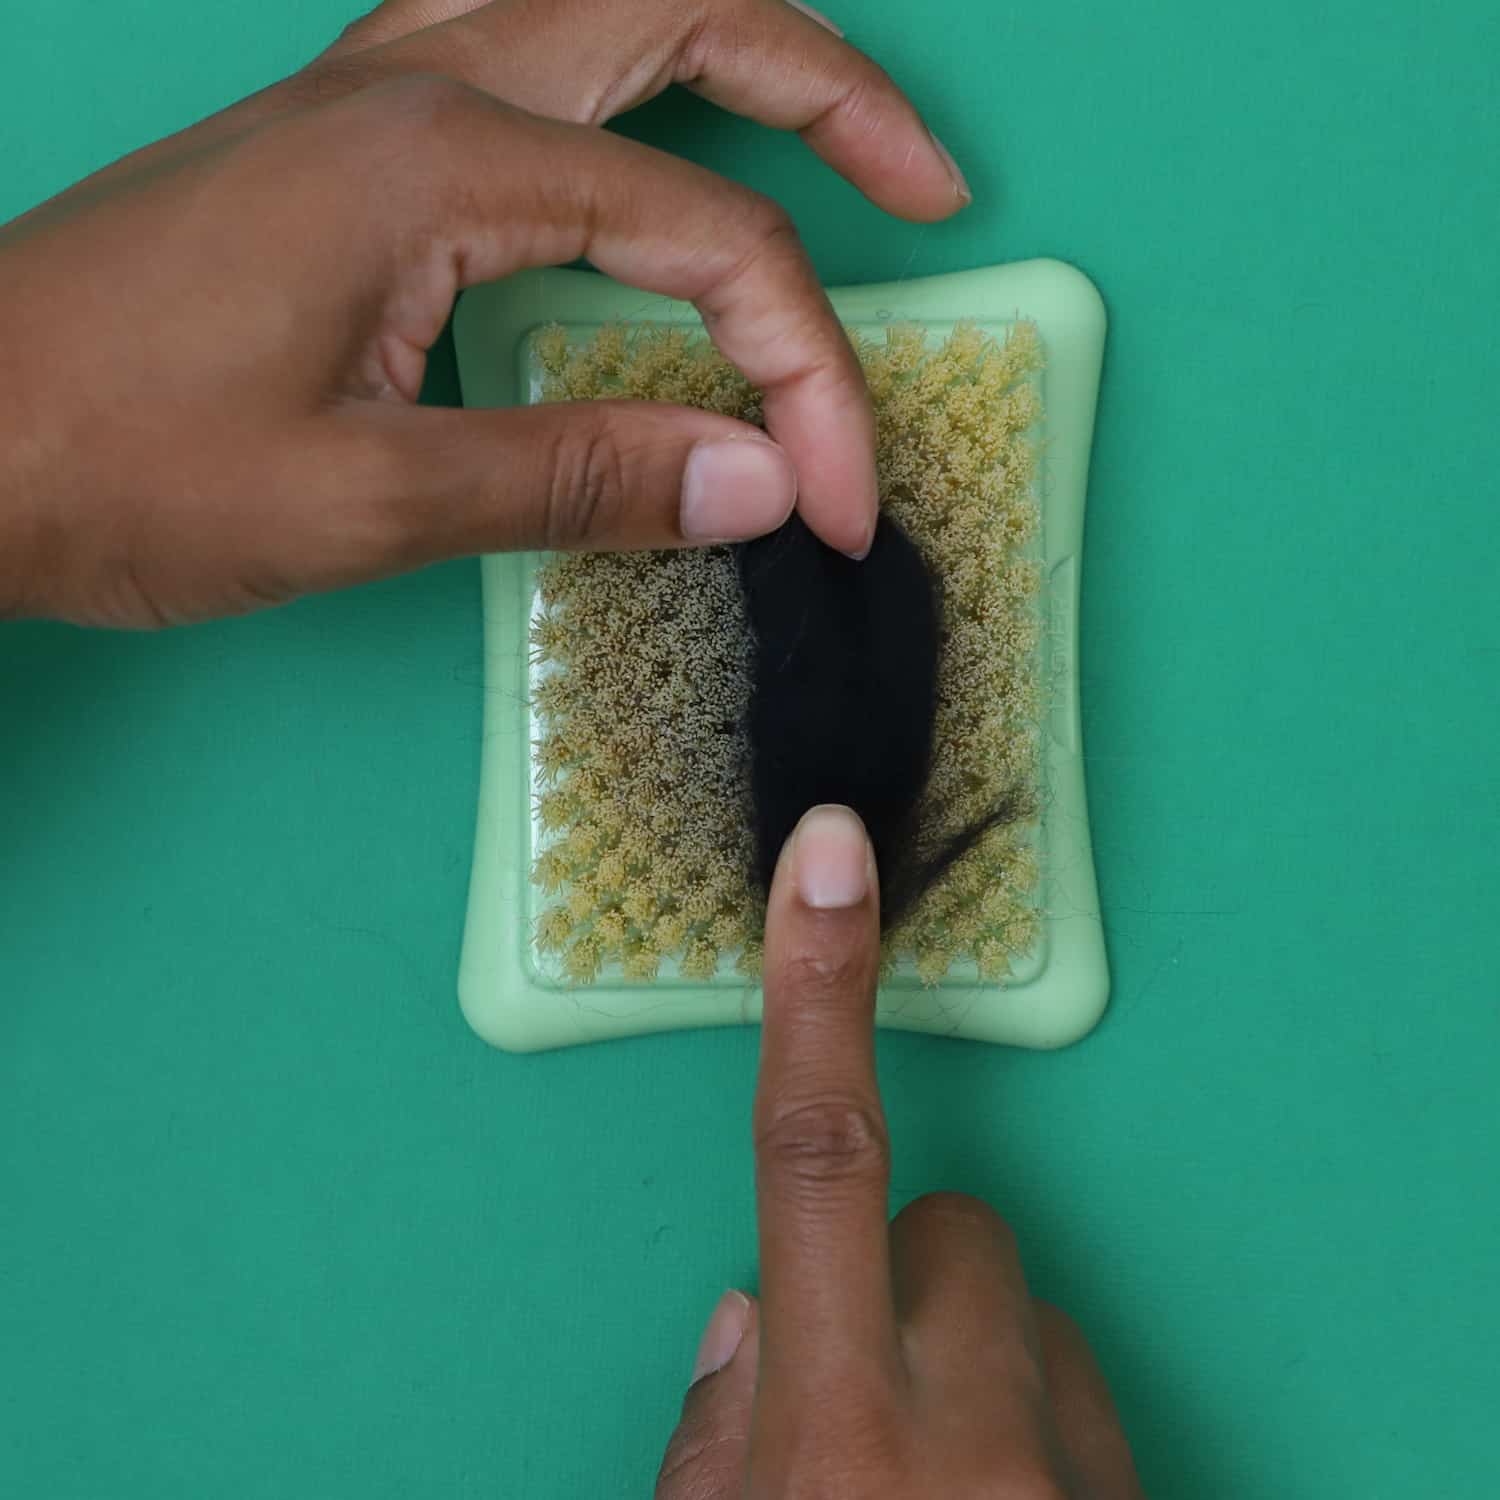

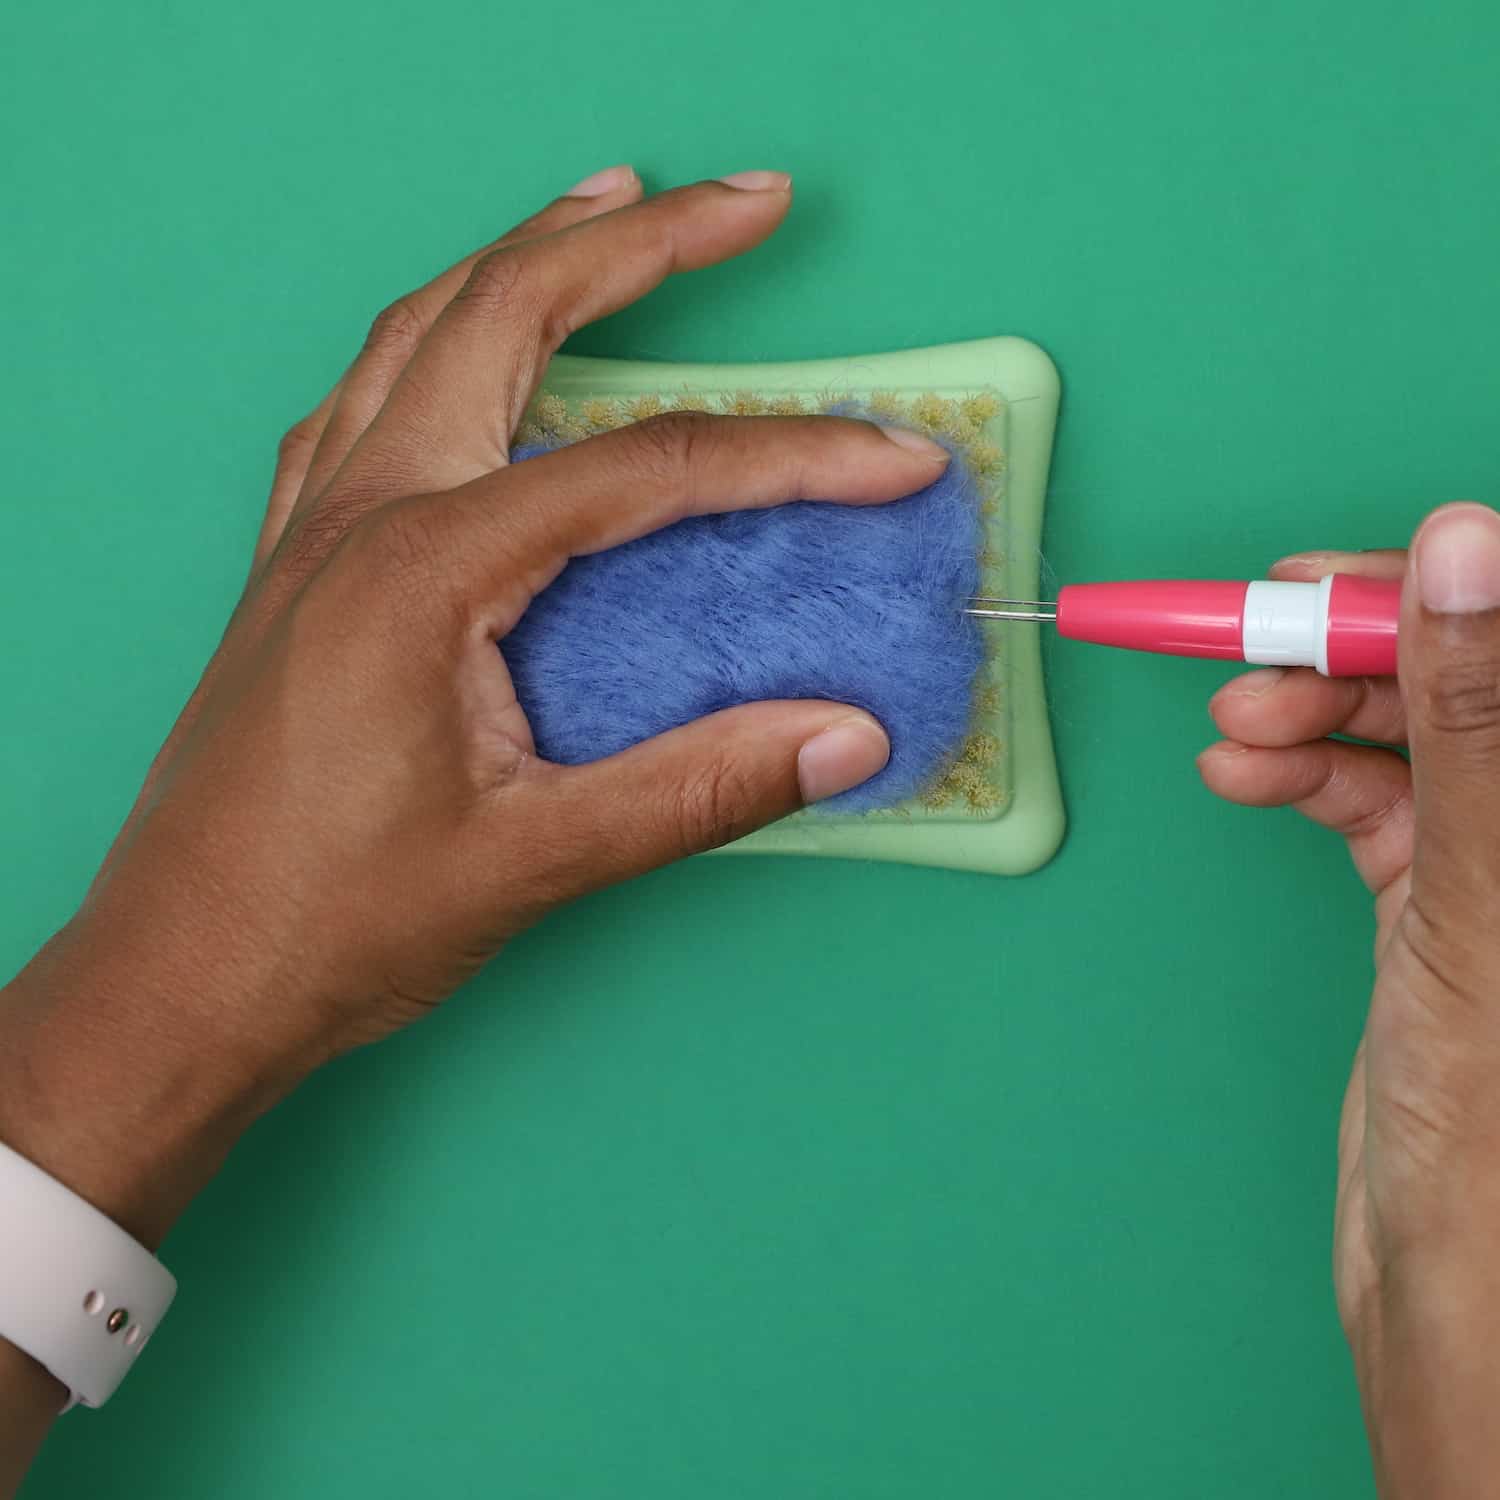
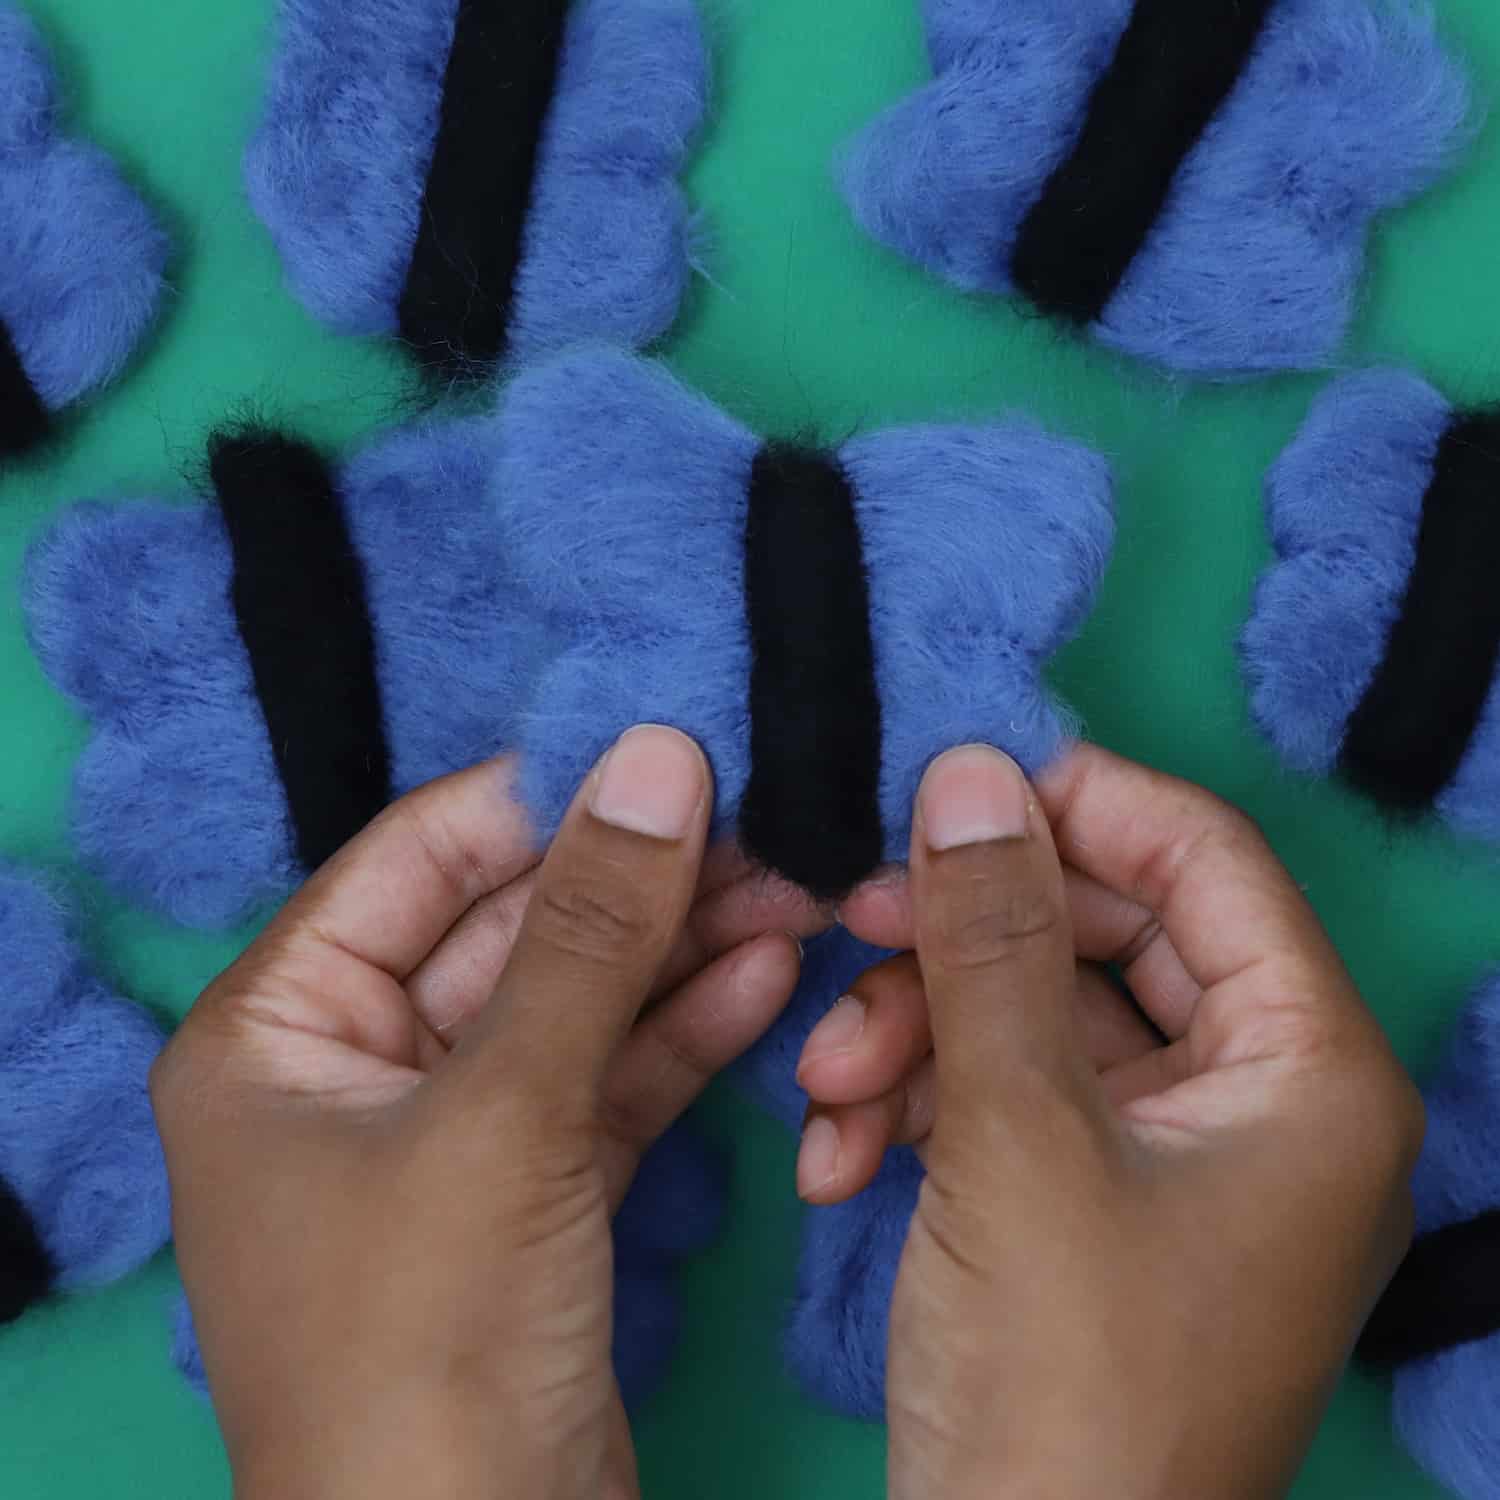
Step 5. Combine the Wool Pieces
Use the pen felting tool to attach the body to the wings. Start in the center, then move on to the sides.
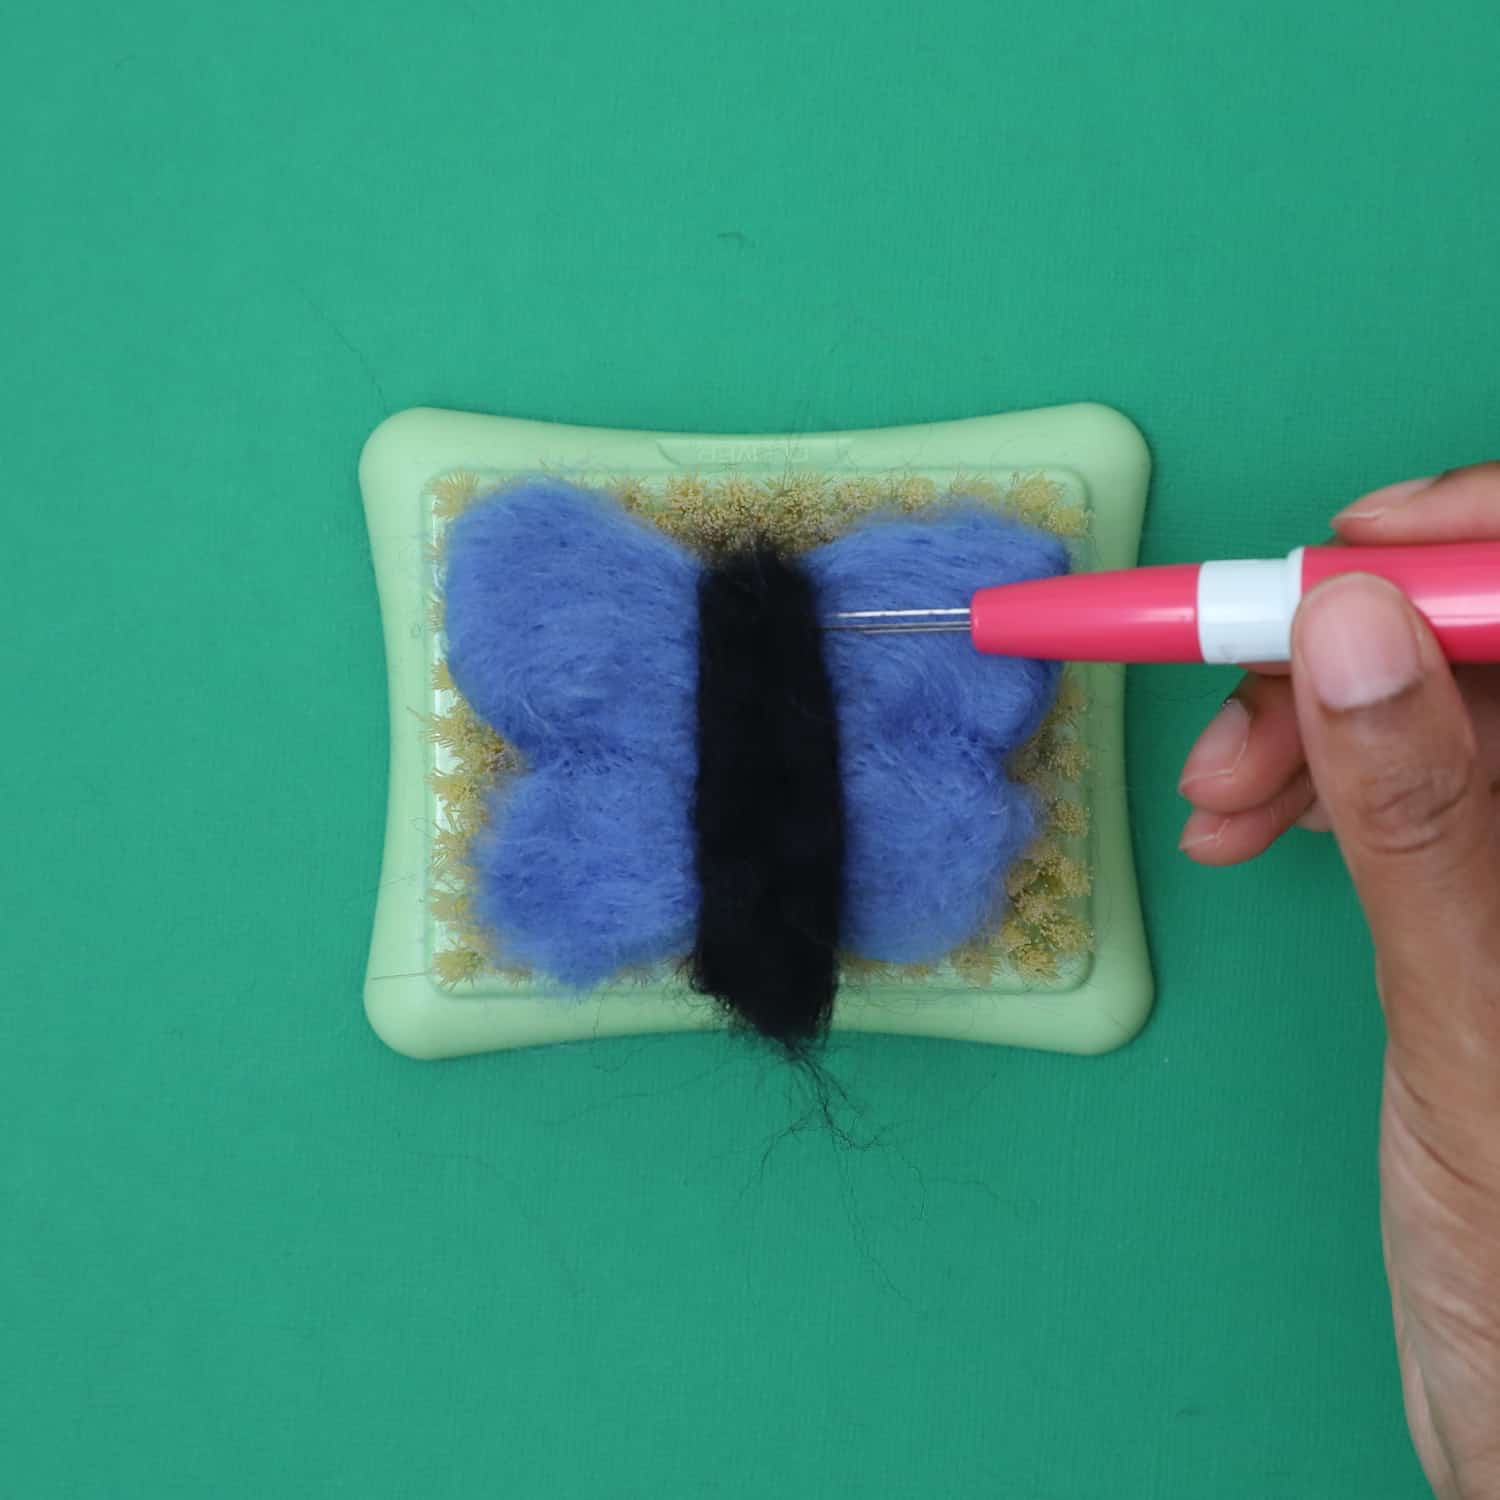
Flip to butterfly and continue needle felting the body until it no longer lifts.
Wow! Aren’t these butterflies super cute?! Repeat steps 1-5 until you have 30 butterflies.
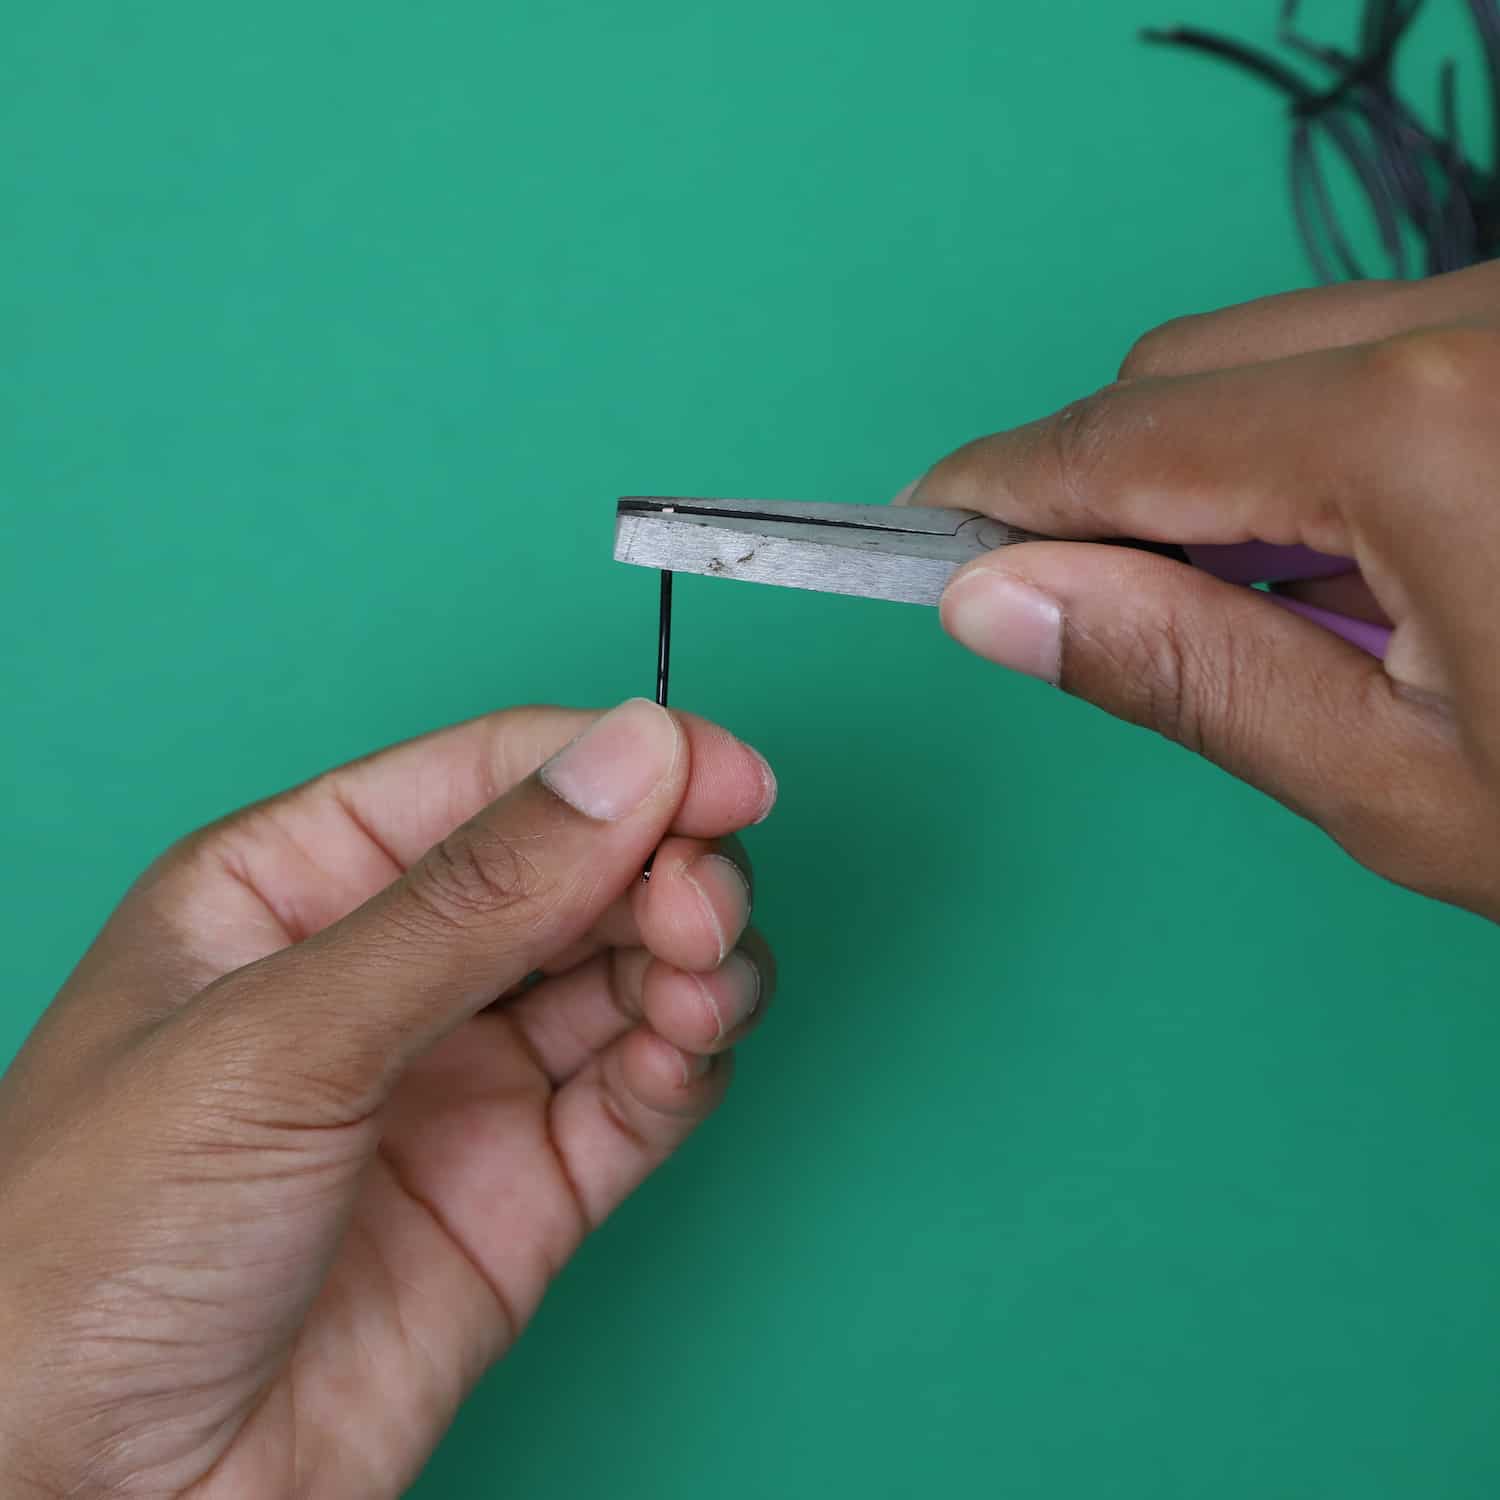
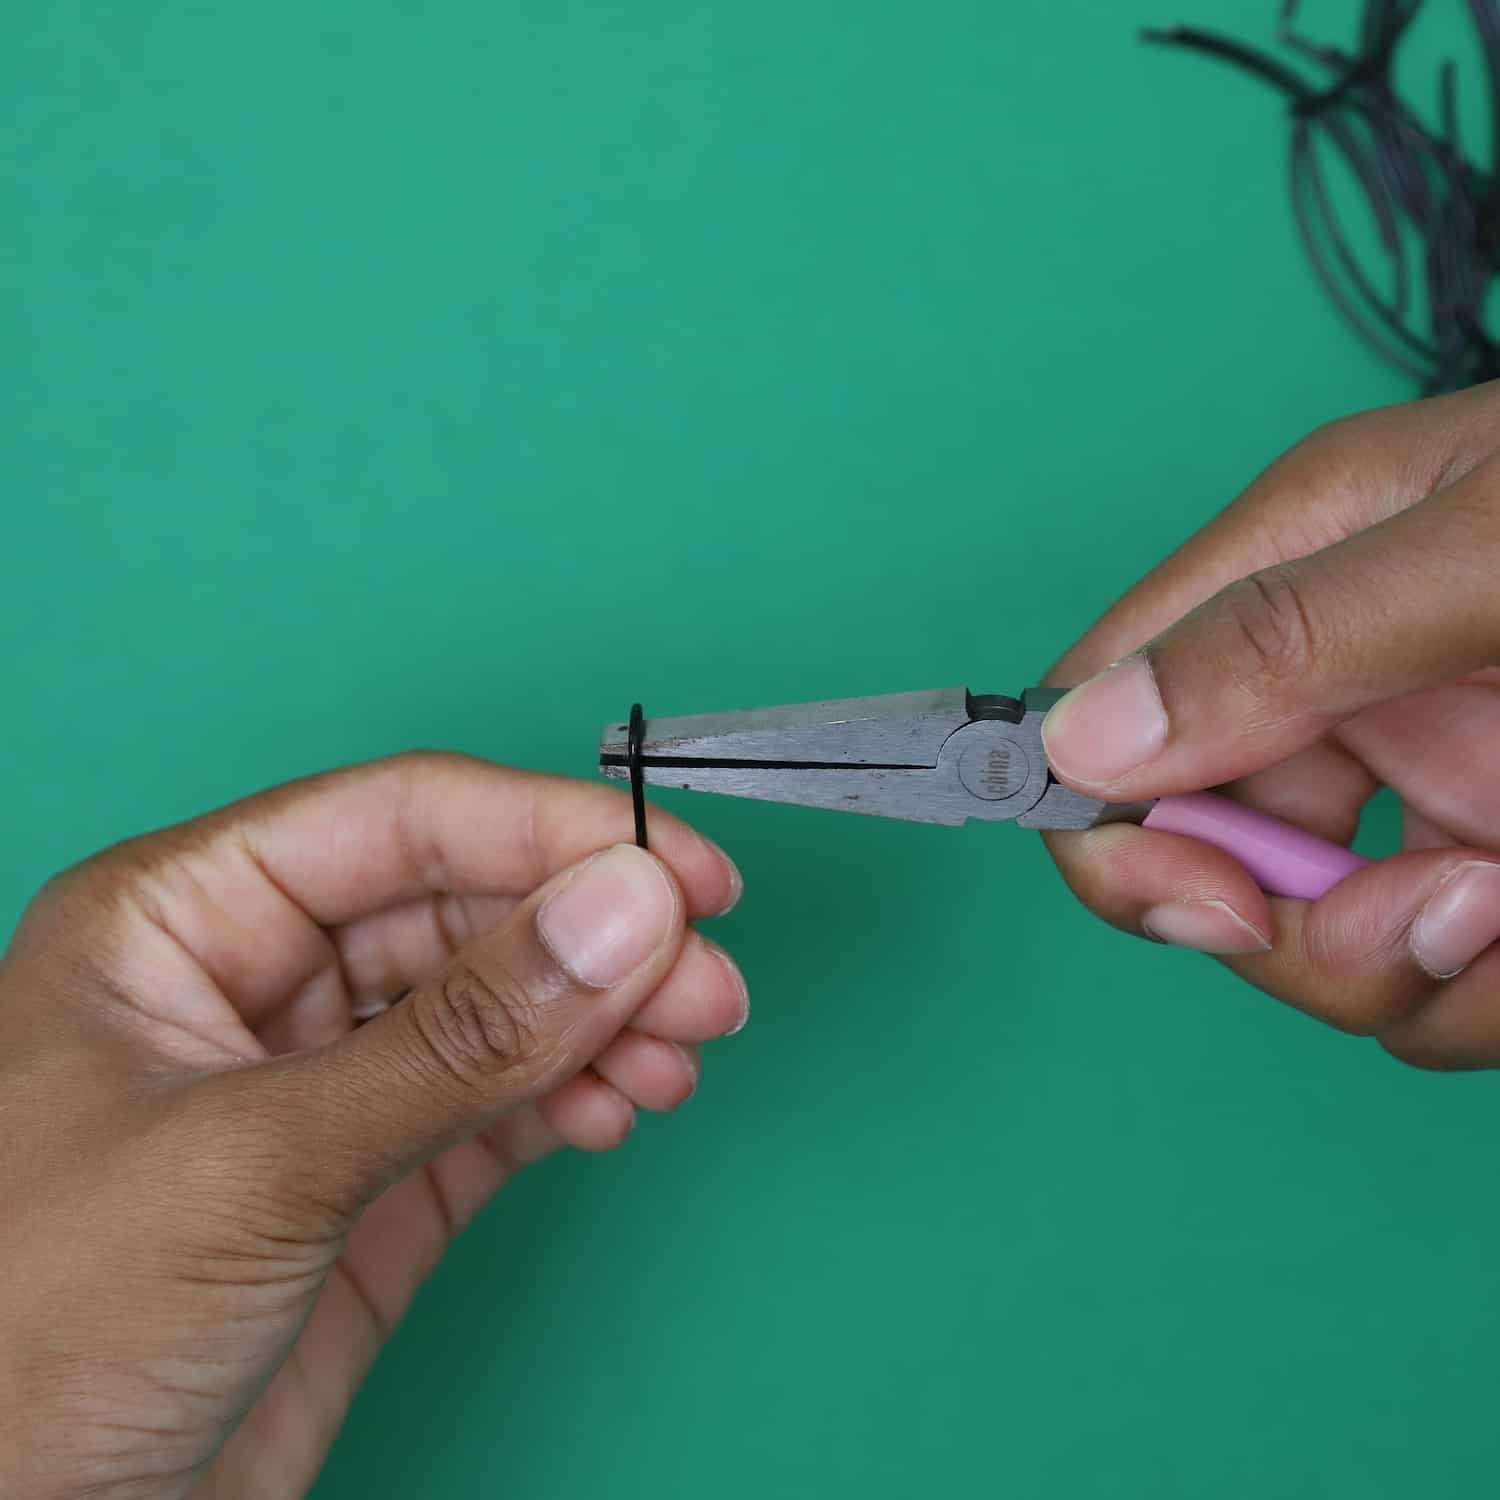
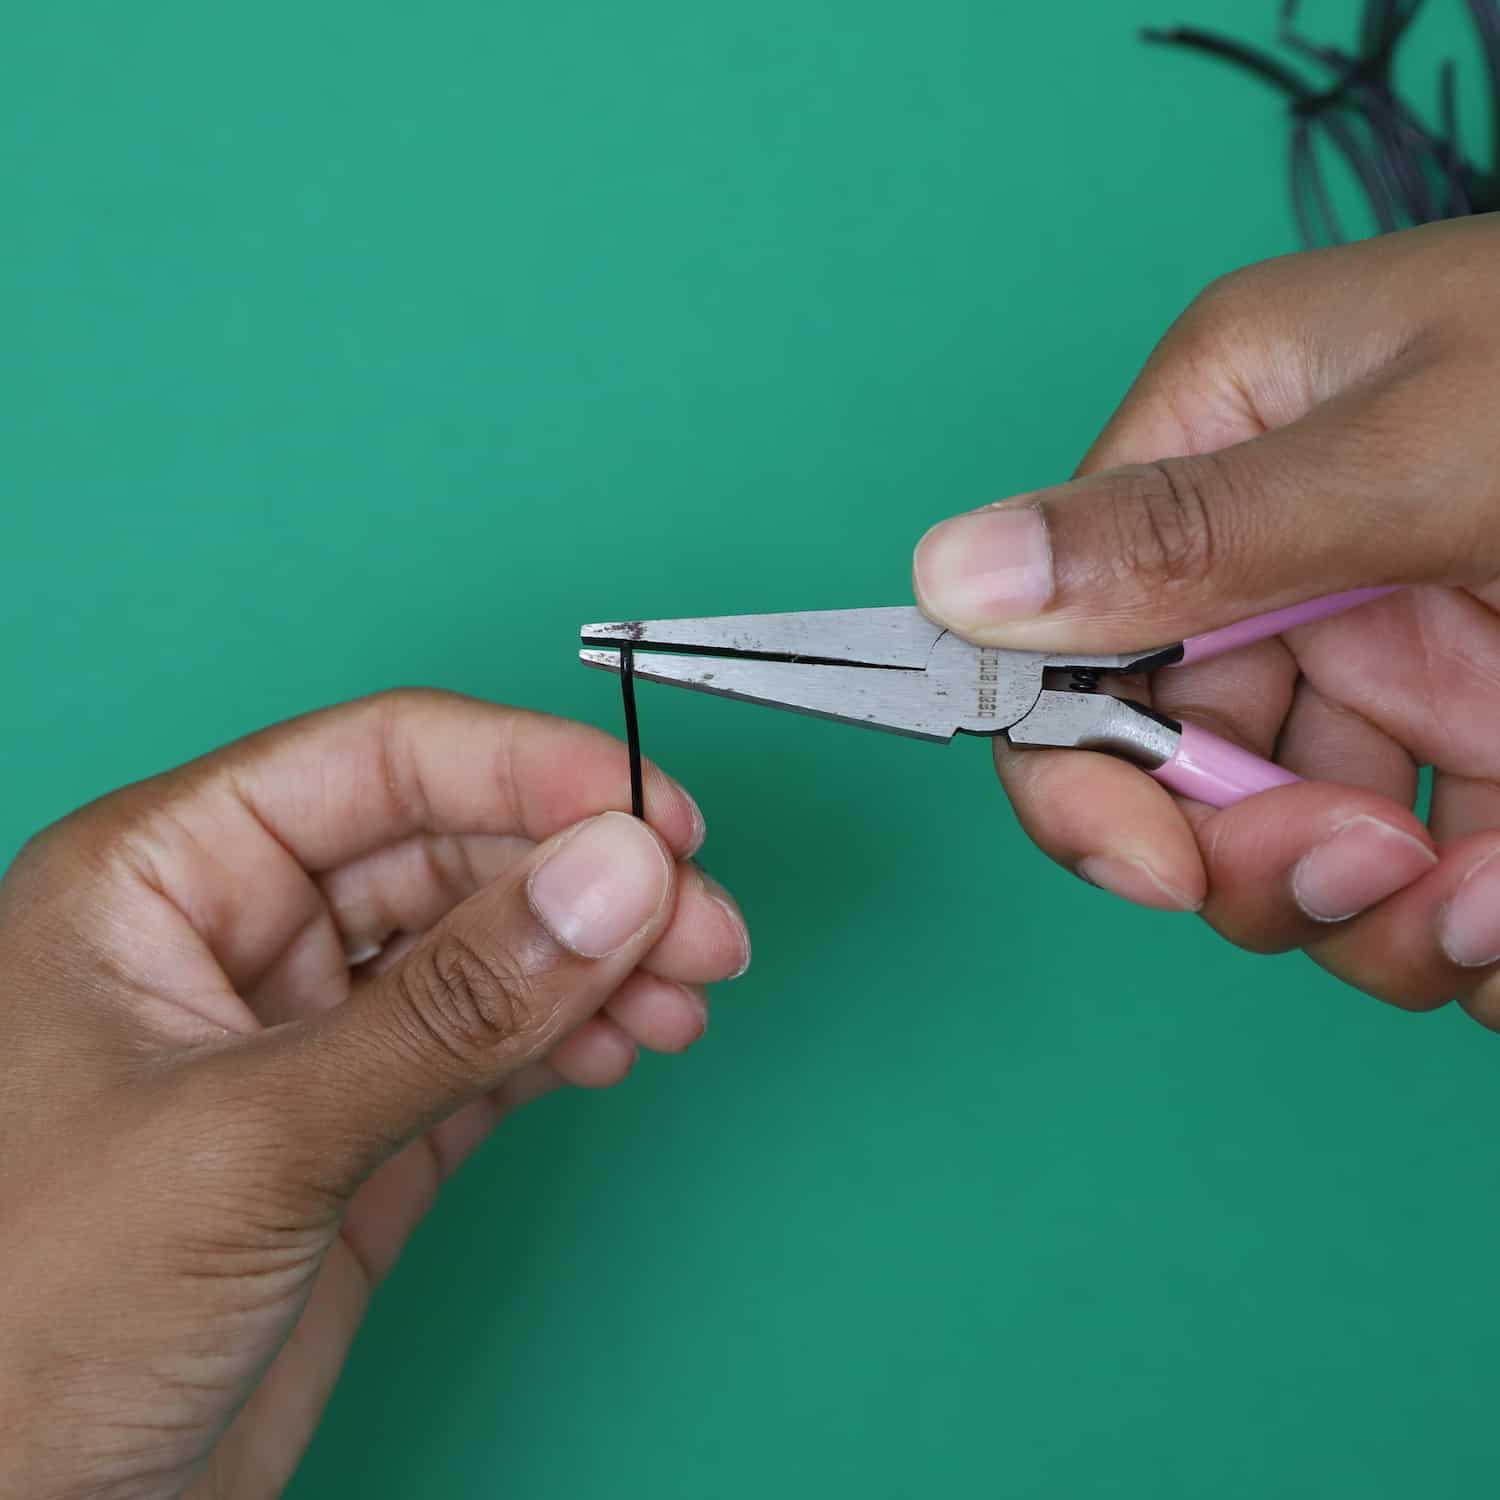
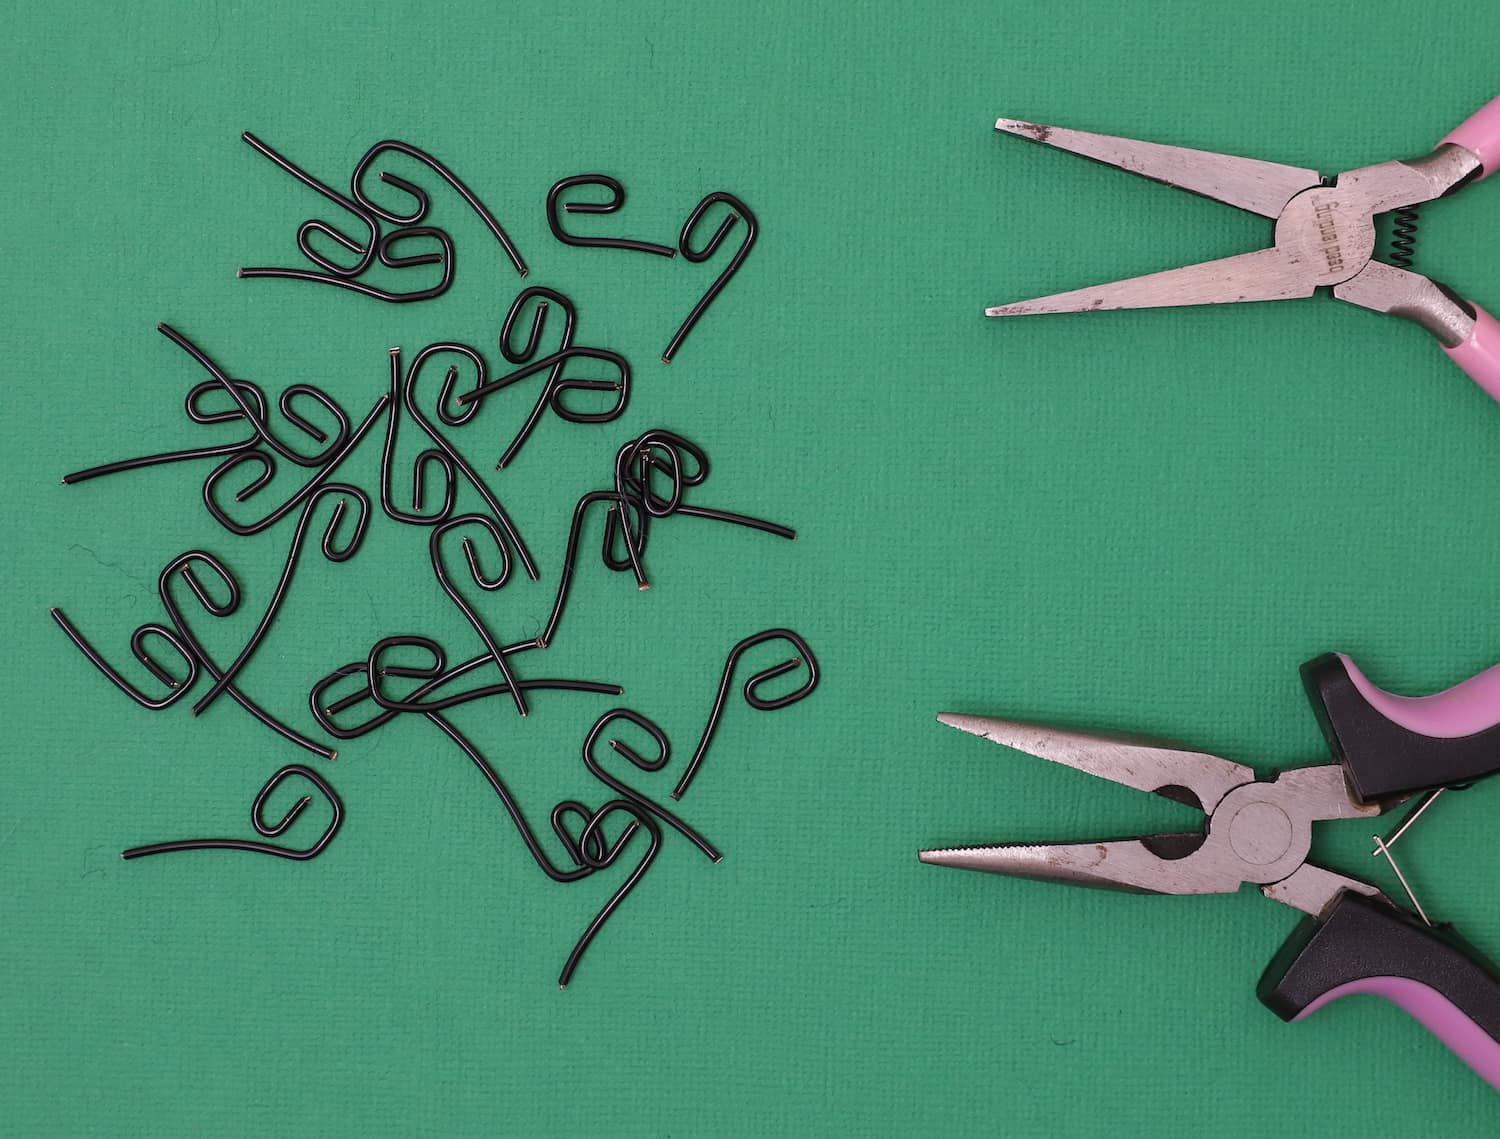
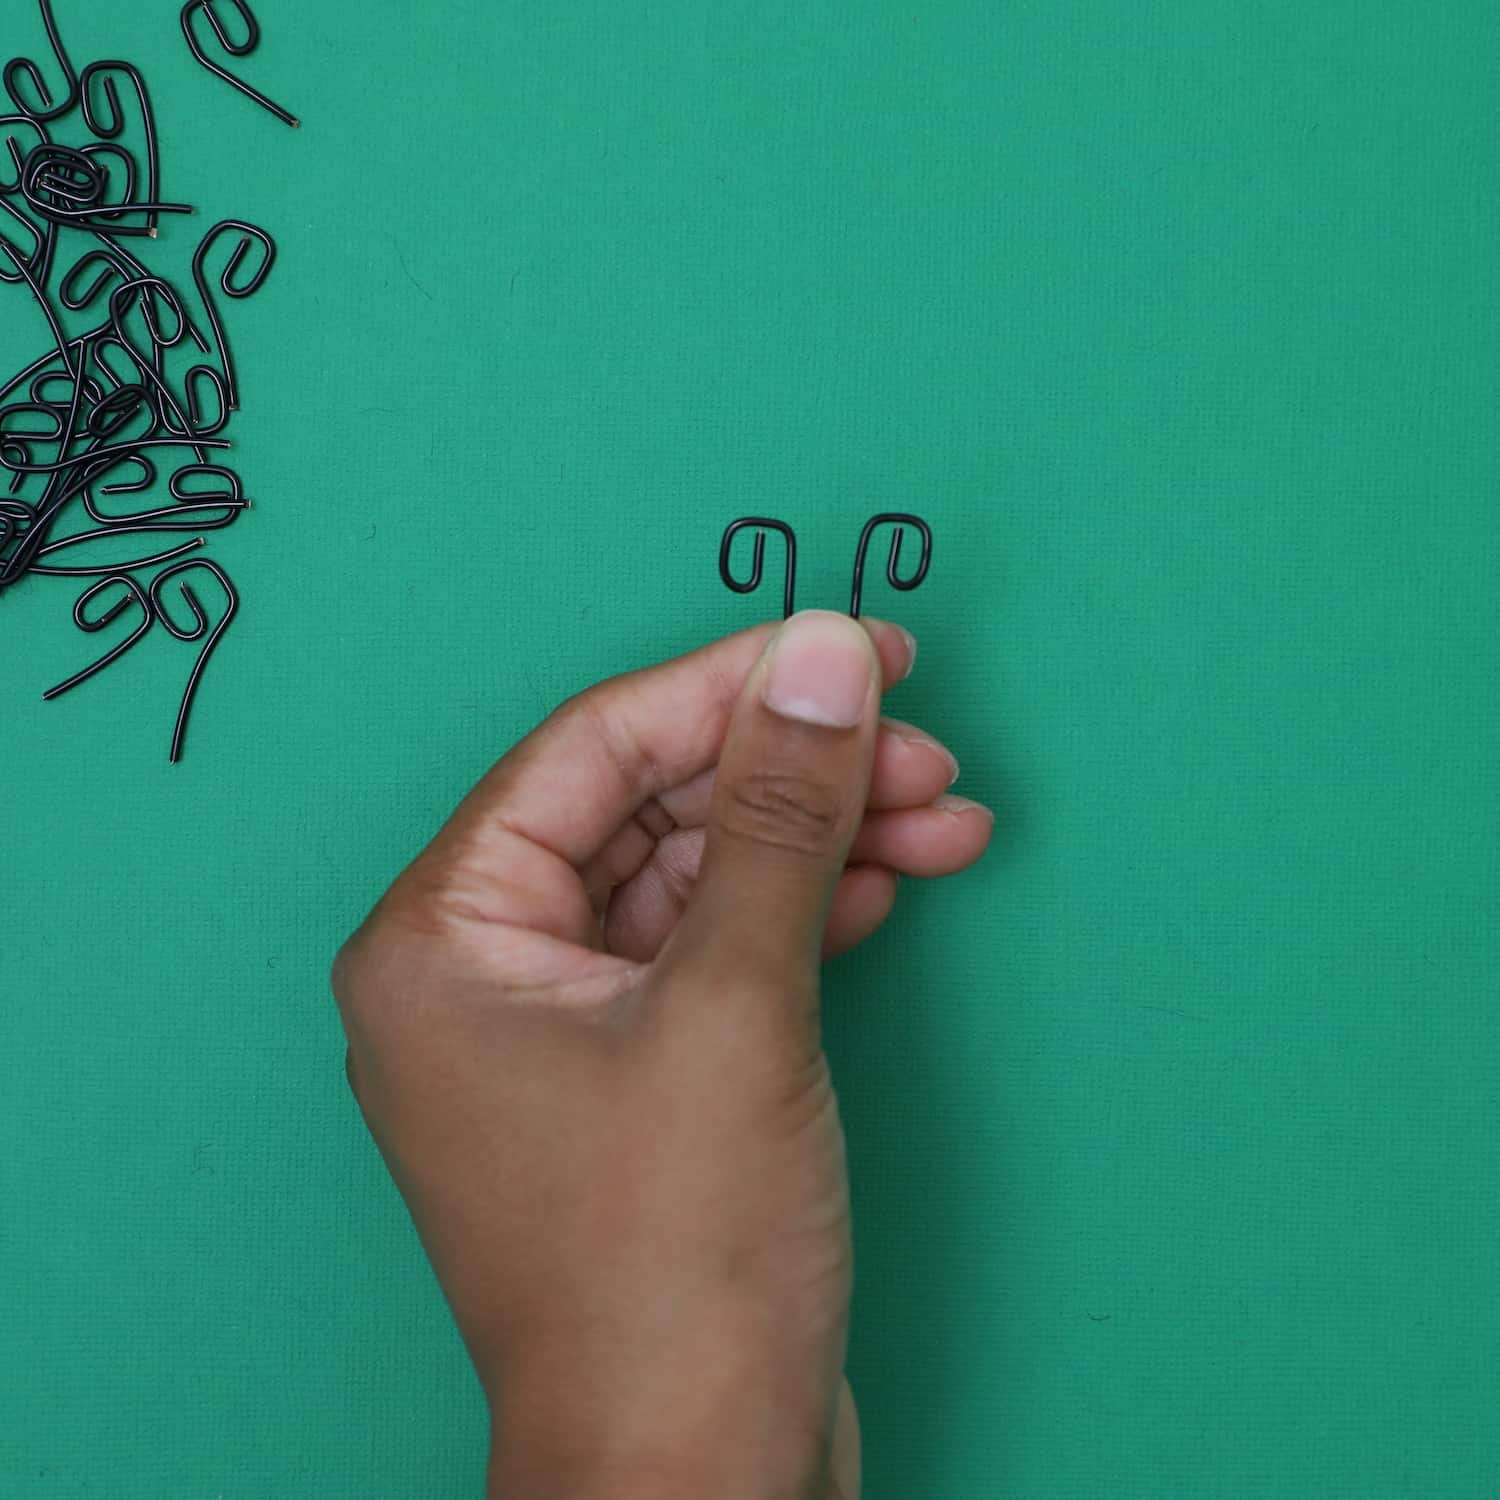
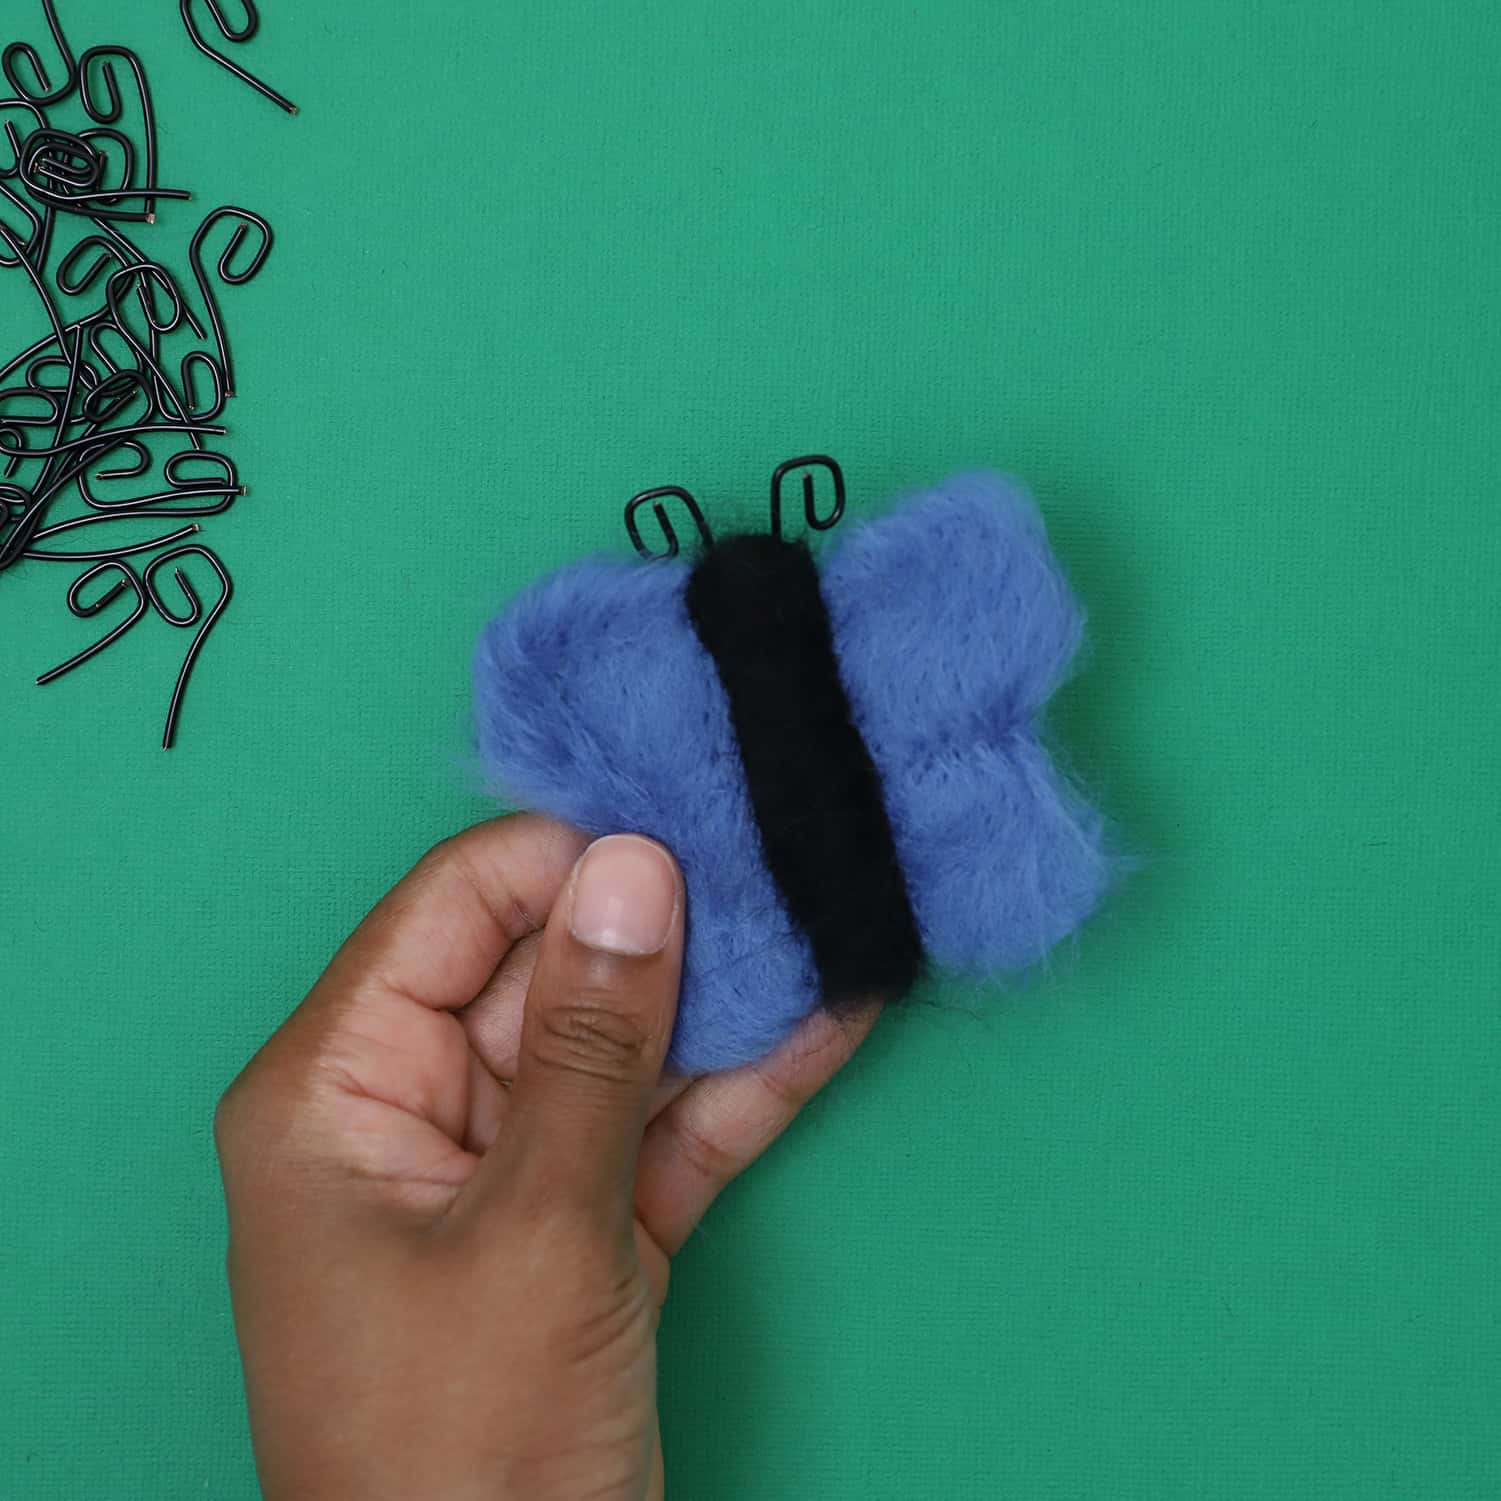
Step 6. Create the antennas with the black wire.
Cut the wire 2-2.5 inches with the jewelry nippers.
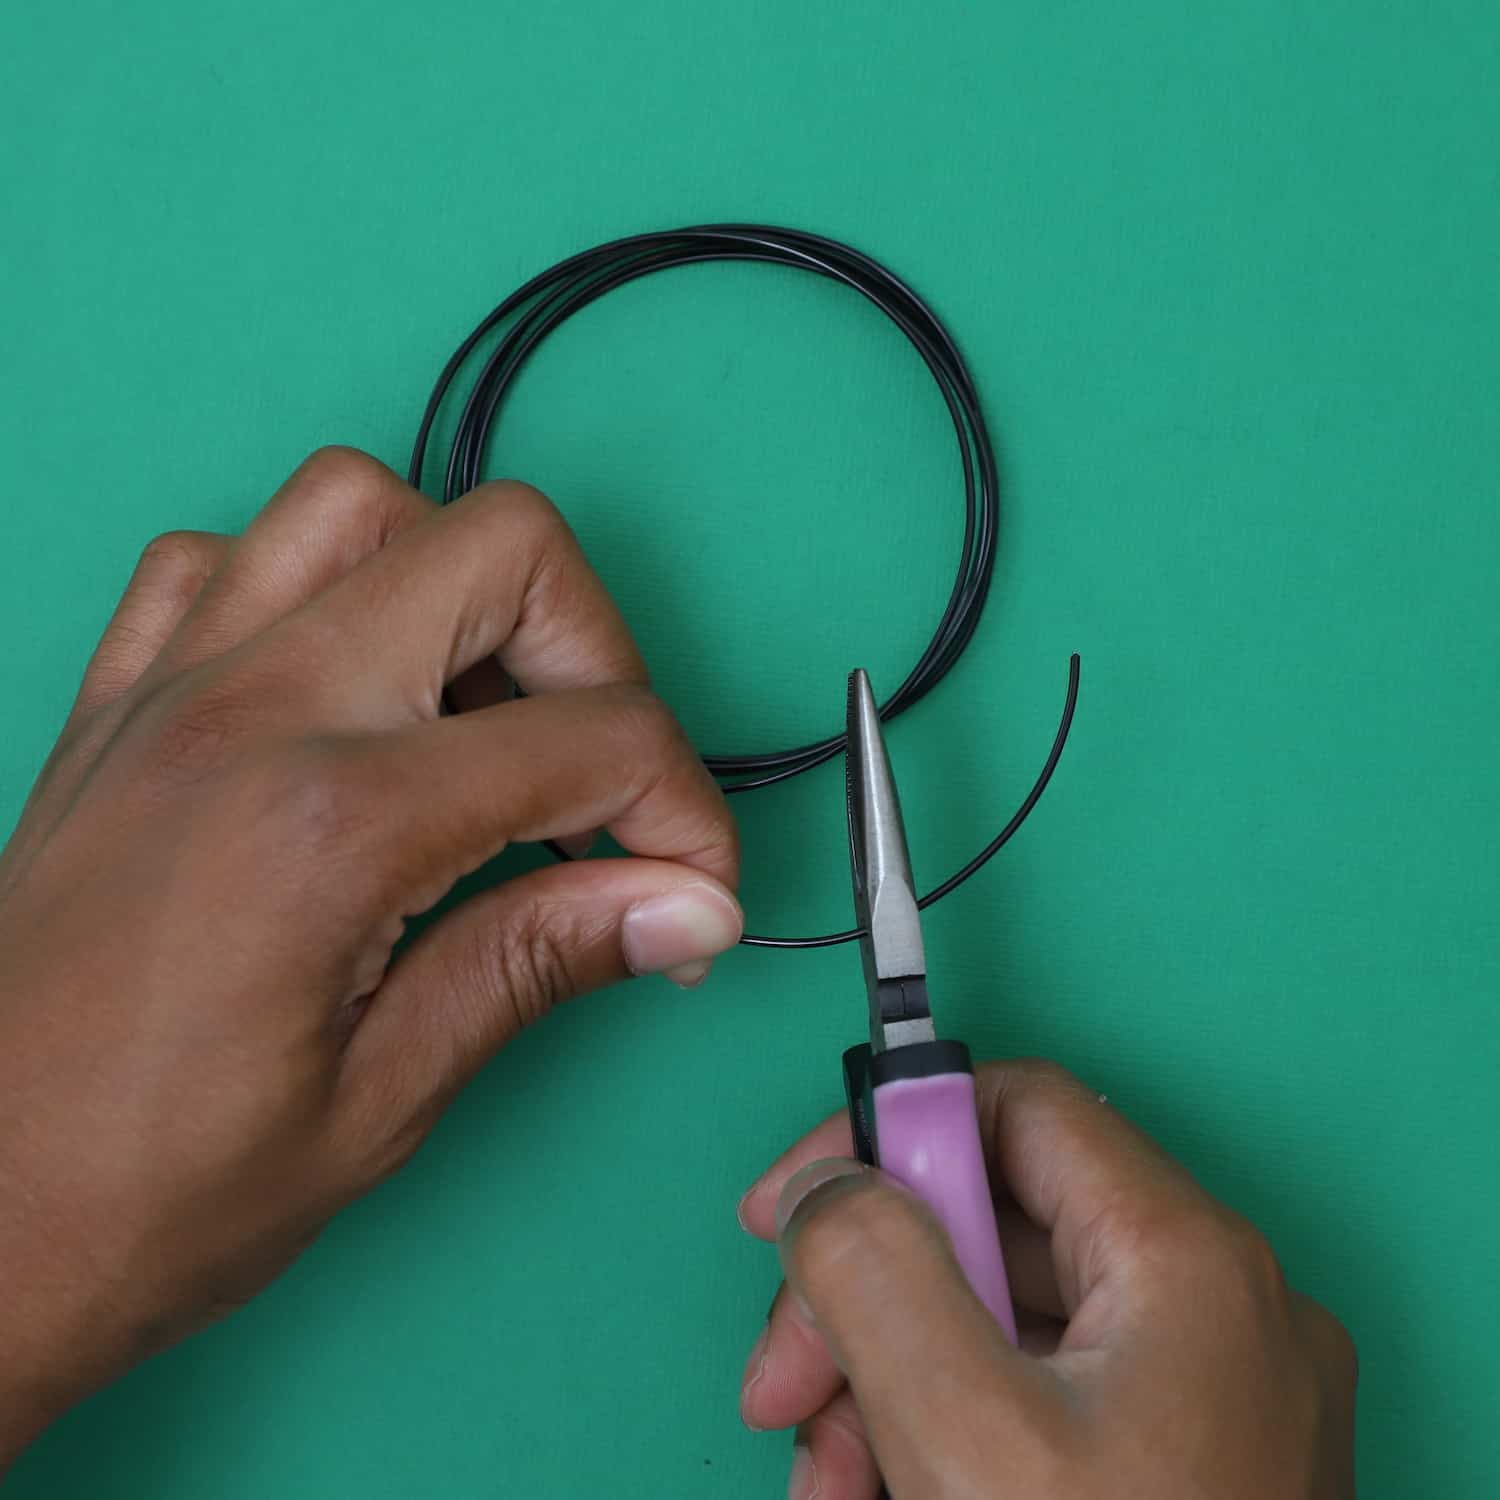
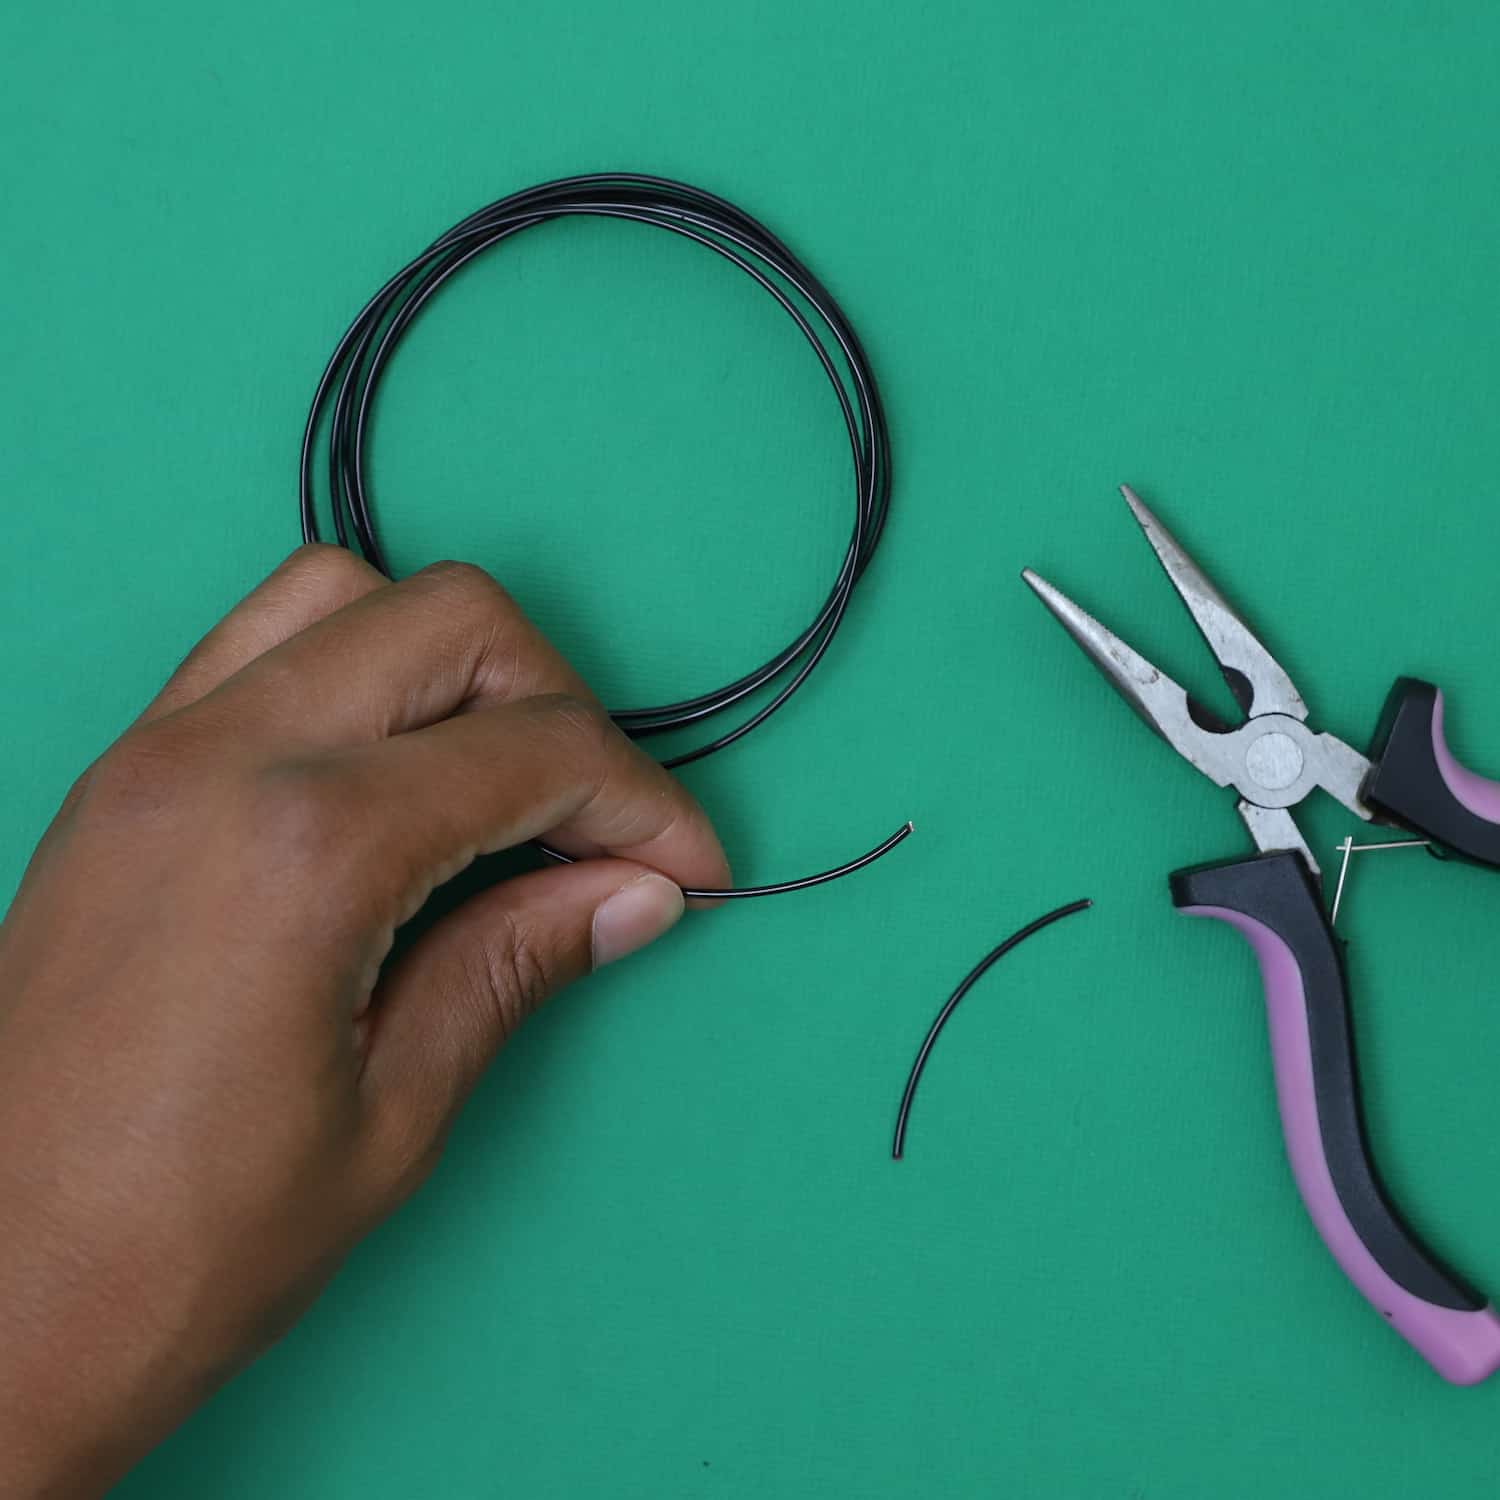
Grab the black wire with the tip of the flat-nose pliers, then twist the wire down 3 times to create the butterfly antennas.
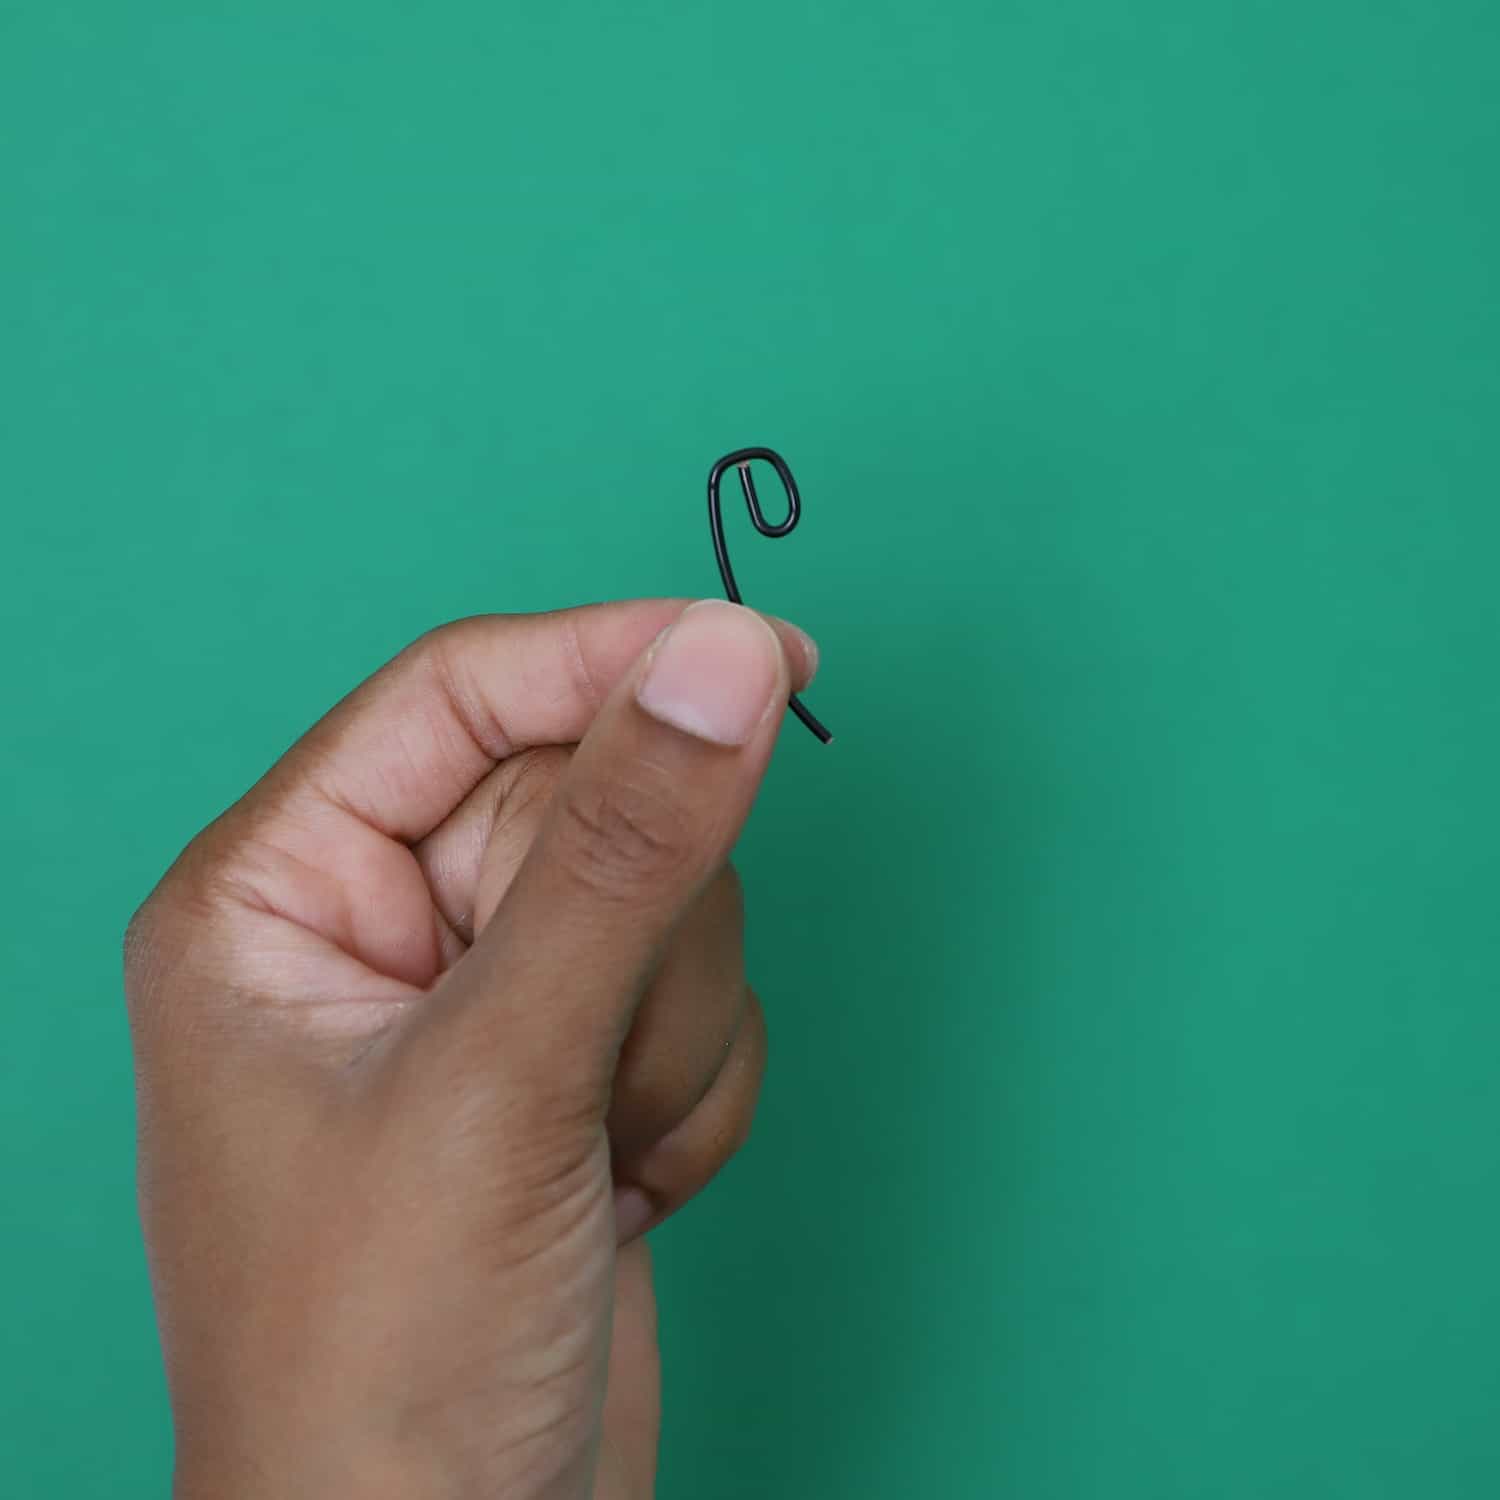
If you plan to stick 30 wool butterflies on your wall, you will need to create 60 antennas.
Safety Note: These butterflies should not be placed in areas that children can reach due to the wire. They can be hung outdoors as a wind chime or on a baby crib mobile without the wire.
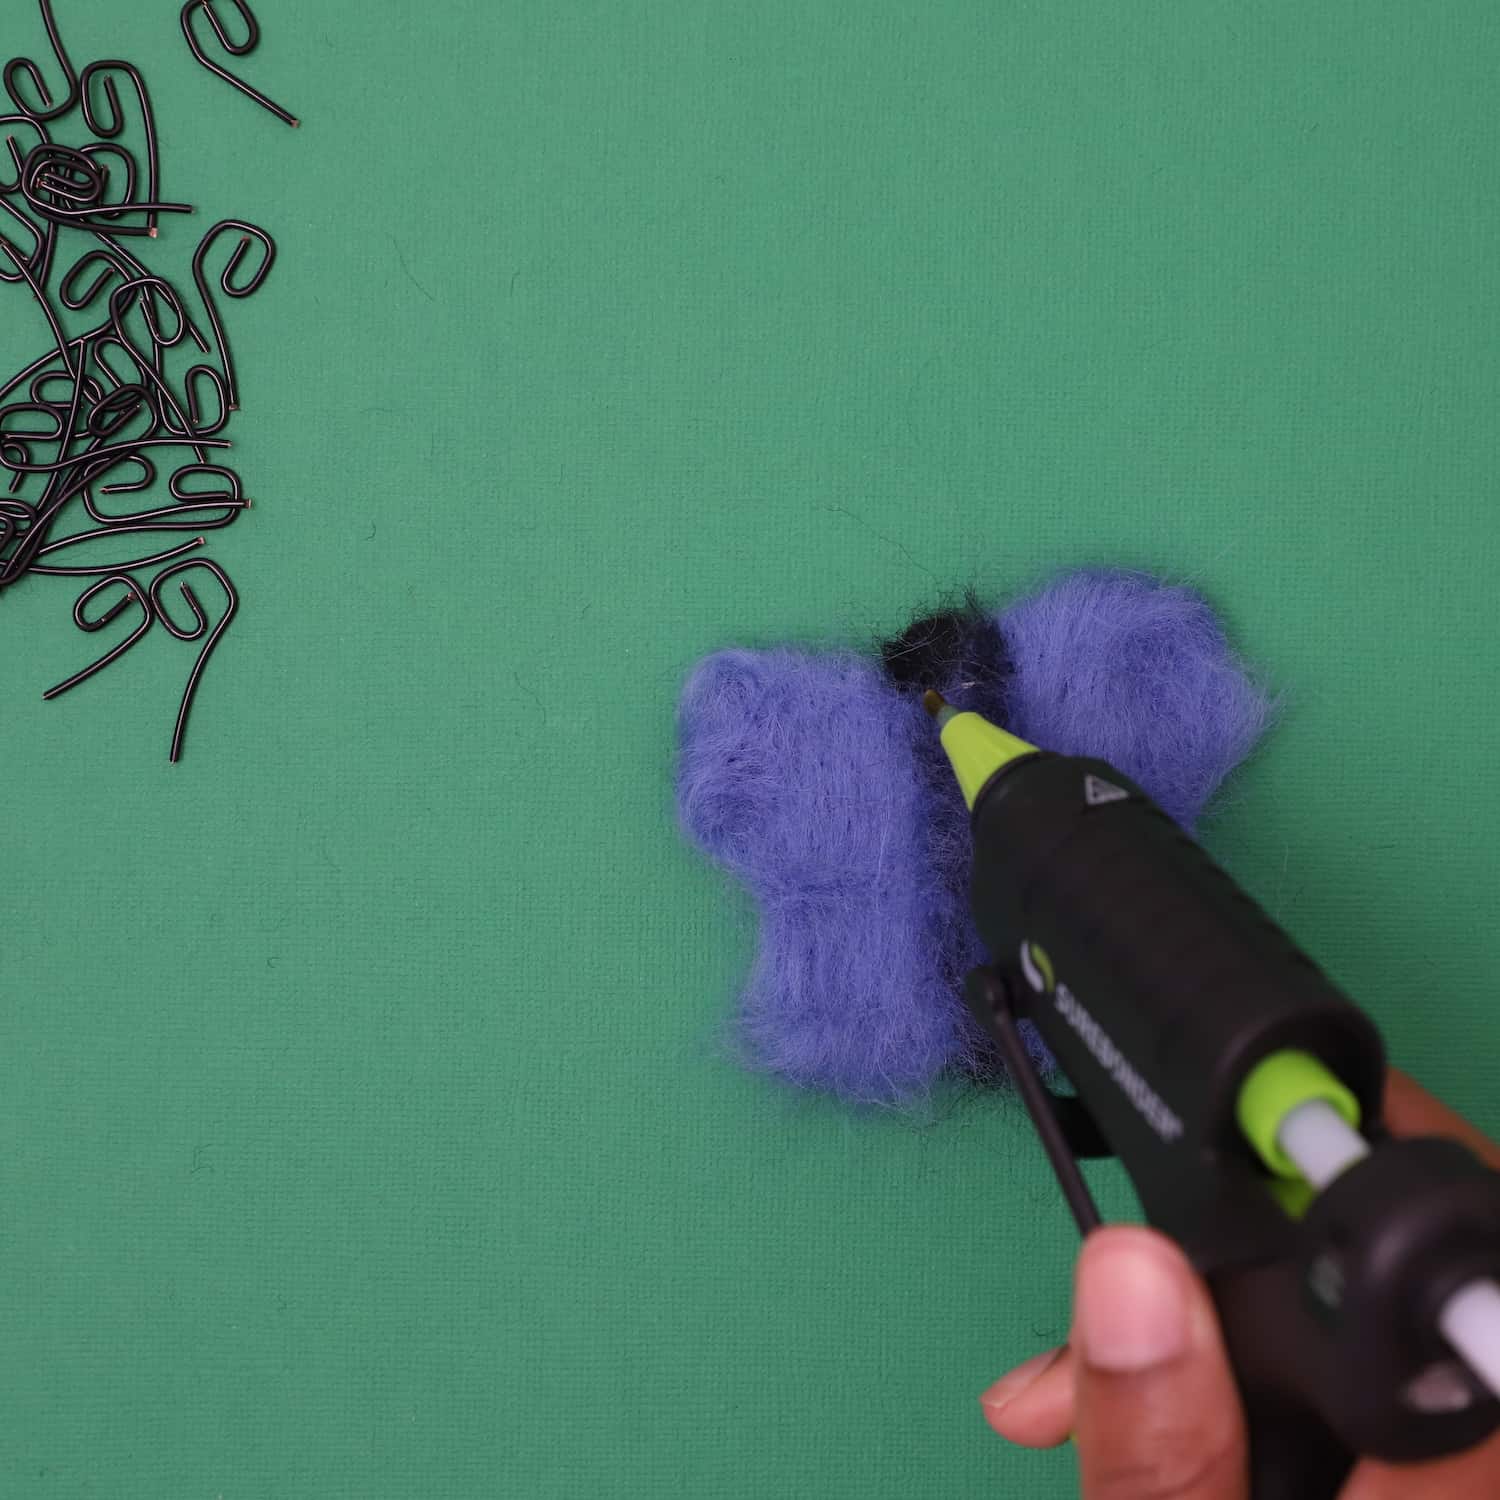
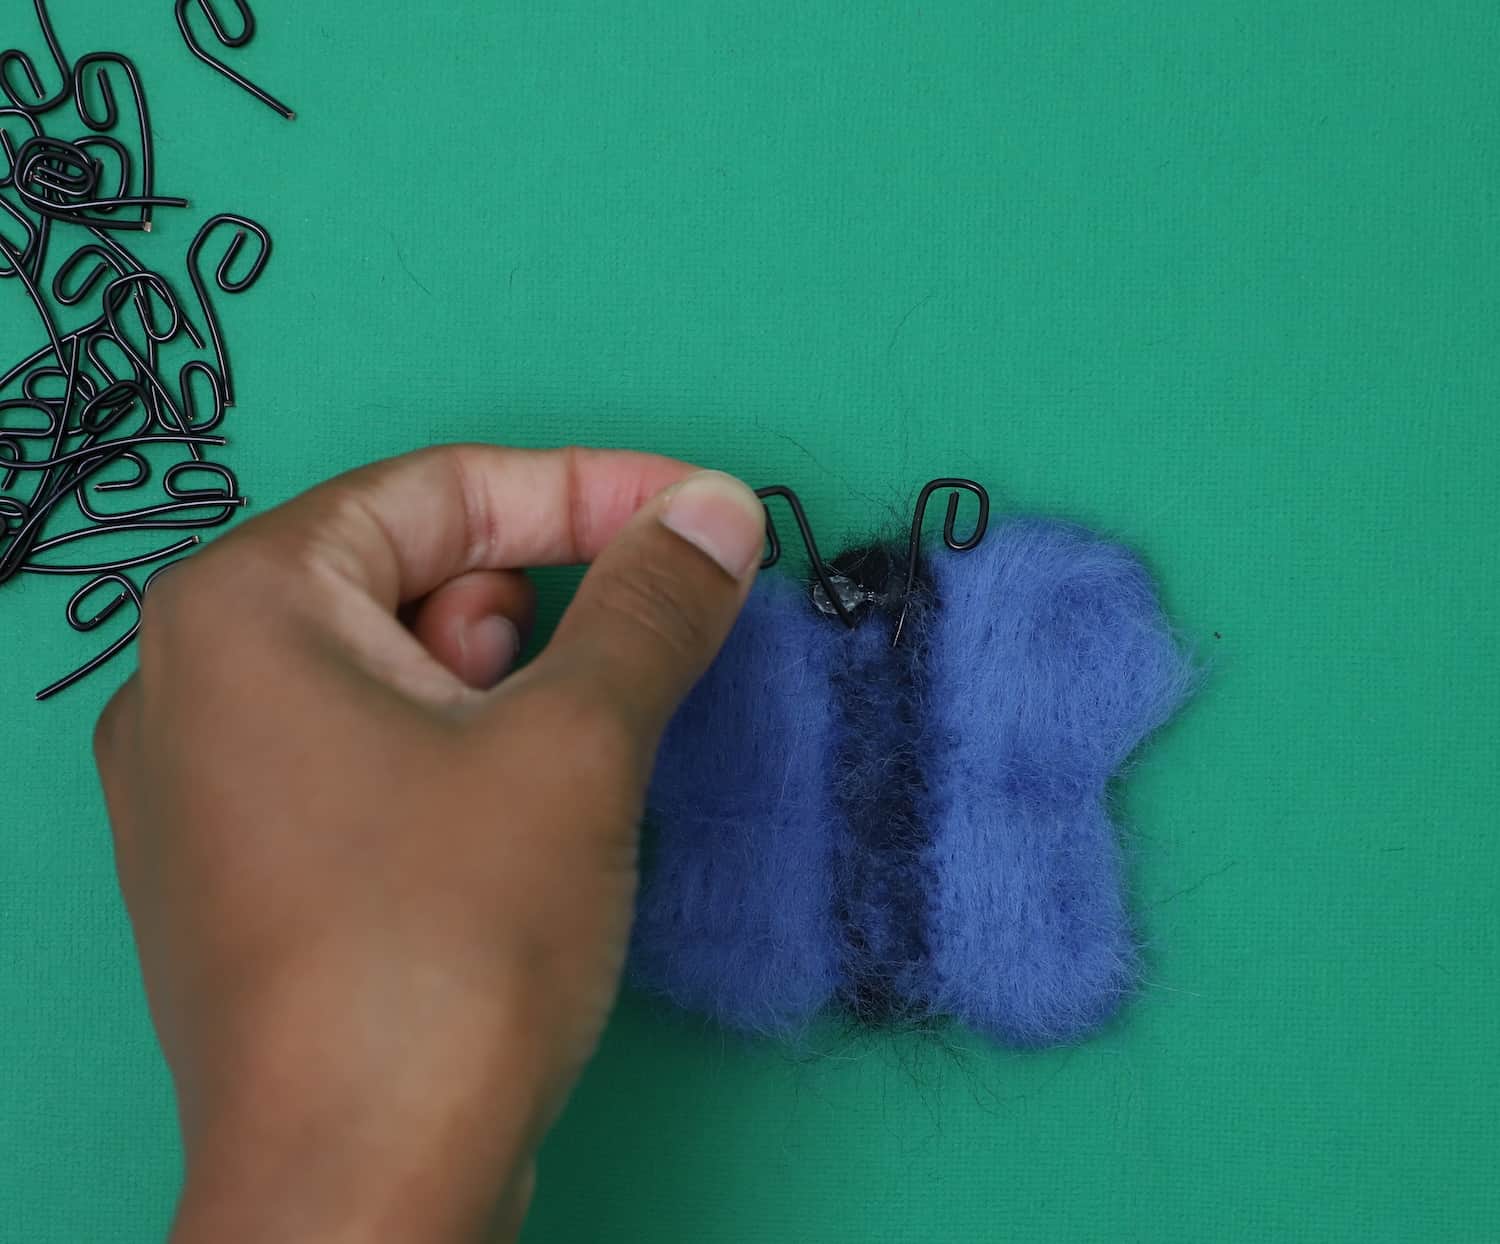
Step 7. Attach the antennas
Use a hot glue gun with a fine tip to add the antennas.
Quick Note: The wire will get hot once it comes in contact with the hot glue, so be sure to not touch the wire again until the glue has cooled.
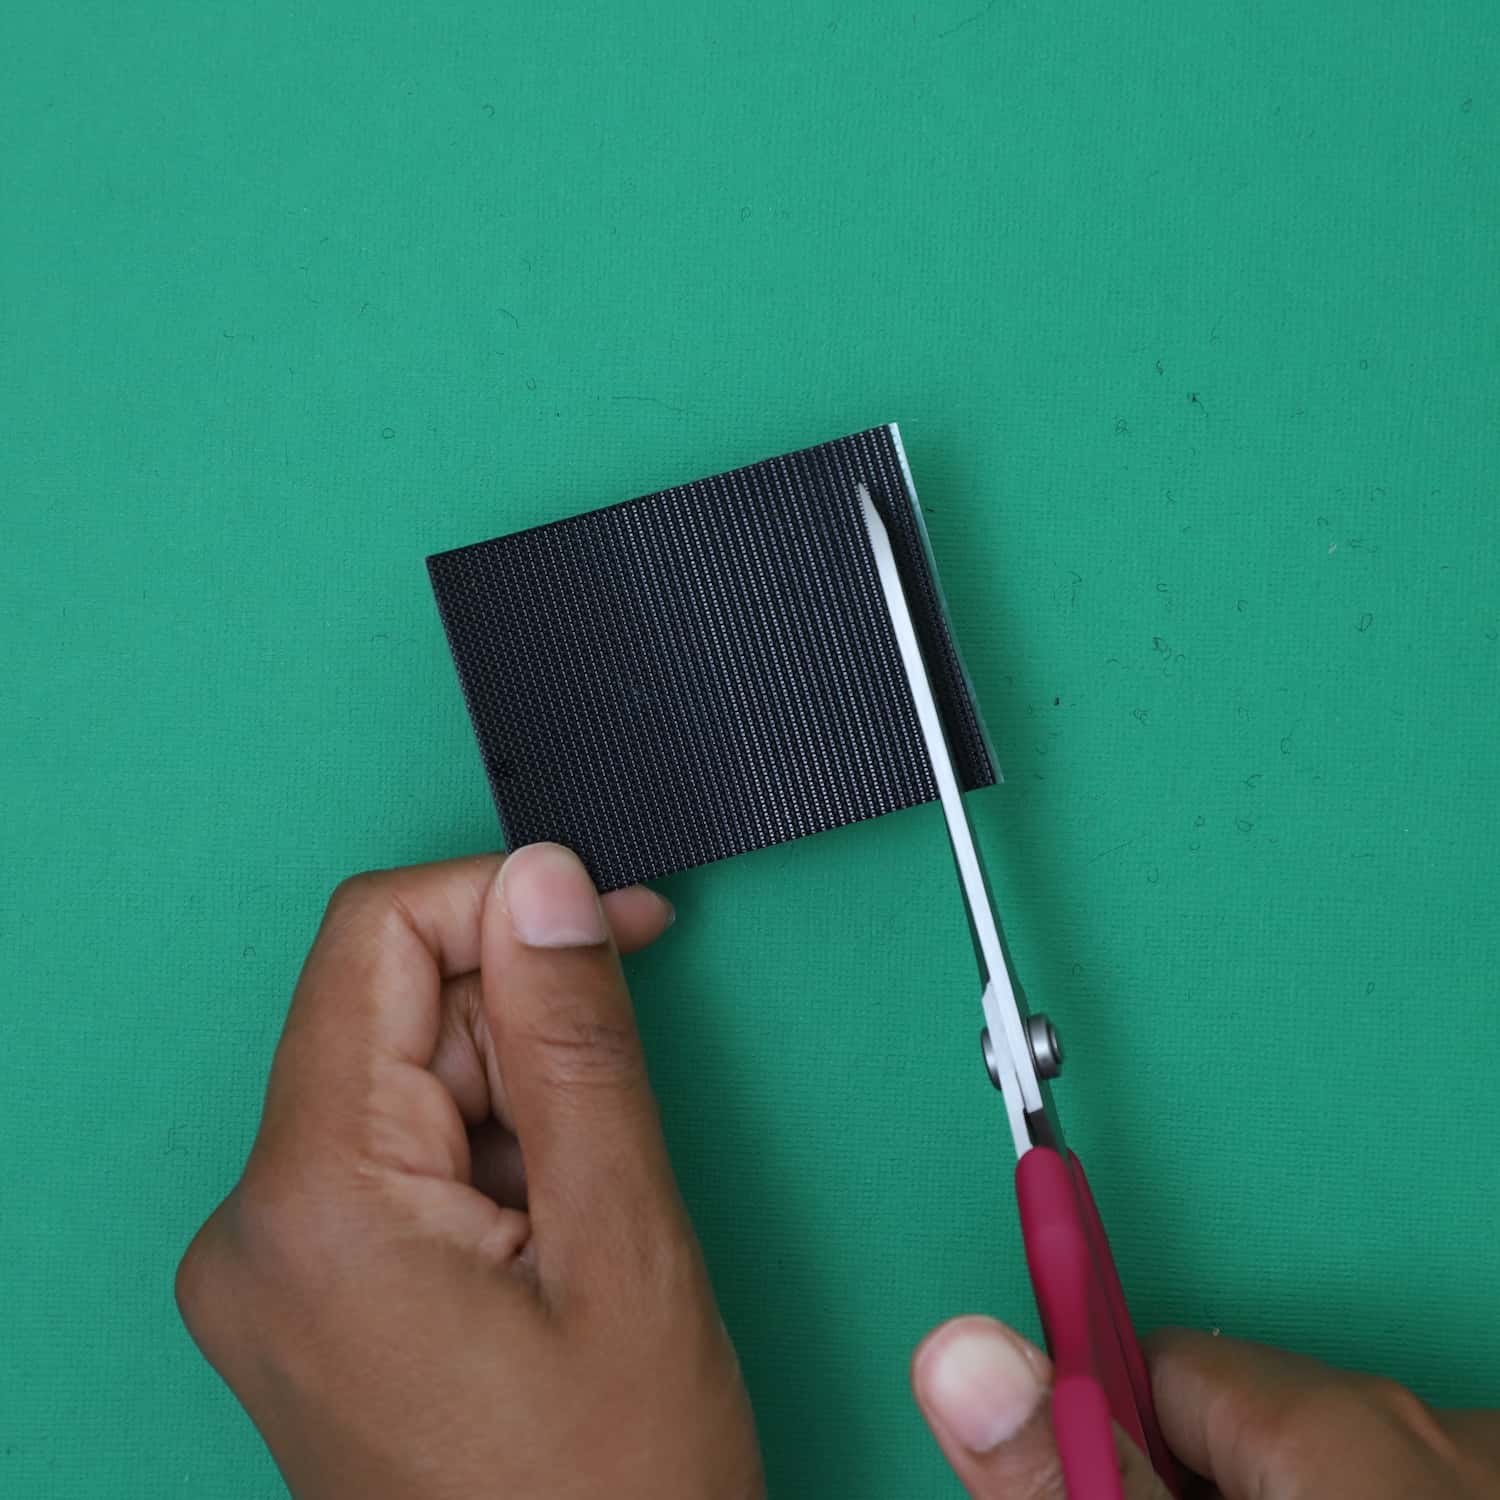
Step 8. Cut and attach the Adhesive Velcro
Cut the velcro using the Bordeaux Shears, then begin attaching it to the back of the butterflies.

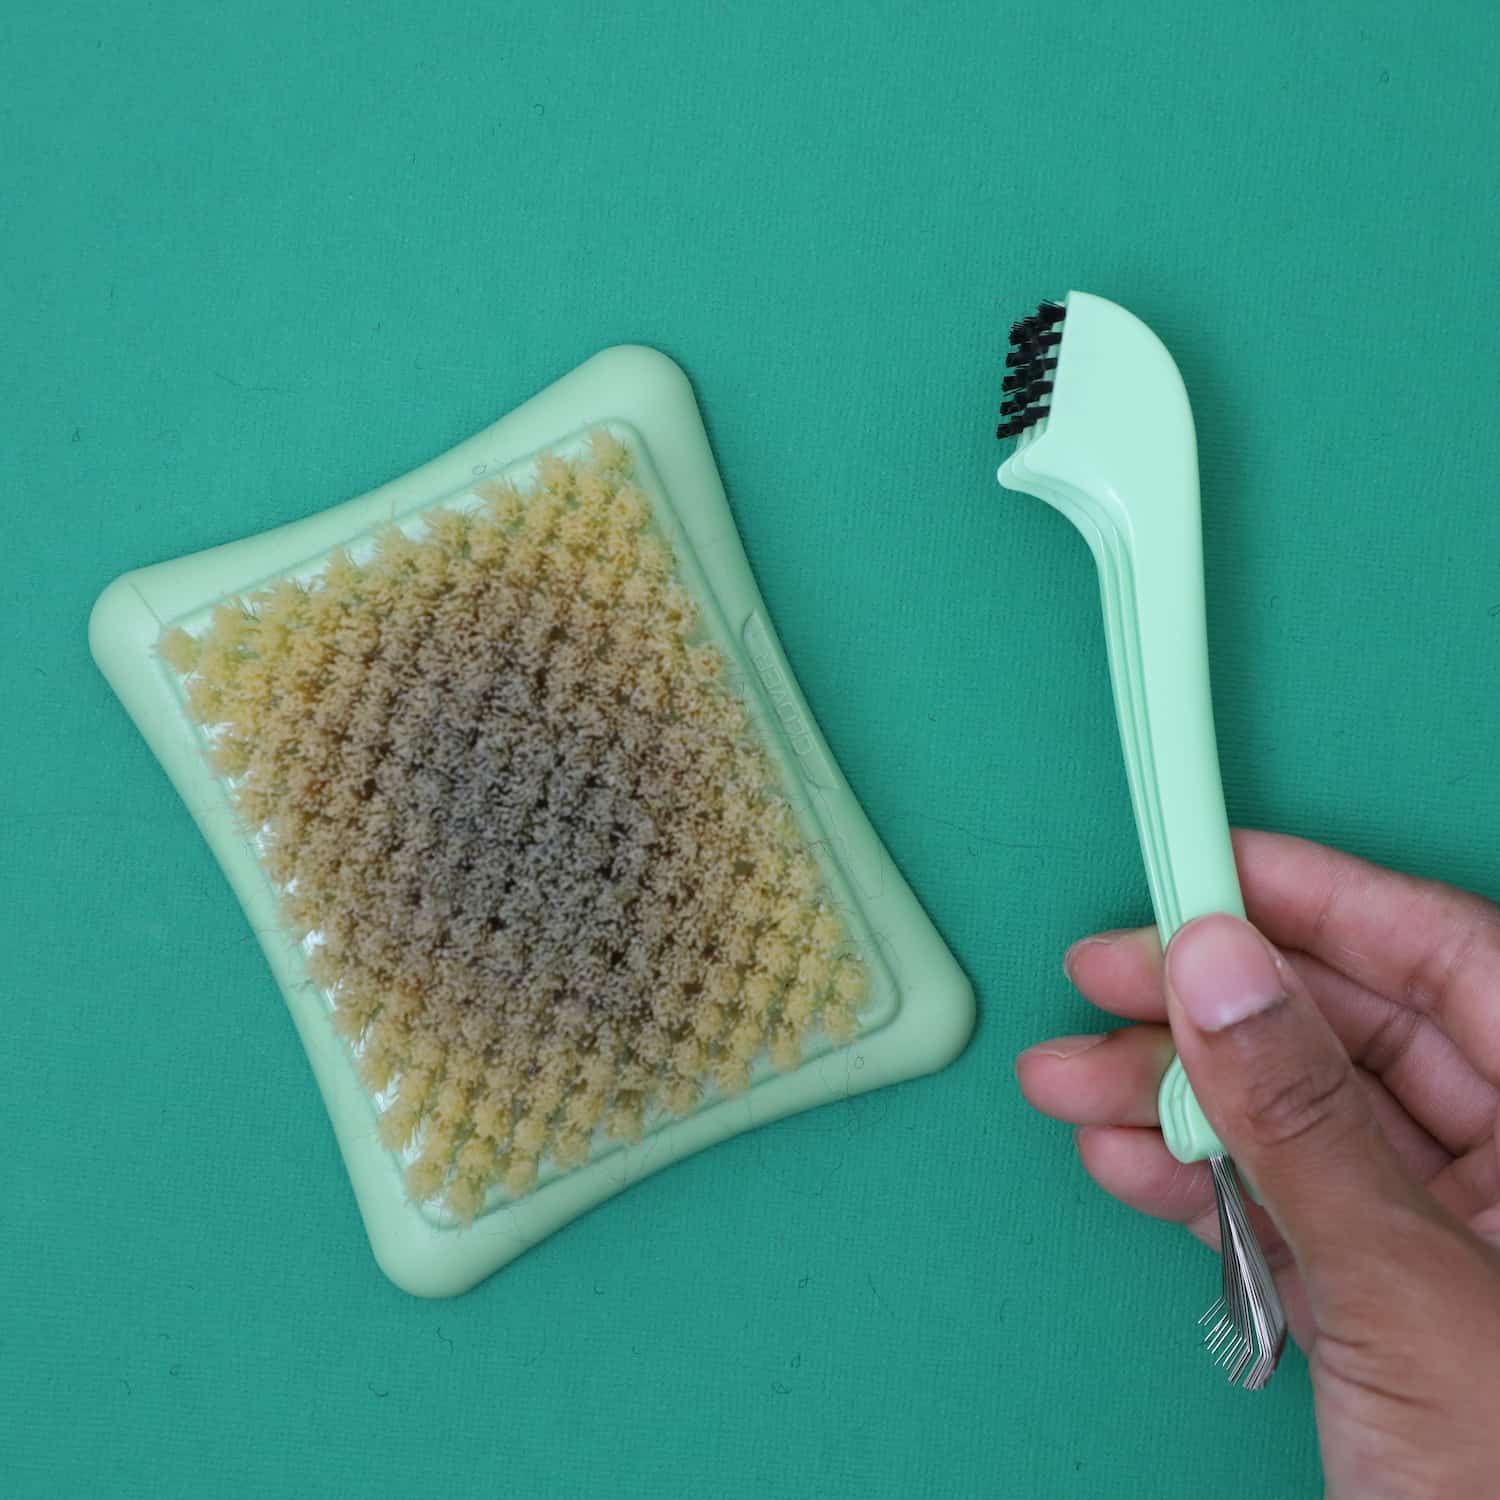
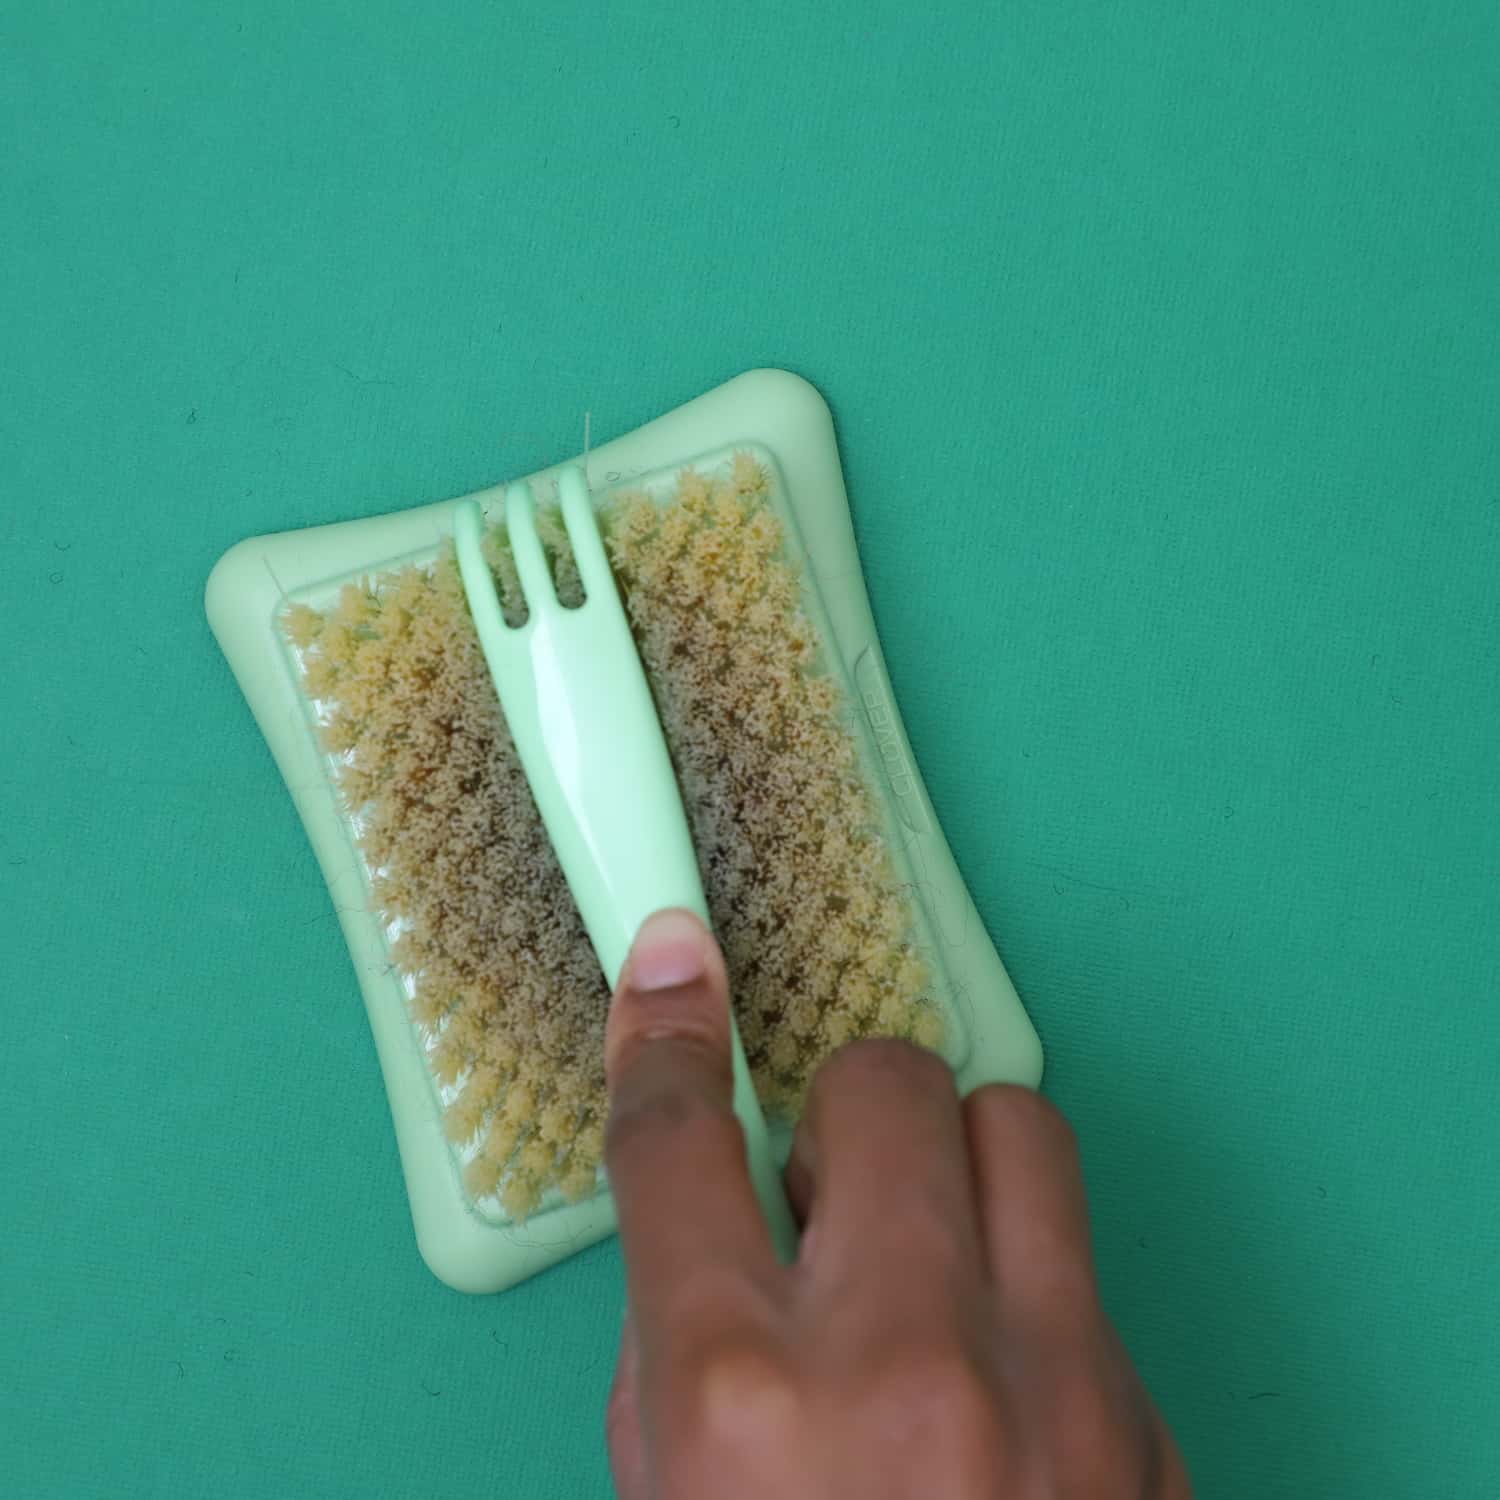
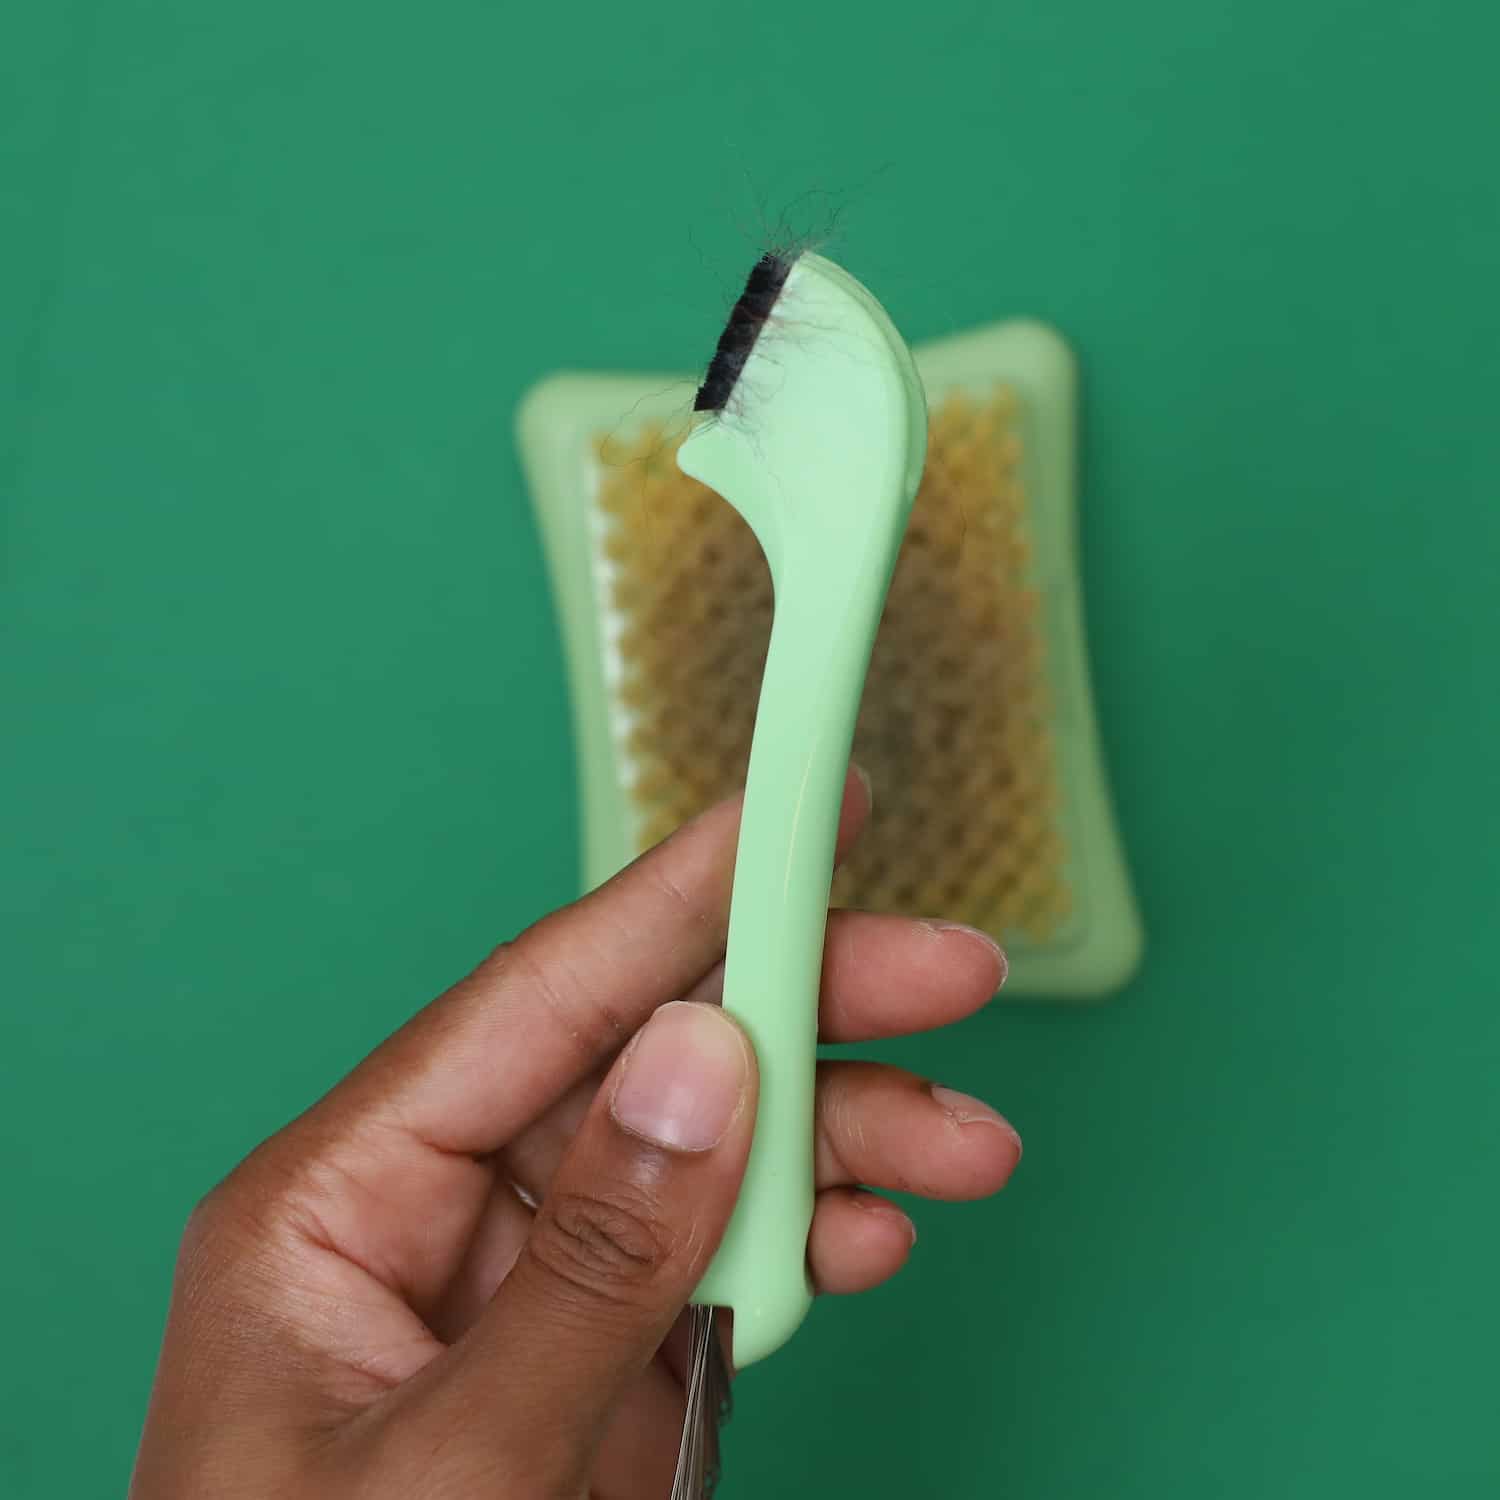
Step 9. Clean the Needle Brush Mat
Before putting your supplies after, use the Clover Claw and Mat Cleaner to remove wool from the brush mat. This tool can reach deep down into the mat to remove additional fibers.
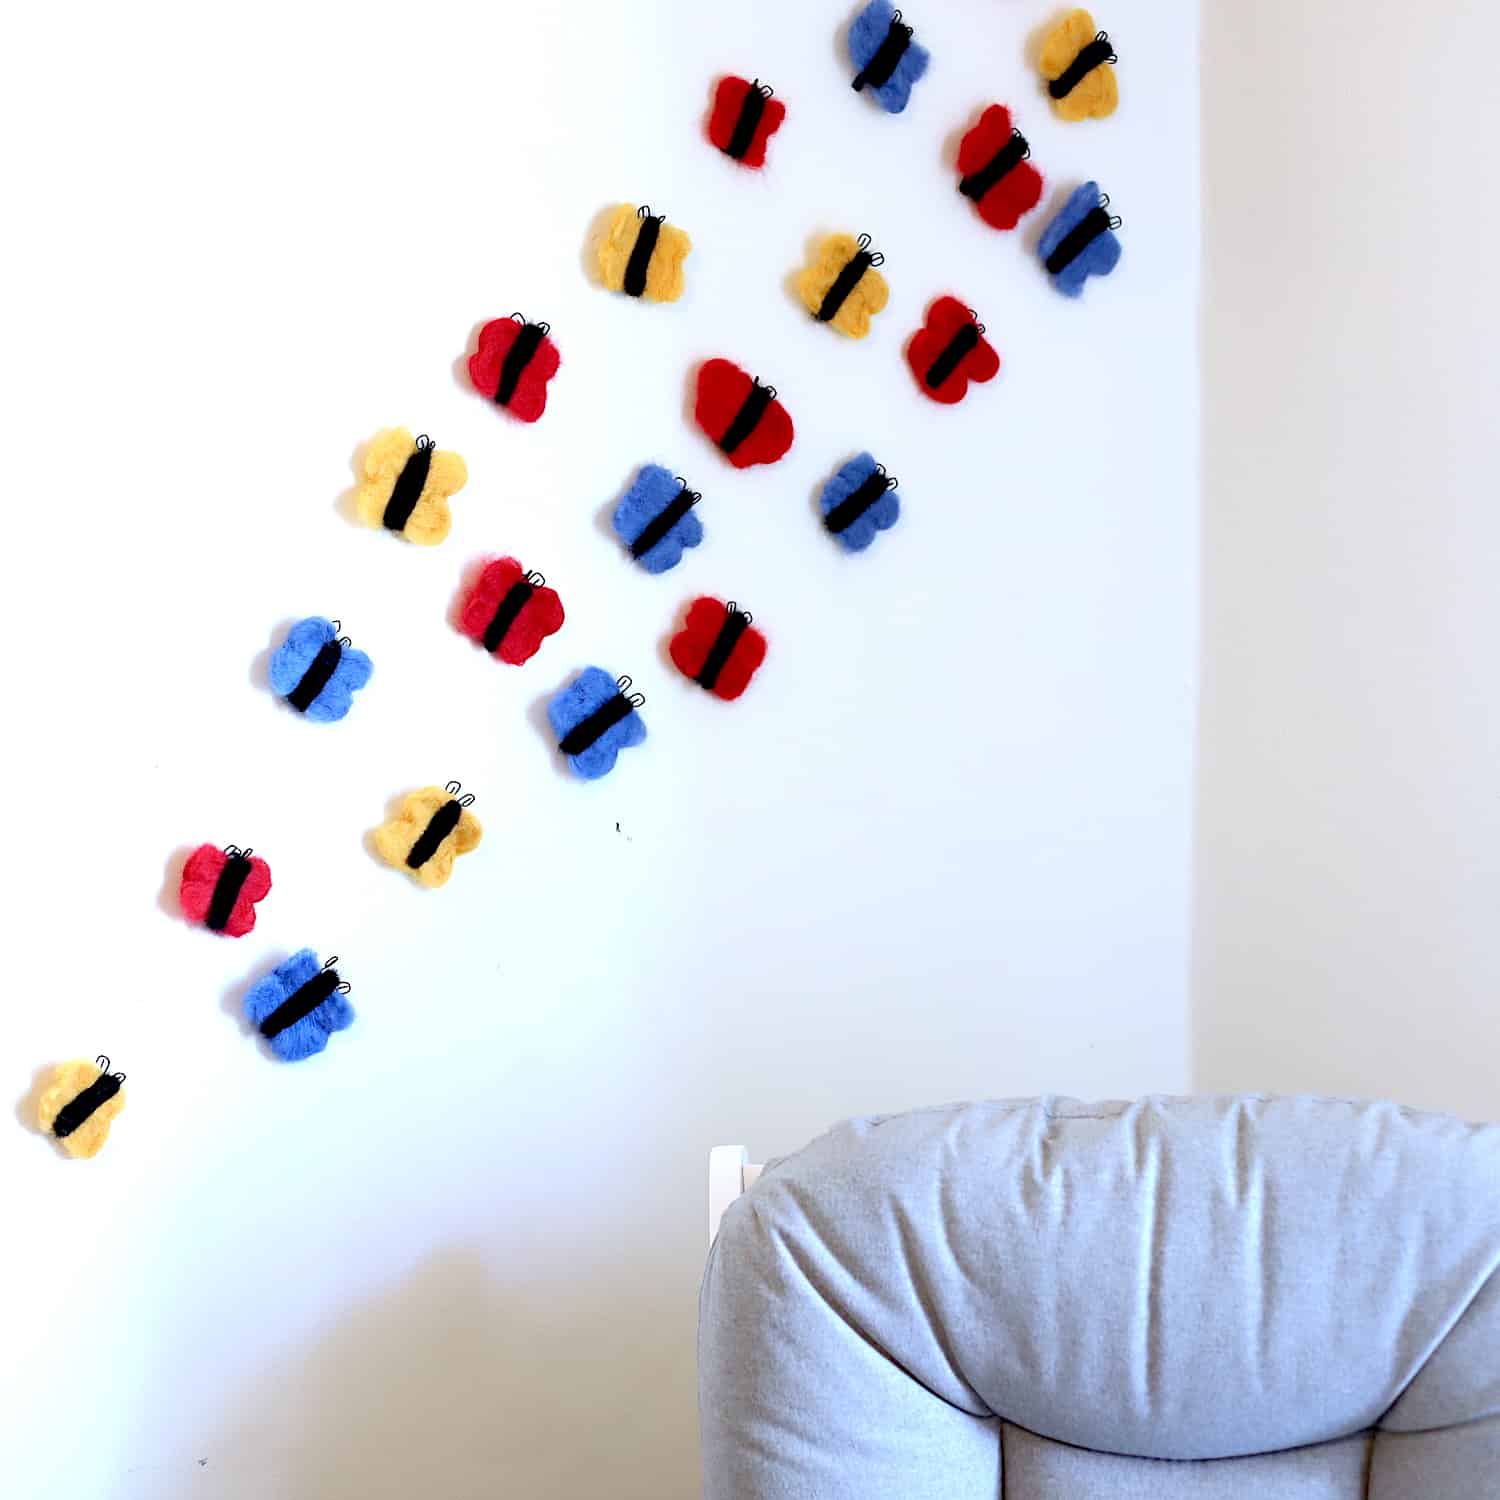
Step 10. Adhere the butterflies to the wall
Yay! We finished our wool butterflies. I like to use velcro because it adheres without lifting, but you can totally hang these butterflies instead of placing them on a wall.
I hope you enjoy creating these cute wool butterflies for your home! If you decide to make this project, be sure to take a picture and tag @cloverusa
Well, until next time, have a craftastic day!
-Danielle
Want to check out more of my blogs and tutorials? Here are my social links below!
Blog | Instagram | Facebook | Pinterest | YouTube
Stay connected with Clover on Facebook | Twitter | Instagram | Pinterest | YouTube | Ravelry