Flopsy the Bunny – Amigurumi Pattern

Hi everyone! I’m Julia from Little World of Whimsy, I’m so excited to be back on Clover’s blog and bring you a pattern just in time for Easter.
Flopsy the Bunny is an adorable Easter Bunny with a pastel pink dress that would match a couple Easter eggs perfectly! This adorable doll would be a perfect gift nestled among some chocolate bunnies and is sure to be a hit with children.

Skill level:
Amigurumi Beginner
Materials
- Clover Amour Crochet Hook D (3.25 mm) – Art. No 1042/D
- Drops Air [Color: (<1 ball) light pink (#8), (<1 ball) off white (#1)] Worsted weight, 65% alpaca
- Mini Patchworks Scissors – Art. No 493/CW
- Quick Locking Stitch Marker (Small) – Art. No 3030
- Darning Needle Set (Bent Tip) – Art. No 3121
- Sewing Pins – check out Clover’s pins
- 4.0mm Safety Eyes
- Fiberfill Stuffing
- Pink Embroidery Thread
Abbreviations
- ch: chain
- MR: magic ring
- sc: single crochet
- sc x: sc x number of times
- dec: decrease
- inc: increase
- sl st: slip stitch
- hdc: half double crochet
- dc: double crochet
- st(s): stitch(es)
- (x sts): x total stitches in round/row
- rnd: round
- FO: finish off
- sk: skip one stitch
- (…) x: repeat stitches within brackets x times
Finished Size
- 7″ x 2″
Technical Notes
- 1.Crochet in continuous spiral rounds, unless specified otherwise. Use a stitch marker or piece of yarn to keep track of the last stitch in each round.
- When filling with polyester stuffing, pull apart each large chunk into many smaller chunks. This ensures an even distribution of firmness within the amigurumi.
- Stuff the head and the body firmly at the openings so that the neck is stable upon completion.
- To avoid large holes in the crochet fabric, increase tension until the holes cannot be seen, or choose a crochet hook a size down.
- Use sewing pins to secure limbs of the amigurumi before you sew them.
- For this pattern, the MC is off white, and the CC is light pink.
The Pattern
LEGS
(in MC)
Round 1 6 sc in MR (6 sts)
Round 2 (2 sc, inc) x2 (8 sts)
Round 3-8 (6 rnds) sc around (8 sts)
Invisible finish off, and weave in the end. Stuff very lightly. Make another leg identically, but do not finish off.

BODY
(in CC)
Round 1 Beginning off the side of the leg you are working on, 8 sc around the other leg, then work 8 sc around the original leg (16 sts)
Round 2 In BLO, sc around (16 sts)
Round 3-6 (4 rnds) sc around (16 sts) Round 7 (2 sc, dec) x4 (12 sts)
Finish off, leaving a tail for sewing. Stuff.
DRESS
(in CC and in joined rounds. We will be working in round 2 of the body, into the horizontal bars left over from the BLO stitches)
Round 1 Attach yarn into the BLO stitch at the back of the body. Chain 1, then pick up single crochet stitches all around, slst into the first stitch. (16 sts)
Round 2 ch, hdc inc x16, slst (32 sts)
Round 3 ch, hdc inc x32, slst (64 sts)
Round 4 ch, hdc around, slst (64 sts)
Invisible finish off and weave in end.

HEAD
(in MC)
Round 1 6 sc in MR (6 sts)
Round 2 inc x6 (12 sts)
Round 3 (sc, inc) x6 (18 sts)
Round 4 (2 sc, inc) x6 (24 sts)
Round 5 (3 sc, inc) x6 (30 sts)
Round 6 (4 sc, inc) x6 (36 sts)
Round 7 (5 sc, inc) x6 (42 sts)
Round 8-13 (6 rnds) sc around (42 sts)
Insert 4mm safety eyes between rounds 11 and 12, 7 sts apart.
Round 14 (5 sc, dec) x6 (36 sts)
Round 15 sc around (36 sts)
Round 16 (4 sc, dec) x6 (30 sts)
Round 17 sc around (30 sts)
Round 18 (3 sc, dec) x6 (24 sts)
Round 19 sc around (24 sts)
Round 20 (2 sc, dec) x6 (18 sts) Stuff.
Round 21 (sc, dec) x6 (12 sts)
Round 22 dec x6 (6 sts)
Finish off, and weave in the end. Using the tail from the body, sew the head to the body.

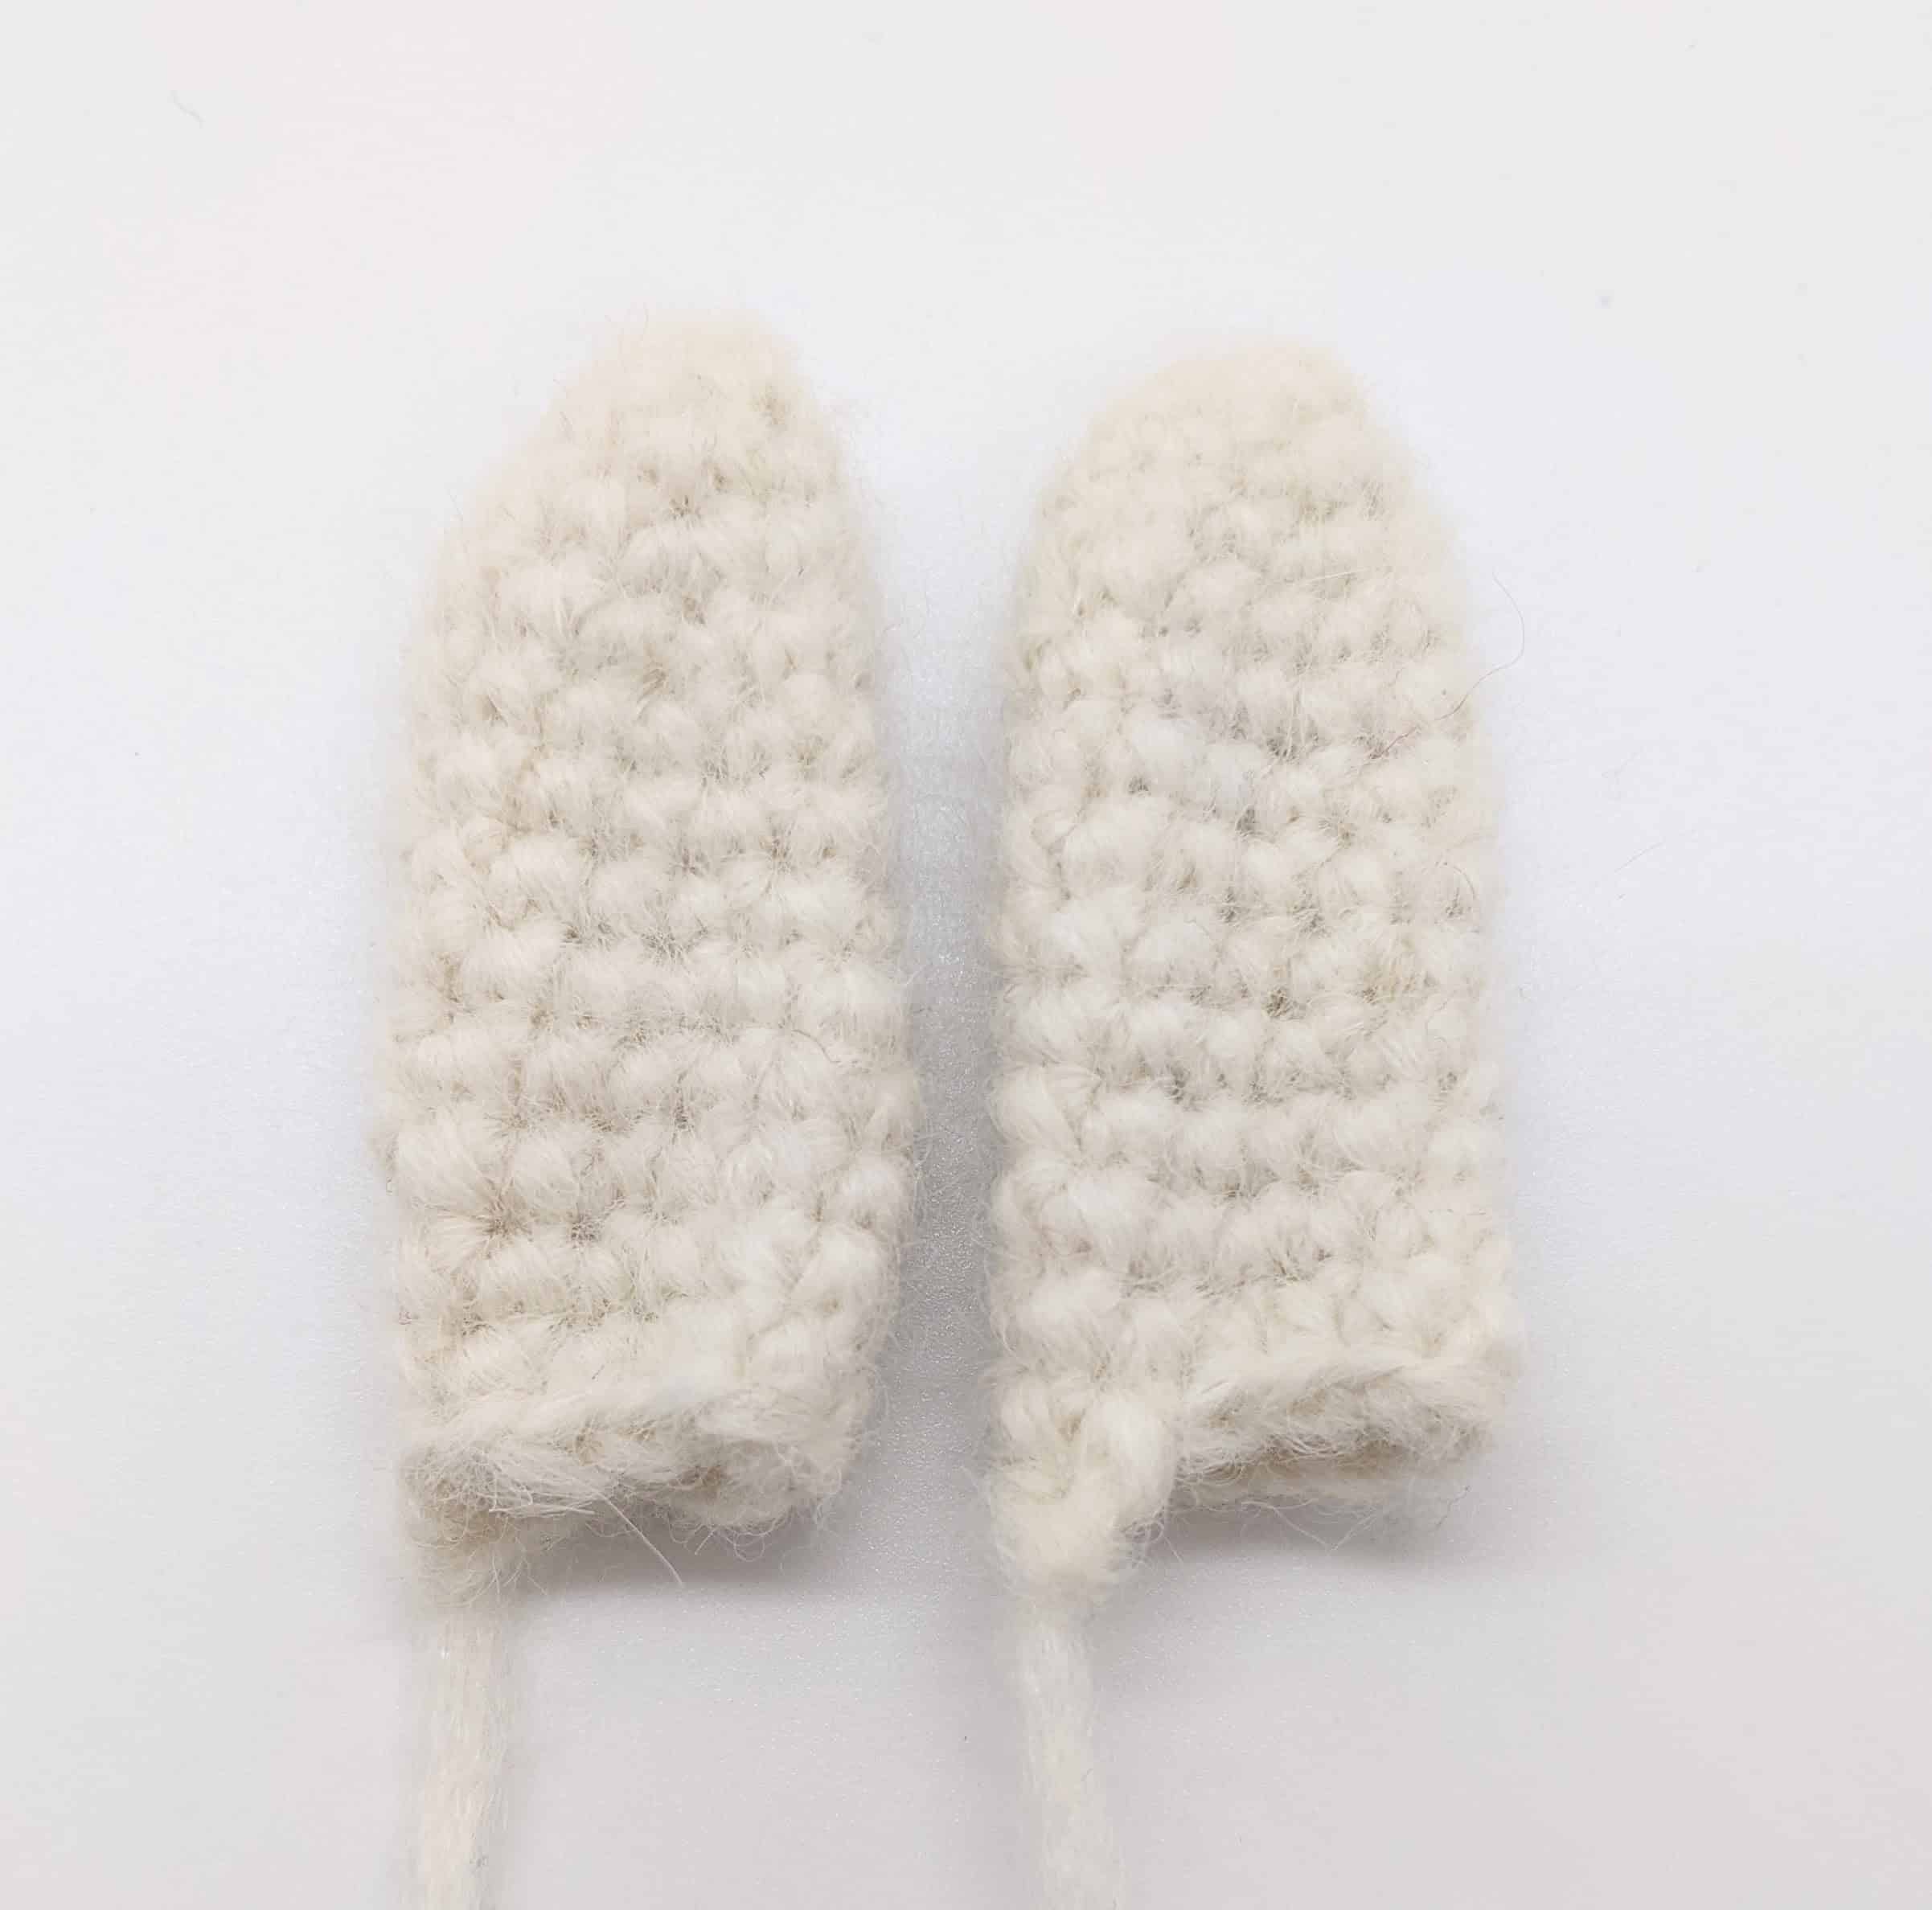
EARS
(in MC)
Round 1 6 sc in MR (6 sts)
Round 2 (sc, inc) x3 (9 sts)
Round 3 (2 sc, inc) x3 (12 sts)
Round 4-13 (10 rnds) sc around (12 sts)
Do not stuff. Finish off, leaving a long tail for sewing. Flatten the ear and seam the opening shut, and then fold the seamed side of the ear in half lengthwise and sew across to secure. Make another identically and sew to the left and right sides of the head, between rounds 3 and 4.
ARMS
(in MC, then CC. Begin with MC.)
Round 1 6 sc in MR (6 sts)
Round 2 (2 sc, inc) x2 (8 sts)
Round 3-5 (3 rnds) sc around (8 sts)
Round 6 (2 sc, dec) x2 (6 sts)
Round 7 Sc around (6 sts)
Switch to CC. Stuff very lightly using the tail end of the yarn. Round 9-10 (2 rnds) Sc around (6 sts)
Finish off, leaving a tail for sewing. Make another identically. Sew the arms to the left and right side of the body, at the seam between the head and the body.

ASSEMBLY
Using pink embroidery thread, embroider a small x directly between the eyes, between rounds 13 and 14.
![]()
Flopsy the Bunny is all done!

I hope you enjoyed crocheting him and found the pattern helpful. I would love to see your finished amigurumi, so share a picture on Instagram with me by using the #littleworldofwhimsy and tagging me @littleworldofwhimsy.
This pattern is free but if you’d like to purchase a low-cost PDF, you can find it here.
Once again, if you have any questions don’t hesitate to reach out to me with a direct message on Instagram @littleworldofwhimsy or through email at littleworldofwhimsy@gmail.com.
Happy crocheting!
Find Little World of Whimsy on her Blog | Instagram | Facebook | Pinterest | Etsy
Stay connected with Clover on Facebook | Twitter | Instagram | Pinterest | YouTube | Ravelry
[mc4wp_form id=”11289″]