Lunar New Year Lantern – Amigurumi Pattern
Hi everyone! I’m Julia from Little World of Whimsy, and I’m here to share a cute lantern pattern just in time for Lunar New Year!
This simple and elegant Lunar New Year Lantern is a beautiful homage to the traditional lanterns you can find in Chinatown or other centers for Asian culture. As an Asian American person, this lantern brings me a sense of nostalgia and warmth, so I hope you love it as much as I do! You can get the inexpensive, beautifully formatted, printable PDF on Etsy here.

This project has a very simple construction, consisting of a central ball shape with two extra caps sewn on at the end. There is also a tassel attached to the bottom, which I made using Clover’s easy and convenient tassel maker. Click here for a quick tutorial on how to use it. You can customize the tassel to any size you like using this tool!

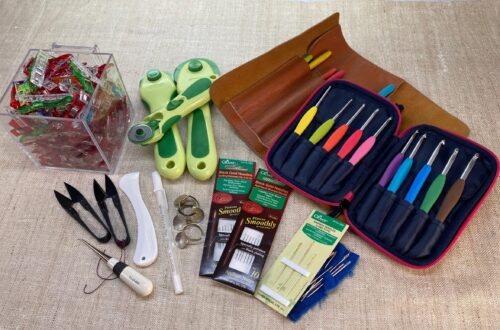
Materials
- Clover Amour Crochet Hook C (2.5 mm) – Art. No 1041/C
- WeCrochet Brava Sport (Color: Red & Canary)
- Clover Tassel Maker (Large) – Art. No 9941
- Mini Patchworks Scissors – Art. No 493/CW
- Quick Locking Stitch Marker (Small) – Art. No 3030
- Darning Needle Set (Bent Tip) – Art. No 3121
- Sewing Pins – check out Clover’s pins
- 4.0mm Safety eyes
- Fiberfill stuffing
- Black embroidery thread
Abbreviations
- ch: chain
- MR: magic ring
- sc: single crochet
- x sc: sc x number of times
- dec: decrease
- inc: increase
- st(s): stitch(es)
- (x sts): x total stitches in round/row
- rnd: round
- FO: finish off
Technical Notes
- Crochet in continuous spiral rounds, unless specified otherwise. Use a stitch marker or piece of yarn to keep track of the last stitch in each round.
- When filling with polyester stuffing, pull apart each large chunk into many smaller chunks. This ensures an even distribution of firmness within the amigurumi.
- To avoid large holes in the crochet fabric, increase tension until the holes cannot be seen, or choose a crochet hook a size down.
- Use sewing pins to secure limbs of the amigurumi before you sew them.
- For this pattern, Red is MC and Canary is CC.
The Pattern
LANTERN
(in MC)
Round 1 6 sc in MR (6 sts)
Learn how to single crochet in a magic ring:
Round 2 inc x6 (12 sts)
Round 3 (sc, inc) x6 (18 sts)
Round 4 (2 sc, inc) x6 (24 sts)
Round 5 (3 sc, inc) x6 (30 sts)
Round 6 (4 sc, inc) x6 (36 sts)
Round 7 (5 sc, inc) x6 (42 sts)
Round 8 (6 sc, inc) x6 (48 sts)
Round 9 (7 sc, inc) x6 (56 sts)
Round 10 (8 sc, inc) x6 (60 sts)
Round 11-17 (7 rnds) sc around (60 sts)
Insert 4mm safety eyes between rounds 13 and 14, with 4 stitches between them.
Round 18 (8 sc, dec) x6 (56 sts)
Round 19 (7 sc, dec) x6 (48 sts)
Round 20 (6 sc, dec) x6 (42 sts)
Round 21 (5 sc, dec) x6 (36 sts)
Round 22 (4 sc, dec) x6 (30 sts)
Round 23 (3 sc, dec) x6 (24 sts)
Round 24 (2 sc, dec) x6 (18 sts)
Round 25 (sc, dec) x6 (12 sts) Stuff.
Round 26 dec x6 (6 sts)
Finish off and weave in end.

CAP
(in CC, worked in joined rounds)
Round 1 6 sc in MR, slst (6 sts)
Round 2 ch, inc x6, slst (12 sts)
Round 3 ch, (sc, inc) x6, slst (18 sts)
Round 4 ch, (2 sc, inc) x6, slst (24 sts)
Round 5 ch, working in BLO, sc around, slst (24 sts)
Invisible finish off, stuff lightly using the tail end of the yarn. Sew to the top of the lantern. Make another cap identically, but do not sew it on yet.


ASSEMBLY
- Using the golden yellow yarn, sew six lines beginning from the cap down to the bottom of the lantern. To do this, cut a length of yarn about 48 inches long, and thread the yarn through a tapestry needle. Insert the needle under the yellow cap on the top so that it is secured, and then insert the needle again at the very last round on the bottom of the lantern. Push the needle under the last round of stitches on the lantern and up on the other side, then insert the hook under the top cap again, directly opposite from where you began. Repeat those steps two more times for a total of 6 ribs going around the lantern. Then, sew the second cap to the bottom of the lantern directly opposite the top one.


- Make a tassel using Clover’s Large Tassel Maker. Wrap the yarn around the frame vertically, tucking the ends under the frame on either side. Using a scrap piece of yarn, tie around the yarn in the middle of the frame to secure. Cut the wrapped yarn, setting the scissors in the groove of the frame. Take the bundle of yarn off the frame by unscrewing the pins. With the uncut side of the yarn upright, wrap the CC color of yarn all around about 3/4 of an inch from the top. Secure and tie off the CC yarn. Using the MC, thread the yarn through a tapestry needle and insert through the loops on top of the tassel and tie both ends of the yarn together, and sew to the bottom of the lantern. Click here for an in depth video tutorial.


Your Lunar New Year Lantern is all done!
I hope you enjoyed crocheting it and found the pattern helpful. I would love to see your finished amigurumi, so share a picture on Instagram with me by using the #littleworldofwhimsy and tagging me @littleworldofwhimsy.
This pattern is free but if you’d like to purchase a low-cost PDF, you can find it here.
Once again, if you have any questions don’t hesitate to reach out to me with a direct message on Instagram or through email at littleworldofwhimsy@gmail.com.
Happy crocheting!

Find Little World of Whimsy on her Blog | Instagram | Facebook | Pinterest | Etsy
Stay connected with Clover on Facebook | Twitter | Instagram | Pinterest | YouTube | Ravelry
[mc4wp_form id=”11289″]