Learn to Crochet the Single Crochet Stitch
Hi Everyone! I’m Ashley, the designer and maker behind The Loopy Lamb. I’m so excited to be invited back to the Clover blog to teach you all how to do the Single Crochet Stitch.
The single crochet stitch is a basic crochet stitch that all beginners need to learn in order to crochet. The single crochet stitch is used in a wide variety of projects. The Single Crochet stitch, when written in crochet patterns will be abbreviated as SC. At the end of this post, I’ll include some free crochet patterns that use the single crochet stitch that you can use to practice your new skill.
Supplies You’ll Need to Follow Along With This Tutorial:
- 5.5mm Clover Amour Crochet Hook
- A ball of worsted weight yarn (size 4) in any color. I’m using We Crochet Brava Worsted in Denim
Watch this helpful video tutorial or continue scrolling for a picture tutorial!
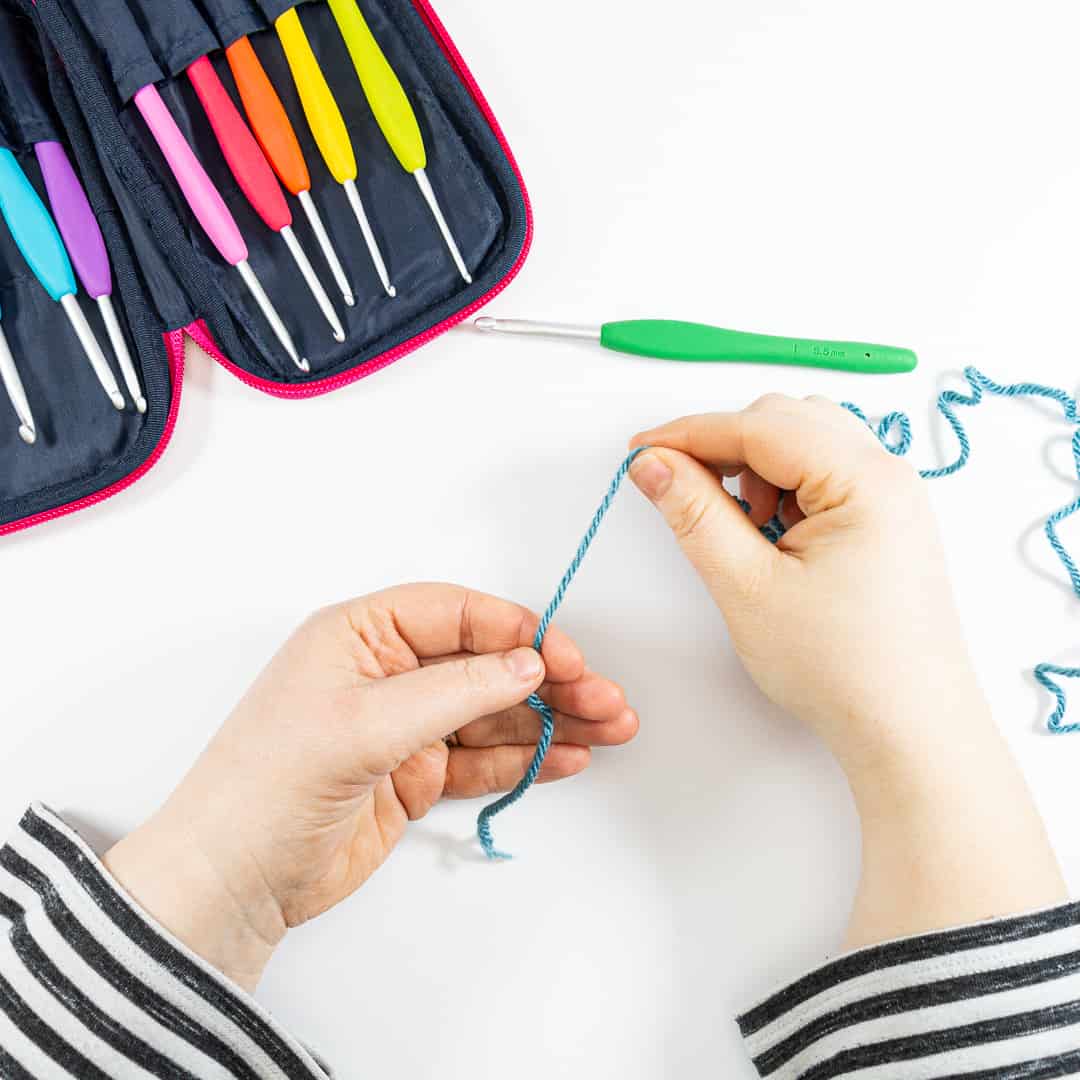
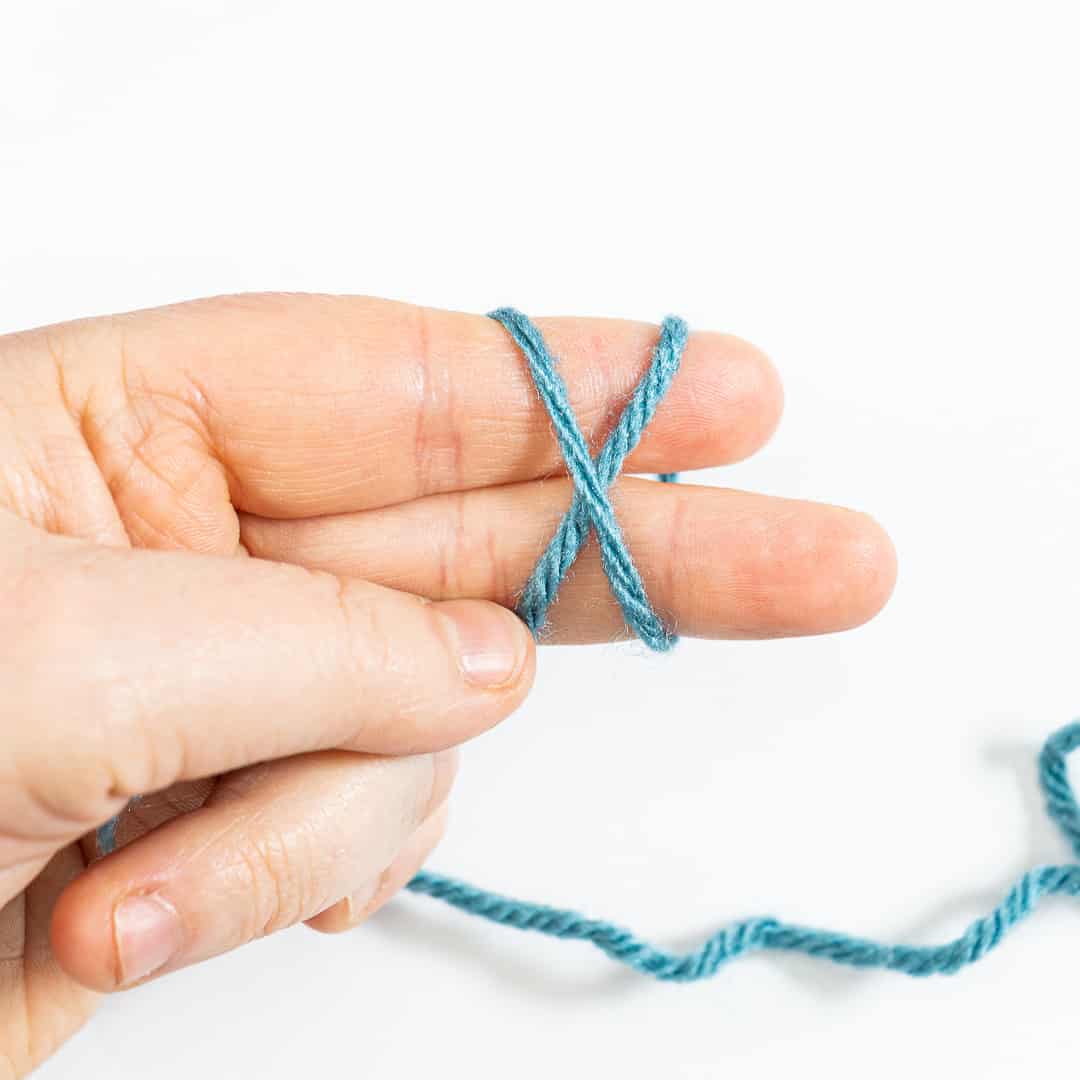
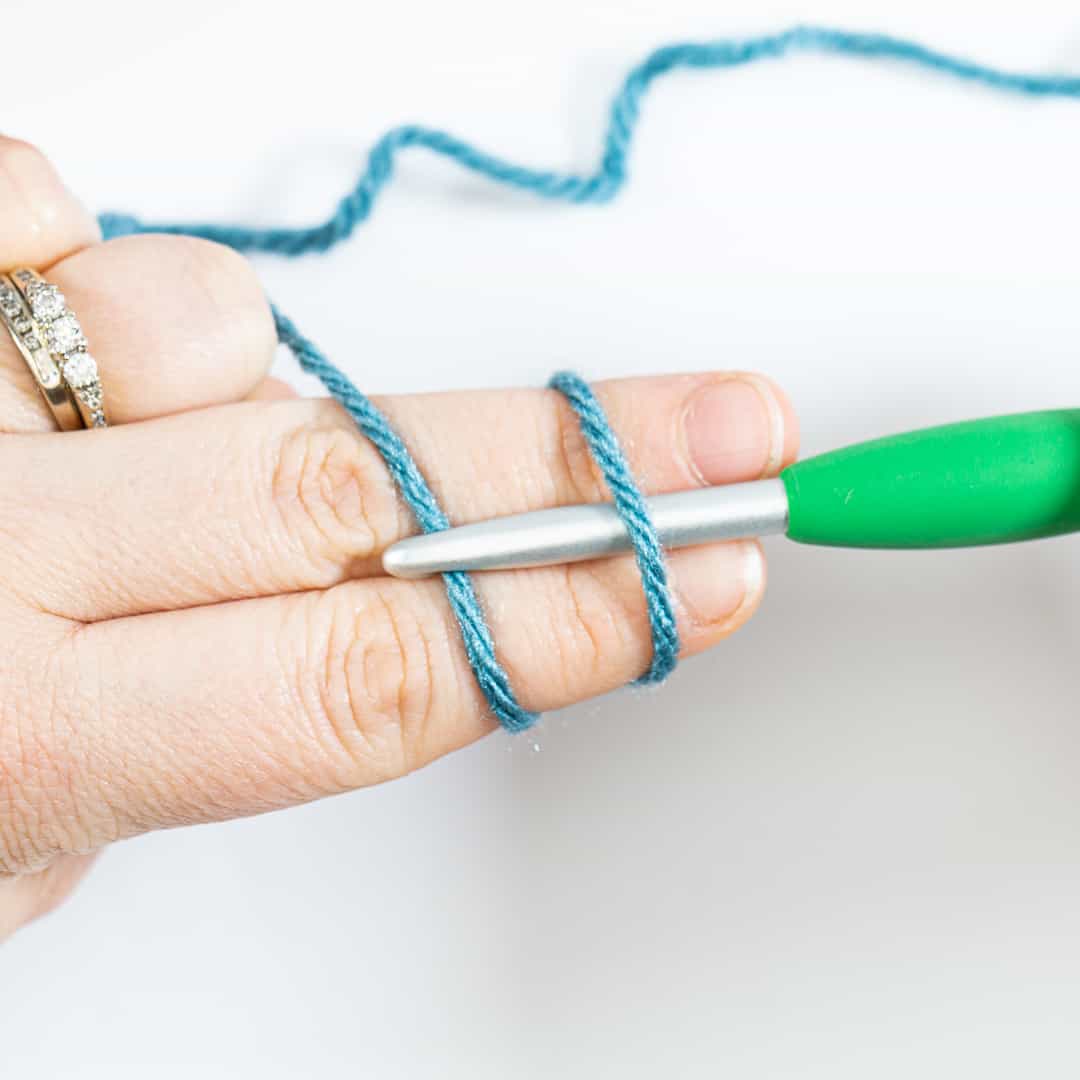
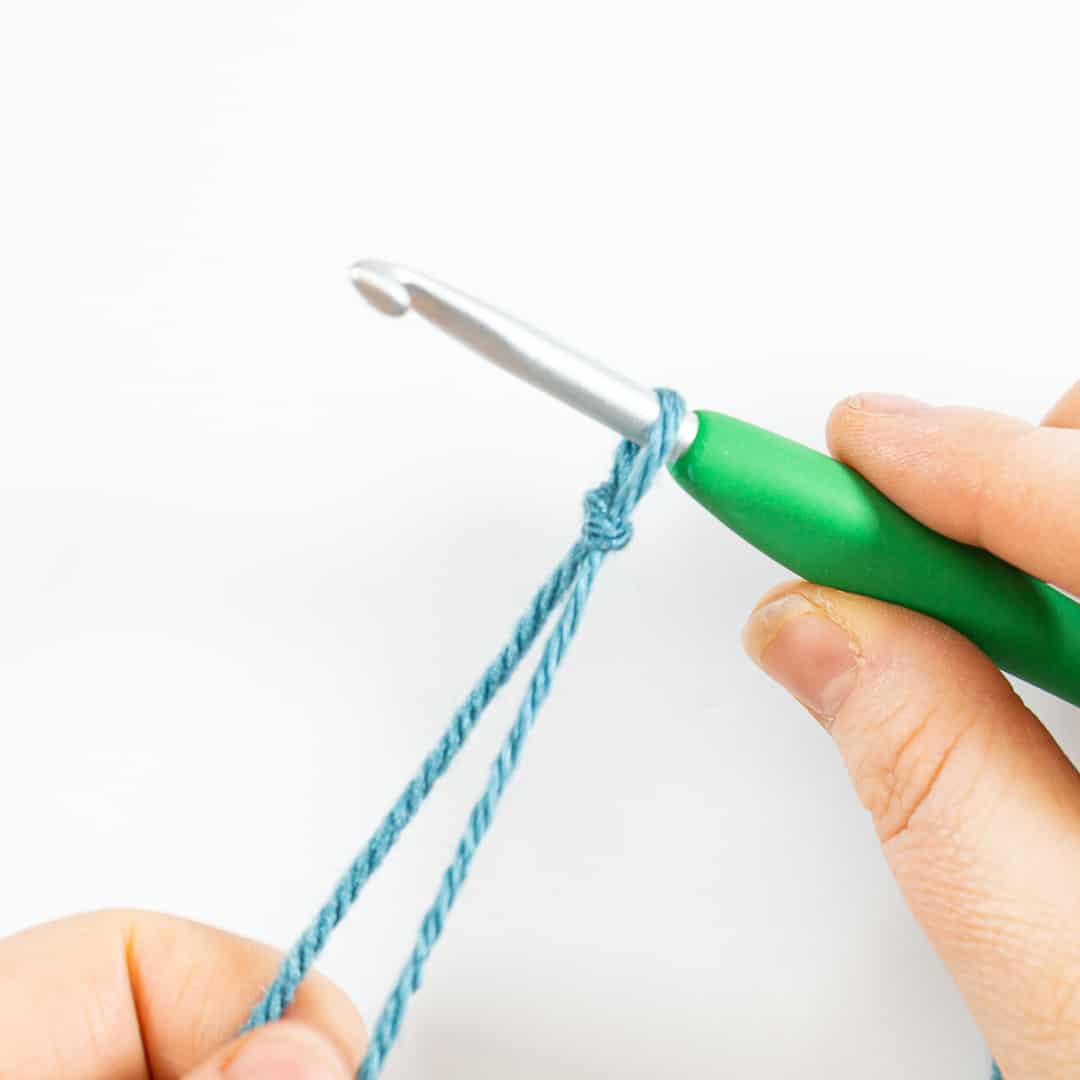
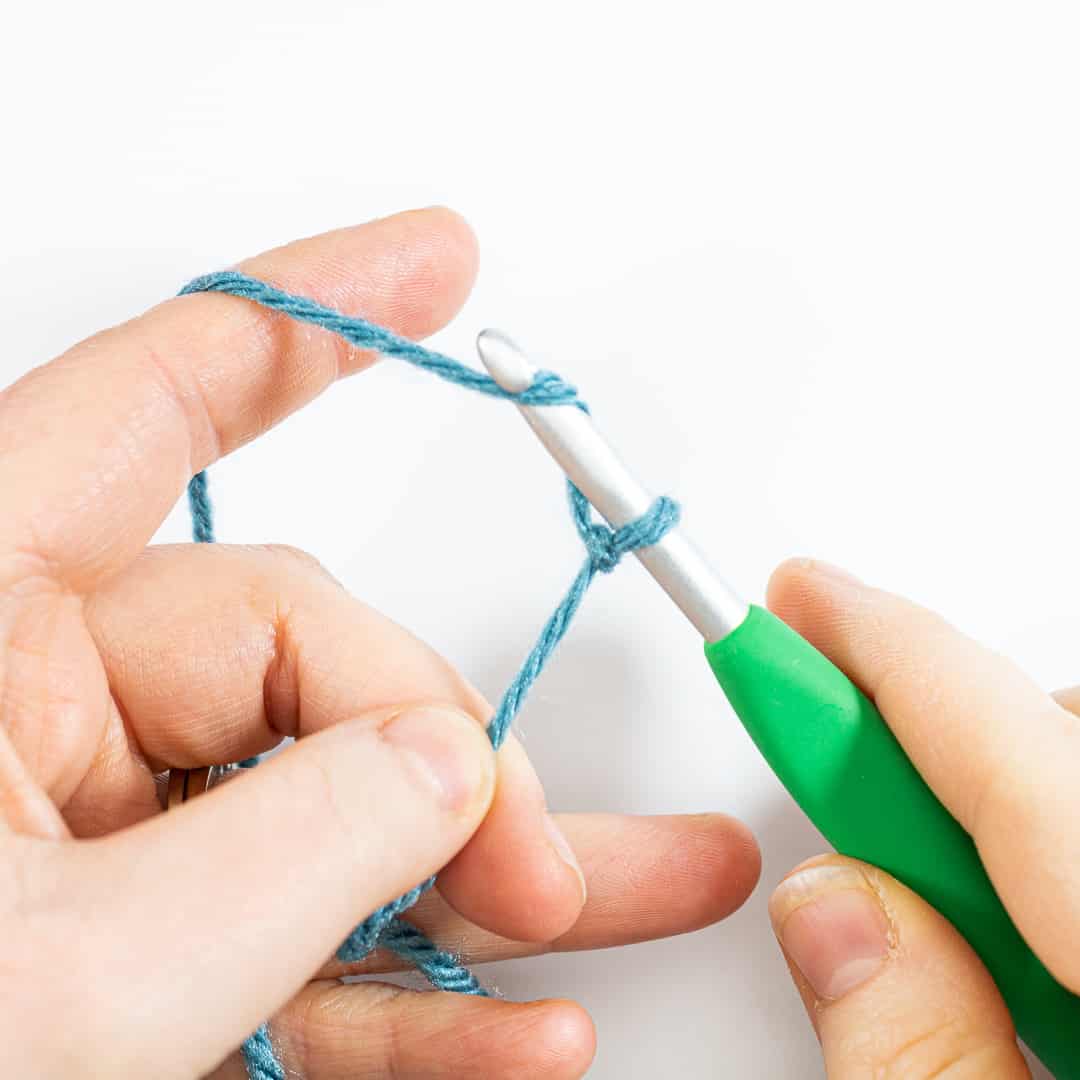
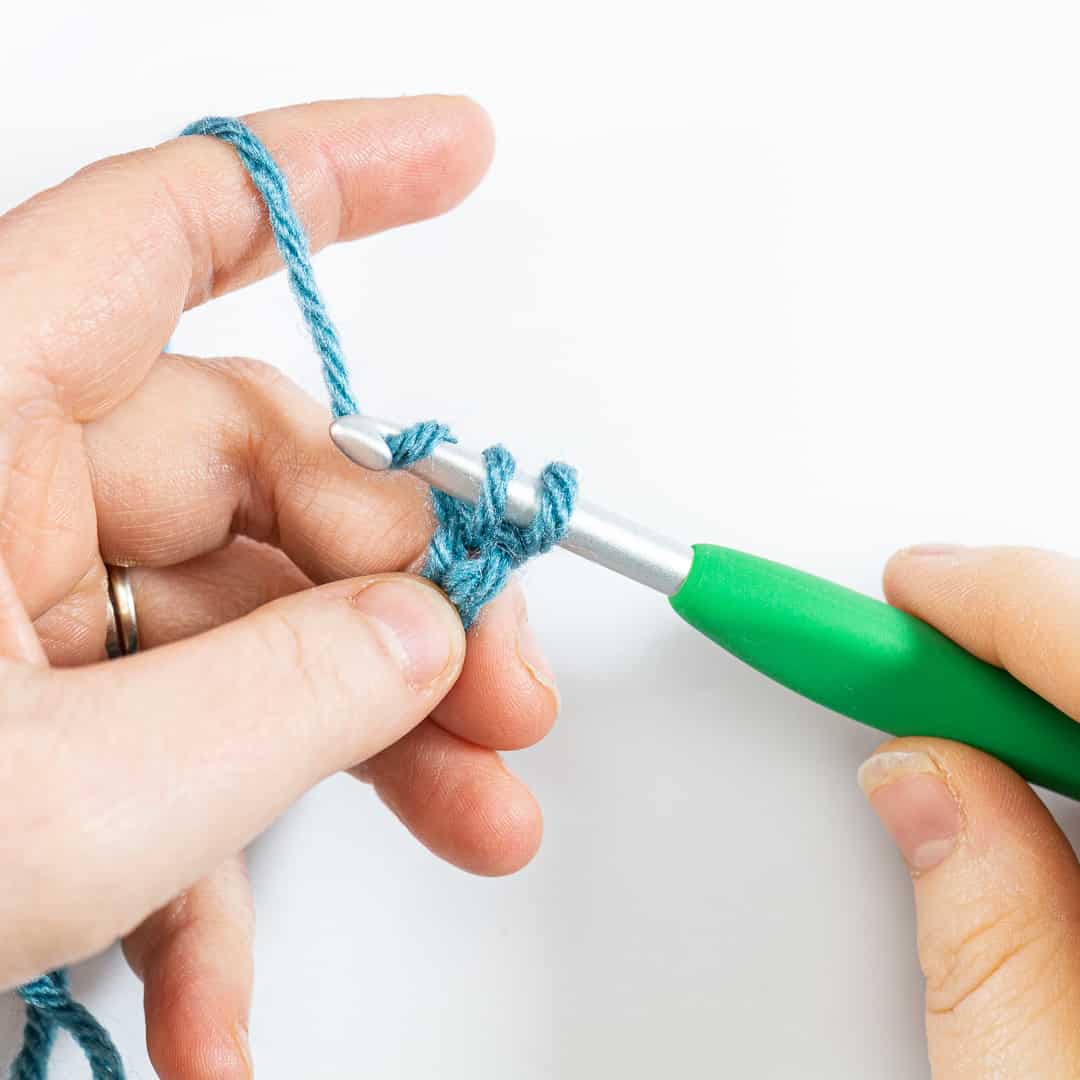
Creating a Slip Knot: Holding on to the end of your yarn, create a slip knot, leaving a tail of yarn about 4” long. To create a slip knot hold the yarn between your thumb and finger of your non-dominant hand at the point where you want to create the slip knot. Wrap the yarn around your first two fingers, crossing the yarn in your dominant hand over the yarn already wrapped around your fingers to form an “X”. Lay the working yarn across the top of your hand and use your other fingers to hold it in place. Grab your crochet hook and insert it under the first strand of yarn on your hand and use your hook to grab the second strand of yarn and pull it under the first strand. Pull the yarn off your fingers and onto the crochet hook. Pull the tail to tighten the knot to your hook (take care not to make this too tight or you won’t be able to move it).
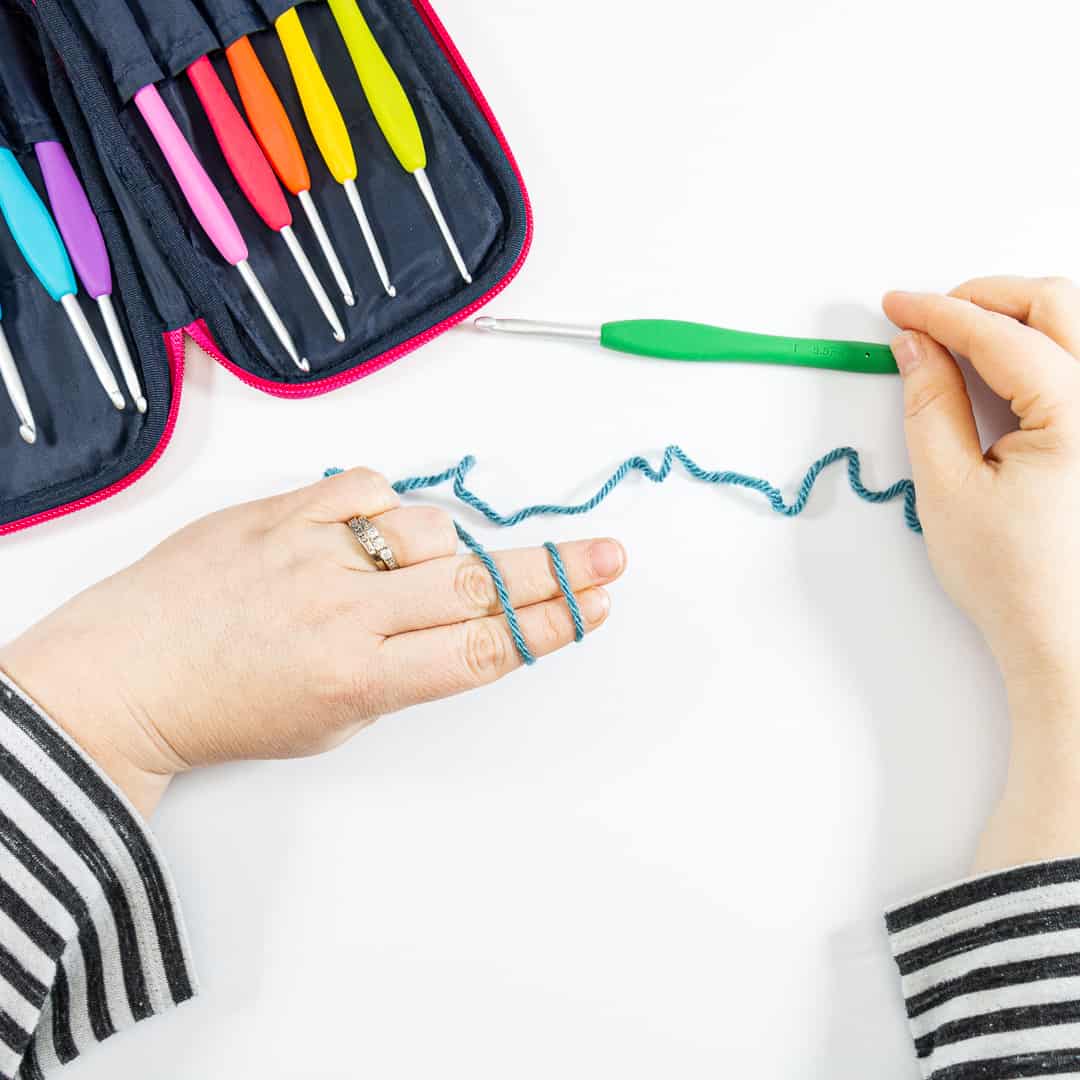
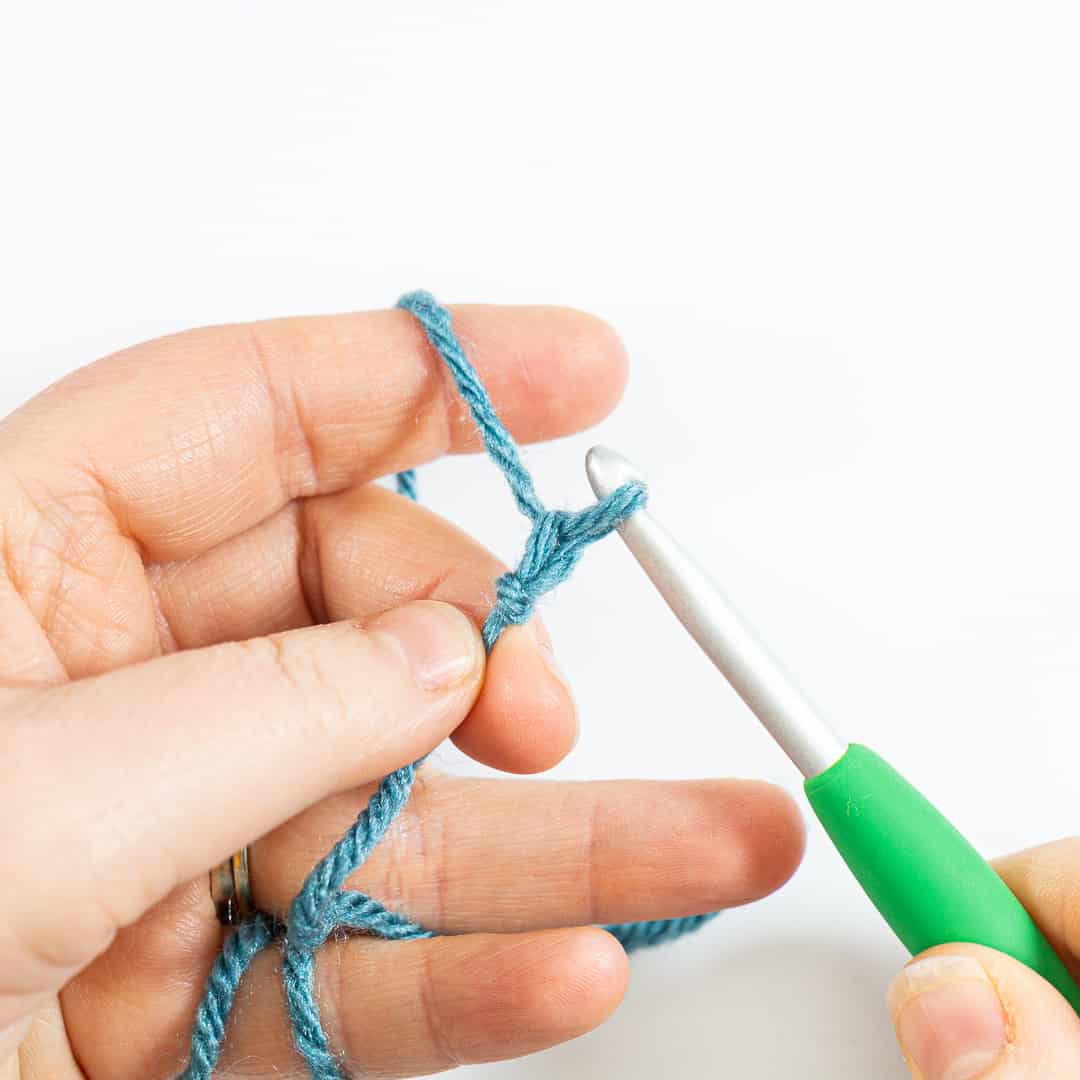
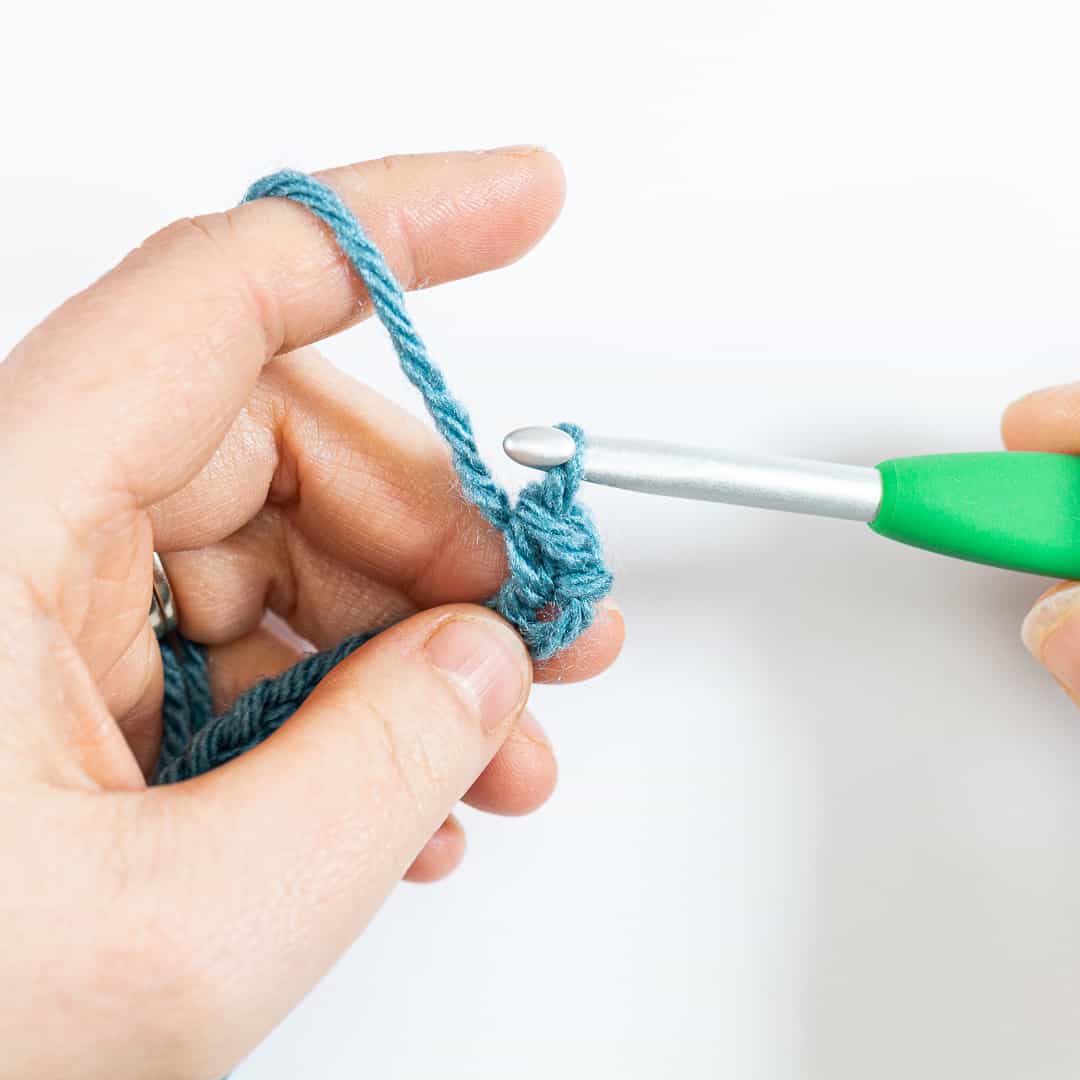
Creating a Chain: Now we’re going to create a chain for us to work our single crochet stitches into. This can be any length that you wish but for today’s tutorial, I want to have 10 stitches so I am going to create 11 chains. That 11th chain is referred to as a turning chain. To create our chain, wrap the yarn over the top of your hook and pull the yarn through your slip knot. This creates a chain stitch (abbreviated as CH in crochet patterns). Now you’ll wrap the yarn over your hook and pull through the chain you just created. This creates a second chain stitch. You will repeat this 9 more times. You should have 11 chains (the loop on your hook never counts as a chain).
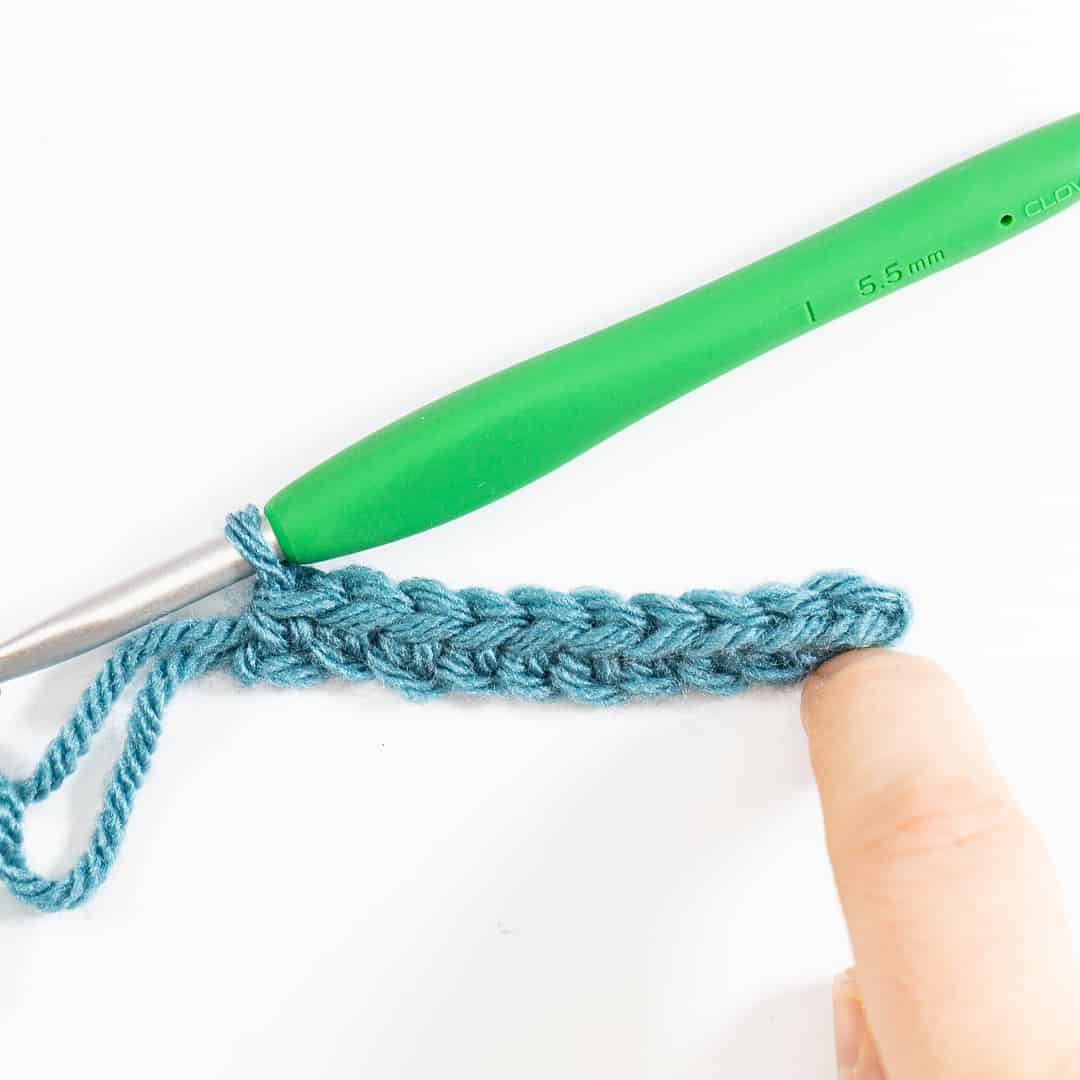
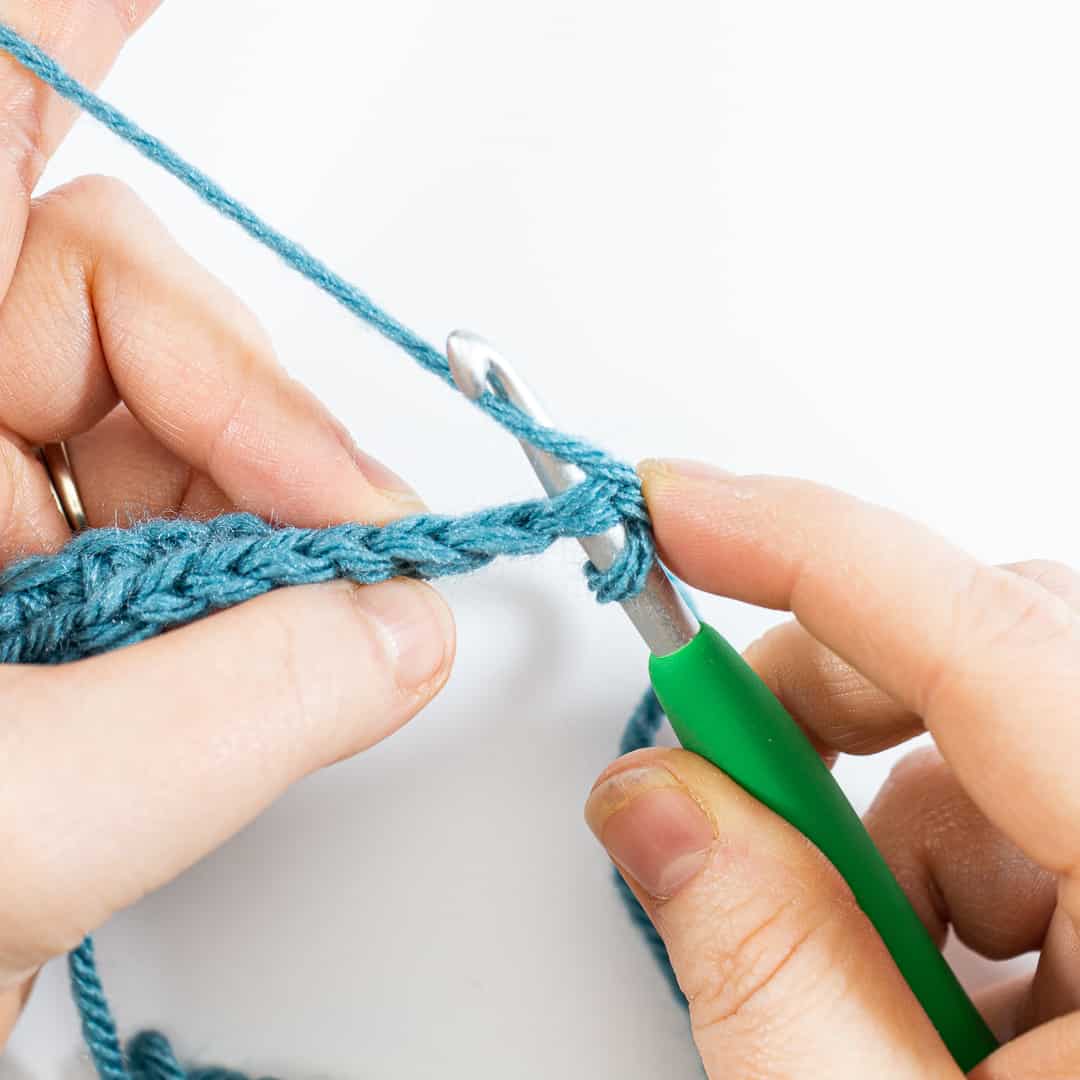
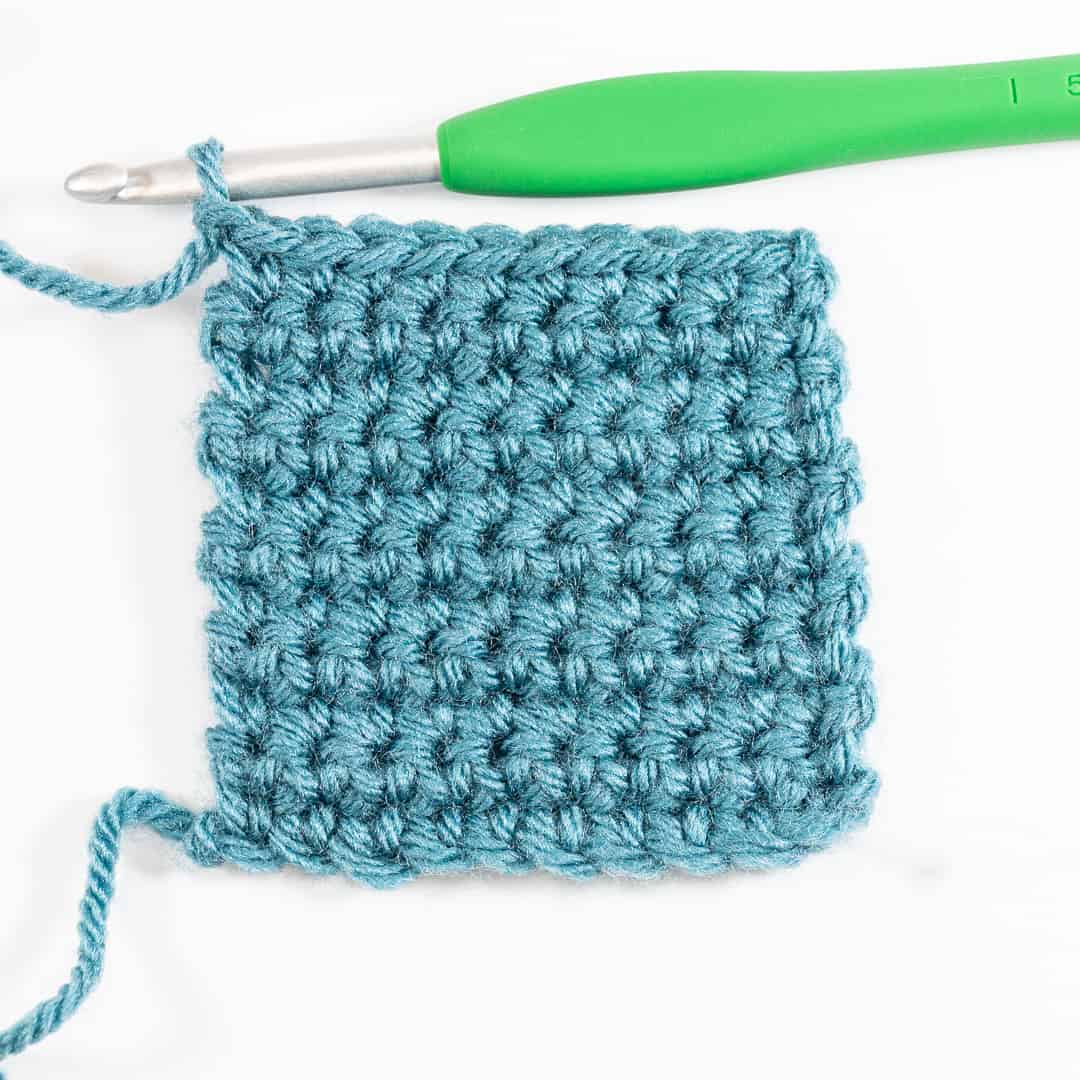
Row 1: Insert your hook into the second chain from the hook. Wrap your yarn around the hook (referred to as a yarn over and abbreviated as YO in crochet patterns) and pull the loop through the chain. You should have two chains on your hook. Yarn over hook and pull the yarn through the two loops on your hook. That’s your first single crochet stitch (SC).

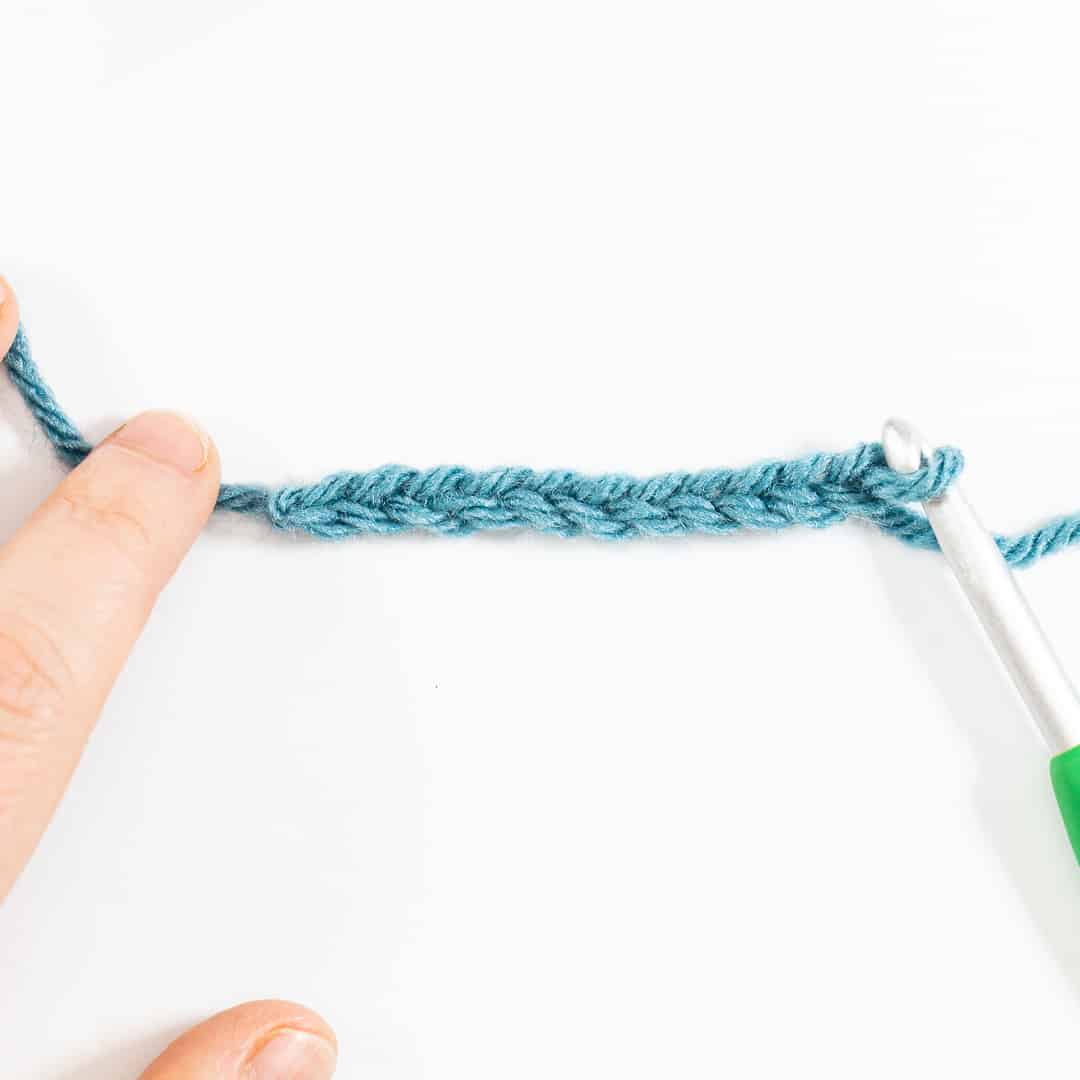
Repeat this step in each of the chains you created. You should have 10 single crochet stitches when you are finished. You count the stitches by counting the V’s at the top of your row.
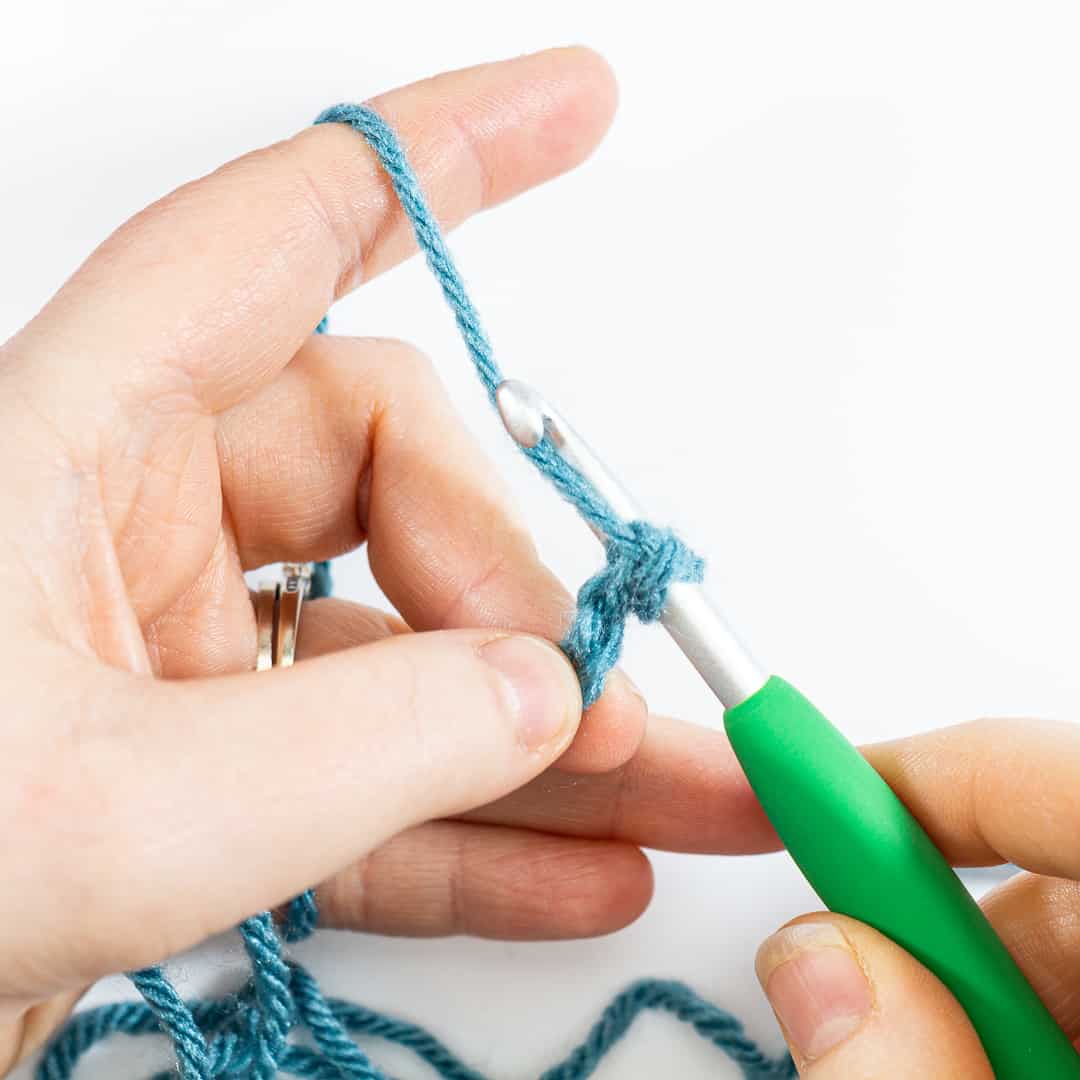
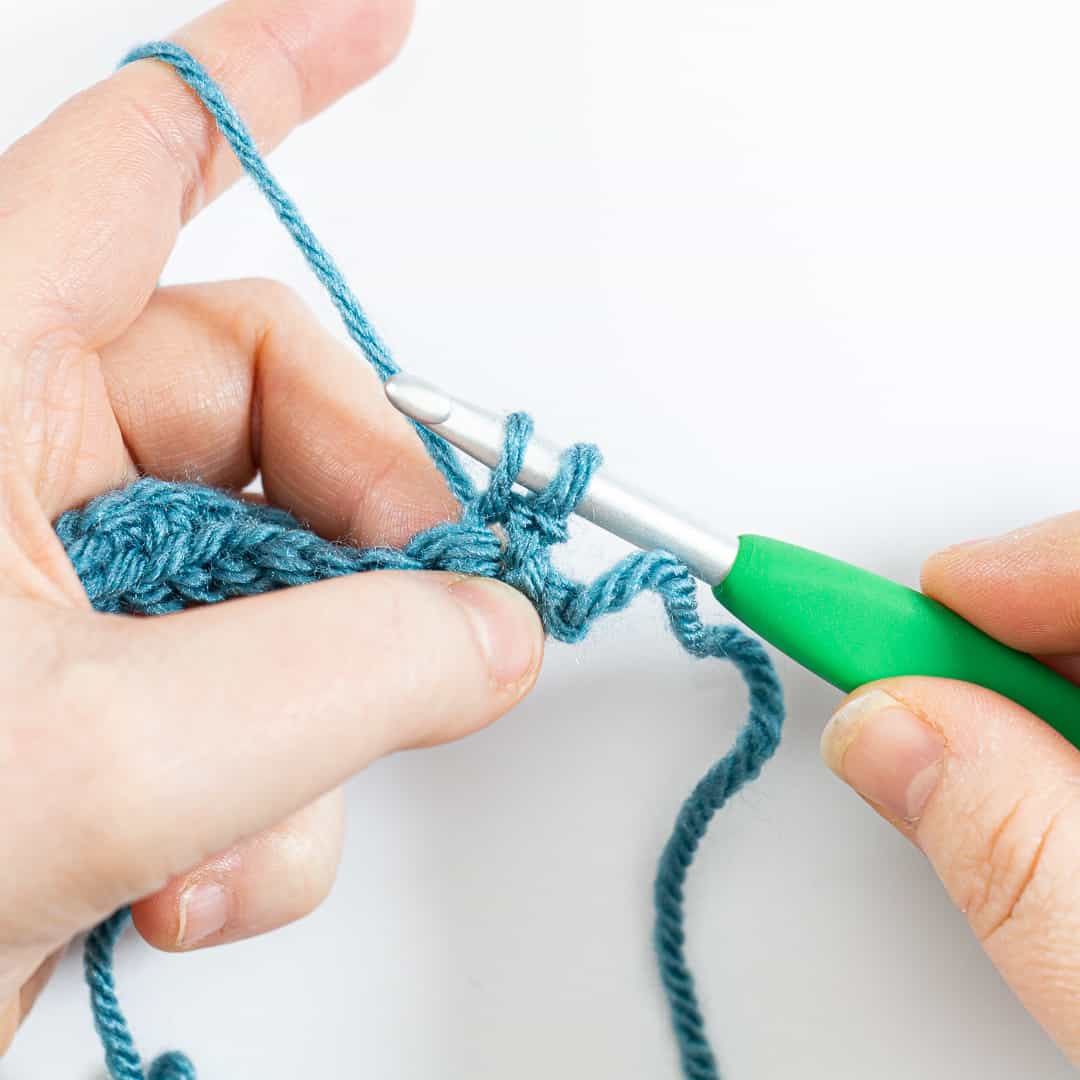
Row 2: To start your second row, you will yarn over hook and pull through the loop on your hook to create a chain 1 (CH 1), this is your turning chain. Turn your work so you will be working from right to left again. We will be working this row into the tops of the stitches from the first row. Insert your hook under the first “V” closest to your hook. Yarn over hook and pull the yarn through the stitch to the front of your work. You will have two loops on your hook. Yarn over hook and pull through both loops on your hook. That’s your first single crochet (SC) of Row 2 created. To work your second stitch, insert your hook under the “V” of the next stitch, yarn over hook and pull through to the front of your work (two loops on your hook). Yarn over hook and pull through both loops on your hook. That’s your second single crochet stitch created. Continue this across your row until all stitches have been worked and you have 10 single crochet stitches completed.
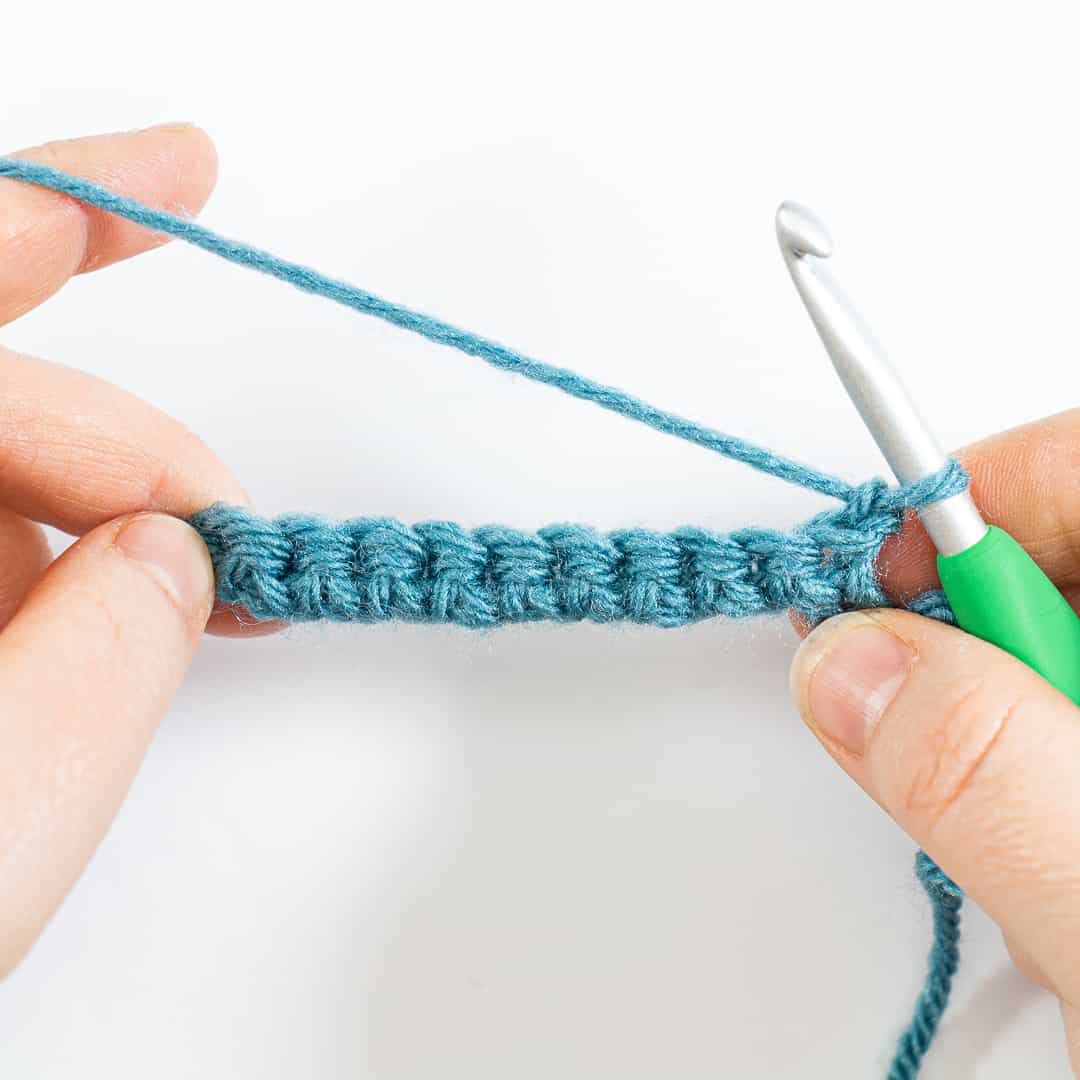
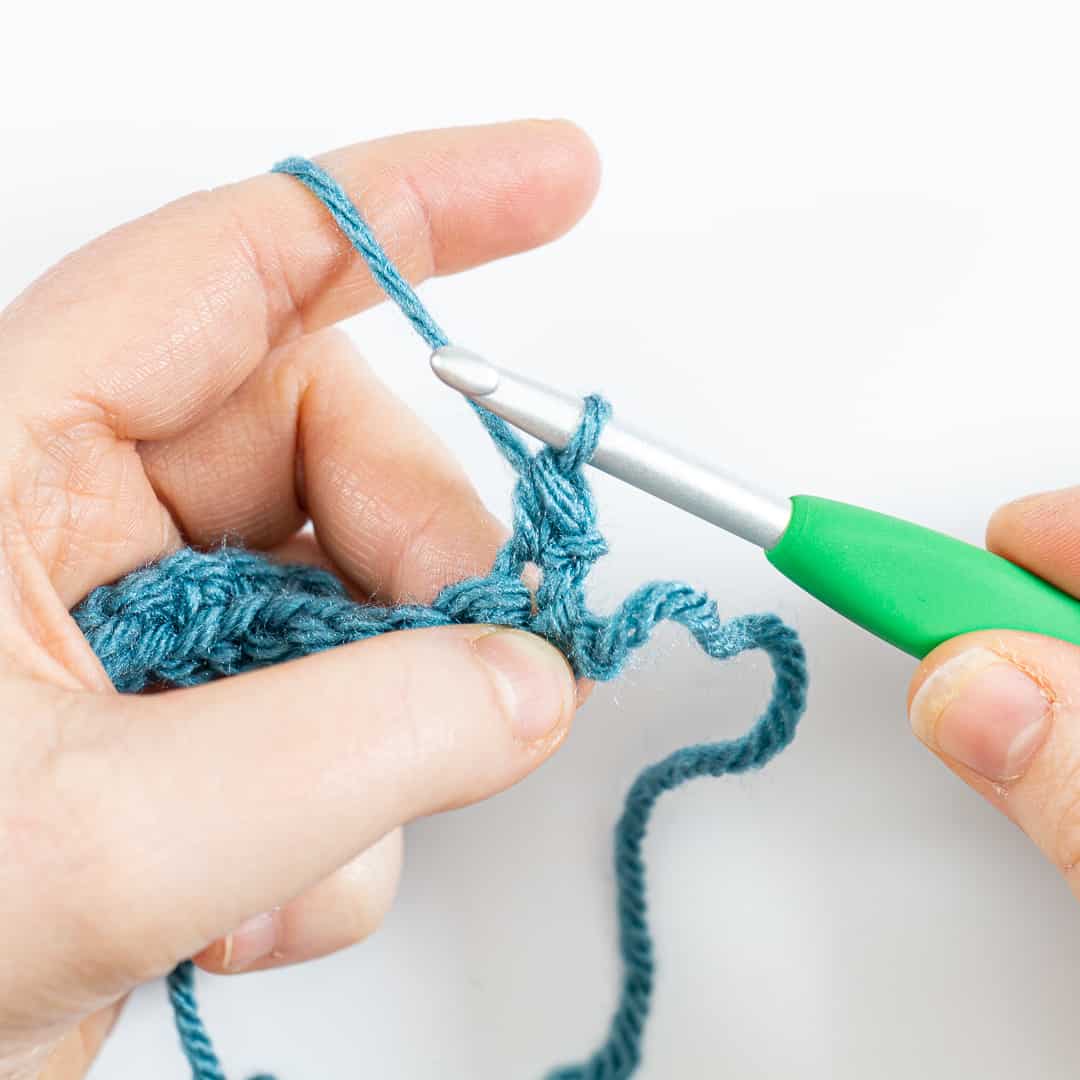
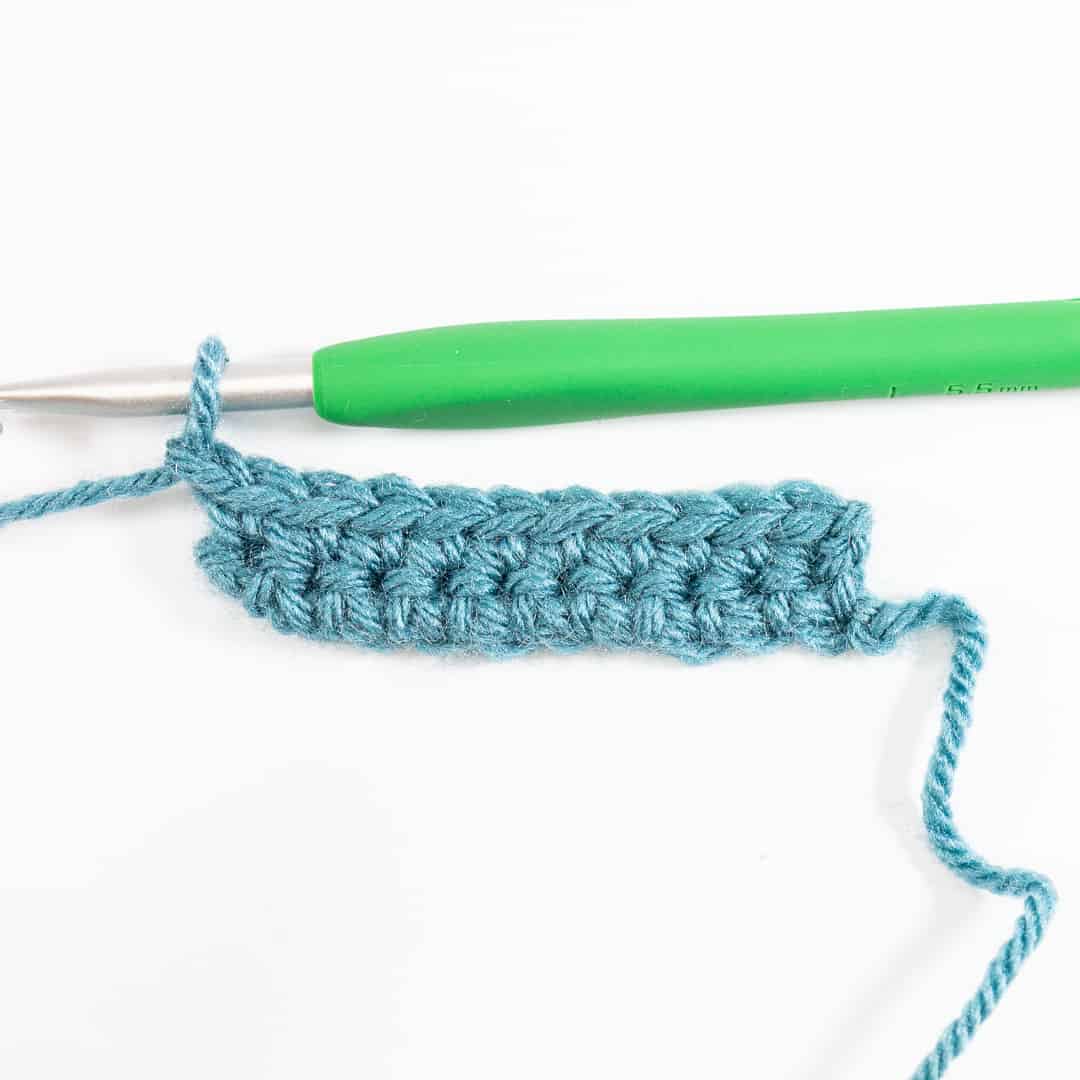
To work consecutive rows: To work consecutive rows of single crochet stitch, repeat the instructions for Row 2 until your work is the length you would like it to be.
I hope you enjoyed this tutorial and are excited to get started learning more crochet stitches. I’ll be back next week with a tutorial on how to do the half double crochet stitch.
Patterns that use Single Crochet:
- Simple Easy Crochet Necklace by Oombawka Design
- Gnome Christmas Tree Ornaments by The Loopy Lamb
- Ribbed Cowl by Amelia Makes
- Infinite Hope Bracelet and Necklace Set by Oombawka Design
- Bob & Betty Bird by The Loopy Lamb
- Lavender Flower Applique by Golden Lucy Designs
- Deluxe Beauty Sleep Mask by Oombawka Design
- Salty the Seal (and her baby seal pups) by The Loopy Lamb
You can find more of my free crochet patterns on my Blog | YouTube | Instagram | Facebook | Pinterest
Stay connected with Clover on Facebook | Twitter | Instagram | Pinterest | YouTube | Ravelry
[mc4wp_form id=”11289″]