English Paper Pieced Floret Patch (QUOE TIPS)
 In quilting, one of the things that has always fascinated me to no end is English Paper Piecing or EPP.
I’m someone who loves geometric simplistic designs, and the look of the honeycomb patterning from the repetition of hexagonal cut fabric has always given me pause. Though I am involved in many long-term projects, I don’t think I’ll ever have the ambition and patience to create a full EPP quilt. For now, I am content in just making single florets. There are many, many uses for individual floret clusters, from coasters to hot pads, to decorations. By far, my favorite use has been as accent patches on my favorite projects. This will be the first in a series of four blogs every Tuesday in October where I will show you how to create patches from some of my favorite fiber crafts, culminating in a big project at the end!
Want to learn the simple steps for creating a floret patch yourself? Let’s get into it!
Supplies:
- Gold Eye Applique Needles (Size 12)- Art. No 497/12
- Desk Needle Threader (Green) – Art. No 4072
- (Optional) Rotary Cutter (45mm) – Art. No 7500
- Cutting Mat (18″ x 24″) – Art. No 7521
- Wonder Fuse- Art. No 4090
- Patchwork Scissors (Mini) – Art. No 493
- Cotton Fabric
- 50 Weight Thread
- Craft Stick Glue
- 3/4” English Paper Pieces
- Iron/Ironing Board

Prepping the EPP:
To begin, take 7 EPP Templates and place in floret pattern below. Choose which fabrics you like before cutting. Traditionally, I like to use a light fabric for the middle, and a high contrast jewel-tone fabric for the outer round. You may find that it is easier to visualize color placement and interaction if you cut your fabric into approximately 1 1/4” squares with a rotary cutter and placing them in the general shape of the floret before cutting around. Once your fabric is selected, take one of your EPP templates and place in the direct middle of the precut fabric. Take your patchwork scissors and cut around template leaving around 1/8” to 1/4” seam allowance on all sides. Fold down sides and press lightly to crease fabric, then unfold fabric to its original position. Take stick glue and apply liberally to edges of template then fold over fabric once again to adhere to paper. This will take the place of a traditionally sewn baste, and save a lot of time in the process! Complete these steps for all 7 pieces.


Sewing the first edge:
Double thread applique needle using the threader. Cut to approximately 5”-7”. Tie overhand knot at end of thread. Take your middle and one outer EPP, and place right sides together, pinching between your thumb and pointer or middle finger. Pass needle through a corner point on both pieces, catching very little fabric from either piece. Do not pull needle all the way through. Pass needle between the loop of end threads near the created knot and pull tightly to secure, locking the beginning stitch in place. Now, being creating shallow, tight whipstitches along one edge of the EPP. The more shallow, and close together the stitches are, the less likely they will be visible on the front. Once you have reached the end of the edge, secure with quilter’s knot and trim thread.


Sewing two or more edges at a time:
Repeat threading process as needed. Take your next EPP and place right sides facing against the middle piece with an edge that is adjacent to the last worked outer piece. You may start sewing along either edge that touches another piece, I always prefer to start at the middle piece’s edge and work towards the outer edges. Once you have completely sewn one edge, you will find that pinching the right sides together while sewing the next is a simple and effective way of whipstitching. This will bend the paper of the middle piece slightly which is to be expected. Repeat this process until you have reached your last EPP. Start stitching the last EPP in at one of the outermost edges and work all the way around the three unseamed edges to finish sewing.


Finishing:
Begin by placing floret right side up on ironing board over scrap fabric, making sure to tuck in any raw edges. Iron on cotton setting until the floret lay flat. Continue ironing for an additional 30 seconds, this will help to release the glue of the paper templates. Let cool, then flip over and carefully remove all paper templates. Discard any damaged ones, and save any salvageable ones for your next patch! Taking care to keep raw edges folded in, again press floret with iron, this time on both the wrong and right sides. Now trace around Wonder Fuse sheet and cut to exact shape of floret. Follow Wonder Fuse package instructions to adhere to floret. Do not pull off paper backing until you are ready to use your patch! Flip to right side and trim any threads or excess Wonder Fuse backing to complete your patch


 We are now done with our floret! I can’t wait to see all of the things they are used to patch up. Be sure to tag Clover and me in any posts so we can see what you create. Stay tuned to the blog for next week’s post, where I will go over creating a cross-stitch patch, along with a free cross-stitch chart of one of my favorite Clover tools!

Catch up on the Series
- 5 Ways To Sew Patches Perfectly
- English Paper Pieced Floret Patch (This Post)
- Cross Stitch Patch
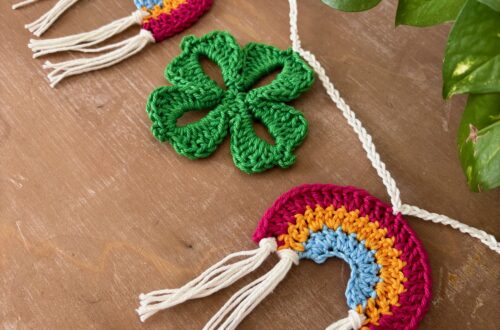
- Knit & Crochet Patches
- Sewing a Patched Project Bag
Follow what Quayln is up to next on his Blog | Instagram | Facebook | Pinterest | YouTube | Ravelry
Stay connected with Clover on Facebook | Twitter | Instagram | Pinterest | YouTube | Ravelry
[mc4wp_form id=”11289″]