Scissor Sheath
Tell the truth, how many of you have a pair of scissors sitting in your craft drawer/junk drawer/tool drawer that is totally naked? You know, just laying there waiting for the right moment for someone to reach in for a screwdriver and pull out a cut finger… OUCH!
Being raised as we were, our parents taught us from a young age that sharp tools need sheaths… especially scissors. Also, keeping your scissors covered helps protect the blades from being nicked and dulled. So, to protect both us and our scissor blades, we make these fabric sheaths to store and carry them in. All it takes is a little scrap fabric – in this case denim from an upcycled pair of jeans and an old shirt – and a couple of tools. Making one of these just took over 10 minutes! It’s a great beginner project for a new sewist… or an expert who’s tired of nicked fingers and blades.
Video Tutorial:
Or scroll down for written instructions.
What you’ll need:
Notions and Tools
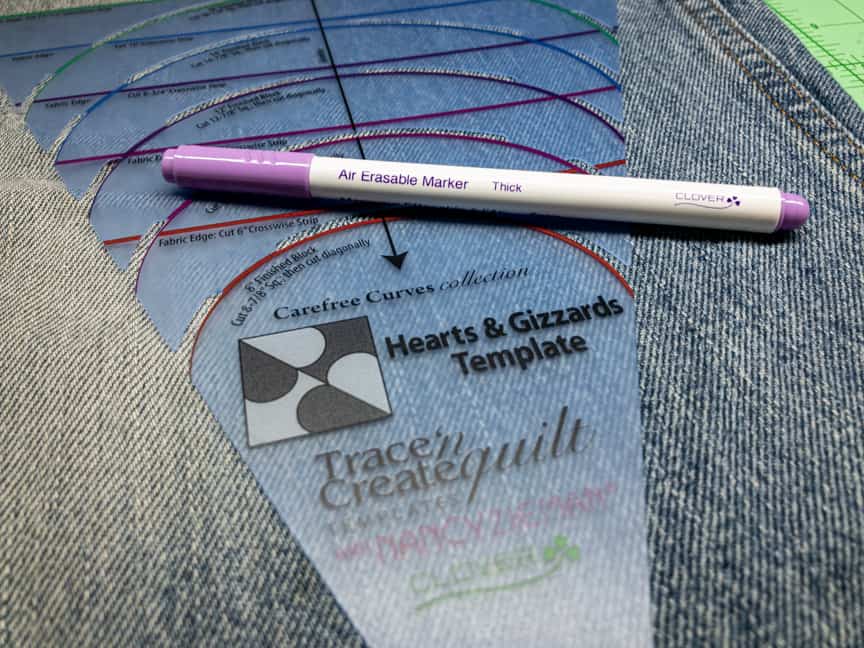
- Carefree Curves Template (Art. No 9578)
- Air Erasable Marker – Thick (Art. No 5031)
- Patchwork Scissors (Art. No 493/L)
- Point 2 Point Turner (Art. No 7803)
- Wonder Clips (Art. No 3155)
Materials
1/4 Yard (0.25m) Denim
NOTE: For this project, we used the leg from an old pair of jeans, but any heavy weight fabric will work.
Fabric
1/4 Yard (.25m) contrasting fabric.
Any fabric can be used, from cotton to silk.
Instructions
Step 1. Measure Your Scissors Against the Template
Lay your scissors down on the template and decide which size of template you’ll need to trace. Choose the template that is a little larger than your scissors.
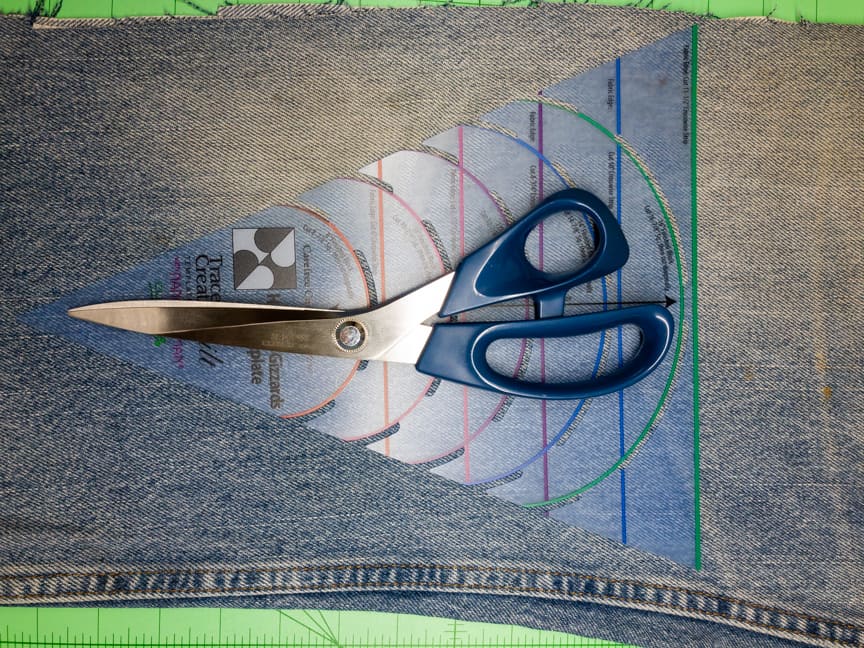
Step 2. Trace & Cut
- Fold your denim fabric in half and lay down your template.
- Using the Air Erasable Marker, trace the template onto the fabric.
- Cut through both layers of the fabric (two pieces cut).
- Repeat all steps on the contrasting fabric.

Step 3. Attach the Curved Tops
- Lay the contrasting fabric on top of the denim, Right sides facing.
- Use Wonder Clips along the curved, top edge to hold the fabric together. You now have two paired sets of denim and contrasting fabric.
- Using the Air Erasable Marker, place a dot at the location where the curve ends. Do this on the right and left of each clipped piece.
- On the first paired set, begin sewing at one dot and continue sewing along the curved edge to the second dot using a 1/4″ seam allowance.
- Repeat for the second paired set.
Step 4. Turn Your Work
- Make a series of small cuts along the curved edge. Be careful to not cut through the sewn seam!
- Turn your work right side out.
Note: Using a Point 2 Point Turner along the inside seam will help get a smooth edge along the curve.
Step 5. Assemble and sew the long sides
- Place Right Sides together (either the denim or contrasting fabric can be use as the “right” side. We liked having the denim side out… the choice is yours).
- Use Wonder Clips down both straight sides to hold the pieces together.
- Again, beginning at one of the previous dots sew along one straight edge to the bottom point using a 1/4″ seam allowance. Turn and sew up to the second dot.
Finishing
Trim the seam allowance around the pointed end to reduce bulk and make it easier to turn your project right side out.
Turn your work Right side out.
Insert your scissors and turn down one edge to show off the contrasting inner fabric… what’s the point of having fancy fabric if you can’t show it off?
Your scissors are now safe to store in any drawer or on your desk.

STITCH ON!
Watch the video tutorial here:
Find the Shibaguyz on Facebook | Twitter | Instagram | Pinterest
Stay connected with Clover on Facebook | Twitter | Instagram | Pinterest | YouTube | Ravelry
[mc4wp_form id=”11289″]