Halloween Pom-Pom Crafts

Pom-Poms are perfect for embellishing clothes, home decor and accessories of all kinds. Also perfect for coming up with new creations…like Halloween decor!
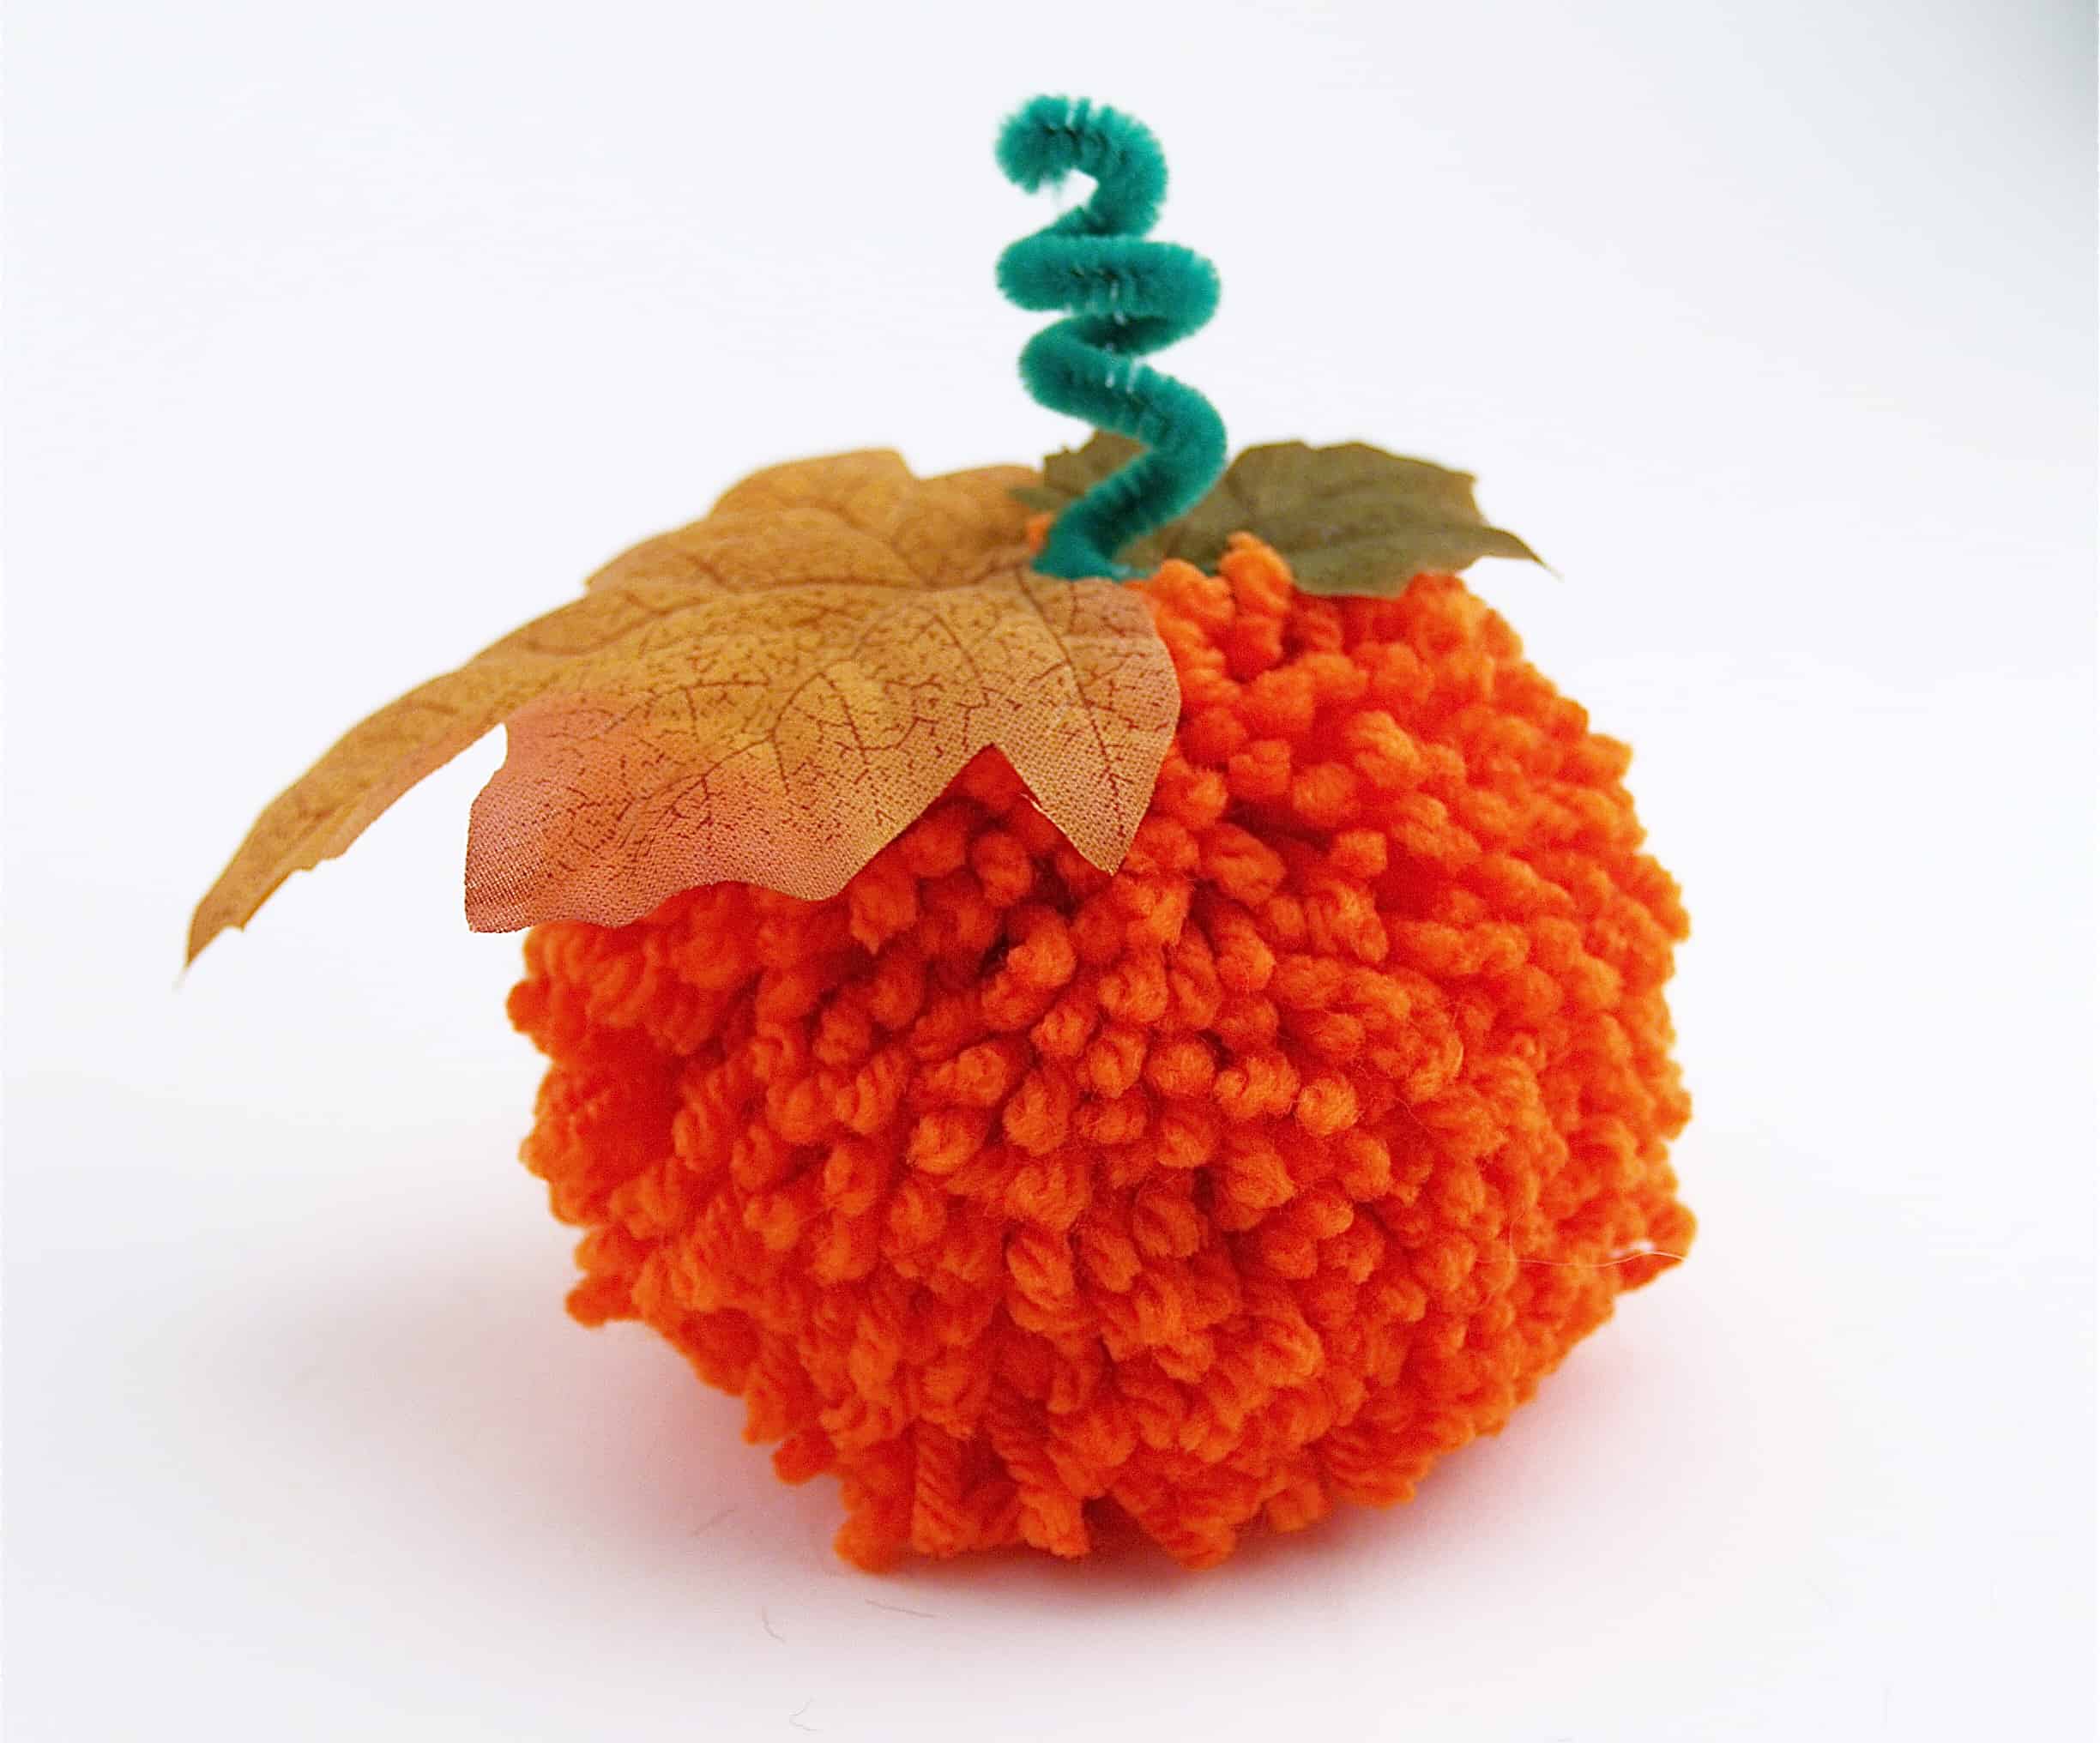
Pumpkin Decor

Supplies
- Pom-Pom Maker (Large) Art. No 3126
- Patchwork Scissors (Art. No 493)
- Orange Yarn
- 1 leaf green chenille stem
- 1 large green leaf
- 2 small fall-colored leaves
- Glue gun and glue sticks
- Pencil and wire cutter
Assembly Directions:
- Make an orange pom-pom and set aside (use 2 1/2″ size). Click here for a Pom-Pom video tutorial
- Cut chenille stem in half with wire cutter and set one piece aside
- Wrap one piece around a pencil to curl and set aside
- Glue the pumpkin onto the leaf
- Place a small amount of glue on one end of the curled stem and insert into the center of the pumpkin. Glue one small Fall leaf on either side of the stem
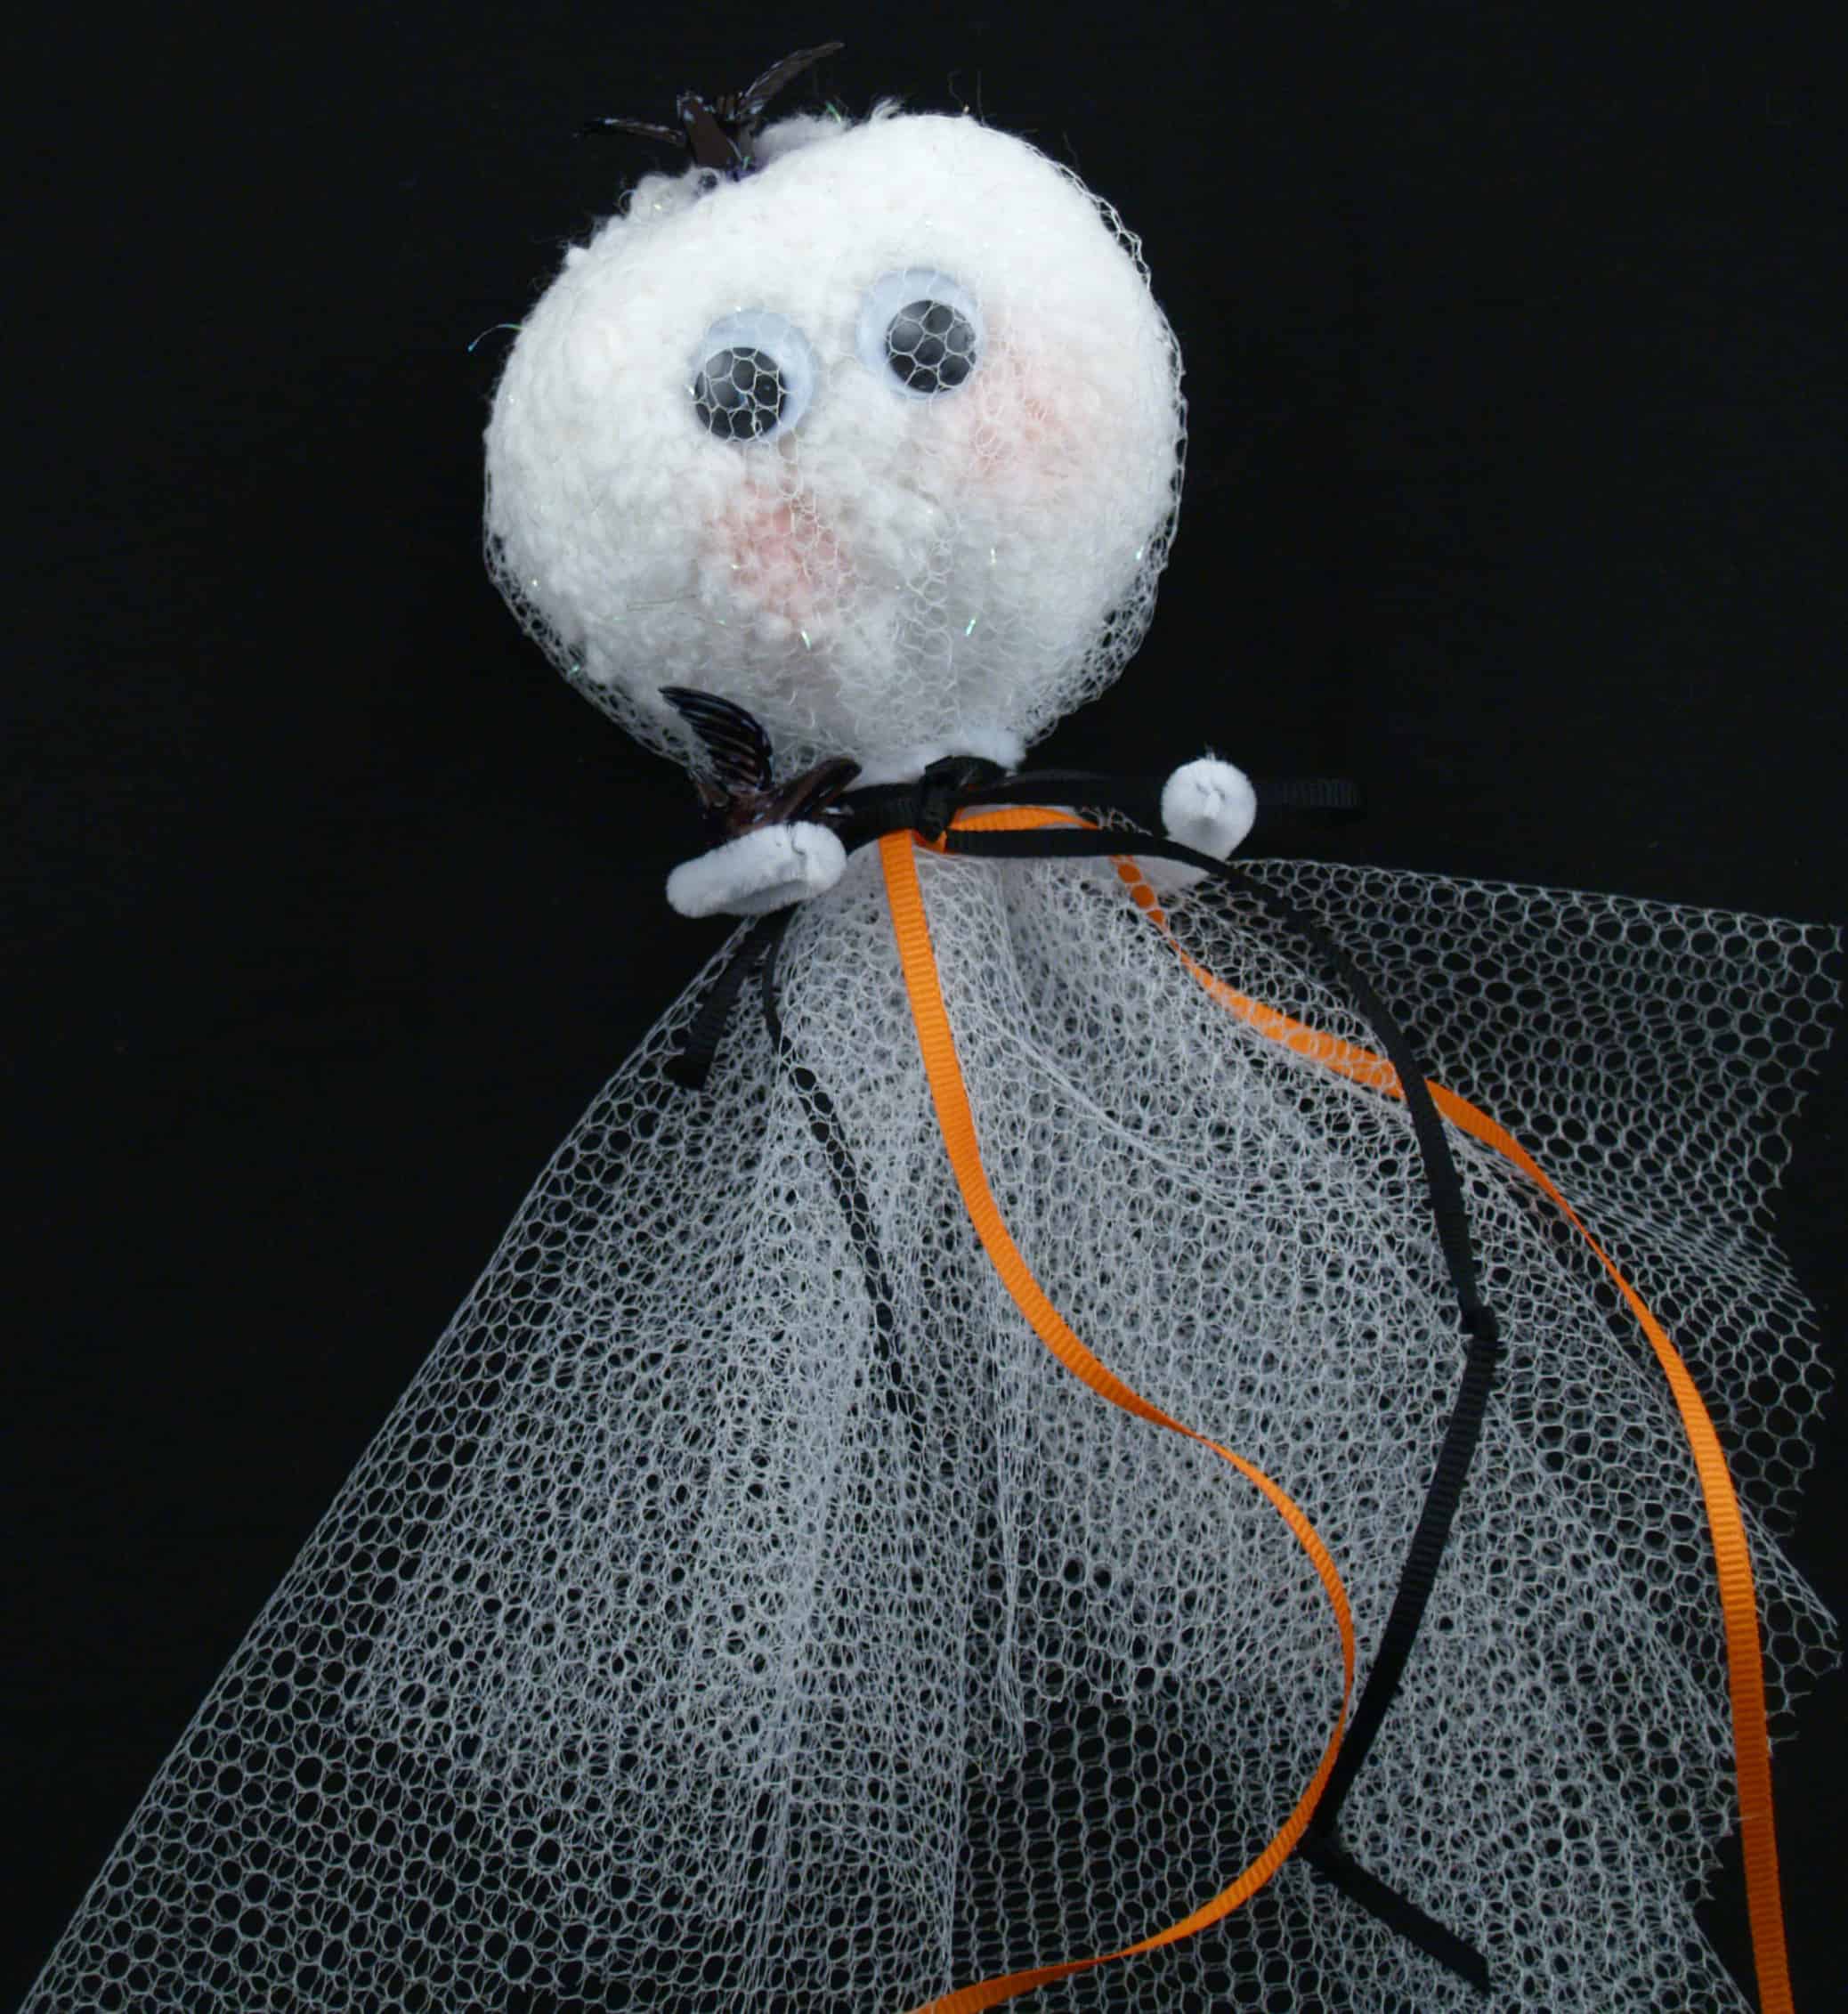
Friendly Ghost
Supplies
- Pom-Pom Maker (Large) Art. No 3126
- Patchwork Scissors (Art. No 493)
- White yarn
- 1/2 yard white nylon netting
- 1 yard each narrow ribbon (black and orange)
- 2 wiggle eyes (12 mm)
- 1 white chenille stem
- Pink powder blush
- Black permanent ink marking pen
- Glue gun and glue sticks
Assembly Directions:
- Make one pom-pom (3 3/8″ size). Click here for a Pom-Pom video tutorial Tie off securely with an extra long length of thread or yarn . Make a knot at the end for a hanger.
- Glue on the wiggle eyes. Brush a small amount of powder blush on each cheek. Set aside.
- Cut the nylon netting in half on the fold. Please note: Nylon netting often comes 72″ wide in which case this will yield 4 pieces. Set aside the remaining 3 pieces for more ghosts or another project.
- Fold the nylon netting into fourths and cut a tiny hole in the center of the fold. Open the netting and insert the long tie through the hole enclosing the pom-pom. Gather the netting around the neck and tie with an additional length of thread.
- Place the chenille stem around the neck and twist to secure. Fold each end about ½ inch to create hands. Bend to form an elbow on each arm.
- Tie the ribbons into a bow around her neck and set aside.
- Paint the doves with the permanent black ink marking pen to make crows.
- Glue one crow on top of its head and one crow on its hand. It is helpful to hang the ghost to allow the crows to adhere and the glue to dry thoroughly.
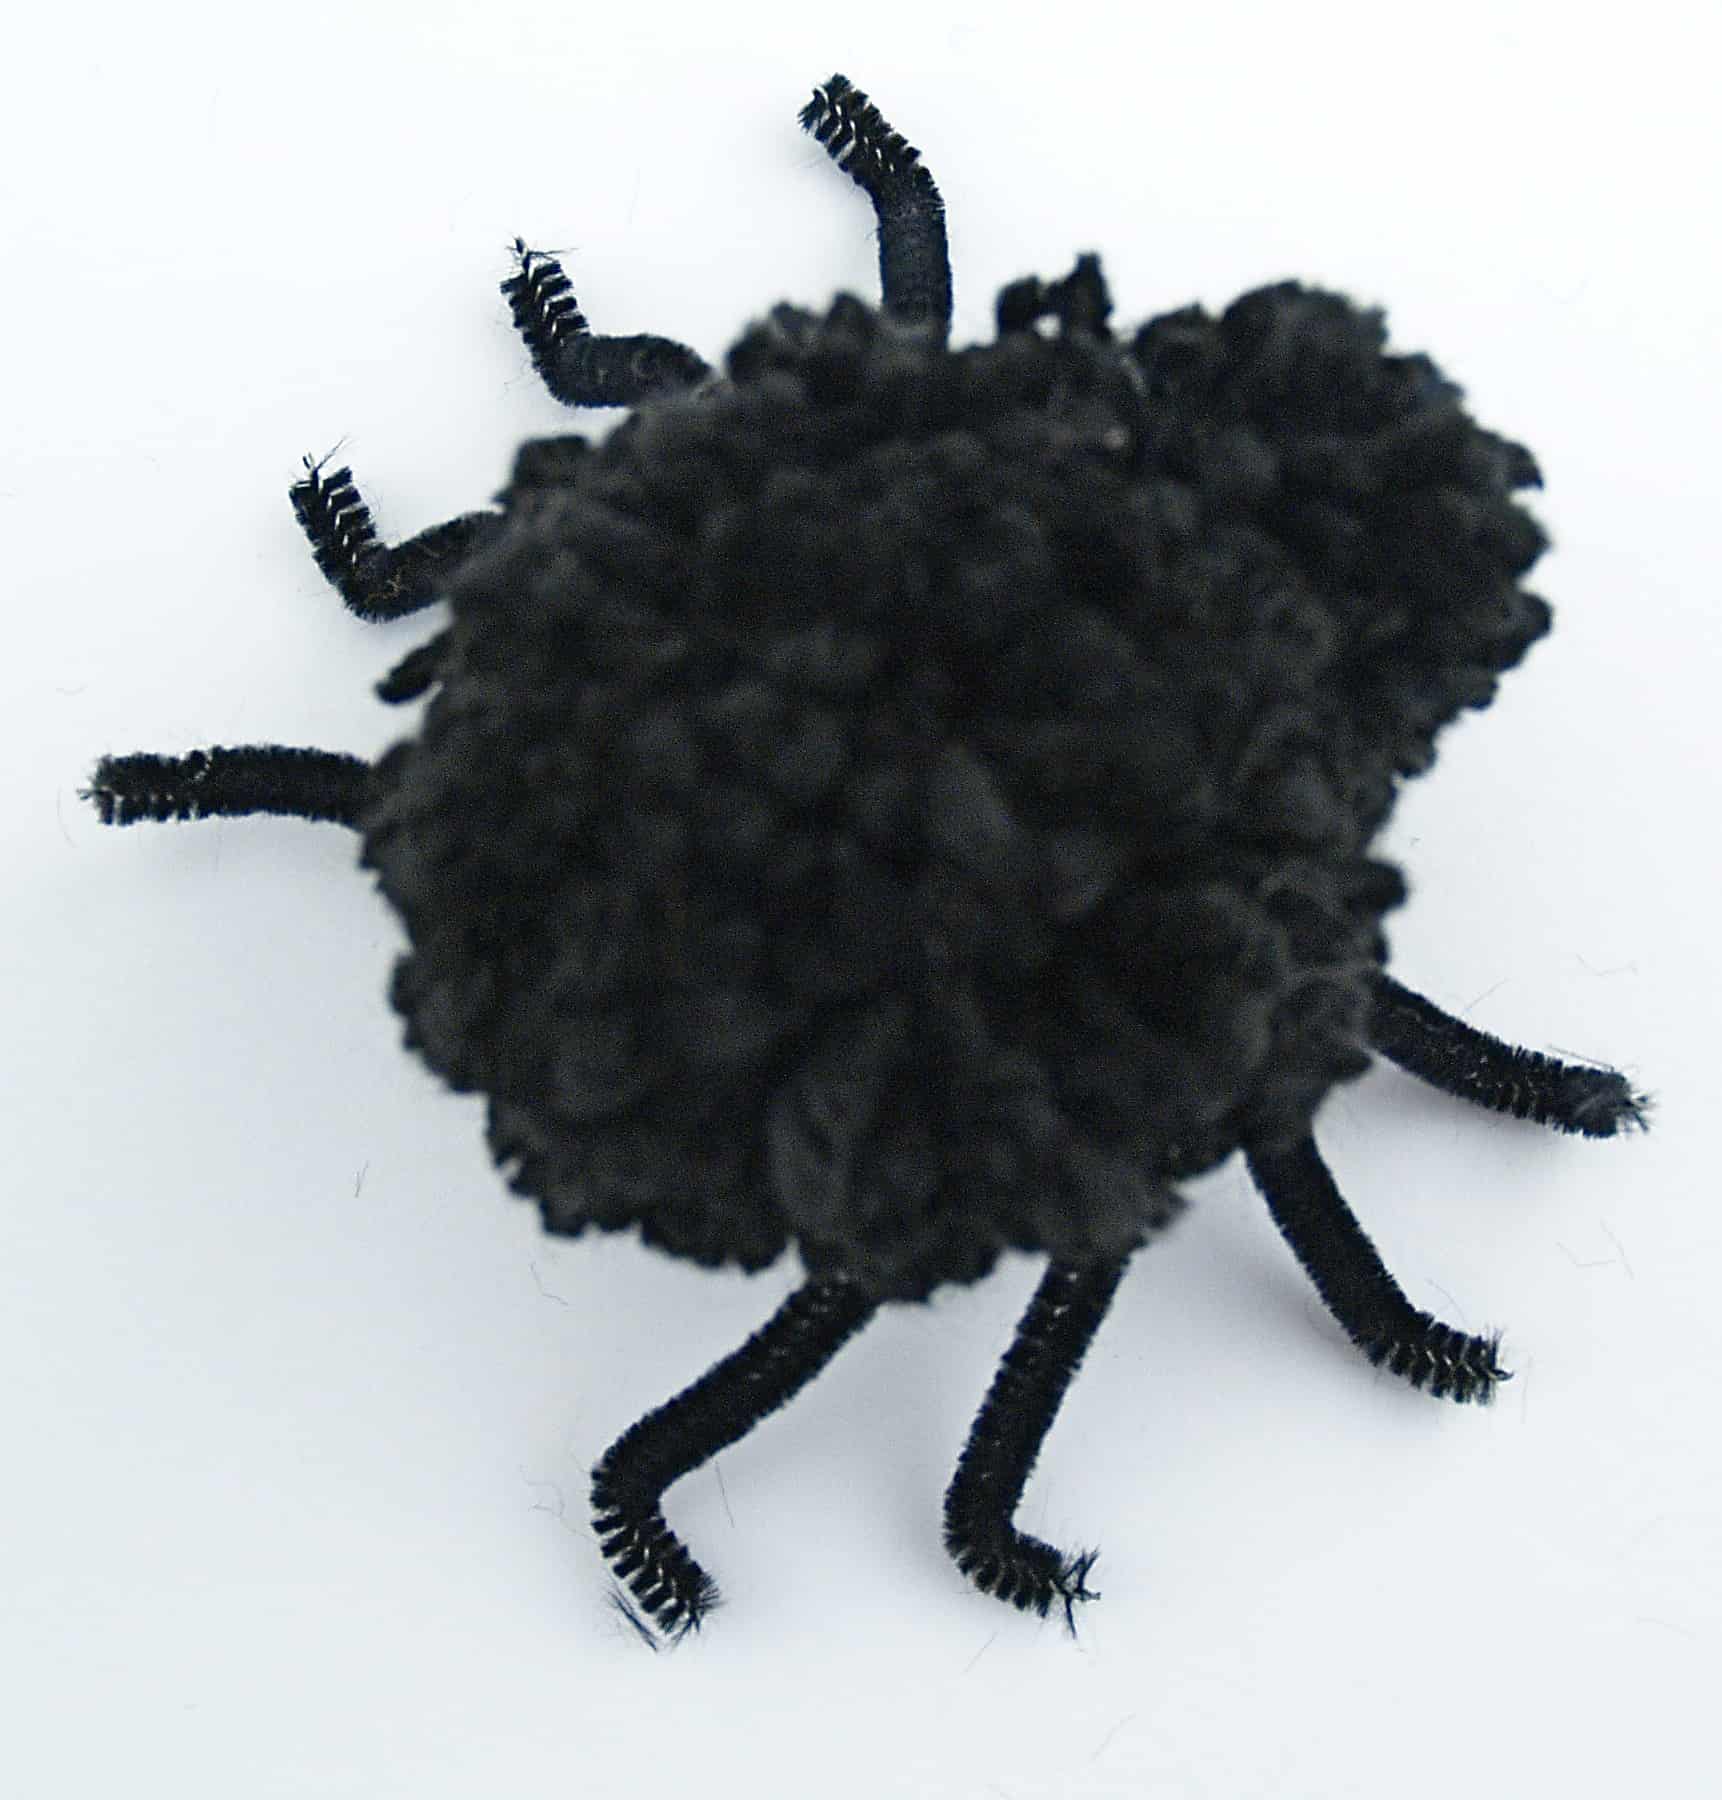
Spooky Spiders

Supplies
- Pom-Pom Maker (Small) Art. No 3124
- Pom-Pom Maker (Large) Art. No 3126
- Patchwork Scissors (Art. No 493)
- Black yarn
- 2 black chenille stems
- 2 wiggle eyes (6mm)
- Glue gun and glue sticks
- Wire cutters
Assembly directions
- Body and head: With black yarn make one large and one small pom-pom per the instructions on the package. Glue the head to the body and set aside.
- Legs: Cut each chenille stem in half with wire cutters. Place the 4 pieces side by side and twist them together in the center and then tie the center securely with a separate piece of yarn.
- Hold the center firmly, separate the legs on each side. About 1/2 inch away from the center on each side, bend each leg down. Make a 1/2 inch bend at the end of each leg to form a foot. Glue leg assembly firmly to bottom of spider body.
- Eyes: Glue one wiggle eye on each side in the head
Pom-Pom Maker Tutorial:
Stay connected with Clover on Facebook | Twitter | Instagram | Pinterest | YouTube | Ravelry
[mc4wp_form id=”11289″]