Embroidery Stitching Tool Hoop Art

This week my son and I had the opportunity to try the Clover Embroidery Stitching Tool to make some sweet hoop art. We had never tried this method of stitching but were absolutely mesmerized by some of the videos we had seen of it being done. My son is a creative 12 year old and kept asking when we could try it out, I on the other hand was putting it off in dread of learning a new craft. We read the directions and each did several test runs playing around to get the feel for it. To my surprise it was wonderfully easy going!
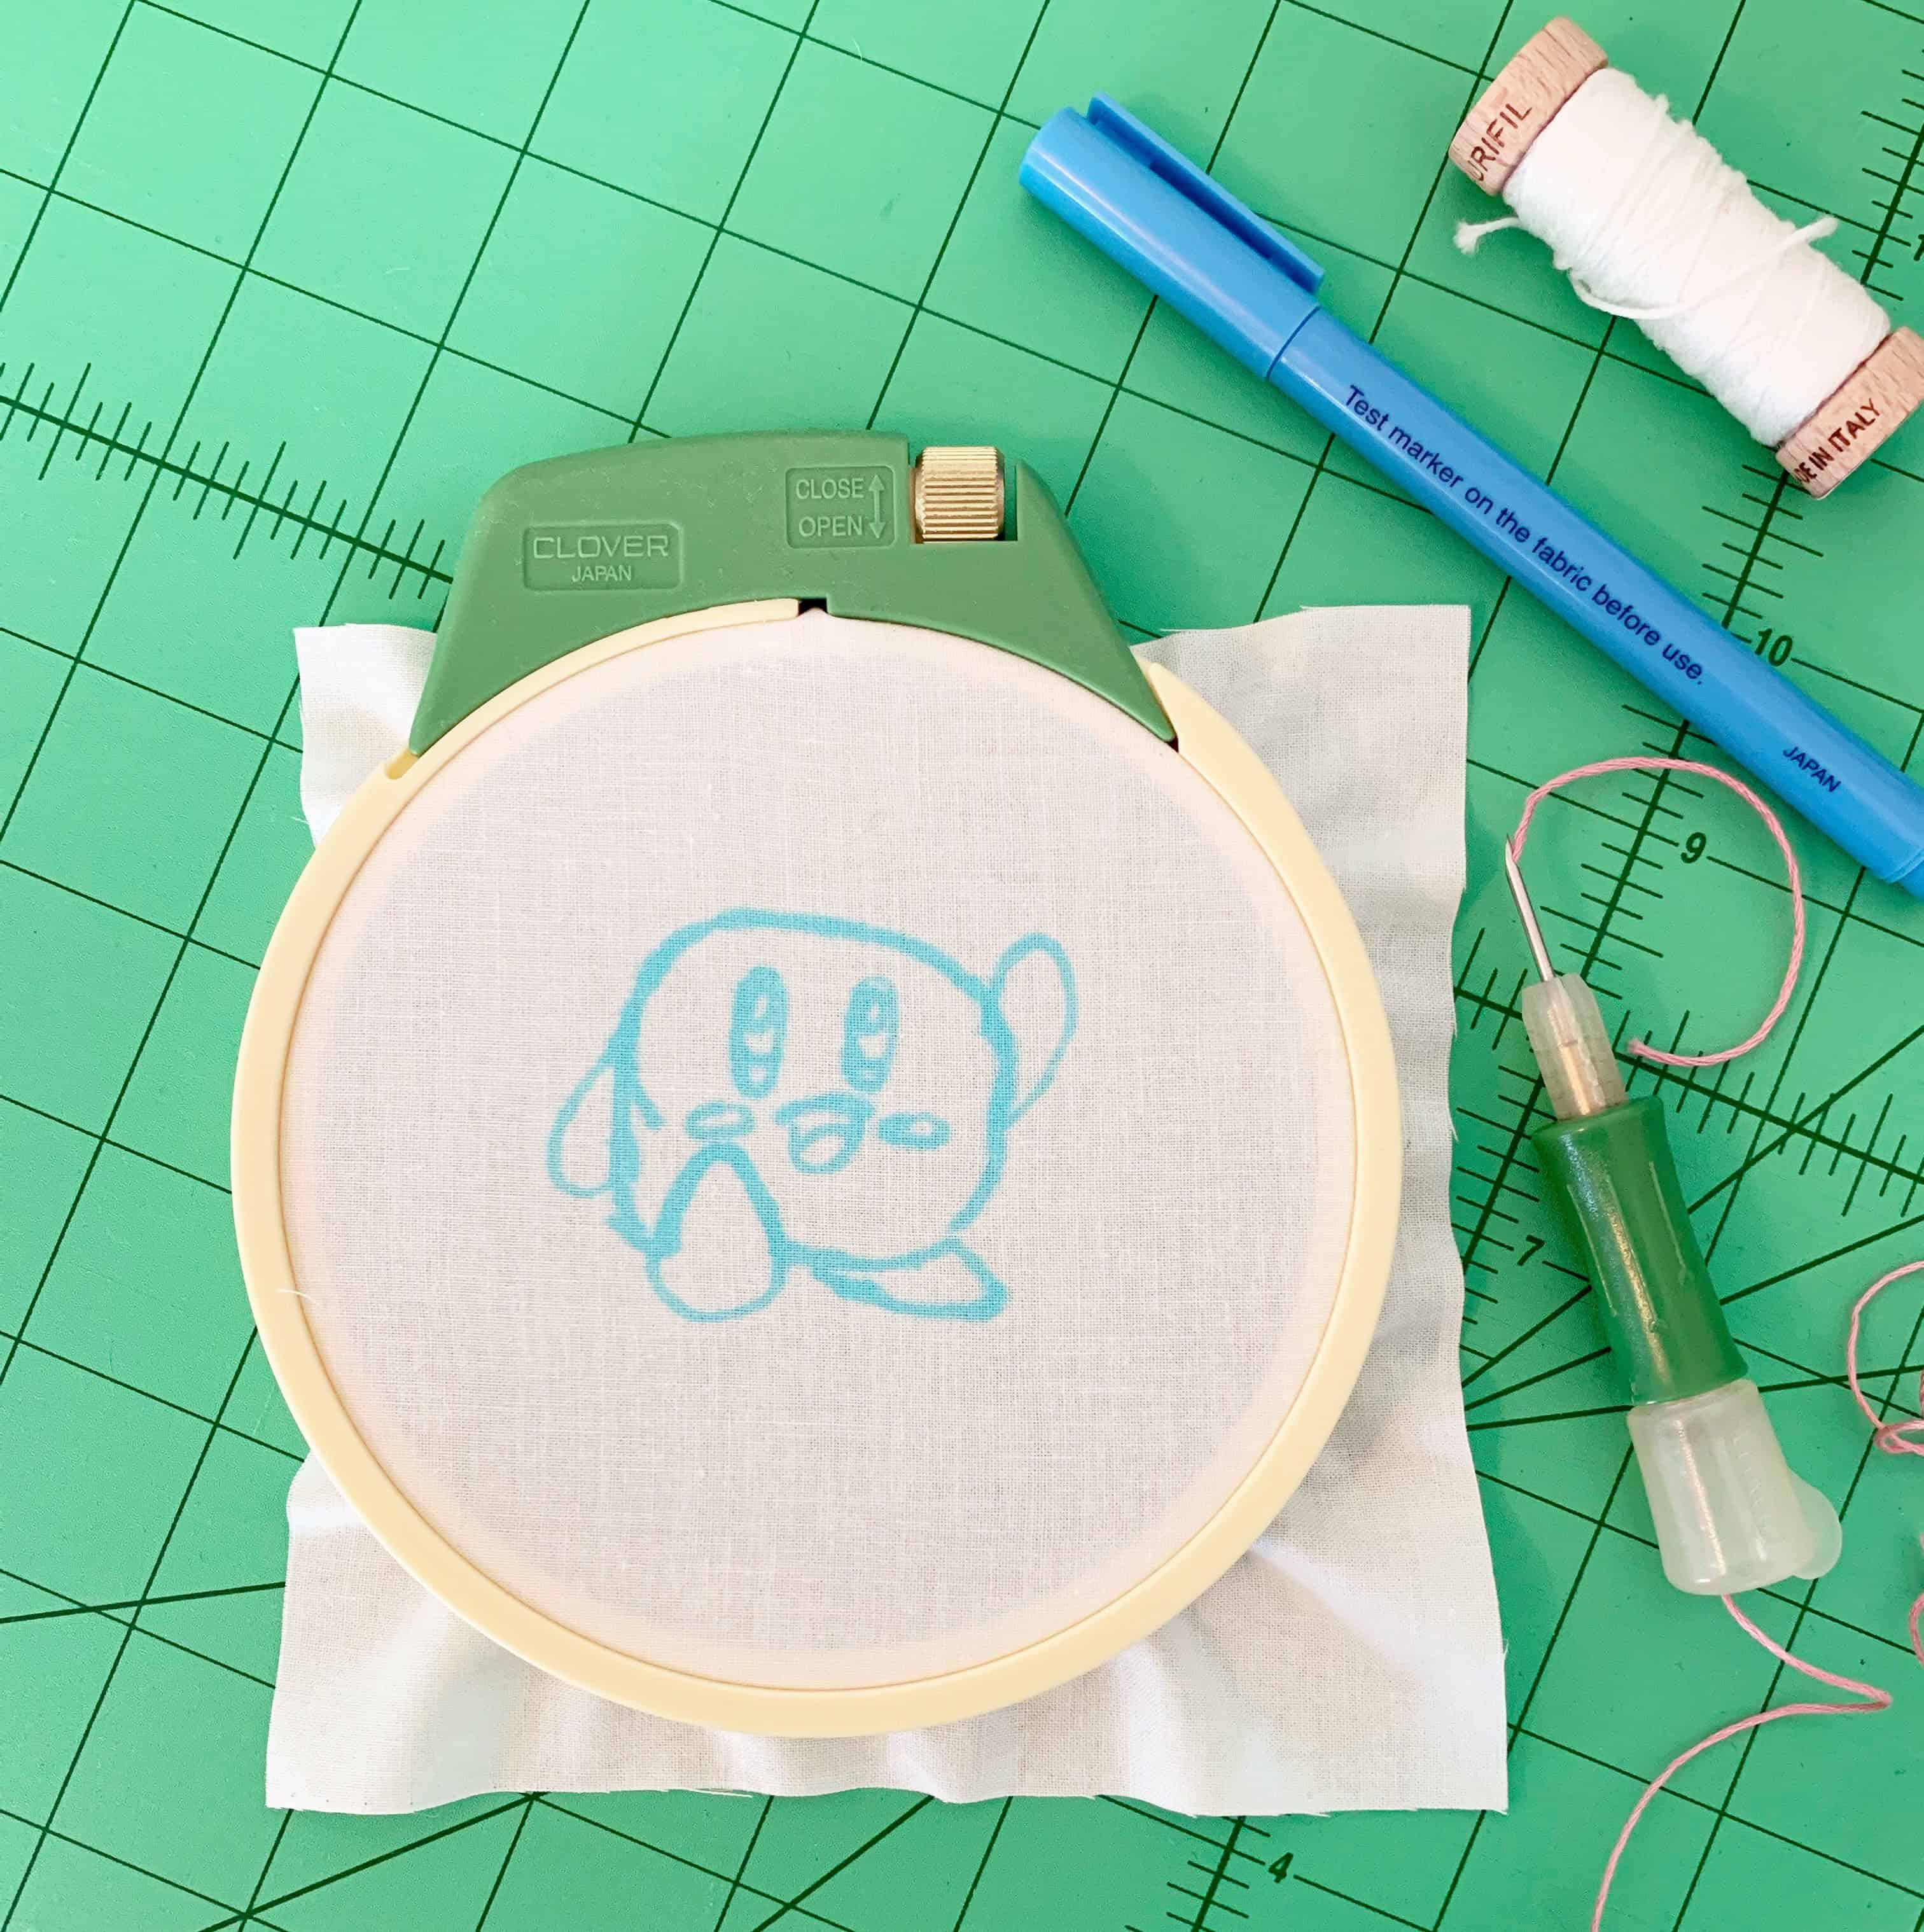
Next we each drew up what we wanted to stitch, he free handed his favorite character Kirby while I traced a puppy out of an embroidery book. While his stitches were good he wanted me to actually stitch his up for him. I used a basic quilting cotton fabric and 6 strands of Aurifil embroidery floss. I know that a thicker fabric would be more stable for the repeat punching motion but for starters on a small project this worked just fine.

We have two needle head sizes, one for the full 6 strand floss and another for a 12 weight thread or 3 strands of floss. The directions that come with this tool were so complete and easy to follow, it made getting started a breeze! There is also a long needle threader (Embroidery Needle Threader) in each kit that is really helpful and easy enough for a child to use.

The feel of this craft is almost like drawing with thread as your needle slides across the top of the fabric as opposed to the motion of classic embroidery. It really is rather magical watching your design appear! The needle itself isn’t as sharp or fine as a typical embroidery needle and therefore makes a great craft project for children to try out as well.

Once all the stitches are finished, I mist with water to remove the pen markings and let it sit over night to dry. My family has a tradition of crafting when all the cousins get together and this year I will be having this embroidery method for all the kids to try. How fun to copy a picture from an embroidery book or draw something up on your own and be able to punch it out in just a little while!

This is the back side where the loops are. I have seen several designs that actually have the loops as the front of their project and that’s something we will try out next time. I used a basting spray to give the stitches some hold since these will be hanging on the wall I didn’t see the need to actually glue them in place.

This will be going on my sons wall to accompany his growing Kirby collection and he couldn’t have been happier with how it turned out, although next time he wants to do his own stitching too! The stitching process from start to finish on a small picture like this was about an hour total and that includes changing several colors of thread. A perfectly rewarding project especially for those just starting out in crafting.
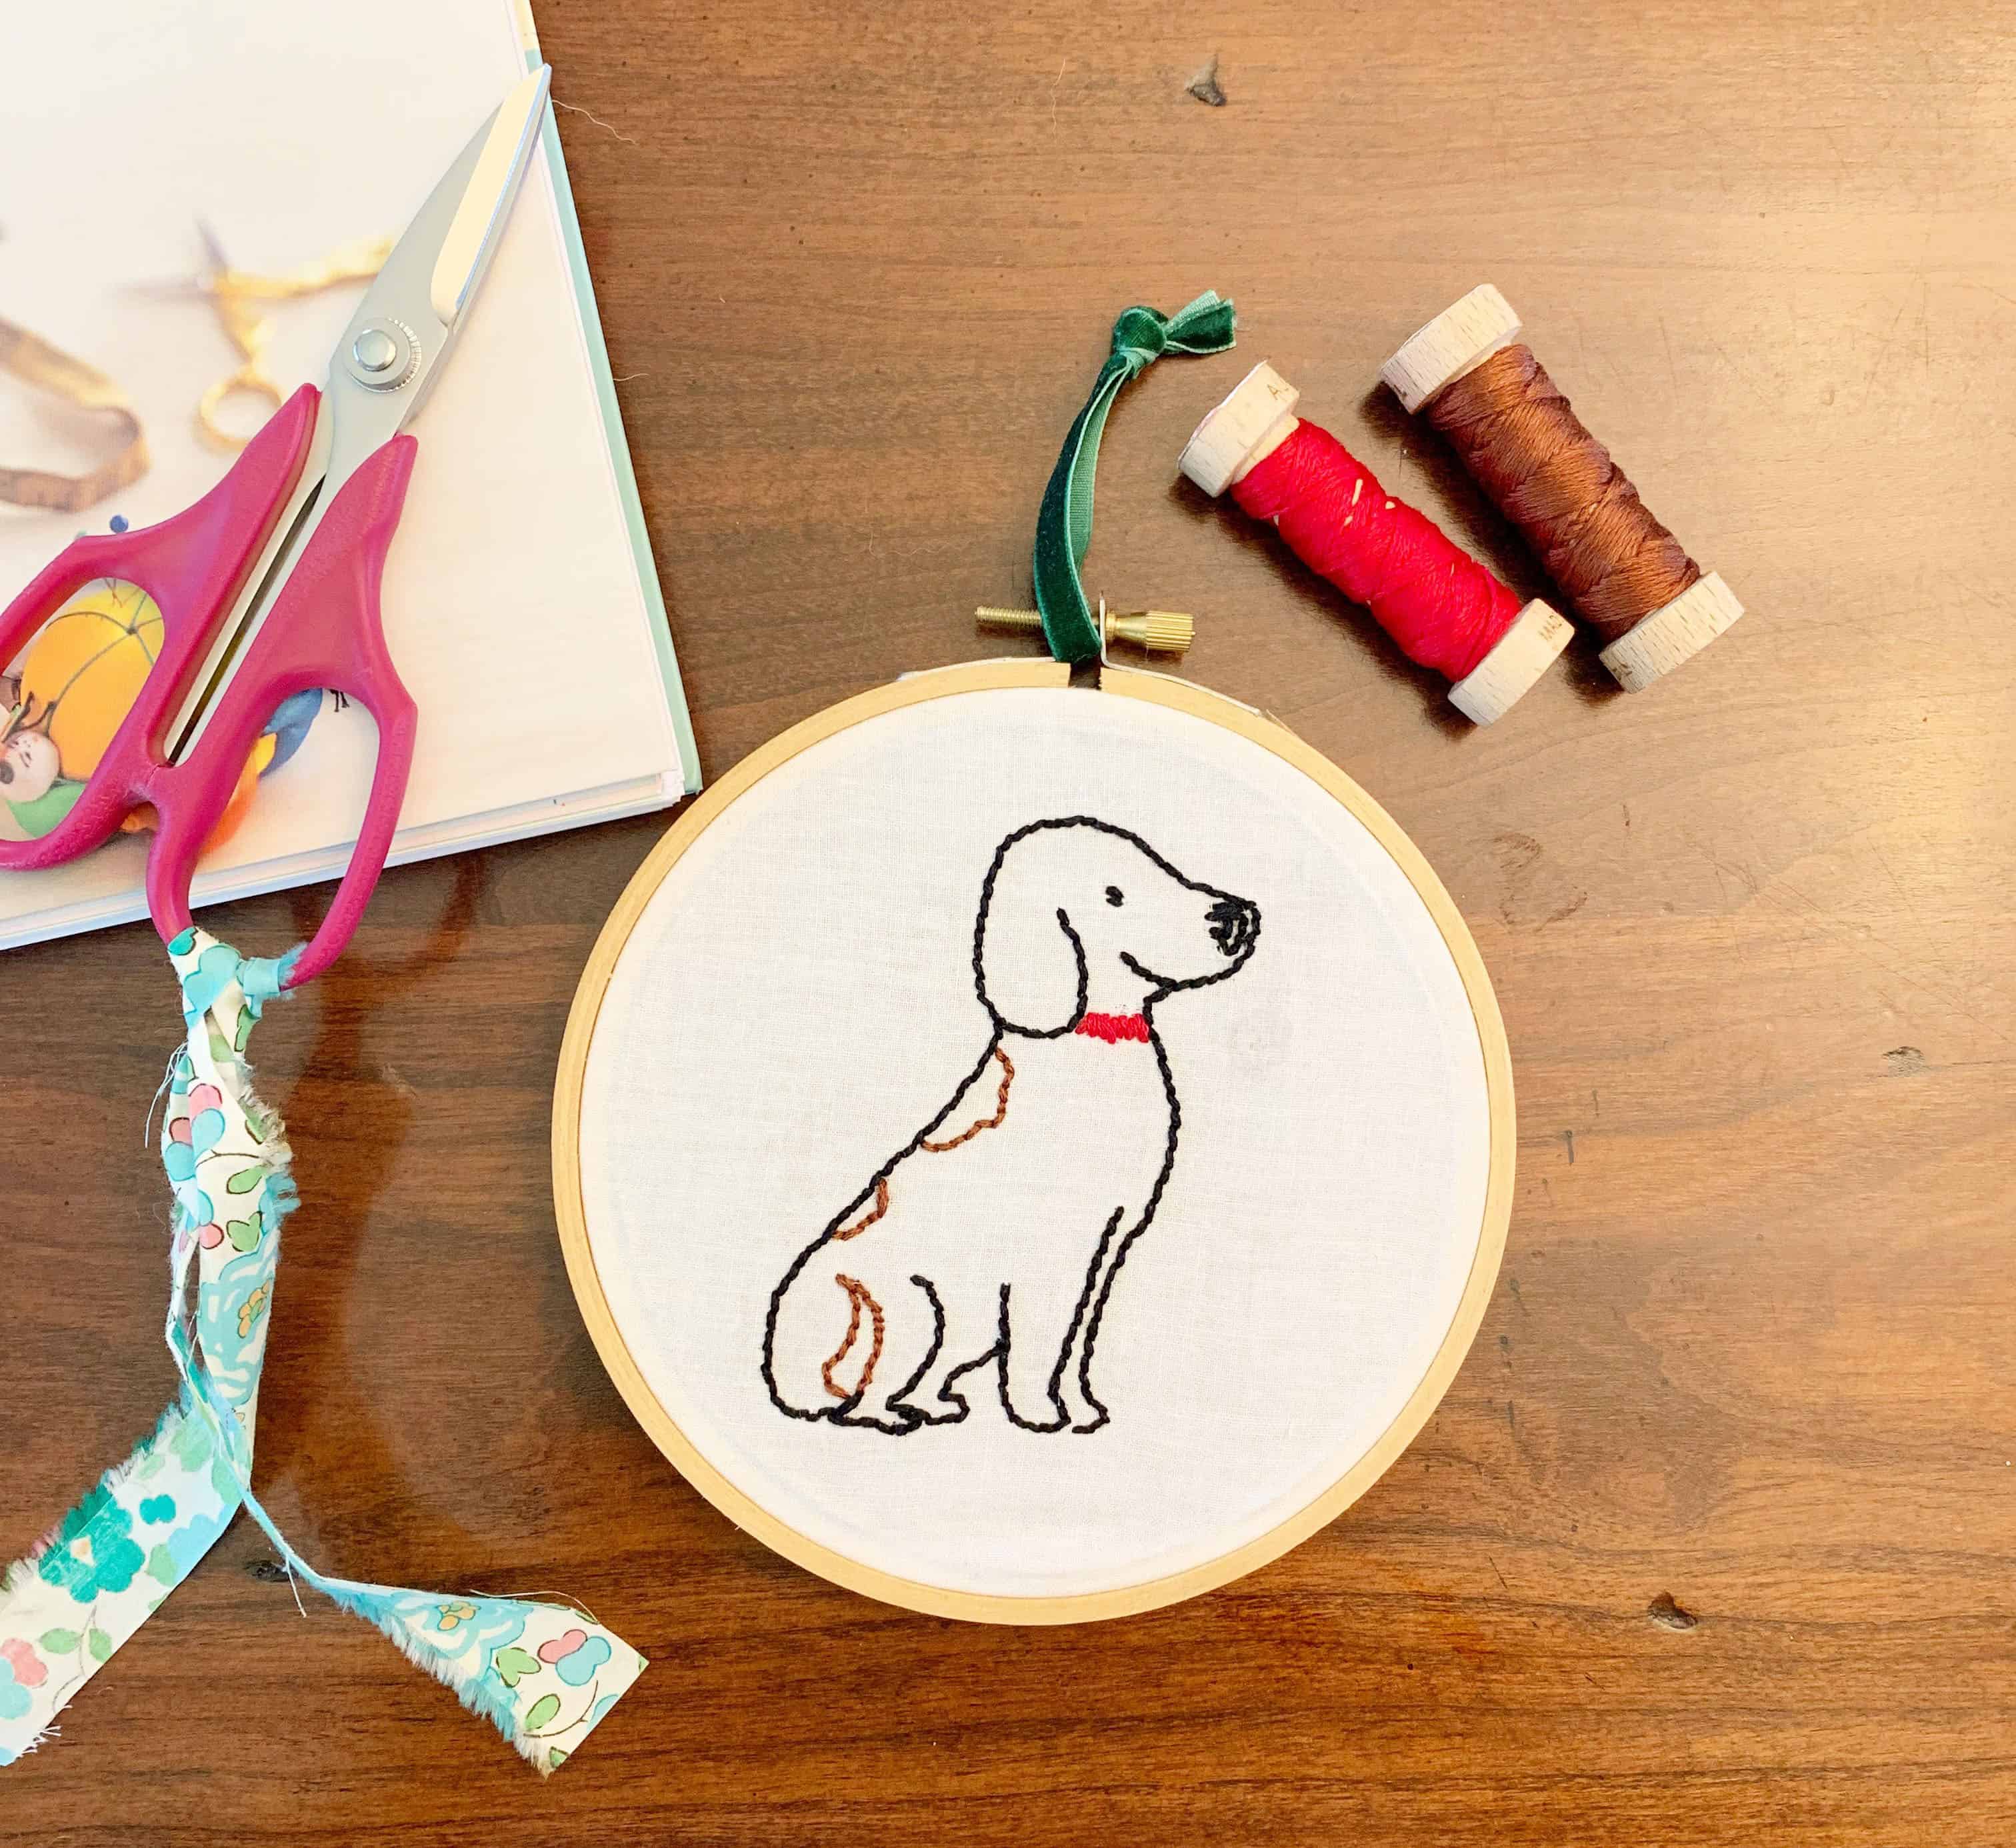
My kids were fighting over who gets the puppy that I made but once I added that green ribbon he became a Christmas dog who will hang in the living room along with some other sweet embroidery work. I’ve ordered some canvas for our next projects and think it will be the perfect way to finish out the last of these long Summer days. I highly recommend giving this stitching method a try, either for yourself as a quick way to make small gifts or for children starting out with crafting! A lot of fun!
Visit Faith’s Blog or find her on Instagram | Facebook
Stay connected with Clover on Facebook | Twitter | Instagram | Pinterest | YouTube | Ravelry
[mc4wp_form id=”11289″]