How to use the Clover Swatch Ruler and Needle (or Hook) Gauge
By Jessie Rayot | Jessie At Home
Hello all! This is Jessie Rayot from Jessie At Home and I am so happy to share this guest post about the Clover Swatch Ruler and Needle (or Hook) Gauge with you today! If you follow my blog, you know I am a fan of Clover products. They always work as advertised, are of high quality, and include wonderful instructions.
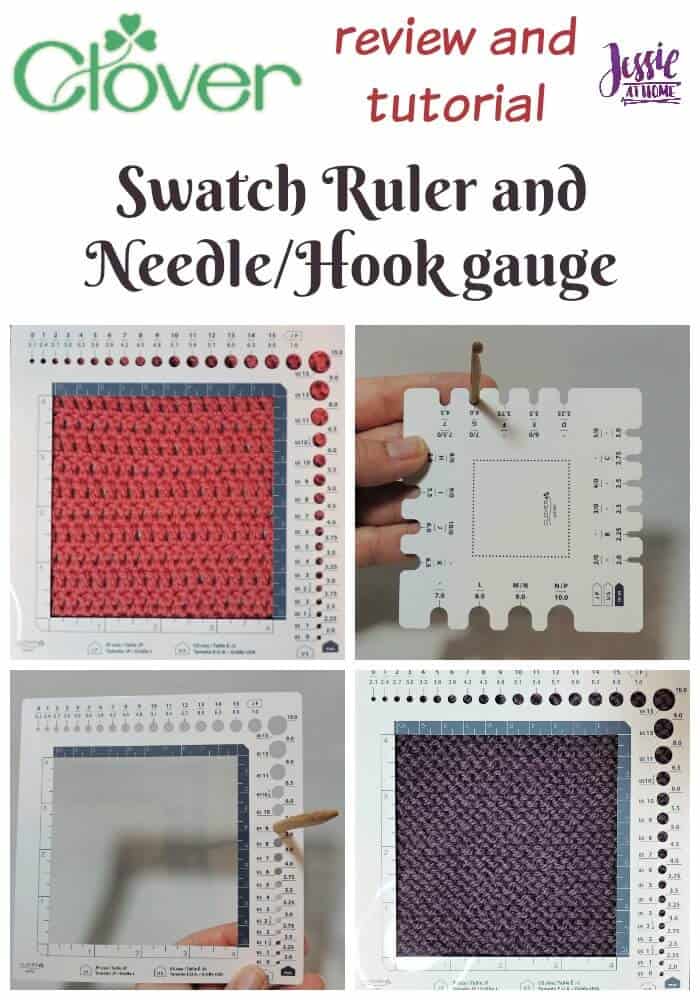
The moment I saw this tool I was in love! It has a 4″ window for measuring your swatch gauge, the holes for measuring your needle gauge are in US, metric, and Japanese sizes, and the second square with the slots for measuring hook gauge fits inside the window so they lay flat together. Everything about this tool is awesome.

So, here’s the plan. I’m going to go over 4 skills with you. We will discuss how to use the needle gauge, how to use the hook gauge, how to measure knit gauge, and how to measure crochet gauge. Then you can pop over to THIS POST on my blog and learn why you should care about gauge and how to adjust your gauge if it is not correct. You can also enter to win one of these awesome tools from Clover!
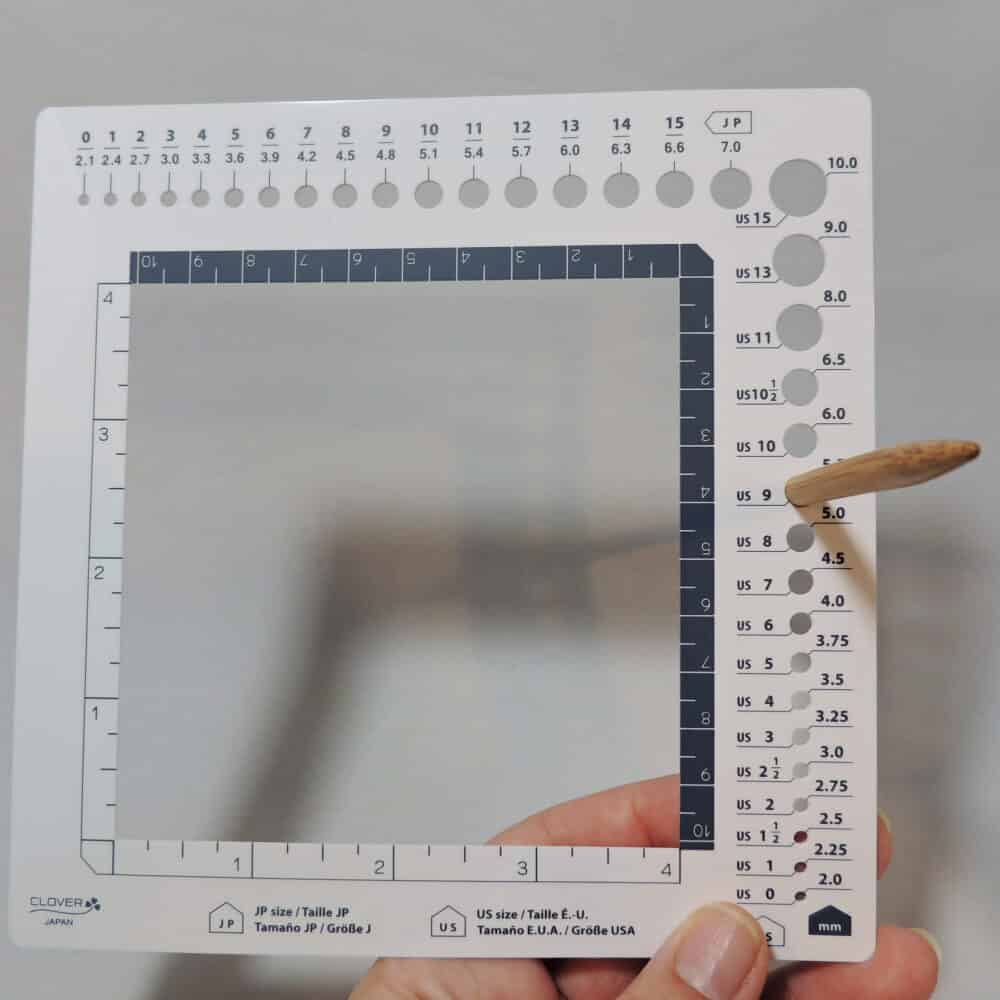
Sometimes knitting needles don’t have the size printed on them, or sometimes we use our needles so much that the size has worn off. I know most of my double pointed needles have no sizes on them, and knowing what size needles you are using is important! That’s where the needle gauge comes in.
To find the size of your needle, you just have to find the smallest hole that your needle will insert completely into. This means the needle needs to go all the way into the hole, not stop at some part of the tip before the needle has reached its full diameter. Once you find a hole that works, check the next smaller hole. If it still fits, keep going down until you find a hole that the needle does not go into completely. The smallest hole that fit is the size of your needle. So the needle in the picture above is a US 9, or 5.5 mm.
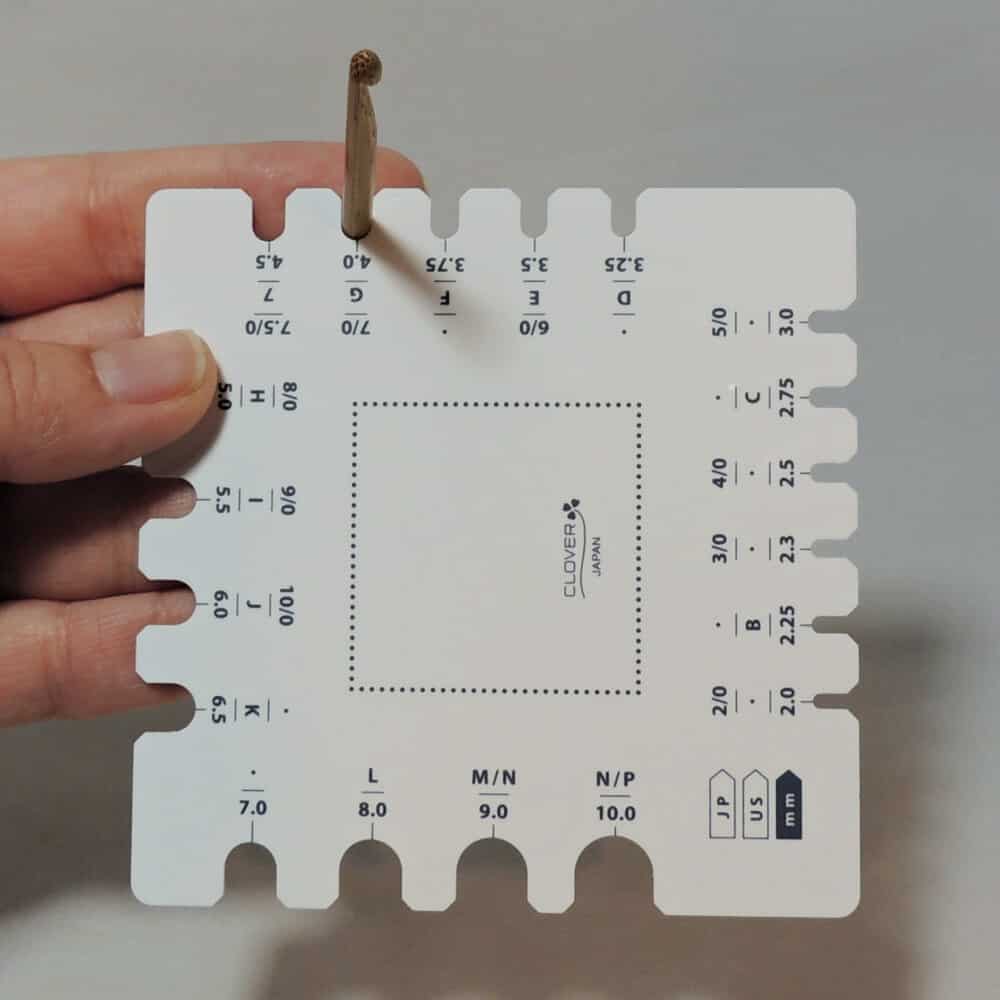
The hook gauge works in a very similar way but for crochet hooks. The tool is made with slots to slide the shaft of the hook into because in some hooks the actual hook part would not fit through the proper size hole. Slide the shaft of the hook into the slot and find the smallest slot that the shaft fits into. This is your hook size.
With hooks it is important to measure the shaft – this is the part of the hook just after the actual hook, but before any shaping for a thumb hole, ergonomic handle, or any other reason. Some hooks are essentially a dowel with a hook at the end and these are easy to measure, but many hooks have variations in the handle, so it is important to measure the correct part of your hook. The hook above is 4.0 mm, US G, and Japanese 7/0.
It’s time to talk about stitch and row gauge. In most cases this means making a swatch and measuring the gauge of that swatch. Traditionally gauge is measured over a 4″ or 10 cm square. When making a swatch it is recommended that you make the swatch at least 6″ or 15 cm square and measure the gauge in the center of the swatch. This is done because the edges of your piece often have distorted gauge.
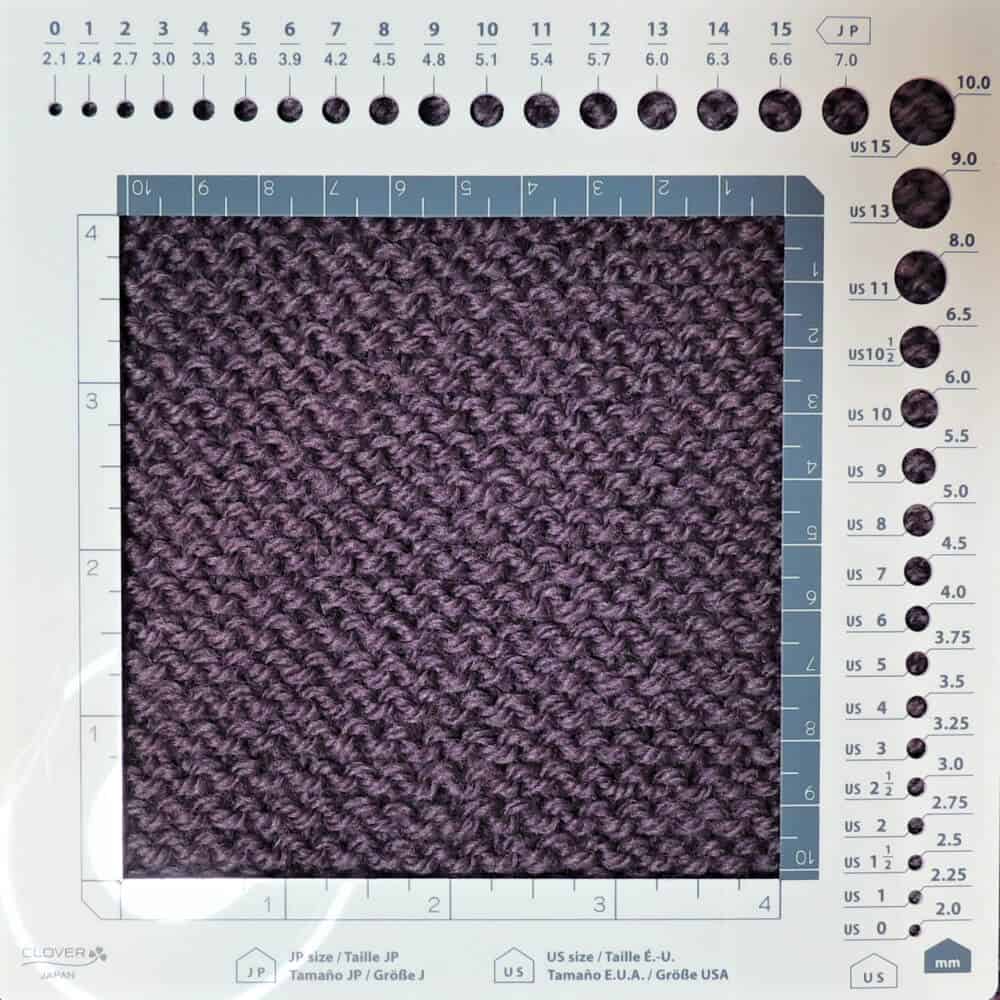
Now let’s look at knit gauge. For this sample I have a knit garter stitch swatch. Lay the Clover Gauge Tool on top of your swatch with the bottom left corner of a stitch lined up with the bottom left corner of the window (by the Clover logo). Make sure the tool is lined up vertically and horizontally with the swatch, this may require a little futzing. To find the stitch gauge, count how many stitches can be seen across the bottom of the window. I count 17.
To find the row gauge, count how many rows can be seen along the side of the window. I count 35. This means your gauge is 17 sts by 35 rows in a 4″ or 10 cm square in garter stitch.
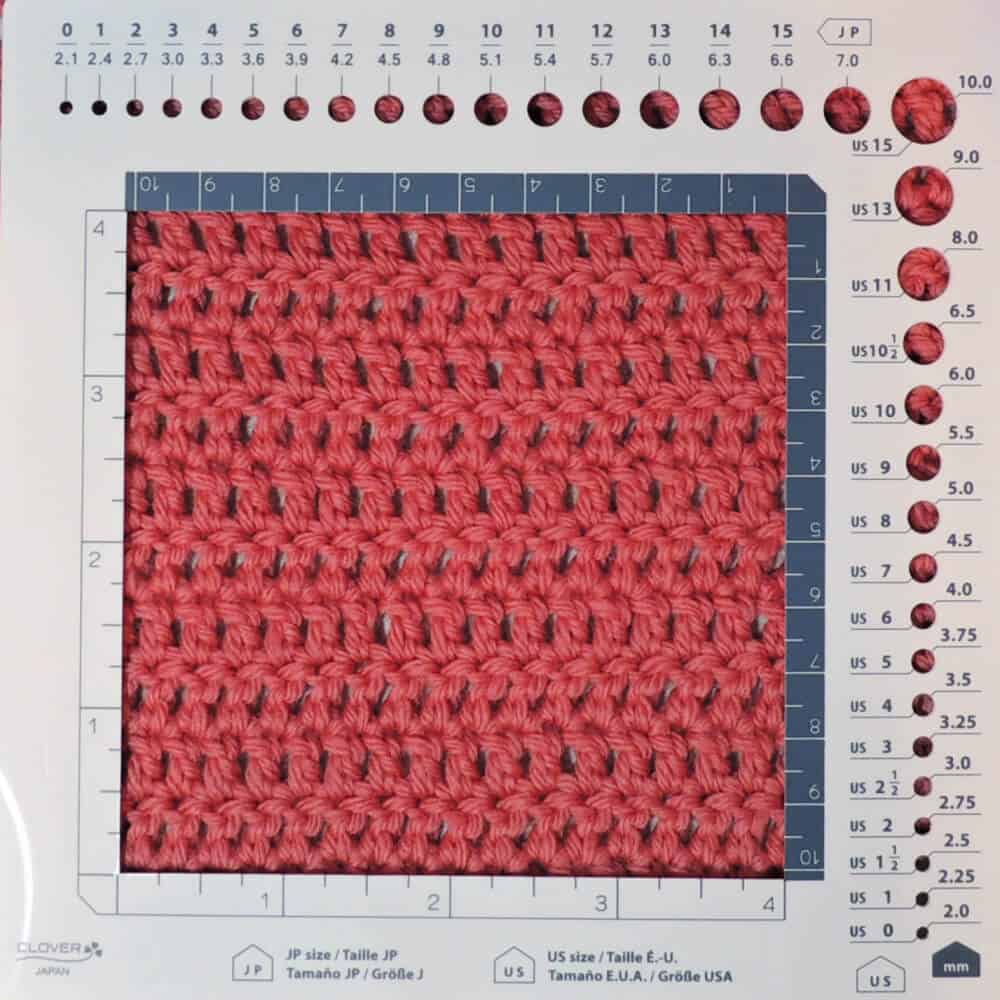
Lastly we’ll look at crochet gauge. It basically works the same as knit gauge. Place the bottom left corner of a stitch in the bottom left of the window and get everything lined up vertically and horizontally. Count the number of stitches across the bottom and the number of rows along the side. For this swatch you can see the gauge is 16 sts by 10 rows in a 4″ or 10 cm square in double crochet.
Most gauges are written for 4″ or 10 cm in patterns. If you need to find gauge for a different size, hop on over to THIS POST on my blog for some tips.
As usual, Clover has created a wonderful tool. It is thin enough to be easily stored, but thick enough to be sturdy. The tool includes all the useful parts I need and is clearly labeled. I have slid both parts of my Clover Gauge Tool into the side pocket of my favorite project bag so I will always have it on hand. Now go grab on for yourself from Clover HERE.