Chunky Crochet Shawl Pattern + Quick Locking Stitch Markers = TLA
Quick Locking Stitch Markers = Crochet Shawls’ BFF
Counting is important. Arguably in life, but definitely in crochet. Unlike with its knitting sister with her handy needle which holds all live stitches in a tidy row, crochet’s stitches are never “live” — and also, less uniformly in place. It’s so easy to miss a stitch in crochet (especially when one is *cough* binge watching, Night Manager while stitching), but important not to when trying to create a geometric shape. My first recommendation is to stop and count stitches at the end of every row. I know, snoozeville. My second, and more exciting suggestion is to use the new Clover Quick Locking Markers to help keep track of crucial stitches that create the shaping for said, well, shape.
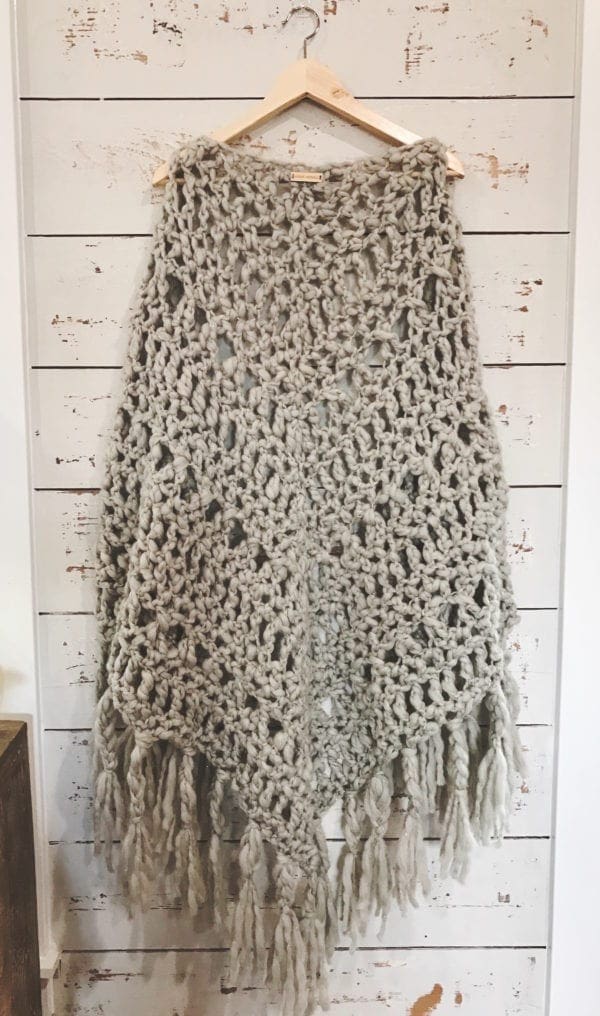
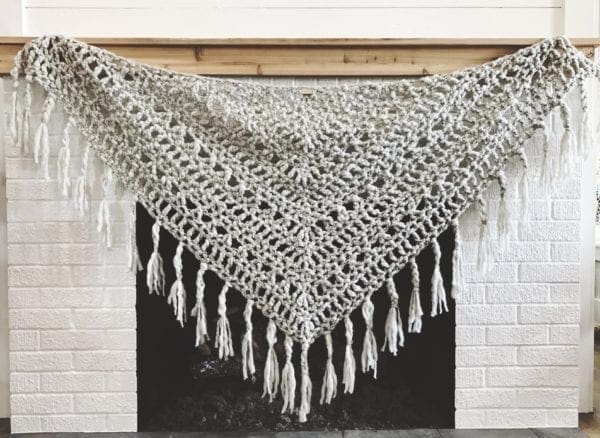
This week I made a luscious, bohemian wrap-blanket. It’s a triangle, designed to start with just a few stitches at the tip and open up outward as you move along. The most important thing to keep track of in order for this project to work is where the center point of each row is, so you’ll know where to increase. This seems simple enough, but when you’re working with a yarn that has any texture at all, and/or working shorter stitches (like hdcs) one stitch can sometimes be a little tricky to track down. This is where Quick Locking Stitch Markers come in.
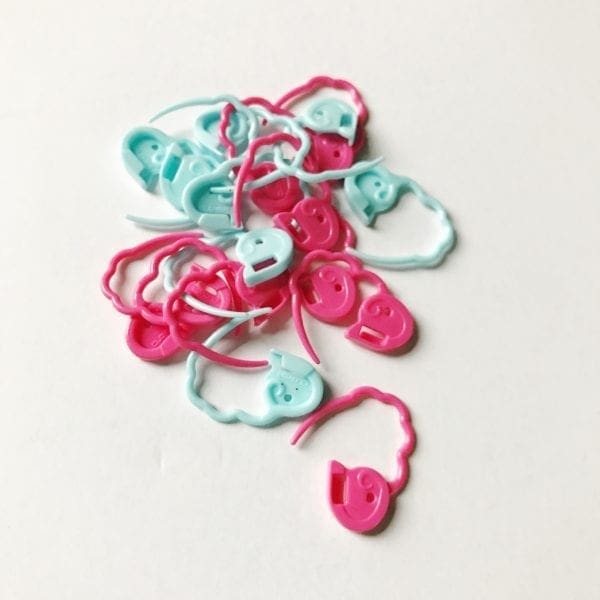
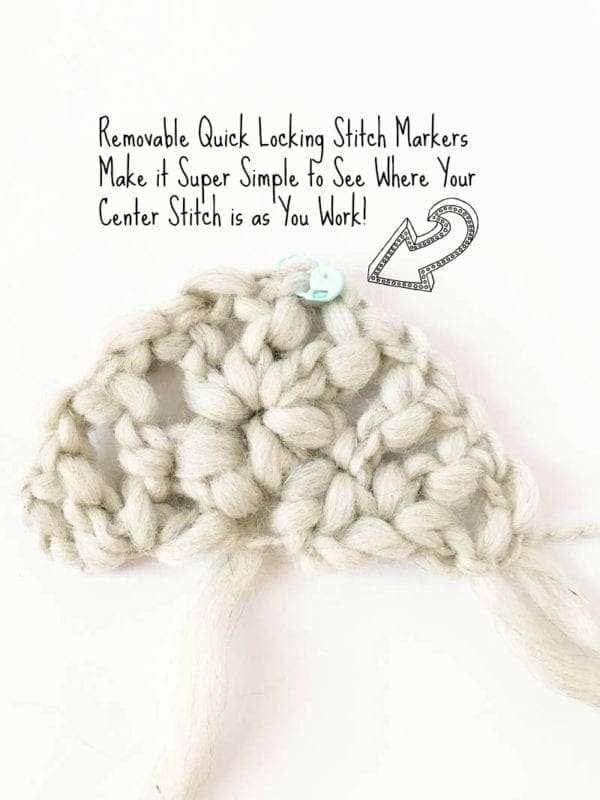
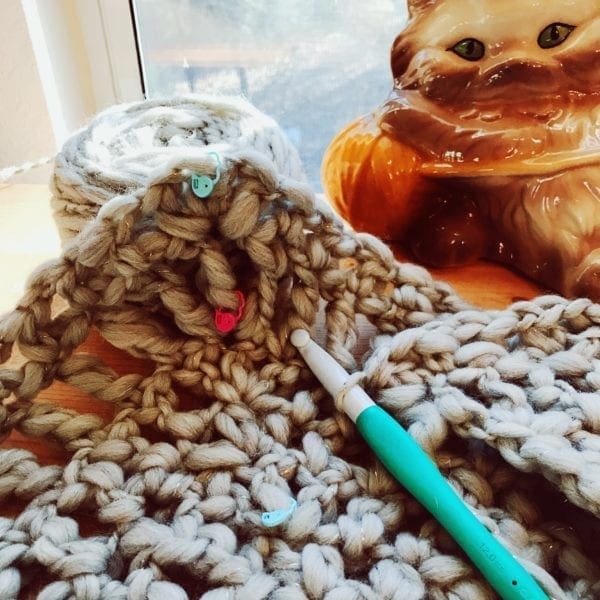
Place a Quick Locking Stitch Marker on the first center stitch of the piece. As you progress, move the marker to the appropriate place to ensure your increases are happening where they should be. If the marker’s off, you’ll know that your stitch count is, too.
SIDE NOTE: You’ll notice the wiggly leg of the marker helps hold it in place, even when the marker isn’t shut. This makes using them fool proof, because you don’t have to worry about the marker accidentally slipping off your shawl!
So grab some scrumptious yarn, an Amour crochet hook (my favorite!), and some Quick Locking Stitch Markers, and get stitching towards some shawl success, people!
Chunky Triangle Shawl
MATERIALS
- 3 Hanks Knit Collage Spun Cloud (100% Wool; 100 yds), in color: Fog Heather — or equivalent bulky, thick & thin yarn.
- 12 mm Clover Amour Crochet Hook
- Clover Quick Locking Stitch Markers (Medium)
- Clover Jumbo Tapestry Needle
FINISHED MEASUREMENTS
- 72″/183 cm wide — excluding fringe
- 34″/86 cm deep — excluding fringe
GAUGE
Approx 8 sts = 4″/10 cm in (hdc, ch-1) stitch pattern.
Pattern
Body:
Ch 4.
Row 1 (RS): [(Hdc, ch 1) 3 times, hdc] in 4th ch from hook (skipped ch counts as first hdc and ch-1 sp), turn. –5hdc, 4 ch-1 sps
Note: Place Quick Locking Stitch Marker in center hdc. Move marker to keep track of center grouping stitch as work progresses.

Row 2: Ch 4 (counts as dc and ch-1), dc in first st, ch 1, sk next ch, dc in next hdc, ch 1, sk next ch (dc, ch 1) 3 times in center hdc, sk next ch, dc in next hdc, ch 1, sk next ch, (dc, ch 1, dc) in last st, turn. –9 dc, 8 ch-1 sps
Row 3: Ch 3 (counts as hdc and ch-1), hdc in first st, ch 1, sk next ch, *hdc in next dc, ch 1, sk next ch** ; repeat from * to ** across to center dc, (hdc, ch 1) 3 times in center st (center group); rep from * to ** to last st, (hdc, ch 1, hdc) in last dc, turn. –13 hdc, 12 ch-1 sps
Row 4: Ch 4, dc in first st, ch 1, sk next ch, *dc in next hdc, ch 1, sk next ch ** across to center st, (dc, ch 1) 3 times in center st (center group), sk next ch; rep from * to ** to last st, (dc, ch 1, dc) in last st, turn. — 17 dc, 16 ch-1 sps
Row 5: Repeat Row 3. — 21 hdc, 20 ch-1 sps
Row 6: Ch 5 (counts as tr and ch-1), tr in first st, ch 1, sk next ch, *tr in next hdc, ch 1, sk next ch** across to center st, (tr, ch 1) 3 times in center st (center group), sk next ch; rep from * to ** to last st, (tr, ch 1, tr) in last st, turn. –25 tr, 24 ch-1 sps
Rows 7-8: Repeat Row 3. — 33 hdc, 32 ch-1 sps
Row 9 (RS): Ch 5 (counts as tr and ch 1), tr in first st, ch 1, *sk next (ch, hdc, ch), tr in next hdc, ch 1, tr in sk tr, ch 1** repeat from * to ** across to center grouping, tr in first hdc of grouping, sk ch, (tr, ch 1) 3 times in center st, sk ch, tr in last st of grouping, ch 1, repeat from * to ** to last hdc, (tr, ch 1, tr) in last st, turn. — 37 tr, 36 ch-1 sps
Row 10: Repeat Row 3. — 41 hdc, 40 ch-1 sps
Repeat Rows 6- 10, twice more. — 81 hdc, 80 ch-1 sps
Note: On some repeats of Row 9 there won’t be an even number of sts to cross before the center grouping. In that case, simple work 1 tr on either side of the center grouping.
Repeat Rows 6-7, once more. — 89 hdc, 88 ch-1 sps.
Fasten off.
FINISHING
Messy Braid Fringe (Make 29):
- Cut 3, 24″/61 cm strands of yarn. Holding strands together, fold in half. Insert crochet hook through RS of shawl edge; lay yarn at the folded point over the hook. Pull yarn through, from back to front, just enough to create loop. Set aside hook and use hands to fold the loop over the edge of the project, pulling the ends of the yarn through the loop. Pull tight-ish.
- You’ll now have 6 strands hanging (3 stands folded). Separate into 3 groups of 2 strands; loosely braid halfway down fringe, and pull to make messy. Use one strand to wrap and tie braid off. Trim and fray ends.
-
Repeat process, attaching 29 fringe bunches evenly (every 3rd ch-sp gap) across shawl edge.
Weave in ends. Wear proudly.
xx,
Vickie
@vickiehowell
Stay connected with Clover on Facebook | Twitter | Instagram | Pinterest | YouTube | Ravelry
[mc4wp_form id=”11289″]

