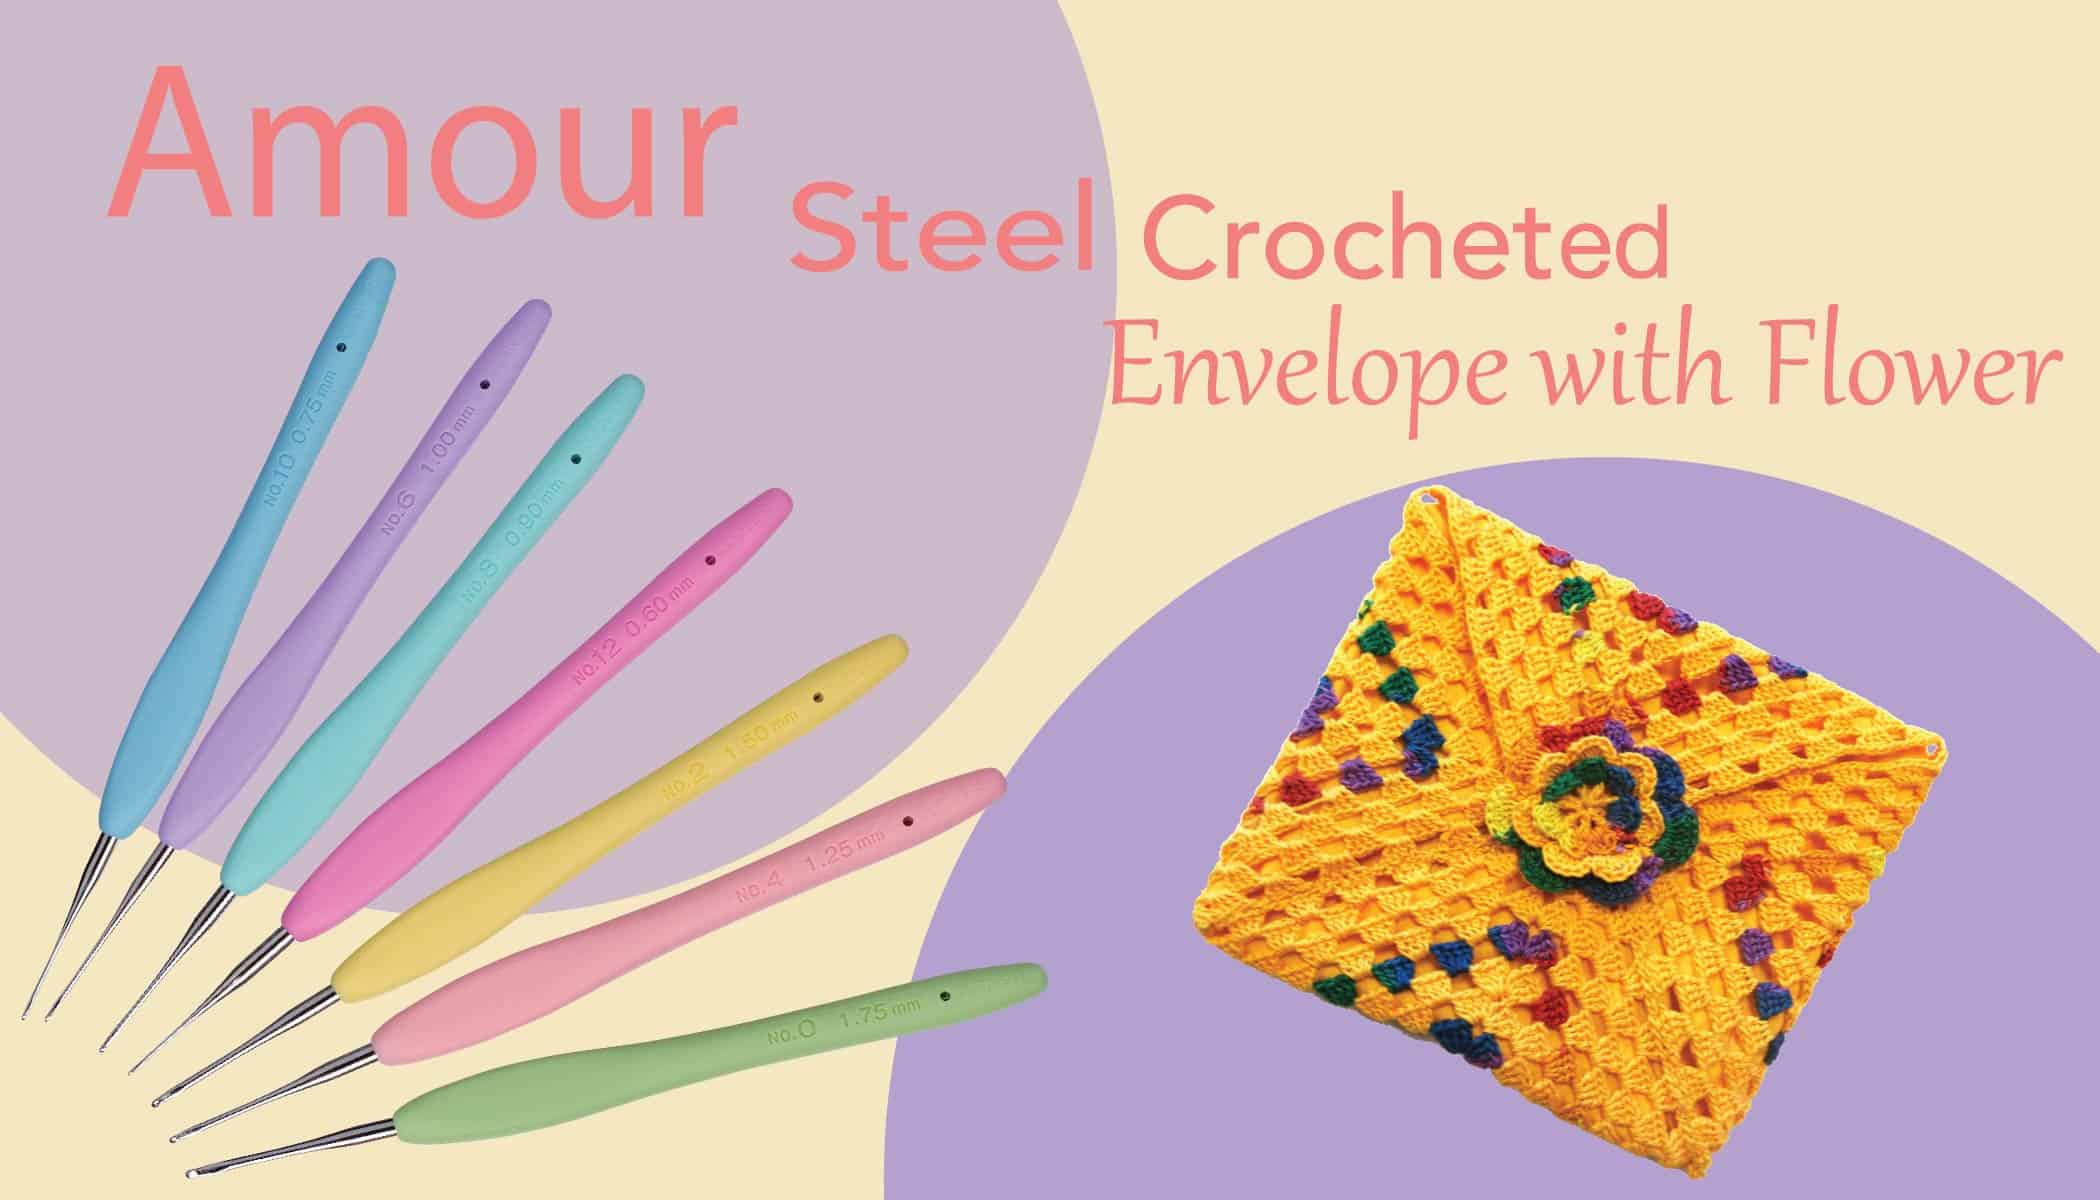
Amour Steel Crocheted Envelope with Flower
With products there are projects. Clover Amour Steel Crochet hooks can help you make the most unique creations.
Abbreviations:
Ch: Chain
Sc: Single Crochet
Dc: Double Crochet
Rnd: Round
Sl St: Slip Stitch
Materials Needed:
Amour Steel Crochet Hook (No.2/1.50mm)
Cotton Crochet Thread (#10 – 2 colors)
Yarn Needle
Fabric square one inch larger than blocked crocheted square
Skill Level: Beginner
Granny square instructions:
Rnd 1: Ch4, join w/ sl st to first ch to form ring. Ch3, 2dc in ring. Ch2. *3dc in ring, Ch2 3 times. Join w/sl st to top of Ch3.
Rnd 2: Sl st in each of the first 2dc and into the first ch2 sp. Ch3, 2dc, Ch3, 3dc in same sp. Ch1. *3dc, Ch2, 3dc in next Ch2 sp. Ch1. Rep from * around. Join w/ sl st to top of Ch3.
Rnd 3: Sl st in each of the first 2dc and into the first Ch2 sp. Ch3, 2dc, Ch3, 3dc in same sp. Ch1. 3dc in next Ch1 sp. Ch1. *3dc, Ch2 3dc in next Ch2 sp. Ch1. 3dc in next Ch1 sp. Ch1. Rep from * around. Join w/sl st to top of Ch3.
Rnd 4: Slst in each of the first 2 dc and into the first Ch2 sp. Ch3, 2dc, Ch3, 3dc in same sp. Ch1. 3dc in next ch1 sp, ch1, twice. *3dc, Ch2 3dc in next Ch2 sp. Ch1. 3dc in next ch1 sp, ch1, twice. Rep from * around. Join w/slst to top of Ch3.
Rnd 5: Sl st in each of the first 2dc and into the first Ch2 sp. Ch3, 2dc, ch3, 3dc in same sp. Ch1. 3dc in next Ch1 sp, Ch1, 3 times. *3dc, Ch2 3dc in next Ch2 sp. Ch1. 3dc in next Ch1 sp, Ch1, 3 times. Rep from * around. Join w/ sl st to top of Ch3. Work the next rounds exactly the same increasing the section (3dc in next Ch1 sp, Ch1 ___ times) by one for each round you add on. You can make your granny square as big as you want by adding rnds You can also use a different color yarn for each rnd of a square for a dazzling effect.
Changing Colors:
To change colors at beginning of each rnd fasten off after sl st to top of Ch3. Leave yarn about 5″ long and after square is complete, weave ends into work. Tie on new color in Ch 2 lp and proceed onto the next rnd in pattern. For finishing each square, after sl st into the top of Ch 3, fasten off and either weave both ends into work or weave just the starting end into the work and leave the finishing end long to sew the squares together. It depends on what type of effect you want as to what you should do.
Finishing:
Block crochet square, lightly steam. Fold fabric 1” around, press. Pin fabric to crocheted block.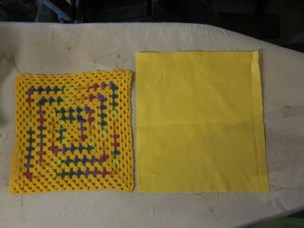
Hem as shown on remaining two sides.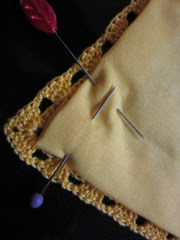
This will be the top part of the envelope that will be seen when open.
Fold three points as shown and stitch together. Crochet flower and attach to top point of envelope.
Sew a snap for closure.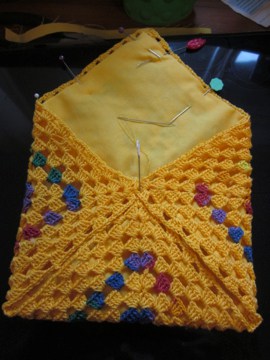
Flower Multi Colored Rows:
Starting with the middle color, make a magic ring.
Rnd 1: Ch4 (counts as 1dc, 1ch),
*dc into magic circle, Ch1, repeat from * 5 more times, join into 3rd chain of the initial chain 4 with a sl st (7 chain spaces).
Pull the magic circle closed, and if changing * 5 more times, join into 3rd chain of the initial chain 4 with a sl st (7 chain spaces). Color for the petals break yarn and join into the first chain space (so that you can crochet over the ends in the next round for less weaving in of ends)
Rnd 2: Ch1, *sc, 3dc, sc into chain space, repeat from * 6 more times (7 petals made), join with a sl st into first sc.
Round 3 is worked behind the petals just made to make chain spaces for the next round of petals.
Rnd 3: Ch1, sc into the sc stem of the last and first sc of round 2 , *ch 3, sc into next pair of sc stems, repeat from *around and finish with a Ch3 and join to the first sc with a sl st (Ch7 spaces behind petals made). Sew crocheted flower to the outside top of envelope .
Attach snap closure to inside of top and body of envelope.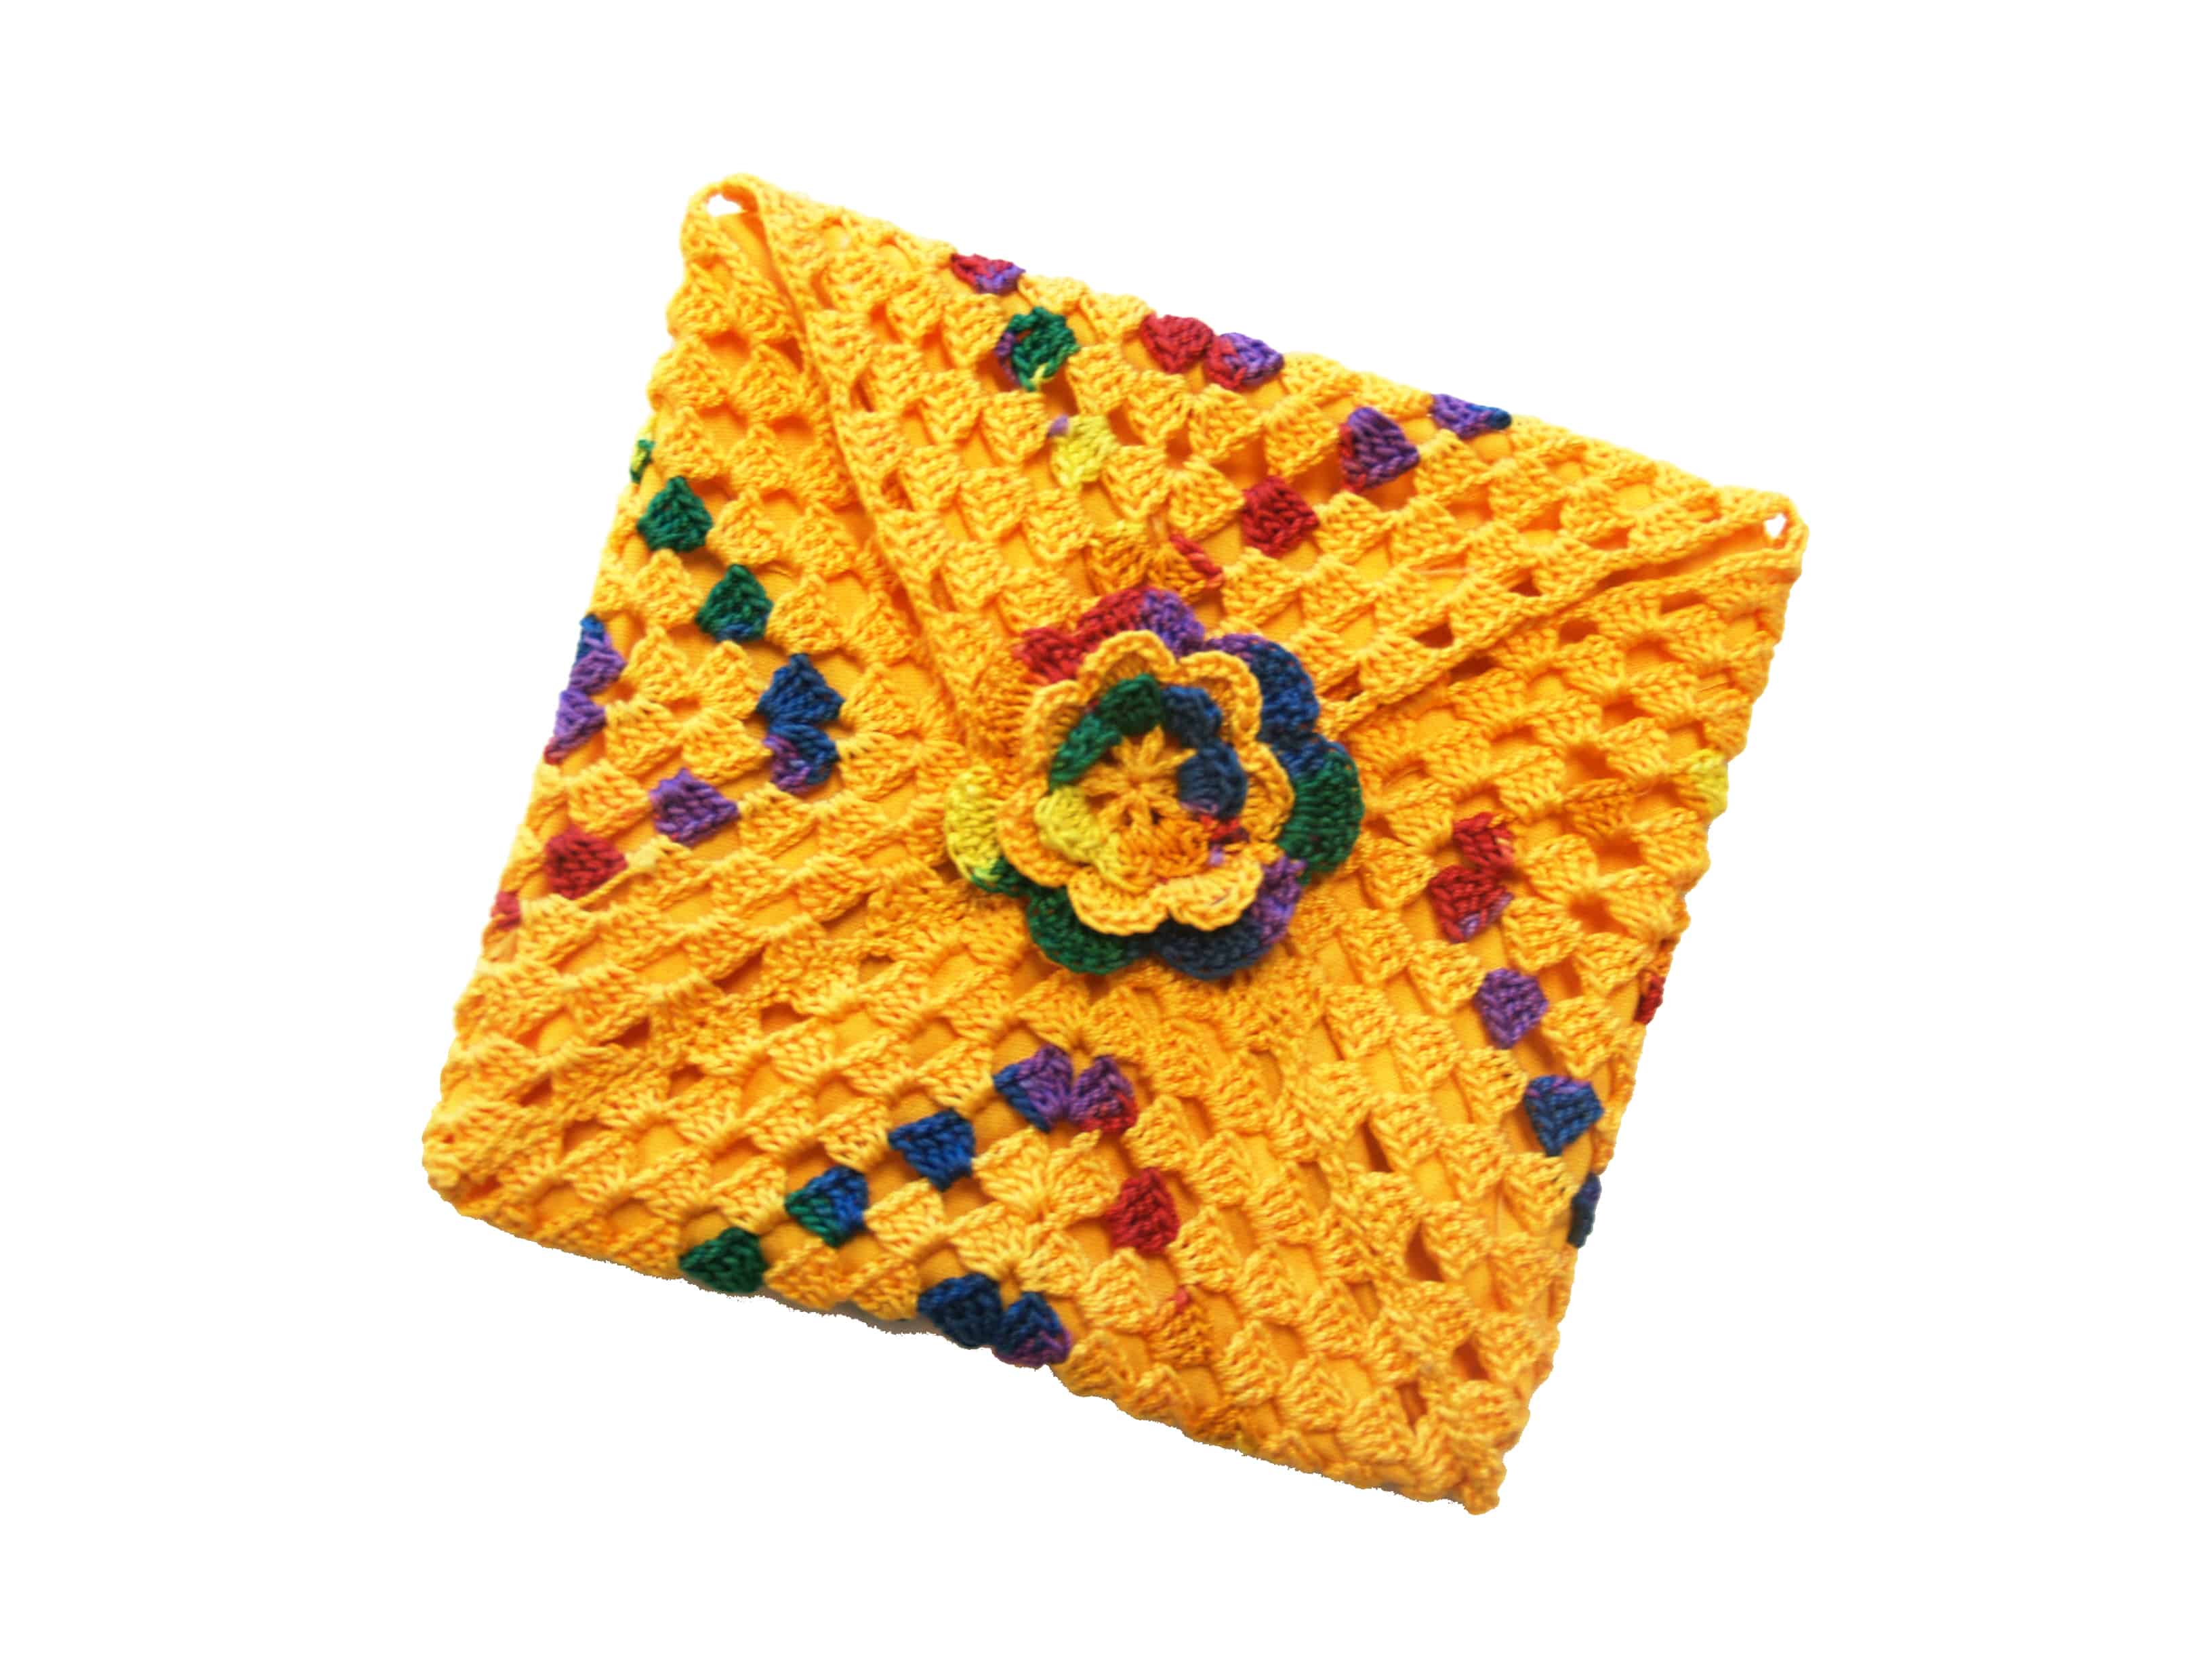
Tell us what you think on Facebook | Twitter | Instagram | Pinterest.