How to Make Kanzashi in Paper by Diane Gilleland
How to Make Kanzashi in Paper
by Diane Gilleland
If you’ve been using and loving Clover’s Kanzashi Makers with fabrics, give them a try sometime with heavyweight crepe paper. It makes beautiful flowers for gift toppers and cards, party favors, bridal, costuming, decor and much more. In this tutorial, I’ll show you the ins and outs of how to use this material with Clover’s Kanzashi tools, and how to add some pretty flourishes to your finished flowers.
Materials:
- Clover Kanzashi Maker, your choice of size and style
- Heavyweight crepe paper; I’m using Melissa Frances Vintage Crepe
- Scissors
- Upholstery thread
- Sewing needle with an eye large enough for upholstery thread
- Shank button with a large hole
- Craft glue
- Buttons
Optional Materials:
- Water-based inks or paints; I’m using Creative Imaginations Twinkling H2O’s
- Paintbrush
- Rubbing alcohol
- Sharpie markers
- Jewelry pliers, wire cutters
- Stem wire
- Double-ended floral stamens; D. Blumchen is a great online source
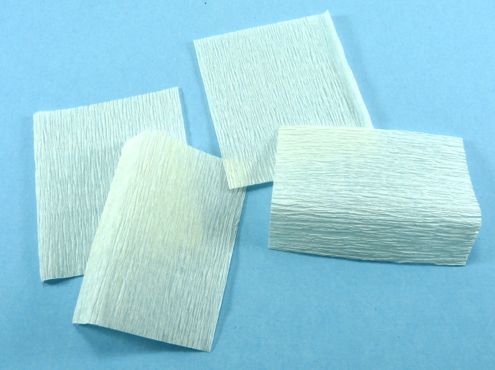
Step 1: To begin, cut your crepe paper into rectangles. You’ll want to pay close attention to the “grain” of the paper, or the direction all those crinkles are running in. For most Kanzashi sizes and styles, you can pre-cut the paper to 2 ½” x 3″, with the grain running along the 3″ length as shown above. If you’re making the Large Round and Large Orchid styles, then precut your paper to 3″ x 3 ½”, with the grain running along the 3 ½” length.
The number of petals you include in your flower is up to you, but it you cut 6-8 pieces of paper, you’ll be ready to make a nice Kanzashi.
Incidentally, don’t worry about any folds in the paper. We’ll take care of these in a moment.
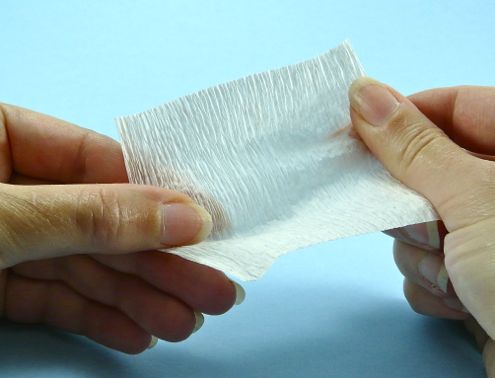
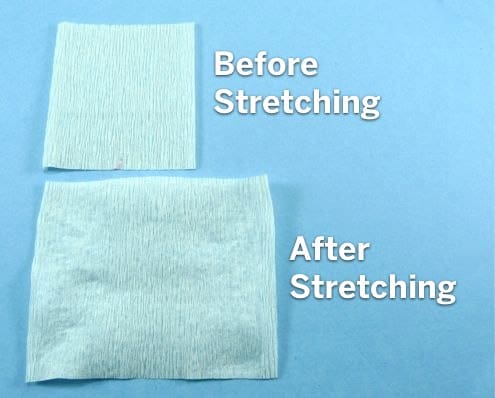
Step 2: Now, gently stretch each piece of paper, smoothing those crinkles out a bit. You don’t need to get the paper completely smooth here – all you’re doing is relaxing it a bit so it will take the folds of the Kanzashi. Stretch until the paper begins to feel softer and won’t stretch further. Try to stretch each piece evenly.
This photo gives you an idea of how much your paper will “grow” through stretching! You’ll gain up to an inch in width.
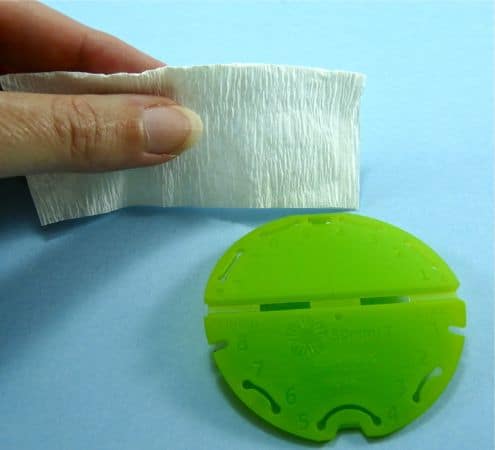
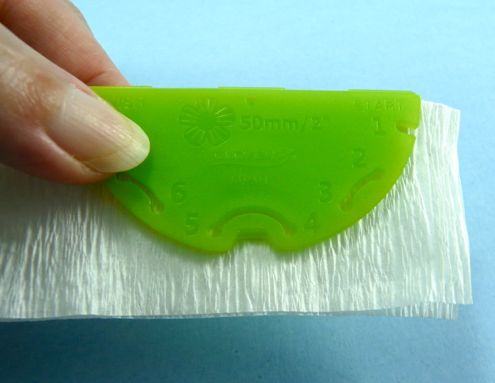
Step 3: Take one piece of stretched paper and fold it in half across the grain, as you see above. This grain direction is very important! When you make Kanzashi from this material, you’ll want the grain of the paper in the finished petals to be running from the top to the bottom of the petal – this allows the paper to take on the petal shapes without any distortion. Almost all Kanzashi styles work best if you start with the grain running this direction.
See how I’ve folded the Clover Kanzashi Maker over the paper?
Now, let’s look at the two exceptions to this grain rule…
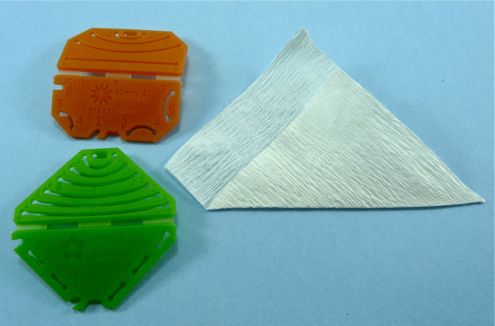
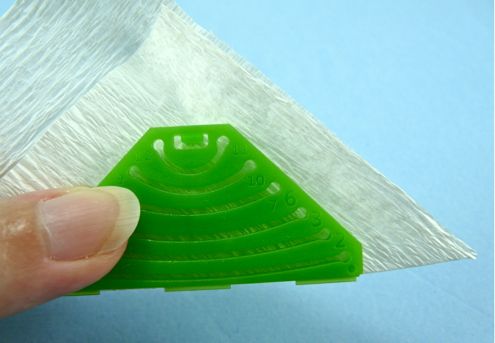
The Gathered and Pointed style Kanzashi Makers (in both large and small sizes) work best if you start by folding your paper with the grain on the diagonal. (Think of this like folding fabric on the bias – it works the same way.) Notice how, with this folded piece, the grain is now pointing to the left? But once we make a petal, the grain will be running from top to bottom.
Now, I could go into a lot more detail here, but it’s probably best just to say: when you’re working with these two styles, make a couple test petals first. Pay attention to which direction your grain was running when you started, and pay attention to how you oriented your Kanzashi Maker when you started. (Seriously, write this information down! You’ll be glad you did.) Then, notice how the petal came out. If you need to, you can flip the paper over so the grain runs the opposite direction and make another test petal. When you get the result you want, just make sure you orient your paper and Kanzashi Maker the same way for each new petal.
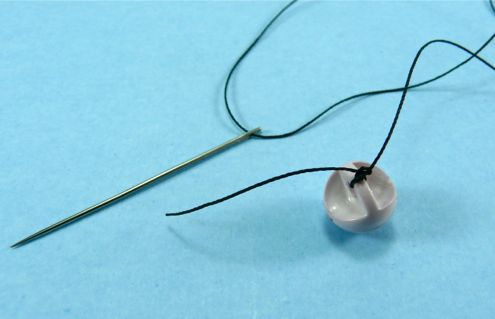
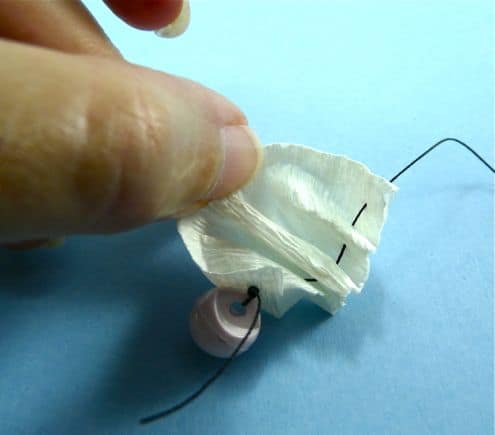
Step 5: Now, we’re just about ready to start making a Kanzashi, but we need to prepare a needle and some upholstery thread. (I’m using black thread here for visibility, but you’ll prefer using a thread that matches your paper.) Nylon upholstery thread is strong enough to withstand the pulling you’ll be doing when you form your flowers, and it’s thick enough that it won’t tear through the crepe paper.
…But most knots you tie in the end of your thread will pop right through the paper, so we’ll make a nice, big stop instead. I like to use a shank button for this purpose – just thread your needle with about 18″ of thread, put the needle through the button shank, slide the button to the end and tie the thread in a double knot.
[youtube http://www.youtube.com/watch?v=wIorNiUVTA0&w=494&h=278]
Step 6: From here, the process of Kanzashi making with paper looks just like the process with fabric. You can see that in action in this video, and also in the instructions that come with the Kanzashi Makers. We just have a couple extra steps to do when we’re working with crepe paper:
First, as you complete each flower petal, take a moment and gently mold it with your fingers into the basic shape you want. Paper is somewhat more literal than fabric, so you’ll need to give it a little tweak here and there as it takes its form. (Also, if you’ve never made Kanashi before, I recommend making a flower or two in fabric before you undertake it in paper – it’ll give you a better idea of how the petals should be forming up.)
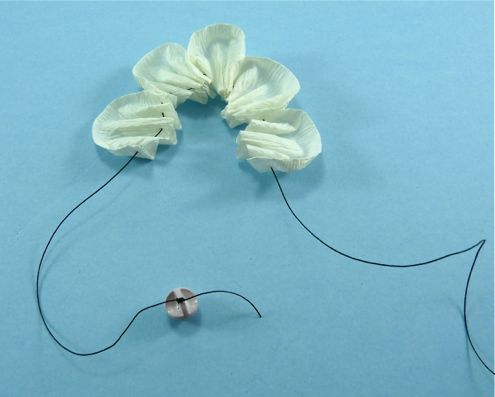
…And then second, when you reach the point where you’ve made as many petals as you want in your flower, you’ll need to slide those petals back up the thread about 6″ so you can tie the ends into a knot. (Again, this is covered in the video.) With paper petals, you’ll need to gently slide them one by one along the thread – if you try to move them all at once, you can crush them.
Cut your stop away before you tie your thread.
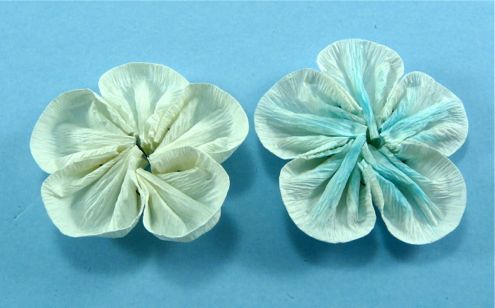
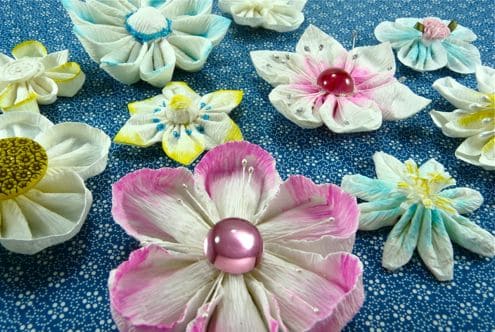
Step 7: Once you’ve tied off the flower, you can <i>really</i> have some fun molding the final shape. Crepe paper has amazing flexibility and stretch. Play around with curling the ends of your petals, or stretching the paper along the edges of the petals to give them a ruffly look. Try flattening your petals out, like I did with the flower on the right. Try creasing all the folds in your petals to make them very sharp. This is an endlessly fun and addictive process.
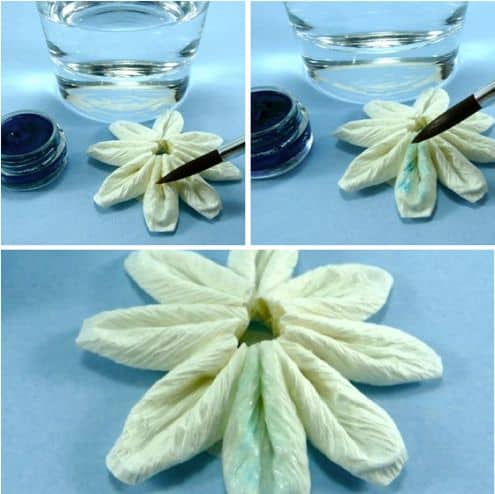
Step 8:One of the most wonderful things about working with crepe paper is all the fun effects you can create by adding color! So here are two simple methods to try. First, get some water-based inks, a paintbrush and a container of clean water. Brush some water onto the flower to moisten the paper, and then brush on a little color. The color will spread over the wet paper. You can brush on more water to thin out the color and smooth its edges, and you can blot away any excess color with a paper towel or cotton swab.
If you want to play with all-over color, you could also use a small spray bottle to dampen the flower more evenly.
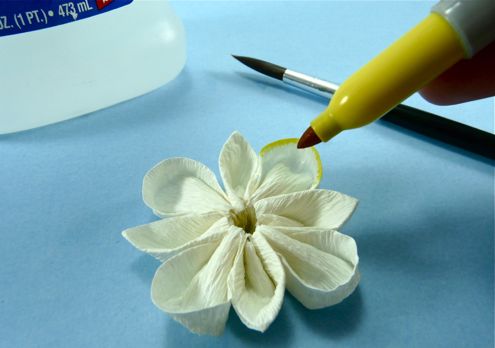
You can do something similar with a paintbrush, rubbing alcohol and Sharpie markers. Just brush some alcohol onto the flower, and then brush the Sharpie over the dampened area. Sharpies are alcohol-based, so the color will smooth right out in the alcohol.
The only difference between these two methods is that rubbing alcohol evaporates more quickly, so be ready to add your color right after you moisten the paper!
Step 8:
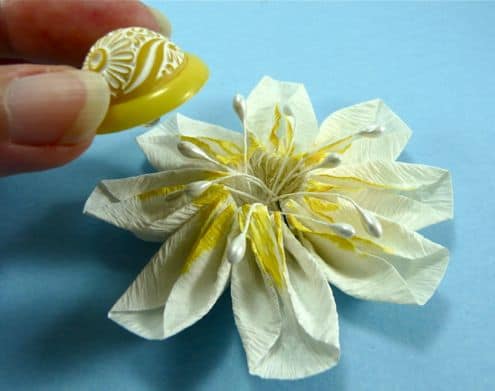
Now, let’s look at some fun options for adding a center to your flower. Of course, you can always use a pretty button, like we often do with fabric Kanzashi. Here, I’m also adding some floral stamens. I just fold them in half, poke the folded end into the center of my Kanzashi, and then glue a button on top.
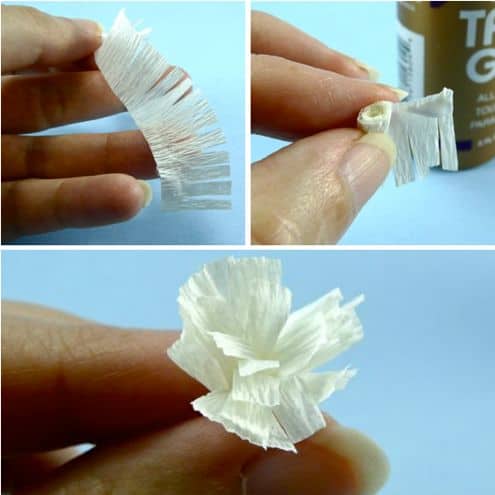
You can also use your scraps of crepe paper to make a simple ruffled center. Take a strip that measures about ½” x 4″, and cut a series of slits down one of the long edges. (Don’t cut all the way through the strip!) Then, roll the strip up, glue the end, and fluff out all those paper fringes.
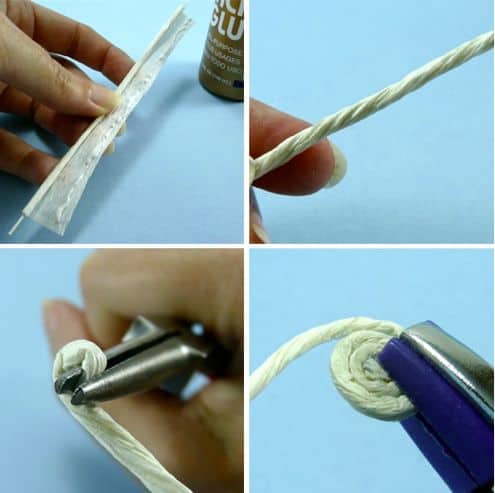
If you have some floral stem wire and jewelry tools on hand, you can make a coiled paper center. Start with an 8″ length of wire and about a 6″ x 2″ strip of crepe paper. Roll the crepe paper as snugly around the wire as you can, and glue the edge. Then, twist the paper around the wire until it’s as tight as it can get. Let this sit a few minutes while the glue sets. Then, use needle-nosed pliers to bend one end into a tight loop. Lastly, use flat-nosed pliers to continue bending the wire into a tight spiral. Trim away any excess wire.
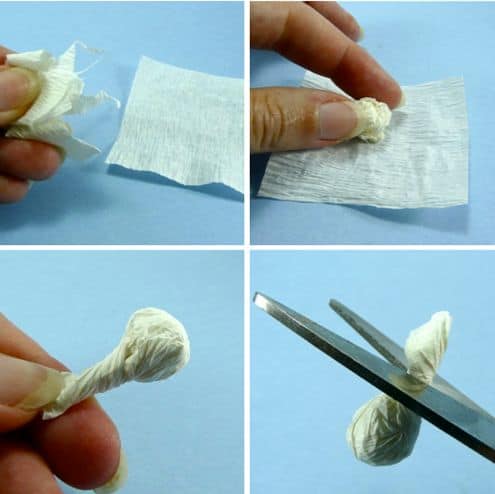
…Or, simplest of all, you can save all the tiny scraps from your Kanzashi-making and use them to make a stuffed center. Start with a piece of stretched paper that’s about 2″ x 2″. Wad some little paper scraps into a tight ball and place it in the center of this piece. Wrap the paper around the wadded center, pull all four sides to the bottom and twist the paper tightly to form a ball. Trim the excess paper away with scissors.
You can also add touches of glitter, beads and flat-backed gems, silk leaves, ribbon – you name it. Once you start playing around with these basic ideas, it’s amazing the variations you’ll discover. Perhaps there’s a great big bouquet of paper flowers in your future!
[diane-gilleland-headshot.jpg
Diane Gilleland is a crafter, podcaster, writer and teacher. Her book Kanzashi In Bloom, shares lots of interesting ways to use Kanzashi in craft projects. And you can catch up with her online at CraftyPod.com
