Paper Piece Your Pincushion
By Rebecca Greco
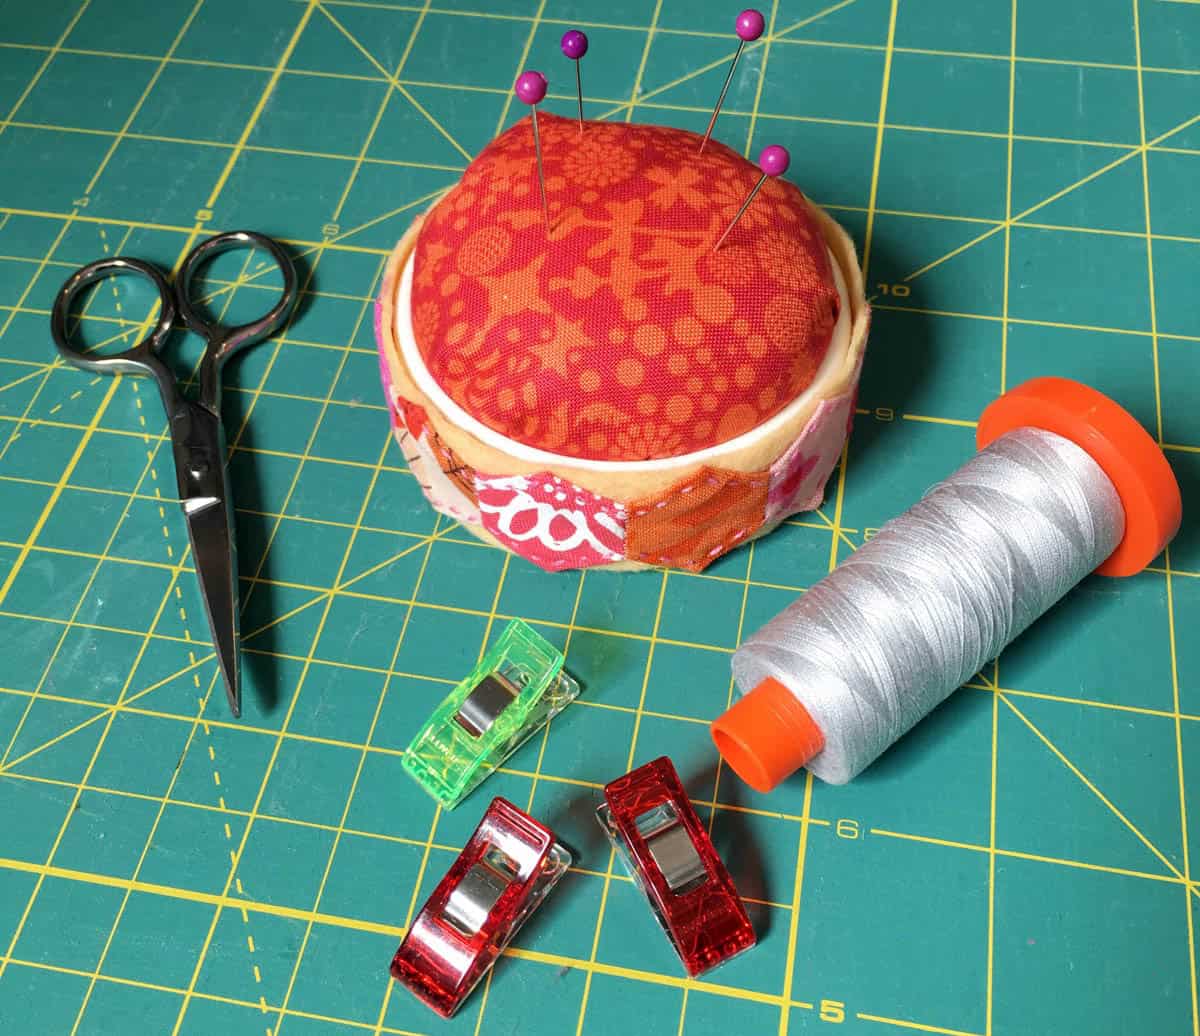
With the Clover’s Create-a-Pincushion you can make a fun and unique creation in no time.
When I saw the pincushion I immediately knew I wanted to decorated it with English paper pieced hexagons. This project is a great way to use up left over scraps of fabric!
Materials:
- Create-a-Pincushion (Art. No 4120 and 4121)
- Black Gold Hand Sewing Needles (Art. No 4963)
- Wonder Clips (Art. No 3180)
- Fabric Adhesive Stick (Art. No 514)
- Thread
- Scissors
- Scraps of fabric
- 1/4” hexagon templates
- Felt (1” x 12” strip)
- Hot glue gun
Step 1: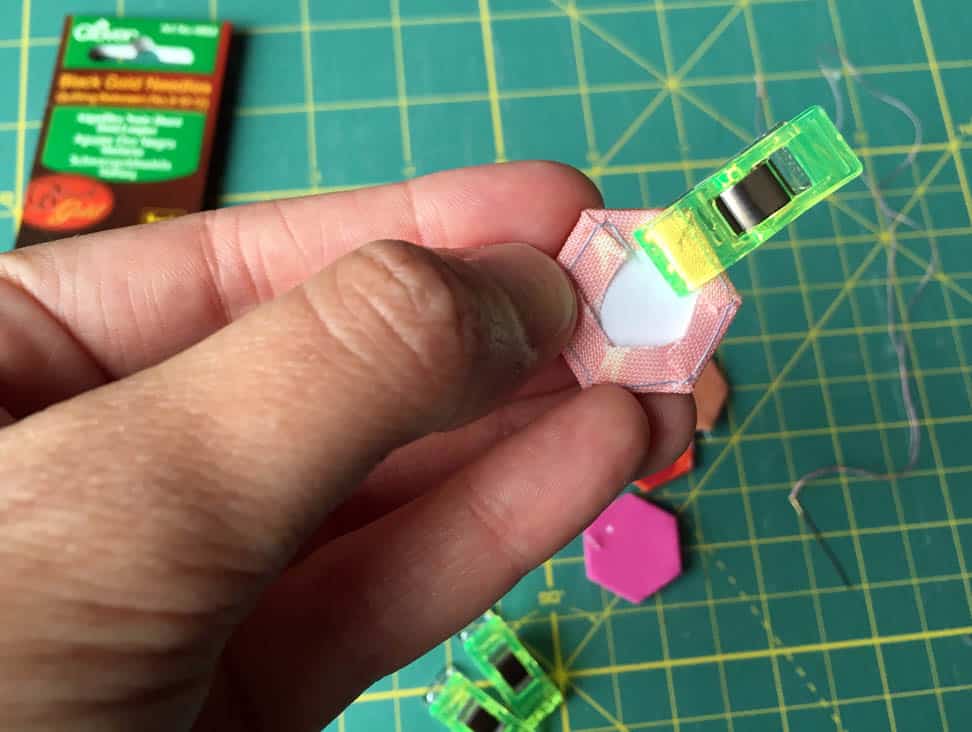 Make 10 hexagons using the 1/4” template (download a copy here). If you are unfamiliar with English paper piecing, there is a tutorial on my blog.
Step 2: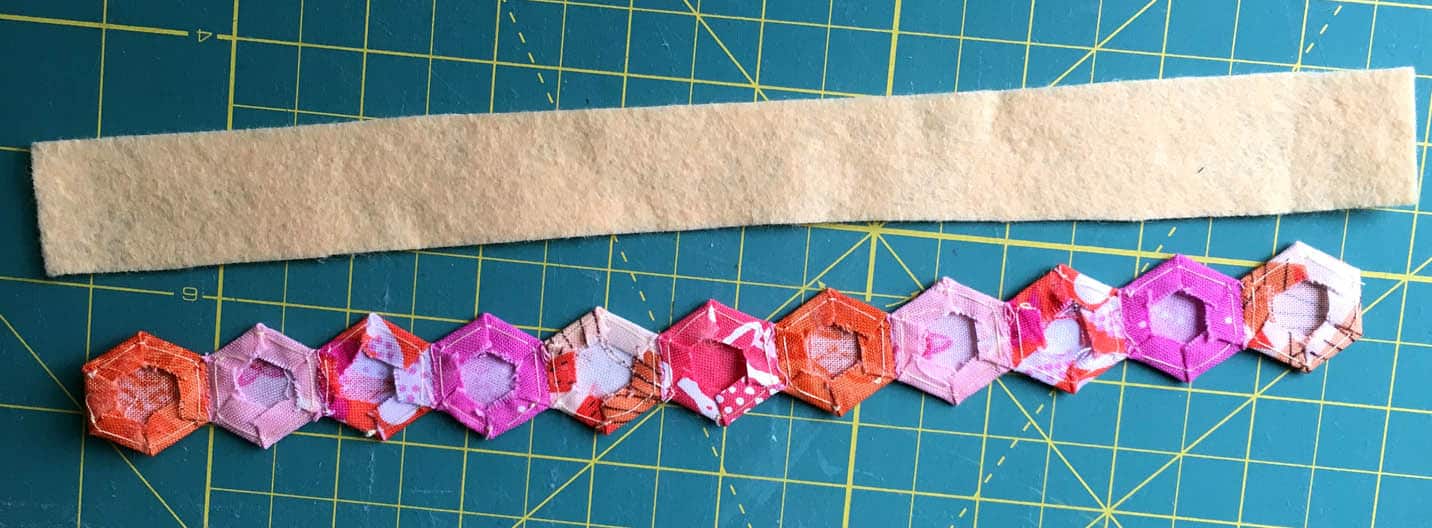 Join the 10 hexagons together into a row. I like to use Wonder Clips to help hold them together when I am stitching them. They’re especially useful when you’re joining larger hexagons.
After you have joined your hexagons, remove the papers from inside them.
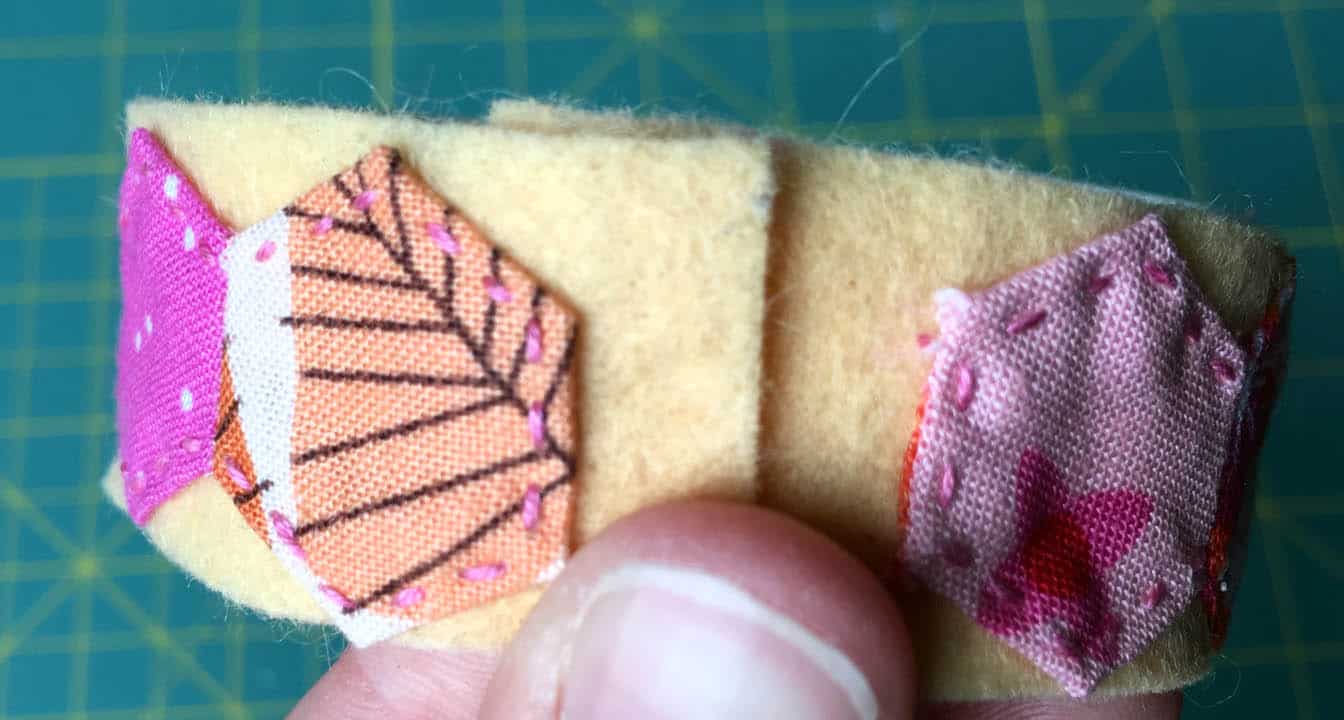
Step 3: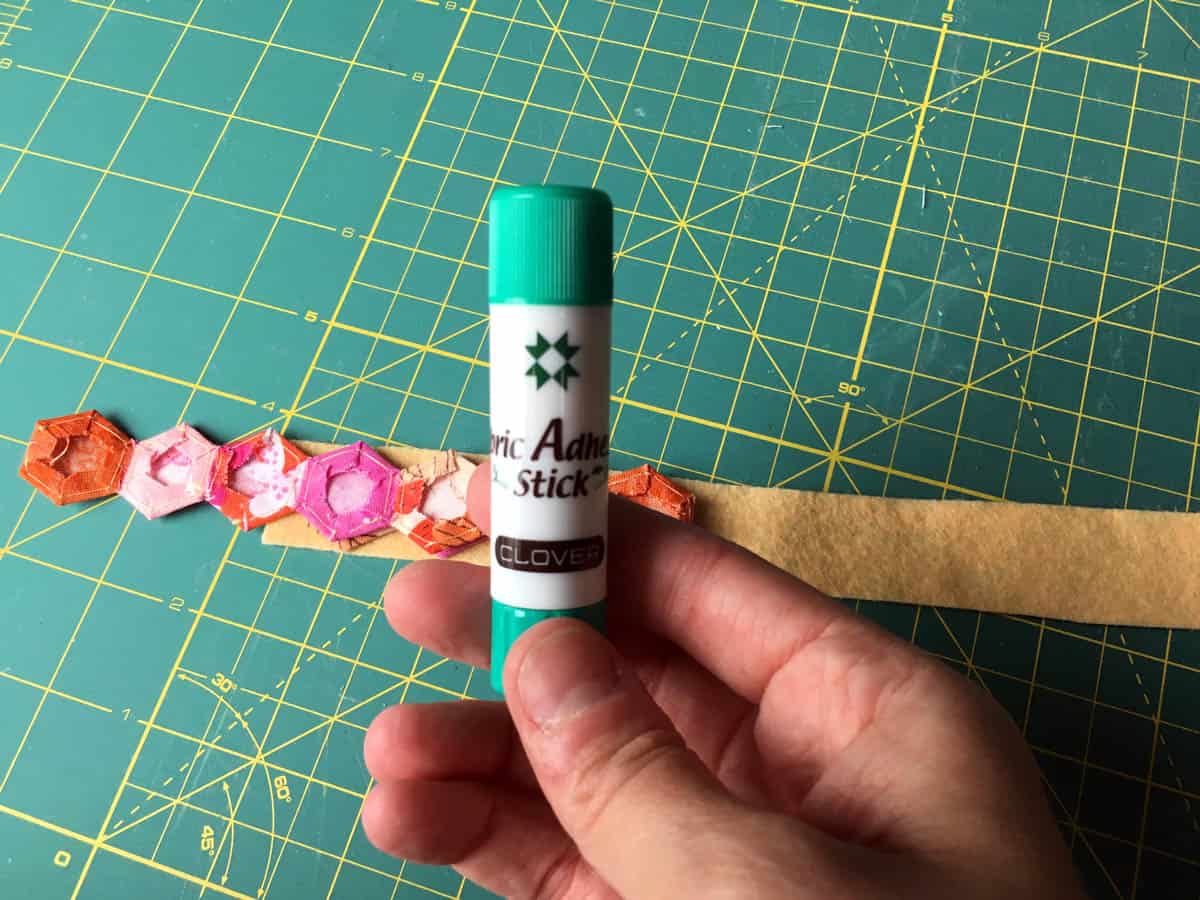 Apply a light layer of glue with the fabric glue stick to the back of the hexagon strip and attached it to the felt. You don’t need much because you only need it to hold the fabric in place while you stitch it down. There should be a small amount of felt that you will overlap when attaching it to the pincushion.
Step 4: 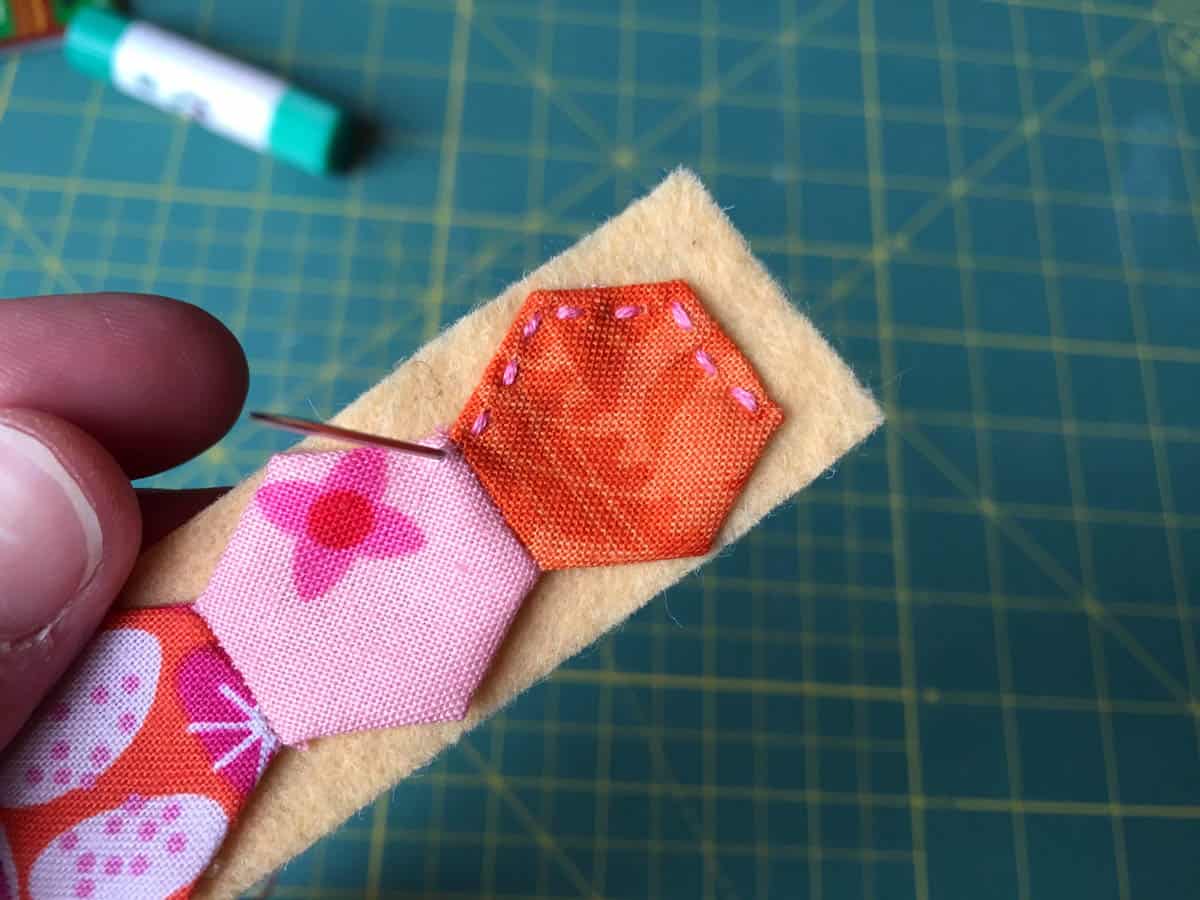 I used a coordinating embroidery thread to do a border of running stitches around the hexagons but you could also machine stitch them down if you would prefer.
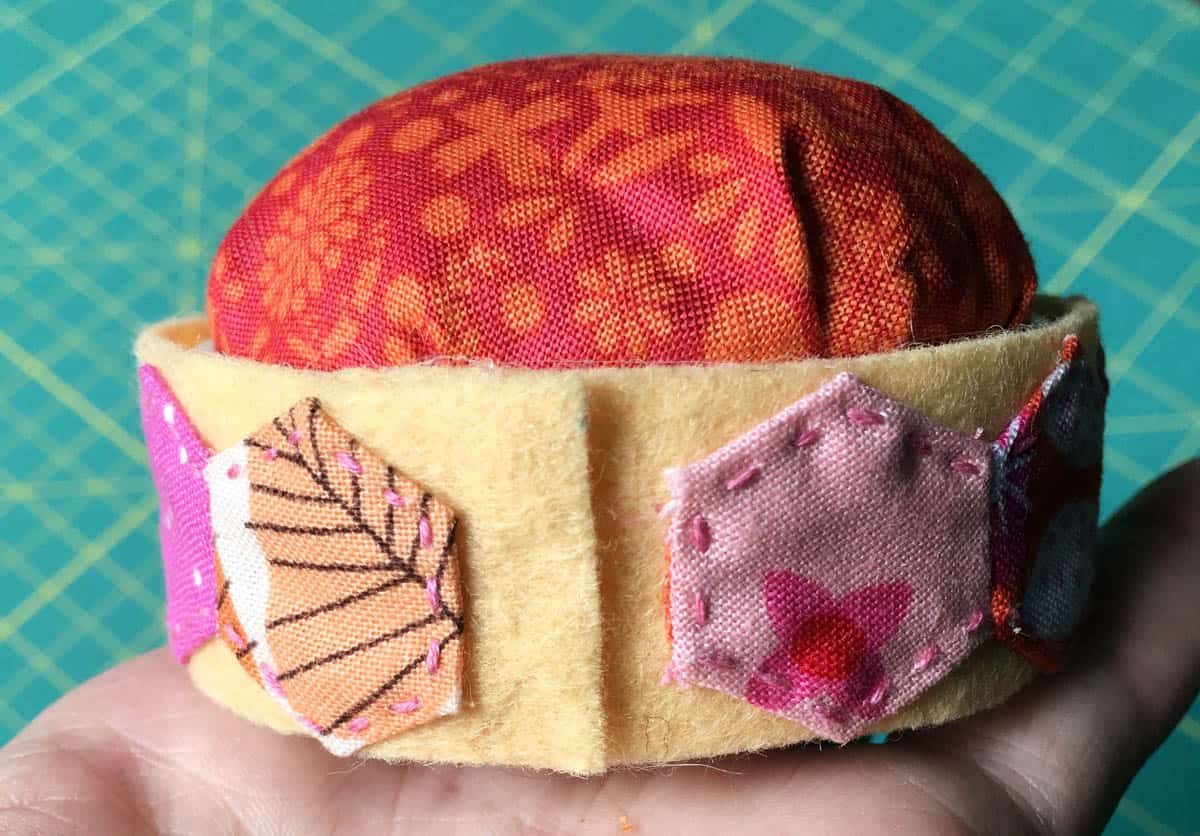
Step 5: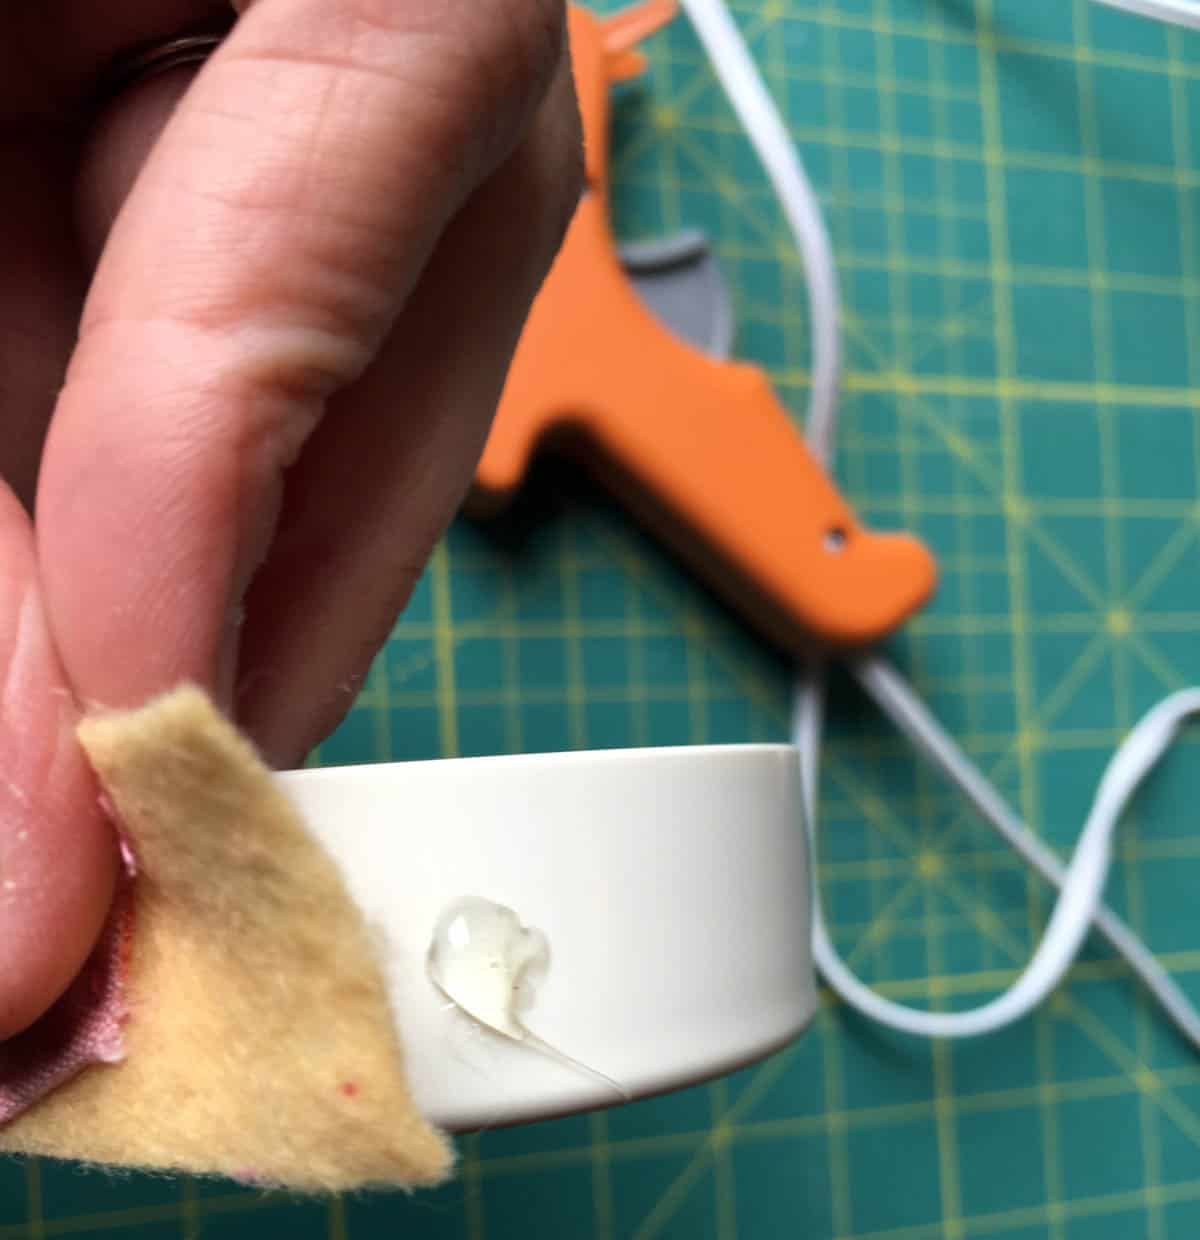 Put a small dot of hot glue on the pincushion ring and attach one end of the felt. I glued it down every few inches working my way around to ensure it was attached smoothly. When I got to the end I overlapped the felt ends and glued them to secure.
Step 6:
 After this just assemble the pincushion according to the instructions on the package. I really love the fact that the fabric can be changed out, it’s fun to customize!
For more of Rebecca’s projects check out her blog here!