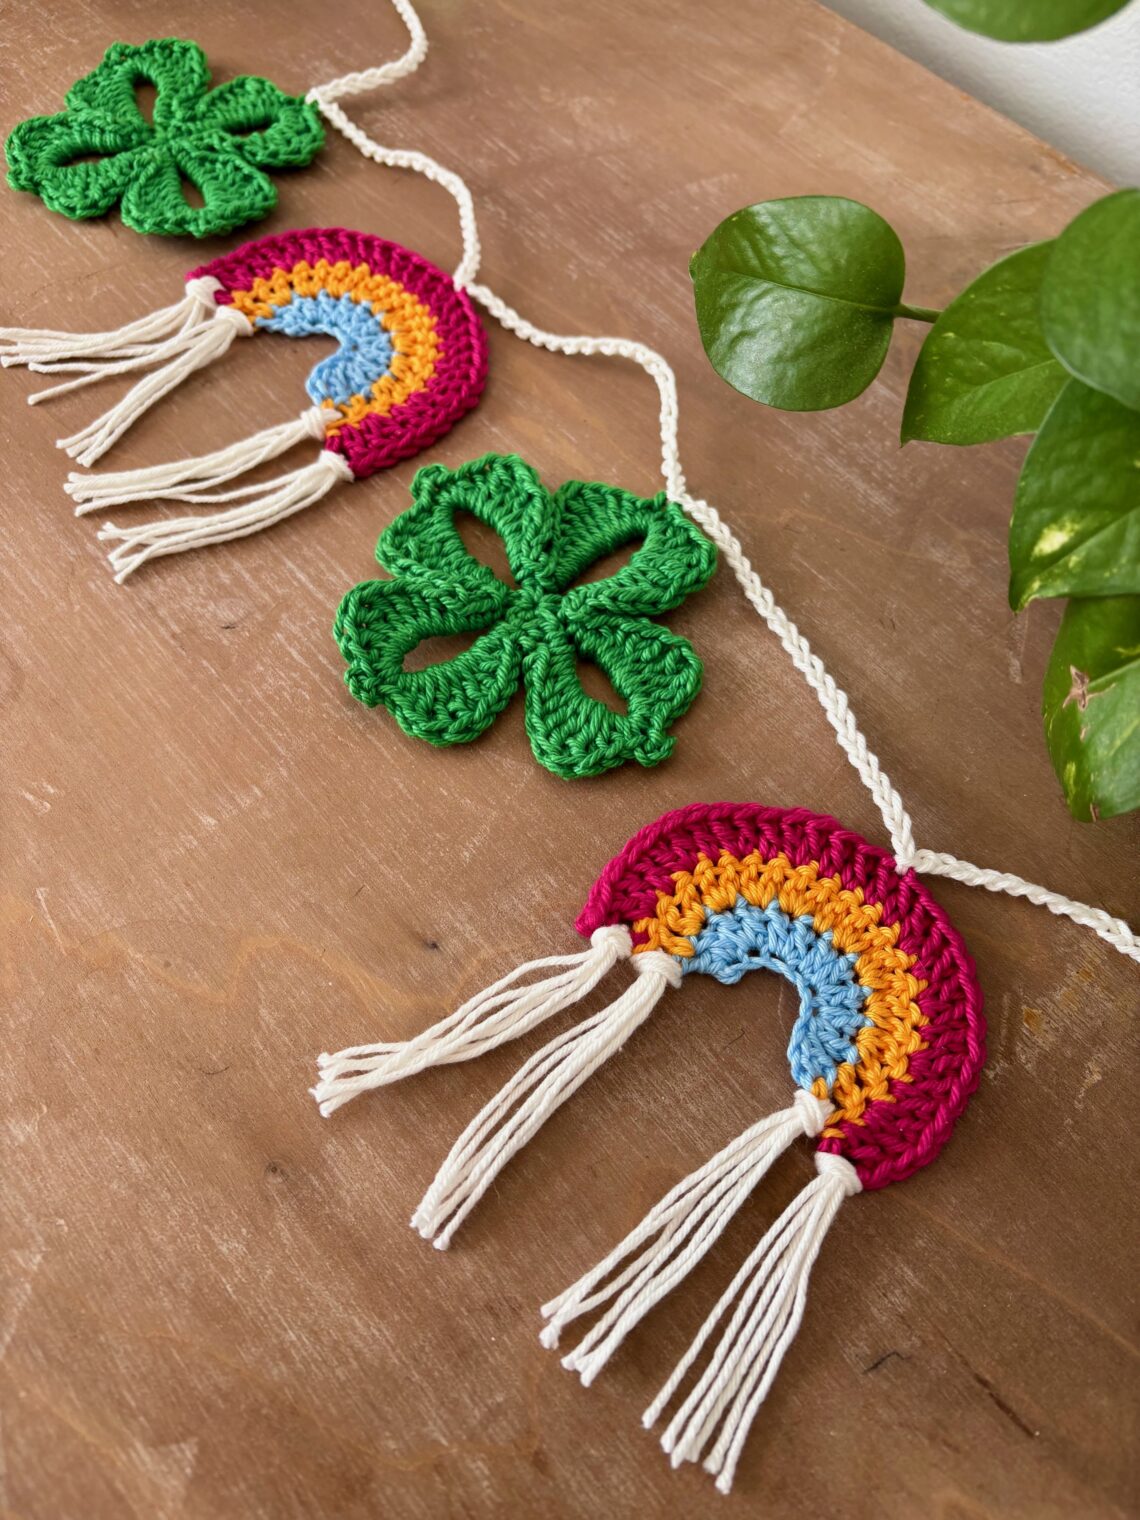
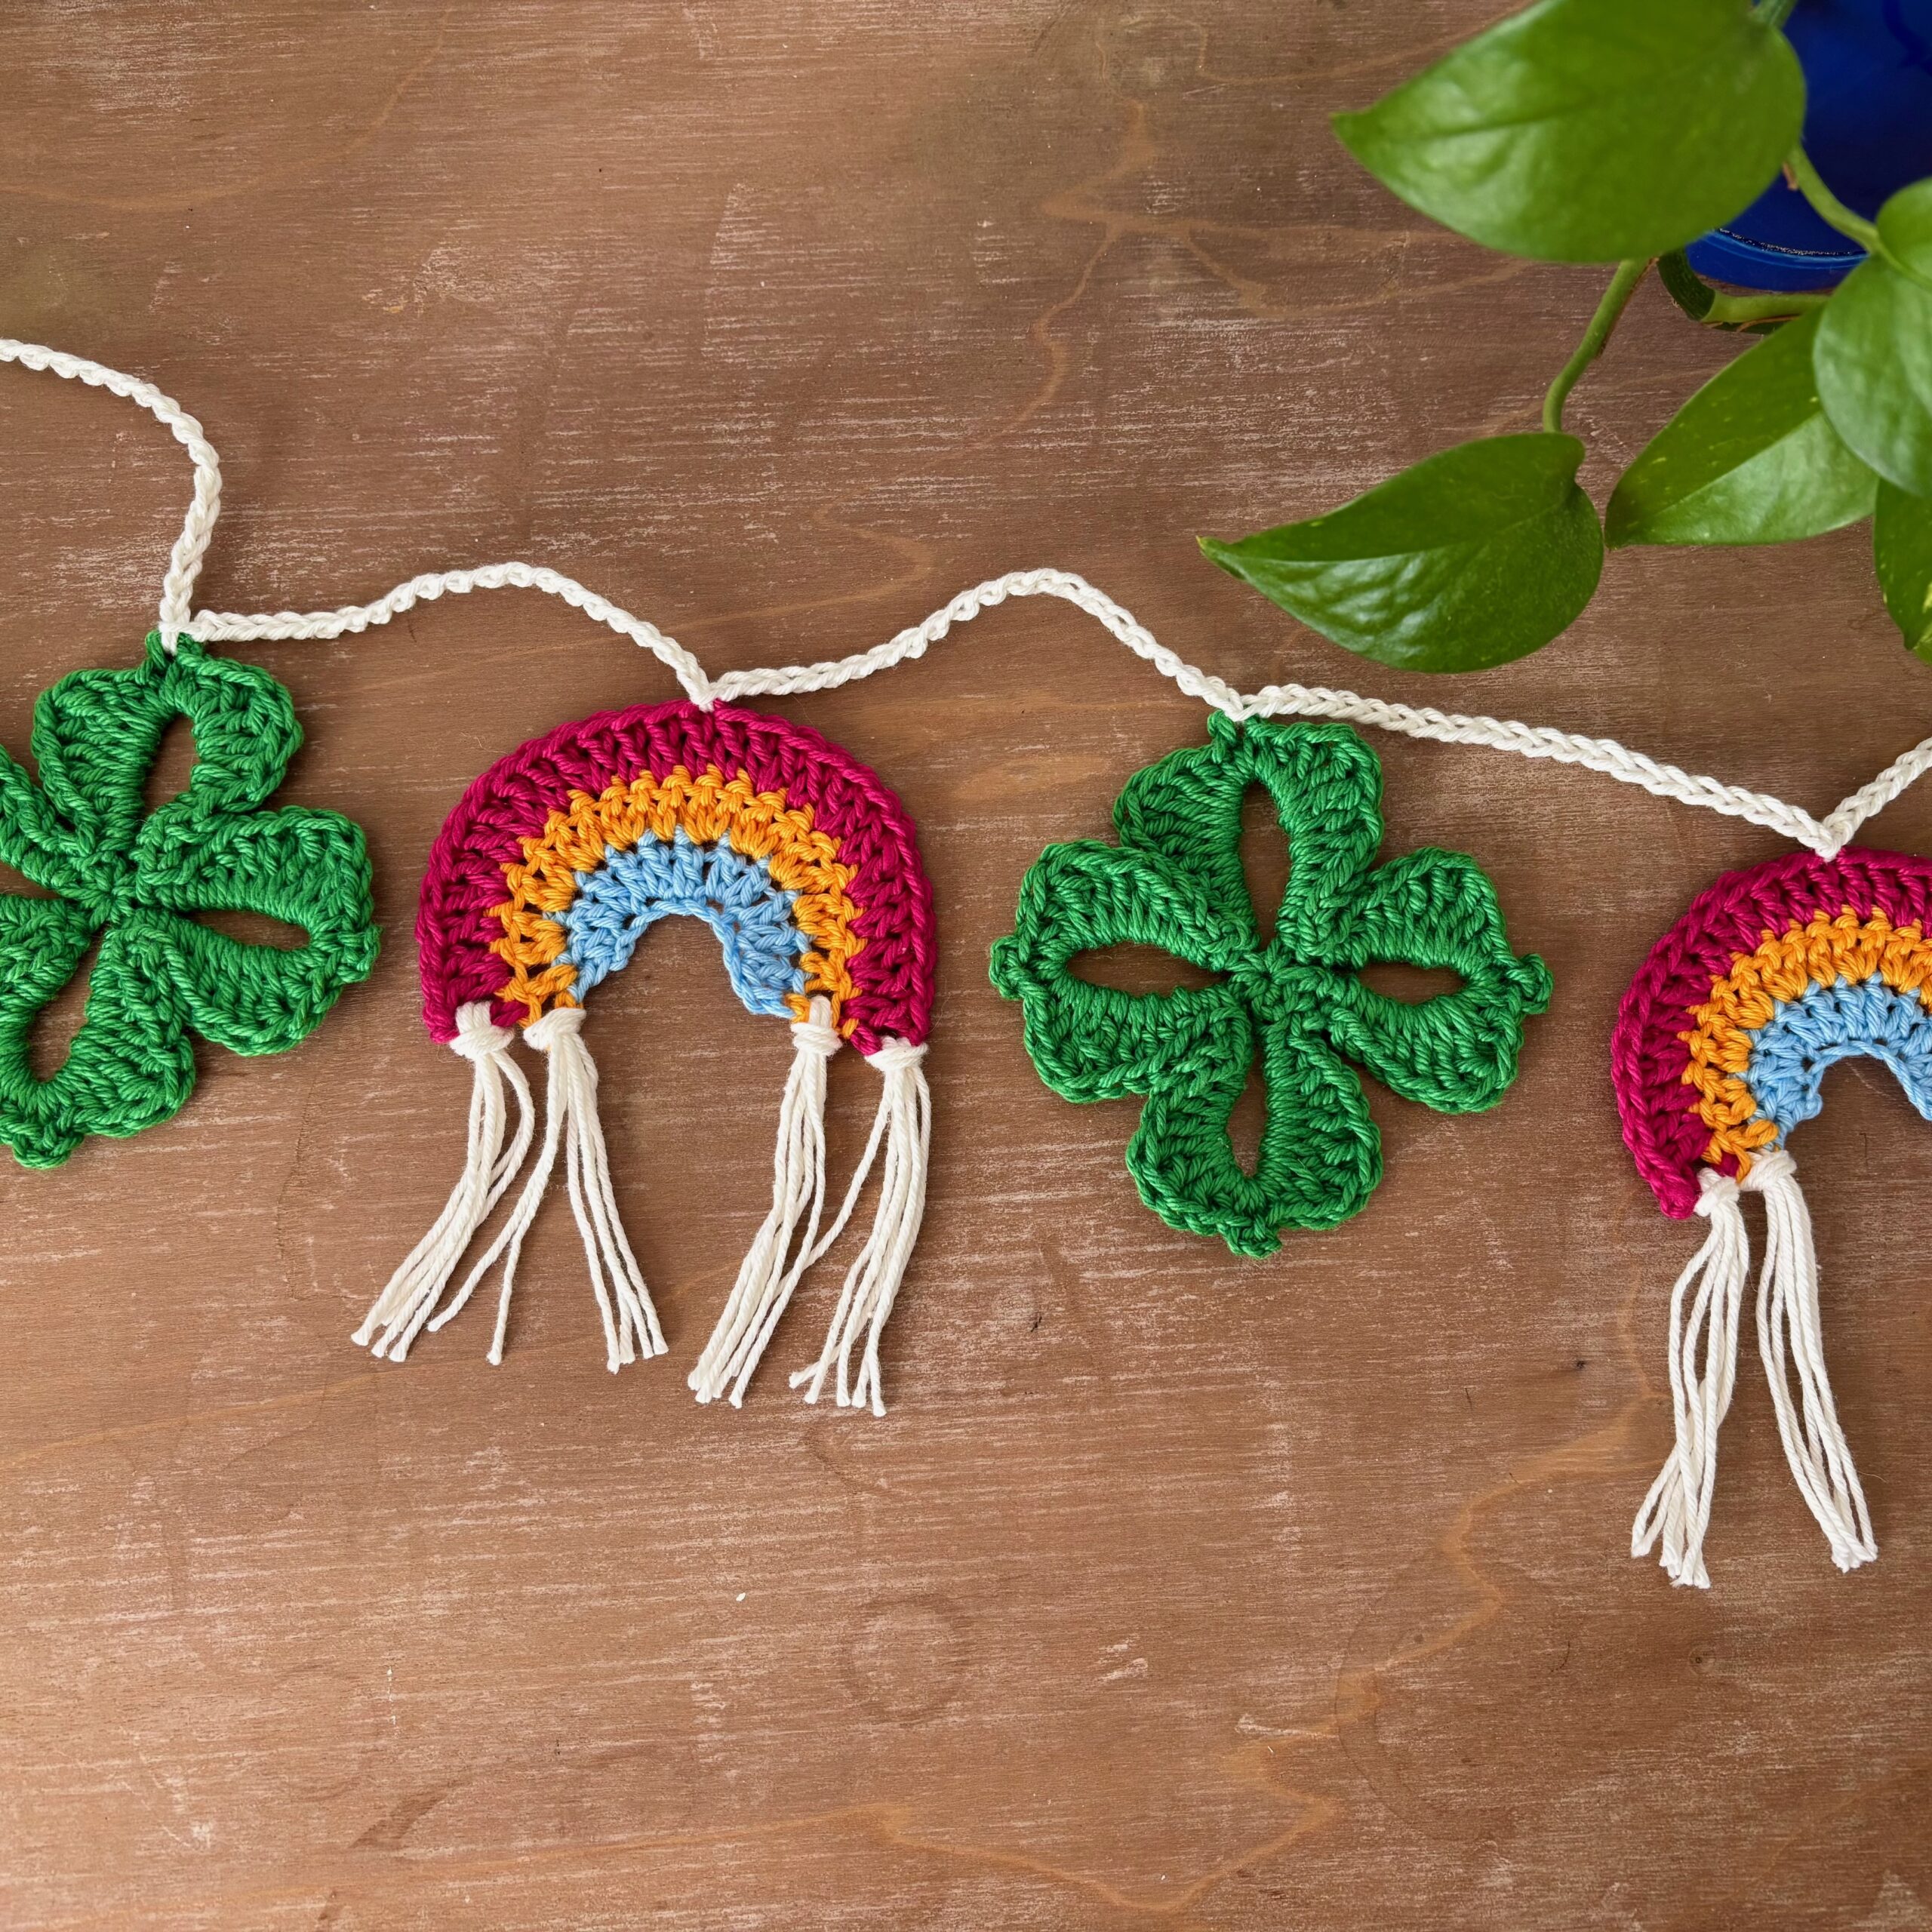
The “Feeling Lucky” Crochet Garland
Add a little handmade luck to your St. Patrick’s Day decor with this cheerful crochet garland! Featuring lucky four-leaf clovers and colorful rainbows, this festive garland is a fun and easy project that brings a playful pop of color to mantels, shelves, windows, or party spaces. Whether you’re decorating for a celebration or simply love seasonal crochet, this garland is a charming way to welcome the holiday with yarn. This pattern also includes a step-by-step video tutorial on YouTube to guide you through the process. CLICK HERE if you’re a visual learner! 🙂
MATERIALS:
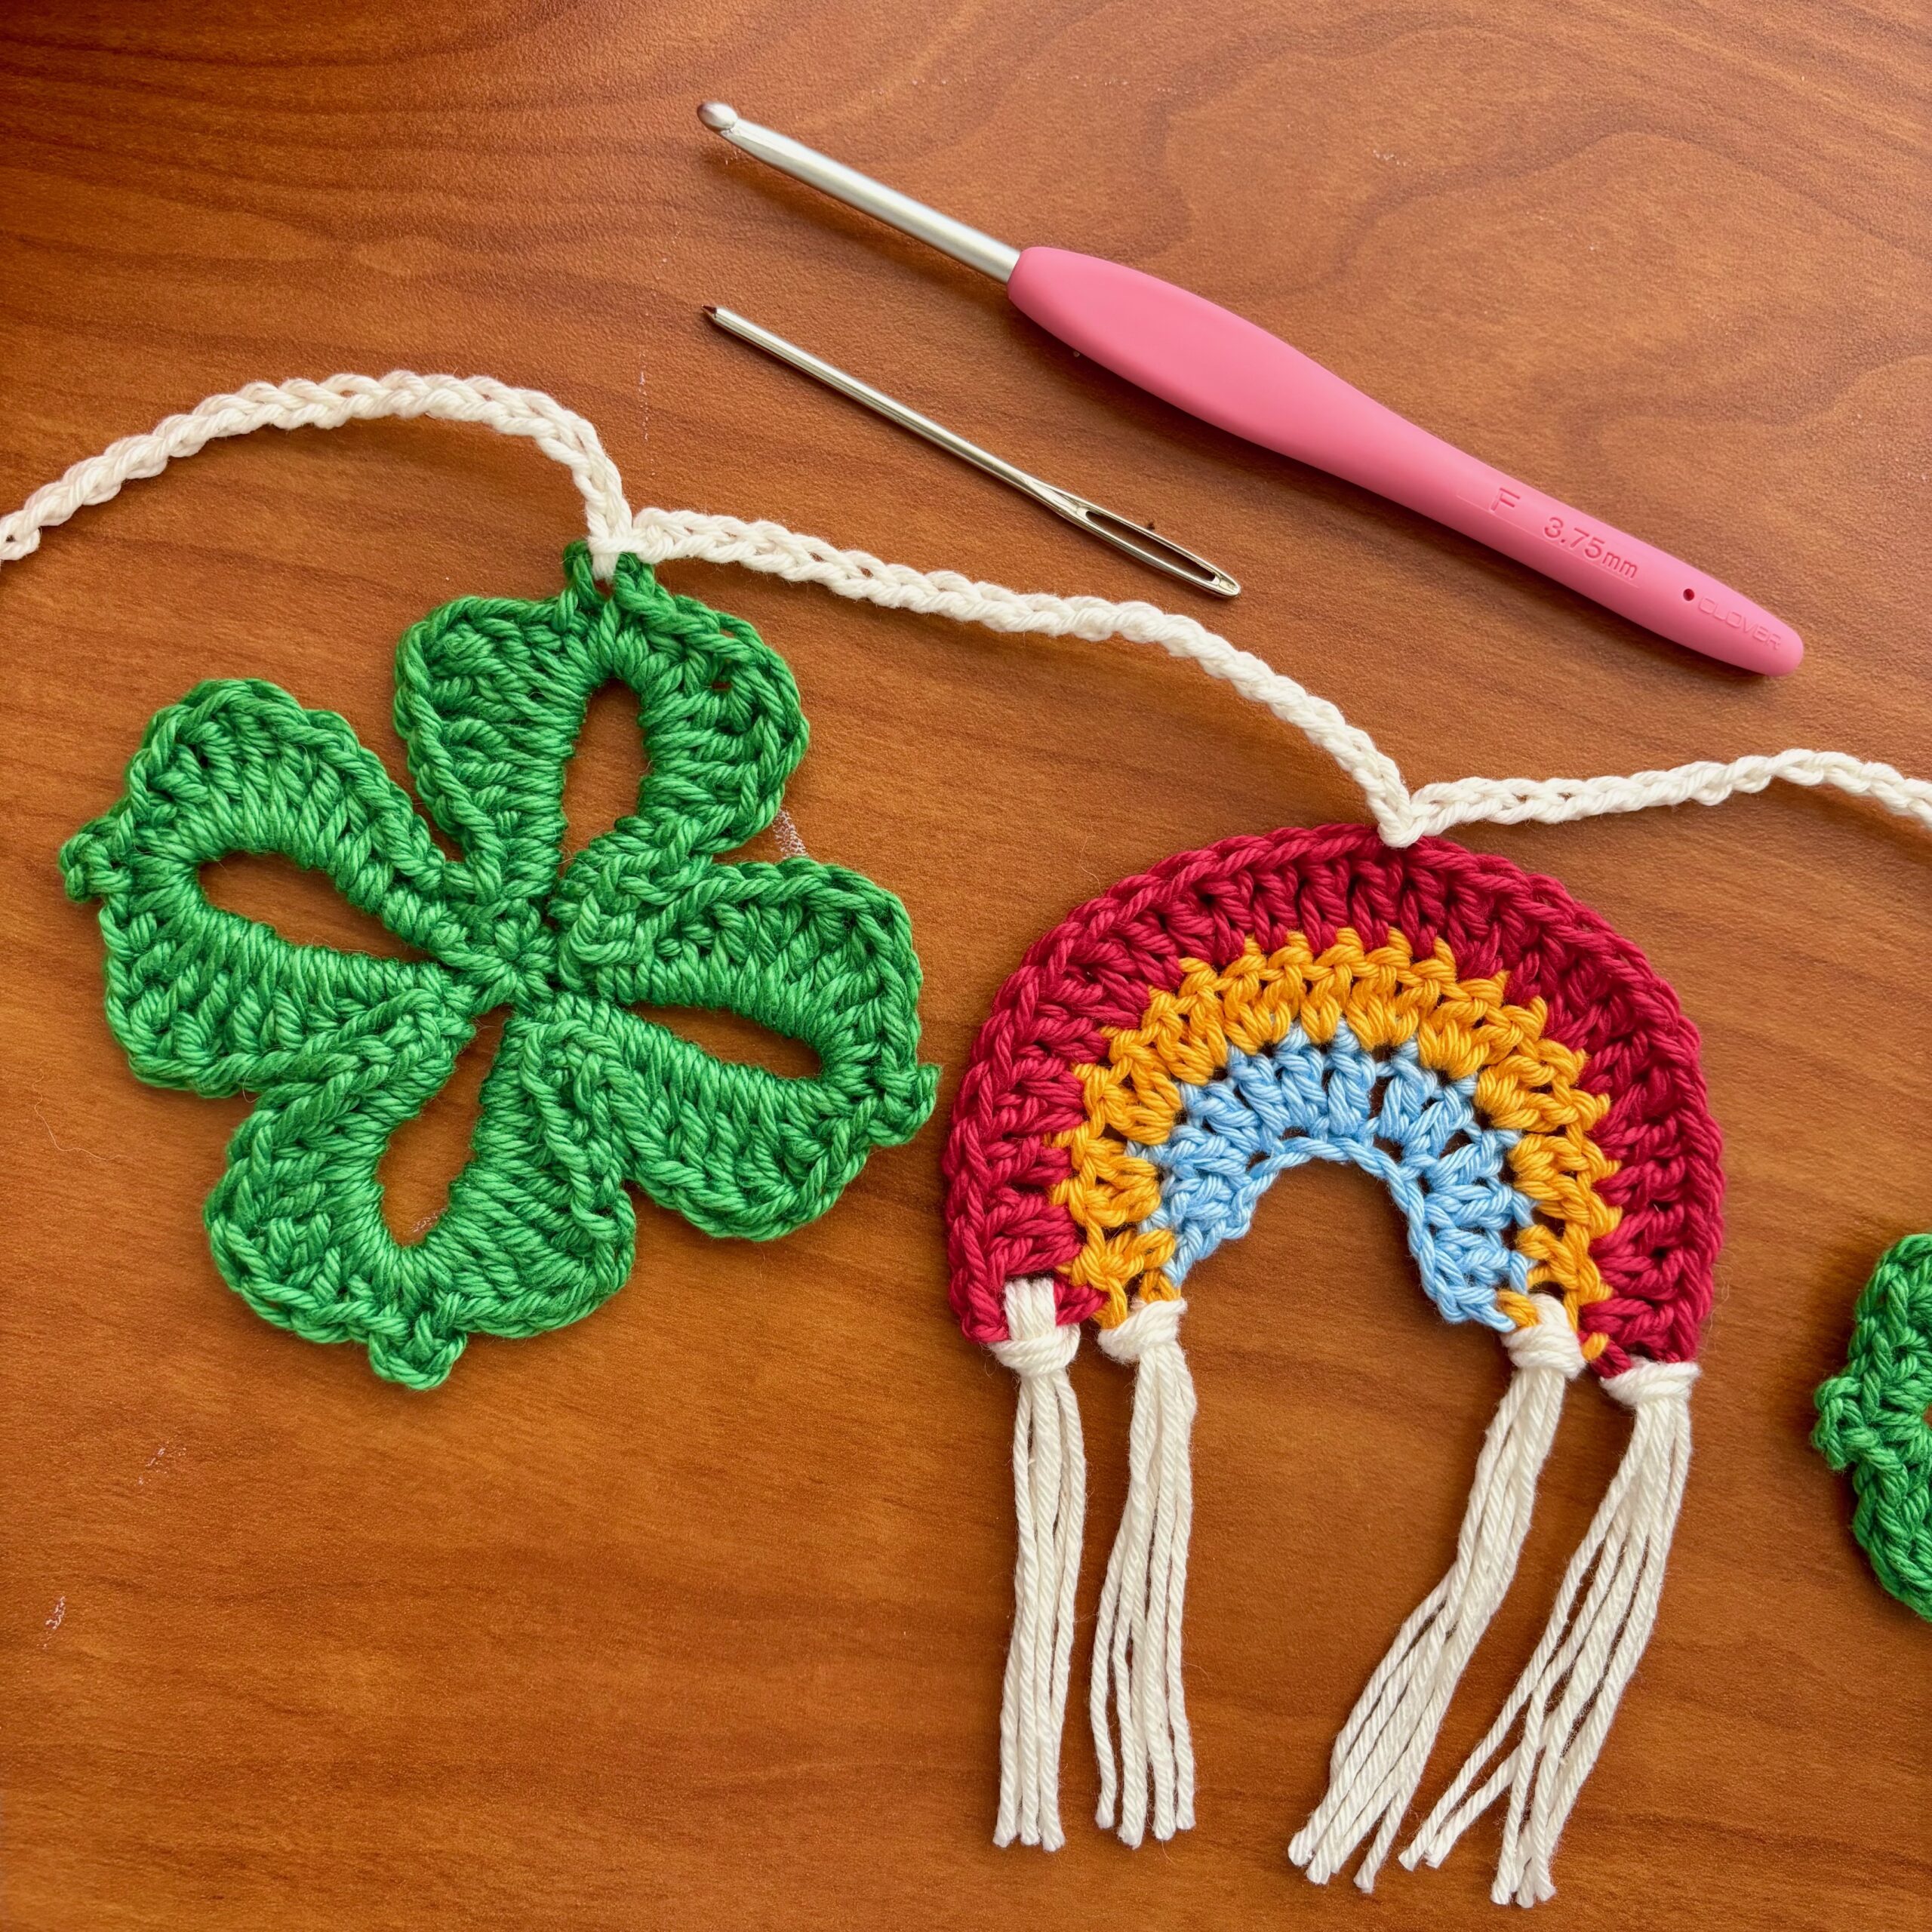
- Amour Crochet Hook F (3.75mm)
- Patchwork Scissors (Mini)
- Darning Needle
- light worsted weight yarn
GARLAND TUTORIAL:
FOUR-LEAF CLOVER:
With green: create a magic ring (or ch 3, sl st in the first ch to form a ring).
- Round 1: [1 sc in the magic ring, ch 12] 4 times. Sl st to the first sc.
- Round 2: Ch 1, *[2 sc, 2 hdc, 2 dc, 2 tr, 1 dc, 1 hdc, 1 sc, ch 3, 1 sc, 1 hdc, 1 dc, 2 tr, 2 dc, 2 hdc, 2 sc] in the next ch-12 sp. * Repeat from * to * 3 more times. Sl st to the first sc. Finish off, weave in ends.
RAINBOW:
With blue, ch 9.
- Row 1: 1 dc in the 3rd ch from the hook, [2 dc in the next ch] 2 times, 1 dc in the next ch, [2 dc in the next ch] 3 times. Change to color orange. Turn.
- Row 2: Ch 3, 1 dc in the first st, [2 dc in the next st] 4 times, 1 dc in the next st, [2 dc in the next st] 4 times, 1 dc in each of the last 2 sts. Change to color pink. Turn.
- Row 3: Ch 3, 1 dc in the first st, 2 dc in the next st, [1 dc in the next st, 2 dc in the next st] 3 times, 1 dc in each of the next 3 sts, [1 dc in the next st, 2 dc in the next st] 4 times, 1 dc in the last st. Finish off. Weave in ends.
With white, cut twelve 6” strands (3 strands per fringe). Attach fringe on each side of pink and then on orange. Trim to desired length.
Once you have your desired amount of four leaf clovers and rainbows, you will now assemble your garland. With white, ch 30, then sl st into the top of a rainbow, then ch 20, sl st into the top of a four leaf clover, and keep repeating that process until all of your appliques are attached, then finish off with a ch 30. Cut your yarn and hang to enjoy!
If you want to keep up with me, Julie, on social media for other fun projects, follow me on: Instagram
If you want to keep up with all things Clover, follow us on: Facebook | Twitter | Instagram | Pinterest | YouTube | Ravelry