


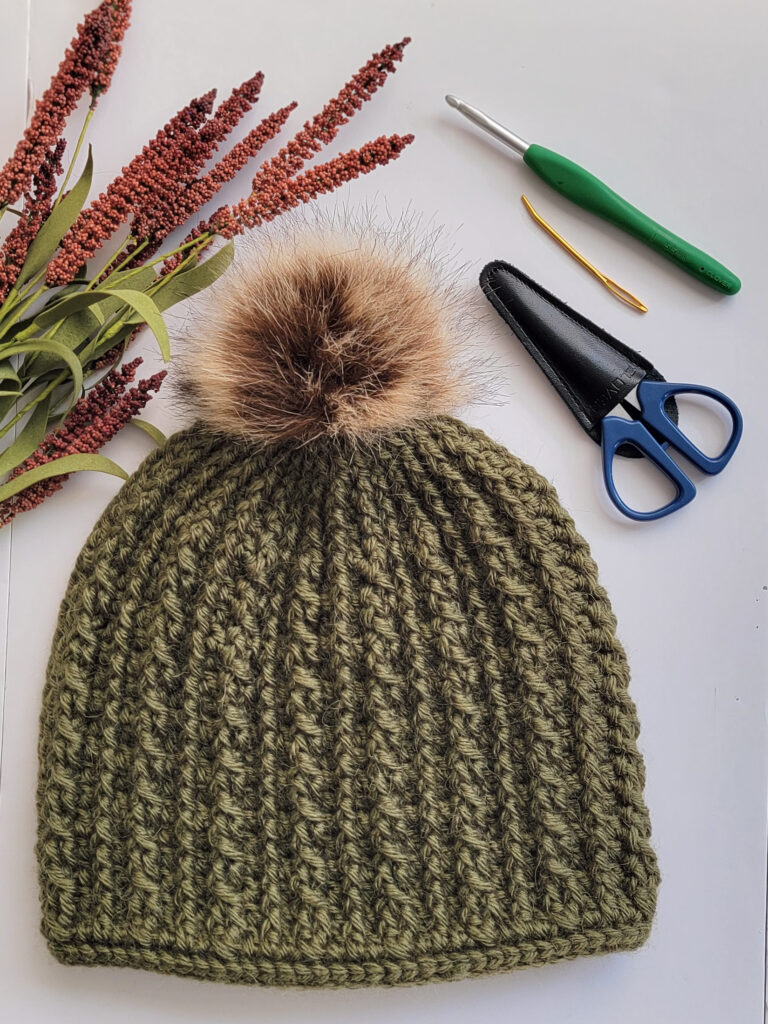
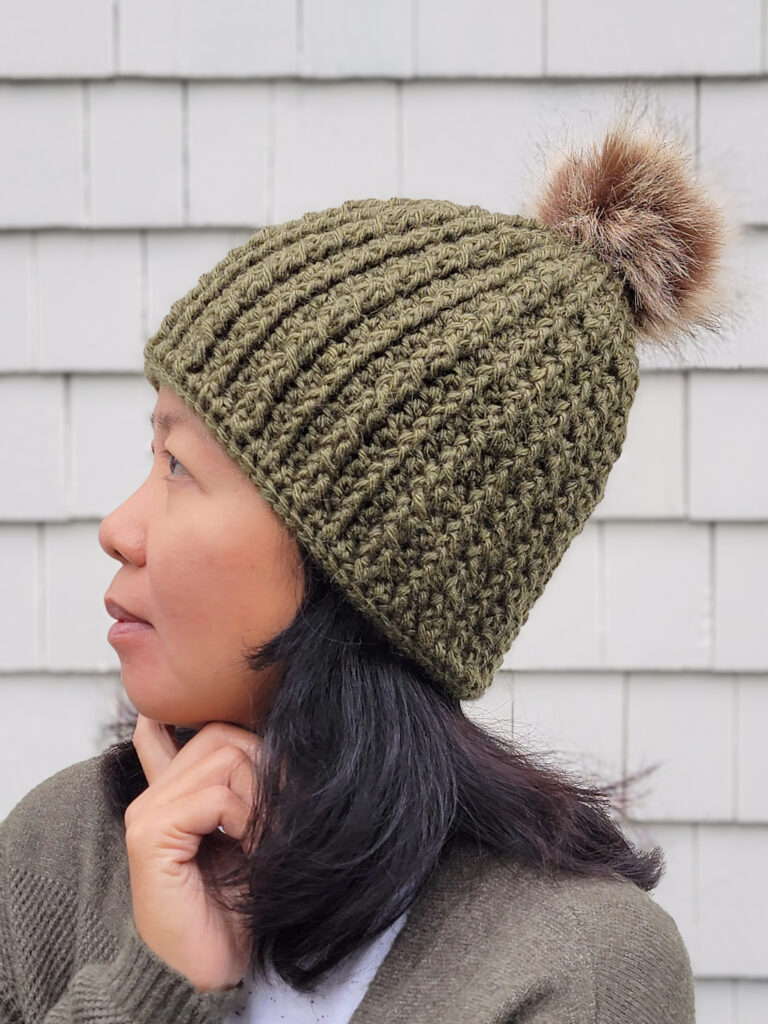
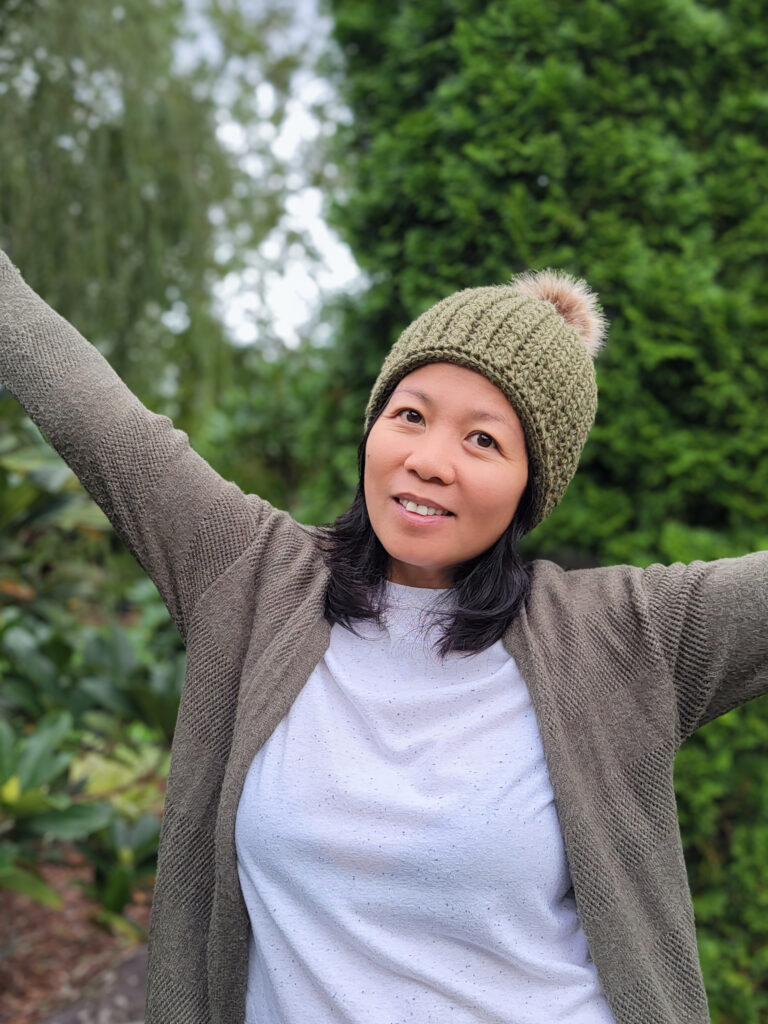
Fall has come, and you know what that means—cold weather is back! With that said, are you ready? To help us prepare for the freezing weather, let’s start making hats! Since I’ve been missing crocheting with cable stitches, I designed this beanie, which I’ve called the Tortuous Beanie. Yes, this beanie has that twisting, winding, and slightly complex look that the name implies. But I tell you, once you get the stitches into their right placements, you’ll find that the pattern is actually very easy and quick to finish. The Tortuous Beanie is worked in the round, beginning at the band with a foundation of single crochet. From there, you’ll transition into the body of the hat, using cable-like stitches that build upward. The crown is then shaped with gradual decreases, creating a neat, finished top.
Crocheted hats are also wonderful handmade gifts for the holiday season. With Christmas just around the corner, now is the perfect time to pick out your favorite yarn and get started! You can easily customize each hat with different colors and yarns to create a cozy accessory that suits the recipient’s personal style. Why stop at gifts for family and friends? Consider making a few extra hats to donate to a local giving tree, school, shelter, or organization serving people experiencing homelessness. A handmade hat is more than something warm to wear—it’s a simple way to share warmth, kindness, and love this holiday season!
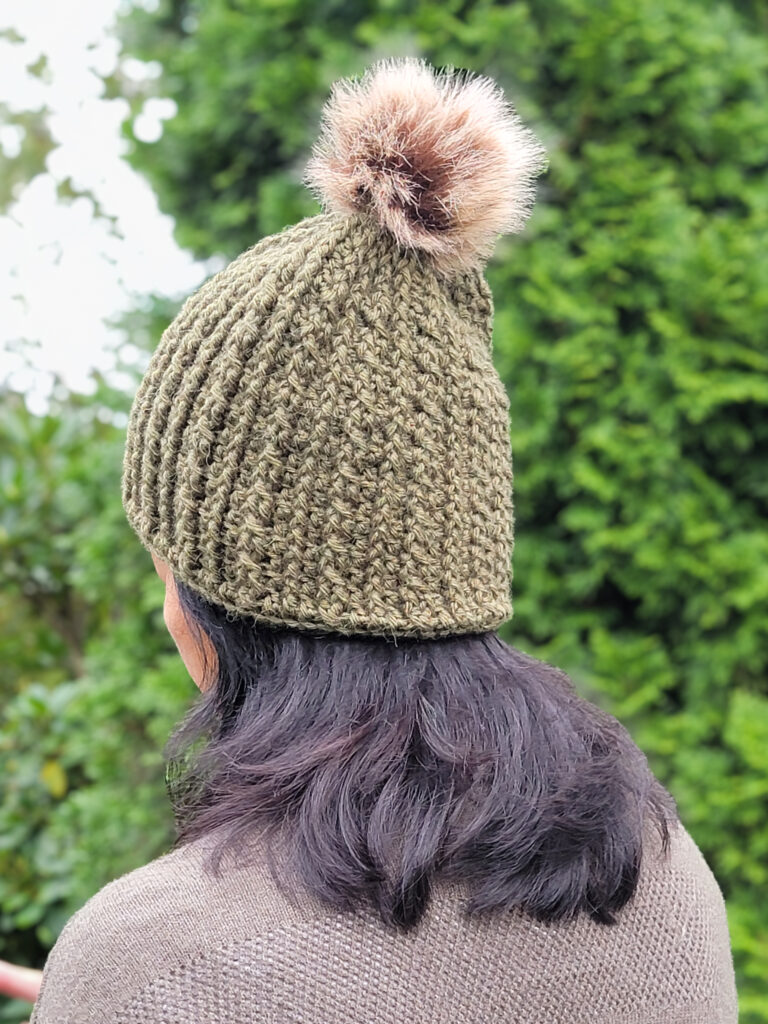
MATERIALS:
- Clover Amour Crochet Hook I (5.5 mm) or size to obtain gauge
- Clover Jumbo Darning Needle (bent point)
- Clover Patchwork Mini Scissors
- tape measure
- worsted weight (4) yarn: I used Lion Brand Touch of Alpaca, about 210 yards
NOTES:
- read the pattern carefully before starting.
- this pattern is worked from the bottom up. I recommend using stitch markers to mark the beginning of the row. Remember to move the stitch marker as you progress.
- * * repeat instructions between asterisks as many times as directed or repeat at specified locations.
- the numbers at the end of the round indicate the number of stitches in each round.
- gauge: Set-up Round: 16 FSC or sc = 4” | Body: 16 sts x 12 rounds = 4”
- skill level: intermediate
- finished measurement: about 8.5” height x 19” circumference, unblocked
- The size of the hat can easily be customized. Keep in mind that the stitch count for the pattern is a multiple of 5.
- Hat height: The number of rounds worked determines the height. For a longer or shorter hat, add or remove rounds in increments of 2 rounds, following the pattern repeat.
- Hat circumference: The circumference is determined by the length of the foundation chain/stitches. For a wider or narrower hat, start with more or fewer foundation chains/stitches.
ABBREVIATIONS:
- BPsc – back post single crochet
- ch(s) – chain(s)
- dc – double crochet
- FPsc – front post single crochet
- FPdc – front post double crochet
- FPdc2tog – front post double crochet 2 stitches together (decrease)
- FSC – foundation single crochet
- rep – repeat
- sc – single crochet
- sk – skip
- slst(s) – slip stitch(es)
- st(s) – stitch(es)
- STsc – stacked single crochet
- dcFpdc2tog – double crochet and front post double crochet 2 stitches together (decrease)
- cdc – crossed double crochet: skip the next stitch, double crochet in the next stitch, going over the stitch just made, double crochet in the skipped stitch.
THE TORTUOUS BEANIE CROCHET PATTERN:
- Set-up Round: Ch 75 (about 19” in length) and slst in 1st ch to join the round, making sure your chs aren’t twisted when joining. Ch 1 (does not count as a st here and throughout) and 1 sc in each ch around. Slst in 1st st to join. Do not turn.
- Optional: Start with FSC 75 and slst in 1st st to join.
- Round 1: Ch 1, 1 BPsc in each st around. Slst in 1st st to join. 75 sts
- Round 2: 1 Stsc in 1st st, 1 dc in next 2 sts, 1 cdc in next 2 sts, *1 dc in next 3 sts, 1 cdc in next 2 sts*; Rep from * to * around. Slst in 1st st to join. 75 sts
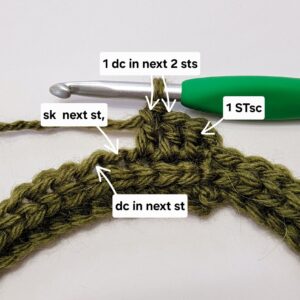
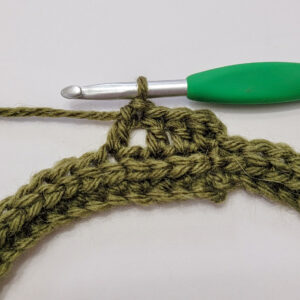
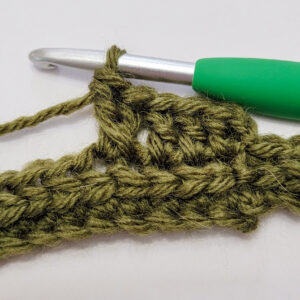
- Round 3: 1 Stsc in 1st st, 1 FPdc in next st, 1 dc in next st, 1 FPdc in next 2 sts, *1 dc in next st, 1 FPdc in next st, 1 dc in next st, 1 FPdc in next 2 sts*; Rep from * to * around. Slst in 1st st to join. 75 sts
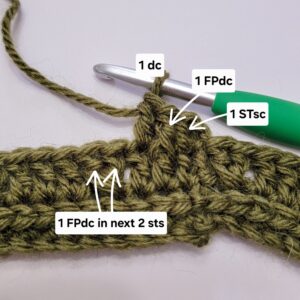
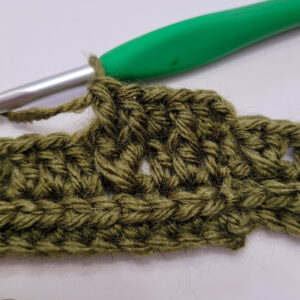
- Round 4: 1 Stsc in 1st st, 1 FPdc in next st, 1 dc in next st, sk 1 st, 1 FPdc in next st, working in front of the st just made, 1 FPdc into the skipped st, *1 dc in next st, 1 FPdc in next st, 1 dc in next st, sk 1 st, 1 FPdc in next st, working in front of the st just made, 1 FPdc into the skipped st*; Rep from * to * around. Slst in 1st st to join. 75 sts
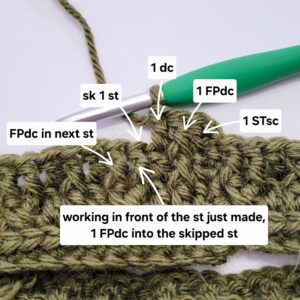
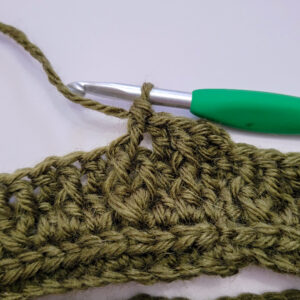
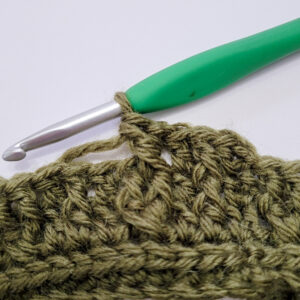
- Round 5 – 18: Rep Rounds 3 and 4.
- Round 19: 1 Stsc in 1st st, 1 FPdc in next st, 1 dc in next st, 1 FPdc2tog in next 2 sts, *1 dc in next st, 1 FPdc in next st, 1 dc in next st, 1 FPdc2tog in next 2 sts*; Rep from * to * around. Slst in 1st st to join. 60 sts
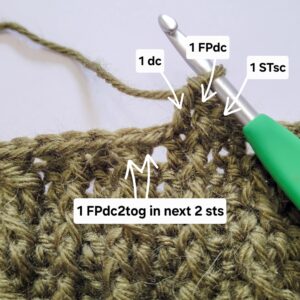
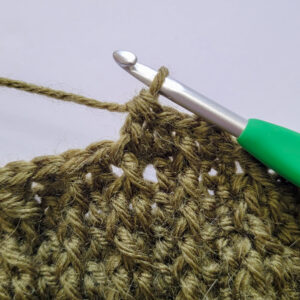
- Round 20 – 21: 1 Stsc in 1st st, 1 FPdc in next st, *1 dc in next st, 1 FPdc in next st*; Rep from * to * around. Slst in 1st st to join. 60 sts
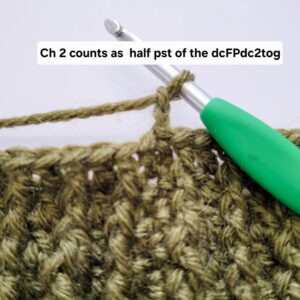
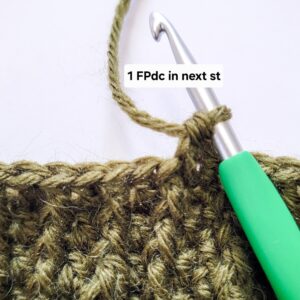
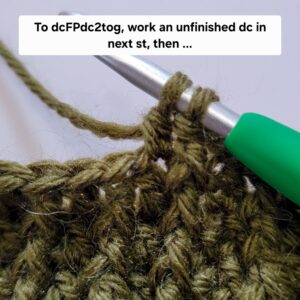
- Round 22: Ch 2 (counts as 1 st, half part of 1 dcFpdc2tog), 1 FPdc in next st, 1 dcFpdc2tog in next 2 sts around. Slst in 1st st (top of FPdc) to join. 30 sts
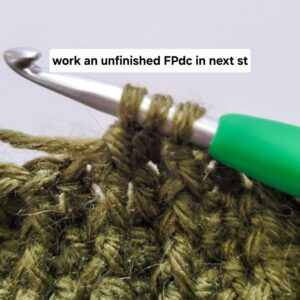
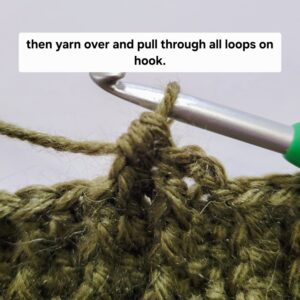
- Round 23: Ch 1, 1 FPdc in each st around. Slst in 1st st to join. 30 sts
- Round 24: Ch 1, 1 FPdc2tog in next 2 sts around. Slst in 1st st to join. 15 sts
- Round 25: Ch 1, 1 FPdc in each st around. Slst in 1st st to join. 15 sts
- Round 26: Ch 1, 1 FPsc in each st around. Slst in 1st st to join. 15 sts
- Finishing: Fasten off, leaving a long tail for closing the top of the beanie. With the long tail yarn and darning needle, thread through the sts around, then pull tight to cinch closed. Fasten off securely and weave in all ends.
- Optional: Add your favorite pompom for a finishing touch, and you are done!
Please don’t hesitate to contact me with questions regarding this pattern. You may also reach out to me on Instagram (@stringsandcuddles)!
If you want to keep up with me, Elisa, on social media for other fun projects, follow me on social media: Instagram | Pinterest | Facebook | Blog | Ravelry
If you want to keep up with all things Clover, follow us on: Facebook | Twitter | Instagram | Pinterest | YouTube | Ravelry