3 Tier Hanging Fruit Basket Crochet Pattern
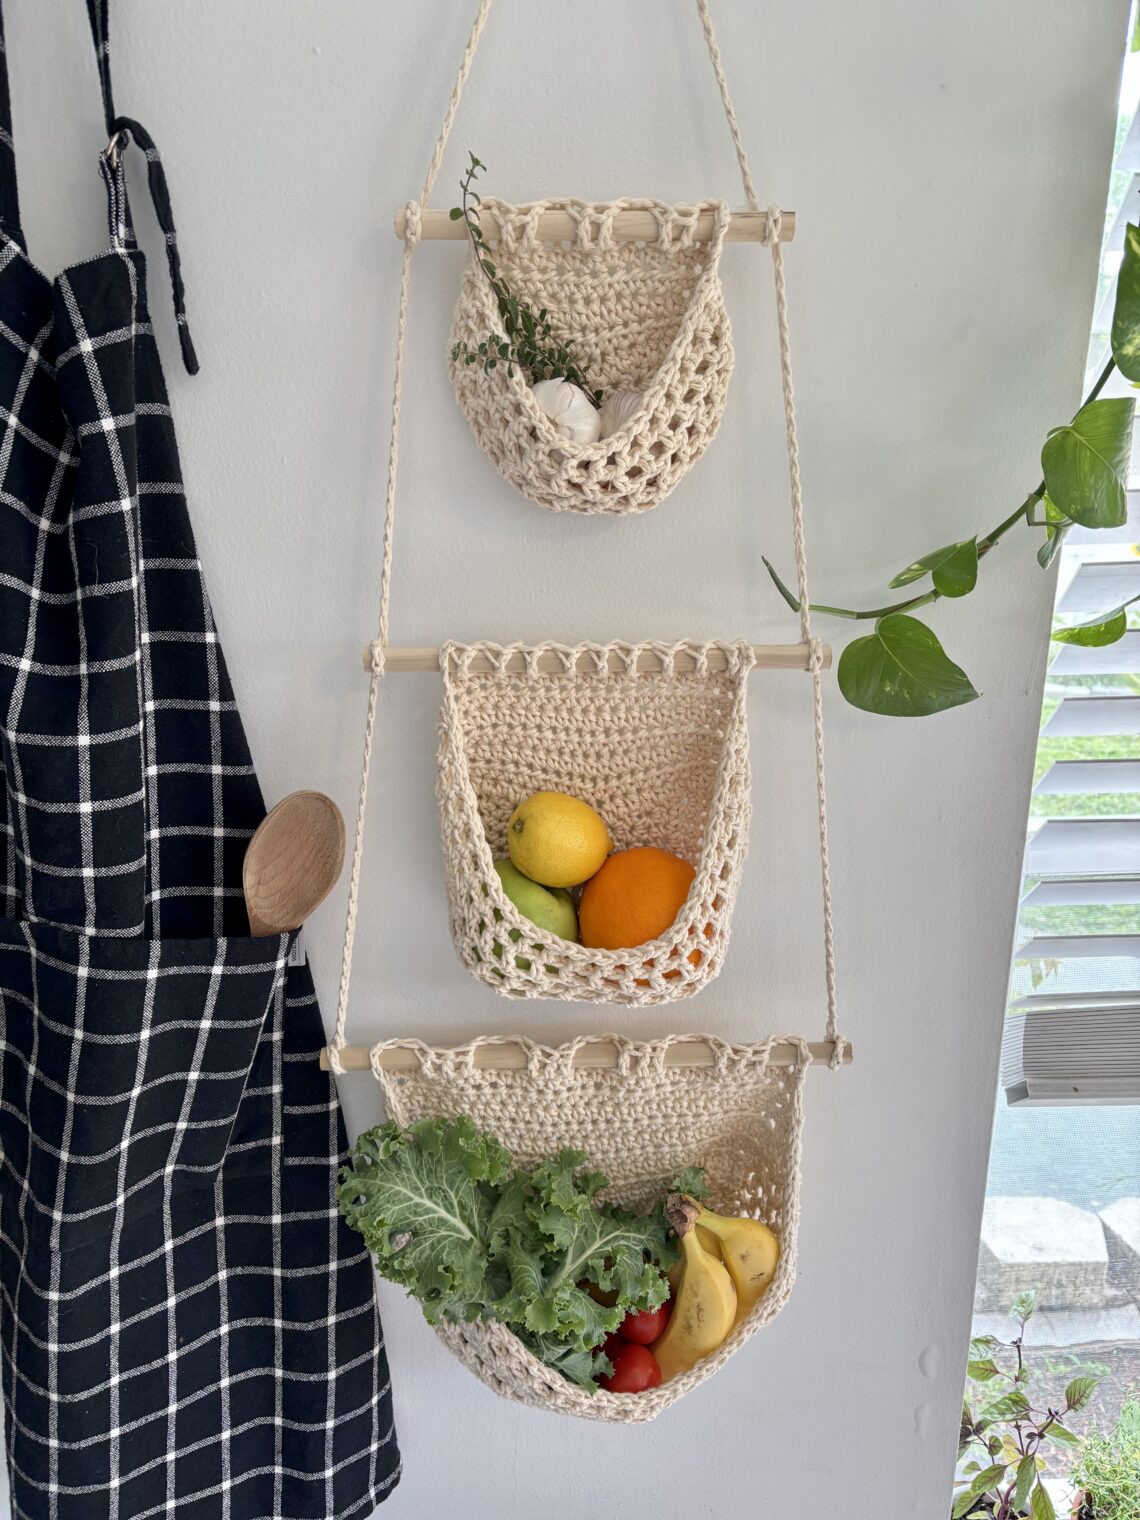
Add a handmade touch to your kitchen with this functional and modern crochet hanging fruit basket pattern! This three-tier design includes a small, medium, and large basket that work together to create beautiful vertical storage for fruit, produce, or other household items. The baskets are worked using a sturdy natural fiber yarn and wooden dowels for structure, creating a clean and elevated look that blends perfectly with modern, rustic, or boho-inspired spaces. While each basket varies in size, they are all constructed the same way, making this a relaxing and repetitive project once you get the hang of it. Whether you use chunky cotton yarn, macramé cord, or jute, this project is a beautiful way to create practical handmade décor for your home. Once you learn the construction process in the video, you’ll be able to confidently make the medium and large sizes using the written instructions below.
To make the pattern even easier to follow, I’ve also created a step-by-step YouTube tutorial showing how to crochet the small basket. CLICK HERE to be taken to the video if prefer to follow along visually!!!
MATERIALS:
- Amour Crochet Hook (7.0 mm)
- Patchwork Scissors (mini)
- Darning Needle
- chunky yarn of your choosing (200 yds)
- 3 wooden dowels: 8.5 inches, 11.5 inches, 14.25 inches
NOTES:
- Dimensions: this is a rough estimate as it depends on your material’s stretch!
- Small basket: 8″ across
- Medium basket: 9.5″ across
- Large basket: 12″ across
- Magic Circle alternative: ch 3, join with a slip stitch to the first ch, then work your first round into the ring your formed with your chains.
3 TIER FRUIT BASKET PATTERN:
SMALL BASKET:
-
- Row 1: Start with a magic circle (magic circle alternative found in notes above), ch 2, 6 hdc in the magic circle. Ch 2, turn. (6 hdc)
- Row 2: 2 hdc in the first st, 2 hdc in each st across. Ch 2, turn. (12 hdc)
- Row 3: 2 hdc in the first st, 1 hdc in the next st, *2 hdc in the next st, 1 hdc in the next st*, repeat from * to * to the end. Ch 2, turn. (18 hdc)
- Row 4: 2 hdc in the first st, 1 hdc in the next 2 sts, *2 hdc in the next st, 1 hdc in the next 2 sts*, repeat from * to * to the end. Ch 2, turn. (24 hdc)
- Row 5: 2 hdc in the first st, 1 hdc in the next 3 sts, *2 hdc in the next st, 1 hdc in the next 3 sts*, repeat from * to * to the end. (30 hdc)
Rotate your work so you will be working along the straight edge of the semi circle. Ch 2.
-
- Row 6: 16 hdc evenly across the bottom edge of the semi circle. 1 hdc in each st around (the rest of the semi-circle). Turn.
- Row 7: Ch 3 (counts as 1 hdc and ch 1), sk 1, 1 hdc in the next st, *ch 1, sk 1, 1 hdc in the next st*, repeat from * to * for a total of 13 more times (so you should have 15 ch-1 spaces from the beginning of the round to here), place 1 hdc in each of the remaining 16 sts (the back of the piece). Ch 2, turn.
- Row 8: 1 hdc in the first st and in the next 15 sts, *ch 1, sk the ch-1 sp, 1 hdc in the next st,* repeat from * to * across, ending the last ch 1 and hdc in the 2nd ch of the beginning ch 3. Turn.
- Rows 9 and 10: Repeat Row 7 and 8 one more time.
- Row 11: Ch 1, 1 sl st in the first st, *1 sl st in the ch-1 sp, 1 sl st in the next st,* repeat from * to * for a total of 14 more times, 1 sl st into the next st, ch 3 (counts as a dc), 1 dc in each of the next 15 sts. Leave a long tail and cut your yarn.
Using your yarn needle and the long tail you left from Row 11, weave down the side of last dc you made down to the bottom of the dc. Then whip stitch the seams together.
MEDIUM BASKET:
-
- Row 1: Start with a magic circle, ch 2, 6 hdc in the magic circle. Ch 2, turn. (6 hdc)
- Row 2: 2 hdc in the first st, 2 hdc in each st across. Ch 2, turn. (12 hdc)
- Row 3: 2 hdc in the first st, 1 hdc in the next st, *2 hdc in the next st, 1 hdc in the next st*, repeat from * to * to the end. Ch 2, turn. (18 hdc)
- Row 4: 2 hdc in the first st, 1 hdc in the next 2 sts, *2 hdc in the next st, 1 hdc in the next 2 sts*, repeat from * to * to the end. Ch 2, turn. (24 hdc)
- Row 5: 2 hdc in the first st, 1 hdc in the next 3 sts, *2 hdc in the next st, 1 hdc in the next 3 sts*, repeat from * to * to the end. Ch 2, turn. (30 hdc)
- Row 6: 2 hdc in the first st, 1 hdc in the next 4 sts, *2 hdc in the next st, 1 hdc in the next 4 sts*, repeat from * to * to the end. (36 hdc)
- Row 7: 2 hdc in the first st, 1 hdc in the next 5 sts, *2 hdc in the next st, 1 hdc in the next 5 sts*, repeat from * to * to the end. (42 hdc)
- Rotate your work so you will be working along the straight edge of the semi circle. Ch 2.
- Row 8: 21 hdc evenly across the bottom edge of the semi circle. 1 hdc in each st around (the rest of the semi circle). Turn.
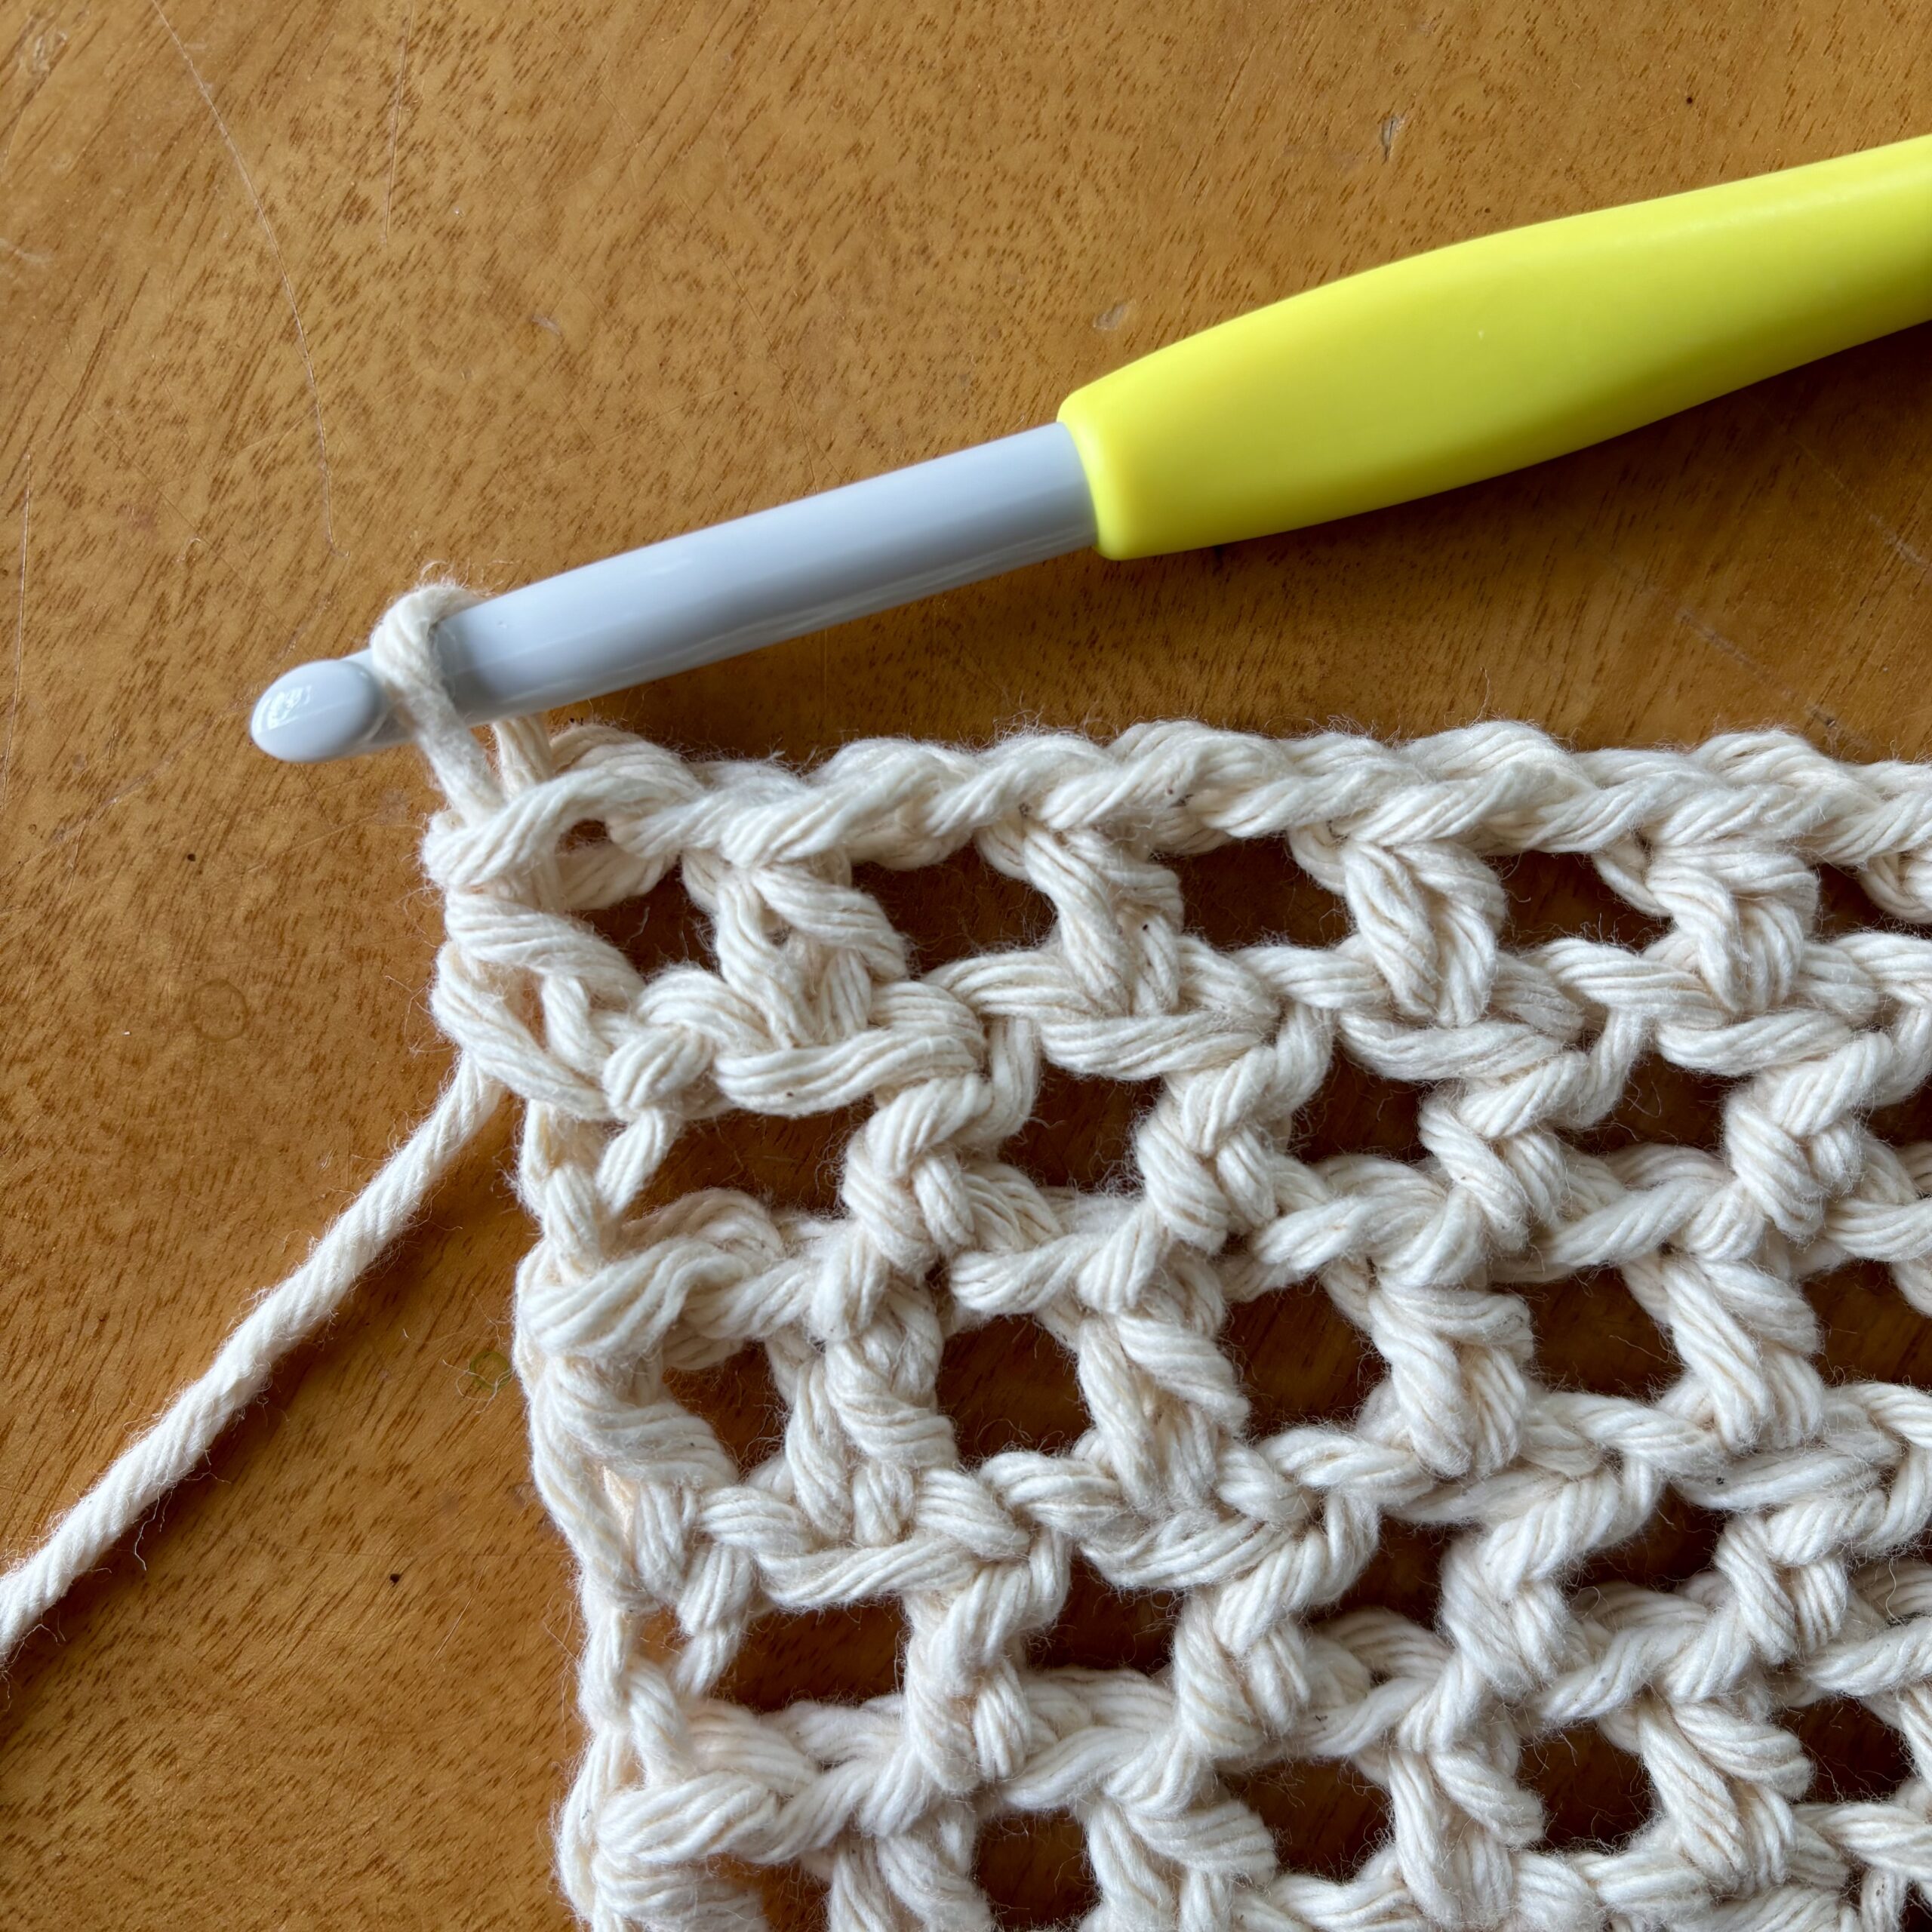
- Row 9: Ch 3 (counts as 1 hdc and ch 1), sk 1, 1 hdc in the next st, *ch 1, sk 1, 1 hdc in the next st*, repeat from * to * for a total of 19 more times (so you should have 21 ch-1 spaces from the beginning of the round to here), place 1 hdc in each of the remaining 21 sts (the back of the piece). Ch 2, turn.
- Row 10: 1 hdc in the first hdc and in the next 20 hdc, 1 hdc in the next hdc, *ch 1, sk the ch-1 sp, 1 hdc in the next hdc,* repeat from * to * across, ending the last ch 1 and hdc in the 2nd ch of the beginning ch 3. Turn.
- Row 11: Ch 3 (counts as 1 hdc and ch 1), sk ch-1 sp, 1 hdc in the next hdc, *ch 1, sk ch-1 sp, 1 hdc in the next hdc*, repeat from * to * 20 more times (giving you a total of 21 ch-1 sps), 1 hdc in each of the remaining 21 sts. Ch 2, turn.
- Repeat Row 10 and 11 once more.
-
- Row 14: 1 hdc in the first st and in the next 20 sts, 1 hdc in the next st, *ch 1, sk the ch-1 sp, 1 hdc in the next st,* repeat from * to * across, ending the last ch 1 and hdc in the 2nd ch of the beginning ch 3. Turn.
- Row 15: Ch 1, 1 sl st in the first st, *1 sl st in the ch-1 sp, 1 sl st in the next st,* repeat from * to * for a total of 20 more times, 1 sl st into the next st, ch 3 (counts as a dc), 1 dc in each of the next 20 sts. Leave a long tail and cut your yarn.
- Using your yarn needle and the long tail you left from Row 15, weave down the side of last dc you made down to the bottom of the dc. Then whip stitch the seams together.
LARGE BASKET:
-
- Row 1: Start with a magic circle, ch 2, 6 hdc in the magic circle. Ch 2, turn. (6 hdc)
- Row 2: 2 hdc in the first st, 2 hdc in each st across. Ch 2, turn. (12 hdc)
- Row 3: 2 hdc in the first st, 1 hdc in the next st, *2 hdc in the next st, 1 hdc in the next st*, repeat from * to * to the end. Ch 2, turn. (18 hdc)
- Row 4: 2 hdc in the first st, 1 hdc in the next 2 sts, *2 hdc in the next st, 1 hdc in the next 2 sts*, repeat from * to * to the end. Ch 2, turn. (24 hdc)
- Row 5: 2 hdc in the first st, 1 hdc in the next 3 sts, *2 hdc in the next st, 1 hdc in the next 3 sts*, repeat from * to * to the end. Ch 2, turn. (30 hdc)
- Row 6: 2 hdc in the first st, 1 hdc in the next 4 sts, *2 hdc in the next st, 1 hdc in the next 4 sts*, repeat from * to * to the end. Ch 2, turn. (36 hdc)
- Row 7: 2 hdc in the first st, 1 hdc in the next 5 sts, *2 hdc in the next st, 1 hdc in the next 5 sts*, repeat from * to * to the end. Ch 2, turn. (42 hdc)
- Row 8: 2 hdc in the first st, 1 hdc in the next 6 sts, *2 hdc in the next st, 1 hdc in the next 6 sts*, repeat from * to * to the end. Ch 2, turn.(48 hdc)
- Row 9: 2 hdc in the first st, 1 hdc in the next 7 sts, *2 hdc in the next st, 1 hdc in the next 7 sts*, repeat from * to * to the end. Ch 2, turn. (54 hdc)
- Rotate your work so you will be working along the straight edge of the semi circle. Ch 2.
-
- Row 10: 29 hdc evenly across the bottom edge of the semi circle. 1 hdc in each hdc around (the rest of the semi circle). Turn.
- Row 11: Ch 3 (counts as 1 hdc and ch 1), sk 1, 1 hdc in the next st, *ch 1, sk 1, 1 hdc in the next st*, repeat from * to * for a total of 25 more times (so you should have 27 ch-1 spaces from the beginning of the round to here), place 1 hdc in each of the remaining 29 sts (the back of the piece). Ch 2, turn.
- Row 12: 1 hdc in the first st and in the next 28 sts, 1 hdc in the next st, *ch 1, sk the ch-1 sp, 1 hdc in the next st,* repeat from * to * across, ending the last ch 1 and hdc in the 2nd ch of the beginning ch 3. Turn.
- Row 13: Ch 3 (counts as 1 hdc and ch 1), sk ch-1 sp, 1 hdc in the next st, *ch 1, sk ch-1 sp, 1 hdc in the next st*, repeat from * to * 25 more times (giving you a total of 27 ch-1 sps), 1 hdc in each of the remaining 29 sts. Ch 2, turn.
- Repeat Rows 12 and 13 two more times.
-
- Row 18: 1 hdc in the first st and in the next 28 sts, 1 hdc in the next st, *ch 1, sk the ch-1 sp, 1 hdc in the next st,* repeat from * to * across, ending the last ch 1 and hdc in the 2nd ch of the beginning ch 3. Turn.
- Row 19: Ch 1, 1 sl st in the first st, *1 sl st in the ch-1 sp, 1 sl st in the next st,* repeat from * to * for a total of 26 more times, 1 sl st into the next st, ch 3 (counts as a dc), 1 dc in each of the next 28 sts. Leave a long tail and cut your yarn.
- Using your yarn needle and the long tail you left from Row 19, weave down the side of the last dc you made down to the bottom of the dc. Then whip stitch the seams together.
- Once all of your baskets are complete, weave the wooden dowels through the tops of the baskets along the double crochet stitches.
- Next, chain 180 and fold the chain in half to create two hanging strands. Decide how much spacing you would like between each basket. Starting with the small basket at the top, wrap one side of the strand around the end of the dowel one time to secure it. Continue down to the medium basket, then finally the large basket, adjusting the spacing as desired between each tier.
- Secure the ends with hot glue or super glue, then repeat the same process along the opposite side.
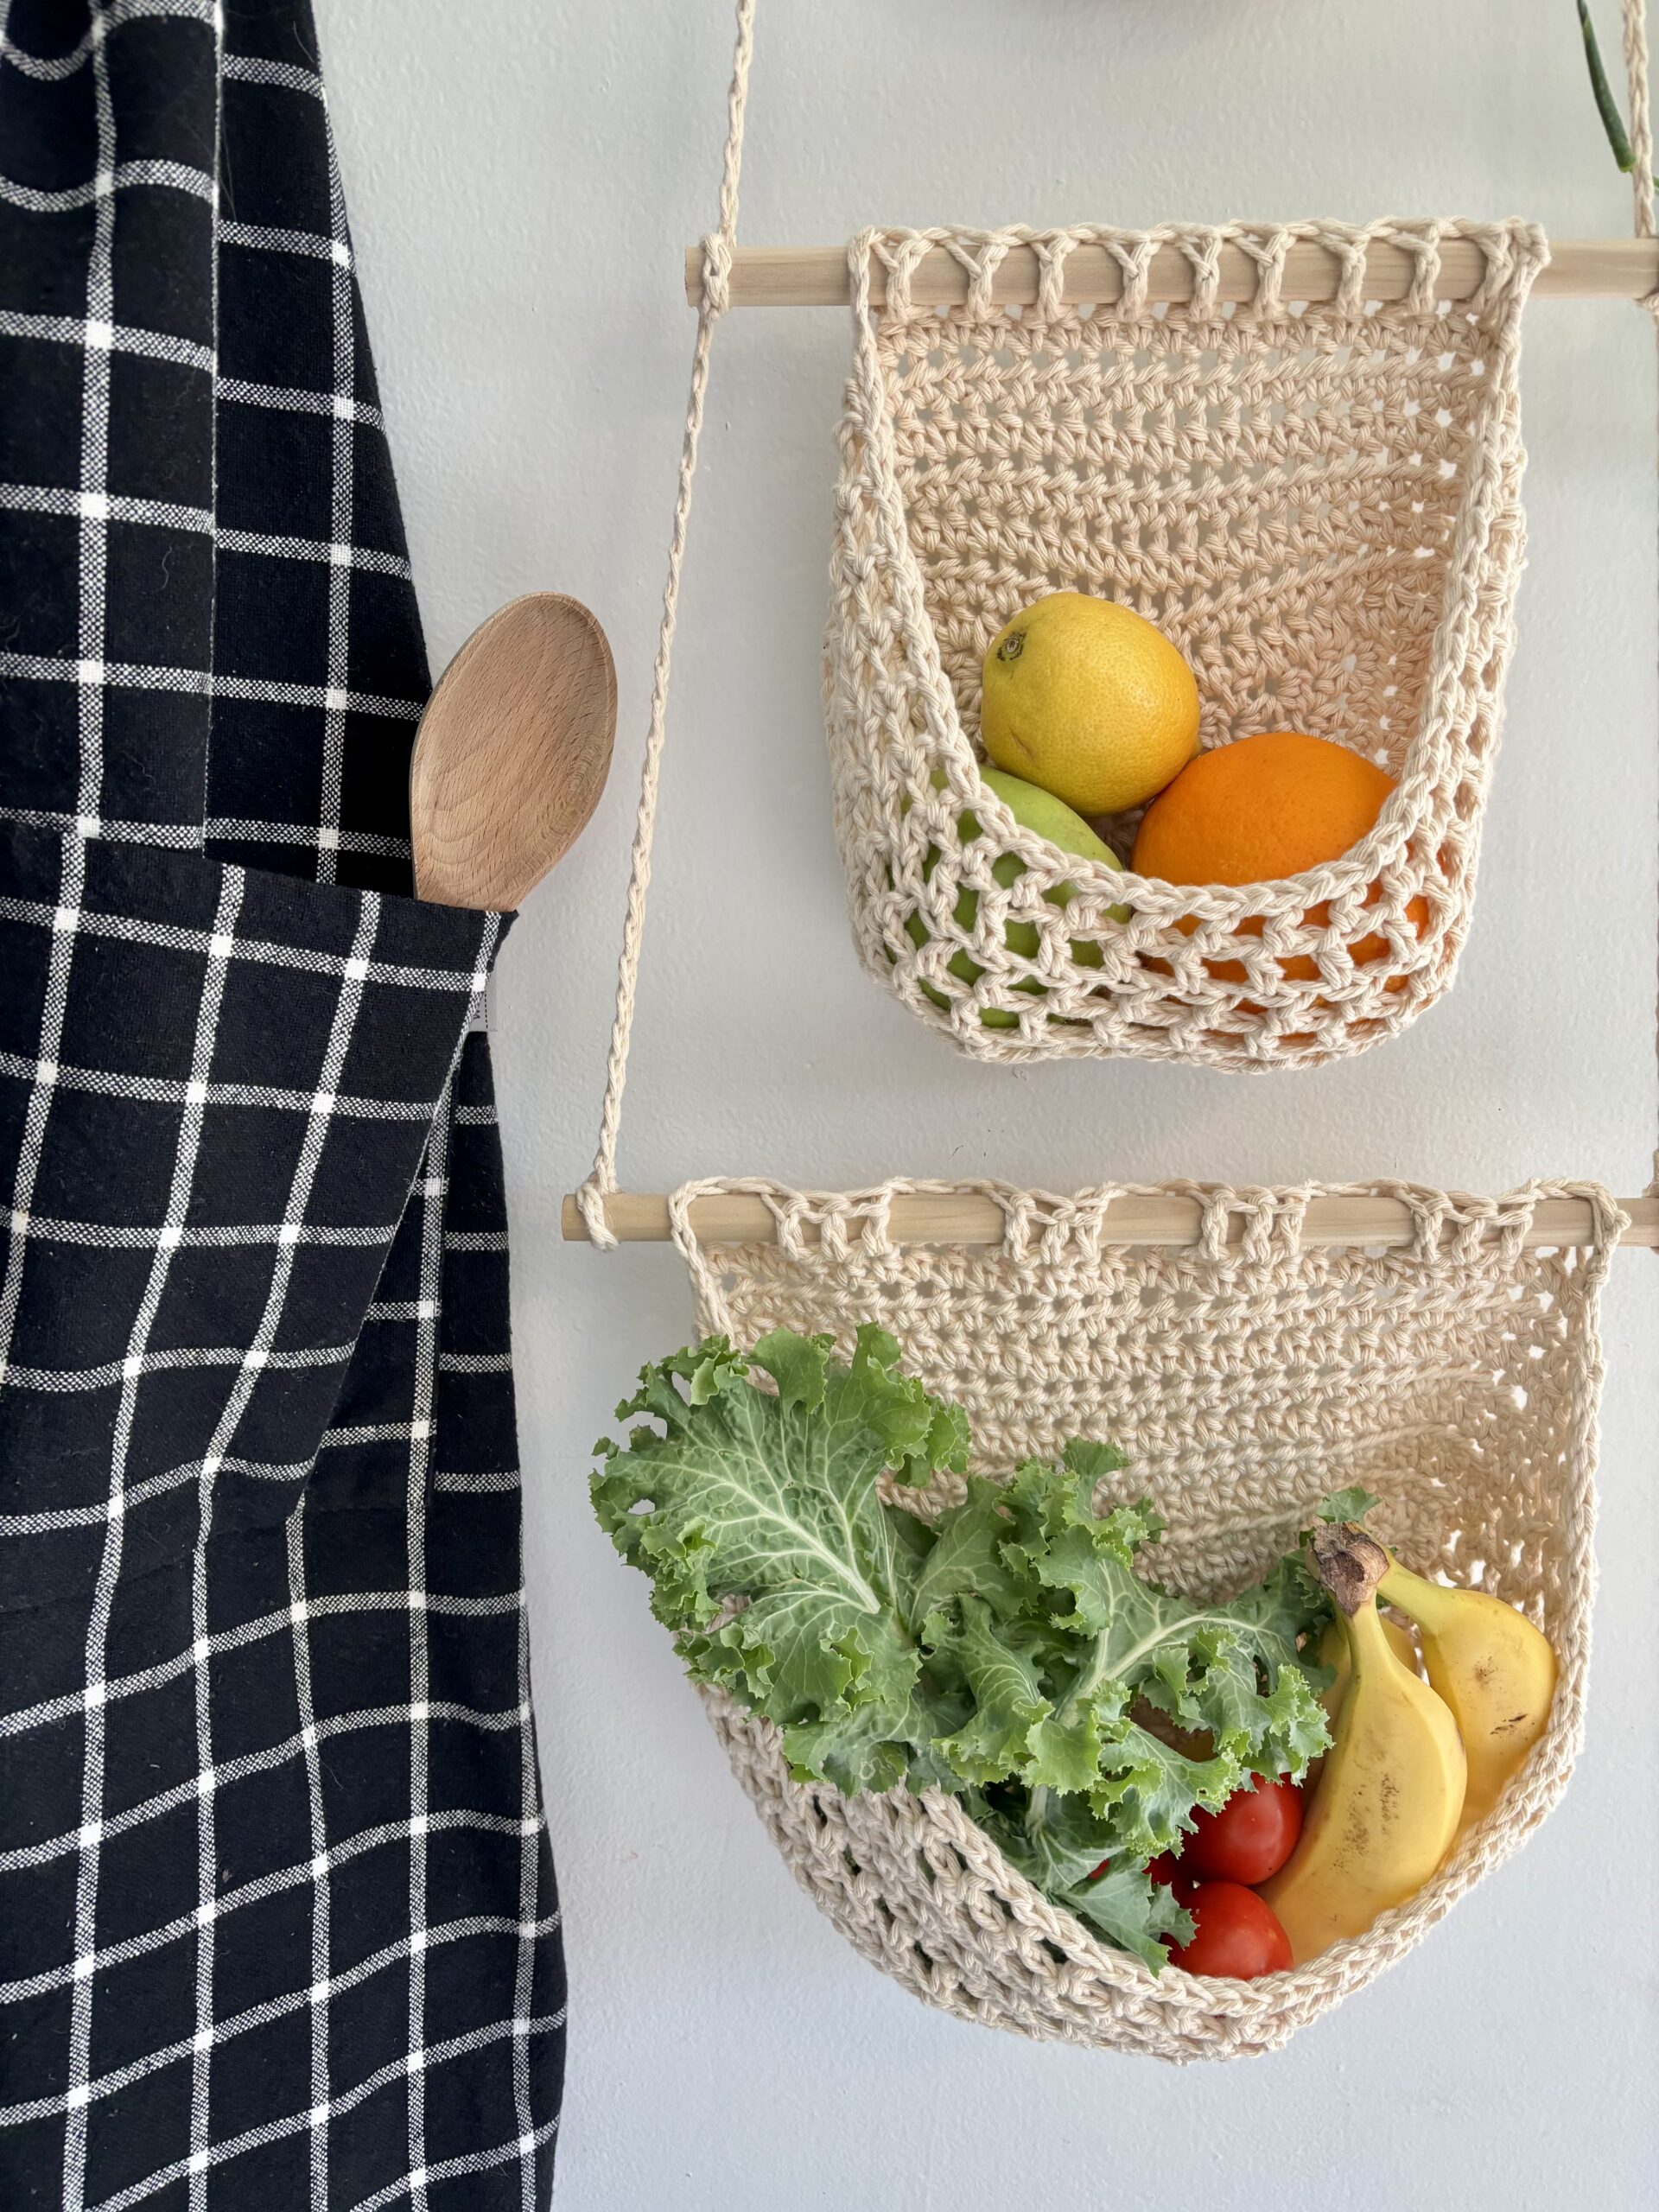
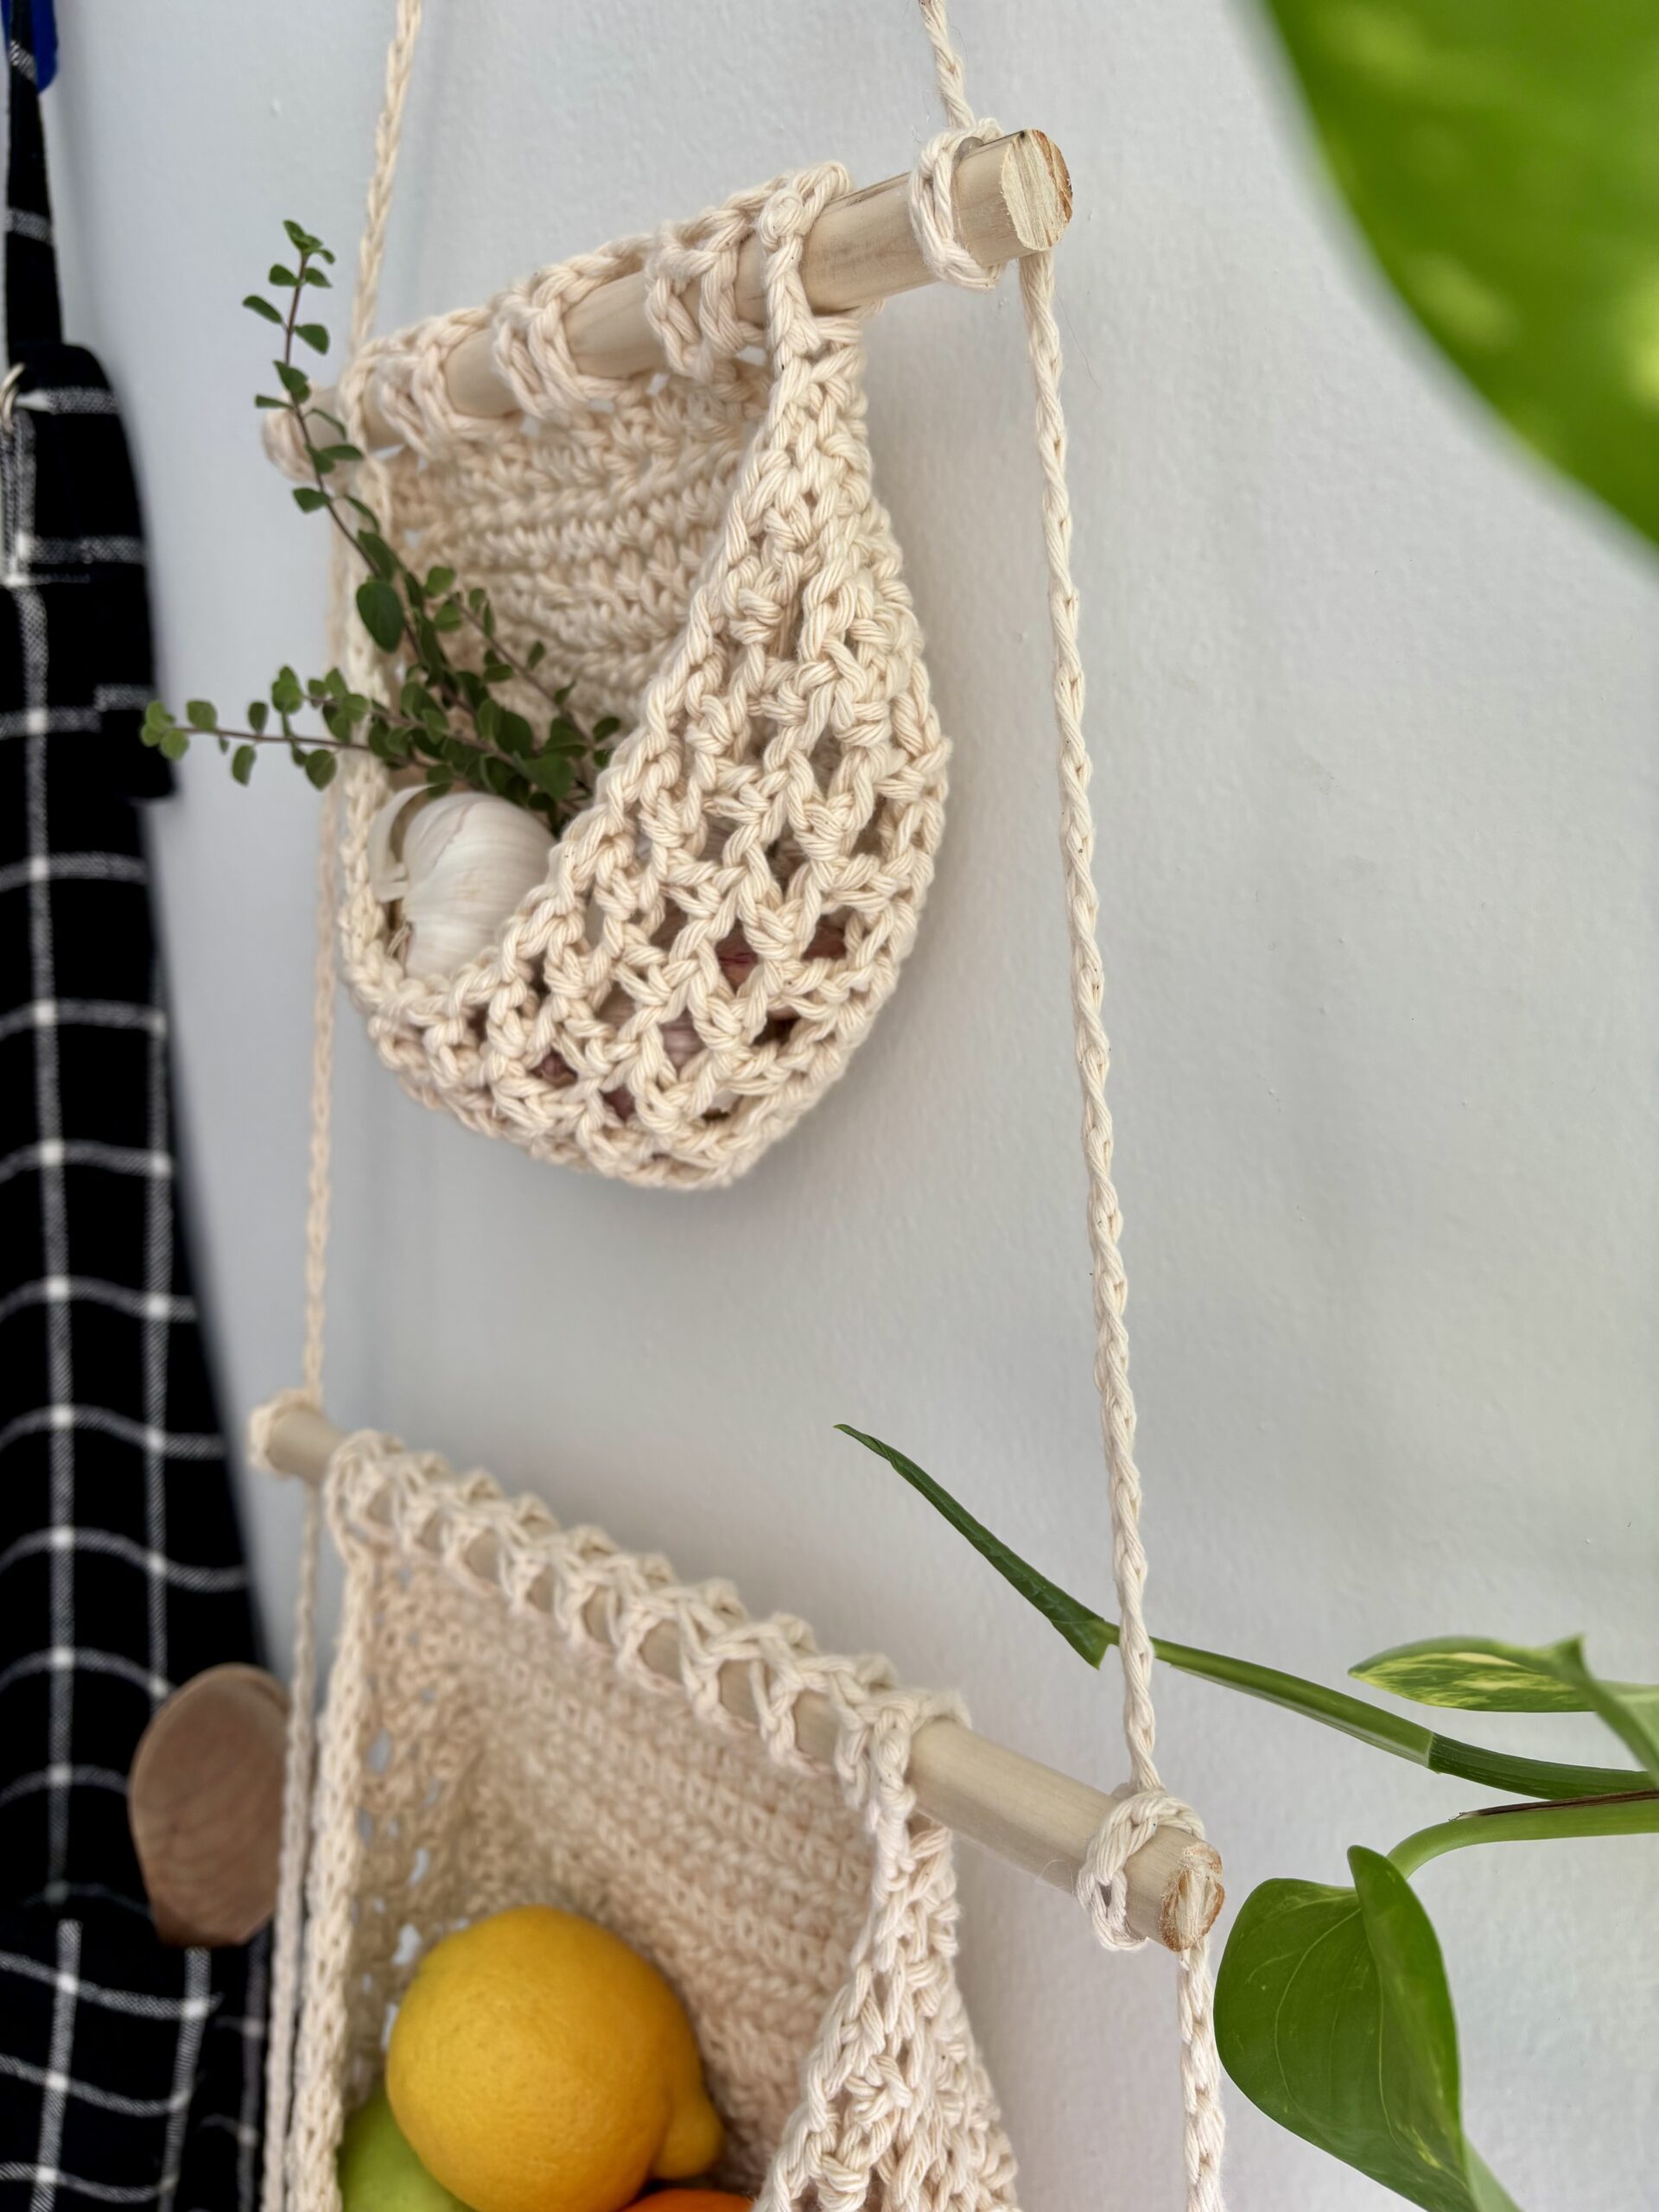
Congratulations, you’ve completed your 3-tiered fruit basket hanging!!! 🙂
If you want to keep up with me, Julie, on social media for other fun projects, follow me on: Instagram
If you want to keep up with all things Clover, follow us on: Facebook | Twitter | Instagram | Pinterest | YouTube | Ravelry