

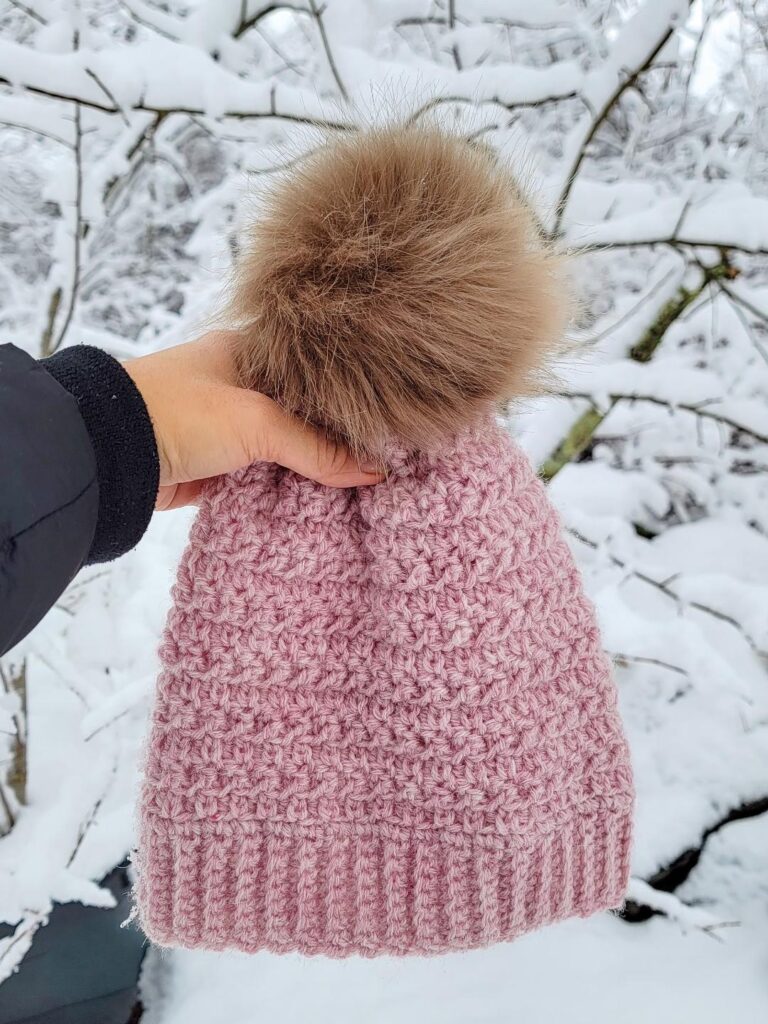
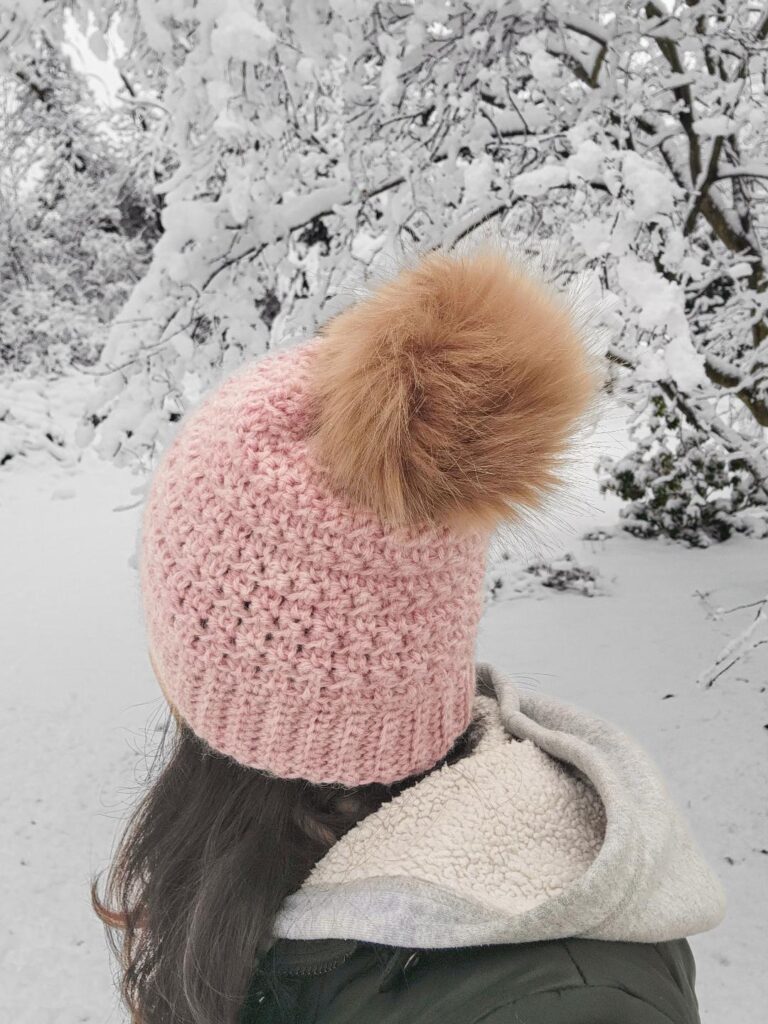
Winter is a time to find inspiration. A chance to pause, think, and create. I find myself staying indoors and creating some patterns while the temperature drops and snow falls. This beanie I’m sharing with you today is one of them. My Darling Beanie is ideal for Valentine’s Day as well as the winter months. I hope you find this pattern enjoyable. Let’s begin crocheting!
MATERIALS:
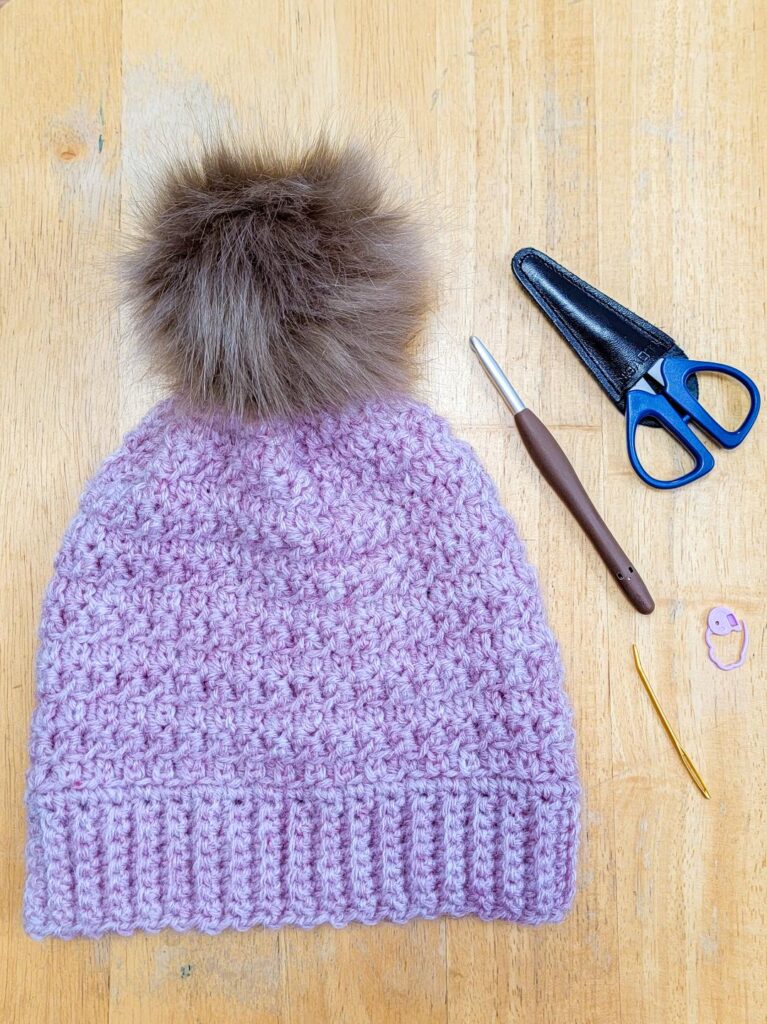
- Clover Amour Crochet Hook J (6 mm)(or size to obtain gauge)
- Clover Jumbo Tapestry Needle (Bent Point)
- Clover Patchwork Mini Scissors
- Clover Quick-Locking Stitch Markers
- tape measure
- worsted weight yarn (#4)
NOTES:
- Read the pattern carefully before starting.
- This pattern is worked in from the bottom (brim/band) up. I recommend using stitch markers to mark the beginning of the row. Remember to move the stitch marker as you progress.
- ( ) Work instructions within parentheses as many times as directed, or work a group of stitches all in the same stitch.
- * * Repeat instructions between asterisks as many times as directed or repeat at specified locations.
- Not all heads conform to size by age; please measure for a more accurate fit. To change the beanie’s size, add or subtract 2 rows for the band or 2 stitches for the body pattern. If you want your beanie to be slouchy, add a few more rows to the body before continuing with the decrease round.
- The number of stitches in each row is indicated by the numbers at the end of the row/round.
- Gauge: Brim: 7 sts X 7 rows = 2″ (in pattern) | Body: 8 sts X 5 rows = 2″ (in pattern)
- Skill level: adventurous beginner to intermediate
- Finished measurement: about 8.5 inches (height) x 20 inches (circumference)—unstretched. Fits most adults.
ABBREVIATIONS:
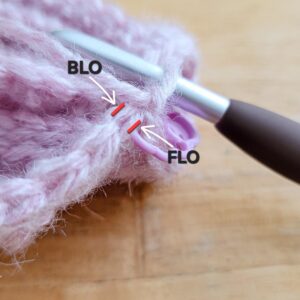
- blo: back loop only
- ch(s): chain(s)
- flo: front loop only
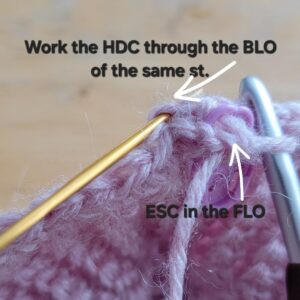
- hdc: half double crochet
- pm: place marker
- prev: previous
- rep: repeat
- rs: right side
- sc: single crochet
- sc2tog: single crochet two (2) stitches together (decrease)
- sk: skip
- slst(s): slip stitch(es)
- st(s): stitch(es)
- ws: wrong side
- esc: extended single crochet: Insert the hook in the designated st, yarn over, and pull up a loop (2 loops on the hook); yarn over, pull through only the first loop (2 loops on the hook); then yarn over and pull through the remaining 2 loops.

BEANIE PATTERN:
BRIM/BAND:
Gauge: 7 sts x 7 rows = 2 in
- Row 1 (RS): Ch8, 1SC in the 2nd ch from the hook and in each ch across. Turn. 7 sts
- Row 2 (WS): DO NOT ch1, 1SC in 1st st, SC through the BLO to last st, 1SC in last st. Turn. 7 sts.
- Rows 3–70: Rep R2.
The brim/band measures approximately 20 inches without stretching. Do not fasten off; place both short ends together (RS facing in), and slst closed through both loops in each st of the brim ends. Do not fasten off; turn the band inside out so the right side is facing out and slst end is facing in. Continue working with the BODY instructions.
BODY:
Gauge: 8 st x 5 rows = 2 in
- Set-Up Round: Ch1 (does not count as a st here and throughout), 1SC into the side of each row of the brim around. Remember to PM in 1st st. Slst in 1st st to join. 70 sts
- Round 1: Ch1, (1ESC through the FLO, 1HDC through the BLO) in the 1st st, sk 1 st, *(1ESC through the FLO, 1HDC through the BLO) in the next st), sk 1 st*; Rep from * to * to end. Slst in 1st st to join. TURN. 70 sts
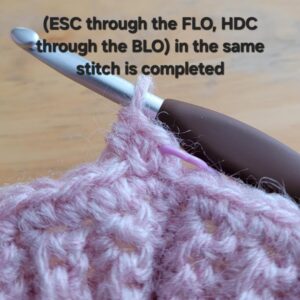
- Round 2: Ch1, sk 1st st, *(1ESC through the FLO, 1HDC through the BLO) in HDC st from the prev round, sk 1 st*; Rep from * to * to end. Slst in 1st st to join. TURN. 70 sts
- Round 3 – 15: Rep Round 2.
- Round 16: Ch1, 1SC2Tog around. Slst in 1st st to join. 35 sts
FINISHING:
- Fasten off, leaving a long tail for closing the top of the beanie. With the long tail yarn and tapestry needle, thread through the FLO sts around, then pull tight to cinch closed. Fasten off and weave in all ends.
- Add your favorite pompom for a finishing touch, and you are done!

I would love to see your version of this beanie for your winter wardrobe! Please tag me @stringsandcuddles and use these hashtags to share: #stringsandcuddles #stringsandcuddlesdesigns
Also, please don’t hesitate to contact me with questions regarding this pattern. You may also reach out to me on Instagram (@stringsandcuddles)!
If you want to keep up with me, Elisa, on social media for other fun projects, follow me on social media: Instagram | Pinterest | Facebook | Blog | Ravelry
If you want to keep up with all things Clover, follow us on: Facebook | Twitter | Instagram | Pinterest | YouTube | Ravelry