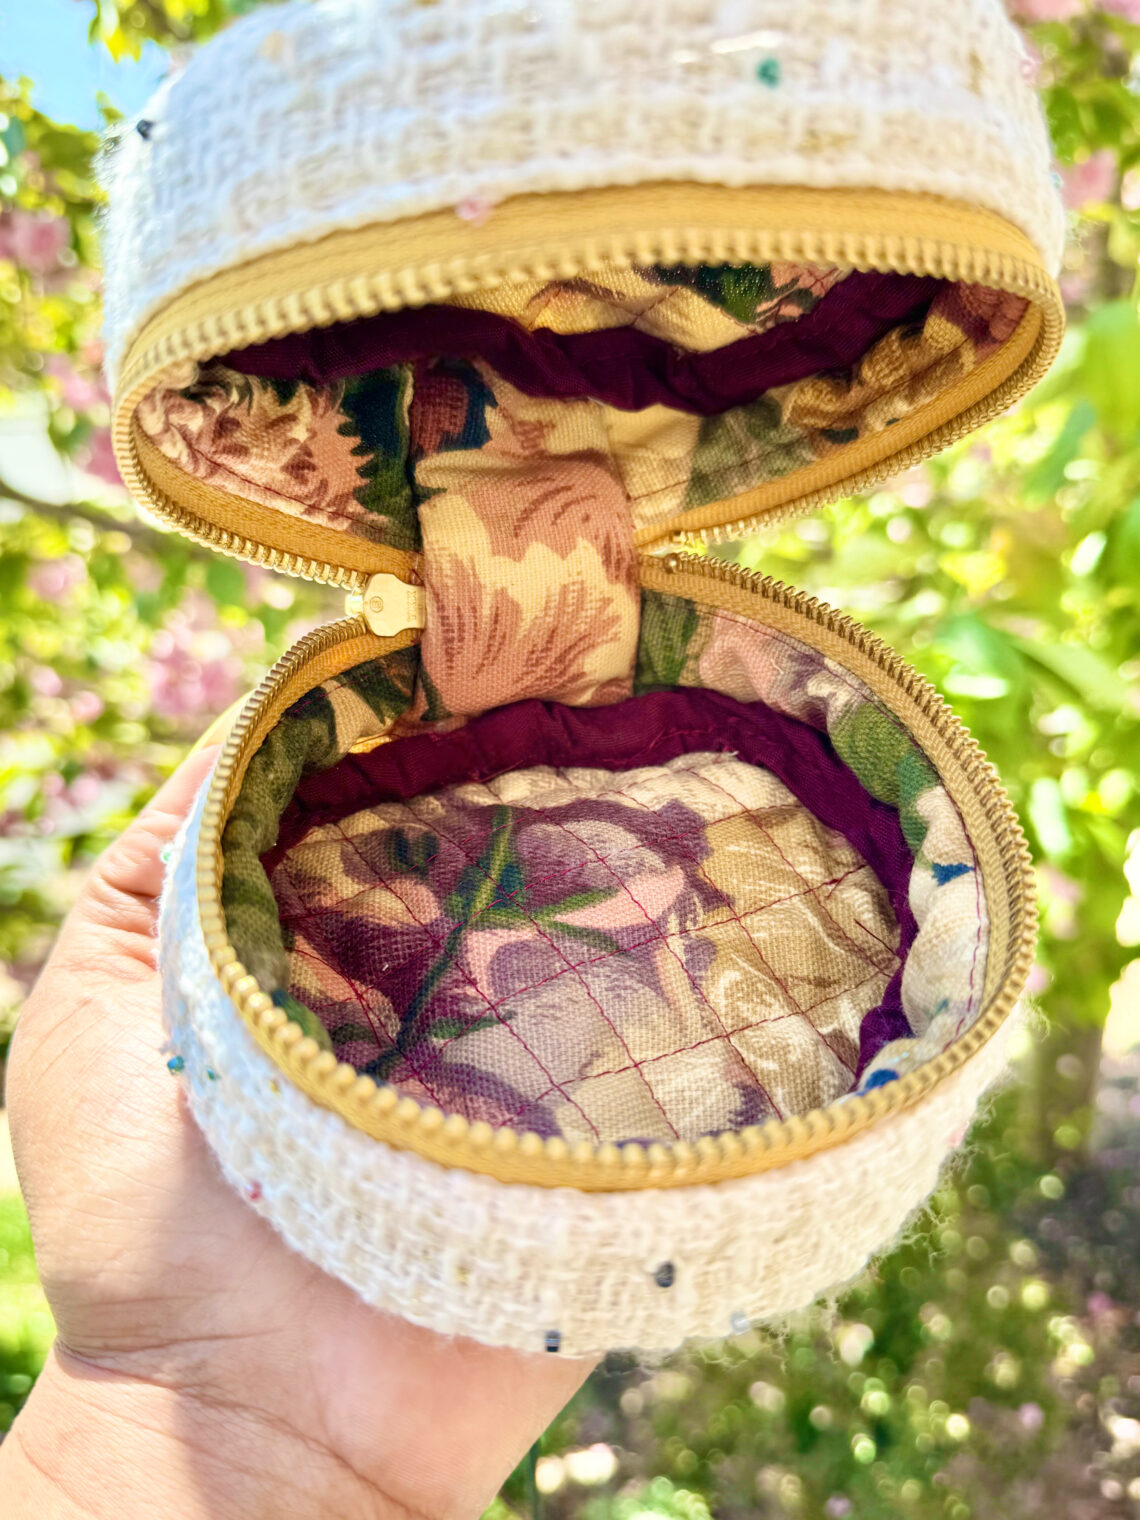
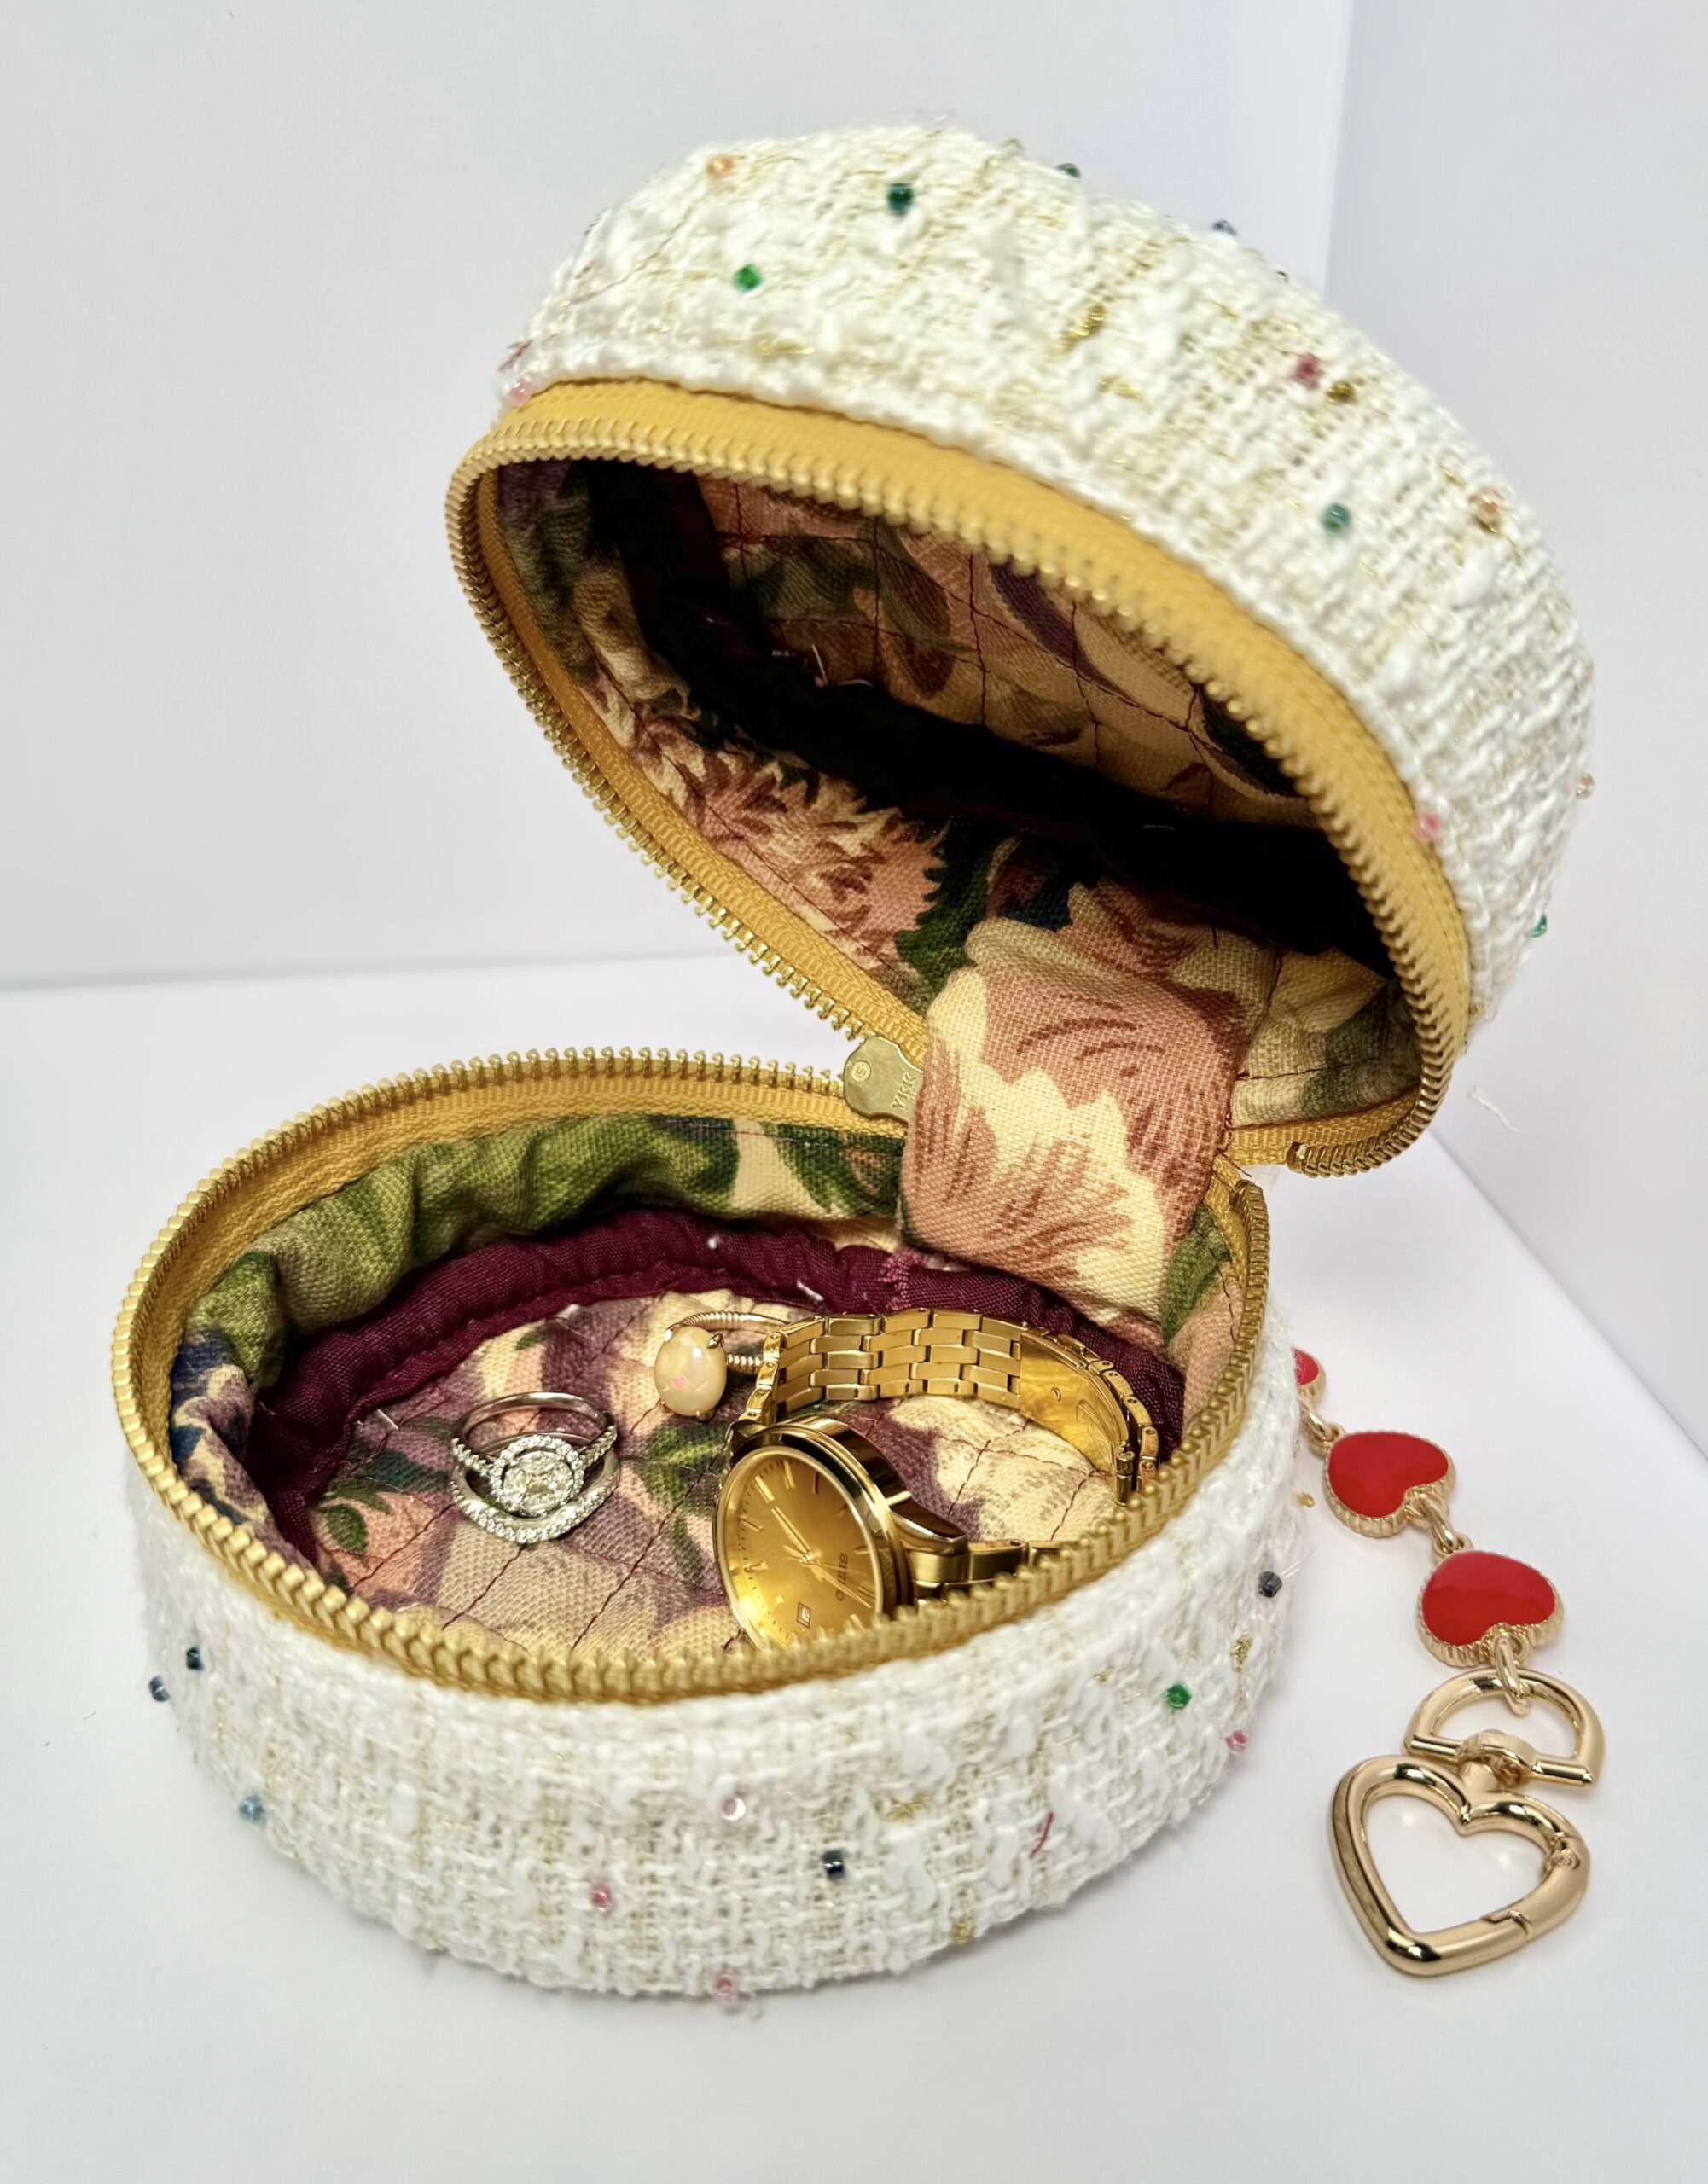
Circular Floral Pouch *mother’s day gift idea!*
Hello everybody! It’s Duana with @duana_m_chandler and @duanastudio. We are almost in the heart of spring, which means it’s time to grab those travel bags and make some memories in the sun! Here’s a cute and practical circle zipper pouch inspired by Pretty Patterns with some modifications. This pouch is the perfect size for storing coins or earbuds. It’s also the perfect Mother’s Day gift for mom to store her jewelry. There’s so many possibilities – you can make 1 of them or 100 of them! They’re just so easy to make and they are so adorable.
MATERIALS:
- Clover Rotary Cutter (60 mm)
- Clover Flower Head Pins
- Clover Wonder Clips (Variety Pack)
- Clover White Marking Pen (Fine)
- Clover Gold Eye Embroidery Needles
- 1/2 yard outer fabric
- 1/2 yard lining fabric
- 1 yard bias tape (or 1/2 yard cotton fabric)
- 14″ zipper
- optional: batting/foam/fleece

TUTORIAL:
1. Prepare the pieces for sewing. I cut out the pieces using my Clover Rotary Cutter (60 mm). The pieces and measurements are listed below:
- A – 1 outer fabric and 1 lining fabric- 2″ x 14″
- B – 1 outer fabric and 1 lining fabric – 1.5″ x 14″
- C – 1 outer fabric – 2.5″ x 3″
- D – 1 outer fabric and 1 lining fabric – 2.5″ x 4″
- E – 2 outer fabric and 2 lining fabric – 5″ diameter circles
If your fabric is thin and not padded, it is a good idea to use some foam, batting or fusible fleece and layer it with the lining. I stitched foam to the lining pieces where the seam allowances would be. I used a 1/4″ seam allowance.


2. Place the outer fabric of B and the zipper right sides together using the Clover Flower Head Pins. Baste together. Place the lining of B on the other side of the zipper wrong side out. Sew through the layers using a 1/4″ seam allowance. Do this again with the outer fabric and lining of A. Turn the layers right side out and press lining away from the zipper. Topstitch both sides of the zipper.


3. Create the strap using C by folding in half at the center and folding in the sides to center the crease. Iron and static along both edges. Pin the strap to the zipper panel. Place the outer fabric of piece D on the zipper panel right sides together and the lining fabric of piece D on the back right side facing the zipper. Use Clover Wonder Clips (Variety Pack) to hold in place. Sew through all the layers with a 1/2″ seam allowance. Use a clip to hold the strap on the opposite side of piece D.


4. Attach the outer fabric piece D to the other side of the zipper with right sides together. Sew through the layers. Fold in the lining piece D about 1/2″ and use a needle to do an invisible stitch to hold it in place. I used Clover Gold Eye Embroidery Needles.


5. Attach the outer fabric and lining fabric of piece E wrong sides together. I basted them together. Using the clips, attach them to what you’ve created so far. Sew carefully and try not to crease it. Repeat on the other side, but open the zipper to make it easier. Give the pouch a good press and shape it. Add bias tape or create bias tape using a cotton fabric to cover the raw edges.


6. Add some accessories or straps and enjoy your new pouch! You can also add a strap if you want it to be a bag 🙂

If you want to keep up with me, Duana, on social media for other fun projects, follow me on social media: Instagram
If you want to keep up with all things Clover, follow us on: Facebook | Twitter | Instagram | Pinterest | YouTube | Ravelry