Spring Bloom Plant Hanger
Welcome the freshness of spring into your home with the Spring Bloom Plant Hanger, a delicate yet sturdy crochet design perfect for displaying your favorite greenery. With its airy stitches and botanical charm, this hanger adds a handmade touch of nature to any space!
MATERIALS:
- Clover Amour Crochet Hook G (4.0 mm)
- Patchwork Scissors
- Yarn Needle
- 8 oz. 100% cotton DK weight yarn
- orange
- pink
- green
- or any 3 colors of your choice!
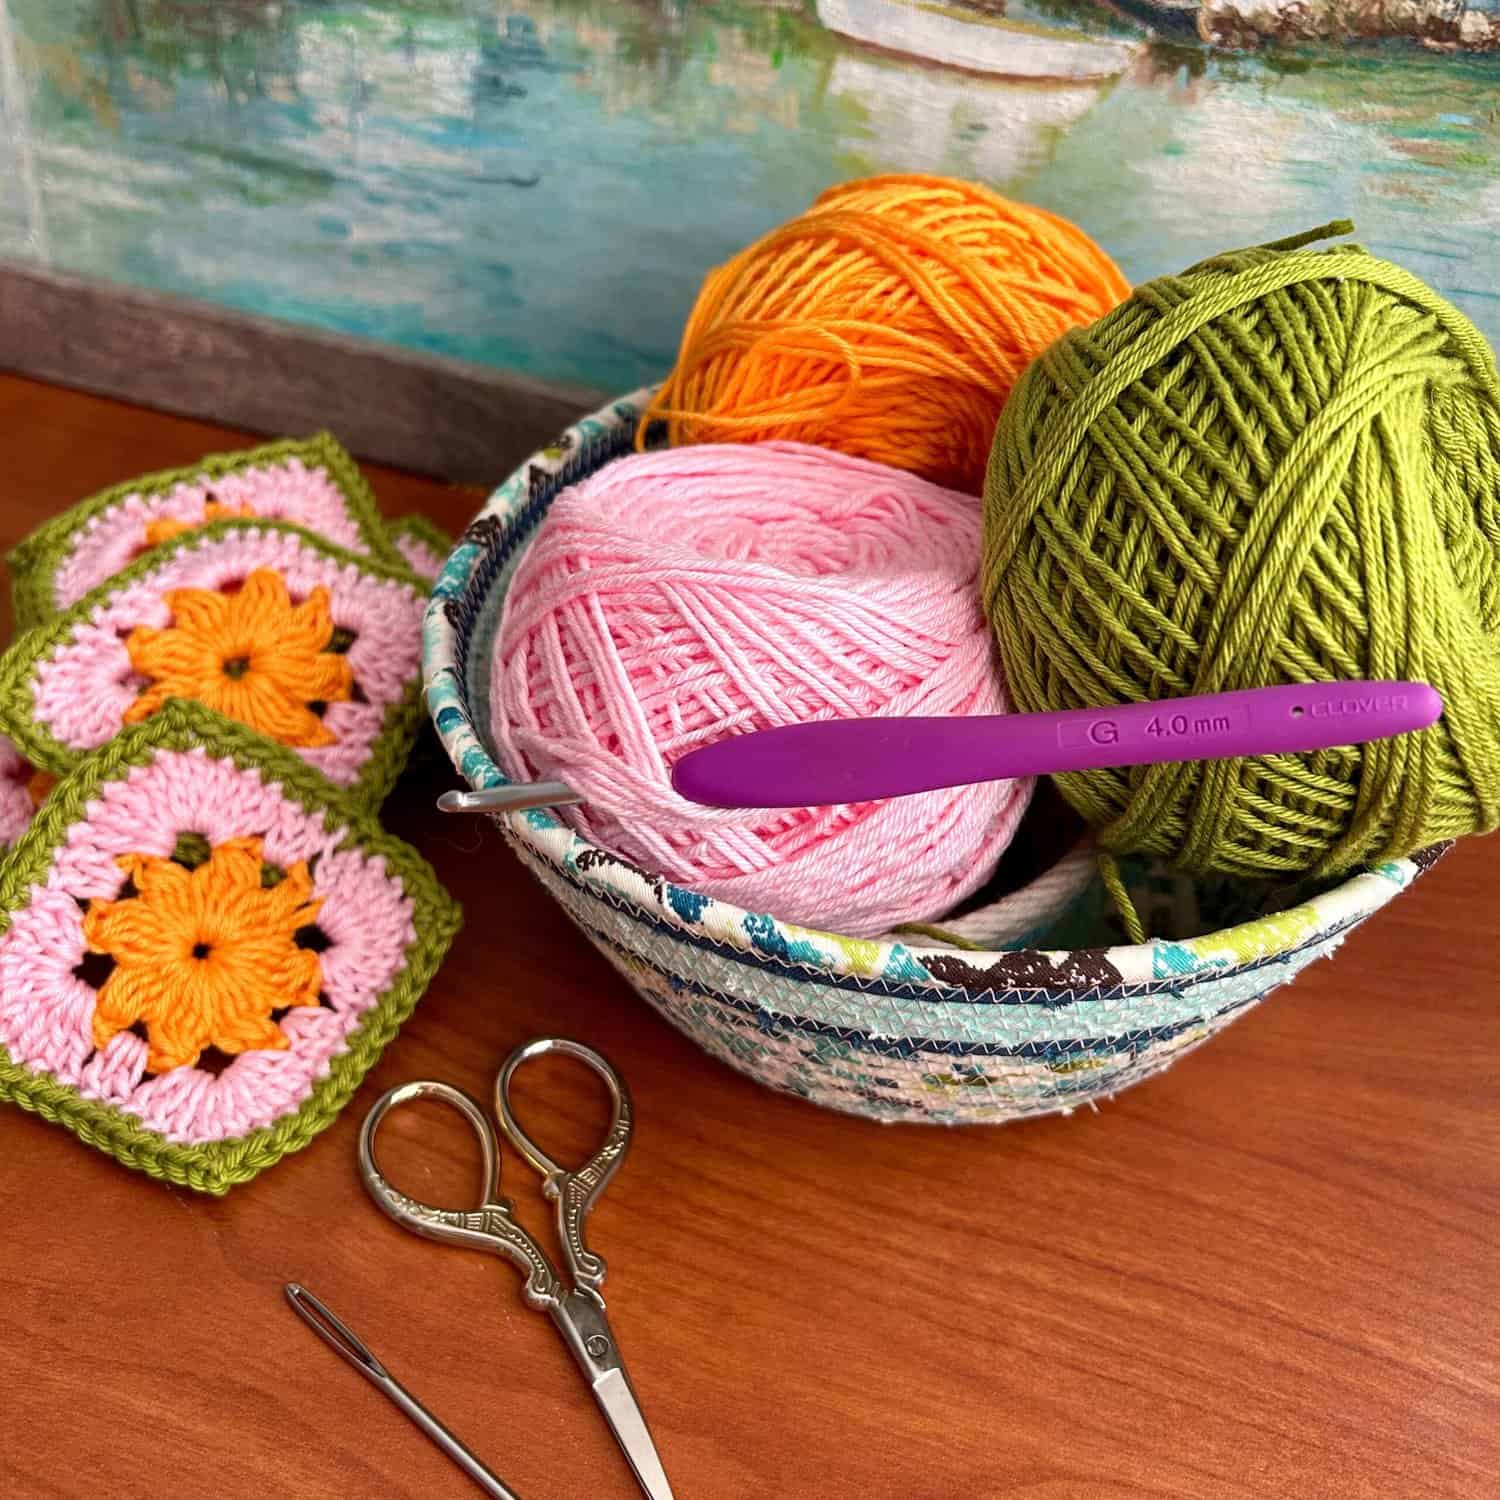
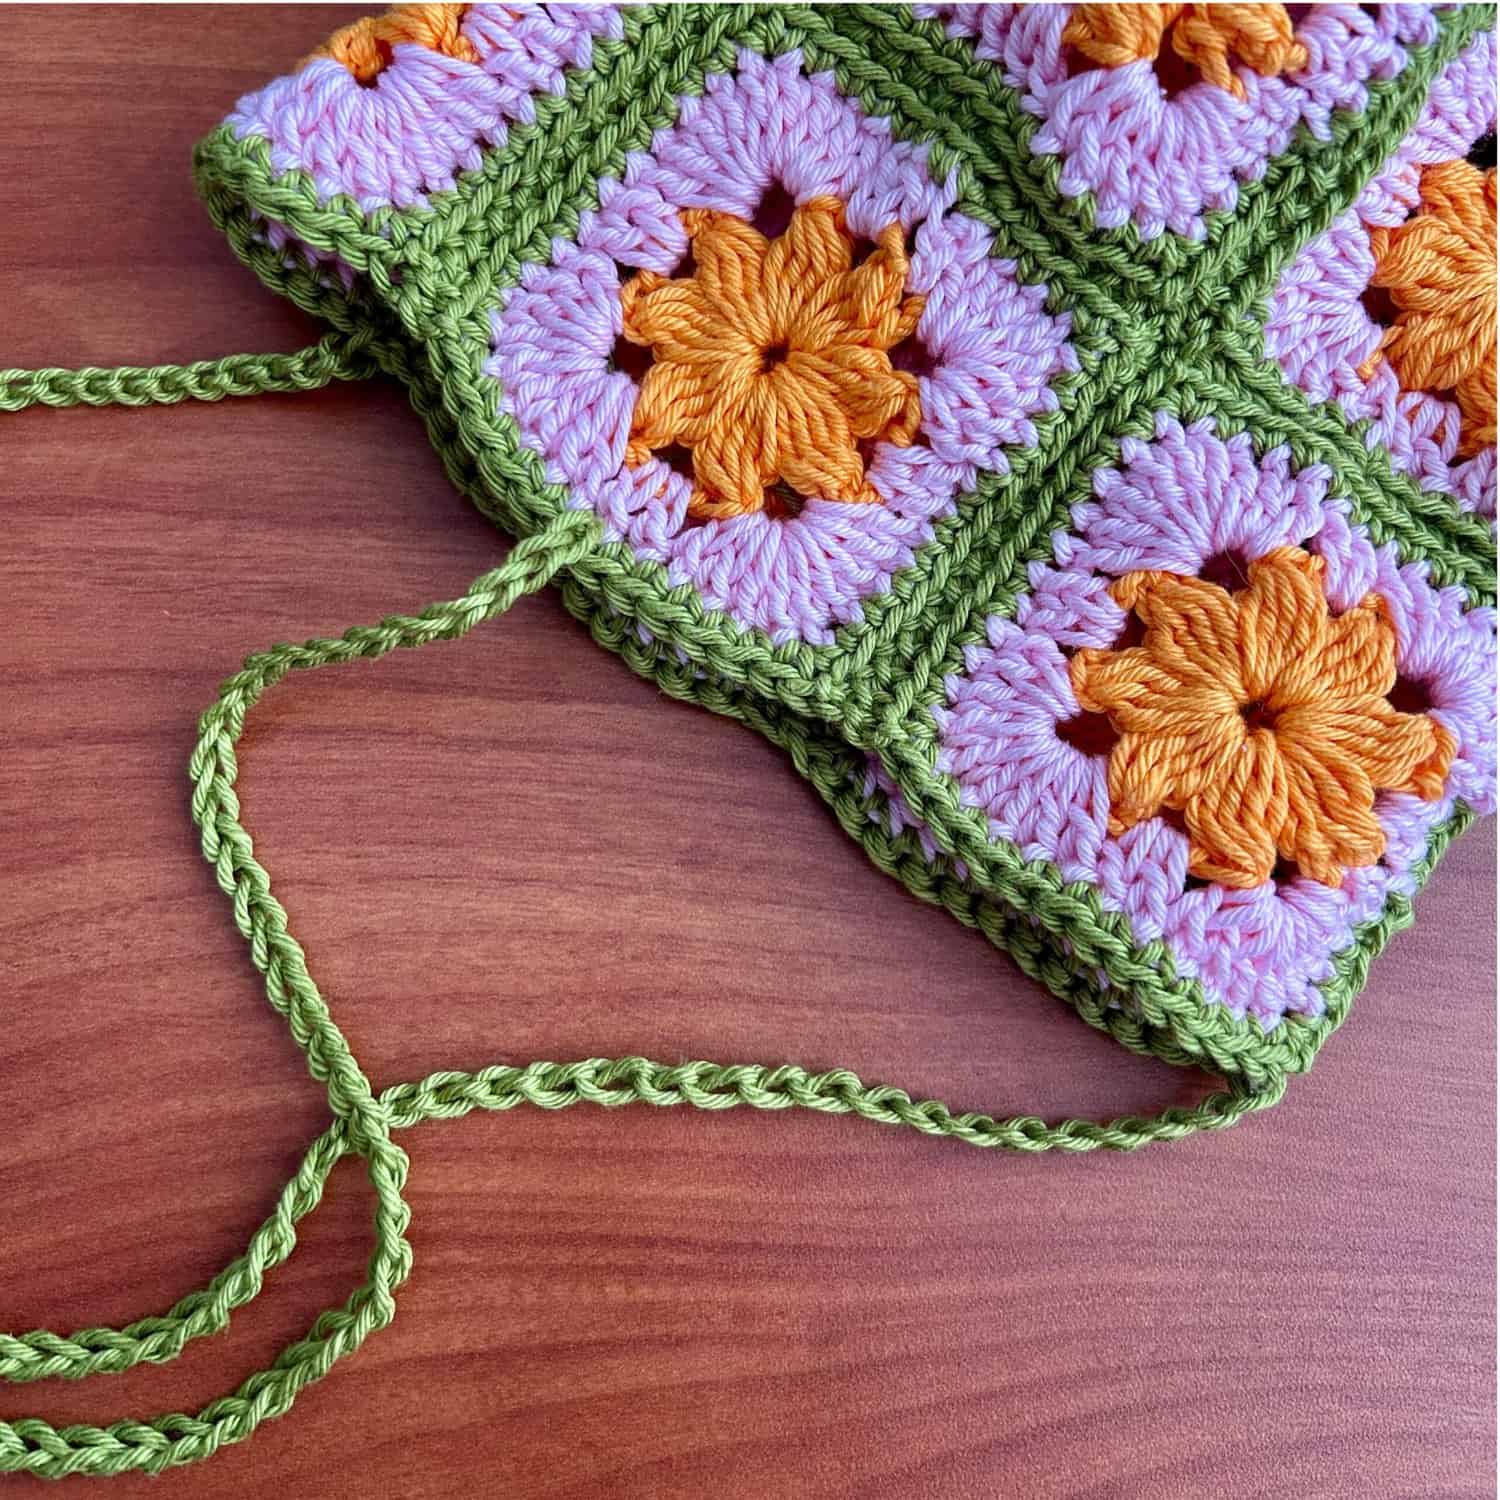
FLOWER GRANNY SQUARE TUTORIAL (make 10):
With orange, start with a magic circle.
- Round 1: Ch 3, 3 dc cluster into ring (counts as 4 dc cluster), [ch 3, 4 dc cluster into ring] 7 times. Ch 3, sl st to the 1st cluster. Pull tight to close the ring.
Finish off orange. Join pink in the same st.
- Round 2: Ch 3 (counts as 1 dc), 2 dc into the next ch 3 sp, [9 dc into the next sp, 2 dc into the next sp] 3 times, 8 dc into the last sp, join with a sl st to the top of the ch 3.
Finish off pink. Join green in the same st.
- Round 3: Ch 1, 1 sc in the same place as ch 1, 1 sc in each of the next 6 sts, *[1 sc, ch 2, 1 sc] in next st, 1 sc in the next 10 sts,* repeat from * 2 times, [1 sc, ch 2, 1 sc] in next st, 1 sc in the next 3 sts, join with a sl st to the first sc.
Finish off. Weave in ends.
ASSEMBLY OF SQUARES:
Using green yarn (or main color), whip stitch the squares together in a strip so you have two rows of 5. Then join the ends together to form a circle.
BASE TUTORIAL:
With orange, ch 5, join with a sl st to the first ch to form a ring.
- Round 1: Ch 4 (counts as beginning ch 3 plus ch 1), *1 dc into the ring, ch 1*, repeat from * 10 more times. Join with a sl st into the 3rd ch of the beginning ch. Finish off.
- Note: If you want to make this part in just one color, then at the end of each round, you would turn your work, ch 3 (counts as the first dc), and follow the pattern as written.
- Round 2: Turn your work, join pink with a sl st (or any joining method you prefer) in any ch1 sp. Ch 3 – counts as first dc and will do so for the entire pattern, (1 dc, ch 1) in the same ch 1 sp. *(2 dc, ch 1) in next ch 1 sp. Repeat from * 10 more times, join with sl st into 3rd ch of beg ch 3.
- Round 3: Turn your work, ch 3, (2 dc, ch 1) in ch 1 sp. *(3 dc, ch 1) in next ch 1 sp. Repeat from * 10 more times, join with sl st into 3rd ch of beg ch 3.
- Round 4: Turn your work, ch 3, (2 dc, ch 2) in the ch 1 sp, (4 dc, ch 2) in next ch 2 sp, *(3 dc, ch 2) in next ch 2 sp, (4 dc, ch 2) in next ch 2 sp. Repeat from * 4 times, join with sl st into 3rd ch of beg ch 3, fasten off.
- Round 5: Turn your work, join green yarn in any dc, 1 sc in each st around, placing 2 sc in each ch 2 sp, join with a sl st to then first sc. Leave a super long tail before finishing off.
Attach the base of the plant hanger to the body of the plant hanger via whip stitch method.
STRAP TUTORIAL:
With green, attach yarn in three different sections that are equally apart. Ch 65, finish off. Bring all three ends together at the top and tie a knot.
And your spring plant hanger is completed! It’s a gorgeous addition to your springtime decor 🙂 If you make one tag us on Instagram using the hashtags #cloverusa #handsofzeal so we can see it and repost ya!
If you want to keep up with me, Julie, on social media for other fun projects, follow me on: Instagram
If you want to keep up with all things Clover, follow us on: Facebook | Twitter | Instagram | Pinterest | YouTube | Ravelry