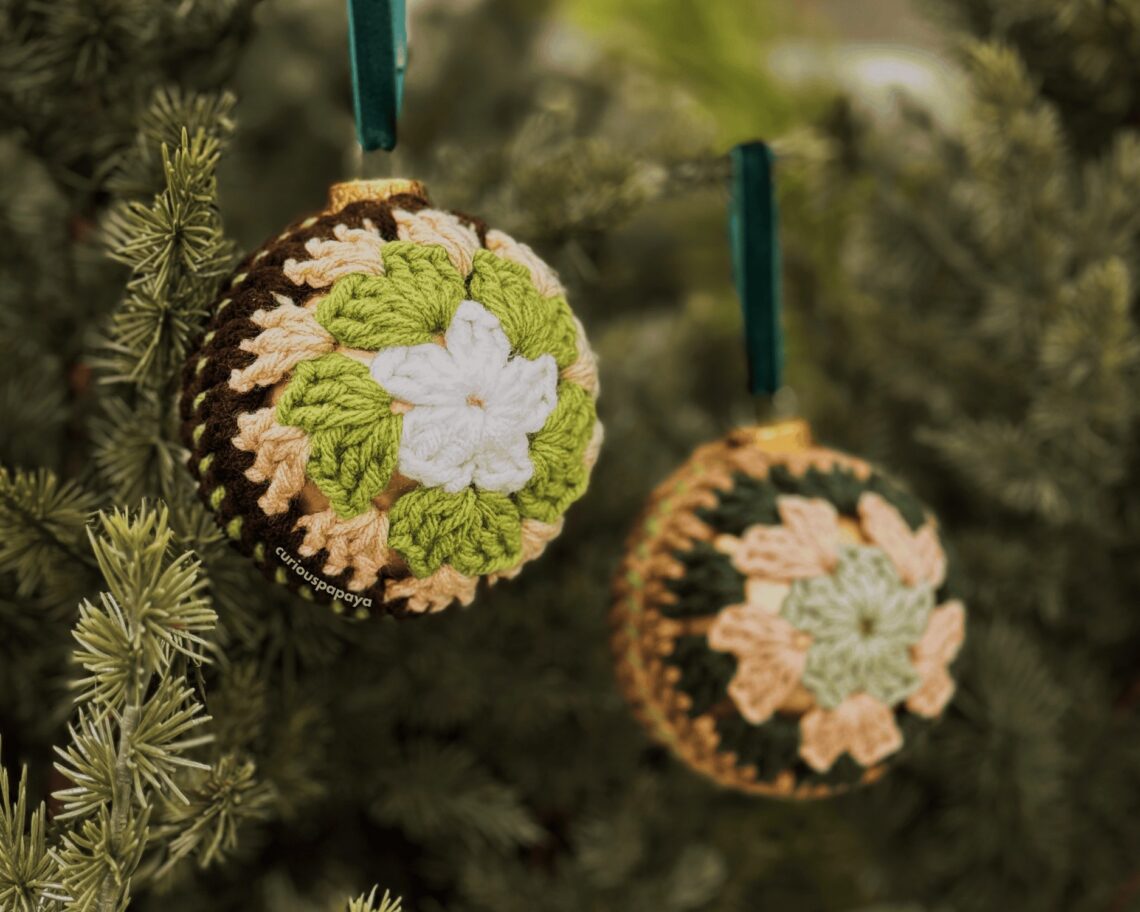
Tree Ornament: Granny Circle Baubles *free crochet pattern*
Granny squares are a classic crochet design loved for their versatility. An equally popular “cousin” of the granny square is the granny circle! In this pattern, we’ll be creating charming baubles with this comforting design. They’re sure to elevate your festive home decor or be that special handmade gift. -Amy (@curiouspapaya)
MATERIALS:
-
- Clover Amour Hook (3.25 mm)
- Clover Patchwork Scissors
- Yarn Needle
- Ornaments (80 mm)
- After much experimentation, I’ve found that using an ornament as an insert (plastic or glass works fine) gives the most polished look. I tried lining the inside and stuffing it with fiber fill but it created a more “craft-like” appearance rather than a luxurious one. For the ornaments, I had initially tried clear plastic ones which were no bueno. The gold opaque ones turned out to be the winner and I loved how the rich color complimented my color palette.
- #4 medium worsted yarn
- Each ornament will require 4 colors which we will refer to in the pattern as “color #”. I made 5 ornaments and chose an earth-toned color palette. The focus was on neutrals with creams, tans, and browns. For my accent colors, I went with deep greens as well as a rusty orange. My thought process was that I wanted each of the ornaments in my collection to look unique but cohesive. In any case, choosing the colors for your project is where the fun is! Take liberty in making yours as wild as you’d like and have fun with it.
- 3/8 in. [9.5 mm] Velvet ribbon in dark green
- Optional: lighter (to singe the ends of the ribbon)
NOTES:
- Please do not copy/redistribute any part of this pattern as your own. This includes reposting/translating without permission. Feel free to sell your finished products in small quantities as long as you give credit to help support my work. Tag your creations with #curiouspapaya so I can feature you!
- This pattern is worked in joined rounds.
- This pattern is written in US terminology.
- Difficulty: Intermediate-beginner +
- Measurements: 3.15 in. [80 mm] in diameter if using the prescribed materials
- Time: ~1 hr
ABBREVIATIONS:
- ch: chain
- ch-sp: chain space
- dc: double crochet
- slst: slip stitch
- st(s): stitch(es)
- rnd(s): round(s)
- [#]: stitch count
- (…) x #: repeat instructions the number of times
Follow along the video tutorial below.
PATTERN:
GRANNY CIRCLE (make two):
Using the 3.25 mm Clover Amour Hook + start in color 1.
If you prefer the premium, printable PDF instead, you can find it HERE. Thank you for supporting my designs!
-
Create a slipknot and ch 6. slst into the first ch to form a loop.
-
Be sure to crochet into the center of the loop in the next rnd and not the individual sts. Crochet over all of the yarn tails to skip having to weave in your ends.
-
Round 1: ch 2 (counts as the first dc), 2 dc. This is your first cluster. Next, we will create 4 more clusters for a total of 5. ch 1, (3 dc, ch 1) x4, slst to the first st to join the rnd and leave a short tail. [15 sts + 5 ch]
-
Join color 2 into one of the ch-sp indicated below on the opposite side of where you fastened off in the previous rnd. This will allow us to crochet over the current color’s tail before crocheting over the previous color’s tail. [img]
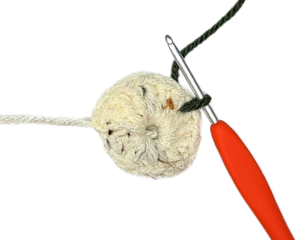
- Round 2: ch 2 (counts as the first dc), 2 dc. ch 1, 3 dc into the same ch-sp. This is your first double cluster. Next, we will create 4 more double clusters for a total of 5. ch 1, (3 dc, ch 1, 3 dc, ch 1) x4, slst to the first st to join the rnd and leave a short tail. [30 sts + 10 ch]
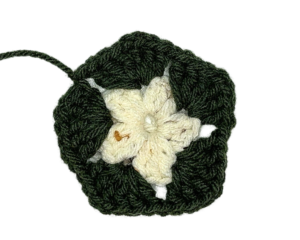
- Join color 3 into one of the ch-sp indicated below on the opposite side of where you fastened off in the previous rnd.

- Round 3: ch 2 (counts as the first dc), 2 dc. ch 1, 2 dc into the same ch-sp. This is your first cluster. Next, we will reate 9 more clusters for a total of 10. (3 dc, ch 1) x9, slst to the first st to join the rnd and leave a short tail. [30 sts, 10 ch]
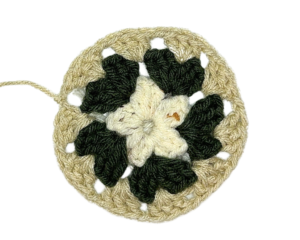
-
- Note: By keeping the st count the same, our piece will begin to form a cup shape. This will allow it to be snug against the ornament insert which is super important!
- Join color 4 into one of the ch-sp indicated below on the opposite side of where you fastened off in the previous rnd.
- Round 4: ch 2 (counts as the first dc), dc all around and work into each ch-sp as you come across them. slst into the first st to join the rnd and leave a short tail. [40 sts]
- Pause to check that the size of the ornament fits. Modify if needed.
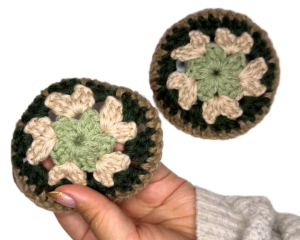
ASSEMBLY:
- Step 1: Cut a long strand of any color. My recommendation is to choose a color that will contrast with the last color used.
- Step 2: Position the two halves of the ornament together with the tail you fastened off aligned.
- Step 3: Using your Clover darning needle, weave into the st next to where we fastened off. Leave a short tail for securing into a knot.
- Step 4: Whipstitch the two halves together, going through both loops. Pause when you are halfway around.
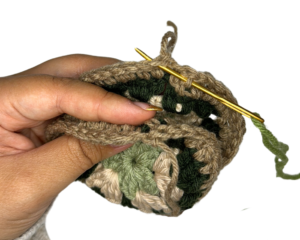
- Step 5: Insert the glass or plastic ornament, positioning the ornament handle with where you started sewing.
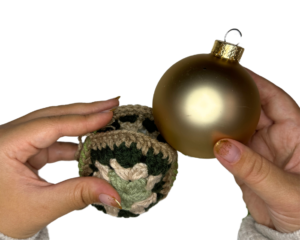
- Step 6: Continue sewing until you reach the end. There will be ~3 sts we leave for the handle.
- Step 7: Weave the two yarn tails off to the side of the ornament and secure them into a knot.
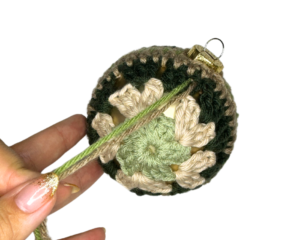
- Step 8: Trim any excess yarn tails and bury them so they’re hidden.
- Step 9: Cut 6 inches of velvet ribbon and thread it through the metal ring to create the handle. Hot glue the ends together.
- Tip: Carefully light the ends of the cut ribbon to prevent fraying.

You’re officially finished! We’d love to see your creations over on Instagram. Tag your creations with #cloversquad and #curiouspapaya to share your makes 🙂
If you want to keep up with me, Amy, on social media for other fun projects, follow me on: Instagram
If you want to keep up with all things Clover, follow us on: Facebook | Twitter | Instagram | Pinterest | YouTube | Ravelry


