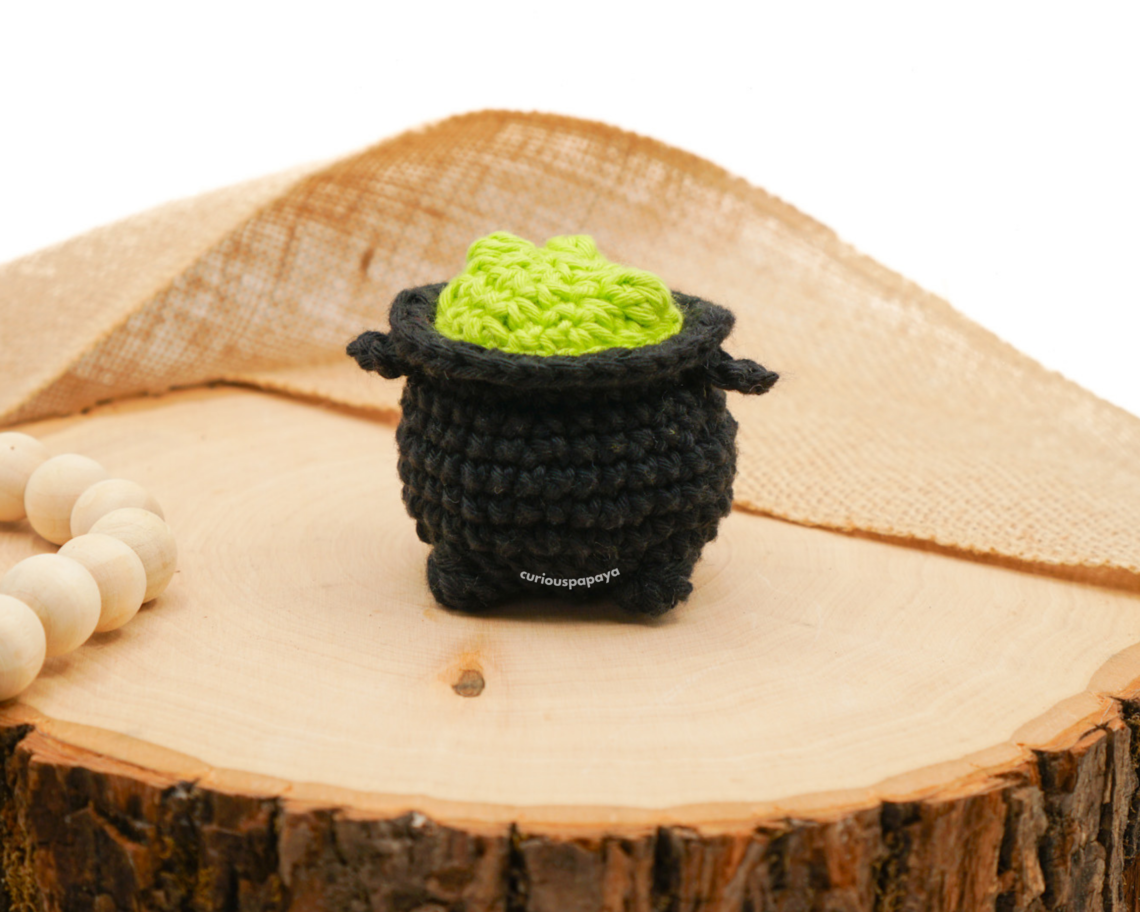
Witch’s Brew Crochet Cauldron *no sewing required!*
“A bit of spice and everything nice, the whisker of a cat, the tooth of a bat…” POOF! You’ve just cast the spell for creating an adorable mini cauldron. Gather your ingredients! -Amy (@curiouspapaya)
MATERIALS:
-
- #3 light worsted yarn
- any 2 colors of your choice (I chose black and neon green!)
- Clover Amour Hook (2.75 mm)
- Clover Patchwork Scissors
- Clover Stitch Markers
- Yarn Needle
- poly-fil stuffing
- Clover Pom-Pom Maker (optional)
- #3 light worsted yarn
NOTES:
- Please do not copy/redistribute any part of this pattern as your own. This includes reposting/translating without permission. Feel free to sell your finished products in small quantities as long as you give credit to help support my work. Tag your creations with #curiouspapaya so I can feature you!
- This pattern is worked in continuous rounds (spiral).
- This pattern is written in US terminology.
- Difficulty: Intermediate-beginner +
- Measurements: 2.5 in. x 2 in. [~6 cm x 5 cm] if using the prescribed materials
- Time: ~1 hr
ABBREVIATIONS:
- blo: back loops only
- ch: chain
- dec: (invisible) decrease
- flo: front loops only
- sc: single crochet
- slst: slip stitch
- st(s): stitch(es)
- rnd(s): round(s)
- [#]: stitch count
- (…) x #: repeat instructions the number of times
SPECIAL STITCHES:
- Watch my bobble stitch tutorial HERE!
- bo4: bobble stitch – yarn over, insert hook into stitch, yarn over, draw loop back through stitch, yarn over and pull through 2 loops. Repeat this 2 more times until you have 4 loops on your hook. Yarn over and pull through all 4 loops.
- bo5: yarn over, insert hook into stitch, yarn over, draw loop back through stitch, yarn over and pull through 2 loops. Repeat this 3 more times until you have 5 loops on your hook. Yarn over and pull through all 5 loops.
NO-SEW OPTION:
I’ve added instructions so that you can crochet in the cauldron handles, making this pattern truly no-sew! However, this requires some adjusting to ensure that they’re centered.
PATTERN:
CAULDRON HANDLES (make two):
Using the 2.75 mm Clover Amour Hook + black yarn.
-
Step 1: Leave a short tail before making a slipknot and ch 6.
-
Step 2: slst into the first st of the chain to make a loop.
-
Step 3: Fasten off and leave another short tail.
CAULDRON:
Using the 2.75 mm Clover Amour Hook + black yarn.
*Note: The cauldron is worked from the bottom up. I’ve added instructions so that you can crochet in the cauldron handles, making this pattern truly no-sew. However, this requires some adjusting to ensure that they’re centered.
- Round 1: Make a magic circle and (sc) x6 [6]
- Round 2: (inc) x6 [12]
- Round 3: (sc, inc) x6 [18]
- Round 4: (sc, inc, sc) x6 [24]
- Round 5: (5 sc, bo5) x4 [24]
- Note: Be sure to push your bobbles outwards!
- Round 6: (3 sc, inc) x6 [30]
- Round 7: (2 sc, inc, 2 sc) x6 [36]
- Rounds 8-10 (3 rnds total): sc all around [36]
- Round 11: (2 sc, dec, 2 sc) x6 [30]
- *Note: If you want to make this pattern no-sew, crochet in the cauldron handles in the next rnd, centered between the bobble feet on opposite sides. Otherwise, follow the instructions below to sew them on at the end.
- Round 12: sc all around [30]
- Round 13: (3 sc, dec) x6 [24]
- Round 14: (flo) – slst, ch 2 (this counts as your first st), hdc into the same st, 3 hdc, (hdc-inc, 3 hdc) x5 [30]
- Use the invisible finish and weave in the tail.
- If you didn’t crochet in the handles, sew on the cauldron handles 2 rnds below the rim of the cauldron. Be sure to center them with the bobble feet.
- Secure the yarn tails into a knot on the inside of the piece.
WITCH’S BREW:
Using 2.75 mm Clover Amour Hook + neon green yarn.
*Note: For round 1, we will use a technique that will create a clean line for the witch’s brew. When counting the rnds, rnd 1a and 1b will appear as one rnd which is why the pattern is written this way.
- Join the new color in one of the loops left from rnd 14. Make sure that the piece is facing away from you.
- Round 1a: (blo) – loosely slst all around [24]
- In the next rnd, make regular decreases instead of invisible decreases since we will be working in the blo.
- Round 1b: (blo) – (2 sc, dec) x6 [18]
- Stuff the piece well.
- Round 2: sc, dec, bo5, dec, sc, dec, bo5, dec, (sc, dec) x2 [12]
- *Note: Again, push the bobbles outwards.
- Round 3: bo4, sc, (dec) x5 [7]
- Fasten off and leave a tail for sewing. Go through the flo and pull the hole closed.
BONUS IDEA:
Make these cauldrons into a cute garland by stringing them up with pom-poms. Here, I used the yellow Clover Pom-Pom Maker and made 6 pom-poms and 5 cauldrons. The color combinations are endless!

You’re finished! We’d love to see your creations over on Instagram. Tag your creations with #cloversquad and #curiouspapaya to share your makes.
If you want to keep up with me, Amy, on social media for other fun projects, follow me on: Instagram
If you want to keep up with all things Clover, follow us on: Facebook | Twitter | Instagram | Pinterest | YouTube | Ravelry