Neck*TIE* DYE (crochet pattern!)
With Father’s Day approaching, I thought it was only right to create this pattern in respect and admiration for all the dads and father figures out there!
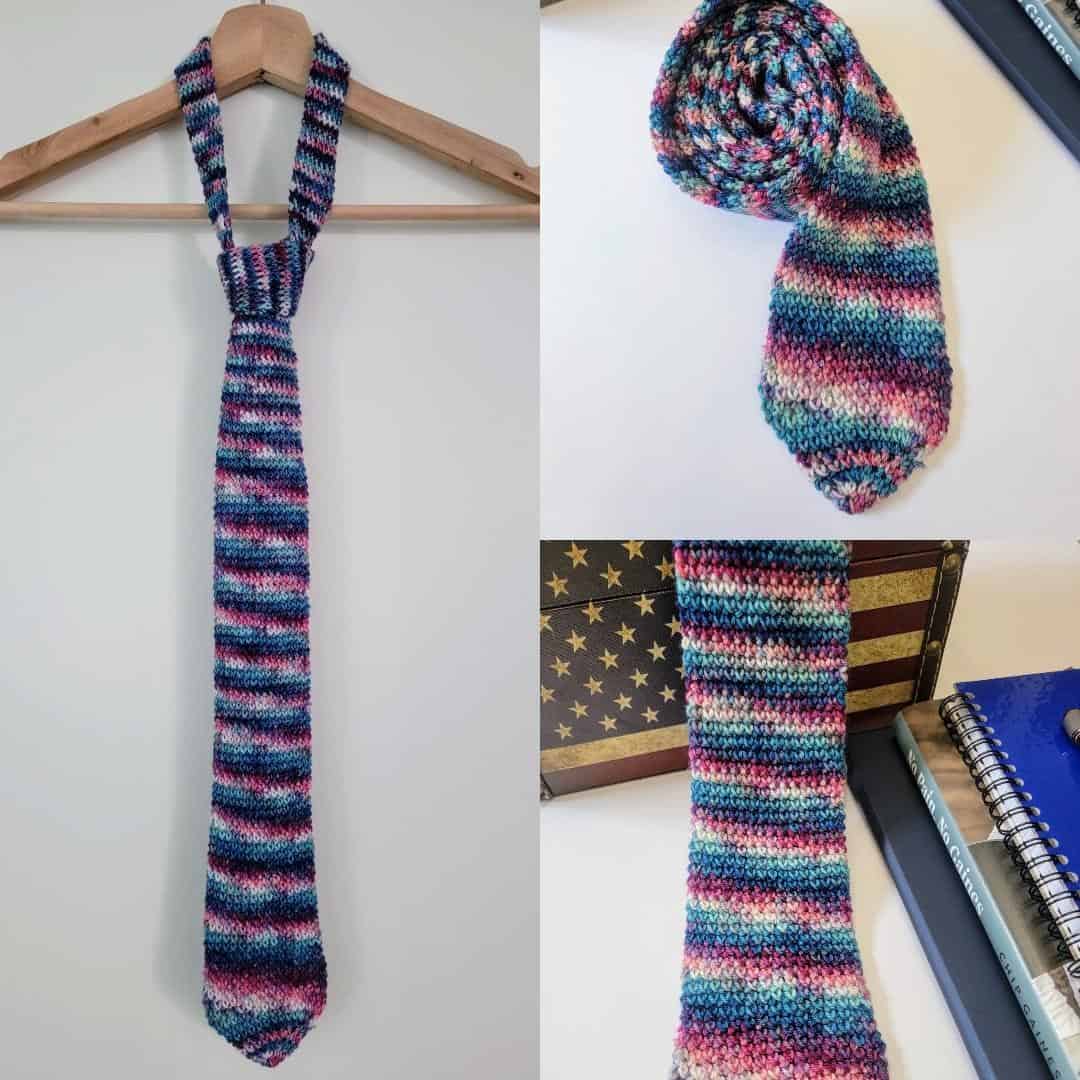
Presenting the Tie Dye Necktie! Forbidden Fiber Co.’s Fortitude (Fingering Weight) Yarn was used to make the sample of this pattern. I thought it turned out great, especially with the gorgeous tie-dye stripes created by this amazing hand-dyed yarn! Do you agree?
NOTES:
- This pattern is worked in the round – in a very long tube that will be flattened and blocked at the end to form the necktie. Do not join rounds unless otherwise stated. Use a stitch marker to mark the beginning of the round and move as work progresses.
- Asterisks ** indicate repeat instructions between asterisks as many times as directed or repeat at specified locations.
- If you’re not familiar with the CSSC stitch, please click on the highlighted words to watch this video: Cross Stitch Single Crochet.
- GAUGE: 5 sts x 5 rounds = 1 in (blocked)
- SKILL LEVEL: beginner-friendly/intermediate
- FINISHED MEASUREMENT: about 58 in (length) x 3.25 in (width at its widest part)
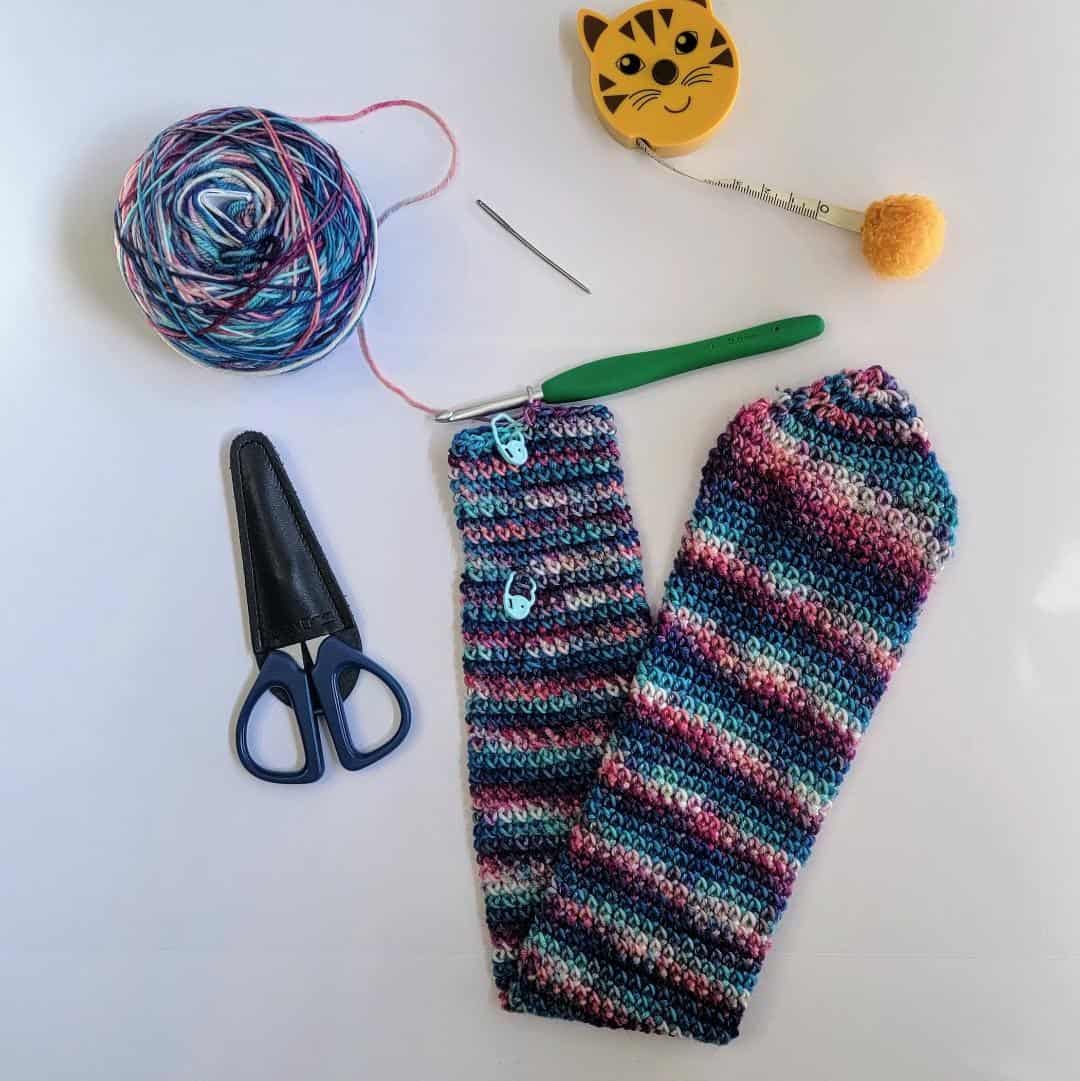
MATERIALS:
- Clover Amour Crochet Hook I (5.5 mm)
- Clover Darning Needle
- Clover Patchwork Mini Scissors
- Clover Quick-Locking Stitch Markers
- Clover Tape Measure (ON SALE RIGHT NOW!!!)
- Fingering Weight (#1) Yarn
- Forbidden Fiber Co. in Fortitude Yarn (Sultan’s Daughter – Aladdin Collection) (about 300 yards/69 grams)
- 100% Superwash Merino (about 435 yards/100 grams)
ABBREVIATIONS:
- ch(s): chain(s)
- MR: magic ring
- rep: repeat
- PM: place marker
- sl st(s): slip stitch(es)
- CSSC: cross stitch single crochet – insert hook in the indicated st, yarn under, pull up a loop, yarn over, pull through 2 loops.
- CSSC2Tog: cross stitch single crochet 2 together (to decrease) – insert hook in the indicated st, yarn under, pull up a loop, insert hook in the next st, yarn under, pull up a loop, yarn over, pull through 3 loops.
PATTERN:
- Round 1: With a MR, ch 1, work 6 CSSC into the ring. Pull tight the yarn tail to close the round. – 6 sts. Remember to PM in the beginning of each round and move it as work progresses.
- Round 2: *2 CSSC, 1 CSSC in the next 2 sts*; Rep from * to * around. – 8 sts
- Round 3: *3 CSSC, 1 CSSC in the next 3 sts*; Rep from * to * around. – 12 sts
- Round 4: *3 CSSC, 1 CSSC in the next 5 sts*; Rep from * to * around. – 16 sts
- Round 5: *3 CSSC, 1 CSSC in the next 7 sts*; Rep from * to * around. – 20 sts
- Round 6: *3 CSSC, 1 CSSC in the next 9 sts*; Rep from * to * around. – 24sts
- Round 7: *3 CSSC, 1 CSSC in the next 11 sts*; Rep from * to * around. – 28 sts
- Round 8: *3 CSSC, 1 CSSC in the next 13 sts*; Rep from * to * around. – 32 sts
- Rounds 9 – 15: 1 CSSC in each st around. – 32 sts
- Round 16: *CSSC2Tog, 1 CSSC in the next 14 sts*; Rep from * to * around. This measures approximately 3 inches. – 30 sts
- Round 17 – 60: 1 CSSC in each st around. This measures approximately 12 inches. – 30 sts
- Round 61: *CSSC2Tog, 1 CSSC in the next 13 sts*; Rep from * to * around. – 28 sts
- Round 62 – 70: 1 CSSC in each st around. This measures approximately 14 inches. – 28 sts
- Round 71: *CSSC2Tog, 1 CSSC in the next 12 sts*; Rep from * to * around. – 26 sts
- Round 72 – 80: 1 CSSC in each st around. This measures approximately 16 inches. – 26 sts
- Round 81: *CSSC2Tog, 1 CSSC in the next 11 sts*; Rep from * to * around. – 24 sts
- Round 82 – 90: 1 CSSC in each st around. This measures approximately 18 inches. – 24 sts
- Round 91: *CSSC2Tog, 1 CSSC in the next 10 sts*; Rep from * to * around. – 22 sts
- Round 92 – 100: 1 CSSC in each st around. This measures approximately 20 inches. – 22 sts
- Round 101: *CSSC2Tog, 1 CSSC in the next 9 sts*; Rep from * to * around. – 20 sts
- Round 102 – 110: 1 CSSC in each st around. This measures approximately 22 inches. – 20 sts
- Round 111: *CSSC2Tog, 1 CSSC in the next 8 sts*; Rep from * to * around. – 18 sts
- Round 112 – 120: 1 CSSC in each st around. This measures approximately 24 inches. – 18 sts
- Round 121: *CSSC2Tog, 1 CSSC in the next 7 sts*; Rep from * to * around. – 16 sts
- Round 112 – 125: 1 CSSC in each st around. This measures approximately 24 inches. – 16 sts
- Round 126: *CSSC2Tog, 1 CSSC in the next 6 sts*; Rep from * to * around. – 14 sts
- Round 127 – 290: 1 CSSC in each st around. This measures approximately 58 inches. – 14 sts
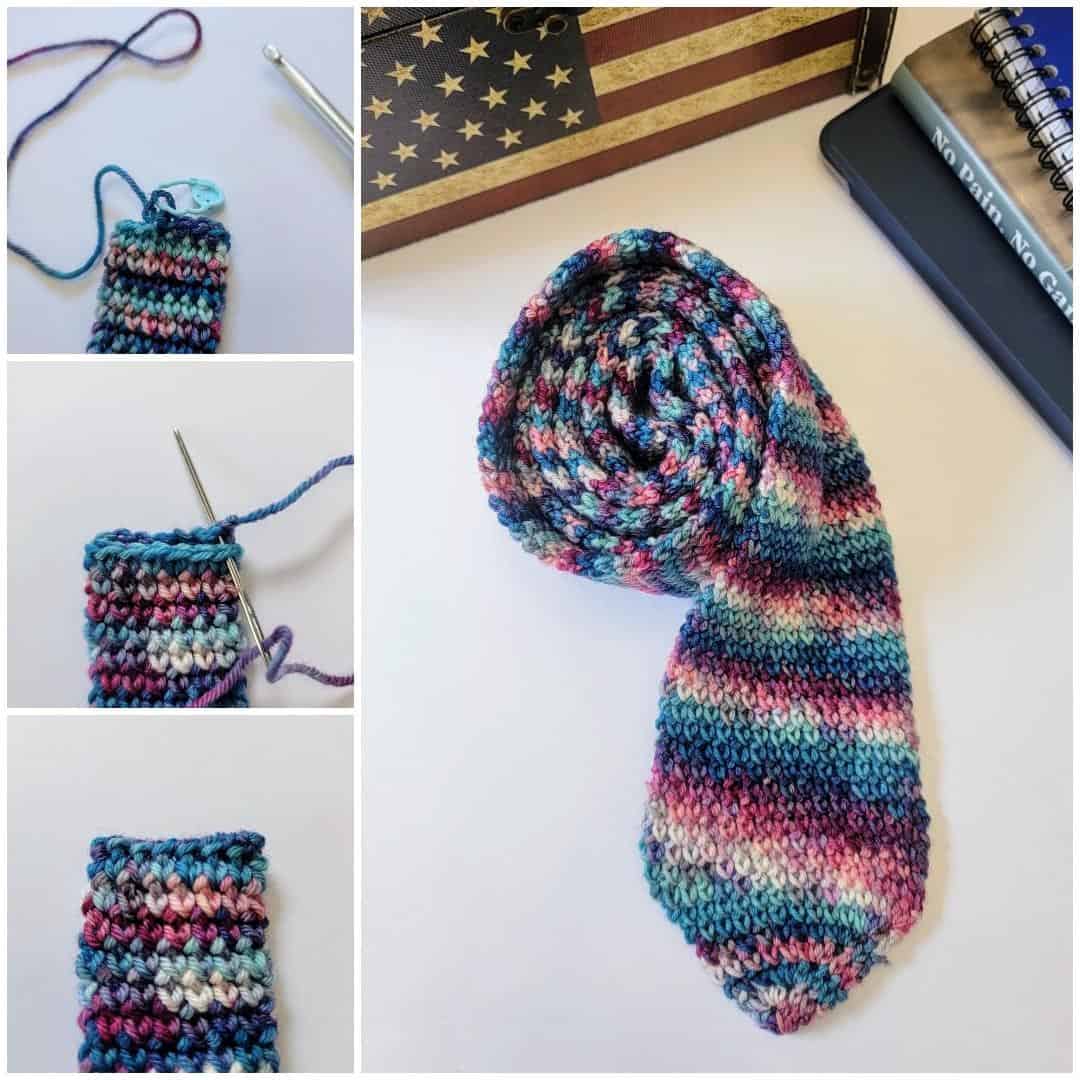
Fasten off, leaving a long yarn tail for later use. To prevent it from ripping off, make sure to use a stitch marker to secure the final stitch. Block your necktie by laying it flat.
You can rip off a few stitches or work a few more stitches to reach the side of your necktie if, after blocking, your last stitch didn’t end up on either side. After your necktie has been properly flattened, insert the yarn tail through your darning needle. Sew your stitches together, front and back, using a whip stitch. Fasten off and weave in the ends. Please see the image below.
You’re all finished! 🙂 Please don’t hesitate to reach out with questions regarding this pattern. And I would love to see your Tie Dye Necktie version! Please tag me @stringsandcuddles and use these hashtags to share: #stringsandcuddles, #stringsandcuddlesdesigns, #tiedyenecktie
If you want to keep up with me, Elisa, on social media for other fun projects, follow me on social media: Instagram | Pinterest | Facebook | Blog | Ravelry
If you want to keep up with all things Clover, follow us on: Facebook | Twitter | Instagram | Pinterest | YouTube | Ravelry