

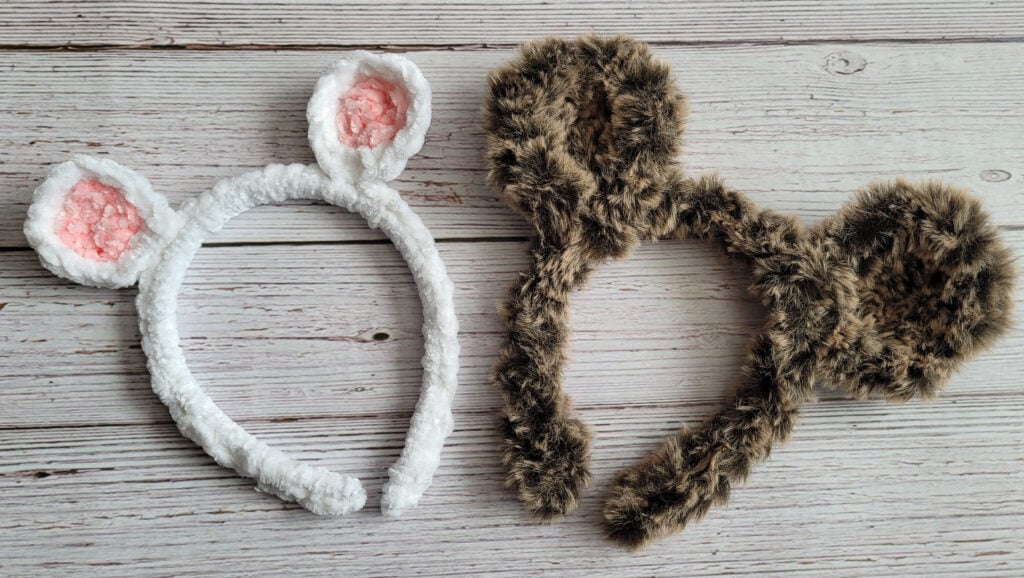
Hello! It’s Jennifer Ryan, the designer and blogger behind Celtic Knot Crochet. I am excited to be sharing this project here on the Clover blog! Since Halloween is right around the corner, making these quick and easy animal ears that are attached to a basic one-size-fits-all headband makes for a superrr cute costume accessory. Let’s get started! 🙂
SKILL LEVEL: Easy
SUPPLIES:
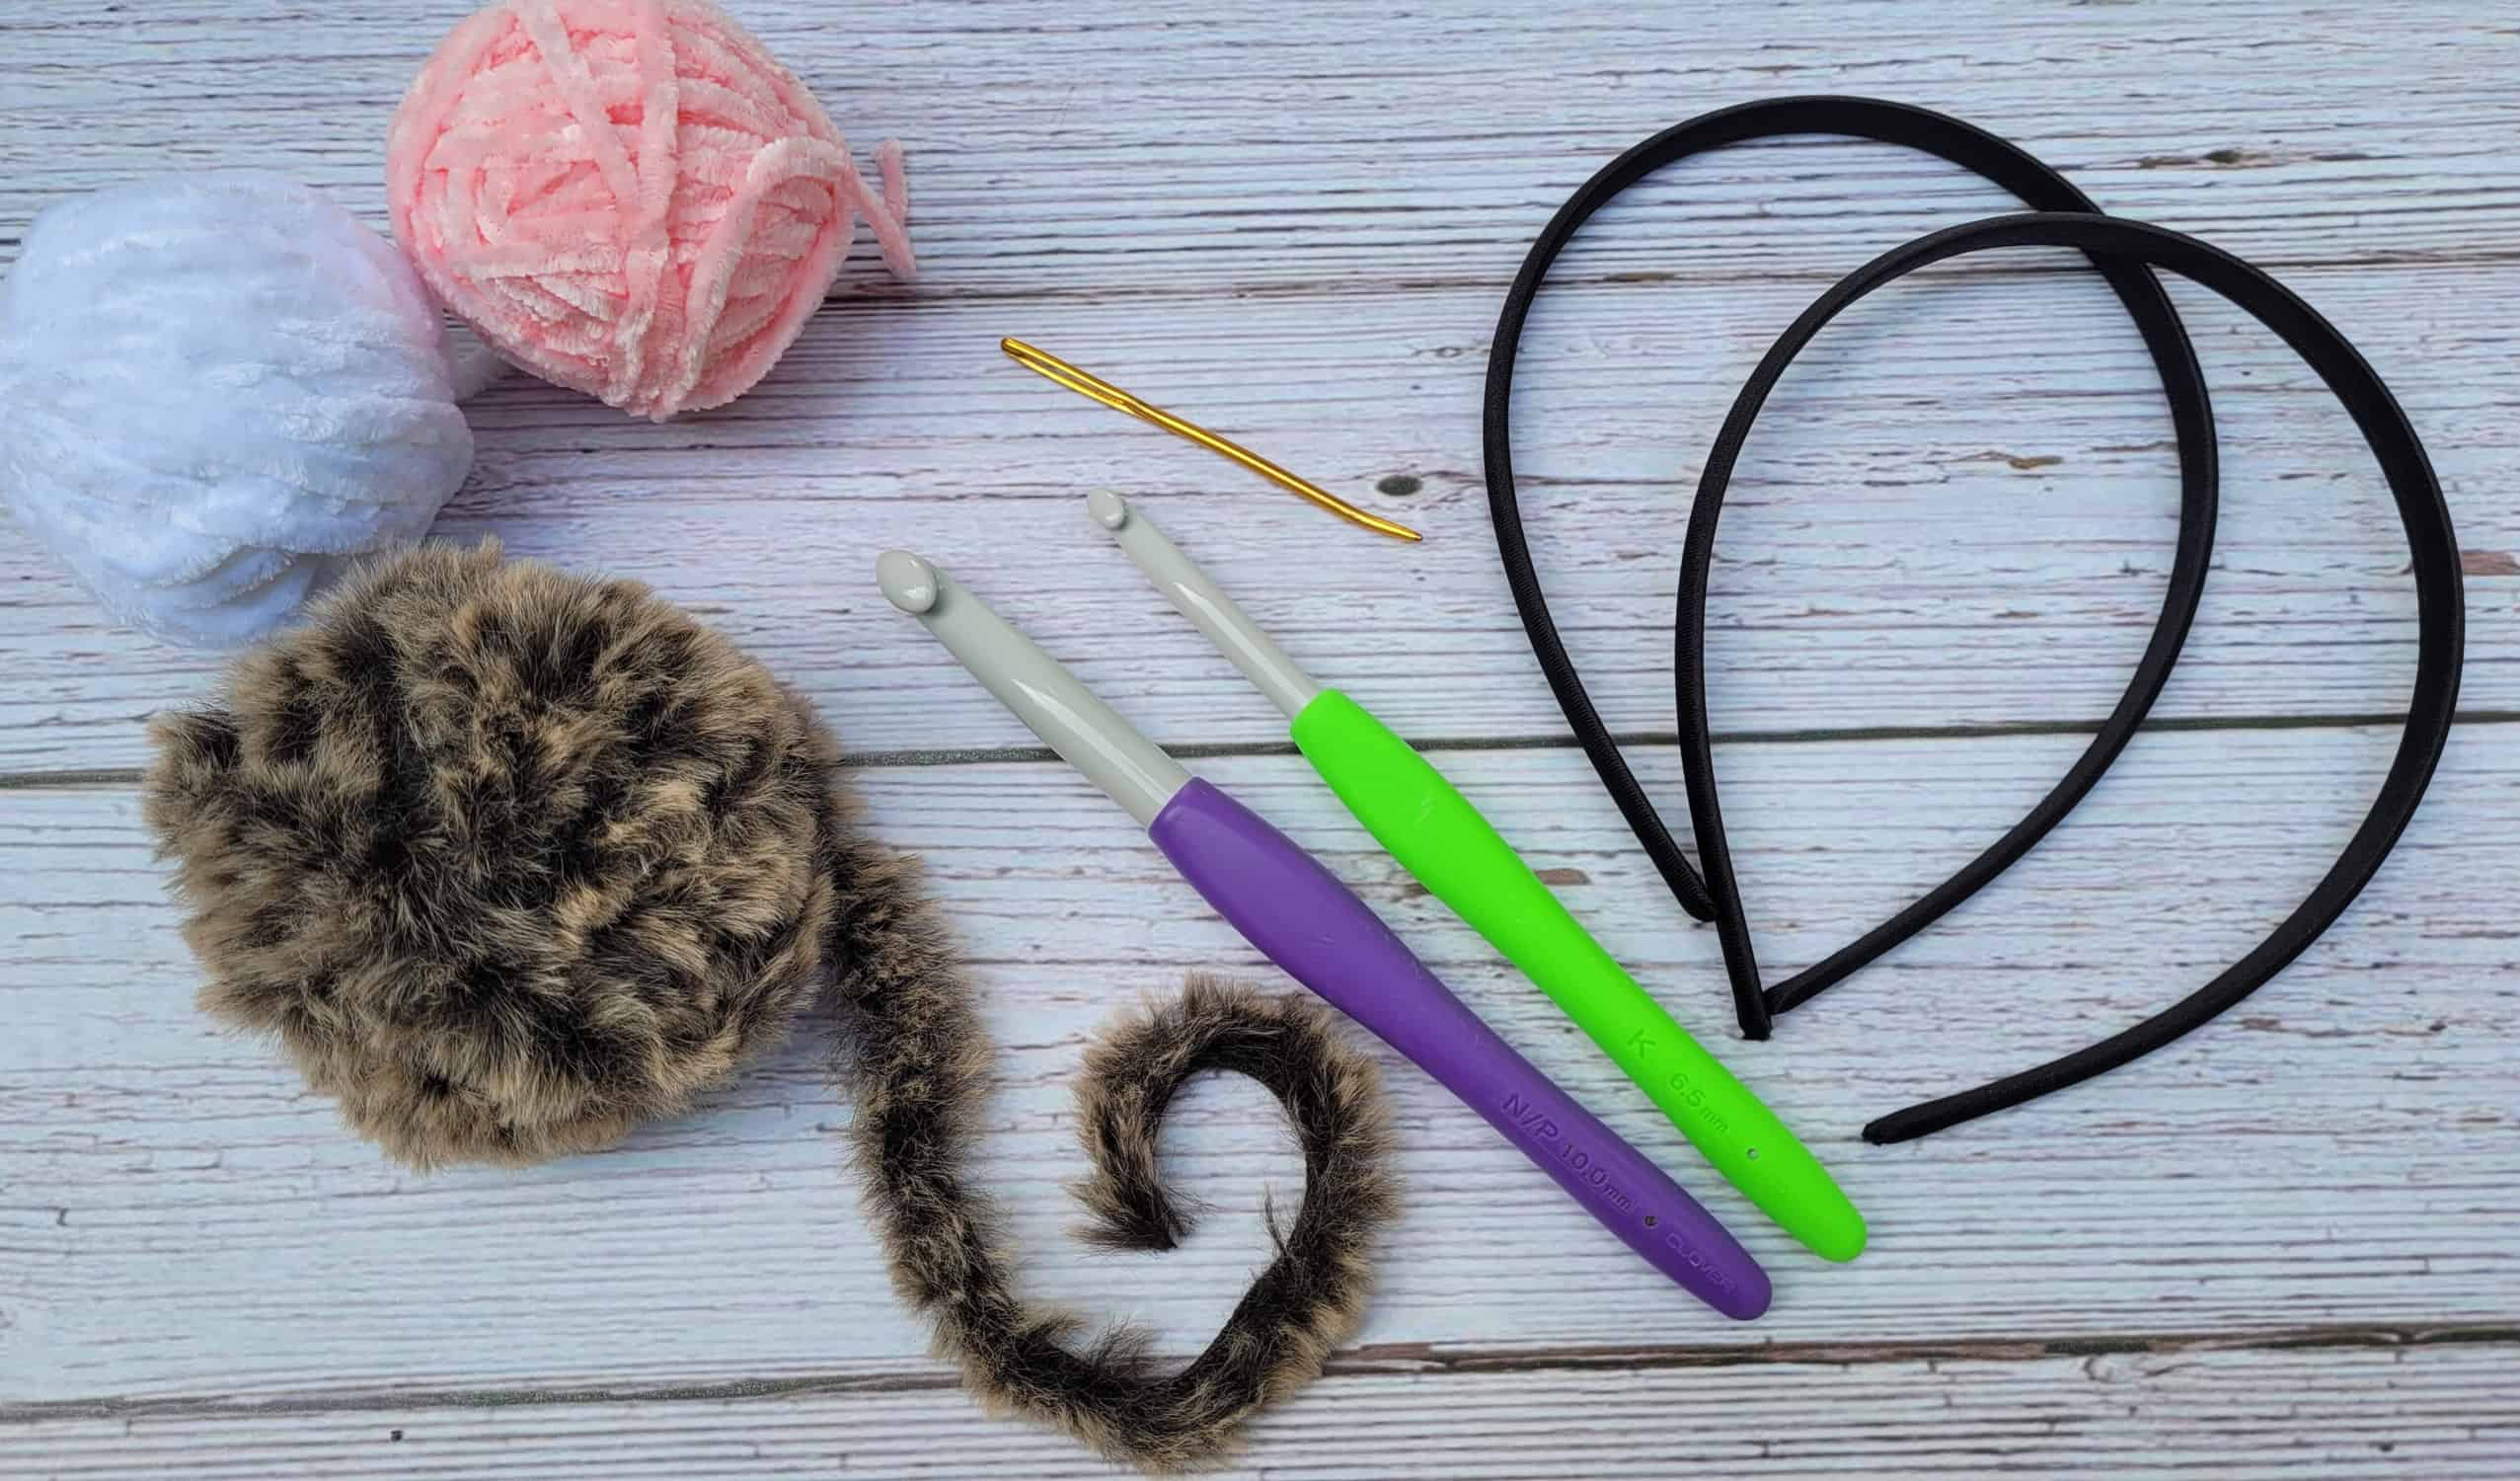
- Fur yarn and Velvet yarn – small amounts
- (I used a thick brown fur yarn and then some velvet yarn in white and pink – you can make these ears with any medium weight or thicker yarn but the fur and velvet yarns look the best)
- 10 mm Clover Amour Hook (to use with the thicker fur yarn)
- 6.5 mm Clover Amour Hook (to use with the velvet yarn)
- Clover Jumbo Tapestry Needle
- 2 headband bases
FINISHED MEASUREMENTS:
- Large ear = Approximately 3” x 3”
- Small ear = 2” x 2”
- Length of headband base = 15”
GAUGE: Gauge is not necessary for this project.
ABBREVIATIONS:
- YO (yarn over)
- Hk (hook)
- Lp (loop)
- Ch (chain)
- St (stitch)
- Sl st (slip stitch)
- Dc (double crochet)
- Sk (skip)
SPECIAL STITCHES:
- Sc2tog (single crochet 2 together) = (Insert hook into next st, YO, draw up a loop) twice, YO, pull through all 3 loops on hook
NOTES:
- First ears are crocheted and then headband base is covered with crochet stitches
- Lastly all ear pieces are sewn to headband base
- *You can purchase an instant downloadable PDF of the project here in my Etsy shop**
- Etsy shop link: https://www.etsy.com/shop/CelticKnotCrochet
TIPS FOR WORKING WITH FUR YARN:
- It can be difficult to see your stitches when working with fur yarn so you could work with another non-fur yarn at the same time (medium weight acrylic) – Pick a color that coordinates with the fur yarn and simply work with both the non-fur yarn and fur-yarn at the same time. Just focus on the regular yarn as you crochet and you will be able to see your stitches much easier
- It also helps to feel your stitches with your hands and count each stitch according to the pattern so even if you might not put the stitches in the exact correct place, your project will still turn out looking good
- Remember, the fur yarn hides a lot of mistakes!
INSTRUCTIONS:
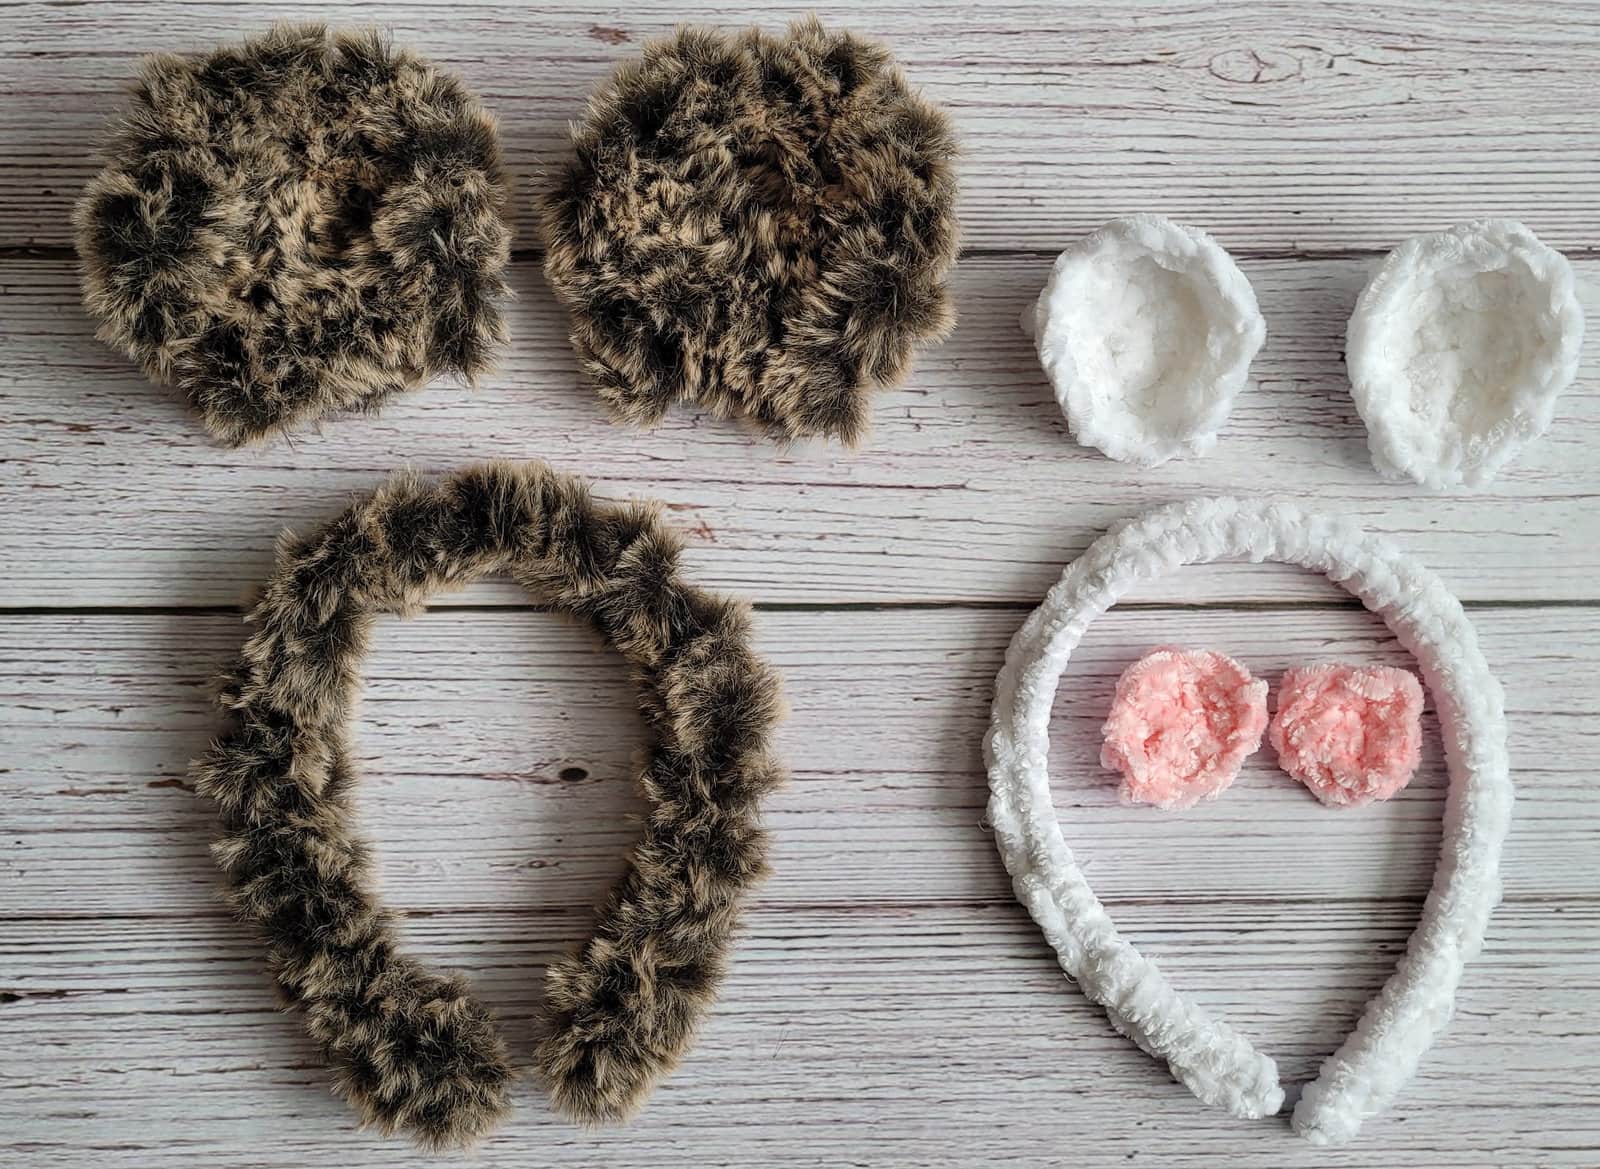
Large Ear (make 2):
With fur yarn and 10 mm hook ch 6
Row 1: Sc in 2nd ch from hk and in each ch across. Turn. (5 sc)
Row 2: Ch 1, 2 sc in 1st st, sc in each of next 3 sts; 2 sc in last st. Turn. (7 sc)
Row 3: Ch 1, sc in each st across. Turn.
Row 4: (Sc2tog) 2 times; sc in next st; sc2tog. Turn. (4 sc)
Row 5: (Sc2tog) 2 times. Turn. (2 sc)
Row 6: Sc2tog. Fasten off leaving a long tail for assembly.
Small Ear (make 2):
With velvet yarn and 6.5 mm hook ch 4
Row 1: Sc in 2nd ch from hk and in each ch across. Turn. (3 sc)
Row 2: Ch 1, 2 sc in 1st st, sc in next st, 2 sc in next st. Turn. (5 sc)
Row 3: Ch 1, sc in each st across. Turn.
Row 4: Sc2tog, sc in next st, sc2tog. Turn.(3 sc)
Row 5: Sc2tog, sc in last st. Do not turn.
Ch 1, sl st around entire edge of ear shape – join with sl st to 1st sl st. Fasten off with long tail for assembly.
Smaller Ear – Pink Inside (make 2):
With pink velvet yarn and 6.5 mm hook ch 4
Row 1: Sc in 2nd ch and in each ch across. Turn. (3 sc)
Row 2: Ch 1, 2 sc in 1st st, sc in next st, 2 sc in last st. Turn. (5 sc)
Row 3: Sc2tog, sc in next st, sc2tog. Fasten off with long tail for assembly
Using photo as a guide and tapestry needle, use yarn tails to attach pink inside to each of the small ears
Headband Base (make 2):
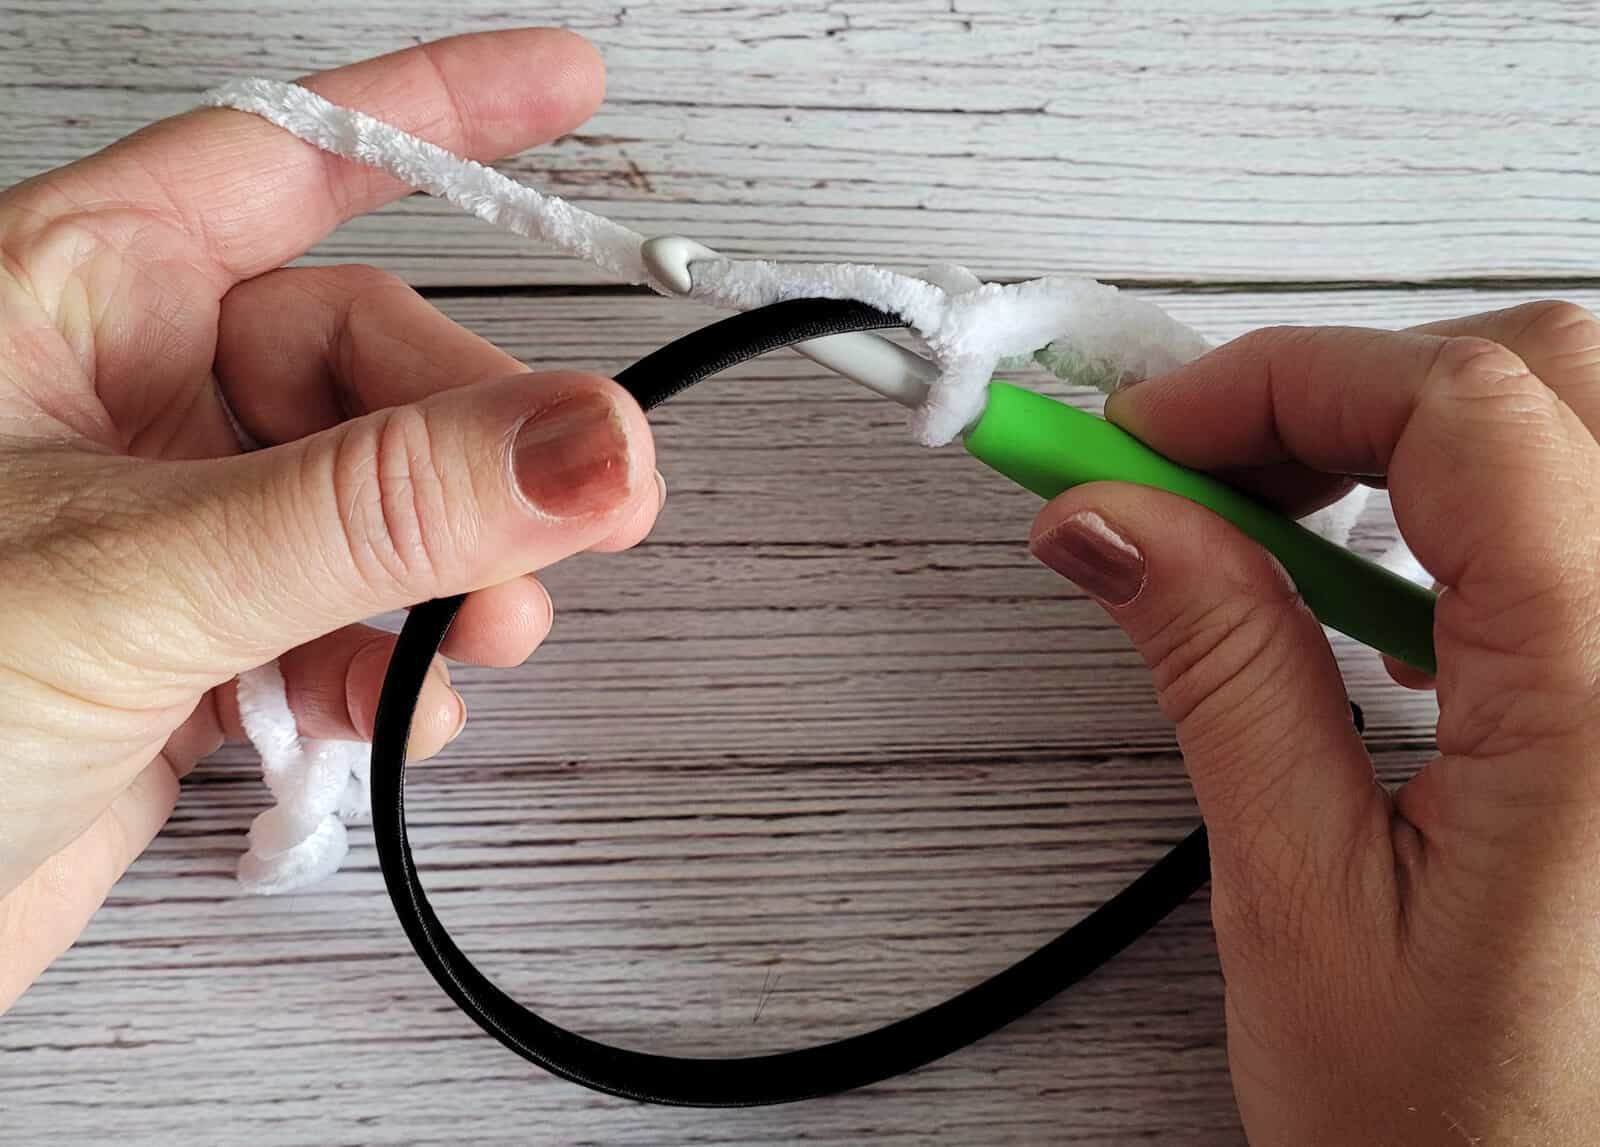
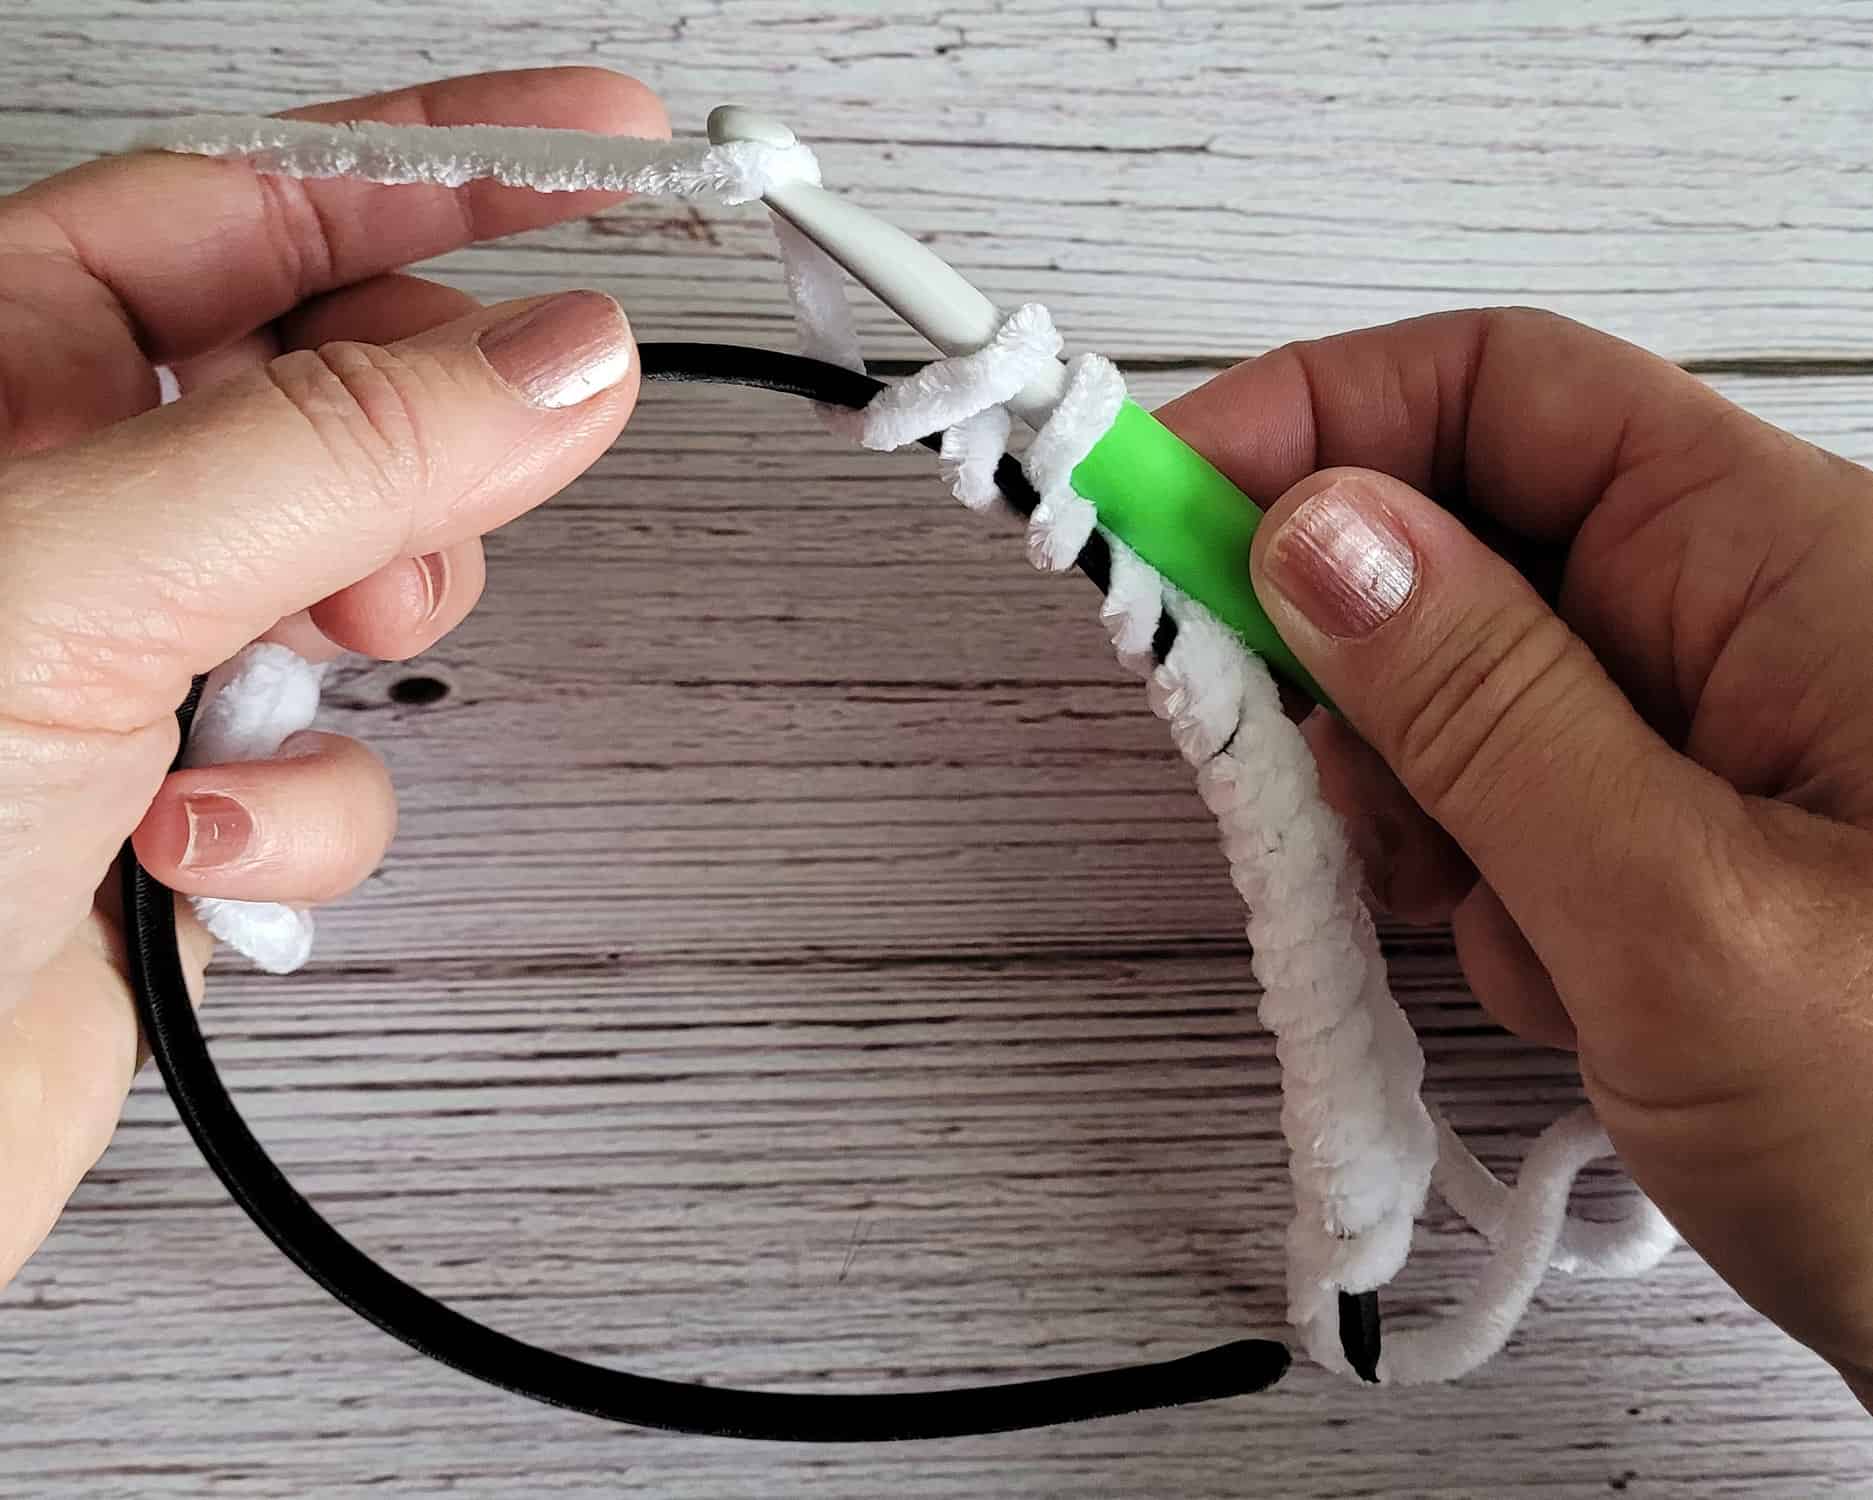
With yarn that matches ears, sc around headband making sure there are enough sts to fully cover headband form.
To sc around the headband: First put slip knot on hook
Then dip hook under headband and out to back side; YO (see photo above)
Next, draw loop to front and YO (over top of headband); Then pull through both loops on hook
Optional: Secure ends of crochet with a small dab of hot glue to headband base
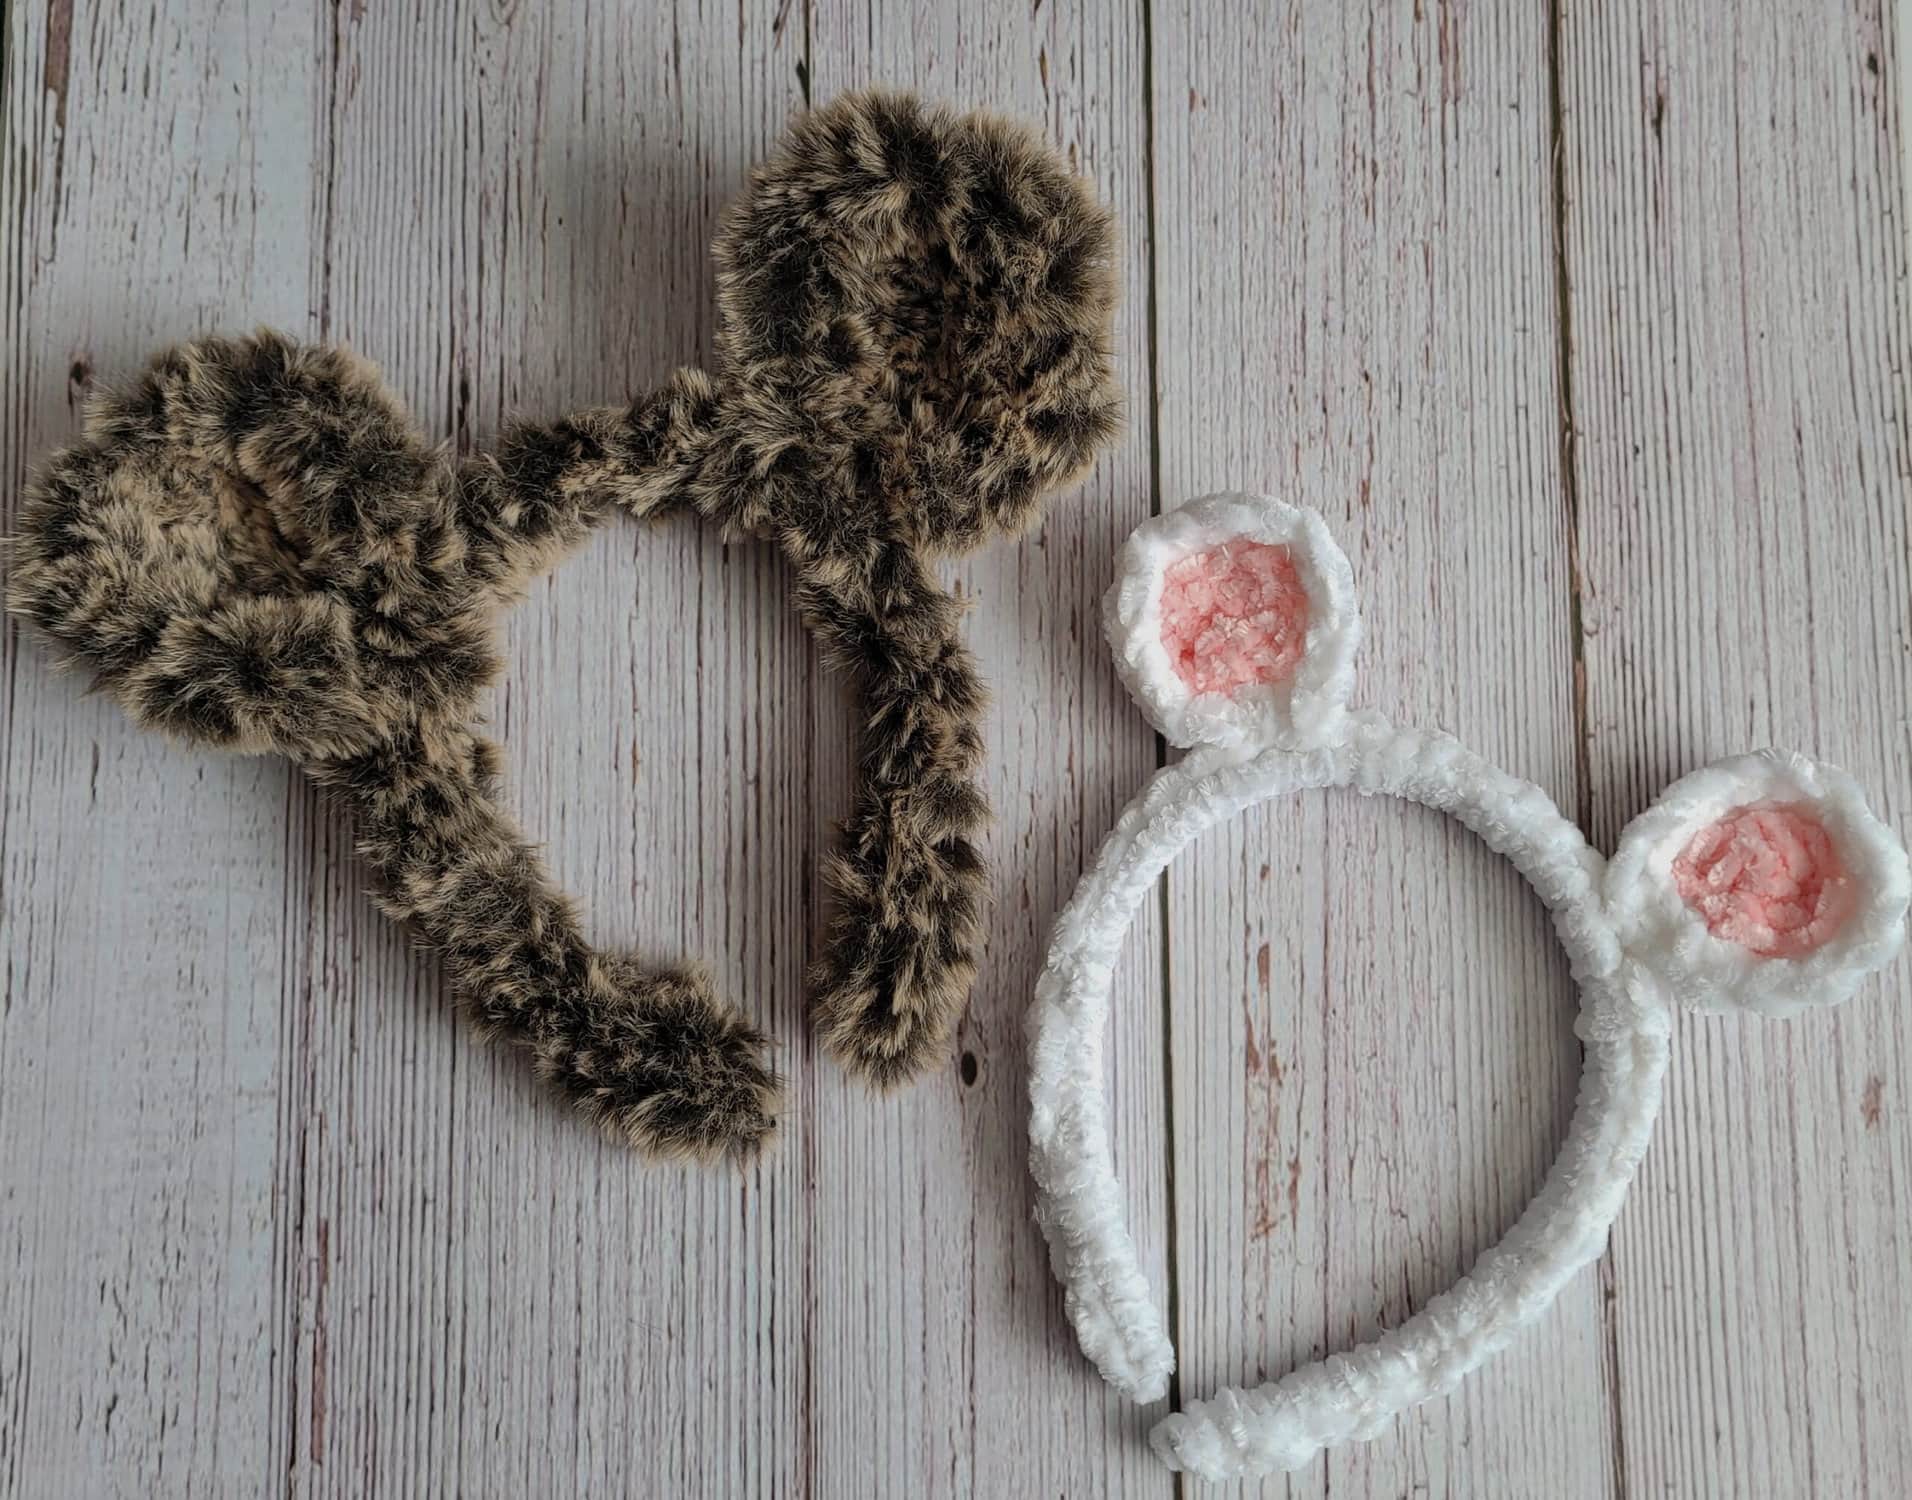
FINISHING/ASSEMBLY:
With tapestry needle and yarn tails, secure ears to headbands using photo as a guide.
Make sure ears curve forward.
It helps to gather the bottom edge of each ear before attaching to headband – this helps give it more depth and a more realistic look.
Weave in all ends.
Tada! Your easy Halloween costume idea is complete 🙂 I hope you enjoyed making this project. You can find a large-print instant downloadable PDF of this pattern by clicking here and purchasing it in my Etsy shop.
Please tag me @celticknotcrochet and use the #celticknotcrochet on Instagram – I would love to see your animal ears! You can also find Celtic Knot Crochet (me) online: Blog Youtube Instagram Etsy Pinterest