Floral Loom Market Bag- Flower Loom Tutorial
Hello! It’s Jennifer Ryan, the designer and blogger behind Celtic Knot Crochet. I am excited to be sharing another crochet project here on the Clover blog!
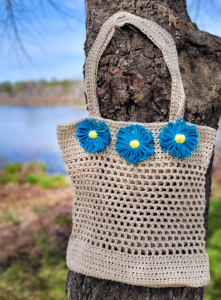
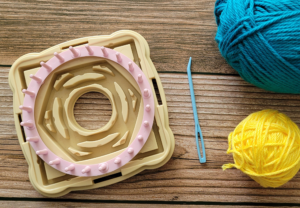
This easy project uses the Clover Flower Loom gadget – have you tried it yet? It is a high quality loom with several variations to make all sorts of pretty flowers. Today I’m going to show you how to use one variation to make the blue flowers you see on the bag in the photo above. (There’s even a video tutorial to help with this!) I’ll also share the pattern for the bag with you below – so let’s get started!
Skill Level: Easy
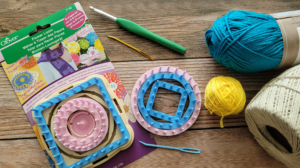
Supplies:
Size 3 Cotton crochet thread – Approximately 500 yds for the bag and a very small amount for the flowers in 2 colors
I (5.5mm) Clover crochet hook- Art No. 1048/I
Clover Flower Loom- Art No. 3146
Clover Tapestry needle (Jumbo bent tip)- Art No. 340
Finished Measurements: Flower =3” diameter ; Bag = 14” wide x 12” tall; Handles = 27” long x 1” wide
Gauge: 4” = 13 hdc stitches; 4” = 10 rows of hdc
Abbreviations:
YO (yarn over)
Hk (hook)
Lp (loop)
Ch (chain)
St (stitch)
Sp (space)
Sl st (slip stitch)
Hdc (half double crochet)
Dc (double crochet)
Notes:
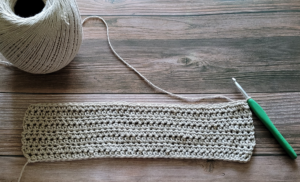
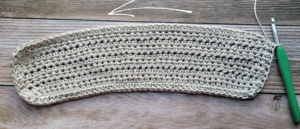
First a rectangle is crocheted to create the bag base
Then stitches are worked in a round around the rectangular base to create the body of the bag
Handles are crocheted and sewn on once bag body is complete
Then flowers are made and sewn to top of bag
**You can purchase an instant downloadable PDF of the project here in my Etsy shop**
[Esty shop link: https://www.etsy.com/shop/CelticKnotCrochet]
Instructions:
Ch 40
Row 1: Hdc in 3rd ch from hk and in each ch across. Turn. (38 hdc)
Row 2: Ch 2, hdc in each st across. Turn.
Rows 3 – 8: Repeat Row 2. Do not fasten off.
Now you will work in rounds:
Round 1: Ch 2, work 8 hdc along short side of rectangle just completed making sure to evenly space; hdc in base of each st along next long side of rectangle, work 8 hdc along next short side of rectangle (again making sure to evenly space); hdc in each st across last long side of rectangle; join with sl st to 1st hdc of round. (92 hdc)
Round 2: Ch 2, hdc in same st and in each st around; join with sl st to 1st hdc.
Rounds 3 – 5: Repeat Round 2
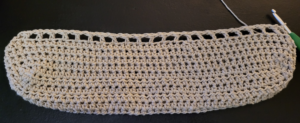
Round 6: Ch 4, (sk next st, dc in next st, ch 1) around ending with a sl st to 3rd ch of starting ch-4. (48 ch-1 sps)
Rounds 7-20: Sl st into next ch-1 sp; ch 4, (sk next st, dc in next ch-1 sp, ch 1) around ending with a sl st to 3rd ch of starting ch-4.
Round 21: Ch 2 (counts as first hdc), hdc in each ch-1 sp and each dc around; join with sl st to top of starting ch-2. (96 hdc)
Round 22: Ch 2, hdc in each hdc around; join with sl st to top of starting ch-2.
Rounds 23 – 28: Repeat Round 22. Fasten off.
Handles – Make 2:

Ch 90
Hdc in 3rd ch from hk and in each ch across. (88 hdc) Fasten off.
Now working on the other side of the ch, join with sl st to 1st ch; ch 2, hdc in each ch across. Fasten off.
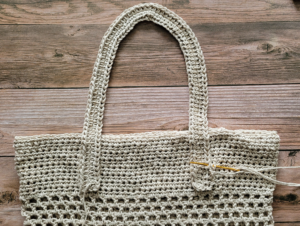
With tapestry needle and matching yarn, sew handles on to inside top of bag making sure they line up and overlap about 2-3” (for extra security)
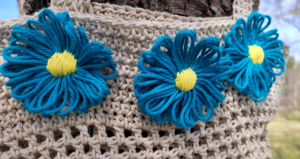
Flowers – Make 3:
Make 3 flowers using Clover’s Flower Loom and sew to top center of bag as shown in photos
**If you prefer watching a video to help you learn how to make these flowers, then click here to see the tutorial on my Youtube Channel! **
Here’s how to make the flower:
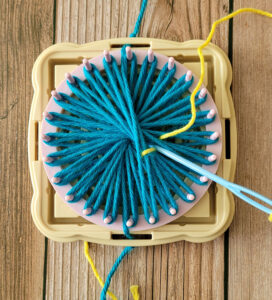
- Assemble Flower Loom as shown below
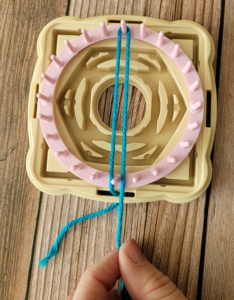
- Thread end of yarn through hole in side of loom and knot; Pull yarn through notch to secure
- Pass yarn to left of first spike and across circle to the left of opposite spike
- Wrap yarn around opposite spike and back across circle & around first spike
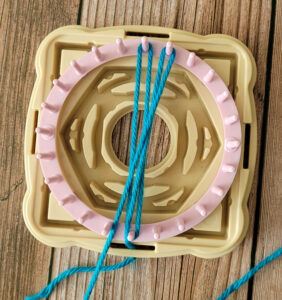
- Lead yarn across circle to wrap around next spike on the RIGHT (being careful to still start on left of the spike and wrap around the back side of spike)
- Lead yarn across circle to wrap around next opposite spike (which is to the LEFT of starting spike)
Repeat #5 and 6 all the way around the circle loom
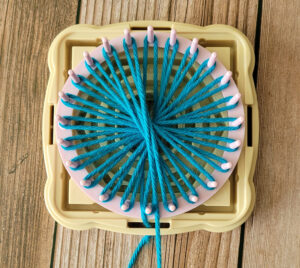
Then Repeat #3 – 6 again so that you go around entire circle a second time
- Cut yarn and pass end through hole on opposite side of loom square base – Tie knot in yarn end and pass through slot to secure
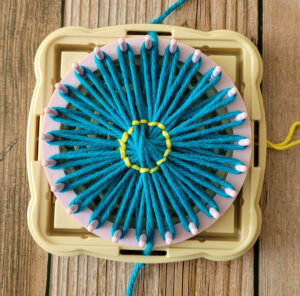
- With a 36” length of a contrasting color of yarn threaded onto tapestry needle (that comes with flower loom) start sewing center of flower
Bring needle up through flower from back and insert needle back down through nearby petal space
- Bring needle up again through flower from back a few petal spaces over
Pass needle back down through flower back near where previous stitching ended
- Continue in this manner around entire flower center
- Then work long stitches across stitched circle just created to fill-in flower center
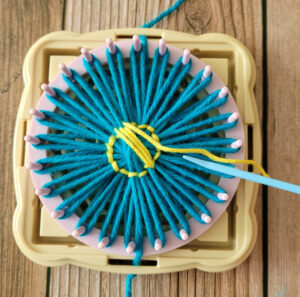
- Tie center-stitching yarn ends in a knot on back side of flower
Remove flower from loom and tie yarn ends together in a knot – Trim yarn ends – Tada!

Now your Spring Flower Tote is complete
You can find a large-print instant downloadable PDF of this pattern by clicking here and purchasing it in my Etsy shop.
[Etsy shop link: https://www.etsy.com/shop/CelticKnotCrochet]
Please tag me @celticknotcrochet and use the #celticknotcrochet on Instagram – I would love to see your crocheted tote and loom flowers!
Find Celtic Knot Crochet on the internet: Blog Youtube Instagram Etsy Pinterest