I’ve Been Framed – Embroidery Tutorial
Hey everyone! Cheri here from Tinkerellen (Instagram)/Tinkinstitches (Etsy) embroidery land. I’m here today to share with you a simple hack for displaying your handmade art. Whether you’ve quilted a mini patchwork block, cross stitched a whimsical holiday scene or embroidered a heartfelt saying, I have a classic way to show them all off.
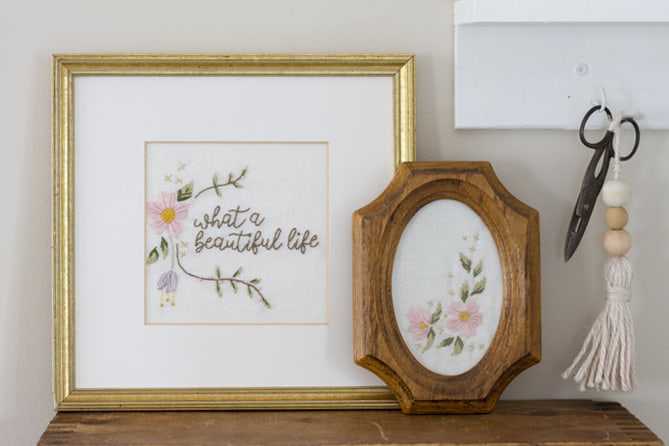
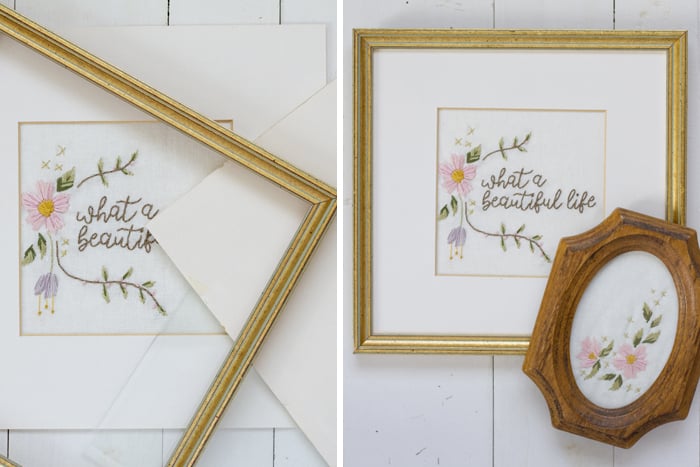
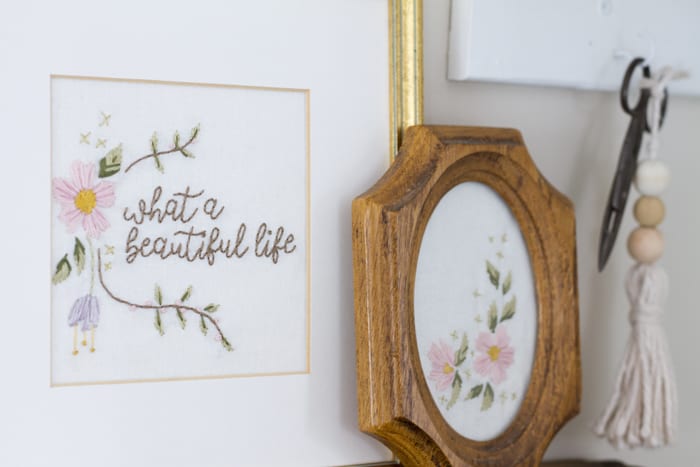
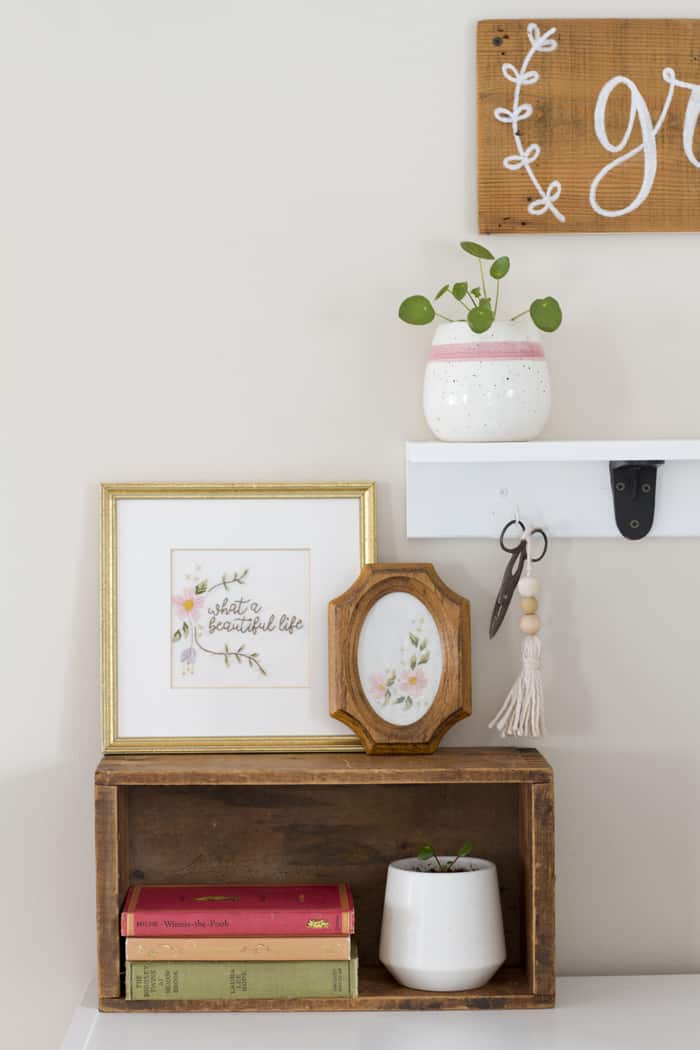
Ta Da! Yes, I know, simple, right? It is, and it’s going to look great. First thing you need is to either measure the piece you already have and shop for a frame OR you can go thrift shopping for vintage frames like I did and make something that fits. I started with three frames but then decided on just two to be embroidered and added a favorite print to the third. This would also be great for creating a gallery wall or nursery decor. I spotted a great wooden frame and another square gold version. I personally love mixing natural elements and textures into my decor so these really fit my home, plus finding different shapes or sizes will add to the interest.
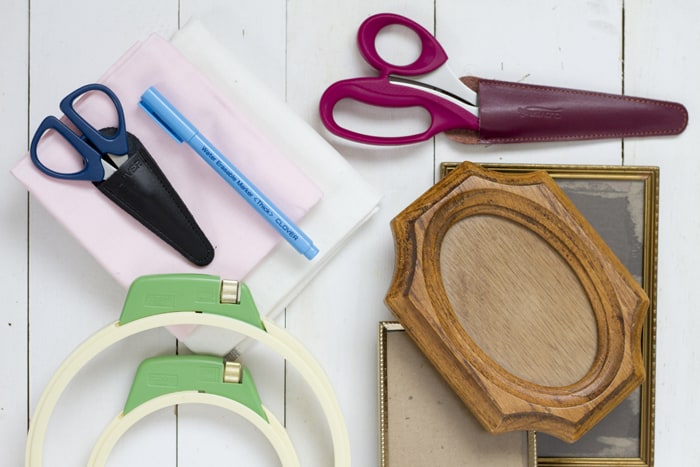
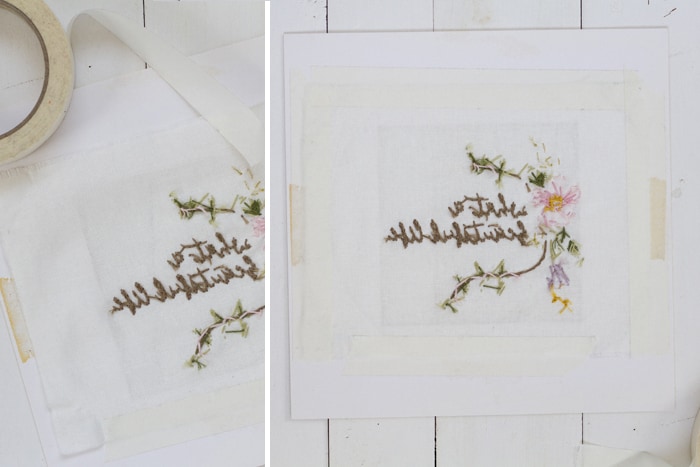
After you’ve found your frames, the best thing to do is trace the glass shape onto some cotton or linen fabric. I’m using the Clover water-soluble marker. Once I’m finished my design, I just run it under water to remove the ink lines and lay it flat to dry in front of the fireplace or in the sunshine.
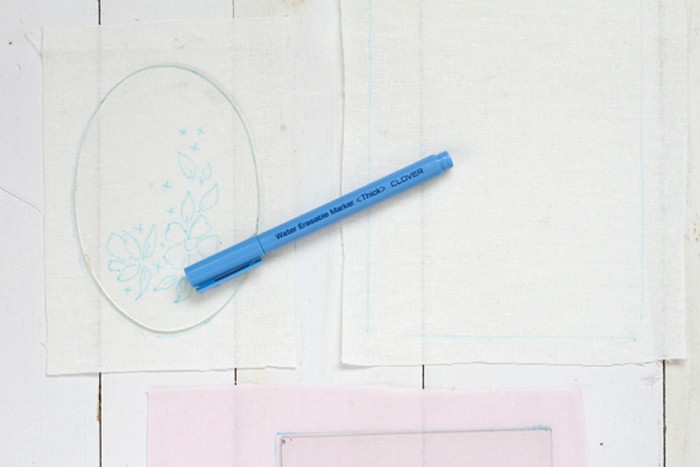
I’m just freehanding a simple floral design as well as tracing a phrase I printed out. I don’t trust my handwriting enough to wing that part of it but making simple florals and leaf sprigs is right up my alley. If you’re not keen to draw your own design, There are so many talented pattern designers out there and an inexpensive pattern is well within reach. Most of the Tinkinstitches patterns are geared to beginner stitchers and all are pdf downloads so you can get to stitching immediately!
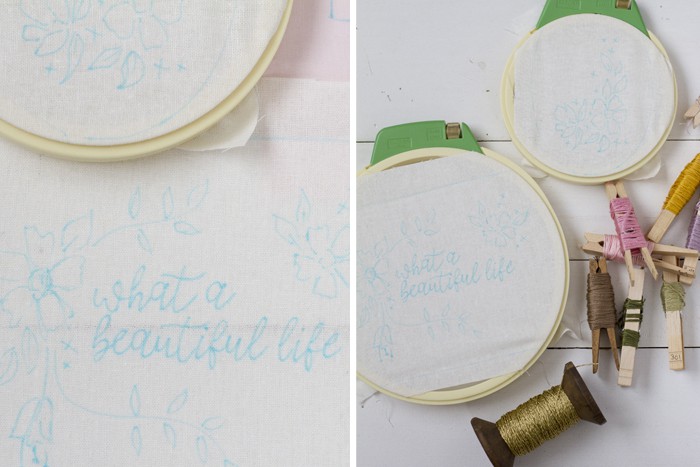
Once you’ve planned out your design, insert the fabrics into an embroidery hoop and tighten. I love using the Clover embroidery hoop since it keeps everything taut as I’m working. Two available sizes mean I have something for whatever I’m working on. For these pieces I wanted to stitch in a more loose style which gives you freedom to enjoy the process and not stress over perfection. (Adding in some little gold thread details also gives it a more elegant feel.) Also, a really good tip for making beautiful lettering is to keep your stitches small, especially around the curves. I usually use only 2 or 3 strands of floss for my lettering to keep it looking more precise and less bulky. Don’t forget the Clover embroidery needles which are fantastically sharp and here I’m using DMC brand embroidery floss from my collection.

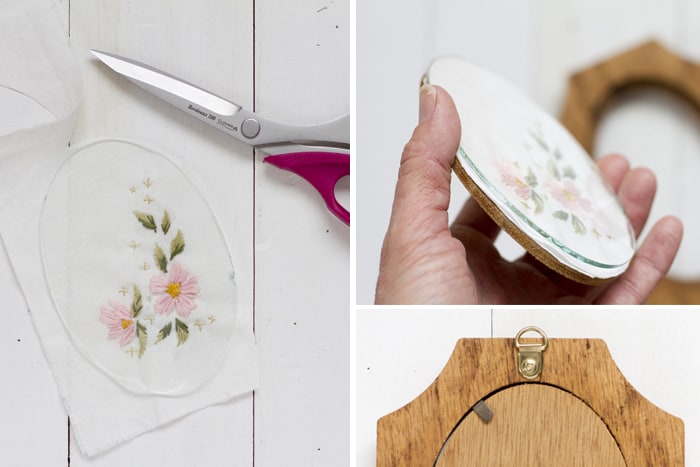
Once you’re all set with your embroidery, you’re going to want to figure out the best way to get your stitching into the frame. One of these needed to be trimmed down to the glass size and just sandwiched into the frame using the glass and the back of the frame. After I did this I added a loop to hang it on the wall since it was originally a tabletop frame. I like to make things work for me by just altering when I can. The second one, the larger piece however, ended up a bit different because a: I cut the original piece too small for the frame (I lucked out and found a perfect square matte in my storage bins!) and b: I broke the glass when I was trying to get everything back in the frame. Hey, sometimes things happen. But I framed it by securely taping each edge of the fabric (keeping it evenly tight) on the back of the matte and then inserting everything into the frame sans glass…honestly, it made it safer and more lightweight to keep on the shelf anyway. No harm done.
And that’s it! Really. It’s that simple. And, personally, I think they’re gorgeous. But I might be biased. I don’t care if I am. They’re beautiful.

I hope you found this helpful and if you have any questions for me, please add them in the comments below. I would love to help you along on your stitchy journey!