Embroidery with Kids
 Happy Friday! It’s Cheri here from Tinkinstitches embroidery. I know the art of embroidery has taken hold for a lot of people especially while coping with lockdown measures and wanting to try something new with all our newly found free time. Giving ourselves something to create while having a product in the end that we’re able to be proud of is wonderfully fulfilling. Teaching kids to create with their hands gives them the skillsets for future handcrafts and sustainability while also teaching them amazing lessons in learning new things, working through different techniques, problem-solving, and accomplishment. Teach them to not give up! And the best way to make that a possibility for them is to understand their capabilities and use tailored tools and patterns to limit frustration and maximize interest.

I have a nine year old who just recently started to enjoy embroidery. For years she watched me sit still and work on projects that included creating gifts for friends, designing patterns to help pay her school bills, and mending clothing to reduce the need to toss them out. We tried a few times to stitch together, but she lost interest quickly even though she did learn safety regarding needles and scissors at a very young age. Still, it wasn’t anything I pushed her to do. I patiently waited for her to come to it in her timing. Fast forward to just a few months ago. Her friend was having a birthday and she wanted to make unique gifts based on her friends love of koalas. I was able to hand draw a little koala face for her to stitch and she went to town. It didn’t take her long before she had a hoop she was proud of and we worked together to put the finishing touches on it. She beamed with pride when she gave that hoop to the birthday girl. Really, she was just so happy and you could see the excitement and love in the whole process. This is what we want for our kids. To truly enjoy what they’re doing, build confidence, and foster creative minds.
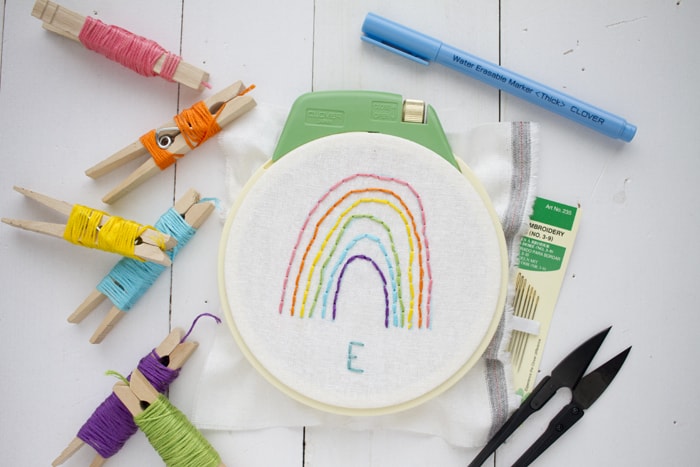

So here’s my simple advice to you: set them up for success. It takes a little work on your part, but prepping them will help immensely. To get my daughter started I cut a square of essex yarn-dyed linen fabric and secured it into this Clover 4.75″ hoop. These hoops are perfect for small hands and the fabric stays tight, reducing the frustration of needle and cloth movement for your child. Grab a Clover water erasable ink marker and draw a simple design or copy one of their drawings to fabric. The best way to start is simple lines and the backstitch. To kids, this is a very straightforward concept to understand because it’s so similar to drawing lines with crayons or colored pencils. Clover offers embroidery needles as well as chenille needles which can sometimes be easier for children to thread due to the larger eye. Teach your kids needle and scissor safety, keep away from eyes, no poking siblings, etc, but if you’re starting very young perhaps using a plastic needle and a cross-stitch fabric may be the best option. You can also use thimbles if needed, like these. (My daughter loves using a needleminder like this strawberry one to keep track of the needle when she steps away for a time.) On our practice hoop we drew a simple rainbow and kept it colorful, simple and fun. Remember, this is their time to be creative so let them choose subject matter and colors!

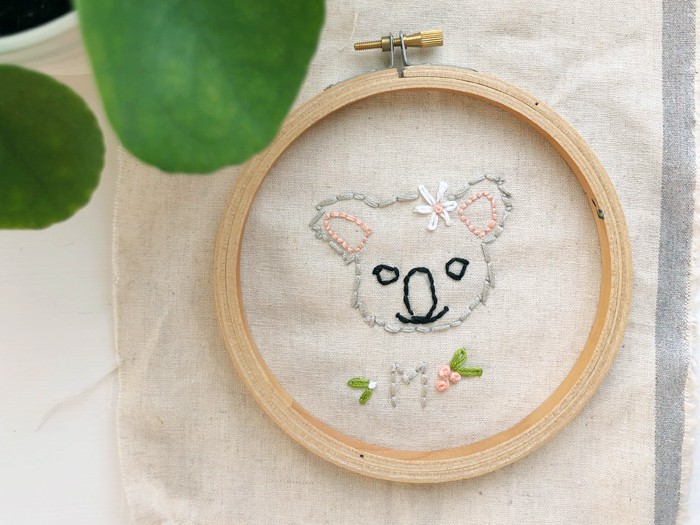
This koala hoop is the one she designed for a friend so we personalized it with a monogram and learned a new stitch called the french knot. Finding tutorials on YouTube (like this french knot tutorial) may be the easiest way to learn a stitch together if you don’t know it well enough to teach them. Learn, explore, try different stitches and threads! Different techniques like filling in an outlined area with a colored pencil may give them a more accomplished feel in shorter spurts of time.

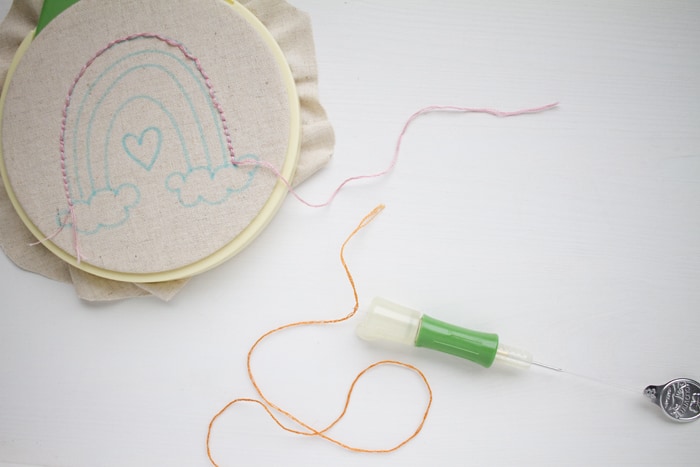
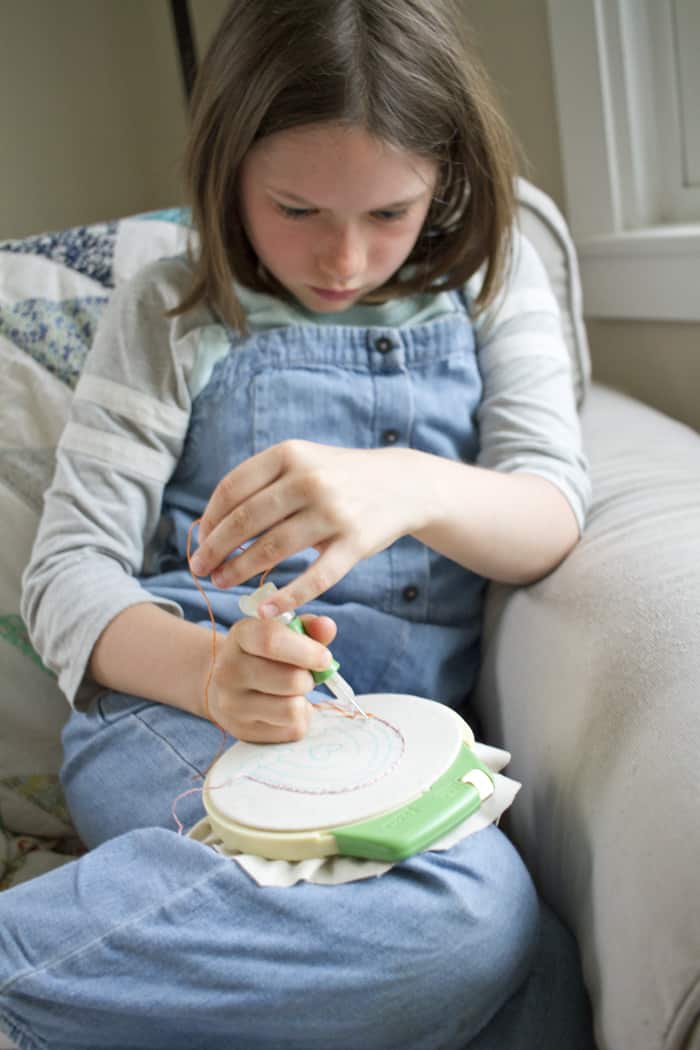
Clover also sent us this Embroidery Stitching Tool to try out. It works like a punch needle tool and it can be a little daunting at first. But once we worked through the clear instructions for threading and use, my daughter gave it a try. I will say, she was SO excited about how fast it was! She kept saying how fun it was and how easy. It’s a simple punch down/pull up method so she didn’t have to keep pulling her needle through the back and out the front. The only issue we had was threading it properly which is essential to the proper working of the tool. It will likely take her a few times under my supervision to get it right, but then I have no doubt she’ll be ready to use the stitching tool completely on her own.
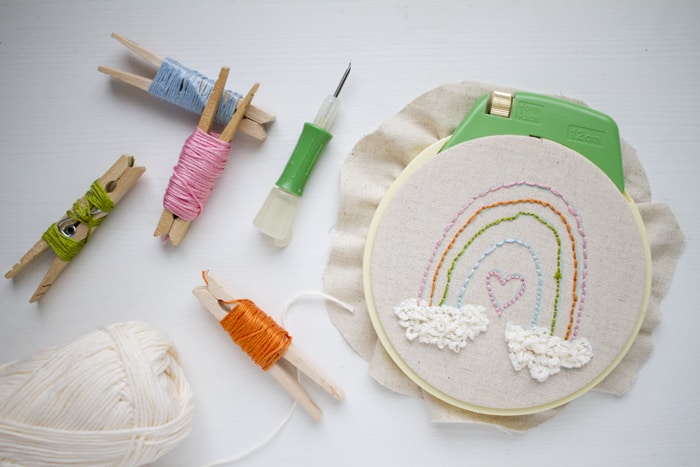 I worked on the clouds myself because I wanted to try swapping out the needles Clover sent and using yarn for a different texture (my daughter did all the backstitch rainbow arches). If the yarn or thread is too thick for the needle, it will not work properly, so don’t bang your head against the wall, just reduce the number of embroidery floss strands or try a thinner yarn. I did really enjoy the loopy look of those soft clouds! My daughter and I are both really excited to try different projects with this new tool. I’ve even secured a book from the library with different punch needle options. That’s another thing you can do to get kids excited about needlework. Try requesting some books from your local library so you don’t have to invest financially if they don’t get excited about something. Let them explore on their own and they’ll be sure to tell you what they want to make. I’ve gone ahead and created a pattern for this simple rainbow design (you’ll only need to learn two stitches!) that you can download here in my Etsy shop, in case you wanted something kid-friendly already made for you. In the future, to get my son excited about stitching, I’ll likely be looking for Star Wars or Lego patterns! Remember to customize it to your individual child’s interests and they’re sure to give it a go.
I hope you’ll enjoy creating with your children and together you can nurture creativity in your home and lives.

Visit Cheri on Instagram | Etsy | YouTube
Stay connected with Clover on Facebook | Twitter | Instagram | Pinterest | YouTube | Ravelry
[mc4wp_form id=”11289″]