Embroidery for Beginners
Hello friends! Well, we’re a few weeks into National Craft Month here and I’ve joined forces with Clover to show you a craft near and dear to my heart: embroidery.
A little about me, I’m Cheri, mom of two, crafty queen, DIYer extraordinaire and the owner and designer behind Tinkinstitches, an online shop for embroidery and sewing patterns, selling thousands to beginners and experts across the world. My passion is to design patterns for every person, age and skill level equipping them with a creative outlet in hand embroidery.
You might ask, why embroidery? For everyone, that reason is different but the benefits are boundless. It is an easily portable craft, fairly inexpensive, a stress reliever and can be started with just a few basic tools. In this post, I’ll be showing you a few of my favorite essentials as well as some helpful tips I’ve picked up over the last several years.
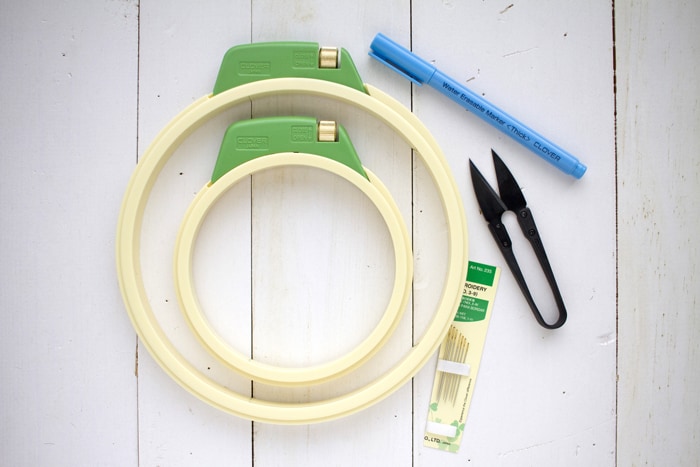
To get started you’ll need a good quality embroidery hoop, fabric, embroidery floss, scissors and a sharp needle. I’m using the Clover Embroidery Hoop, 7” size (although the smaller version is perfect for children’s hands), and it truly is a wonderful hoop to have in your project bag. I’ll admit to using it wrong the first go around, but after reading the very simple and obvious instructions (even the pro’s make mistakes!), I wrapped my fabric tight into the hoop and never had to retighten it. The. Entire. Time. If you’ve ever embroidered before then you know a finicky hoop can be a real issue.
Next up: fabric. Personally I prefer to embroider on a quality cotton or my favorite linen brand, Essex yarn dyed linen. Both options come in an array of colors for your pattern needs. Don’t frustrate yourself with a cheap fabric, the better quality weave the easier it is for your needle and thread to get through and the more beautiful your finished product. Embroidery floss is another thing you don’t want to buy on the cheap. A quality thread will have more rich colors, more variety and be easier to use as well as less likely to knot.
Let’s move on to scissors and needles. I’m using the Clover Thread Clipper “Kuroha”. It’s a perfect travel size, sharp and handy. You really don’t need more than that in a pair of embroidery snips. Now needles. Needles ARE important. A variety of sizes is a good idea so this pack of Gold Eye Embroidery Needles is perfect. I use the smaller, thinner versions (3s) on lightweight fabrics, a mid size (5) on most of my embroidery pieces and a thicker needle like a 9 when going through tougher fabrics like canvas. I don’t have it pictured here, but Clover has a new tool out called the Sweet n’ Sharp Macaron which sharpens dull needles as well as holds your needle using a built in magnet. I like to keep it handy for larger jobs where my needle may dull over a bit of time.
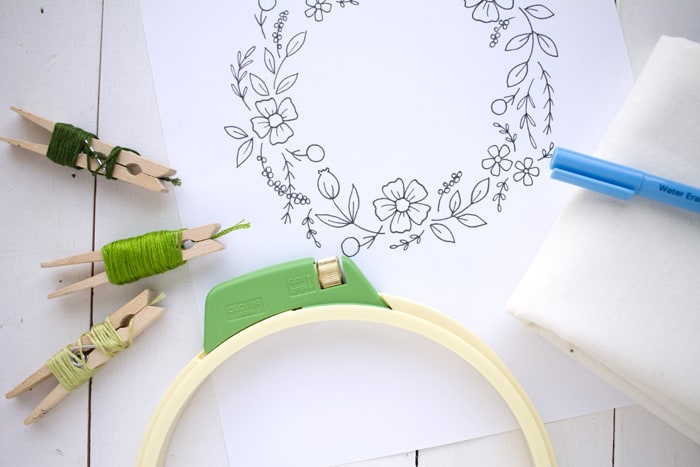
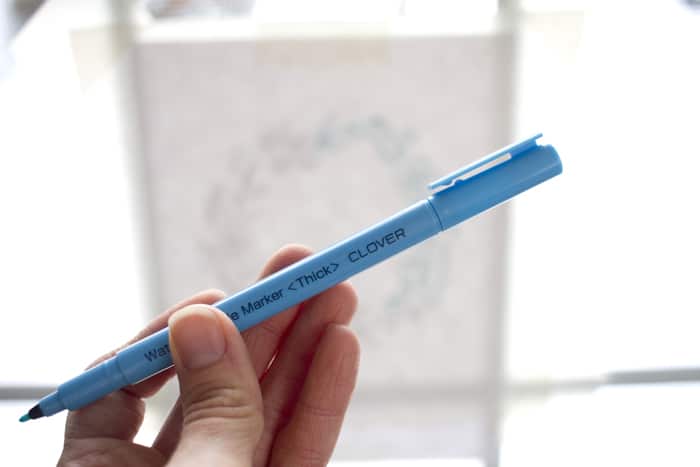
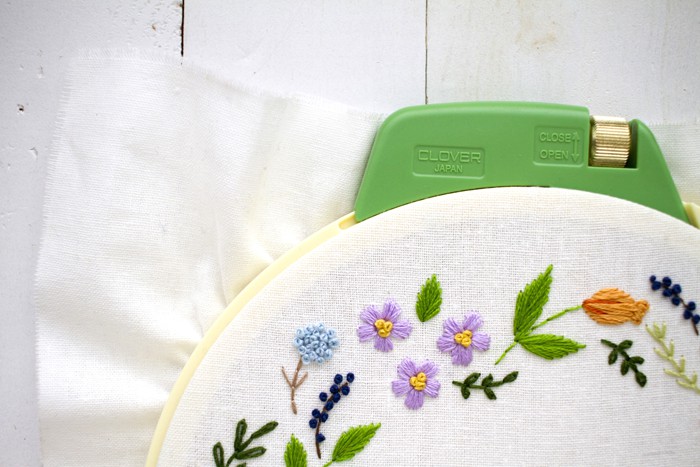
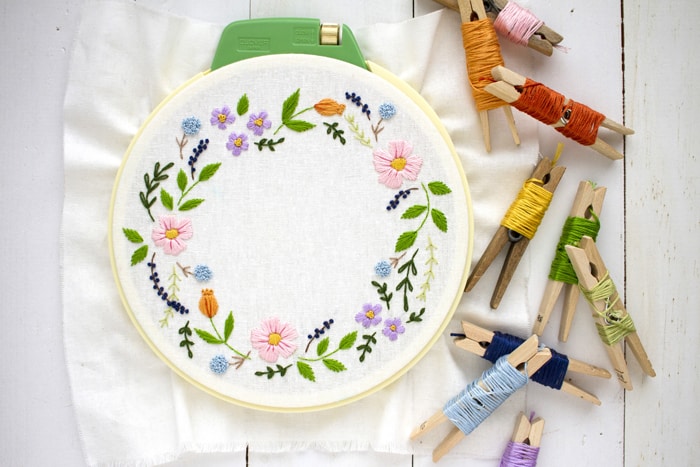
Now that you’re armed with your starter tools, let’s talk patterns. Samplers are a great way to learn stitches, buying kits can also be a good option if you’re overwhelmed on what to buy (but be cautious buying kits, as they may not come with higher quality components) and buying patterns online is an inexpensive way to gather beautiful designs you may want to stitch over and over as gifts. If you are buying patterns digitally, you’ll have to manually transfer your pattern to your fabric. I highly recommend the Clover Water Erasable Marker. The ink is bright enough for easily viewing lines while stitching and the ink simply washes away with water. (I remove the design from the hoop when finished, run it under the faucet and let it air dry in the sun or in front of the wood stove.) The easiest and least expensive way to transfer your pattern is to first print it off on a home printer, tape it up to a bright window, tape the fabric over top and simply trace the design using your marker. Another option is an inexpensive light table which can be purchased online for somewhere around $30. This option is necessary if your ideal time to craft is after dark. You can also trace directly from the computer screen if you find this easiest but make sure your screen viewing is set to 100%.
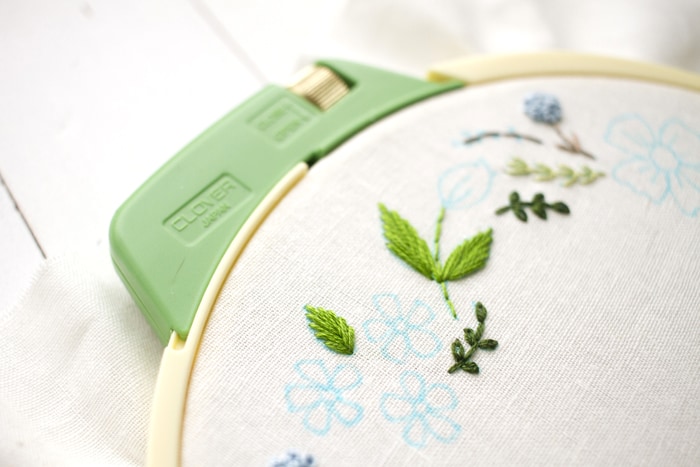

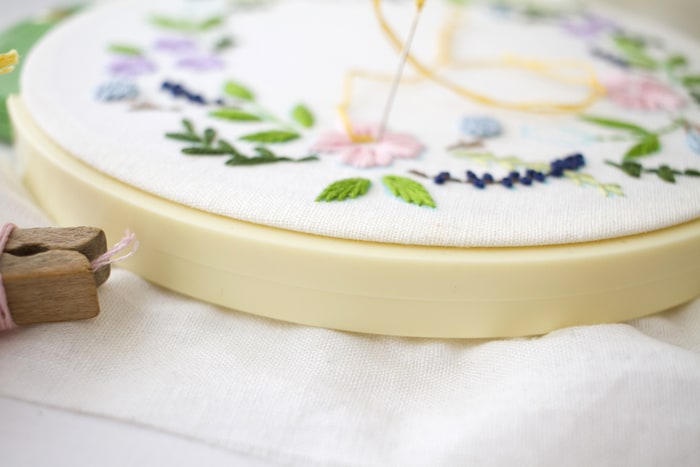
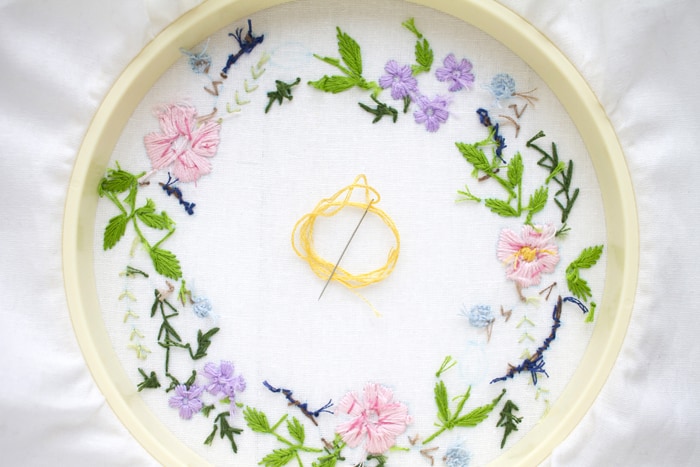
You can find this Petals and Buds pattern as well as several other options in the Tinkinstitches shop. Once you have your pattern transferred, secure it inside your embroidery hoop. I prefer to start working with one thread color at a time. It helps me keep track of my progress, and I find it’s more time efficient. If you have any questions about specific stitches, YouTube is incredibly handy. Just type in the stitch name and you’re sure to come across several helpful videos. Remember to keep your needles sharp and to take your time as well as avoid using too long a length of floss or you’re likely to run into knotting. Save yourself the heartache of tangled threads and keep your floss organized. I myself wrap the floss around wooden clothes pins and write the color numbers on the pins before starting a project. I also prefer to use 3-4 strands of floss by separating the threads one by one until I have the amount I need. (Most patterns will give guidance on strand numbers and most will even have color numbers listed to take the guesswork out of color matching.) Some people prefer to weave their ends into the back of their embroidery at the end of their project but I personally prefer knotting ends and trimming the excess thread as I go.

Most importantly, don’t forget to embrace imperfections and give yourself time and grace to learn the art of embroidery. I’ve been stitching for seven years and I still find myself improving with each project. Embroidery is a beautiful way to create artwork for gifts, heirloom labels for quilts and unique clothing updates as well as a soothing craft to keep your hands working while you relax. I hope these insights have inspired you to pick up a needle and thread, sit down to your favorite movie, a cup of tea, and stitch your way to tranquility.

Visit Cheri on Instagram | Etsy | YouTube
Stay connected with Clover on Facebook | Twitter | Instagram | Pinterest | YouTube | Ravelry
[mc4wp_form id=”11289″]