Sewing a Tin Tool Pouch

I have a love of repurposing things that would otherwise find their way into a landfill. Some of those projects have even ended up as Clover blogs themselves!
One of the easiest ways I put this into practice is for small-scale storage. I clean and save glass sauce jars and the like for button and bead storage, or knit over tin cans to turn them into functional and gorgeous vases. On my work table, I have all my writing utensils and fibrecraft tools in repurposed coffee tins. Recently, they have gotten pretty crowded as my notion collection grows. You know what they say about necessity being the mother of invention!
Let’s get started on a simple and cute Tin Tool Pouch that will give you added room for all your tools!
Supplies:
- Patchwork Scissors (Mini) – Art. No 493/CW
- Rotary Cutter (45mm) – Art. No 7500
- Cutting Mat (18″ x 24″) – Art. No 7521
- Pen Style Chaco Liner – Art. No 4710-4714
- Wonder Clips – Art. No 3185
- Universal Machine Needles – Art. No 9114
- 1/2 Yard Cotton Fabric (2)
- 50 Weight Thread
- Sewing Machine
- Velcro Strips
- Iron and Ironing Board
- Pen, Paper, and Ruler for Template
- Small Metal Tin (or other round container)

Creating Template:
To begin, measure the depth and circumference of your container. After, use these guidelines to calculate your measurements; Length- Length of container times 2 + 1/2”. Width- Circumference of container + 1/2”. In my case, the container measured 5” in depth, and 12” in circumference. This means my fabric should measure 10 1/2” in length and 12 1/2” in width. It is easiest for me to measure this out onto a piece of paper and cut it to size for a pattern, you may also mark the dimensions directly onto the fabric.
Cutting Fabric:
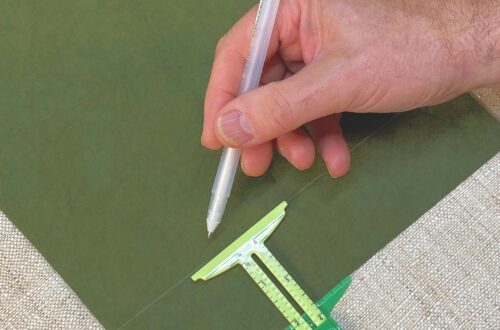
Iron out both fabrics before marking and cutting. Lay one fabric atop the other. If using a paper template, place on fabric and outline around template with Chaco Liner. If marking directly onto fabric, use a straight edge and measure out correct measurements. Cut with Rotary Cutter.


Sewing Seam:
Remove excess fabric. Making sure to have right sides facing, clip around all sides, securing both fabrics together. Leave 2-3” gap at top for turning. Sew with sewing machine using straight stitch and 1/4” seam allowance.


Turning and Ironing:
Clip corners before turning right side out. Turn right side out. Take care to ensure corners and seams are completely pushed out. Iron fabric from the middle outwards, paying close attention to seams and turning space. Sew all around edge using 1/4” seam allowance.


Folding Pouch:
Fold over approximately 1/3 of the fabric from the bottom lengthwise. Iron flat. Flip fabric over, and fold over fabric from the top lengthwise to the edge of first fold made (refer to photos). Iron flat.


Sewing Dividers:
Take Chaco Liner and mark out where you would like your dividers on the 1/3 fold made in previous step. How wide you should make your dividers is based on what you will be storing. I will be mainly storing crochet hooks in mine, so I marked a divider every inch. If you will be storing larger notions, mark accordingly. Sew using straight stitch following marks starting at the top of fold, and working down to bottom. Do not forget to backstitch, as these will be high-stress areas in fabric. Sew either side edge closed along sewn seam. Trim all threads.


Finishing:
To finish, cut two strips of Velcro approximately 2” long. Sew onto back of panel up to pressed fold using straight stitch. Place items in dividers and loosely secure onto tin. Trim excess Velcro


Overall this project is super intuitive and quick to whip up. They make great inexpensive (or free) gifts for other creatives in your life too! I’ll be making one for every tin I have. If you decide to make this project, we would love to see it! Be sure to tag Clover and me in any photos of your pouch!


Follow what Quayln is up to next on his Blog | Instagram | Facebook | Pinterest | YouTube | Ravelry
Stay connected with Clover on Facebook | Twitter | Instagram | Pinterest | YouTube | Ravelry
[mc4wp_form id=”11289″]


